Assembly instructions for the Aurelle Ottoman Bed Frame by Time4Sleep.
Product Information
Aurella Ottoman Bed Frame
Bring effortless sophistication and smart functionality to your bedroom with the Aurella Natural Ottoman Bed Frame. Beautifully upholstered in a soft, natural fabric, The Aurella blends timeless design with modern comfort, creating a calming centrepiece for any interior.\
\
The gently curved headboard and footboard feature soft, rounded edges, offering a refined silhouette that feels both inviting and contemporary. The neutral fabric enhances its versatility, making it easy to style in any room.\
\
Designed with practicality in mind, the ottoman lift mechanism reveals a sturdy sprung slatted base and a spacious hidden storage area beneath the mattress—perfect for keeping bedding, linens, or everyday essentials neatly tucked away. The smooth gas lift mechanism ensures easily accessible storage to maintaining a clean, clutter-free look in your space.\
\
Whether you're refreshing your bedroom or completing a new look, the Aurella Natural Ottoman Bed Frame delivers comfort, style, and smart storage in one beautifully crafted piece.
Double
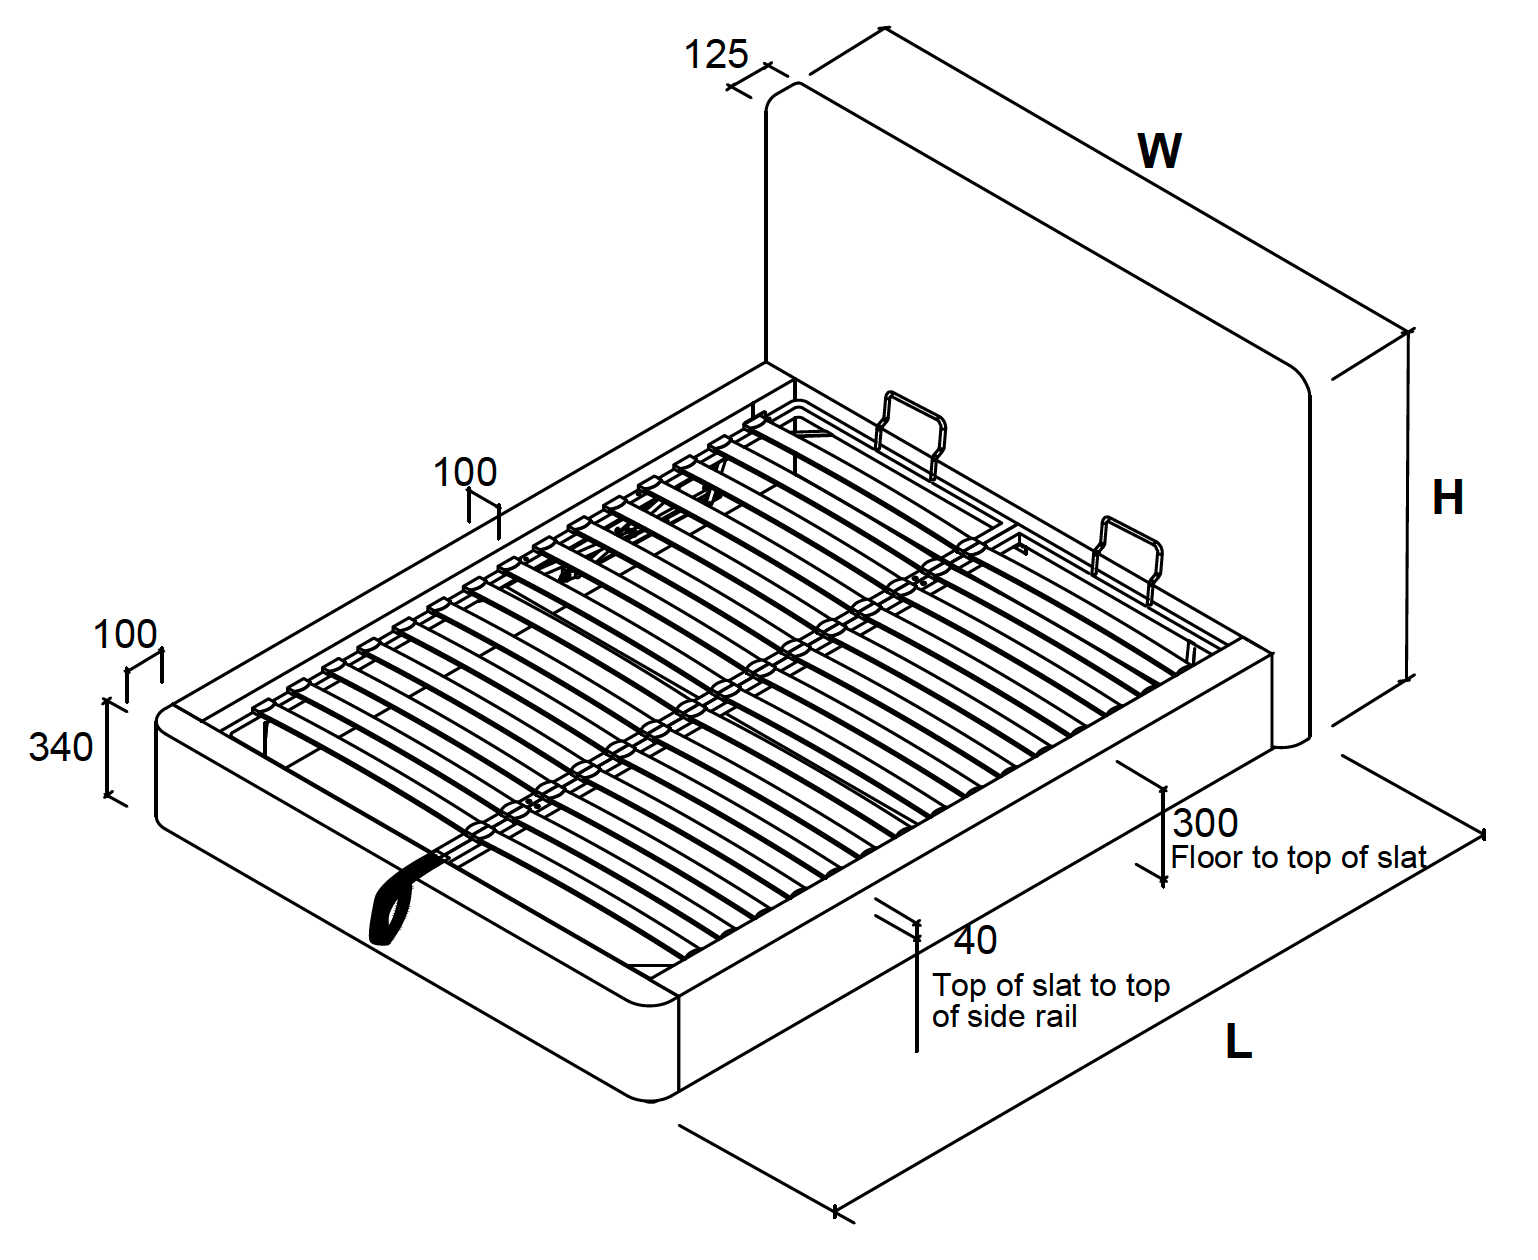
Overall Dimensions (LWH mm)
2155 x 1690 x1100
Storage Dimensions (LWH mm)
1930 x 1380 x 220
Ottoman Piston Strength
800 N
Distance between slats (mm)
70
Slat Dimension (mm)
665 x 53 x9.5
Tools
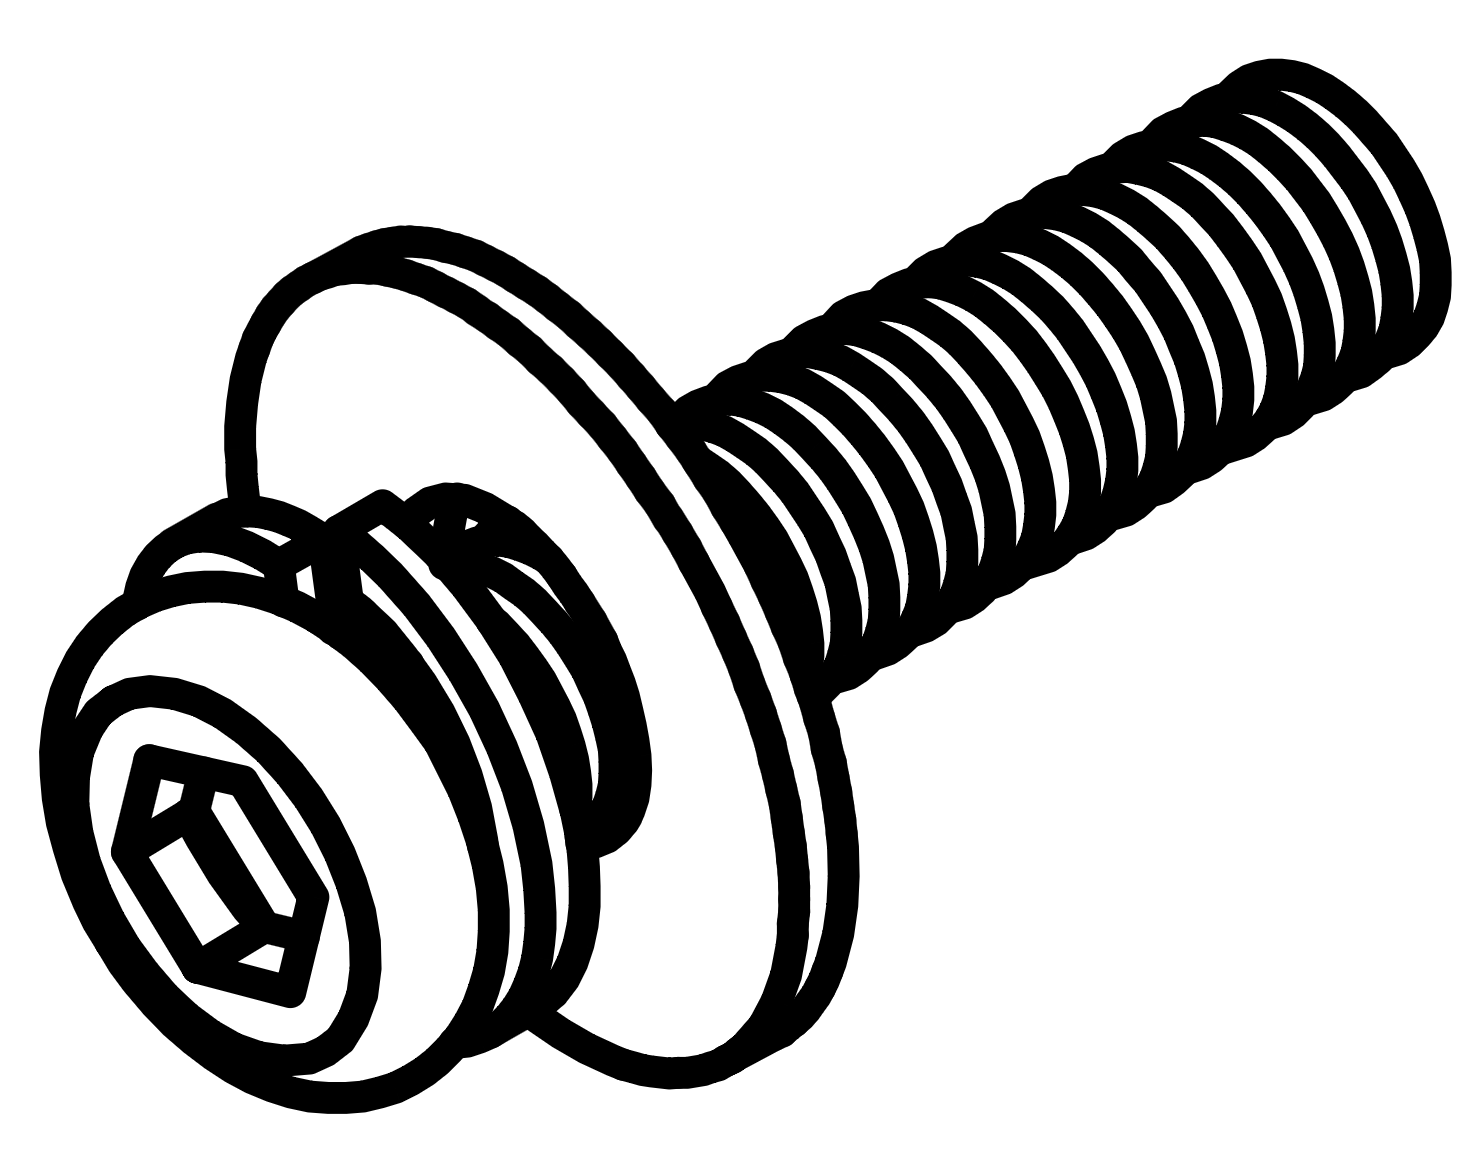
A - Bolt M8x25mm (44 Double / King, 48 Super King)
B - Bolt M8x35mm
C - Blot M8x50mm
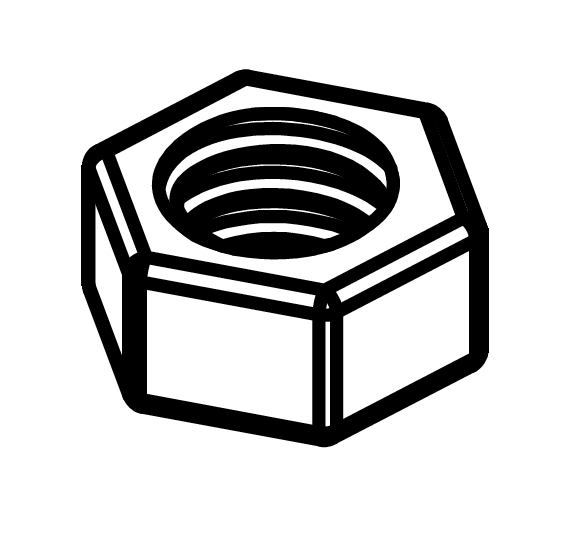
D - Nut for M8 Bolts
E - Spring Washer for M8 Bolts
F - Flat Washer for M8 Bolts
G - Hooked Corner Bracket - Left
H - Hooked Corner Bracket - Right
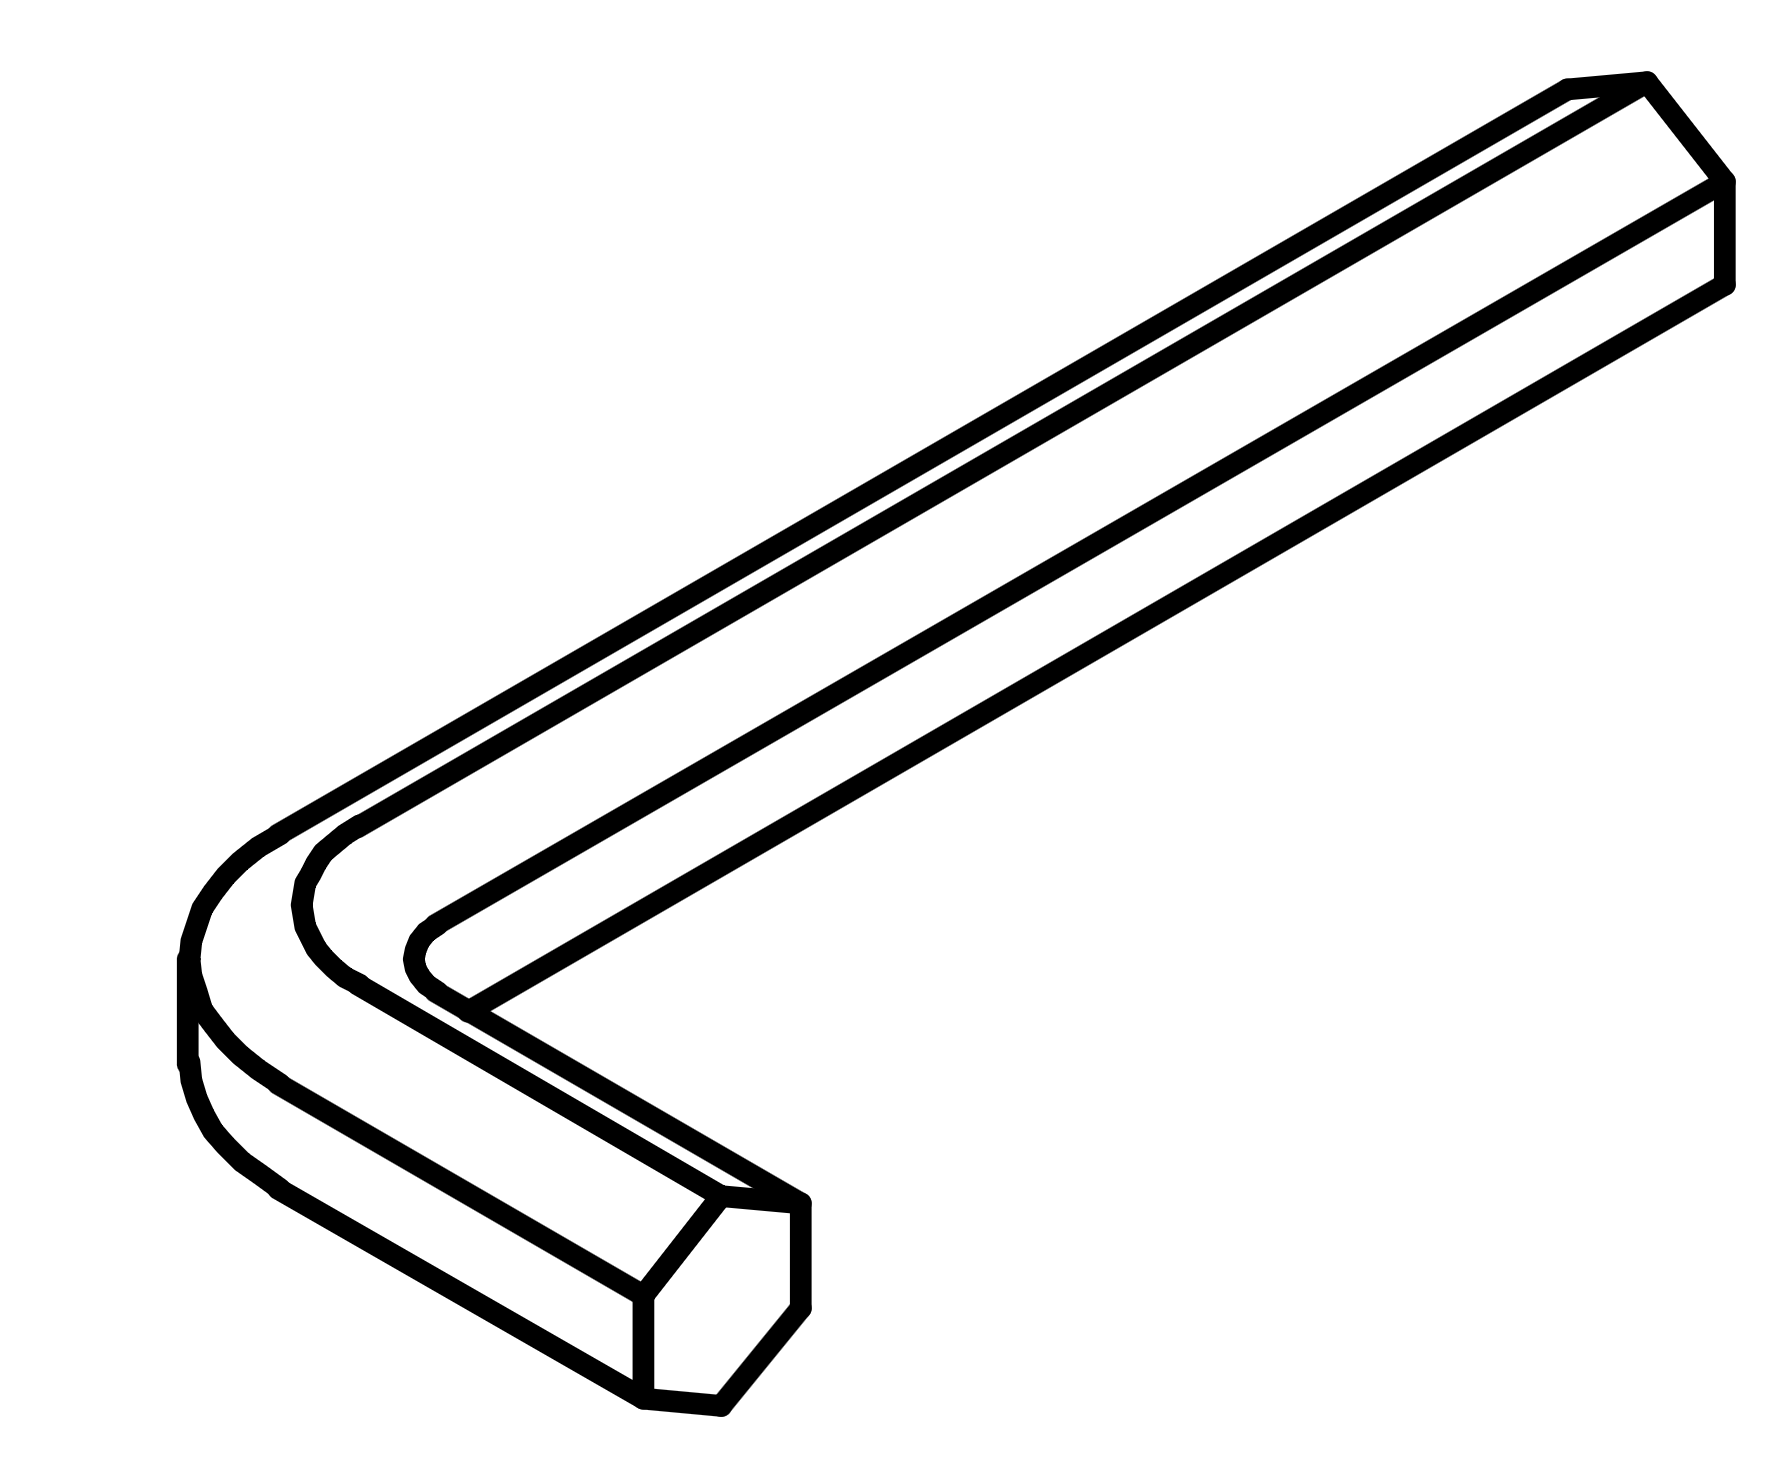
I - Allen Key for M8 Bolts
J - Spanner for M8 Nuts
K - Flanged Lock-Nut M8
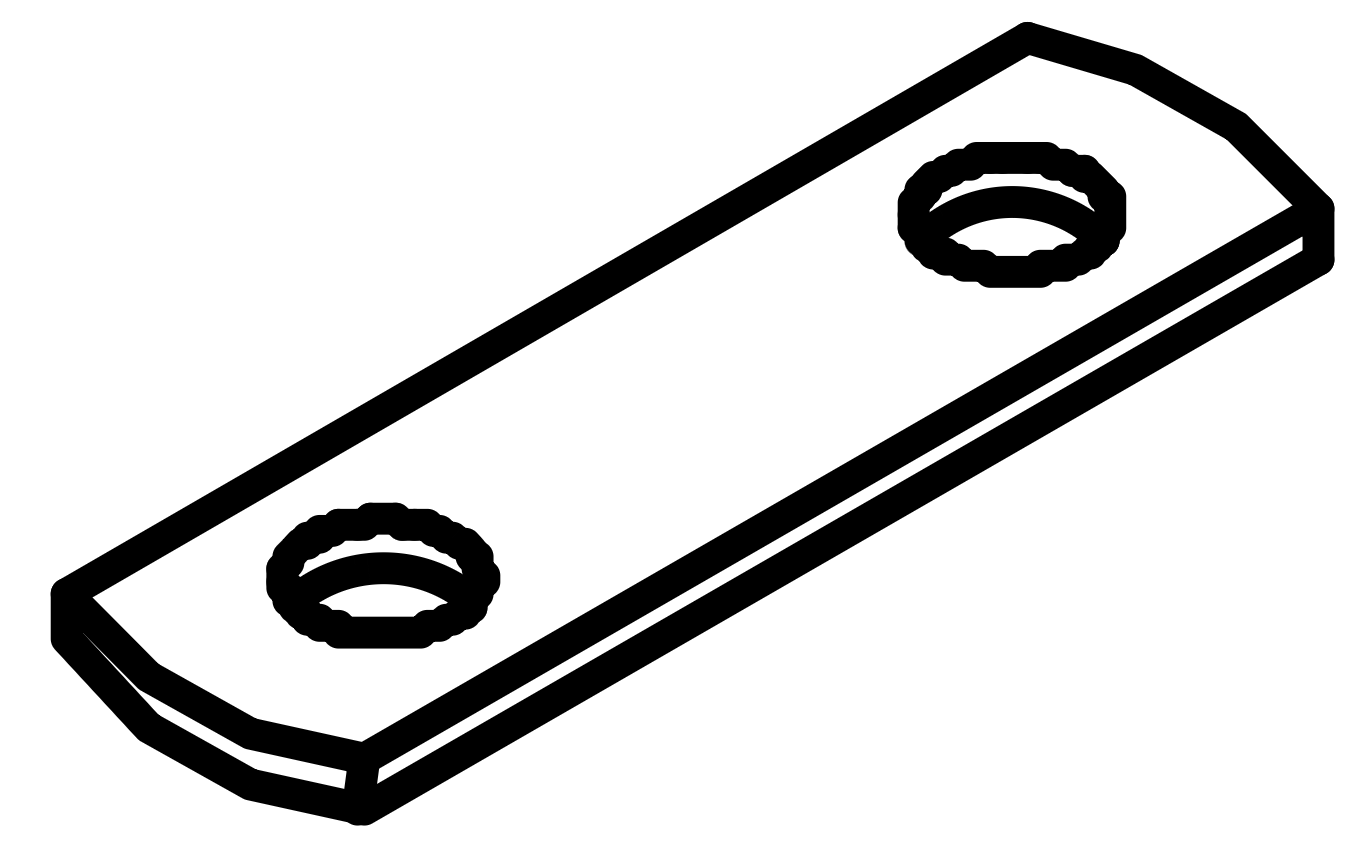
L- Metal Connection Plates for Slat Frame
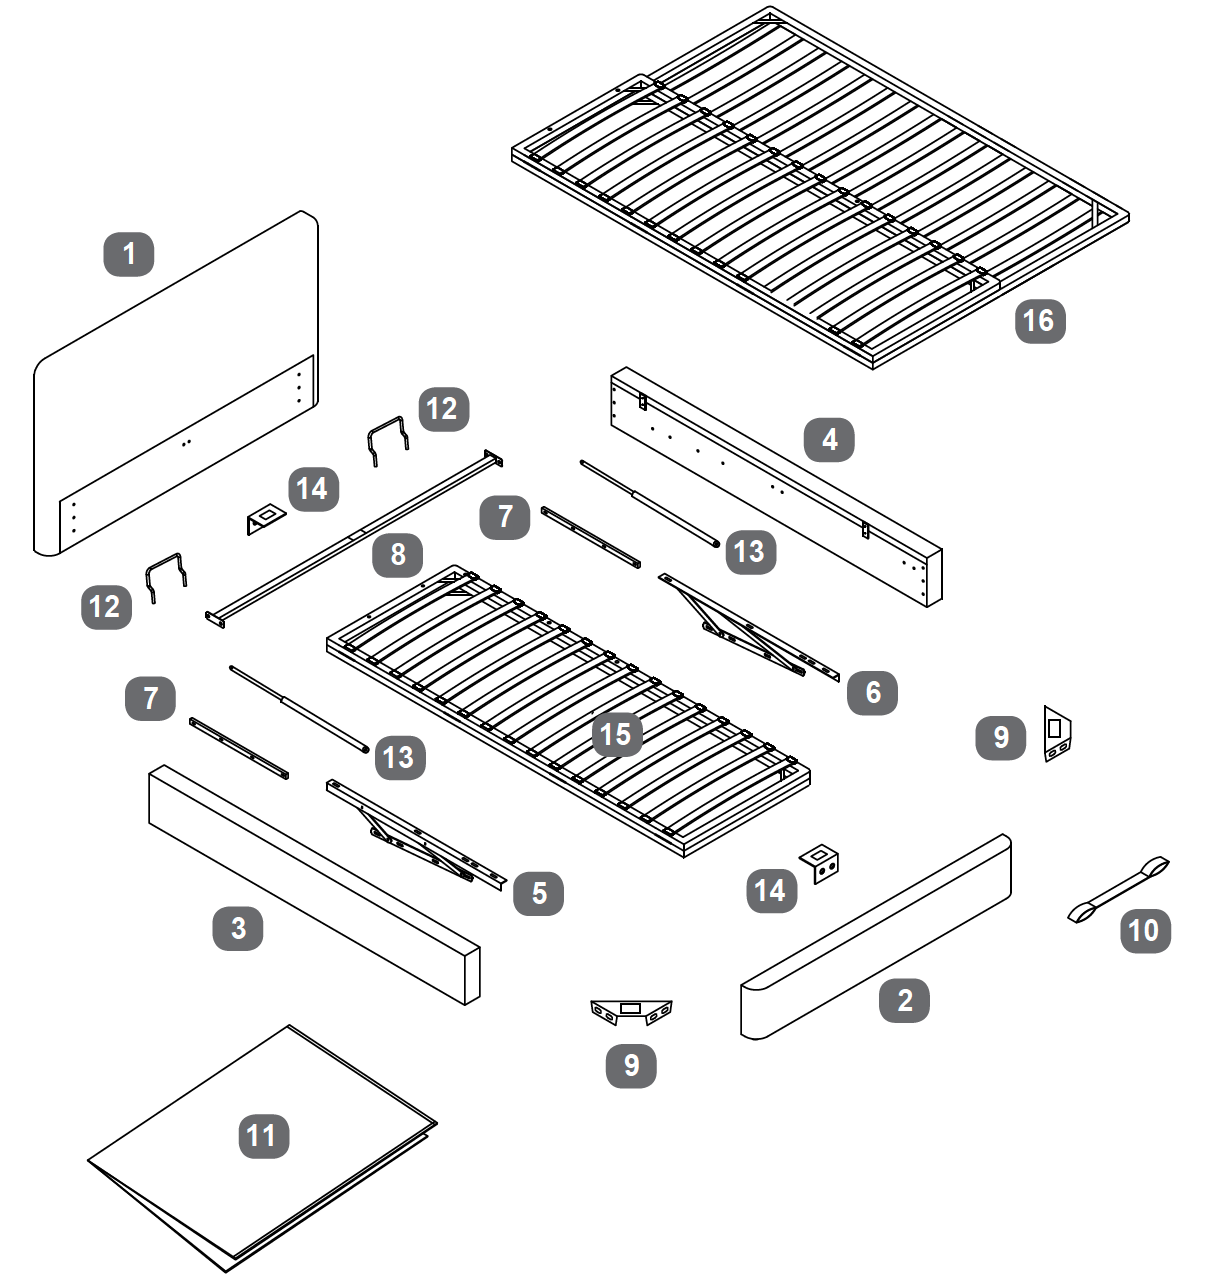
Parts
1Headboard - Box 1
2Footboard - Box 2
3Side Rail - Left - Box 2
4Side Rail - Right - Box 2
5Gas-lift Mechanism - Left - Box 3
6Gas-lift Mechanism - Right - Box 3
7Spacer Rail for Gas Lift Mechanism - Box 3
8Side Rail Cross Bar - Box 3
9Angled Corner Bracket - Box 3
10Fabric Lifting Handle - Box 2
11Fabric Base Cover - Box 3
12Mattress Stopper - Box 3
13Gas-lift Piston - Box 3
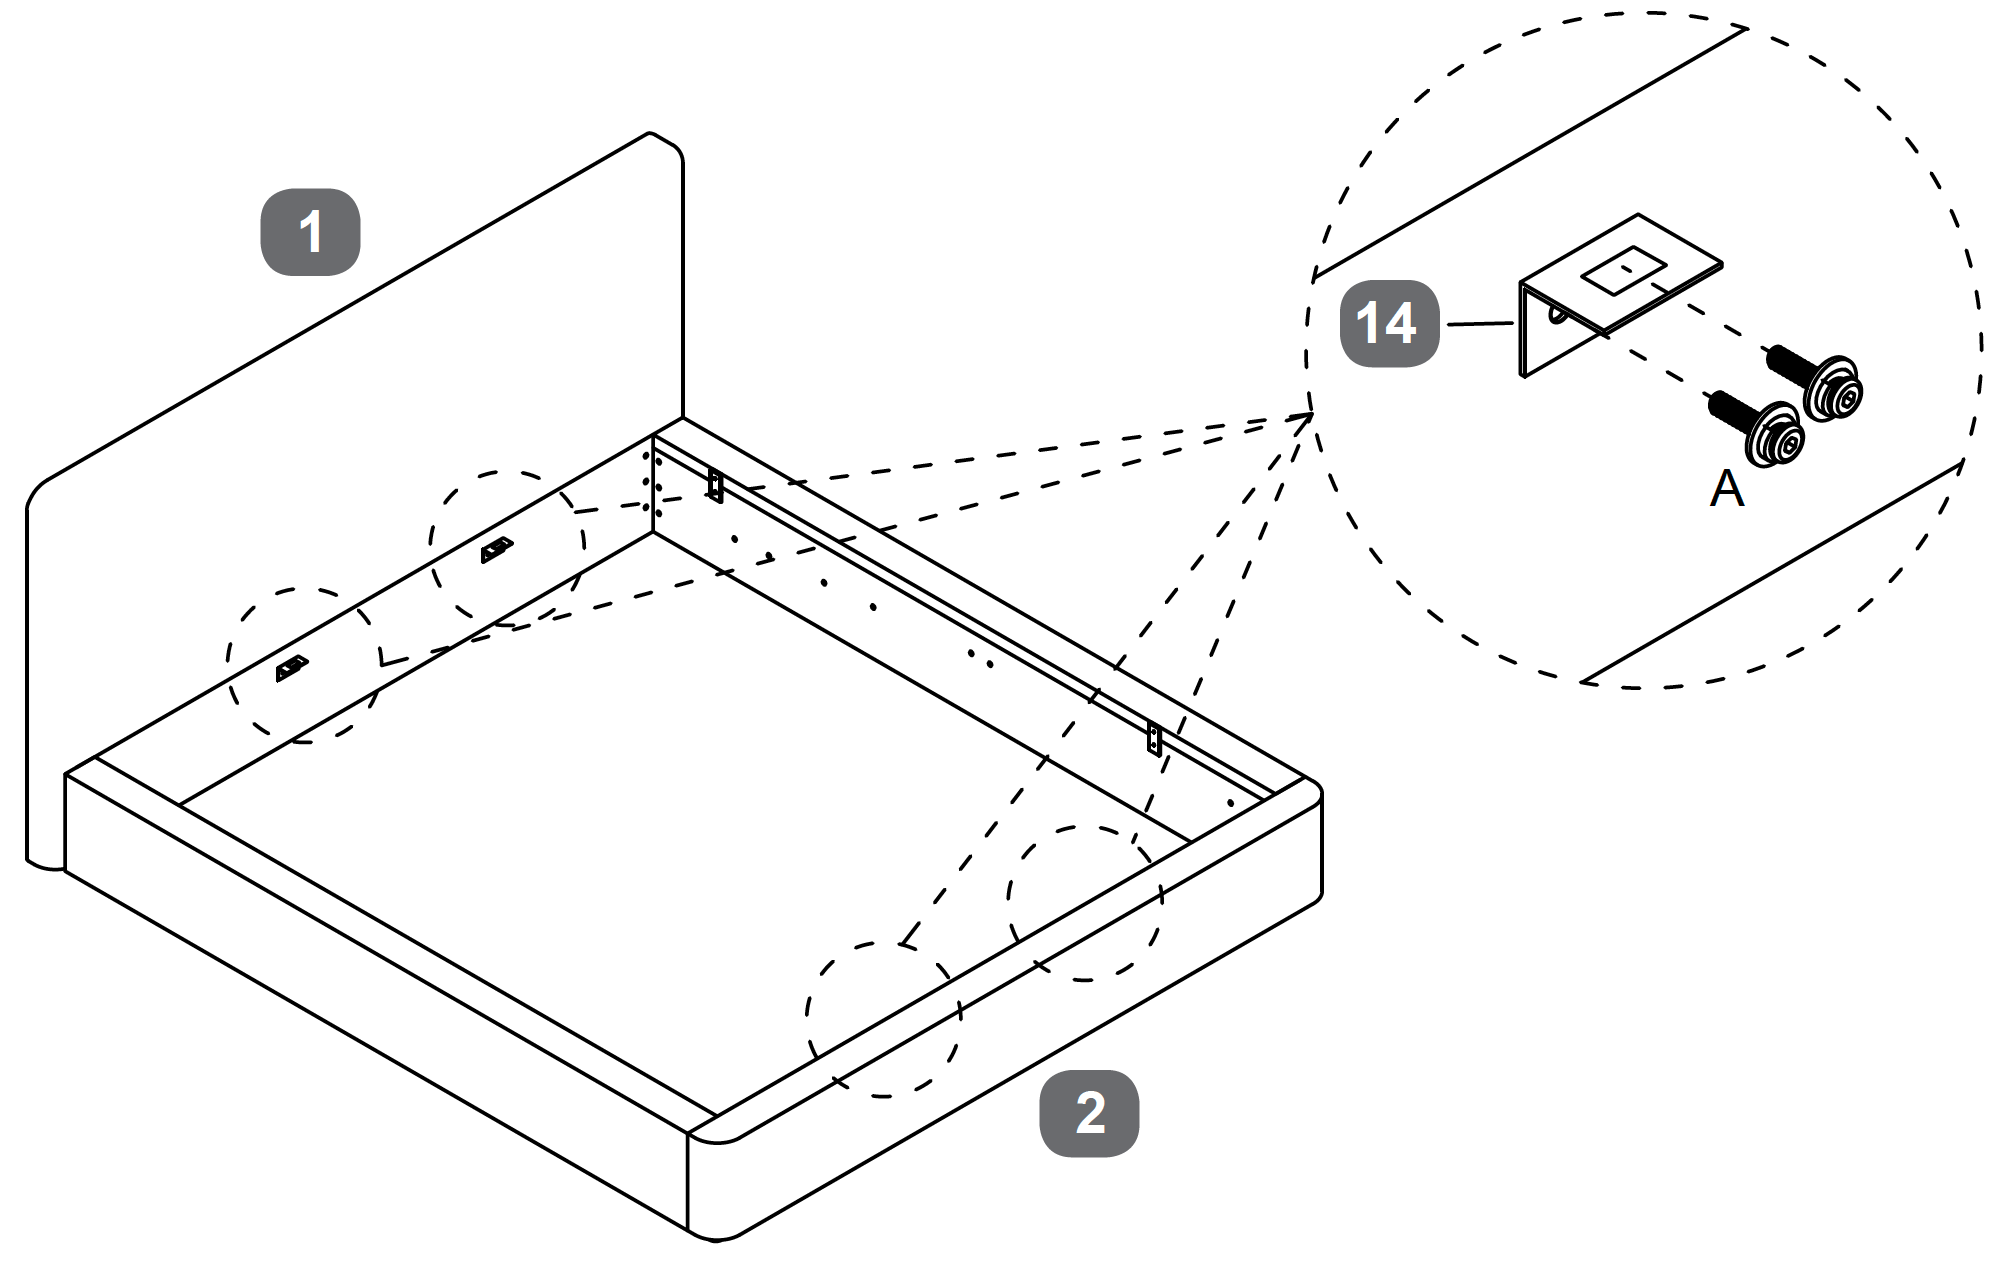
14‘L’ Shape Bracket. (2 for Double/King, 4 for Super King) - Box 3
15Metal Slat Frame (Double/King) - Box 3
16Metal Slat Frame (Super King) - Box 3
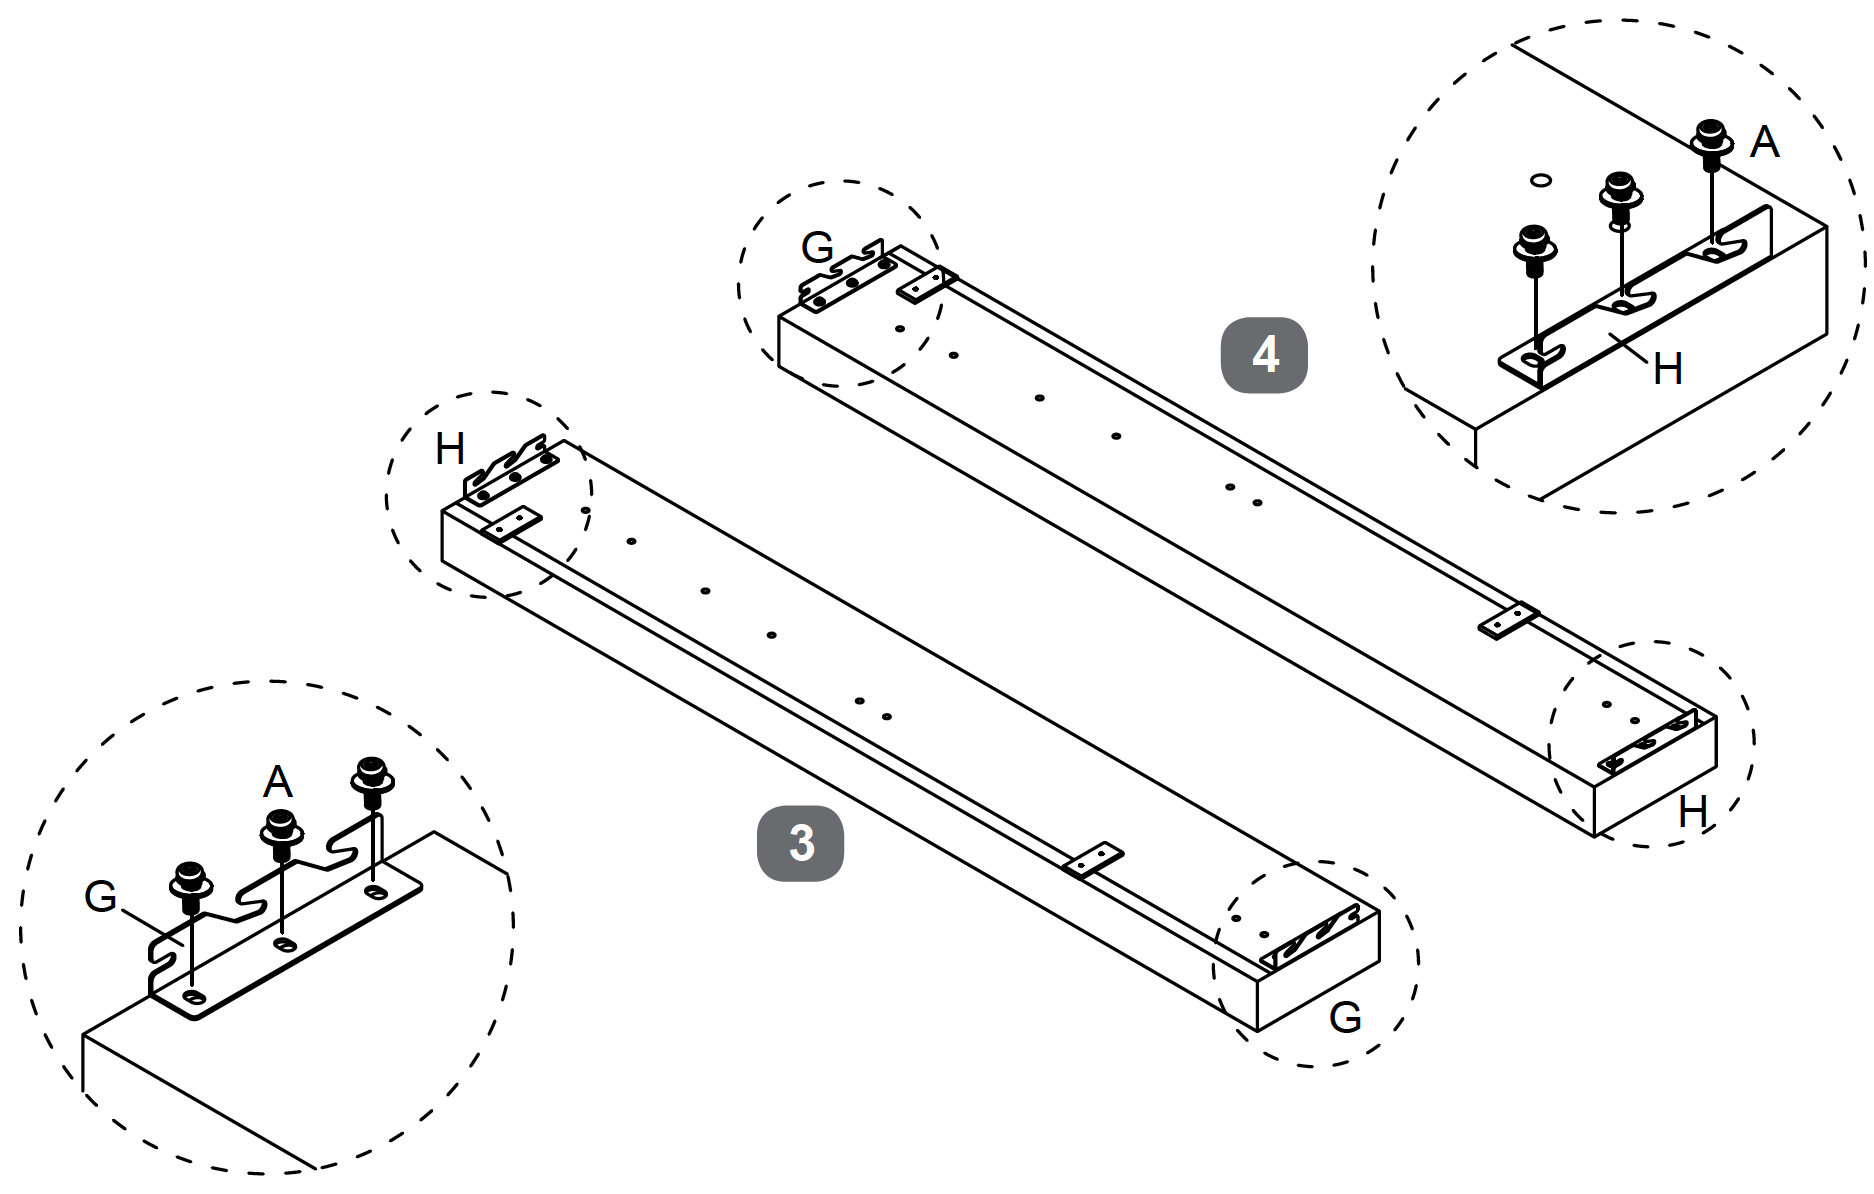
1. Secure Corner Brackets to Rails
1. Position the Side Rails with the ends facing upward. 2. Attach the Hooked Corner Bracket - Left (G) to one end of the first Side Rail using three Bolt M8x25mm (A). 3. Secure the Hooked Corner Bracket - Right (H) to the opposite end of the same Side Rail using three Bolt M8x25mm (A). 4. Repeat the process for the second Side Rail, ensuring the brackets are attached to the correct ends. 5. Tighten all bolts securely using the Allen Key (I), ensuring the brackets are firmly in place.
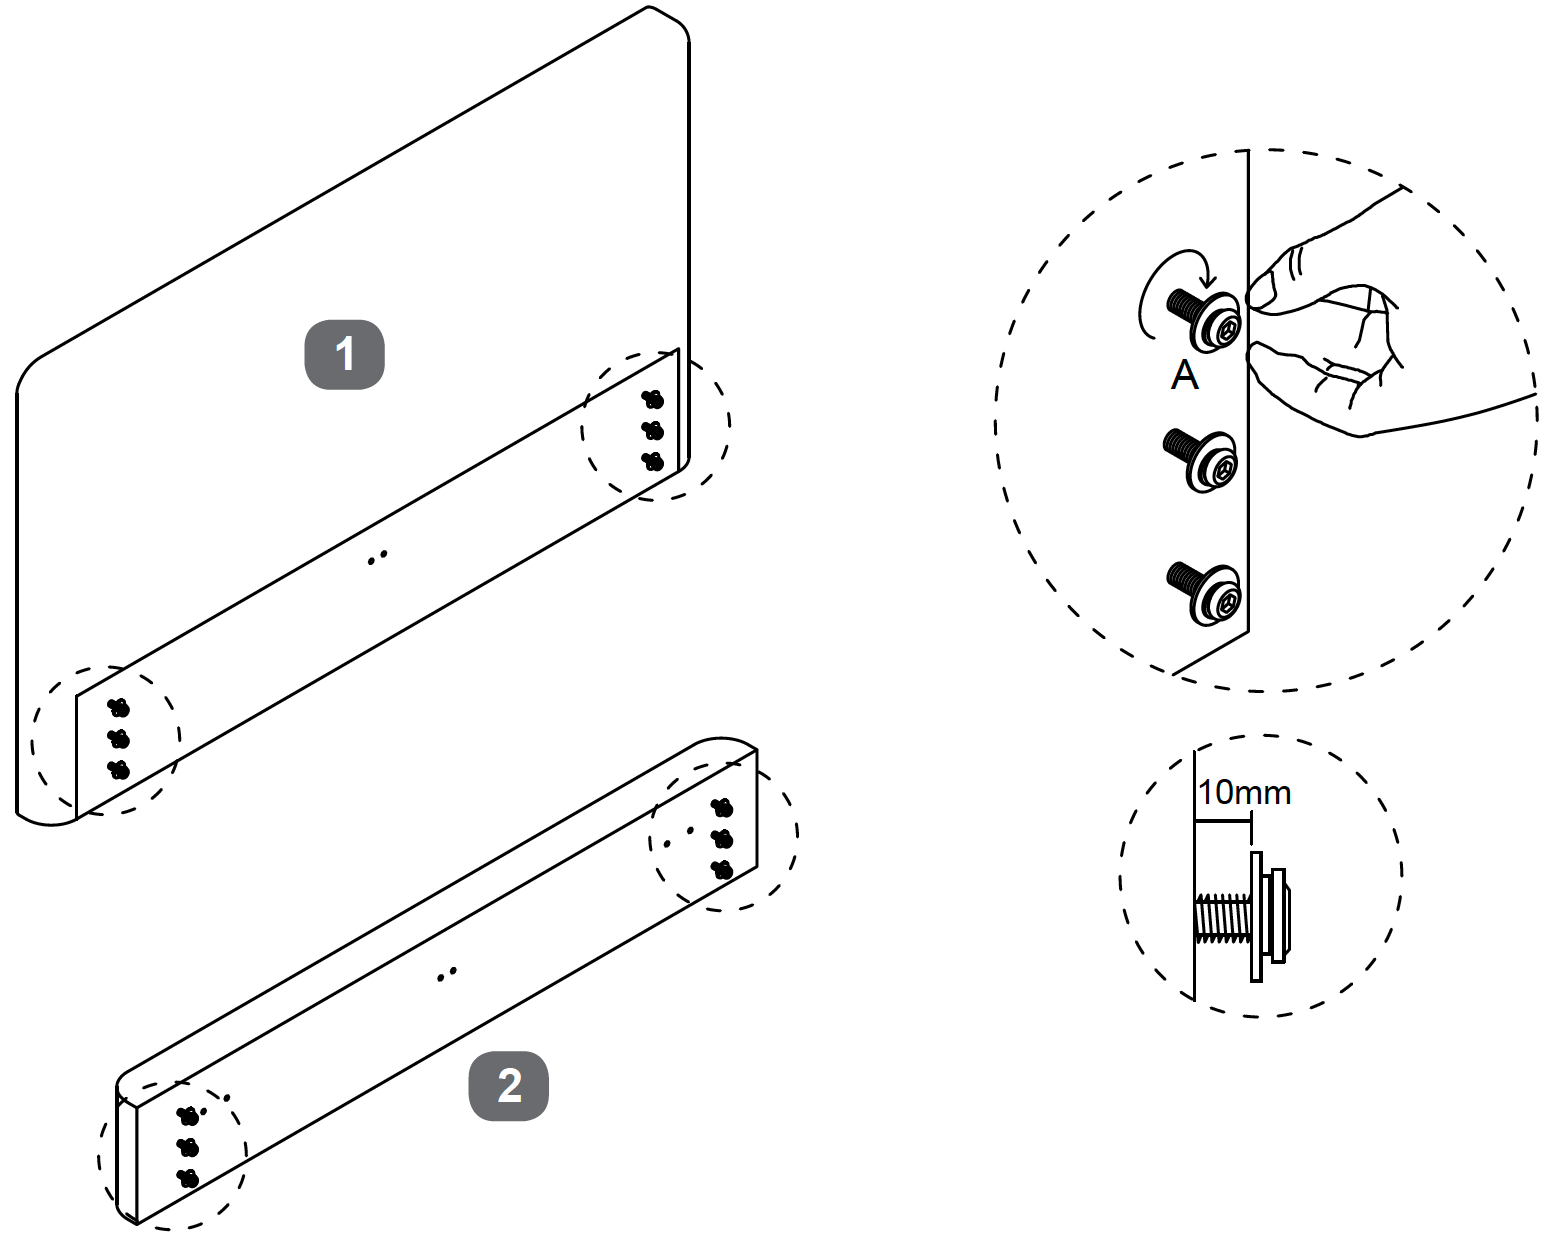
2. Attach Headboard and Footboard
Insert three Bolt M8x25mm (A) into each set of holes, ensuring they pass through the Headboard or Footboard.
Hand-tighten the bolts initially, leaving a 10mm gap to allow for adjustments.
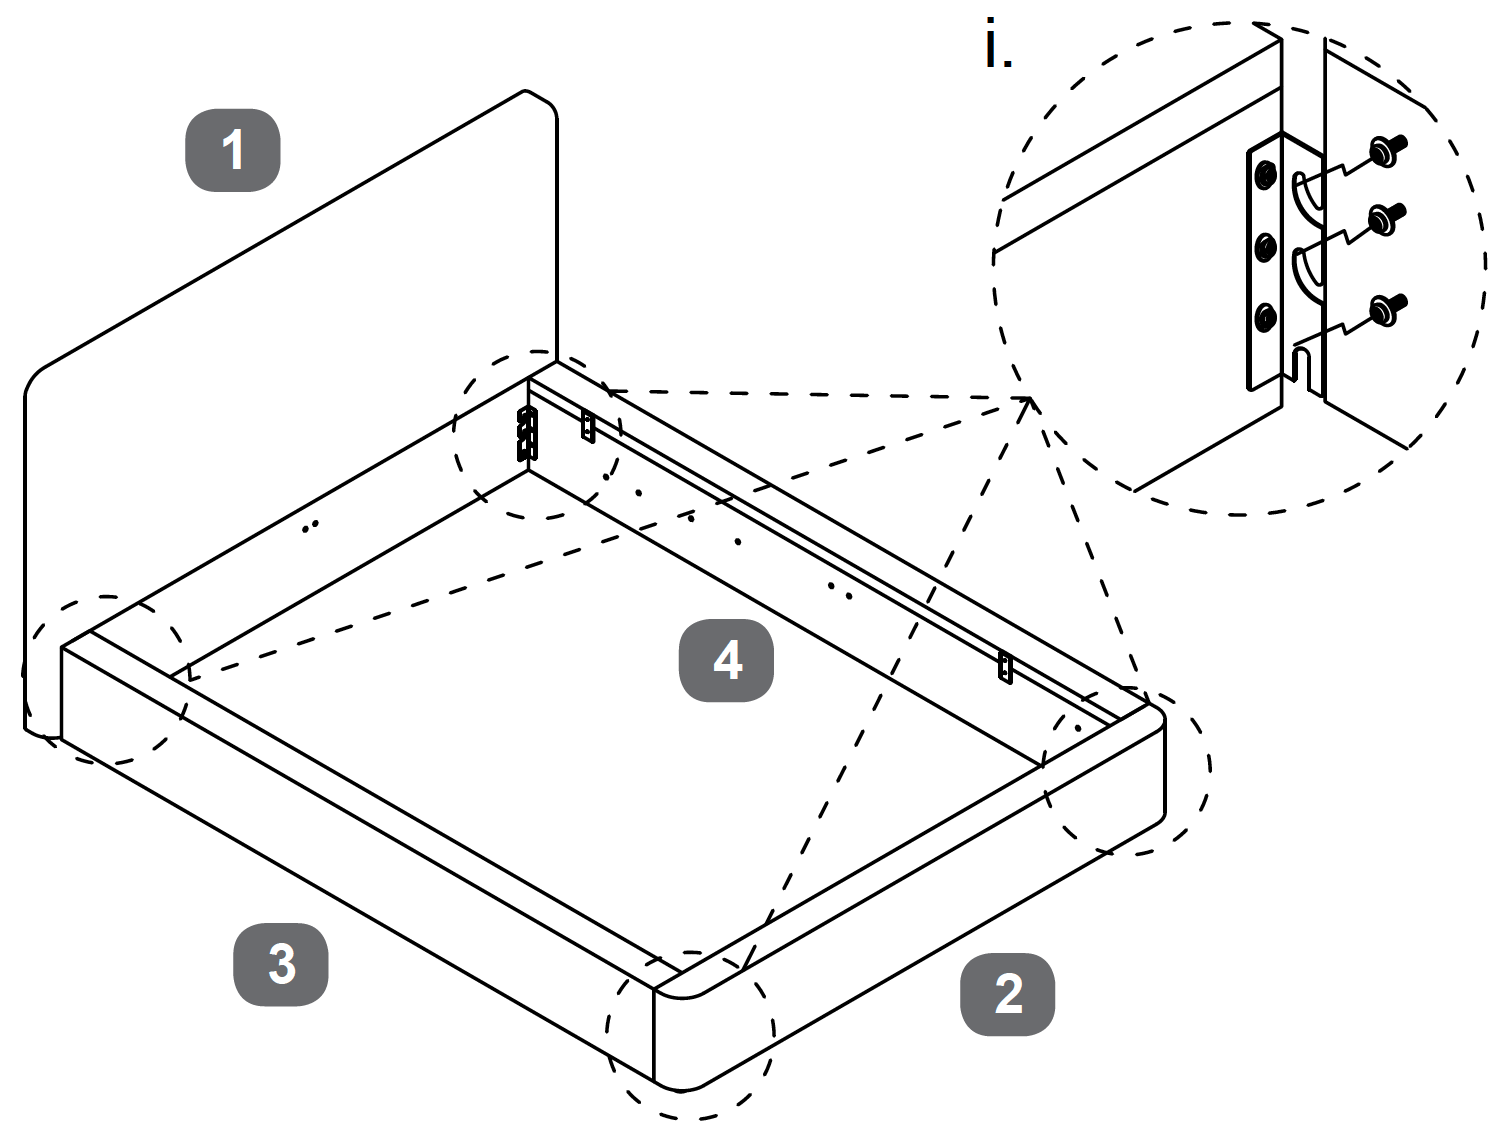
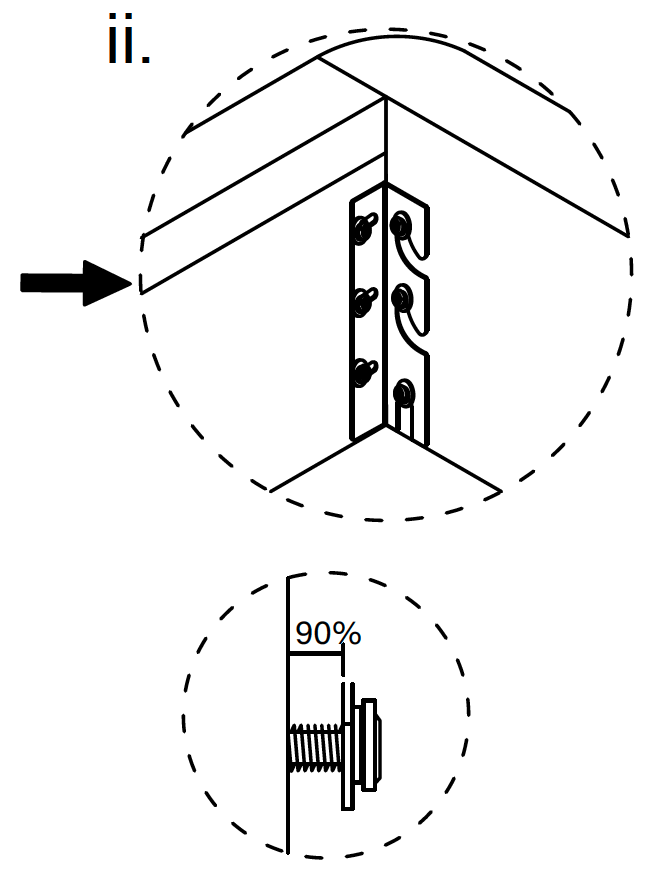
3. Attach Side Rails to Headboard and Footboard
Align the Side Rails (2, 3) with the Headboard (1) and Footboard (4).
Hook the Side Rails onto the Headboard and Footboard using the Hooked Corner Brackets (G, H).
Secure each connection with three Bolt M8x25mm (A) as shown in detail (i).
Ensure the bolts are tightened to 90% as indicated in detail (ii), allowing for final adjustments.
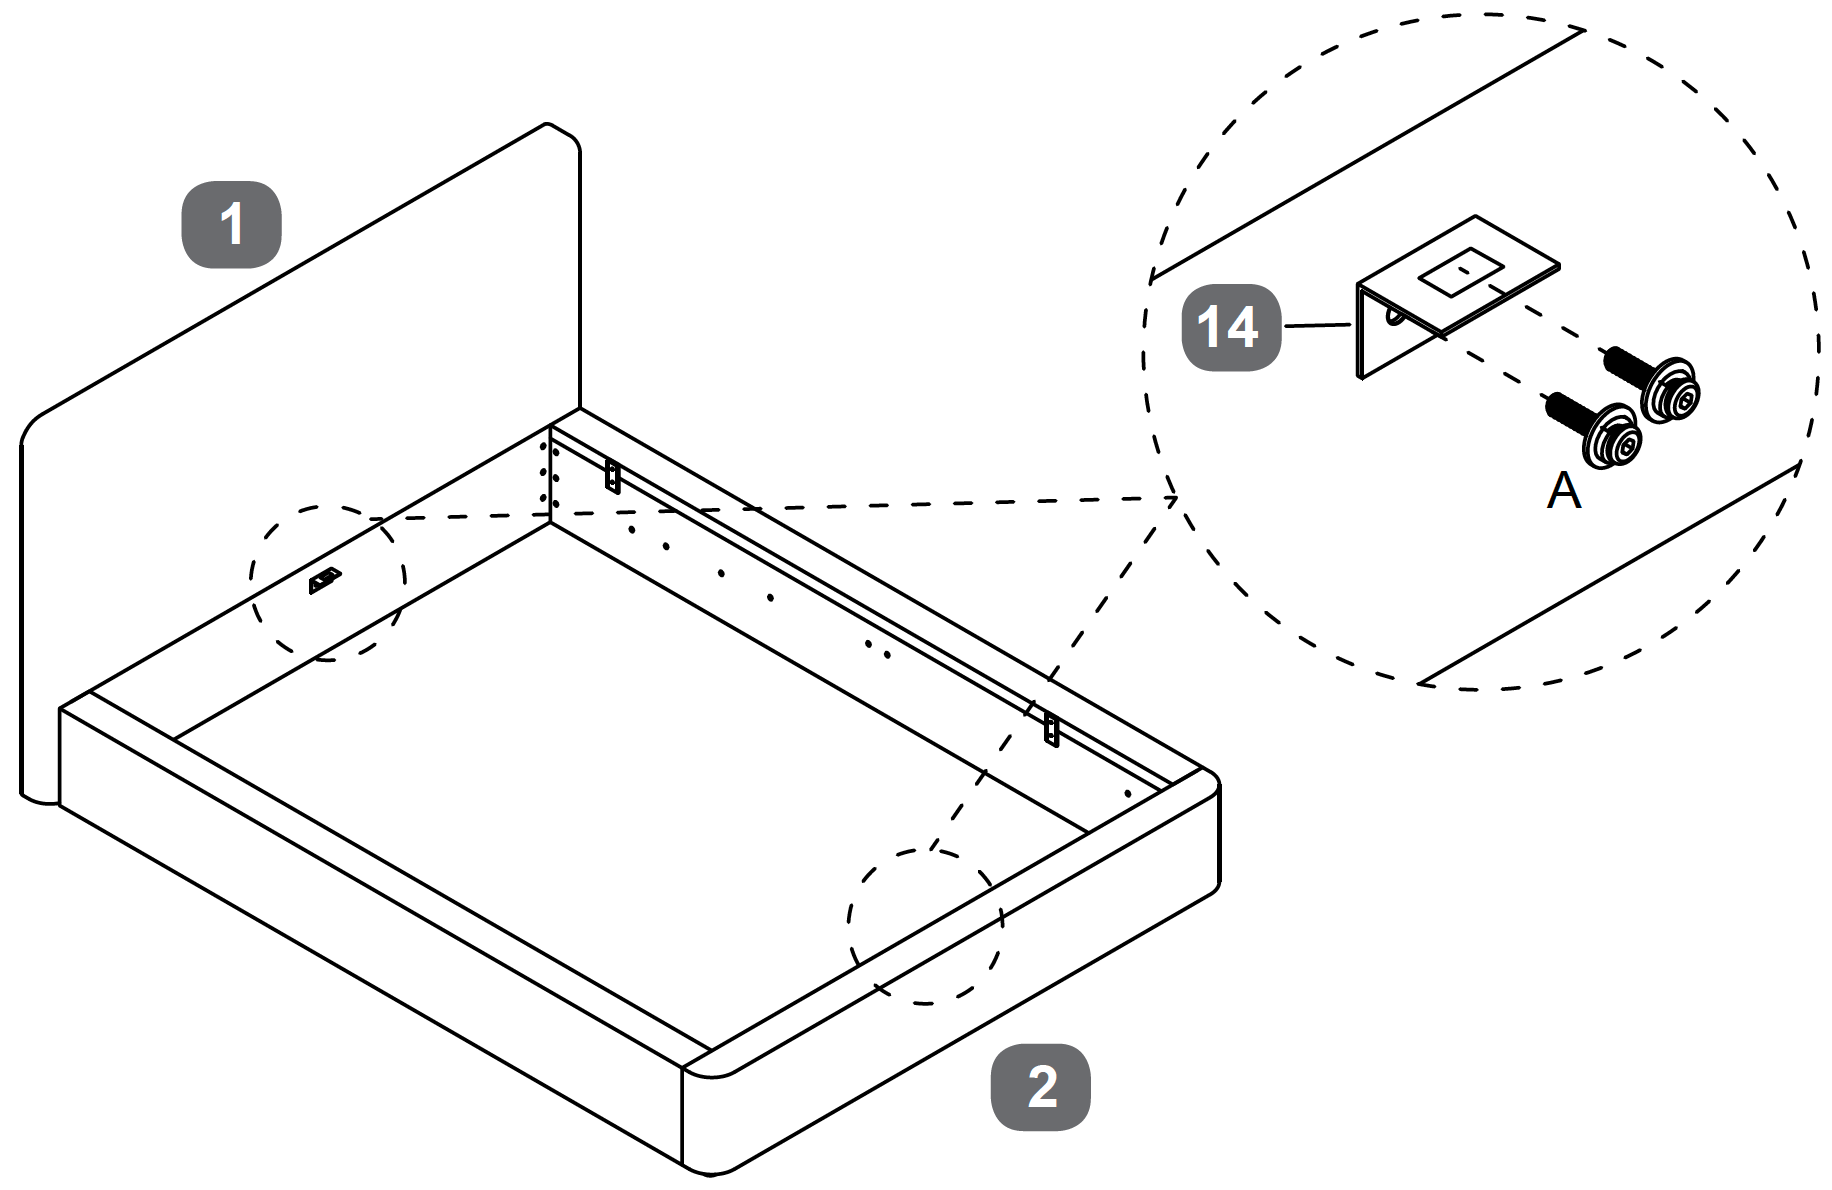
4. Bracket Installation and Alignment for **Double or King**
Attach the ‘L’ Shape Bracket (14) to the inner side of the Headboard and Footboard using two Bolt M8x25mm (A) for each bracket.
Ensure the brackets are aligned with the pre-drilled holes on the Headboard and Footboard
Securely tighten the bolts using the Allen Key (I) to ensure the brackets are firmly in place.
5. Bracket Attachment and Alignment for **Super King**
Attach the ‘L’ Shape Bracket (14) to the inner side of each Headboard and Footboard using two Bolt M8x25mm (A) per bracket.
Align the brackets with the pre-drilled holes on the Headboard and Footboard.
Securely tighten the bolts using the Allen Key (I) to ensure the brackets are firmly in place.
6. Bracket Installation at Corners
Attach the Angled Corner Bracket (9) to the inner corners where the Side Rails (3, 4) meet the Footboard (2).
Use four Bolt M8x25mm (A) for each bracket, ensuring they pass through the bracket and into the pre-drilled holes on the Side Rails and Footboard.
Securely tighten the bolts using the Allen Key (I) to ensure the brackets are firmly in place.
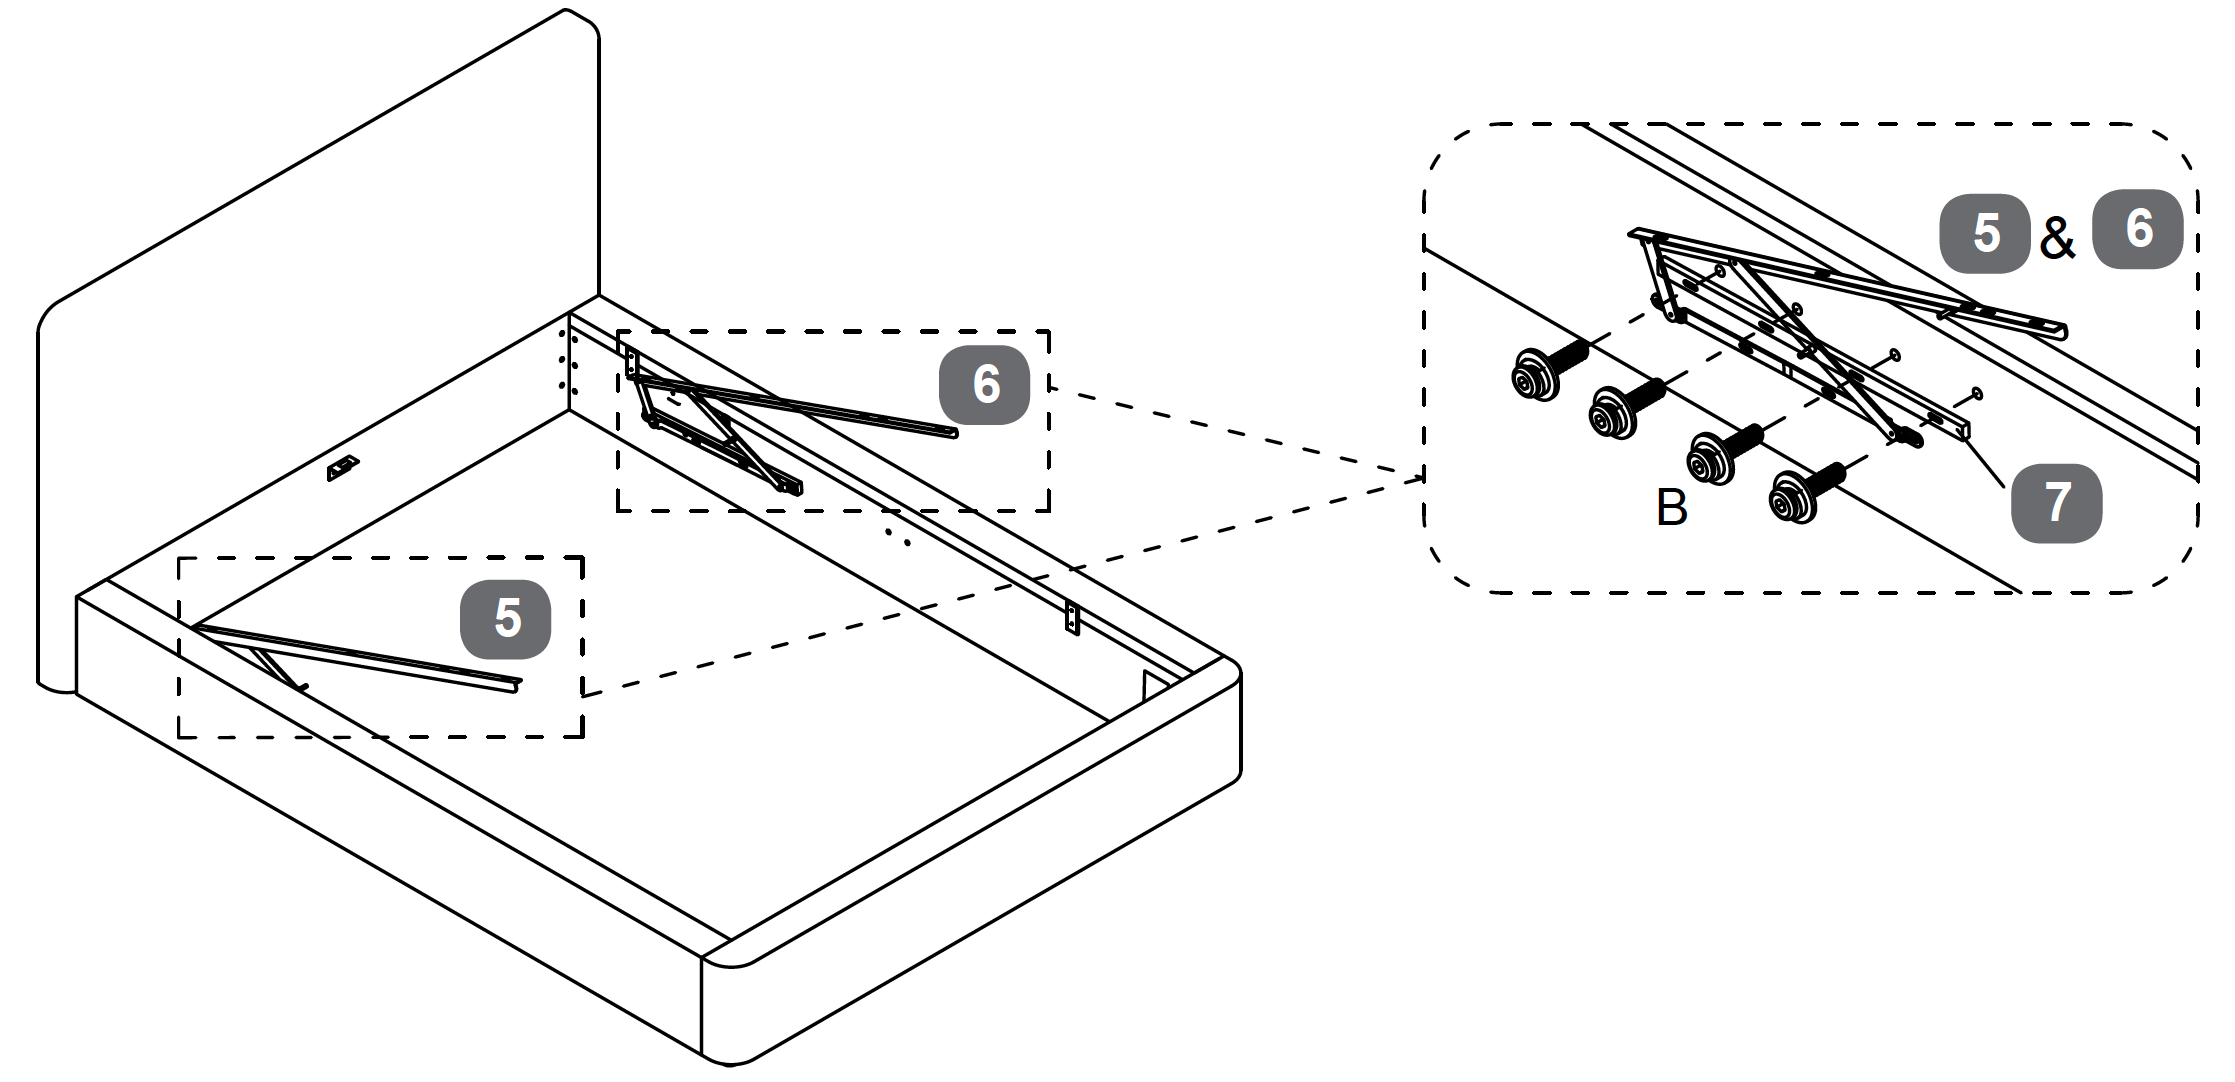
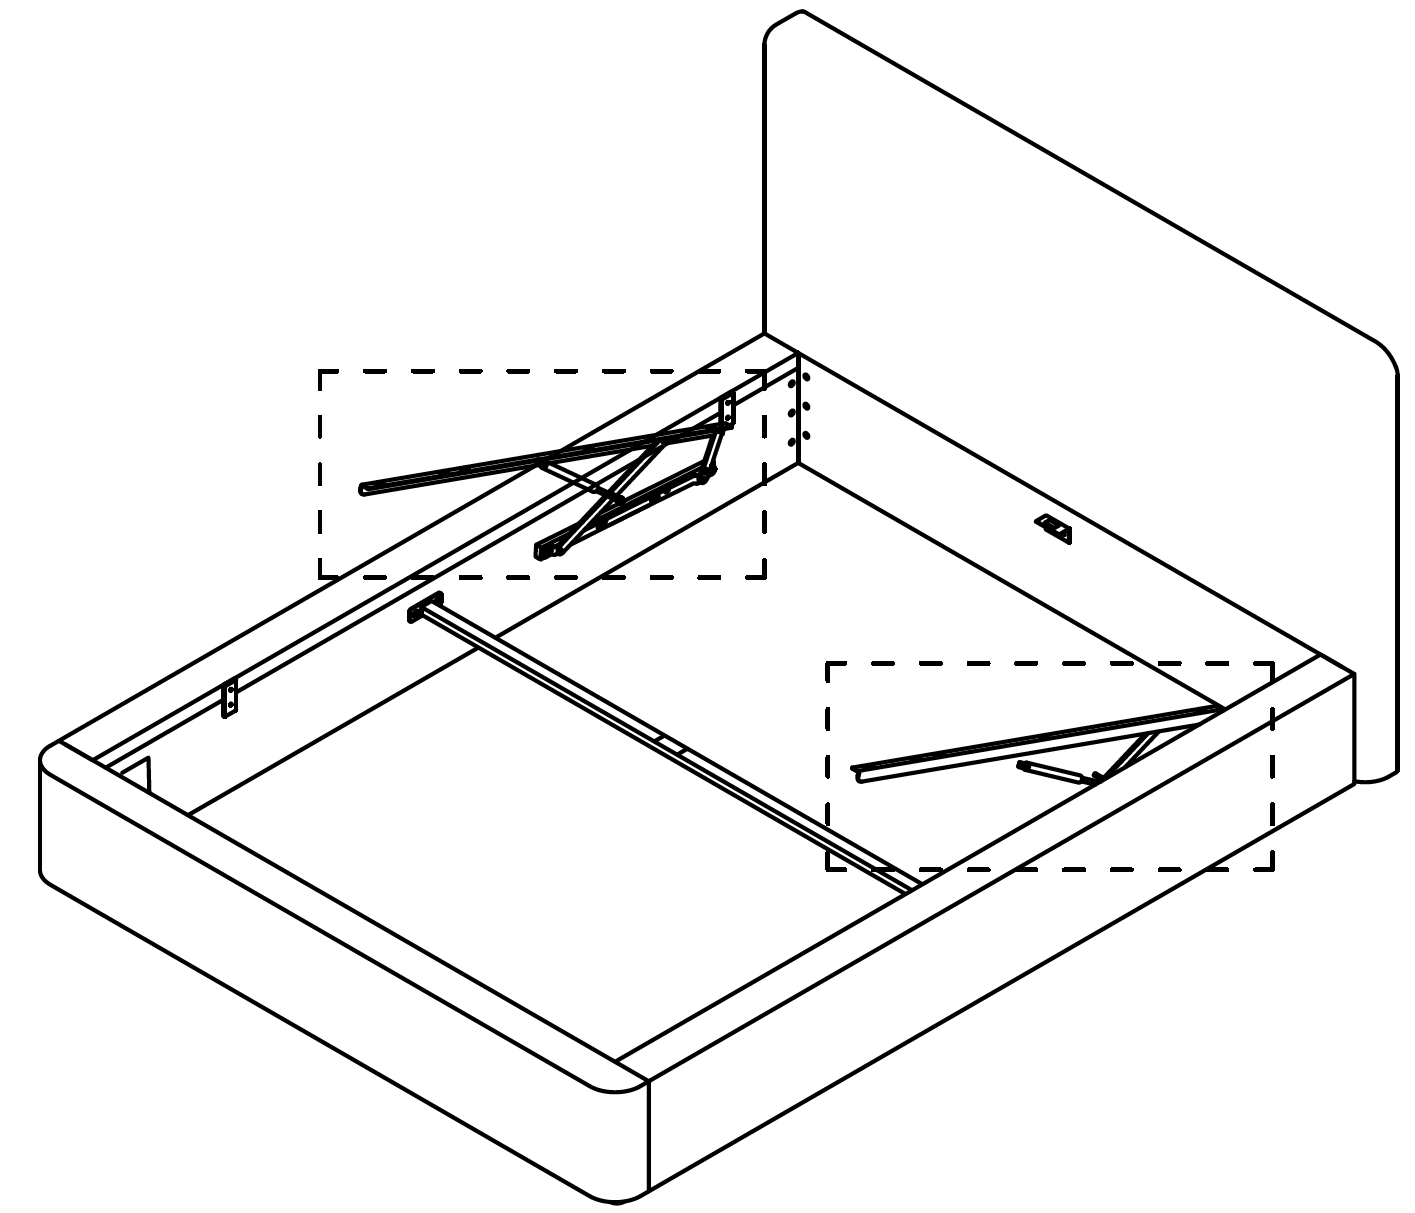
7. Gas-lift Mechanism Attachment and Securing
Attach the Gas-lift Mechanism - Left (5) and Gas-lift Mechanism - Right (6) to the inner sides of the Side Rails, making sure that the Spacer rail (7) is placed in between the Siderail and Gas lift mechanism.
Use Bolt M8x35mm (B) to secure each mechanism, ensuring alignment with the pre-drilled holes.
Insert the bolts through the mechanisms and into the Side Rails, then tighten securely using the appropriate tool.
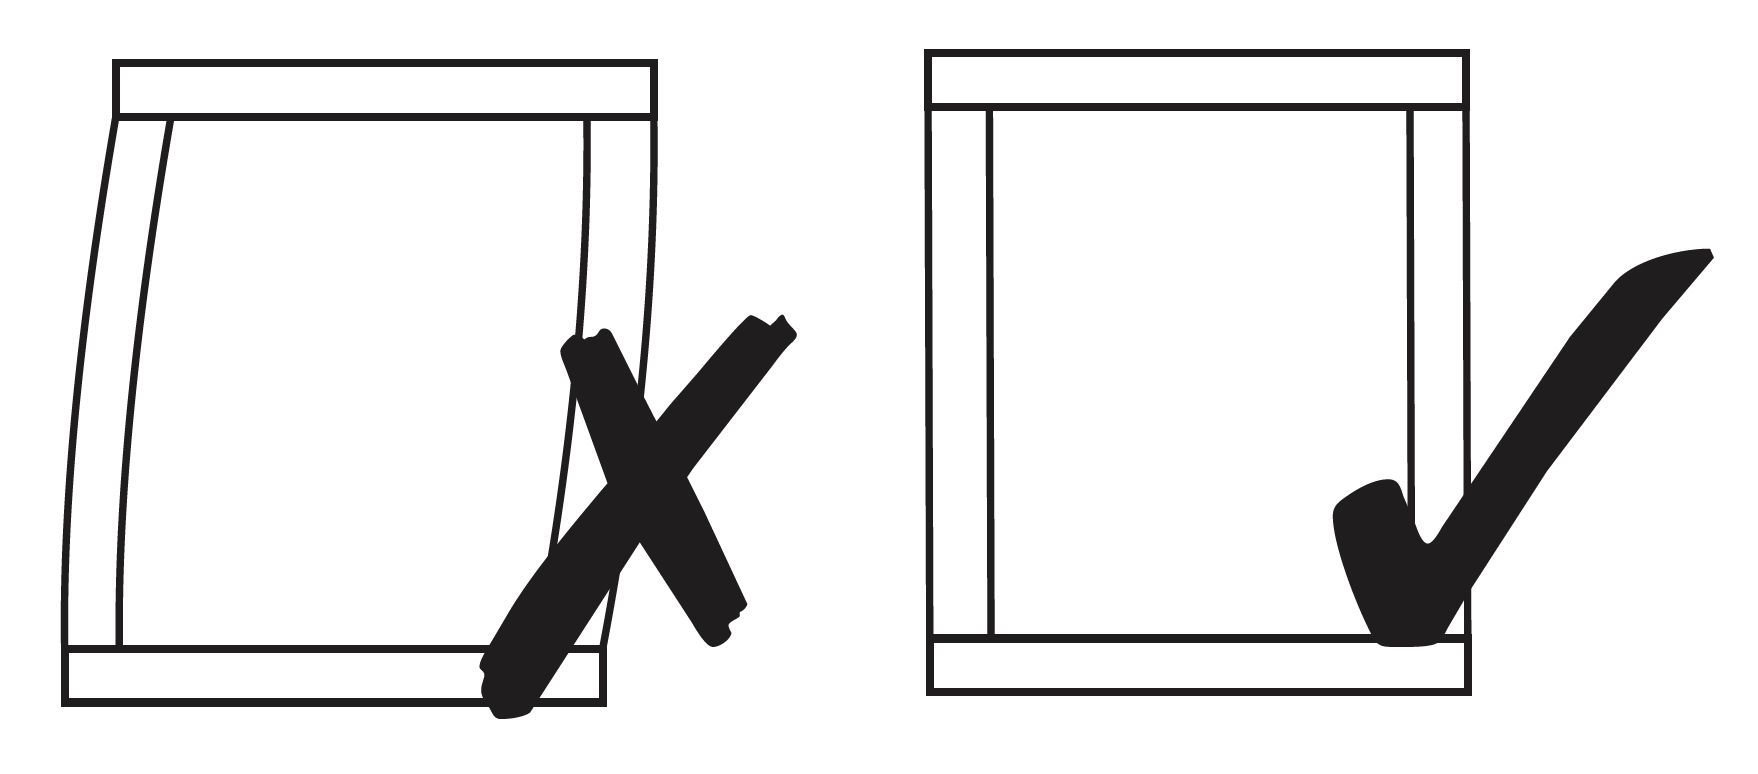
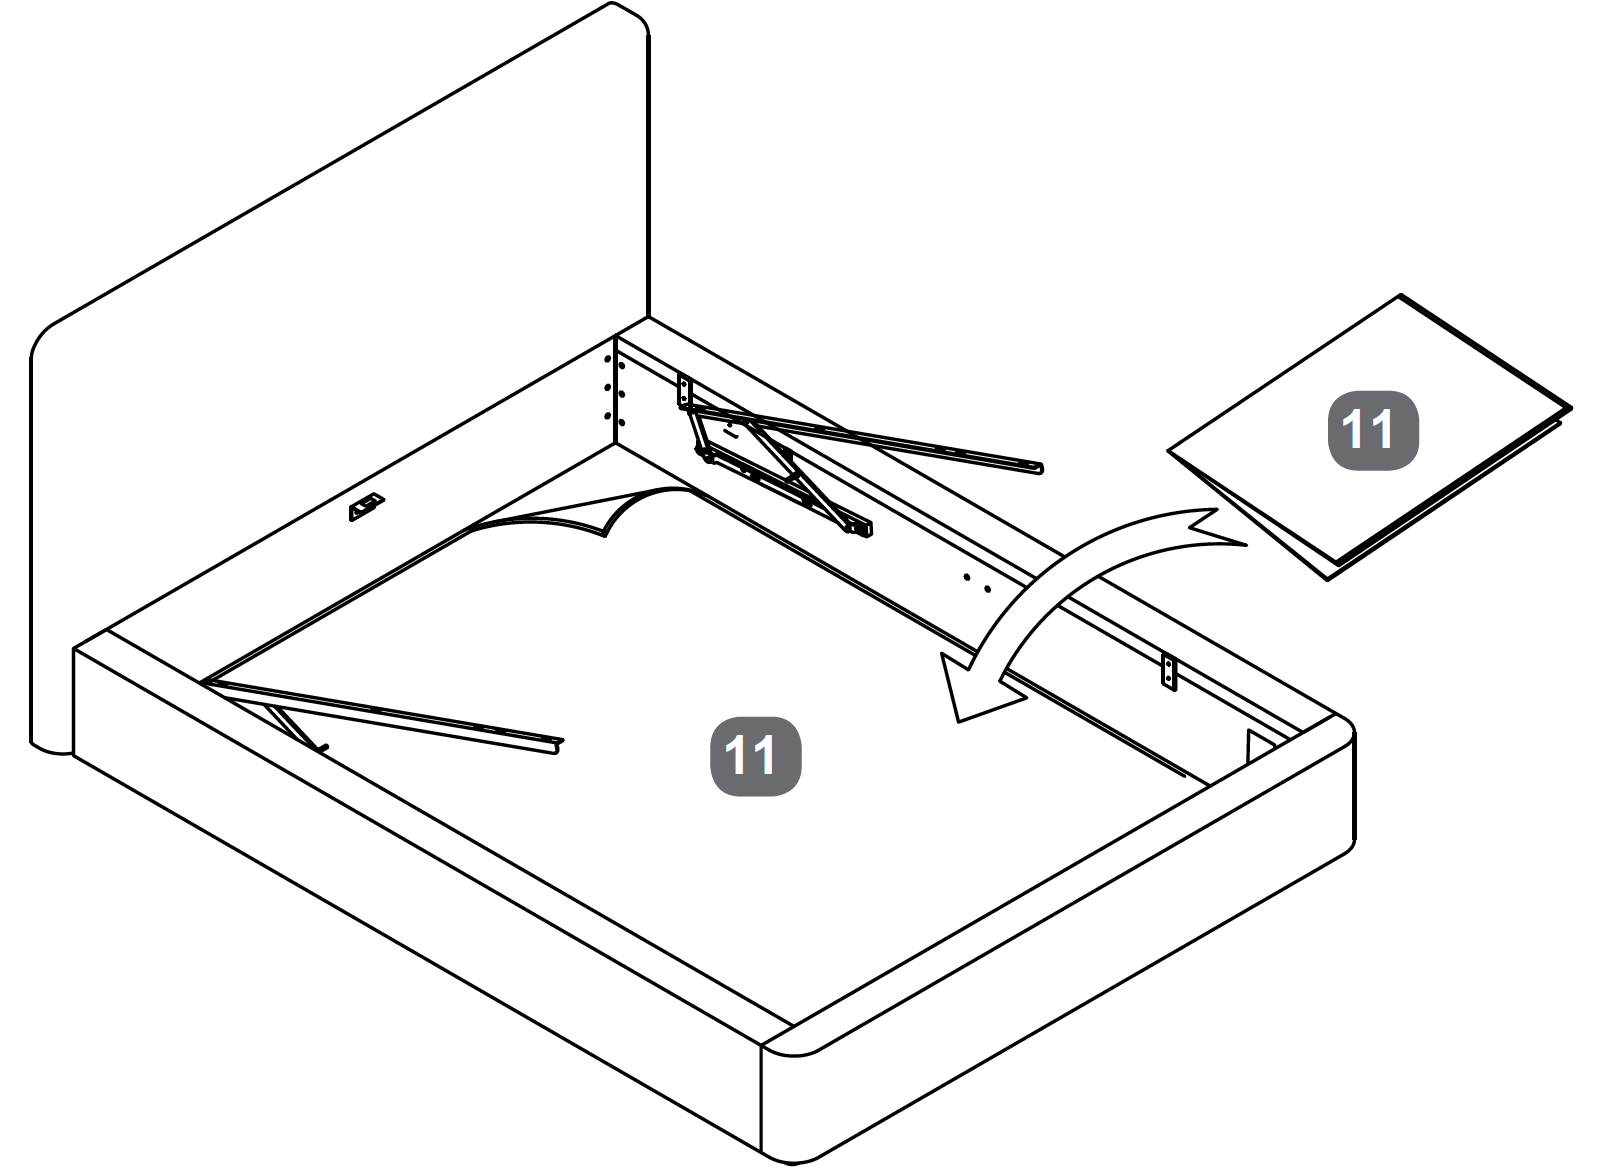
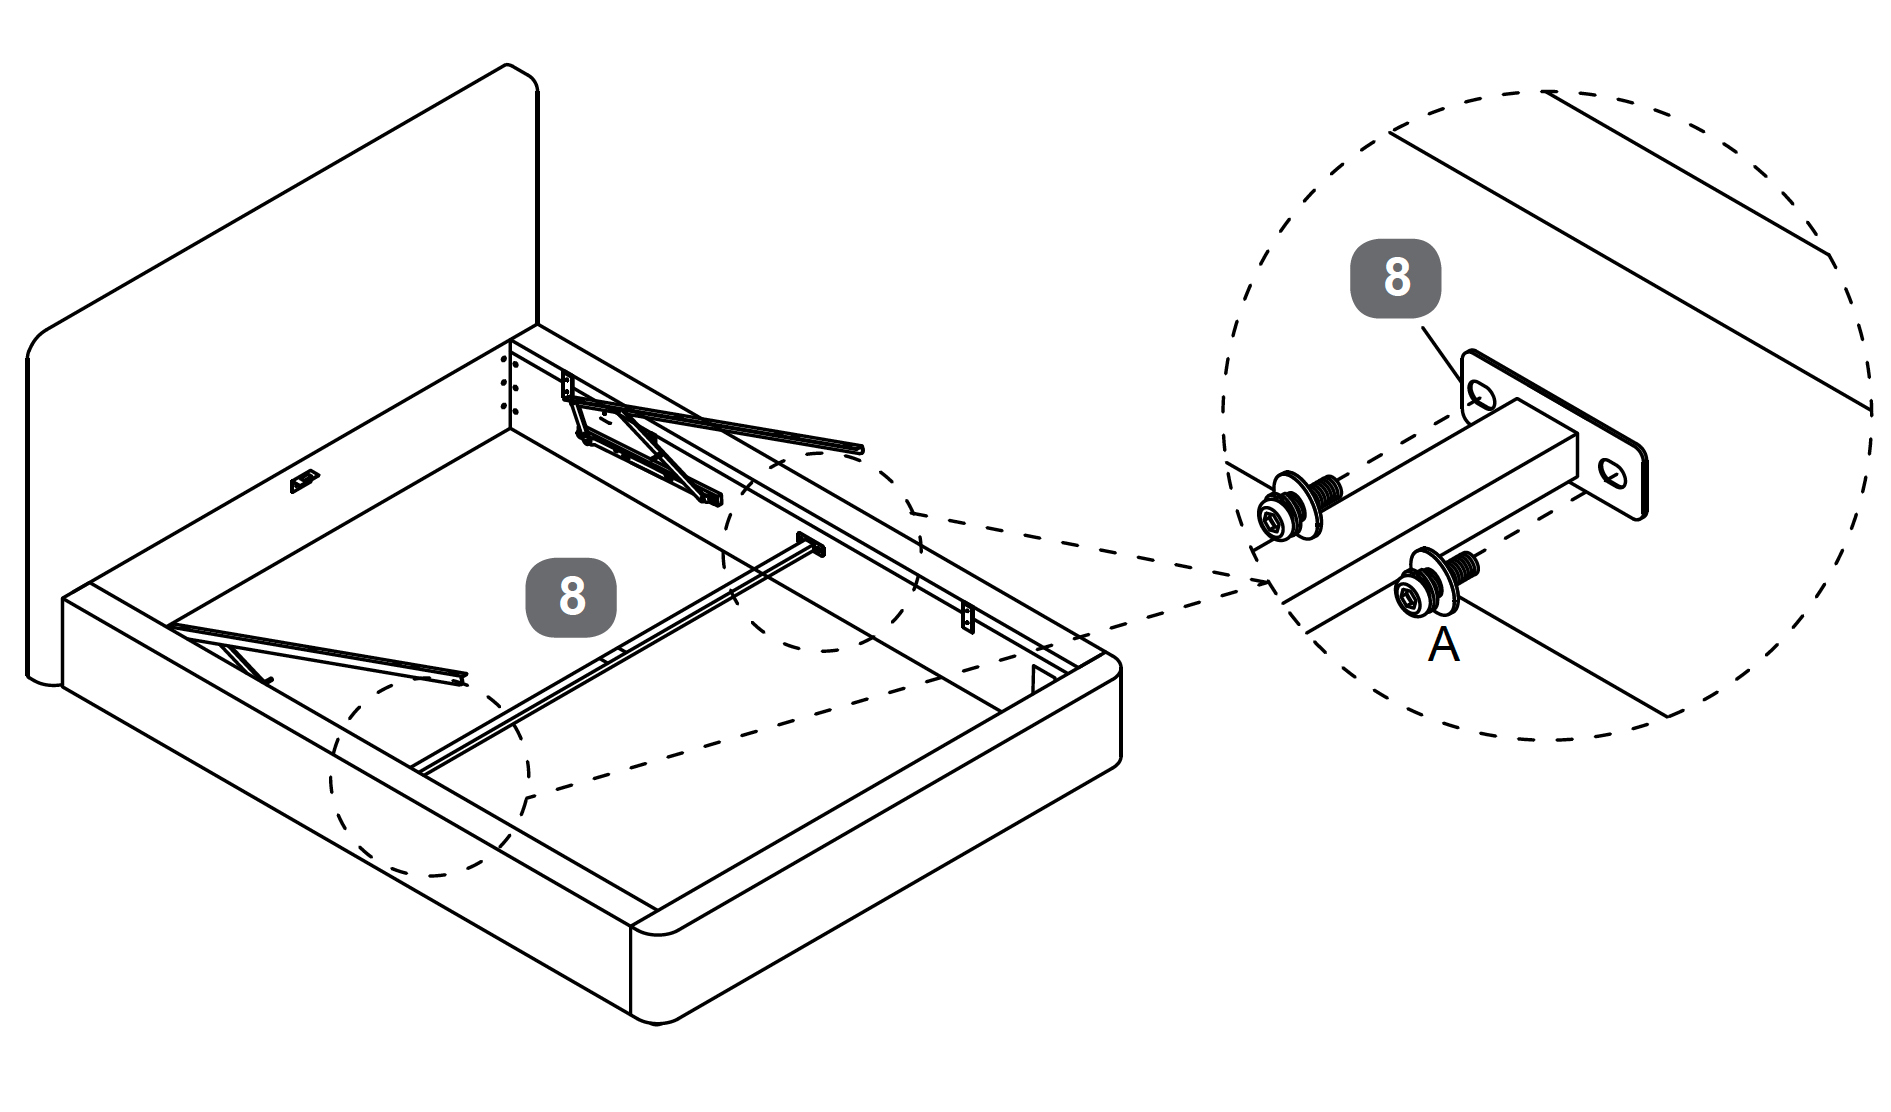
8. Base Cover Placement and Alignment
Place the Fabric Base Cover (11) inside the bed frame.
Ensure it is spread evenly across the bottom, with no folds or creases.
Align the cover with the edges of the frame for a neat fit.
9. Cross Bar Installation and Alignment
Attach the Side Rail Cross Bar (8) to the inner sides of the Side Rails using two Bolt M8x25mm (A) for each end.
Ensure the cross bar is aligned with the pre-drilled holes on the Side Rails.
Securely tighten the bolts using the Allen Key (I) to ensure the cross bar is firmly in place.
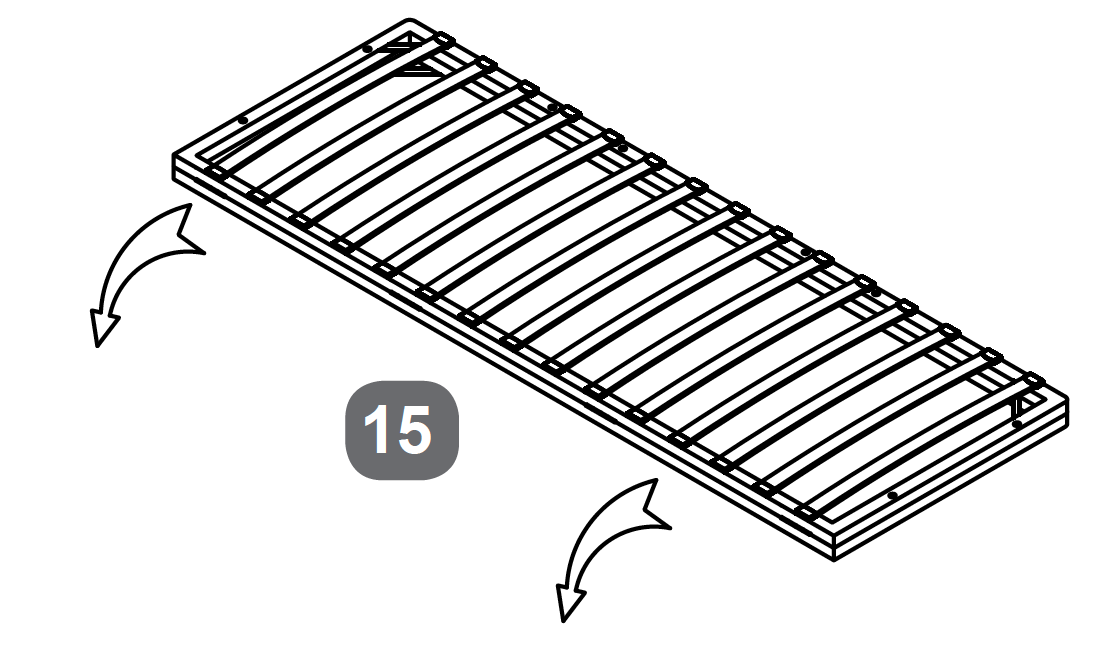
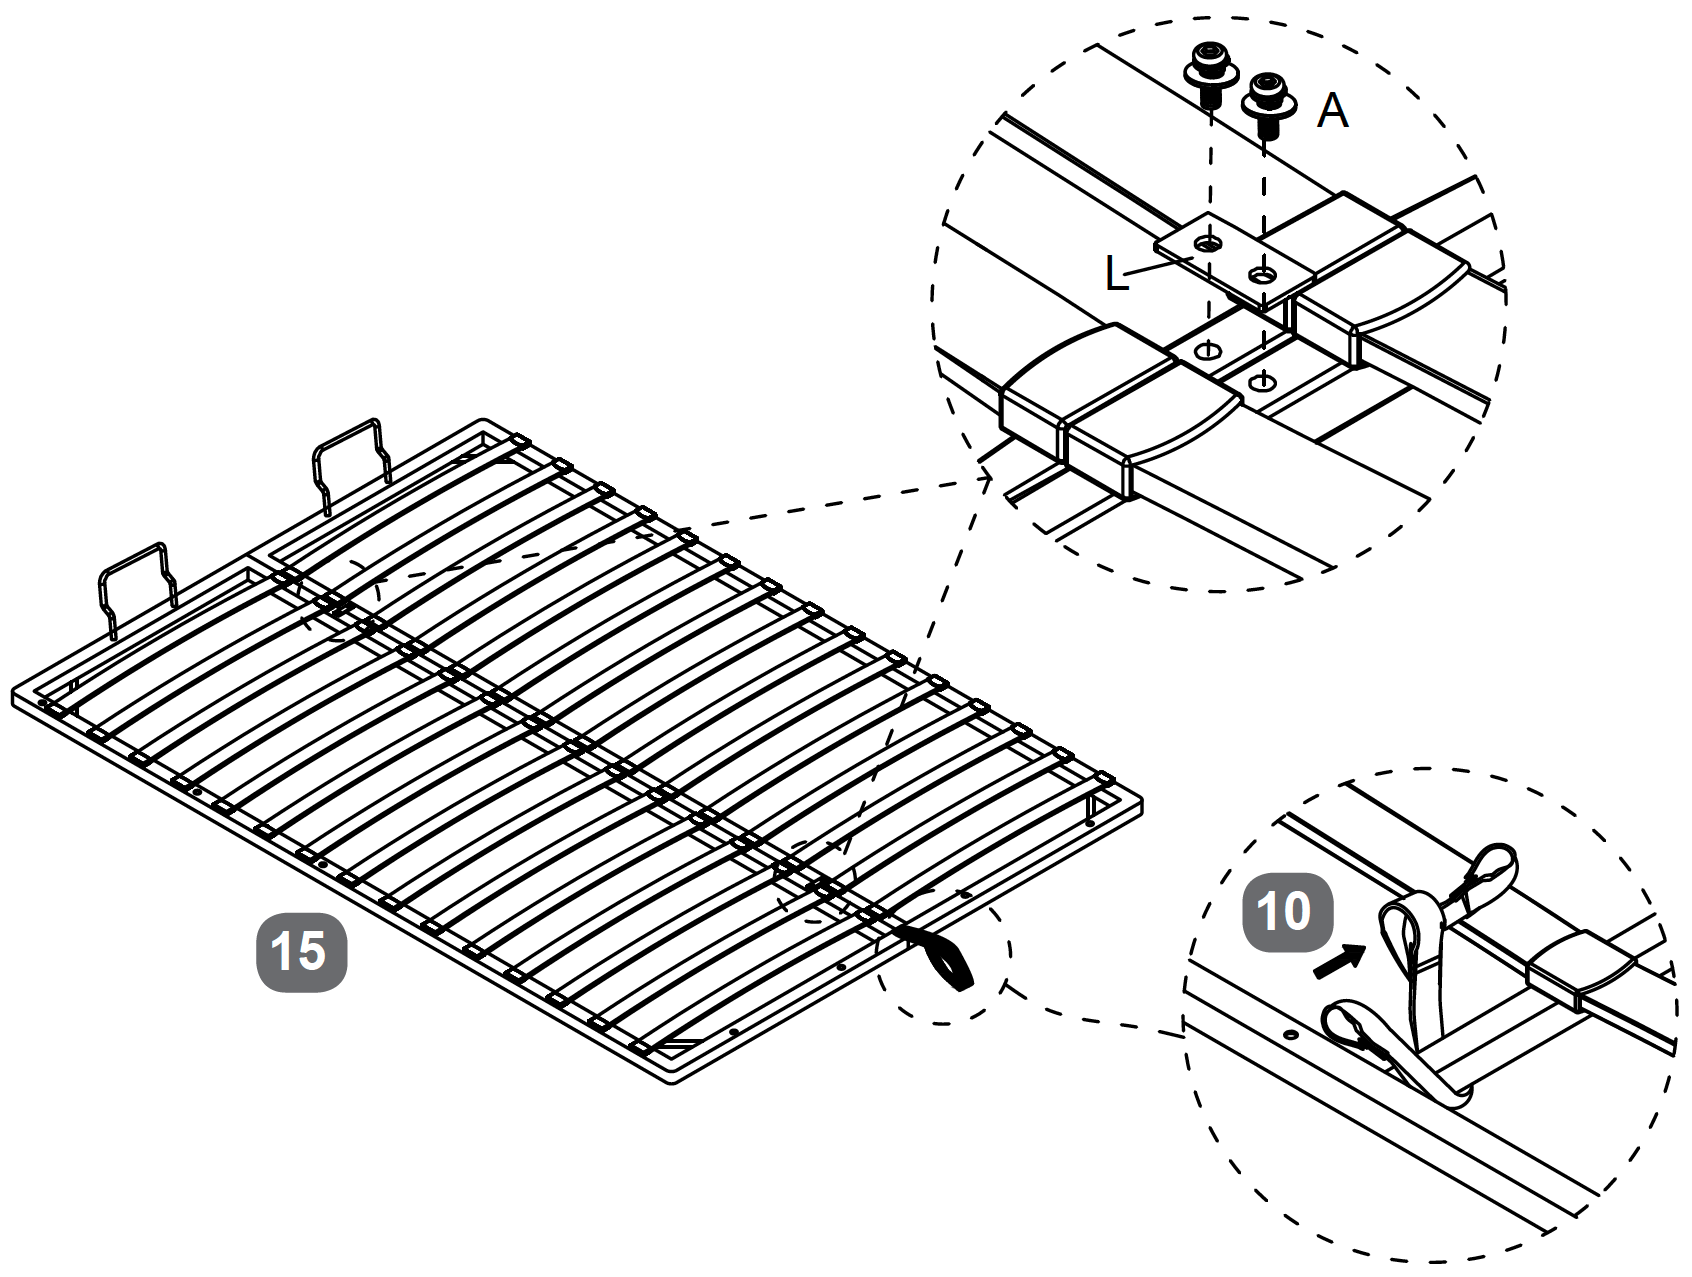
10. Frame Assembly and Component Attachment For **Double or King**
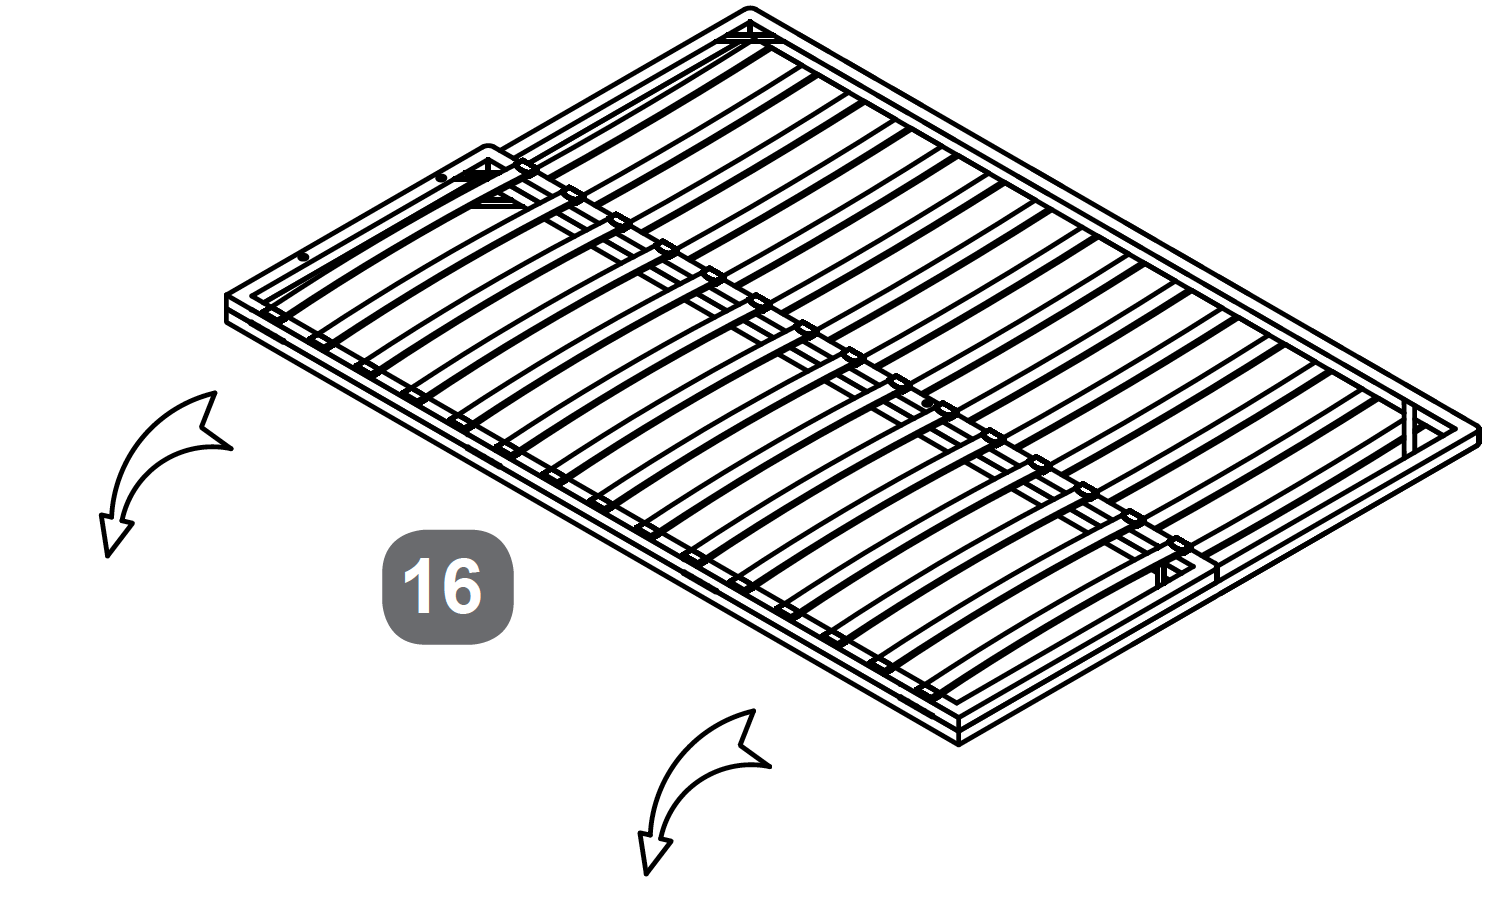
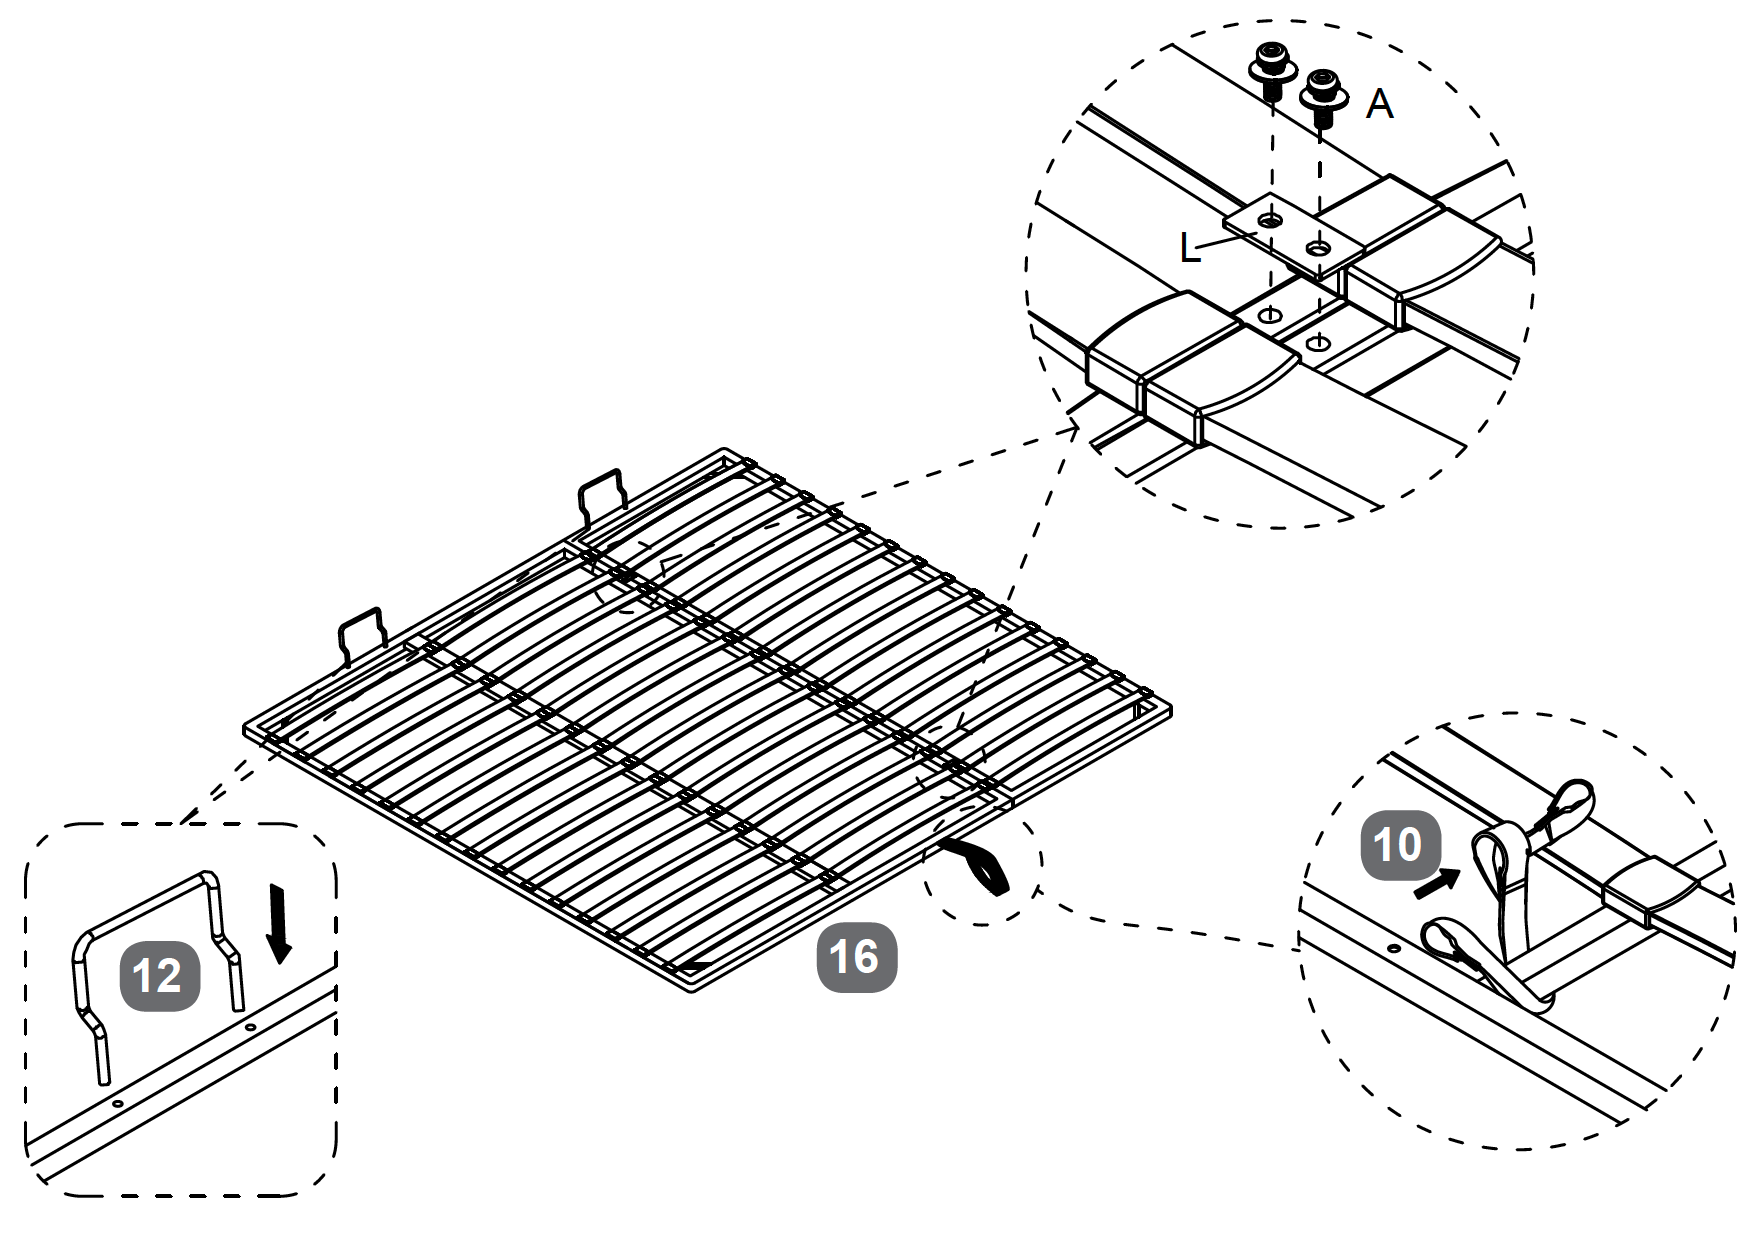
Metal Slat Frame Installation: Place the Metal Slat Frame (15) onto the bed frame, ensuring it is centered and aligned with the edges.
Connection Plate Attachment: Use the Metal Connection Plates (L) to join sections of the slat frame. Secure each plate with Bolt M8x25mm (A) and tighten using the Allen Key (I).
Fabric Lifting Handle Installation: Attach the Fabric Lifting Handle (10) to the designated area on the slat frame, ensuring it is securely fastened.
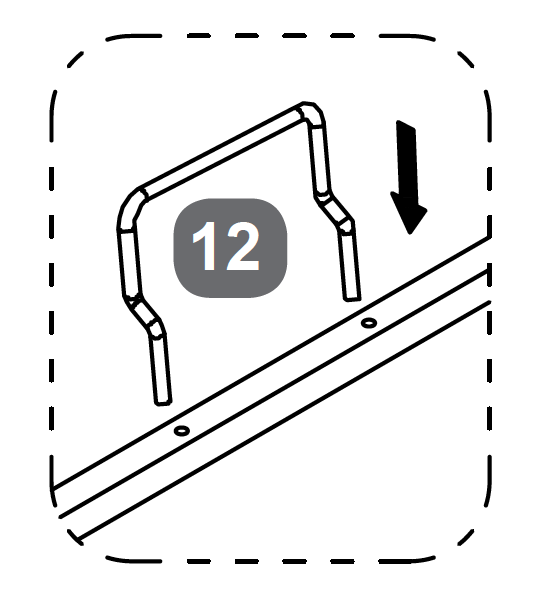
Mattress Stopper Installation: Insert the Mattress Stopper (12) into the pre-drilled holes at the foot of the slat frame to prevent mattress movement.
11. Frame Assembly and Component Setup for **Super King**
Metal Slat Frame Installation: Place the Metal Slat Frame (16) onto the bed frame, ensuring it is centered and aligned with the edges.
Connection Plate Attachment: Use the Metal Connection Plates (L) to join sections of the slat frame. Secure each plate with Bolt M8x25mm (A) and tighten using the Allen Key (I).
Fabric Lifting Handle Installation: Attach the Fabric Lifting Handle (10) to the designated area on the slat frame, ensuring it is securely fastened.
Mattress Stopper Installation: Insert the Mattress Stopper (12) into the pre-drilled holes at the foot of the slat frame to prevent mattress movement.
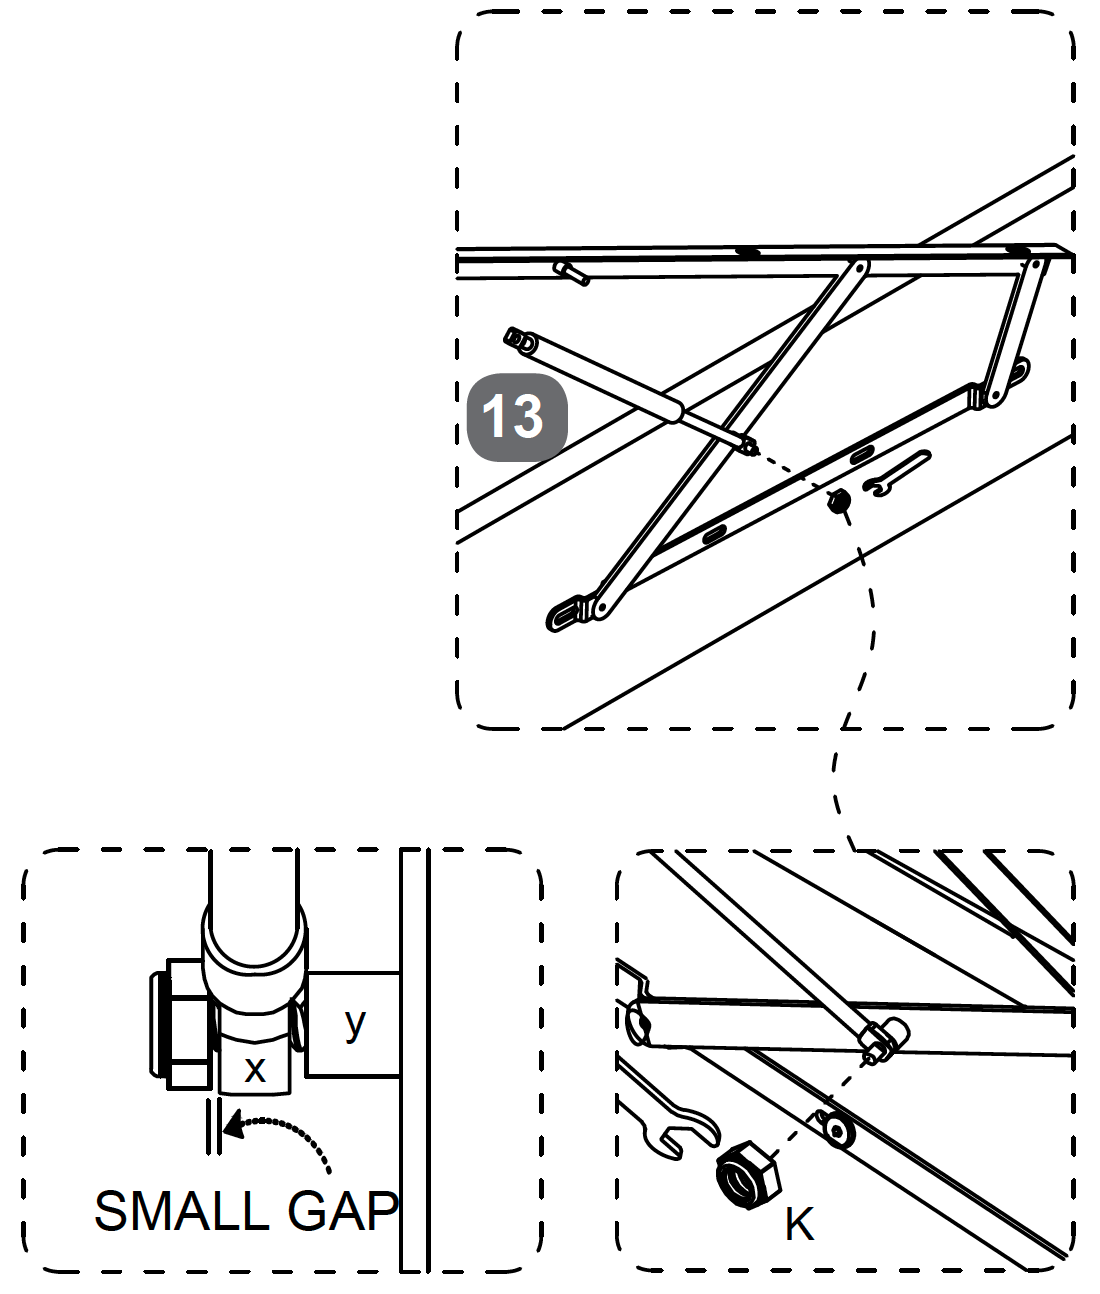
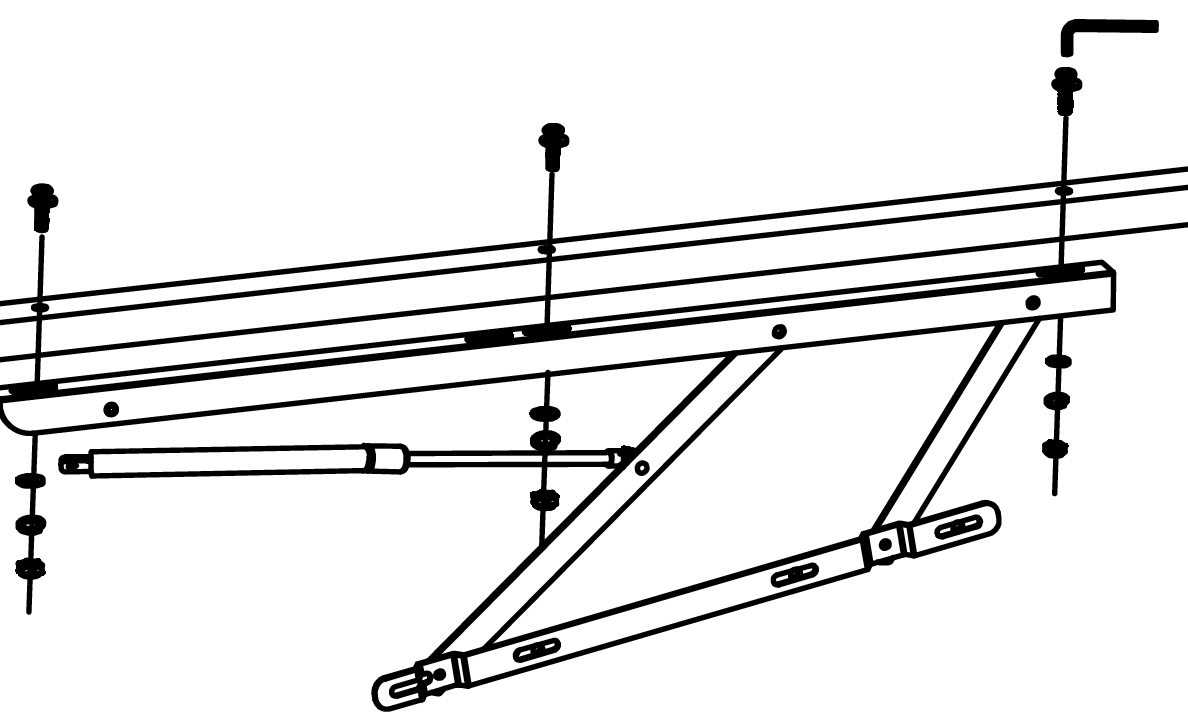
12. Gas-Lift Mechanism Installation
Attach the Gas-Lift Piston that is on the Gas lift mechanism (13) onto the axle (Y).
Secure it using the Flanged Lock-Nut M8 (K), leaving a small gap between components x and y to allow smooth movement.
Use the appropriate tools to tighten the nuts, ensuring the mechanism is firmly in place but not over-tightened to maintain smooth piston operation.
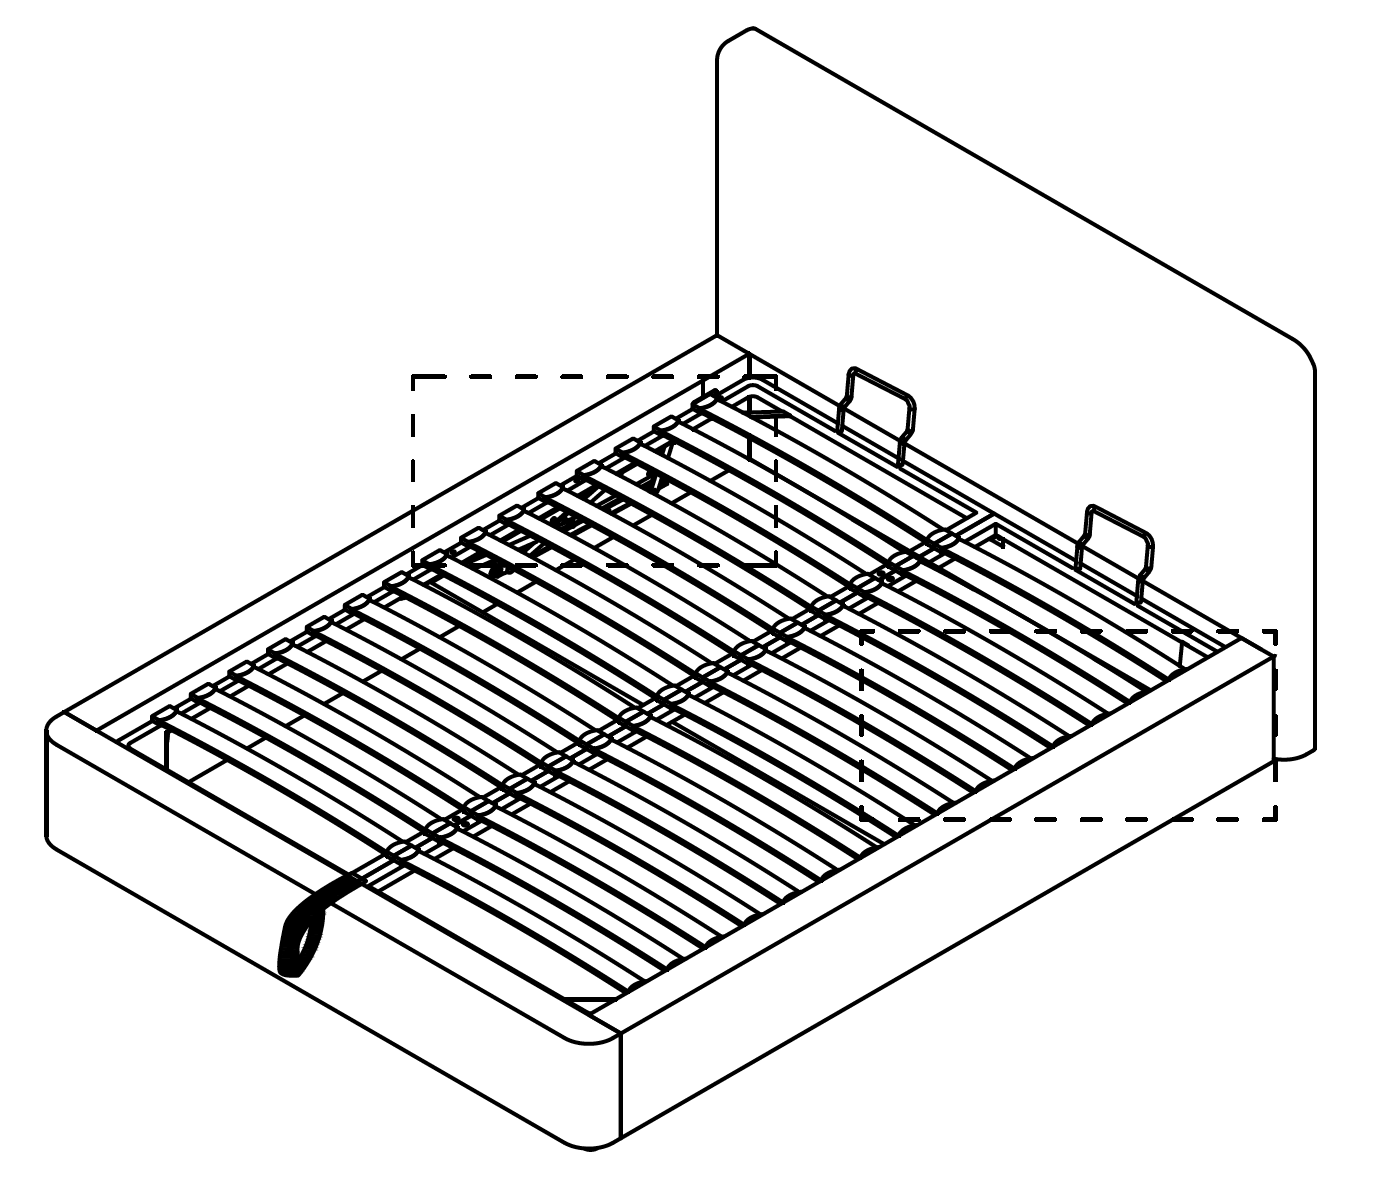
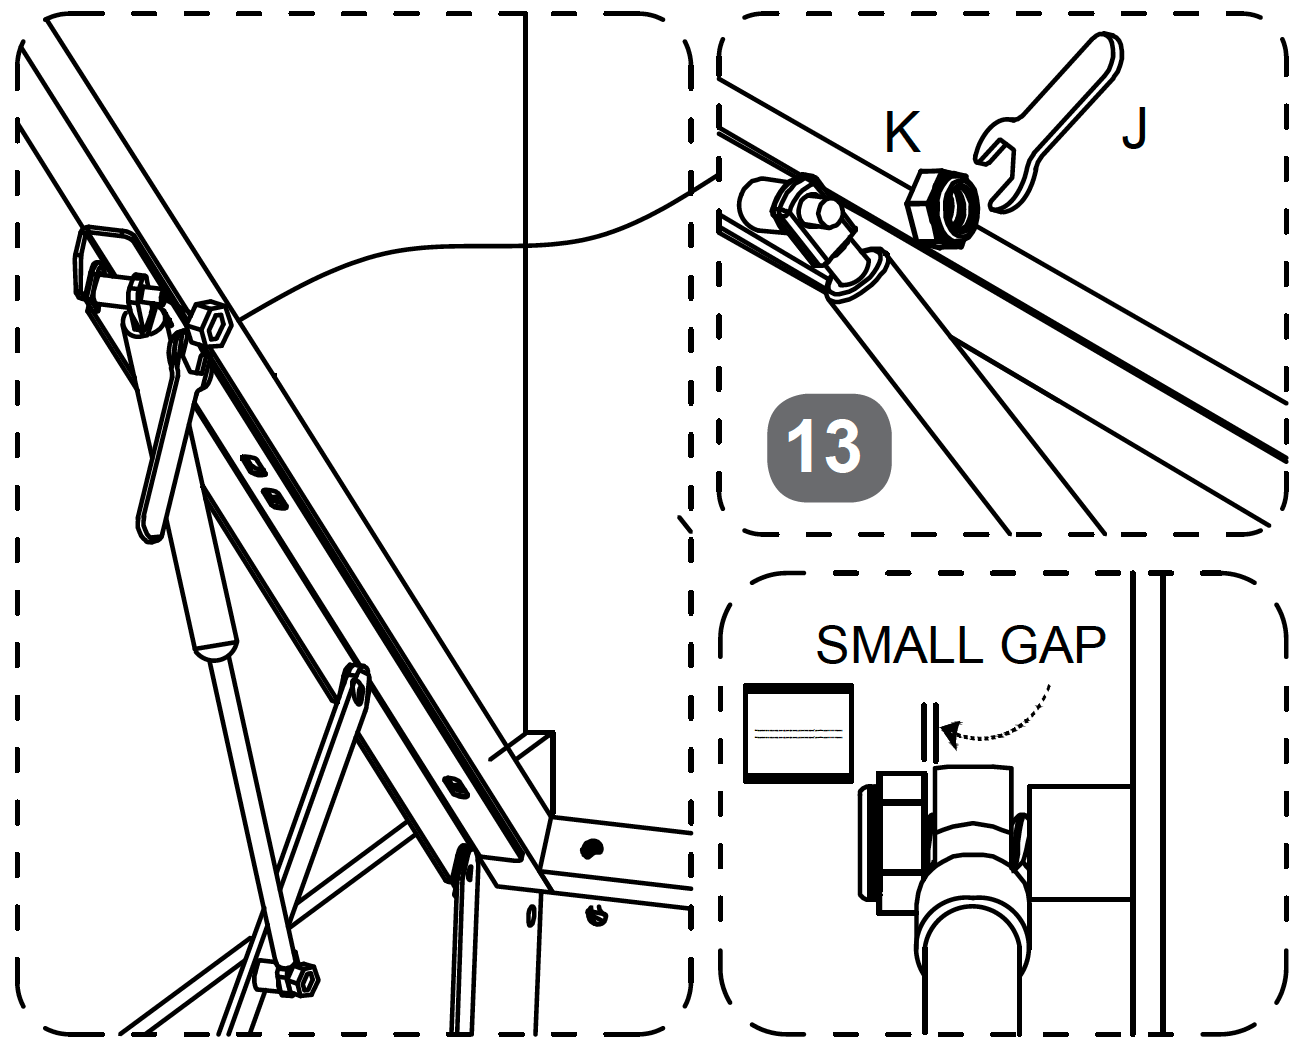
13. Gas-Lift Mechanism Final Assembly
-Align the Gas-Lift Mechanism with the pre-drilled holes on the Metal Slat Frame (15 or 16)
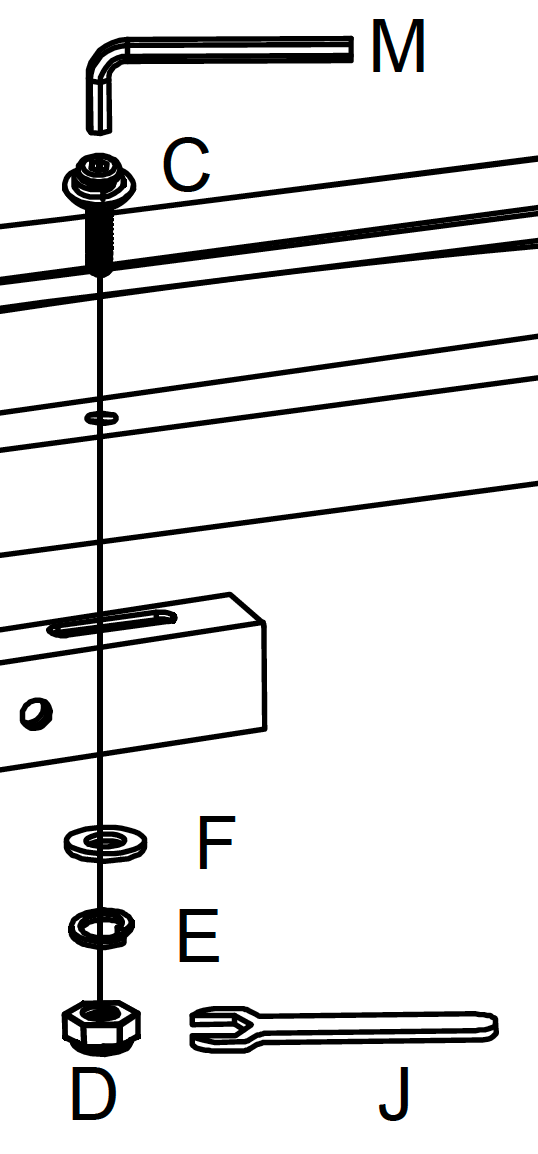
Secure the mechanism loosely using Bolt M8x50mm (C), Spring Washer (E), Flat Washer (F), and Nut for M8 Bolts (D).
When you are sure there are even gaps at each side, use the Allen Key (M) and Spanner (J) to tighten the bolts and nuts, ensuring a small gap is left for smooth piston movement.
Confirm that the mechanism is firmly attached but not over-tightened to maintain smooth operation.
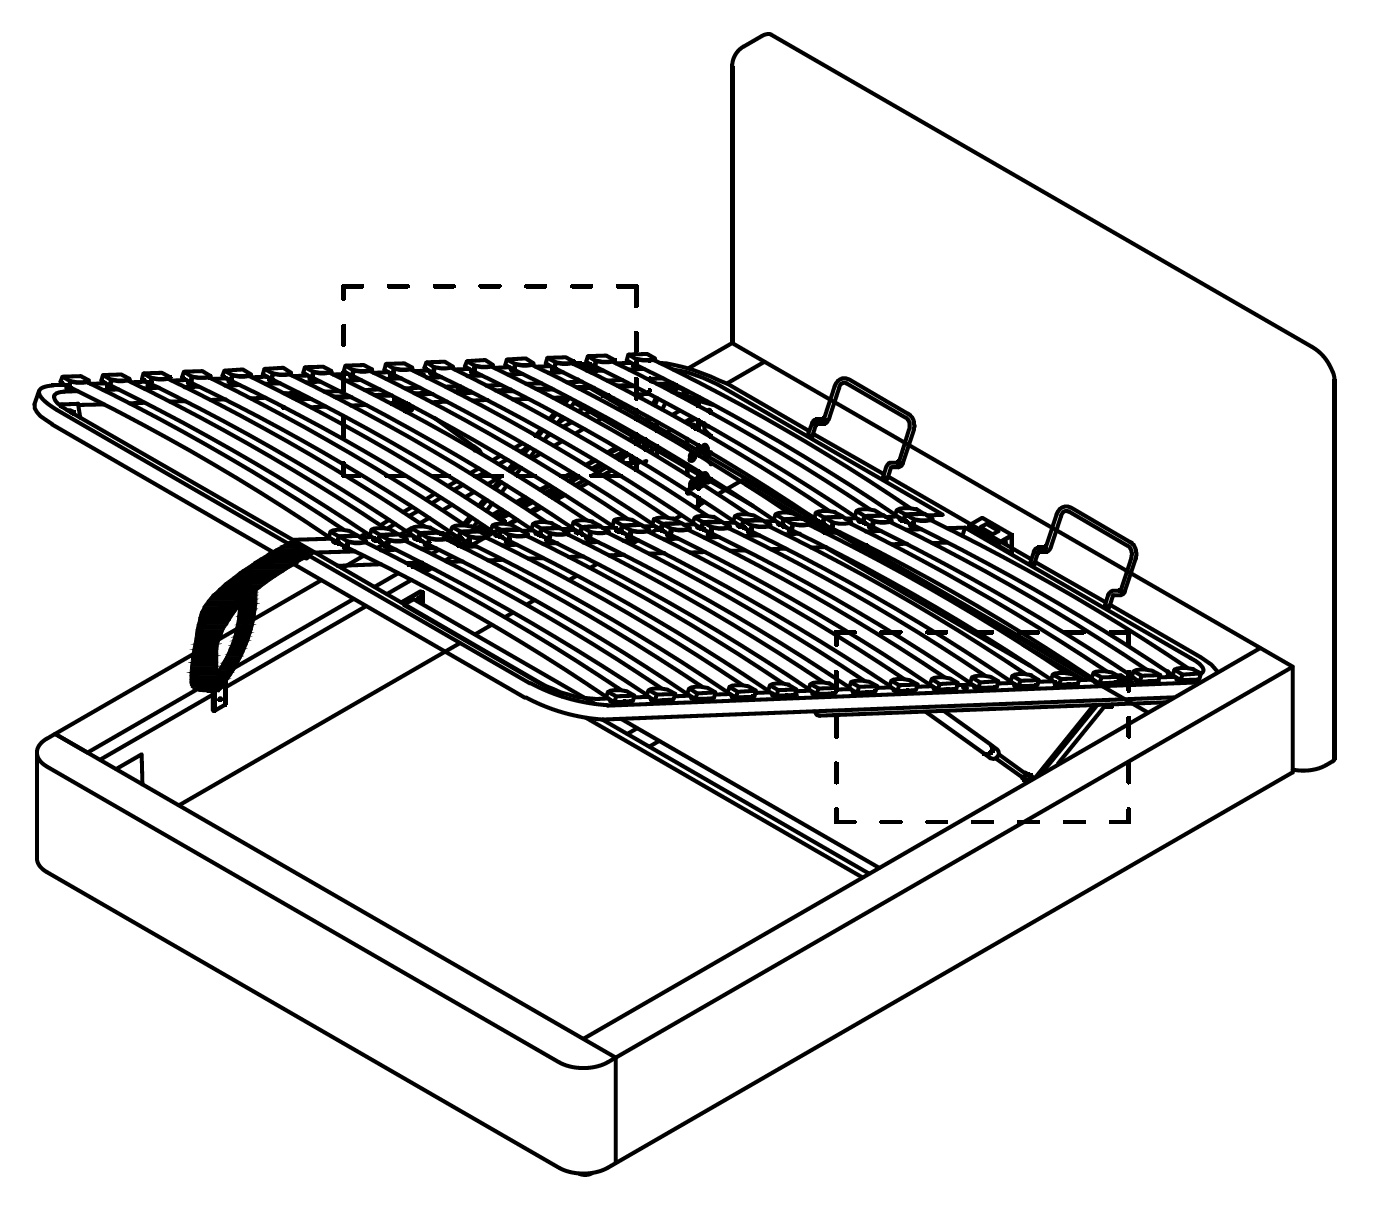
14. Gas-Lift Mechanism Alignment and Adjustment
Slide gas-lift piston stem (X) onto the axle
(Y) then fit the flanged lock-nut M8(K). Tighten
nut with spanner, leave a small gap for smooth operation, confirm the mechanism is securely attached but do not over tighten.
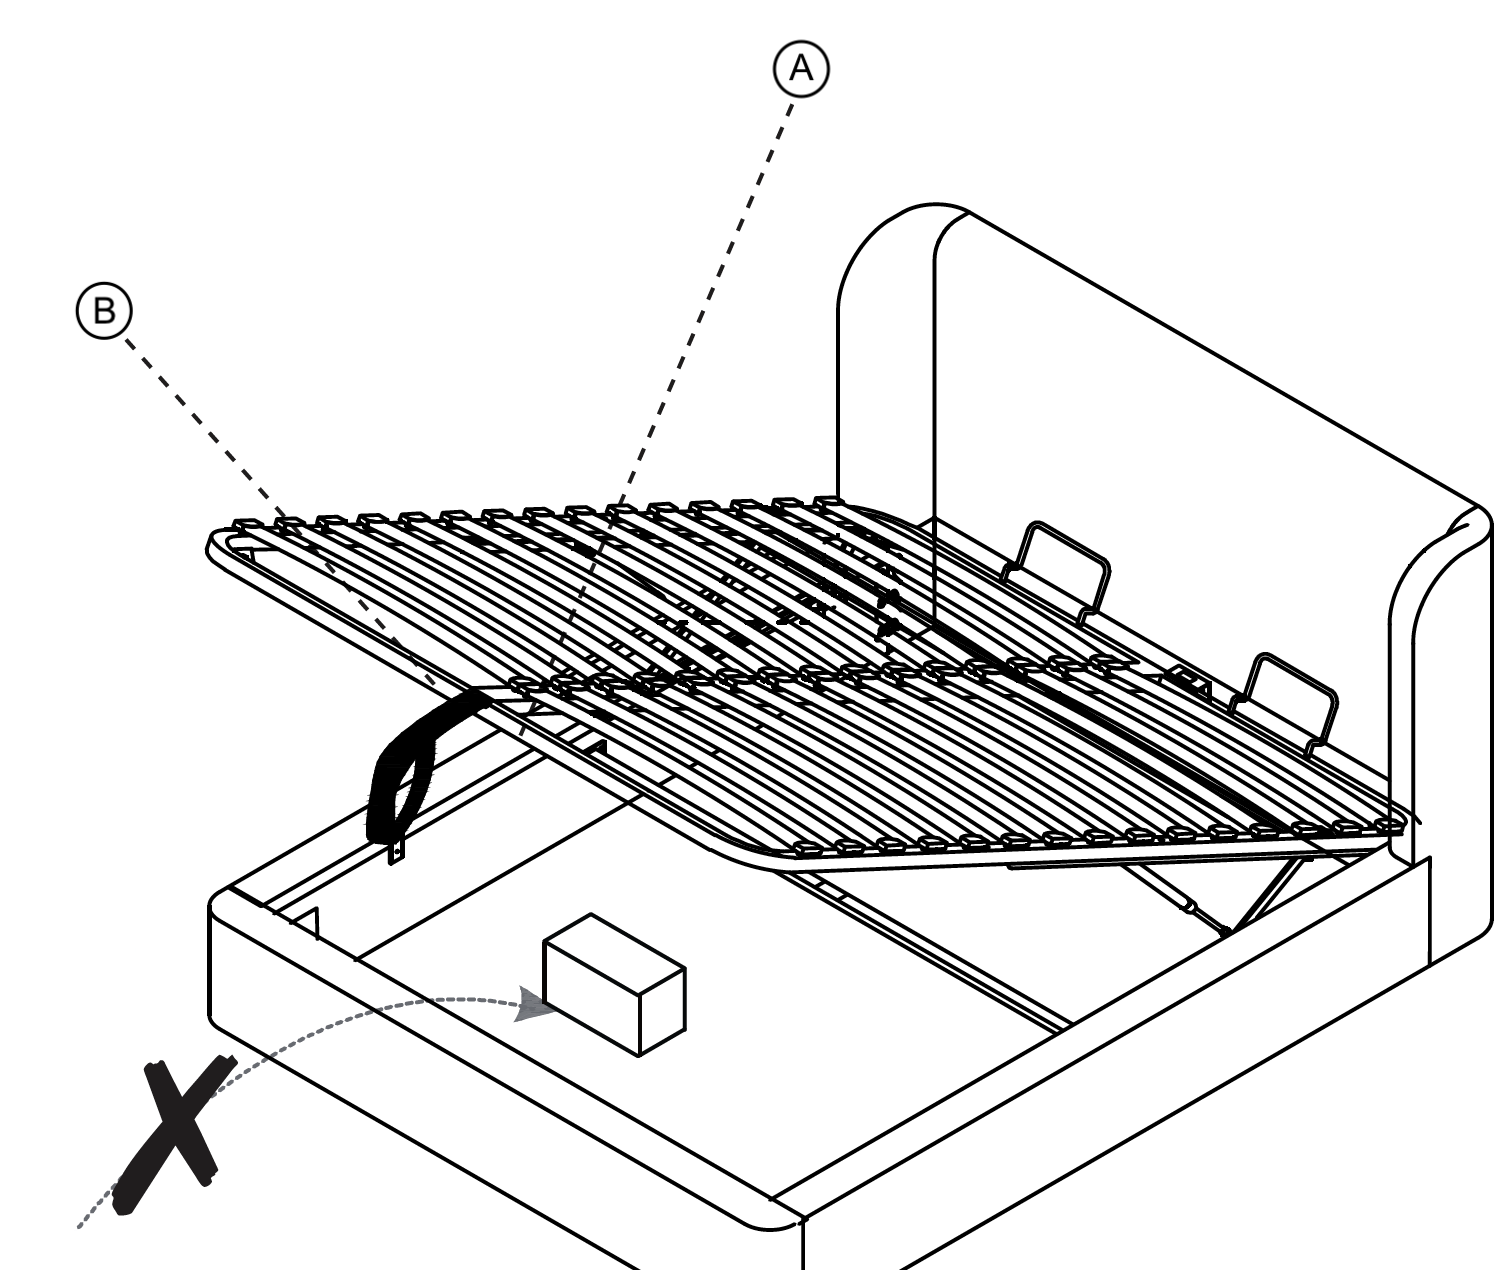
Use the Fabric Lifting Handle to test the lifting and lowering of the slat frame, ensuring smooth movement and proper alignment with the bed frame.
15. Safety and usage guidelines
A: Operating Instructions
Ensure the bed is operated by adults only and not used by children under 12 years old.
Always lift and lower the bed with the mattress in place, using the handle and keeping clear of the mechanism to avoid entrapment.
B: Storage Area Safety
Make sure the ottoman is fully open before accessing the storage area.
Do not reach into the storage area through the hinge mechanism.
Keep children and pets away from the storage area and do not stand inside it.
Regularly inspect the bed to ensure it is functioning correctly.
Note: Be careful what you store under the bed. Items such as suitcases or boxes must not touch the slats, as this may cause damage.