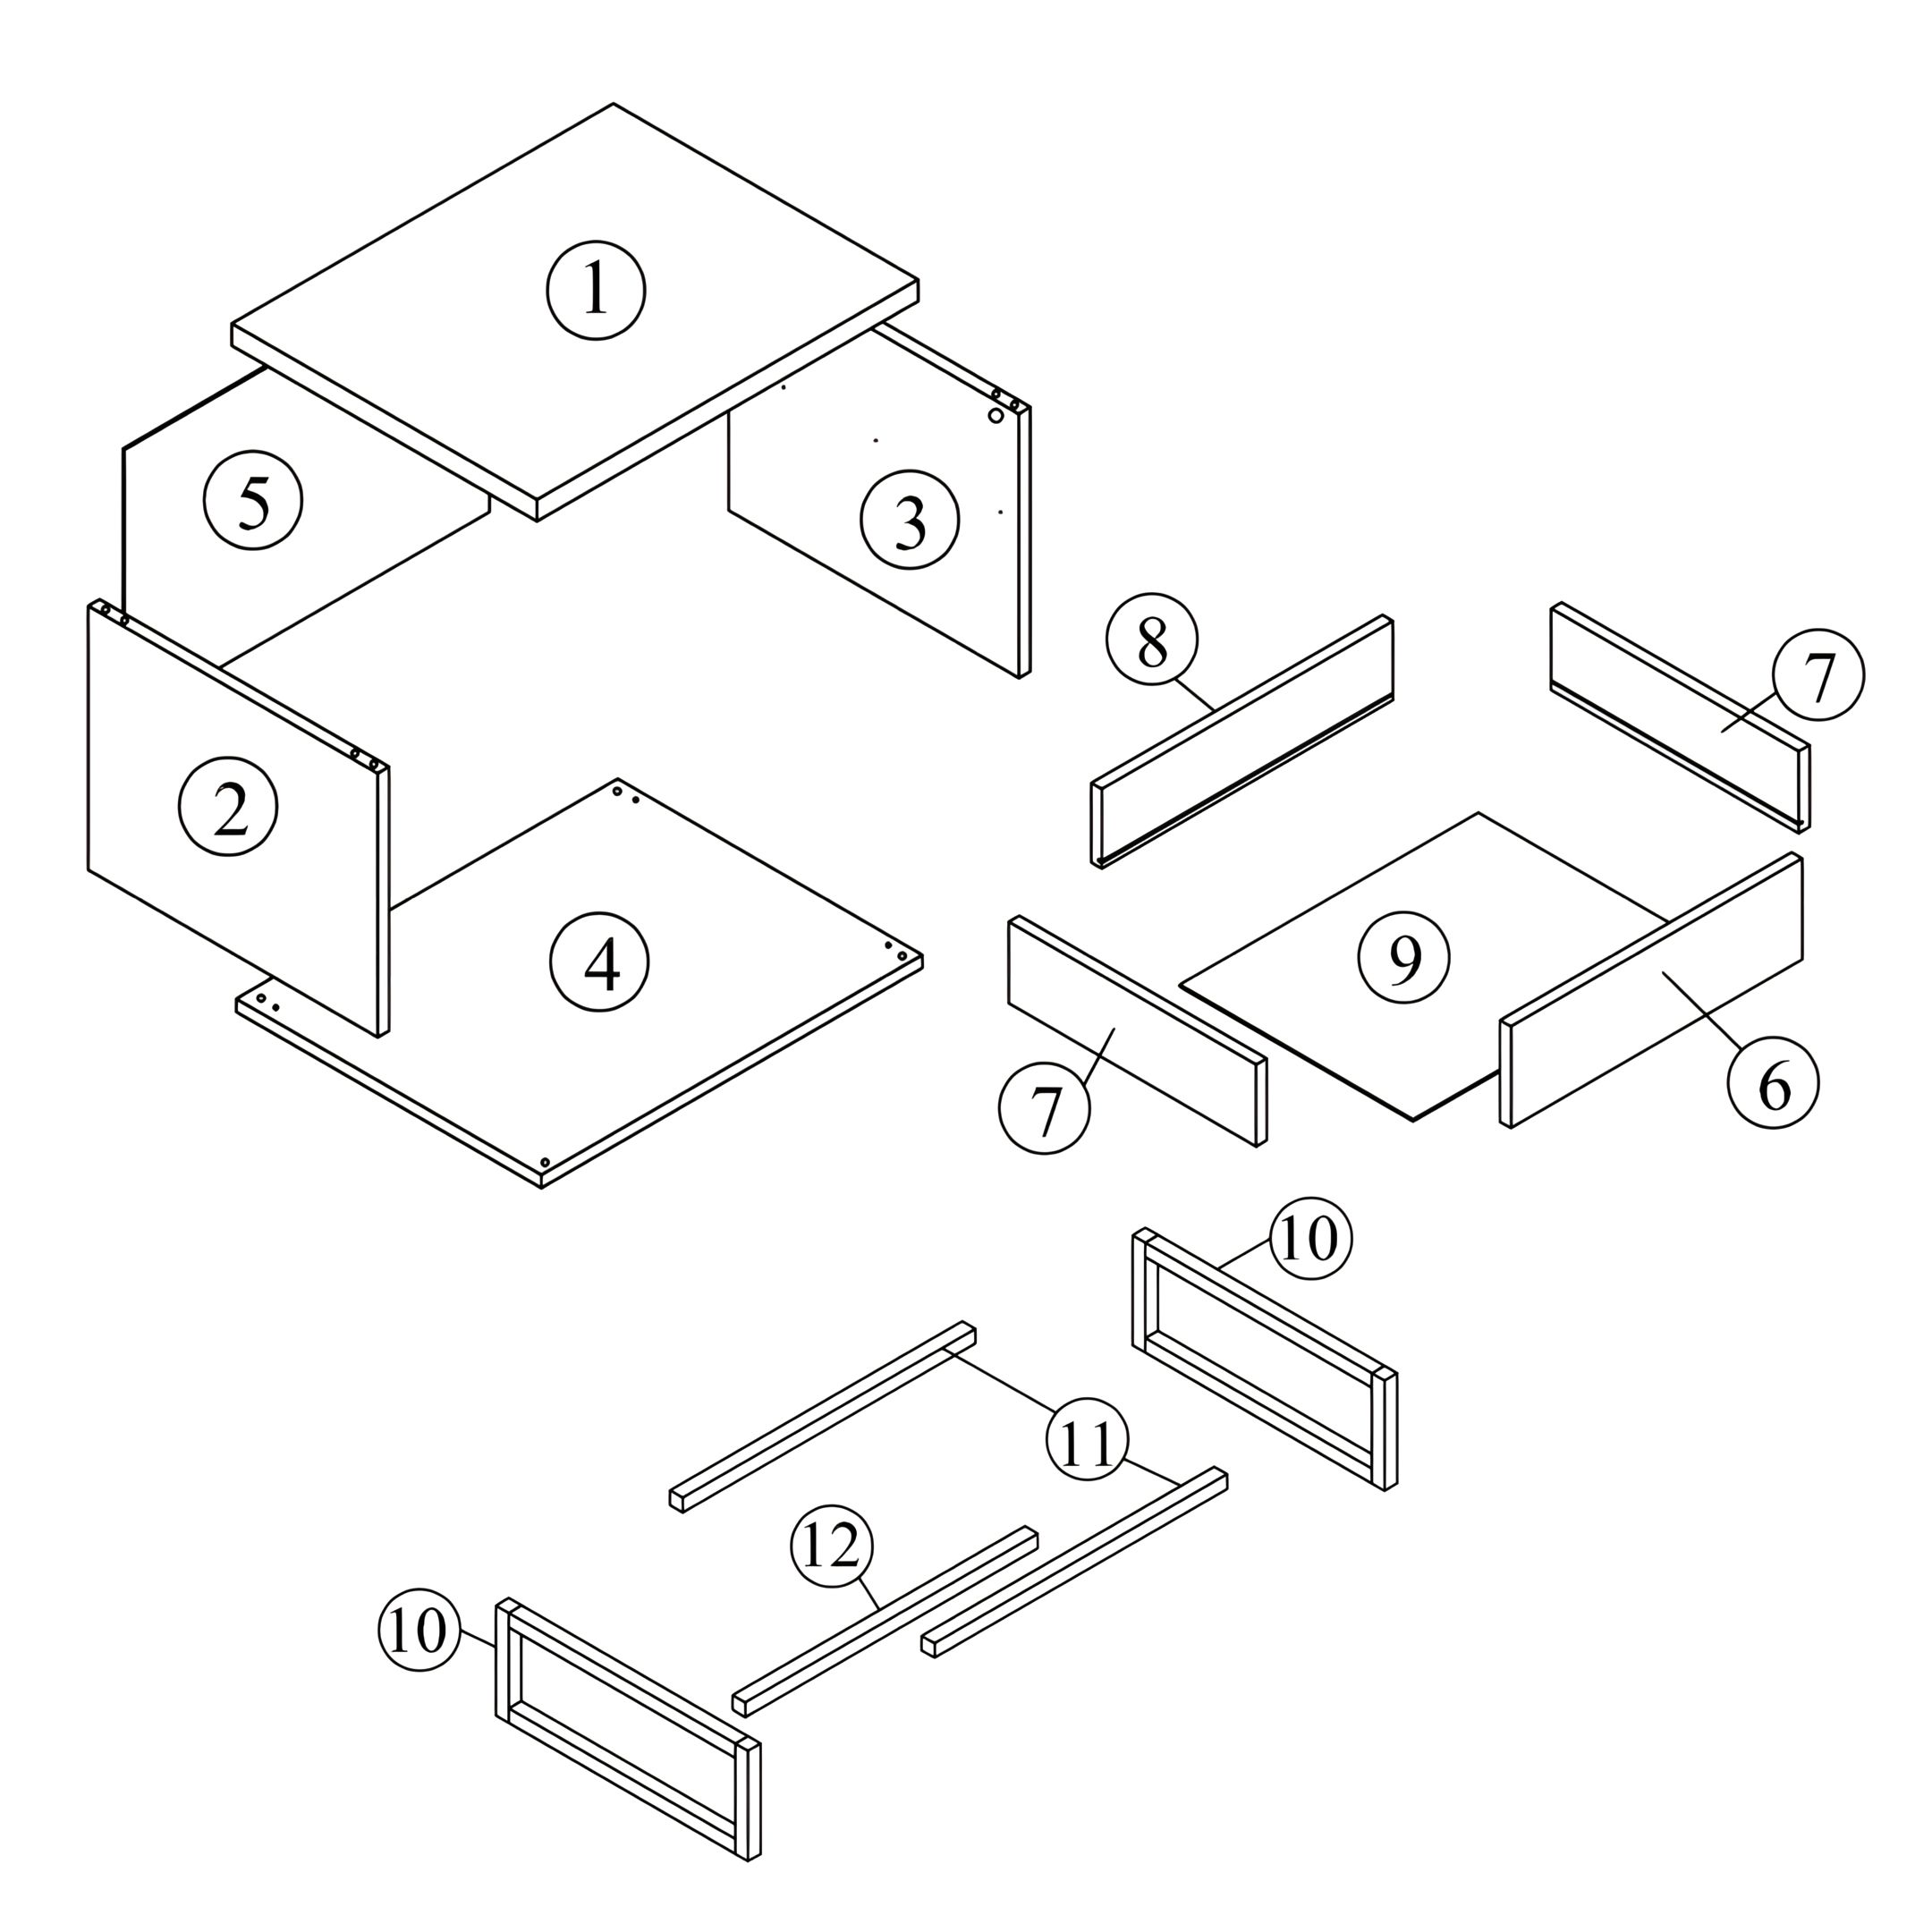
Assembly instructions for Chicago 1 Drawer Oak Finish Bedside by Time4Sleep.
Product Information
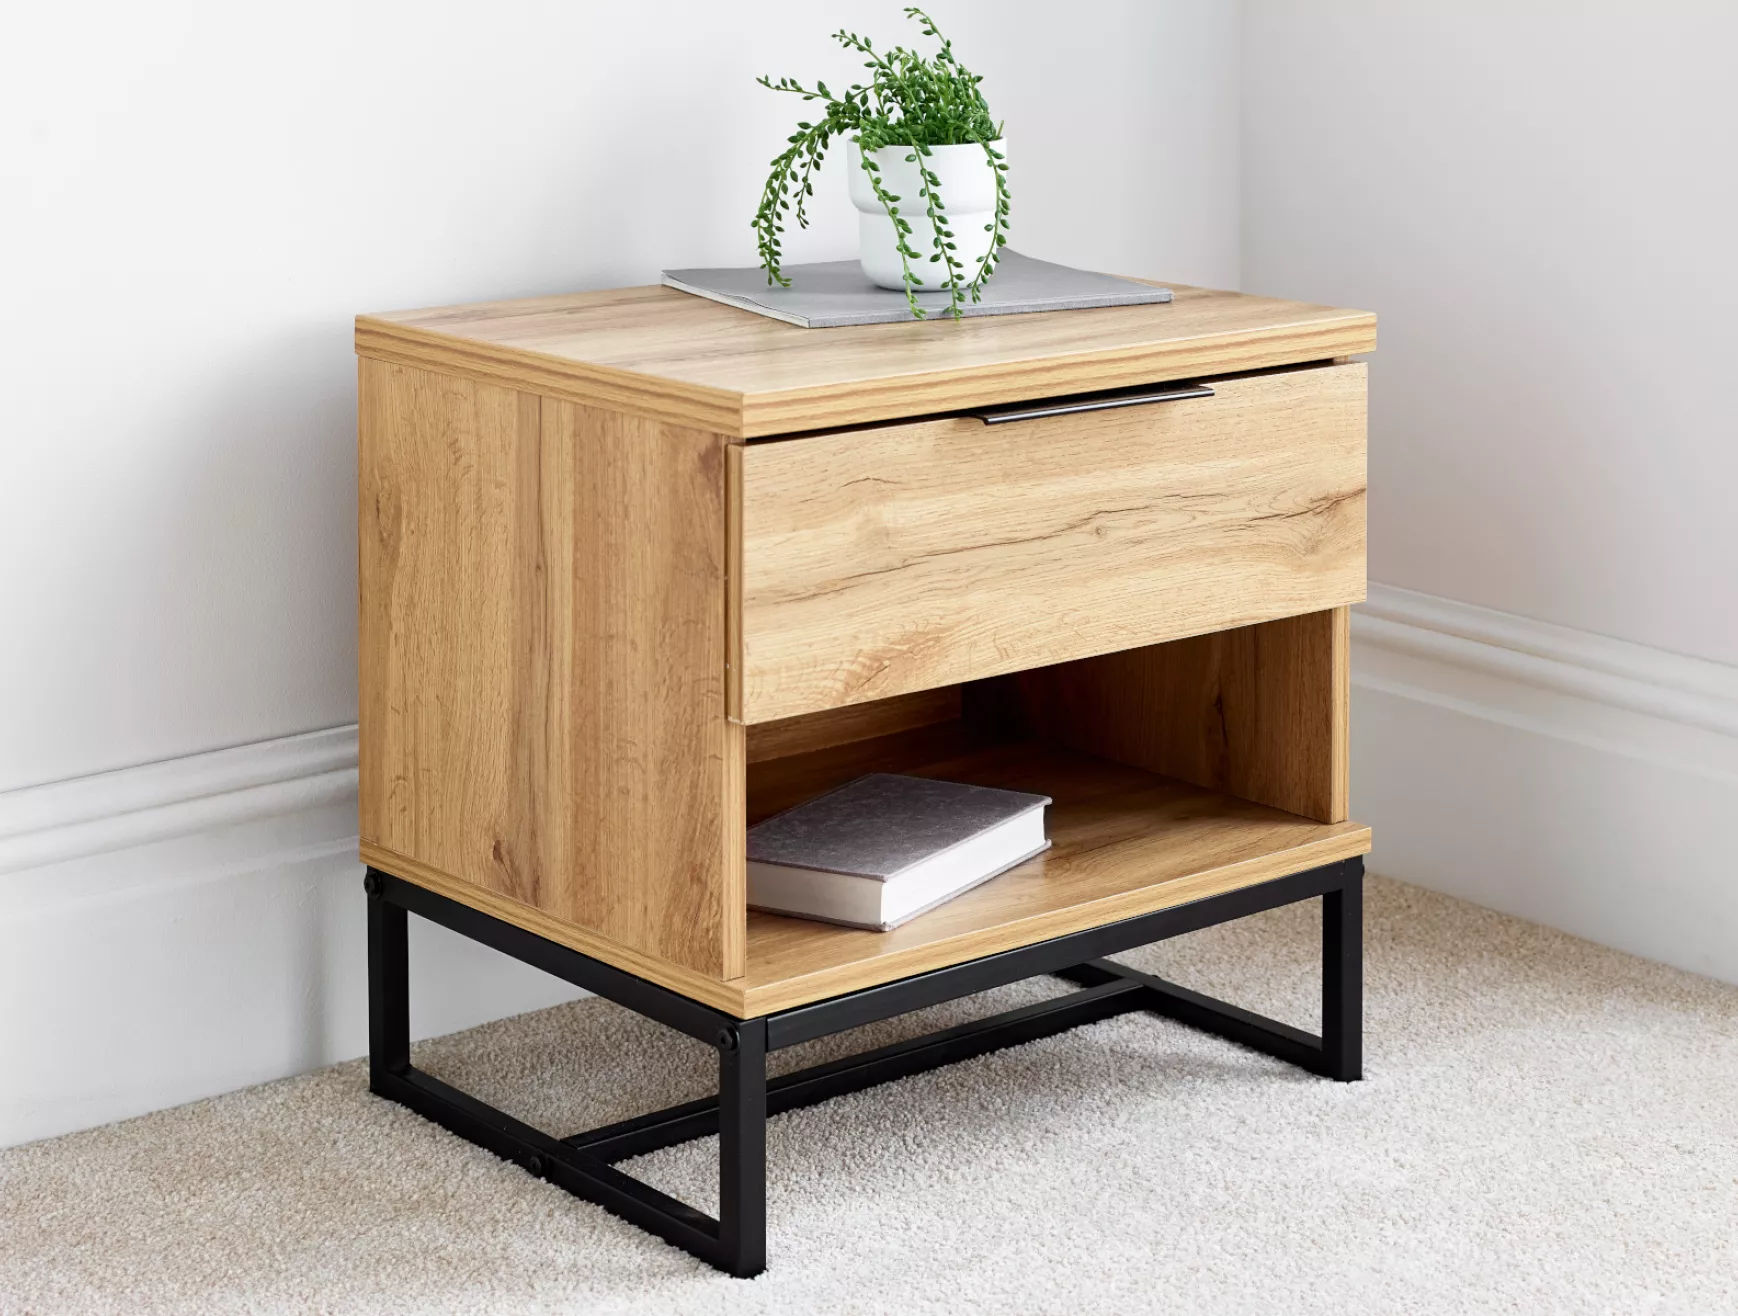
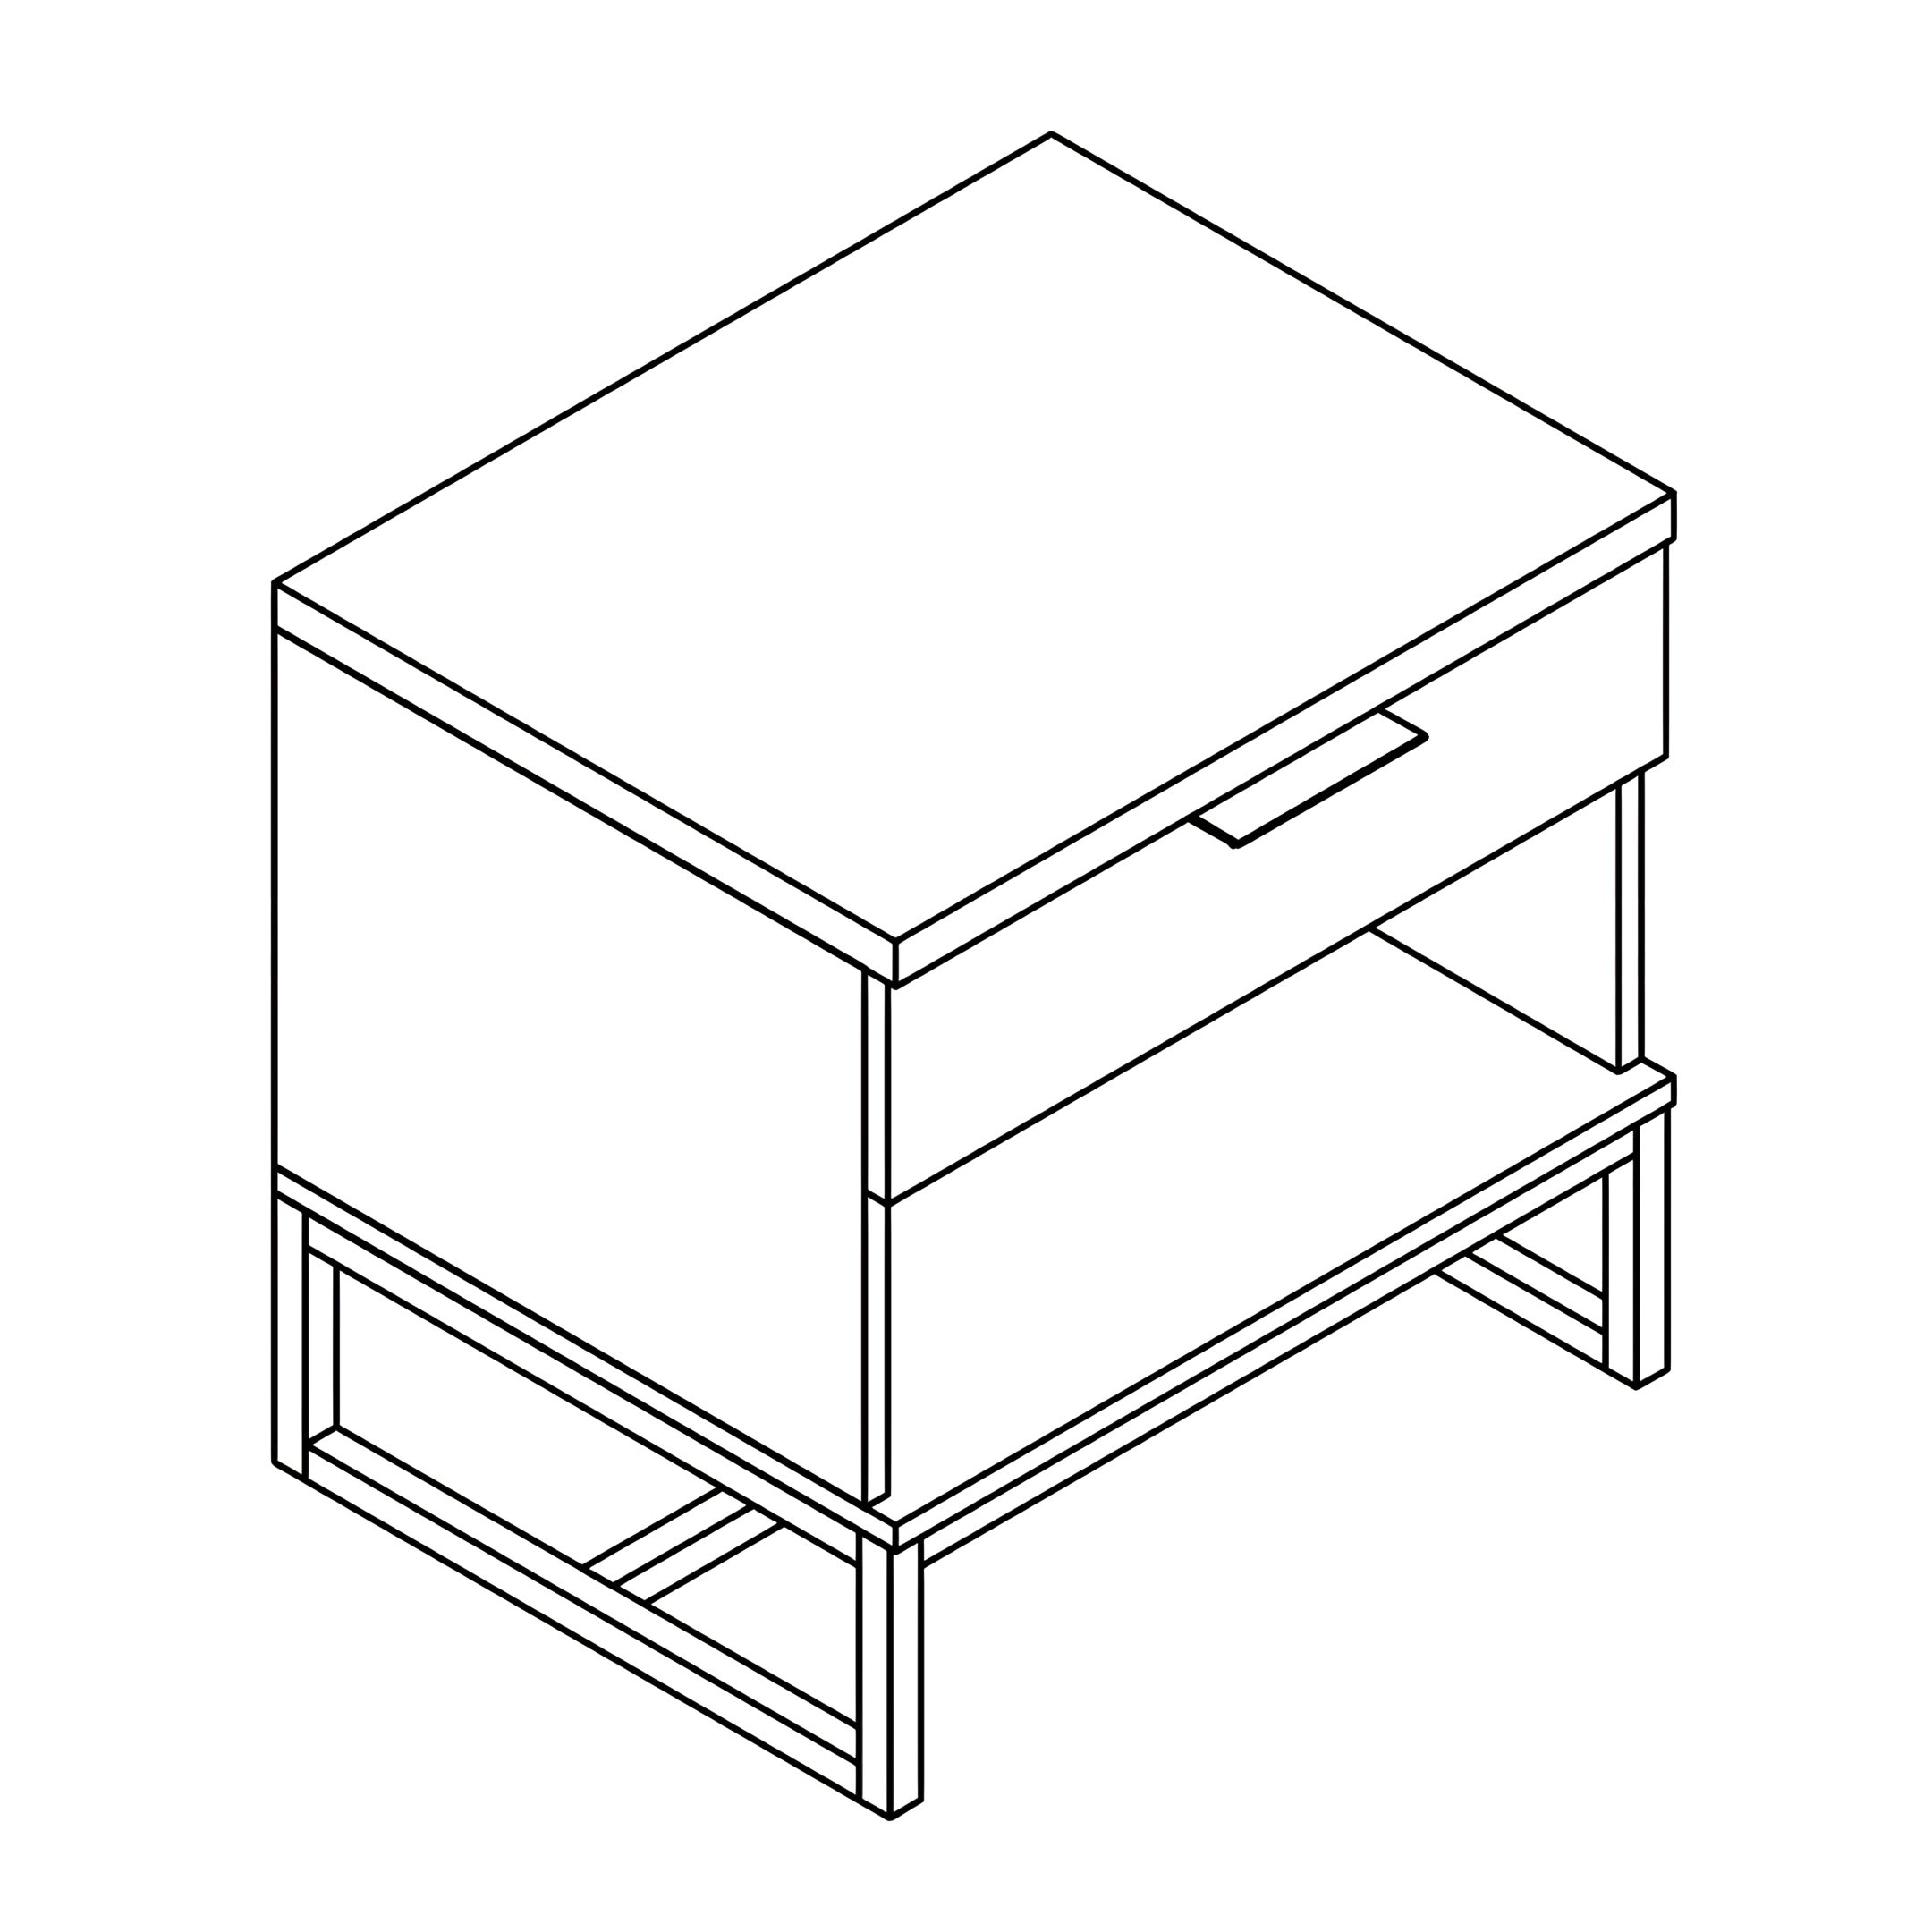
Chicago 1 Drawer Oak Finish Bedside
Our industrial style Chicago one drawer bedside is the perfect blend of rugged aesthetics and functional design. The combination of metal and wood creates a striking contrast, giving the piece a unique and eye-catching appeal.
Featuring a spacious drawer, this bedside table offers convenient storage for your essentials. Whether it's books, reading glasses, or personal belongings, you can keep them within arm's reach, neatly organized and easily accessible.
With its generous dimensions, you'll have plenty of room to arrange your essentials while maintaining a clutter-free environment. The rugged charm of the wooden surface adds warmth and character to your bedroom decor.
The industrial-inspired design of this bedside table is versatile, making it a seamless addition to various interior styles. This product is supplied flatpack for self assembly.
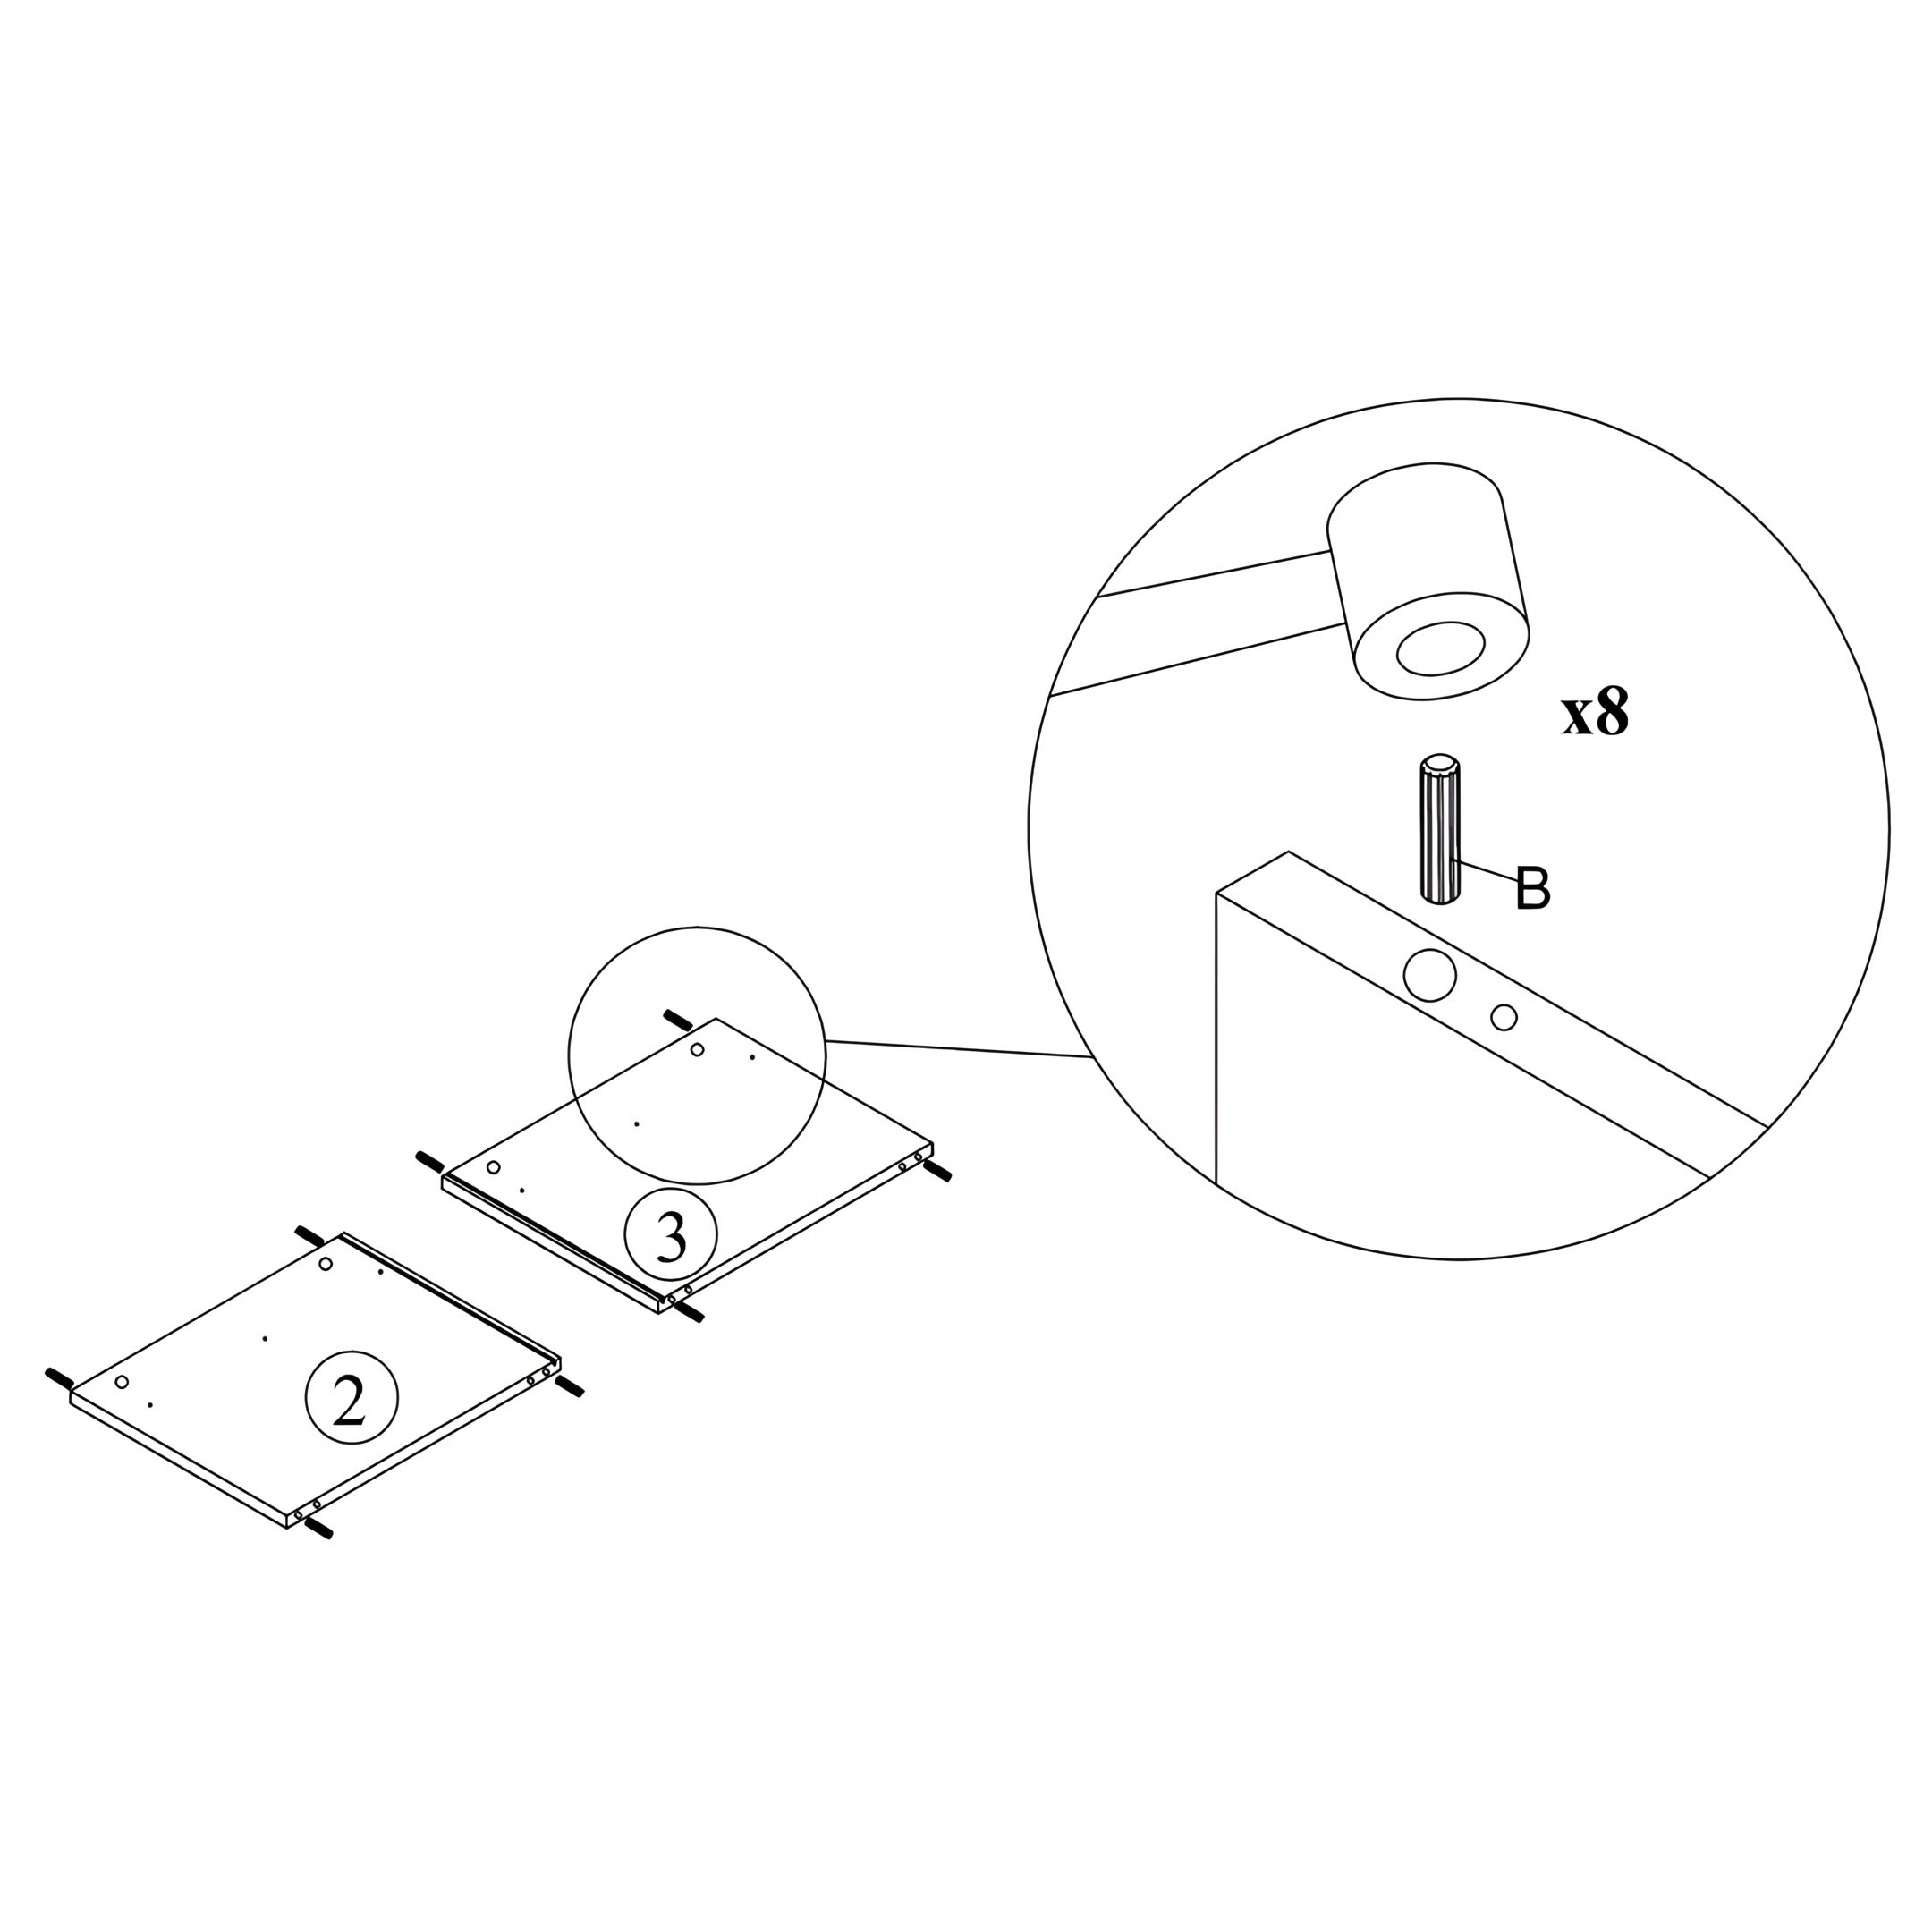
1. Lay down the Left Side Panel (2) and Right Side Panel (3) on a flat surface. 2. Insert Plastic Dowels (B) into the pre-drilled holes on the edges of each panel. 3. Use a rubber mallet to gently tap the dowels into place until they’re fully inserted. 4. Repeat this process for a total of 8 dowels (4 per panel).
2. Install Mini Fix Bolts
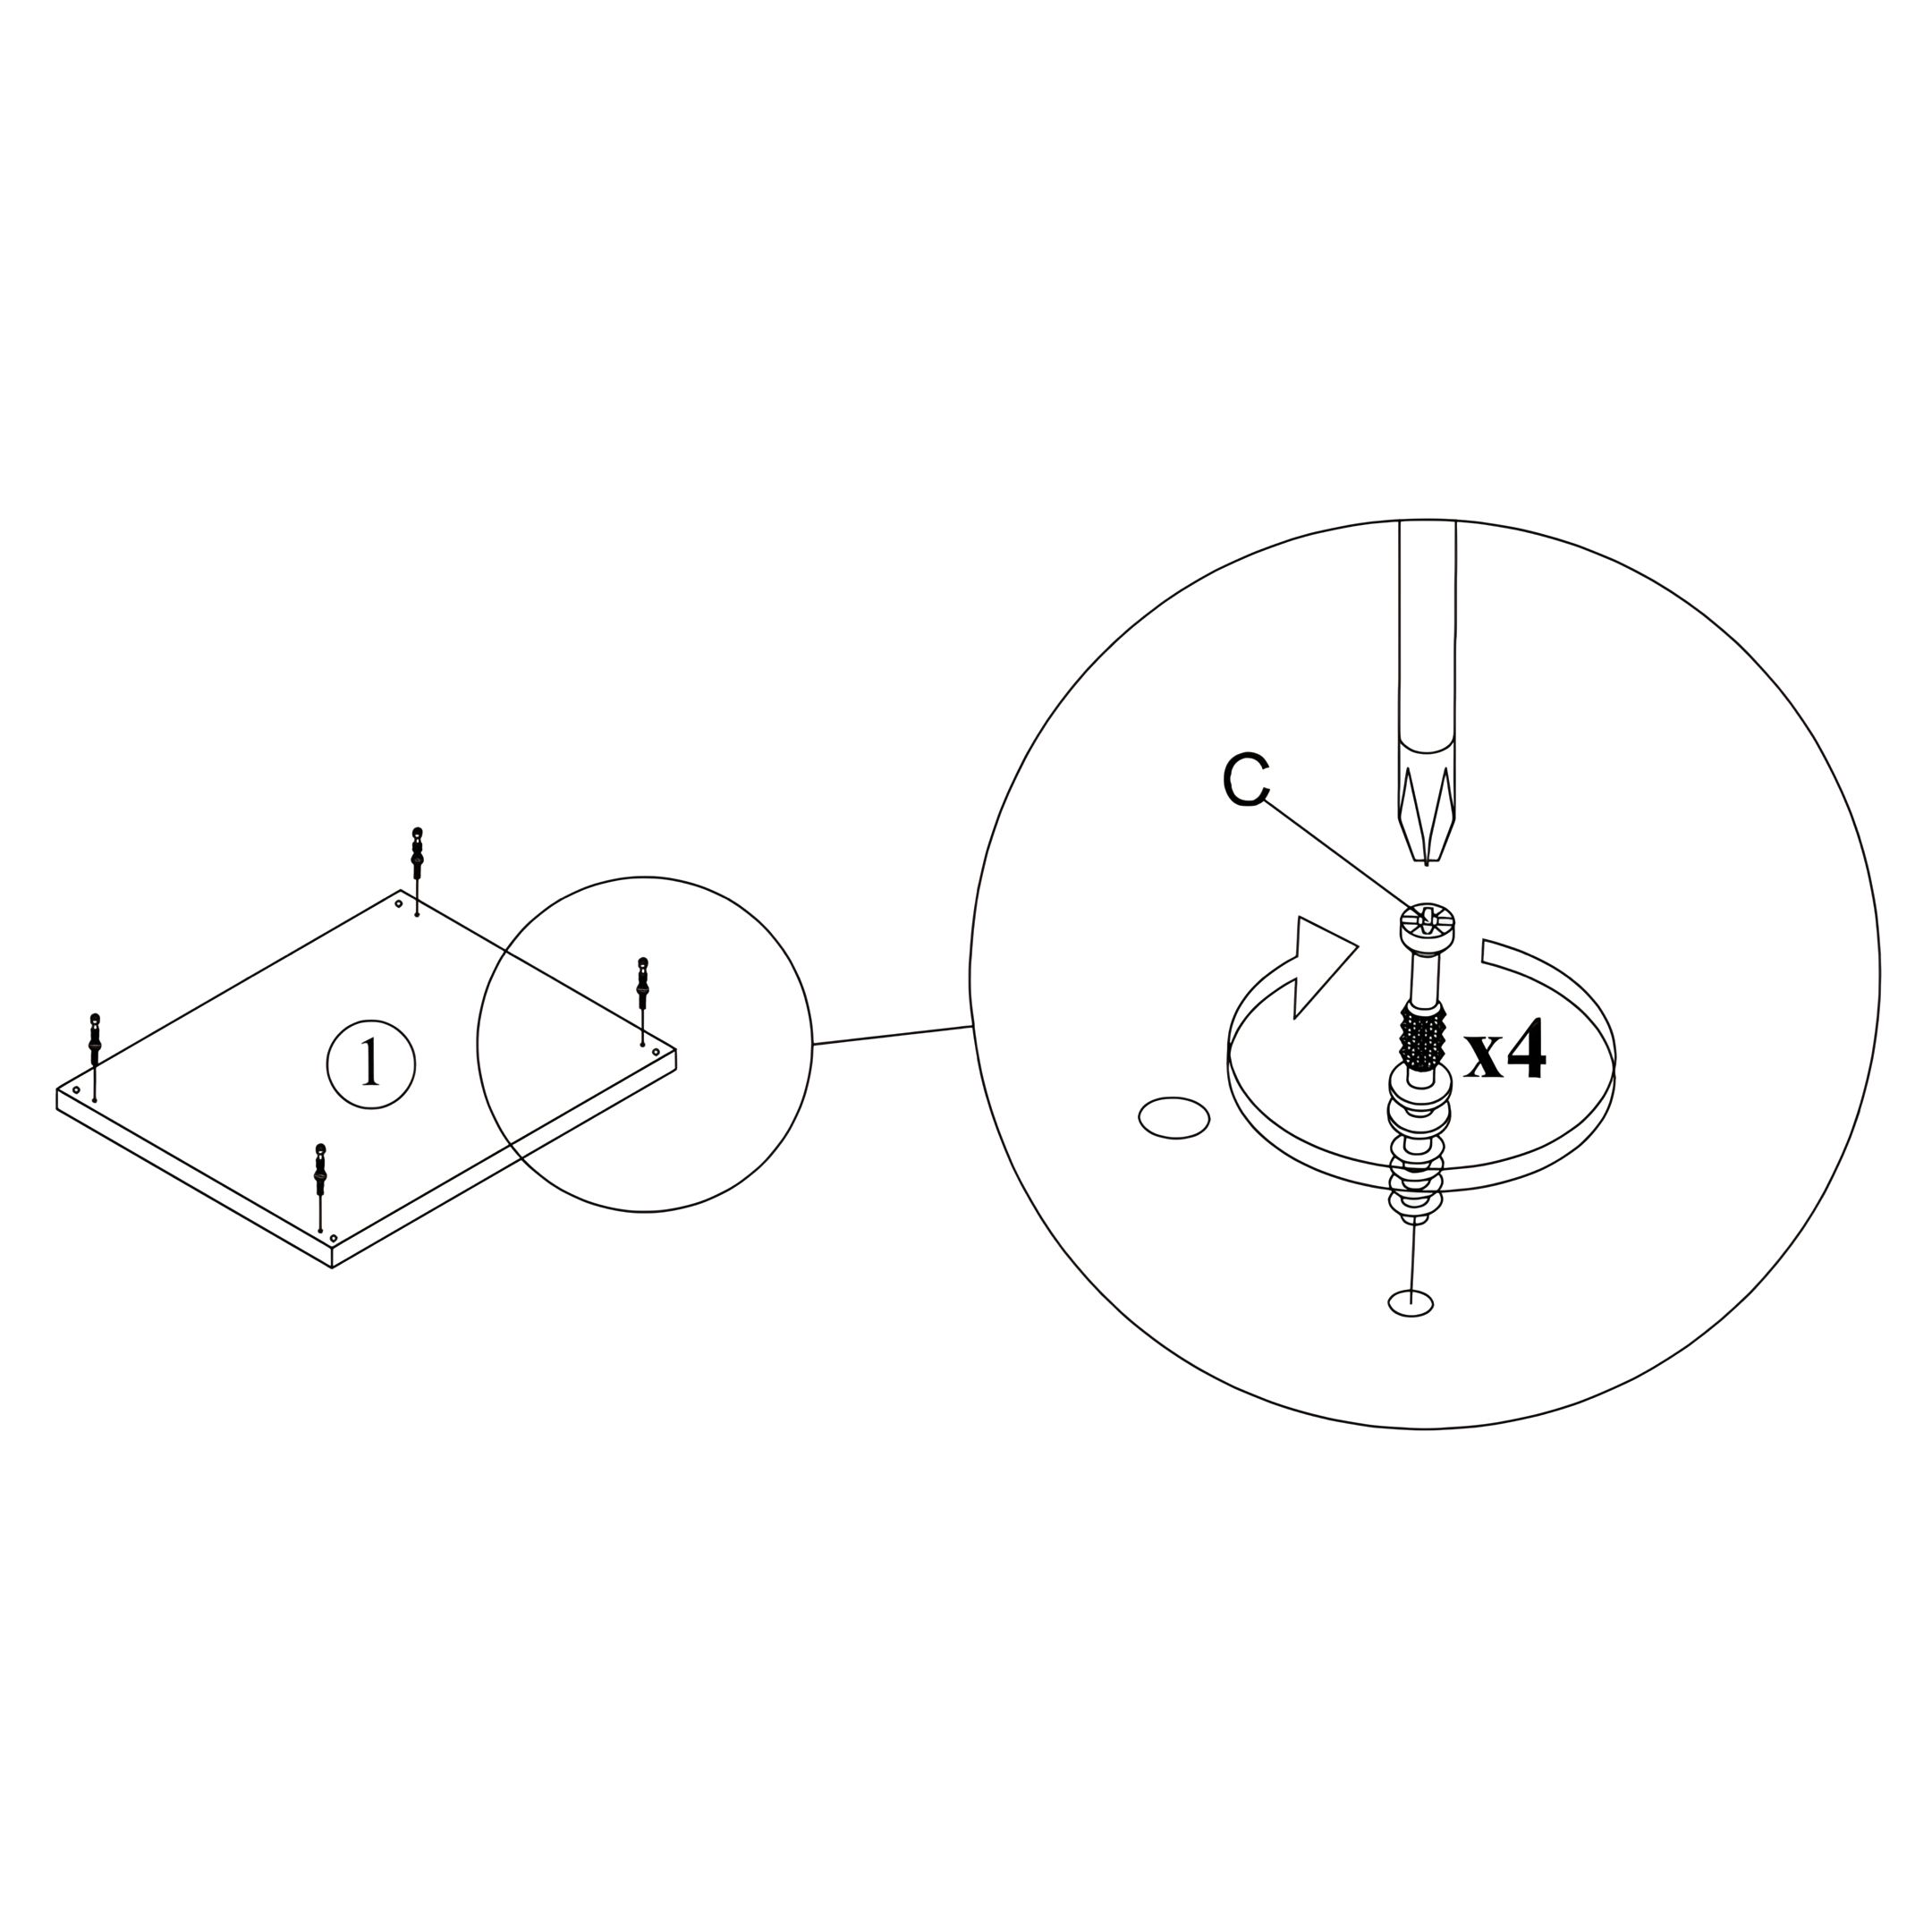
1. Take the Top Panel (1) and place it with the underside facing up. 2. Insert Mini Fix Bolts (C) into the designated holes on all four corners of the panel. 3. Using a screwdriver, turn each bolt clockwise until it is securely fastened. 4. You should install a total of 4 bolts.
3. Insert Mini Fix Housings
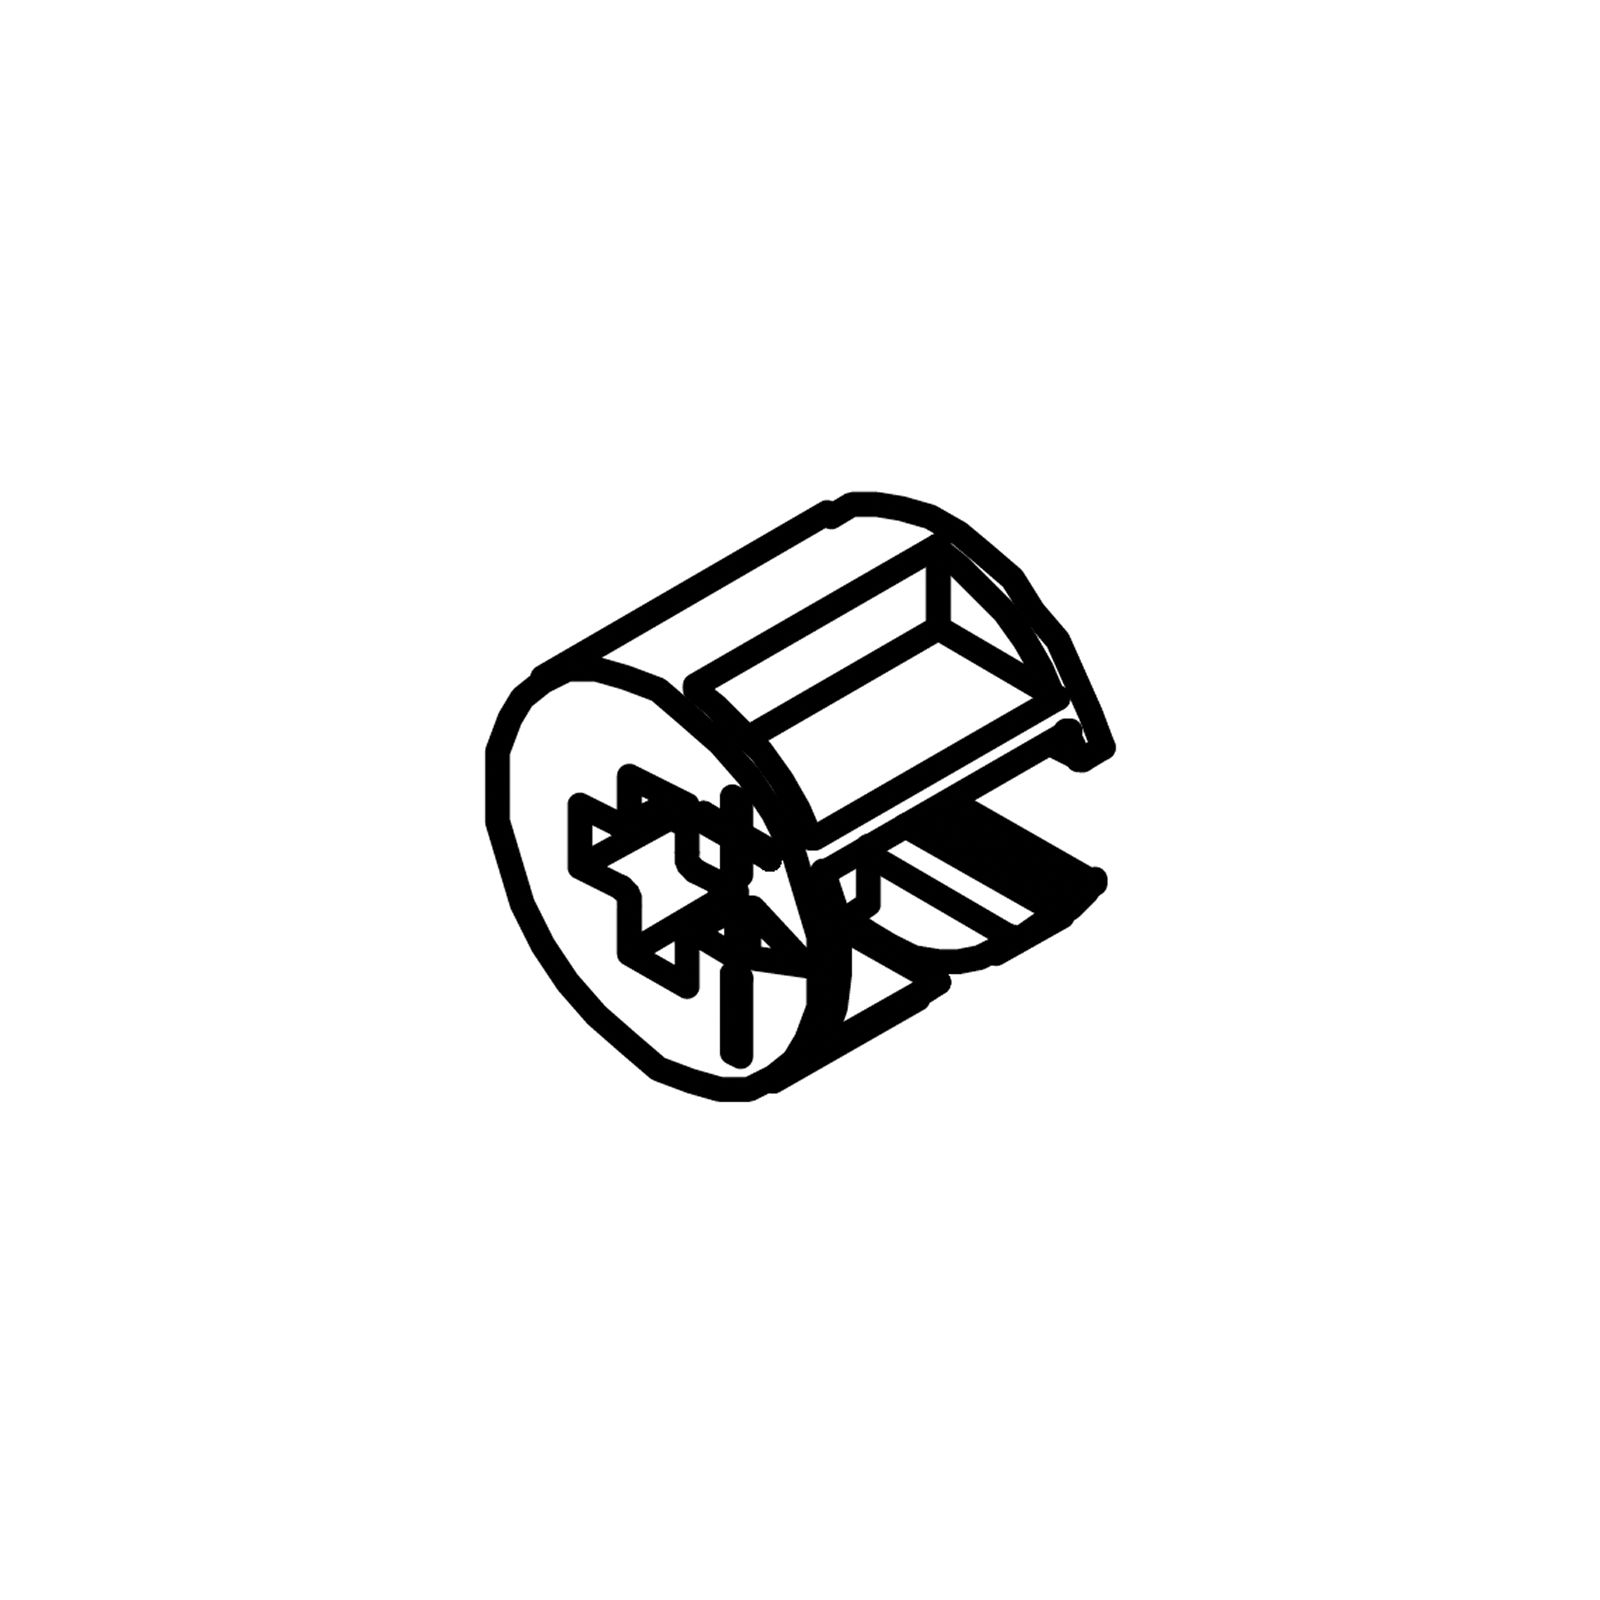
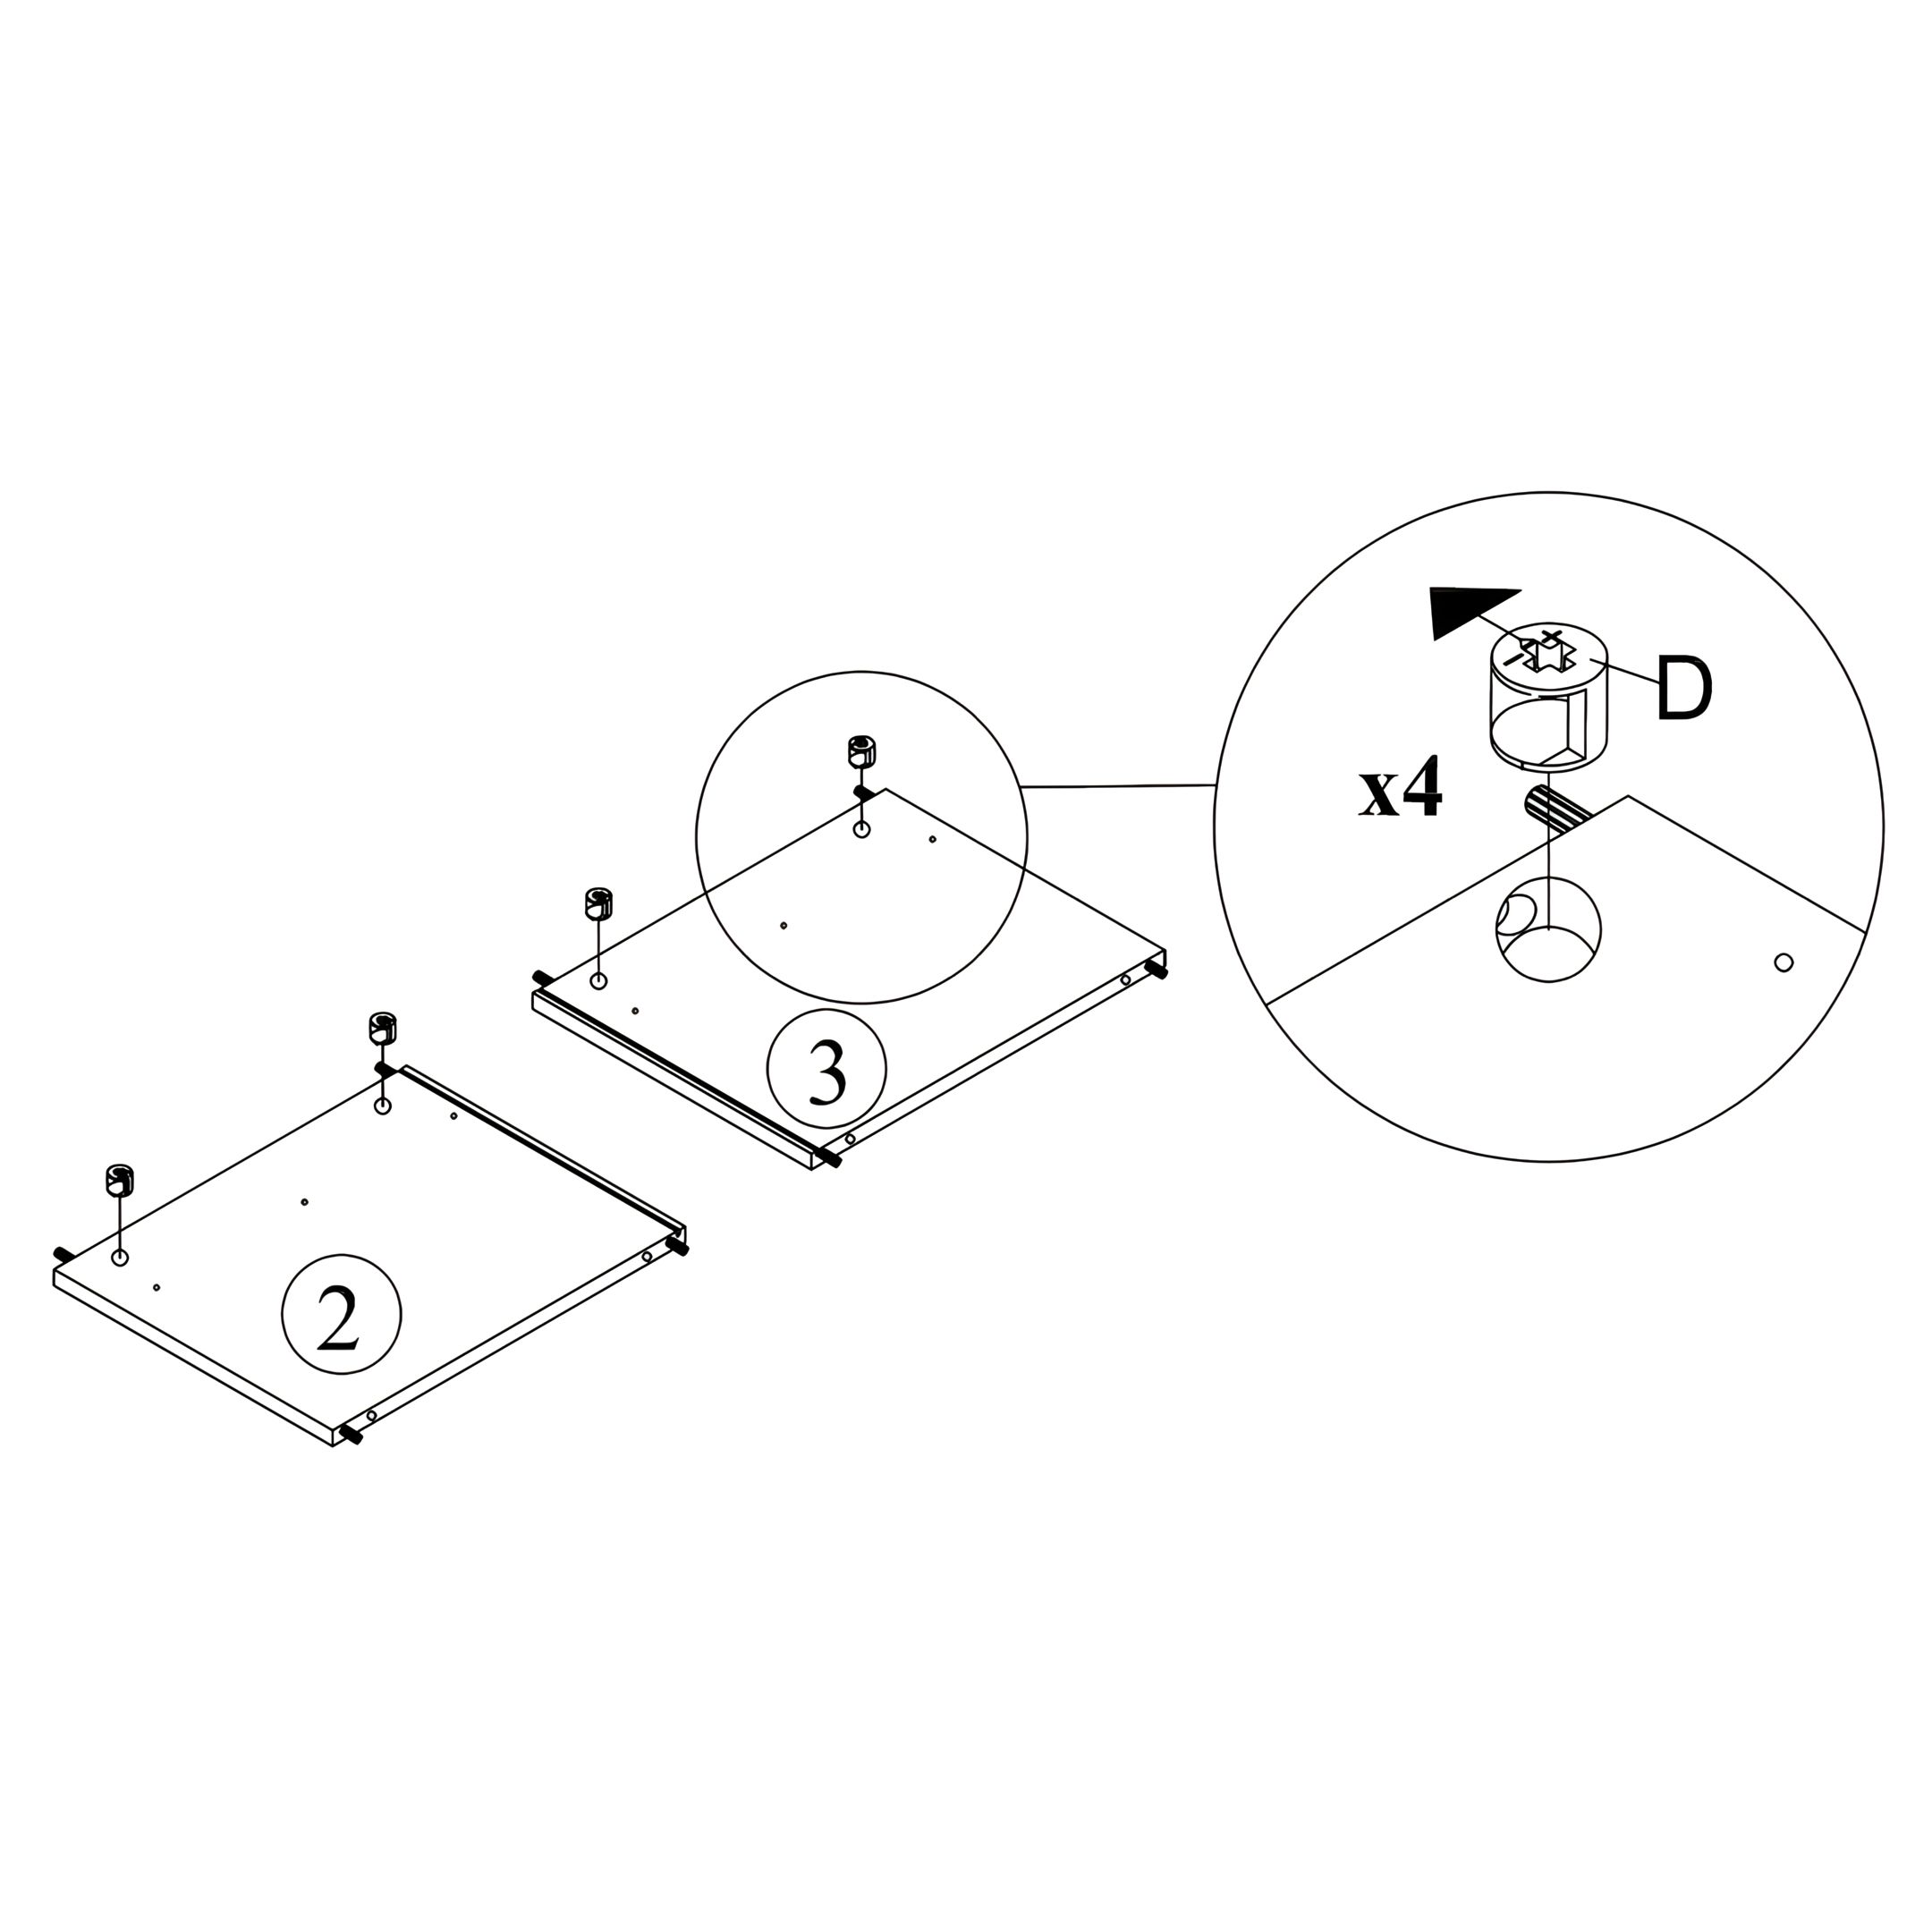
1. Take the Left Side Panel (2) and Right Side Panel (3). 2. Insert Mini Fix Housings (D) into the predrilled circular holes on each panel. 3. Make sure the arrow on each housing points outward, toward the edge of the panel, so it will align properly with the Mini Fix Bolts. 4. Install 2 housings per panel, for a total of 4 housings.
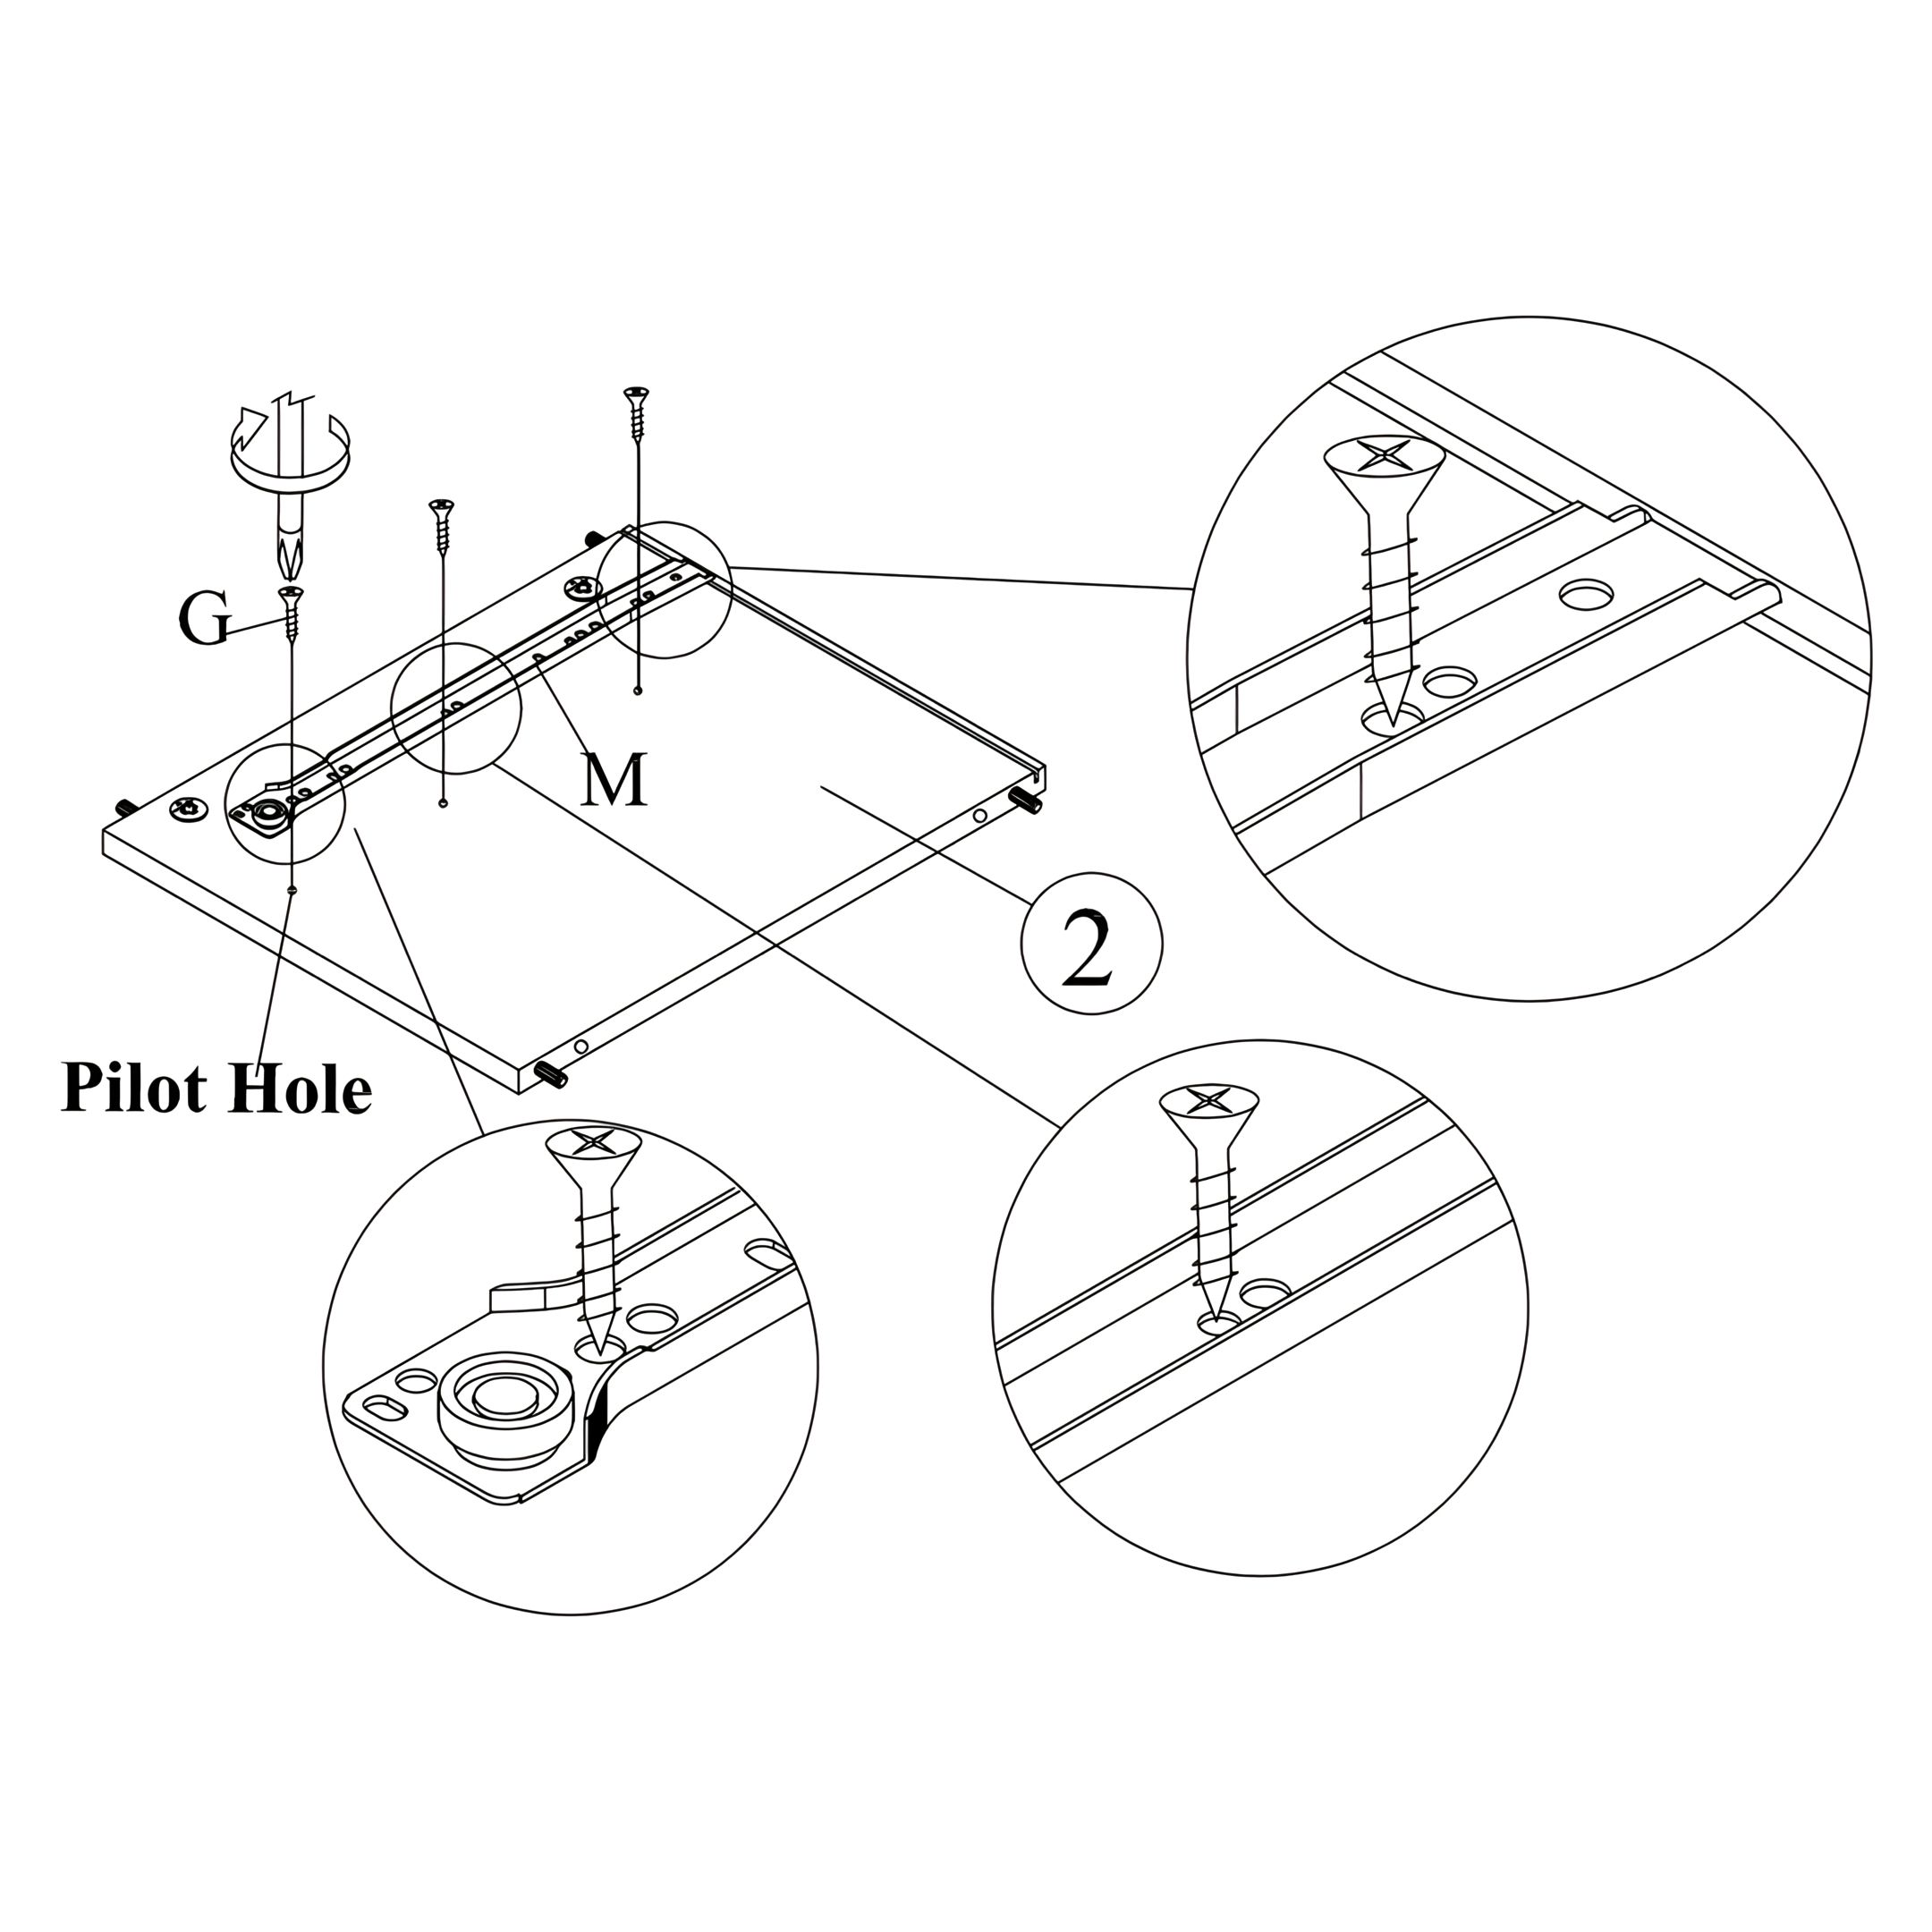
4. Attach Drawer Slide to the Left Side Panel
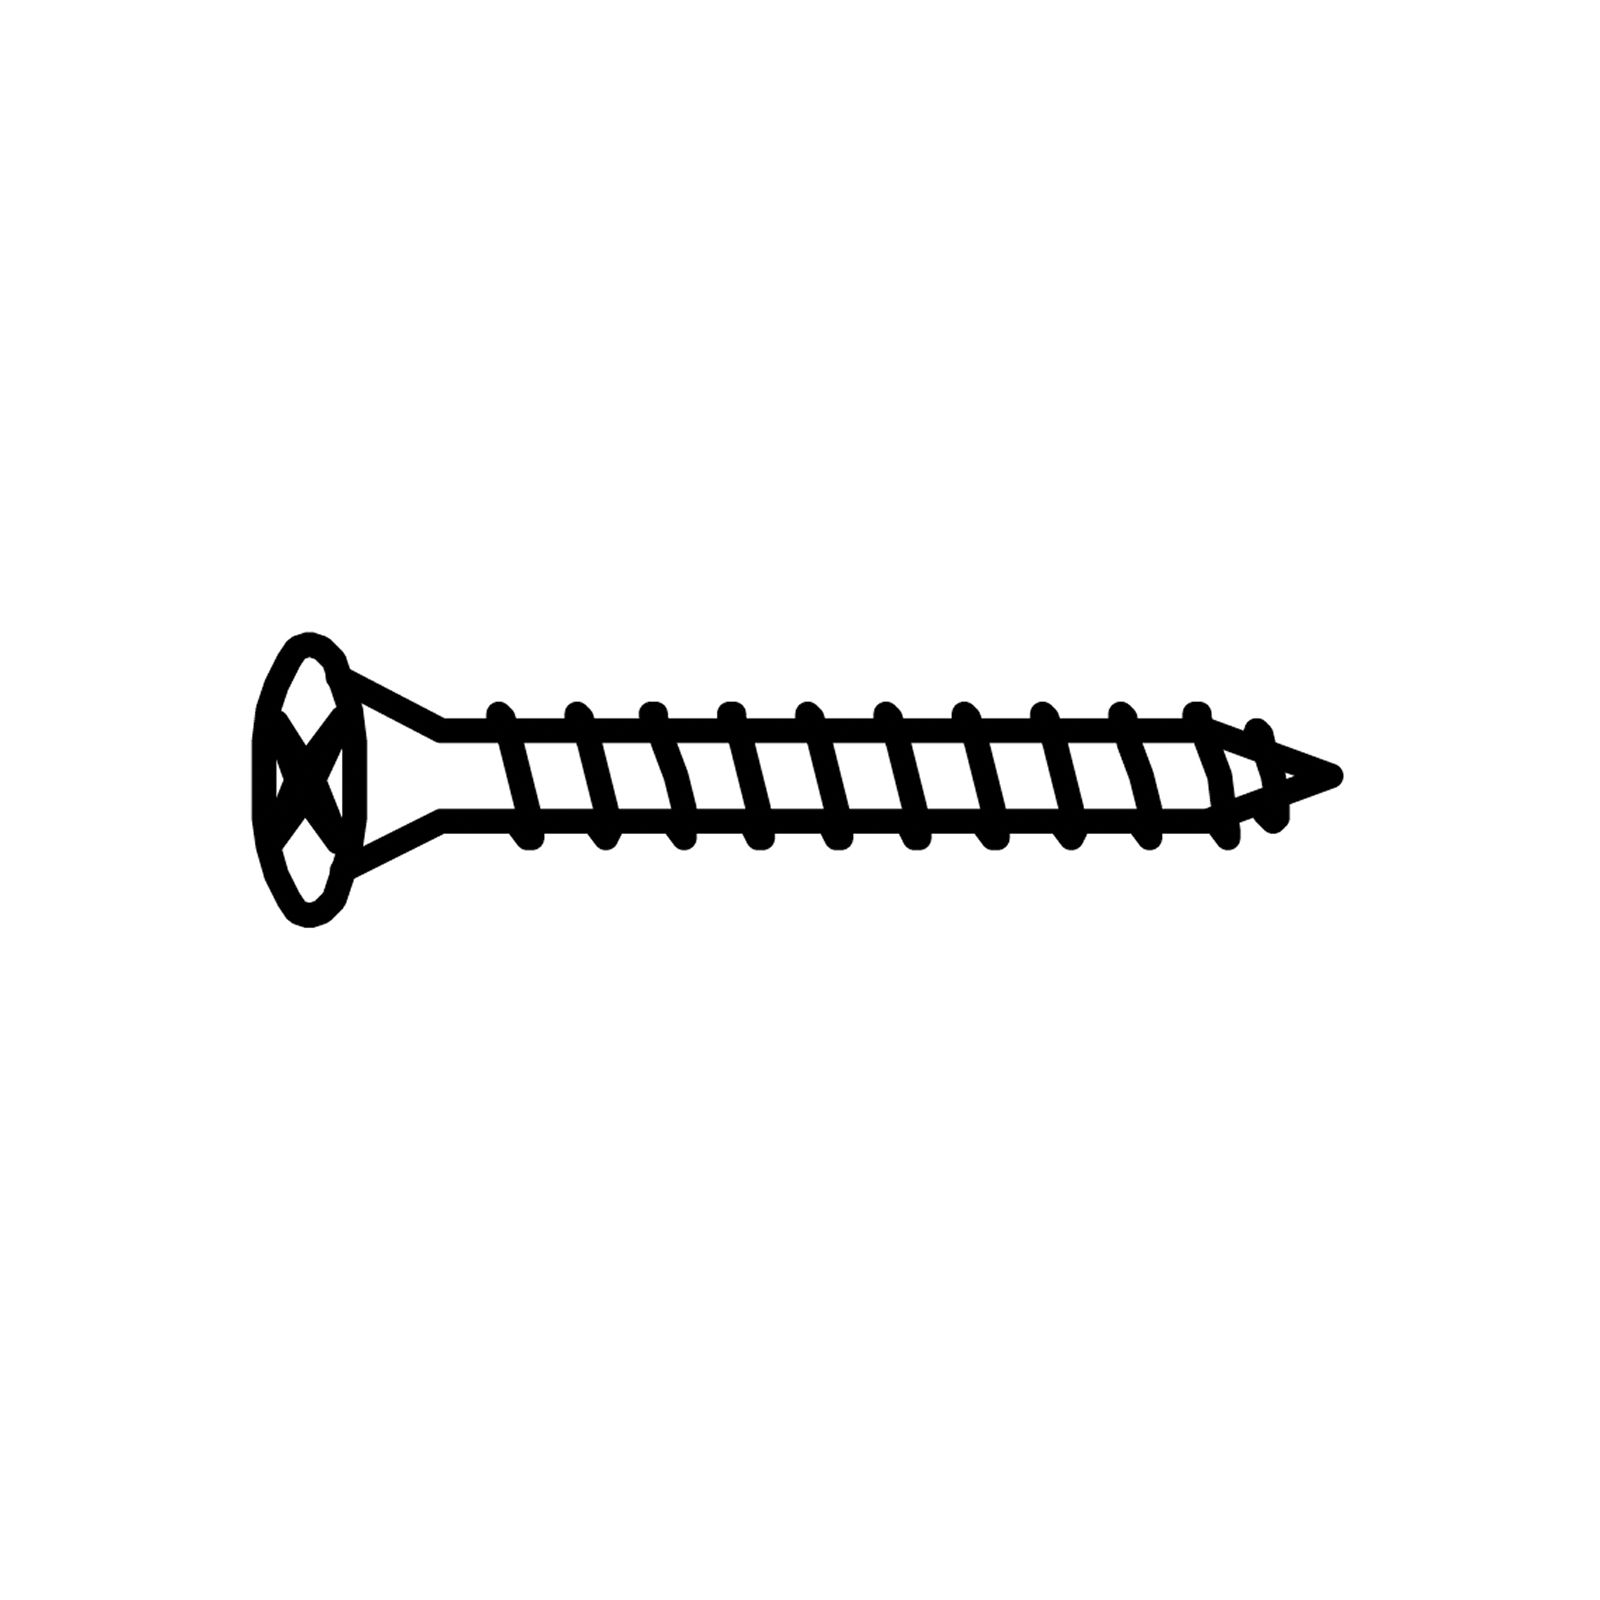
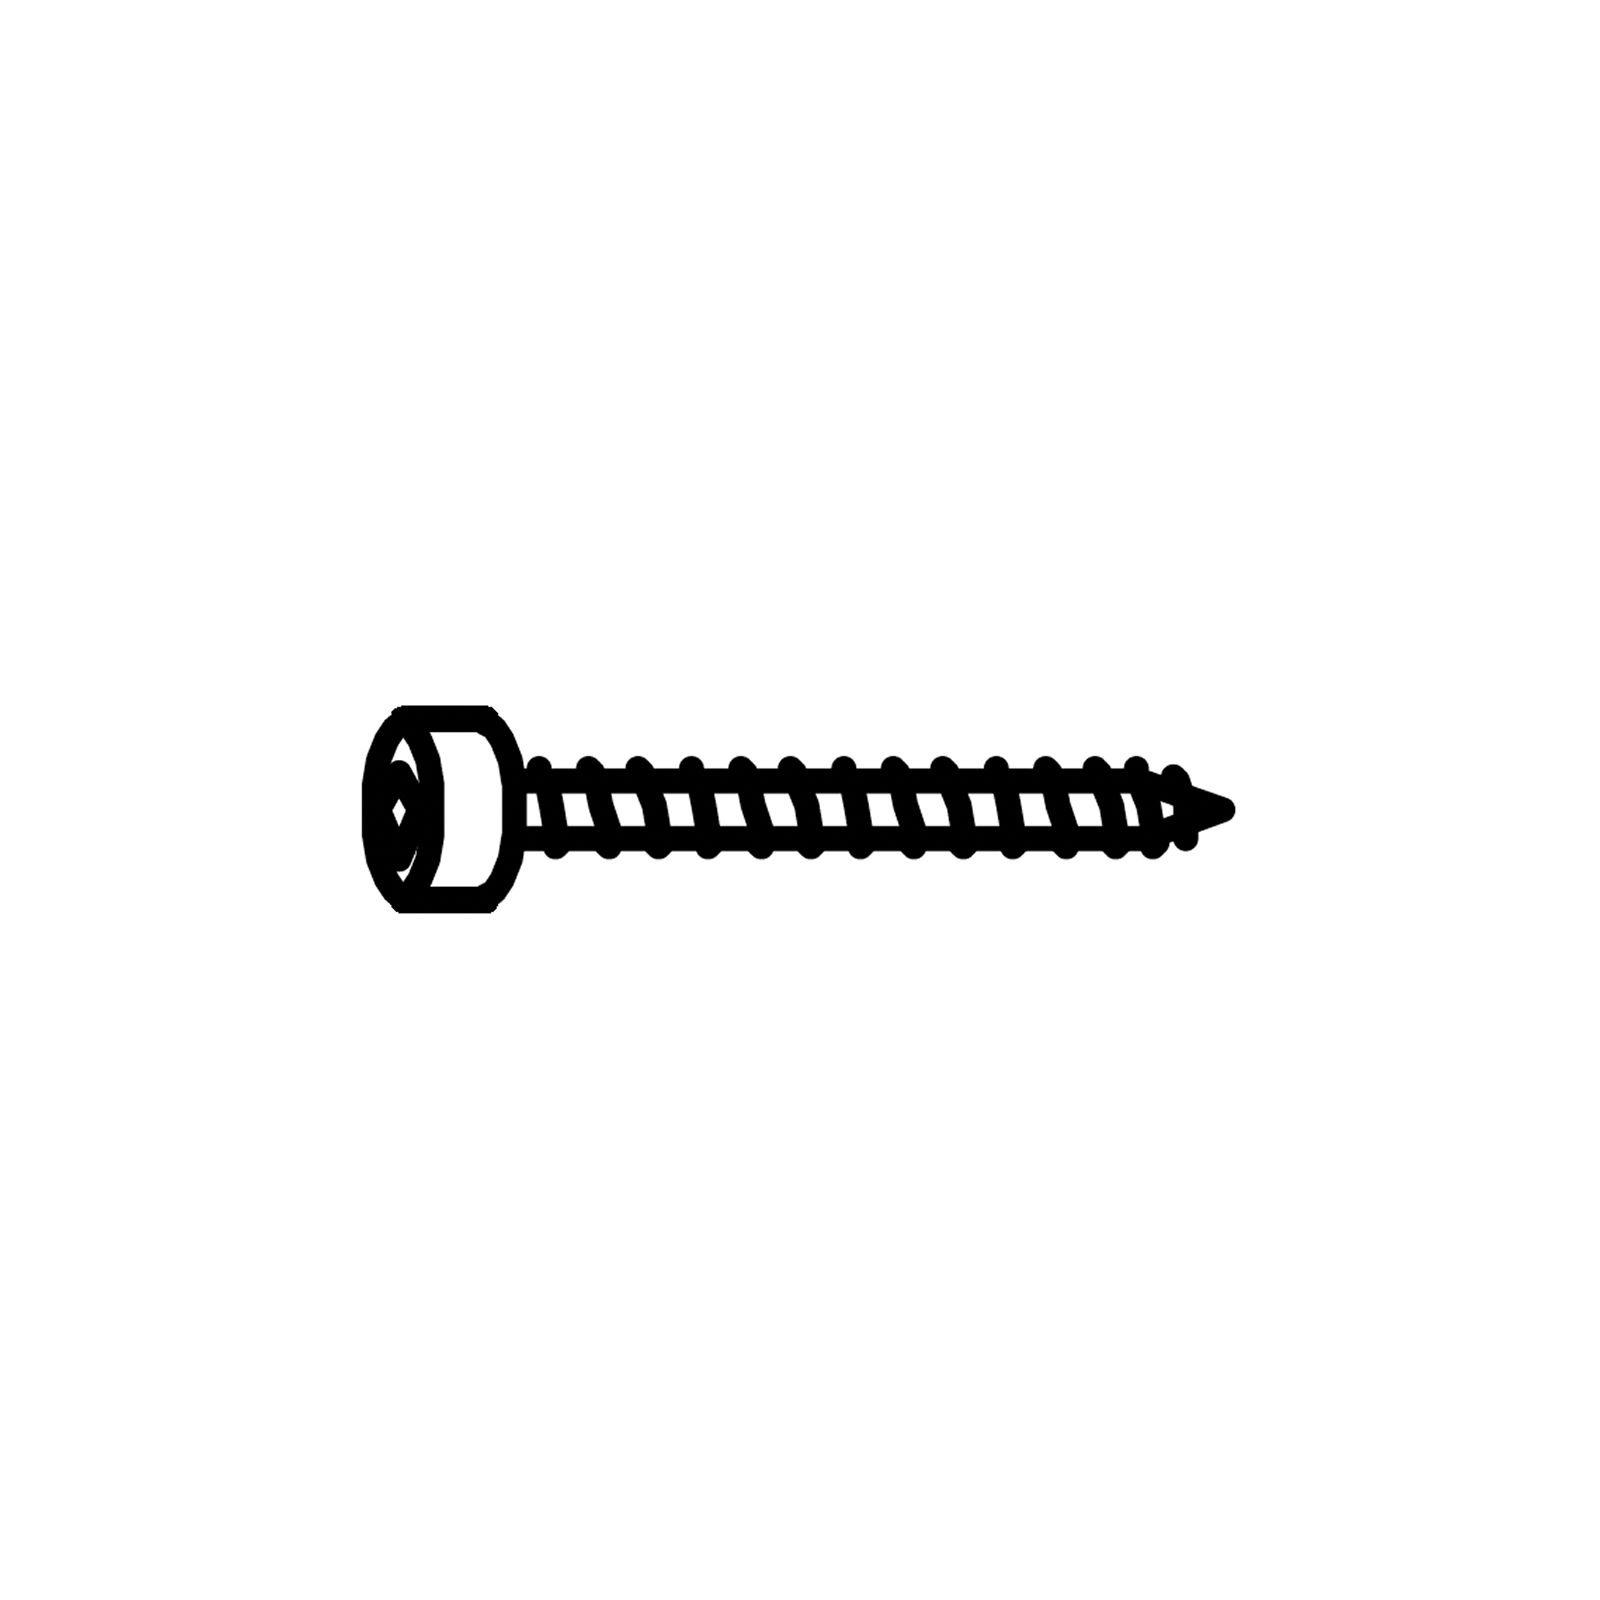
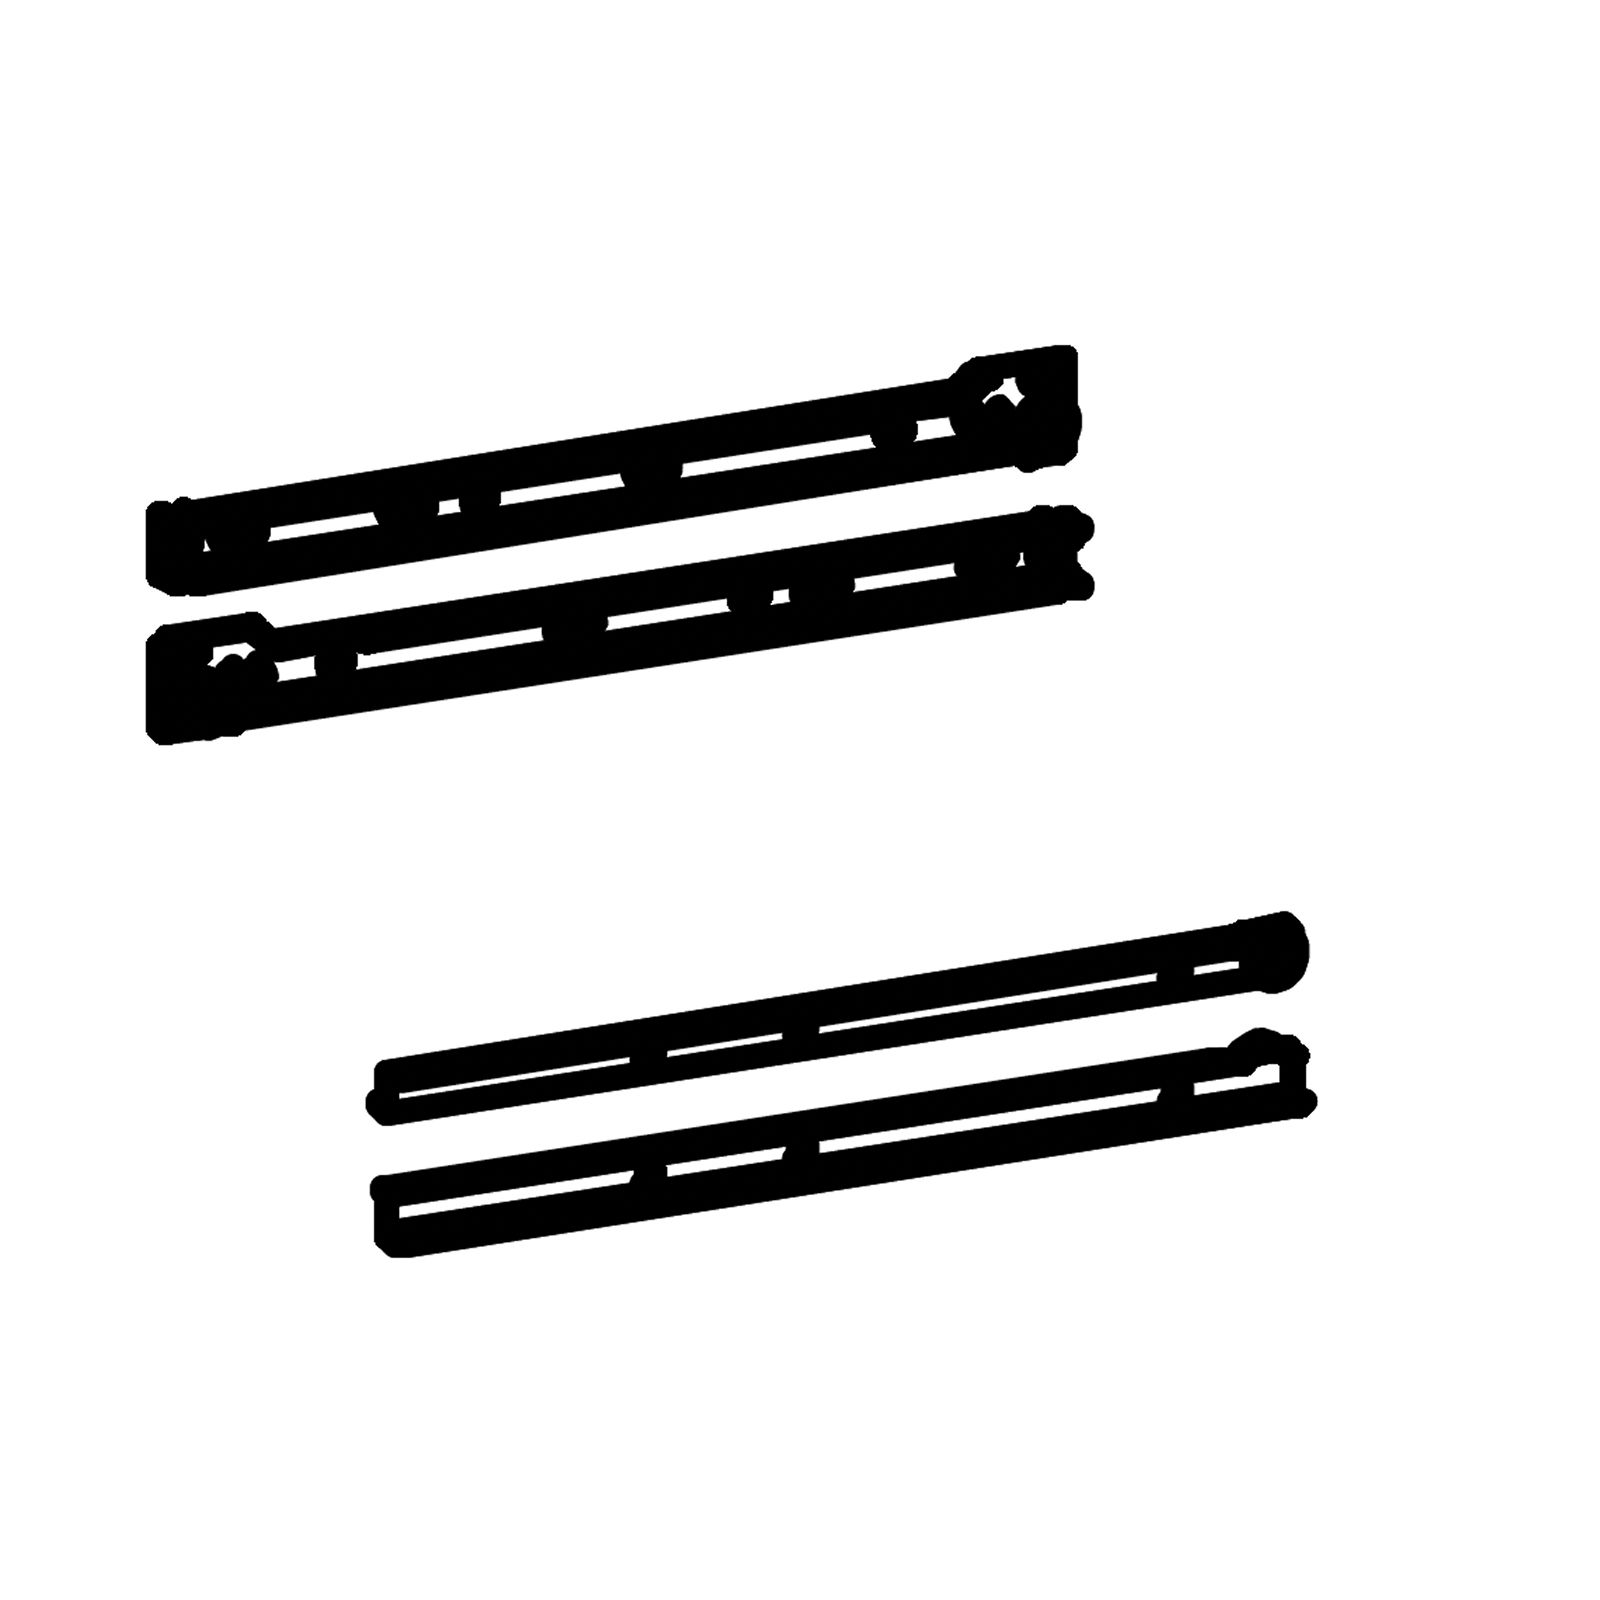
1. Take the Left Side Panel (2) and position it with the pilot holes facing upward. 2. Align the 14" Drawer Slide (M) with the predrilled pilot holes on the inside face of the panel. 3. Secure the slide using CSK Screws M3.5x16mm (G). 4. Use a screwdriver to fasten all screws firmly, making sure the rail is flush and aligned.
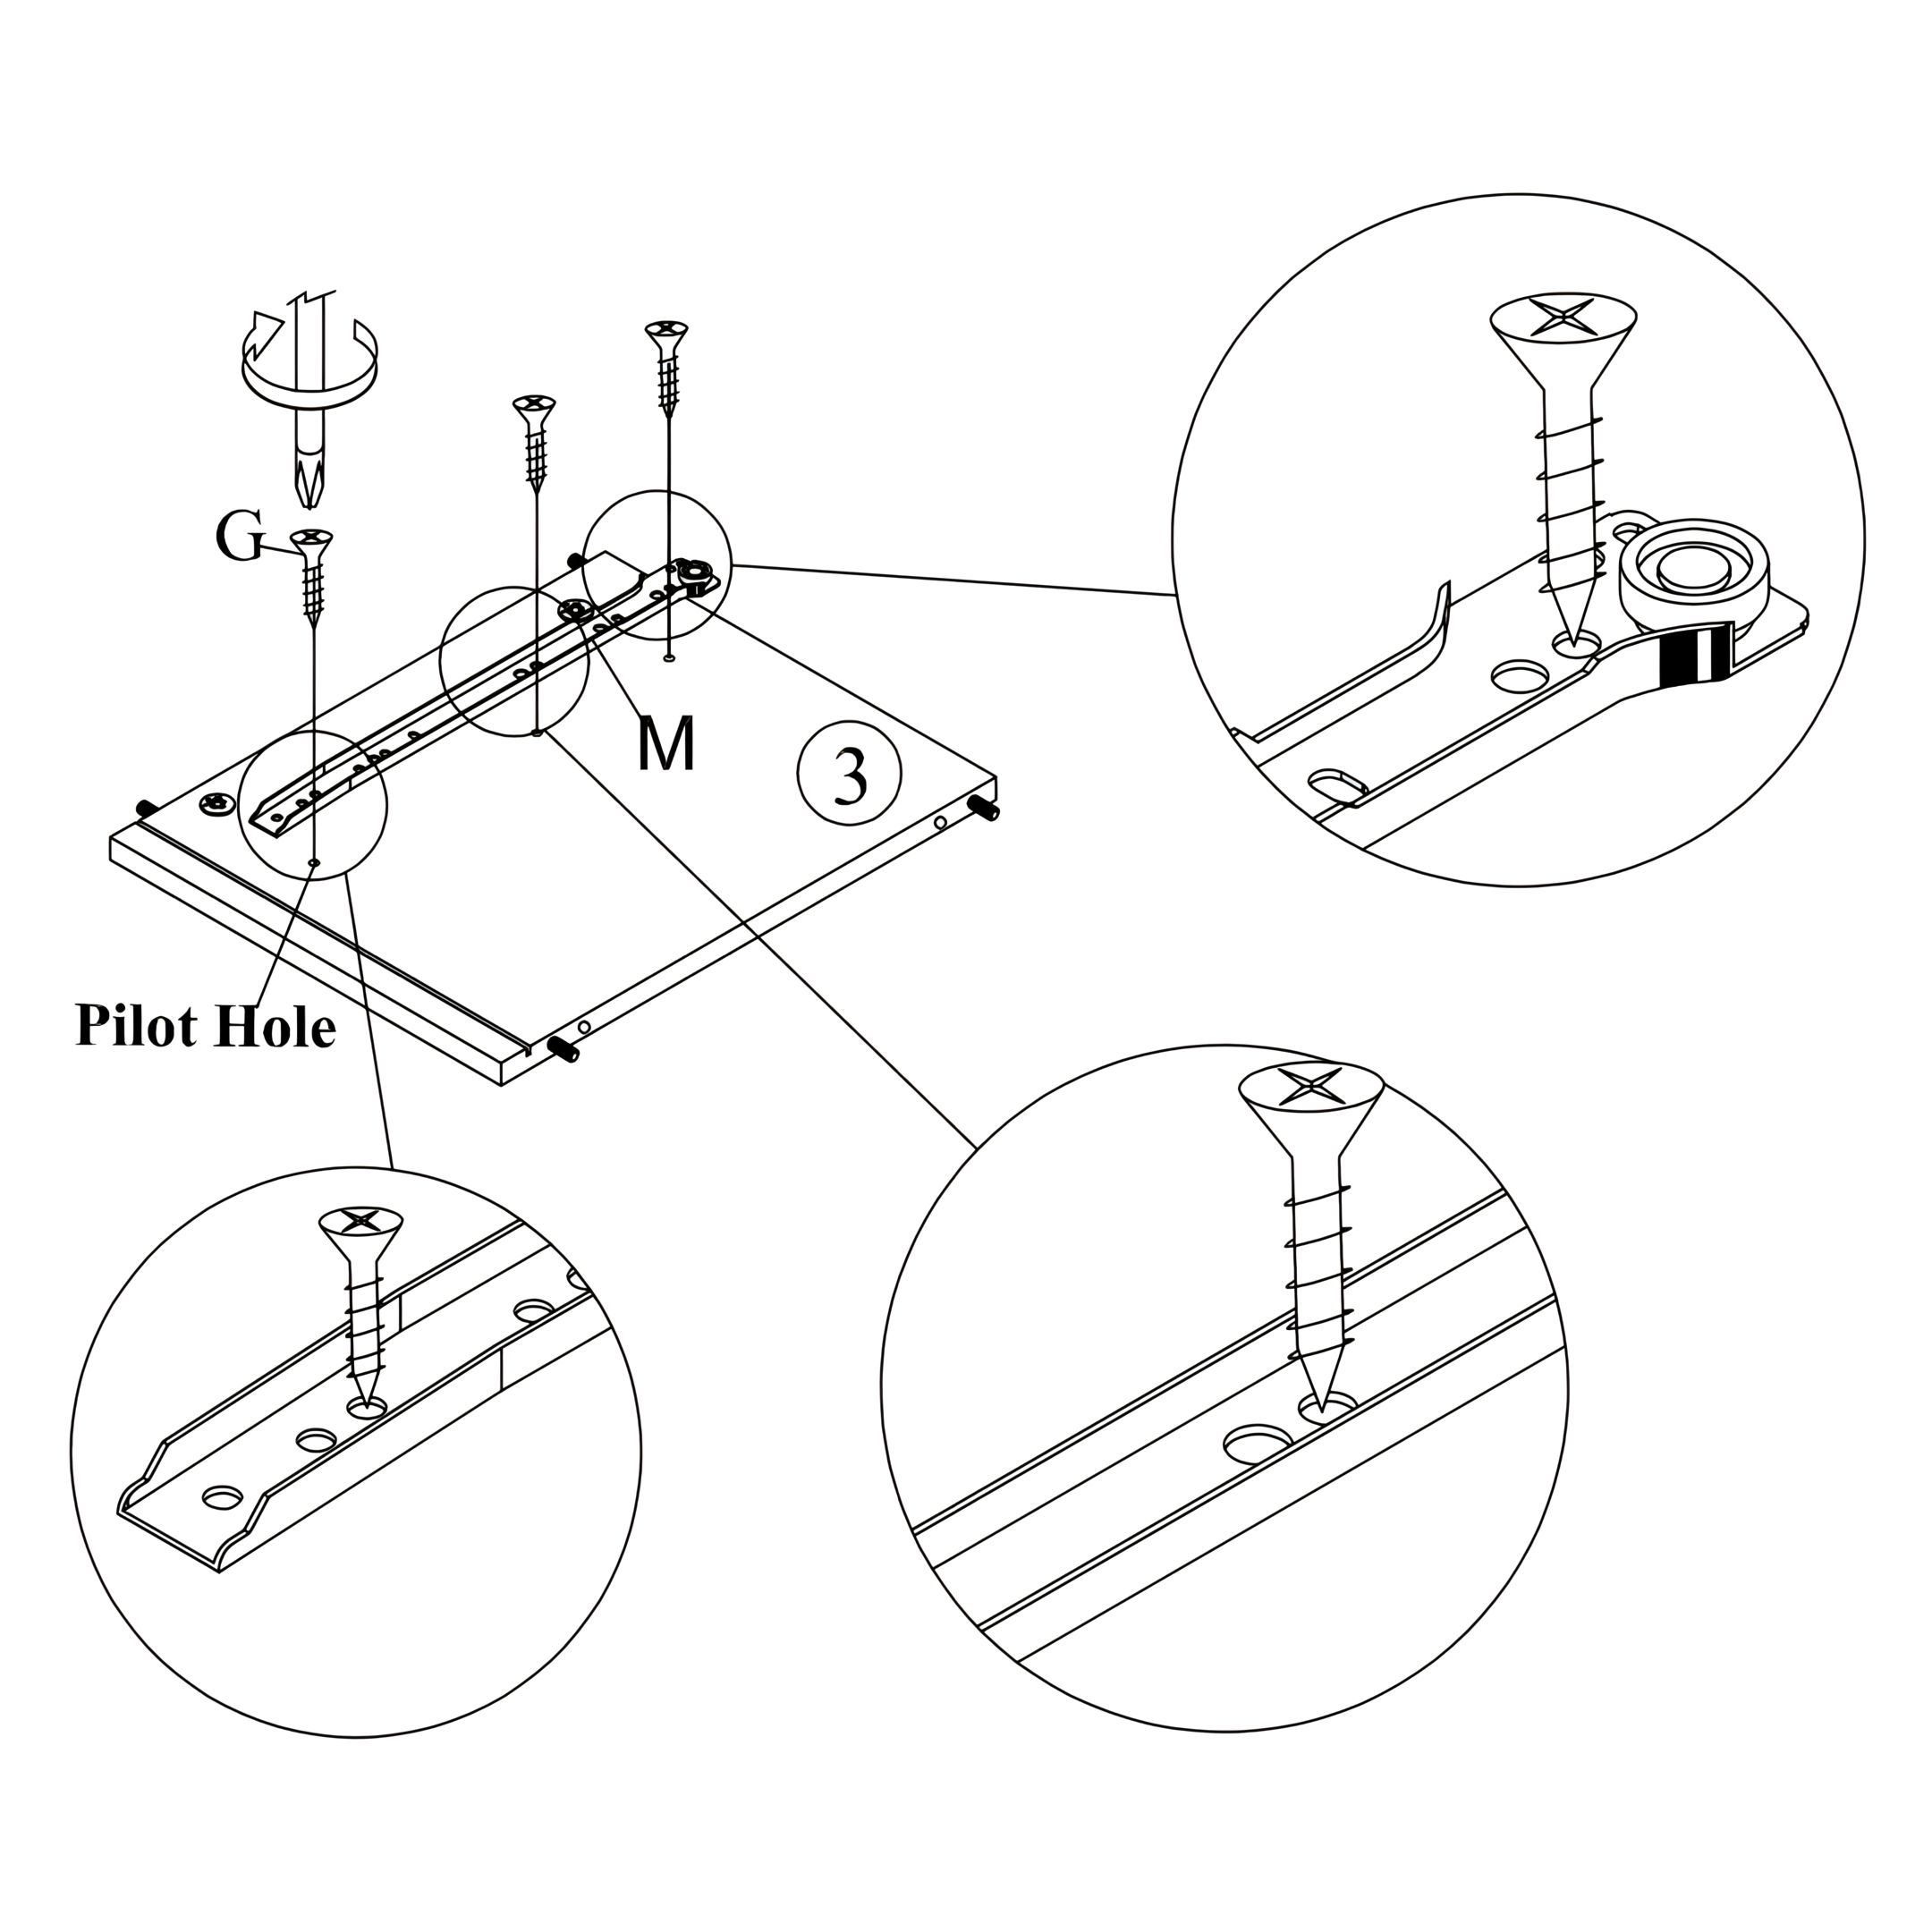
5. Attach Drawer Slide to the Right Side Panel
1. Take the Right Side Panel (3) and place it with the pilot holes facing up. 2. Align the second 14" Drawer Slide (M) with the predrilled pilot holes. 3. Fasten the slide using CSK Screws M3.5x16mm (G), ensuring the screw heads sit flush. 4. Use a screwdriver to tighten all screws securely.
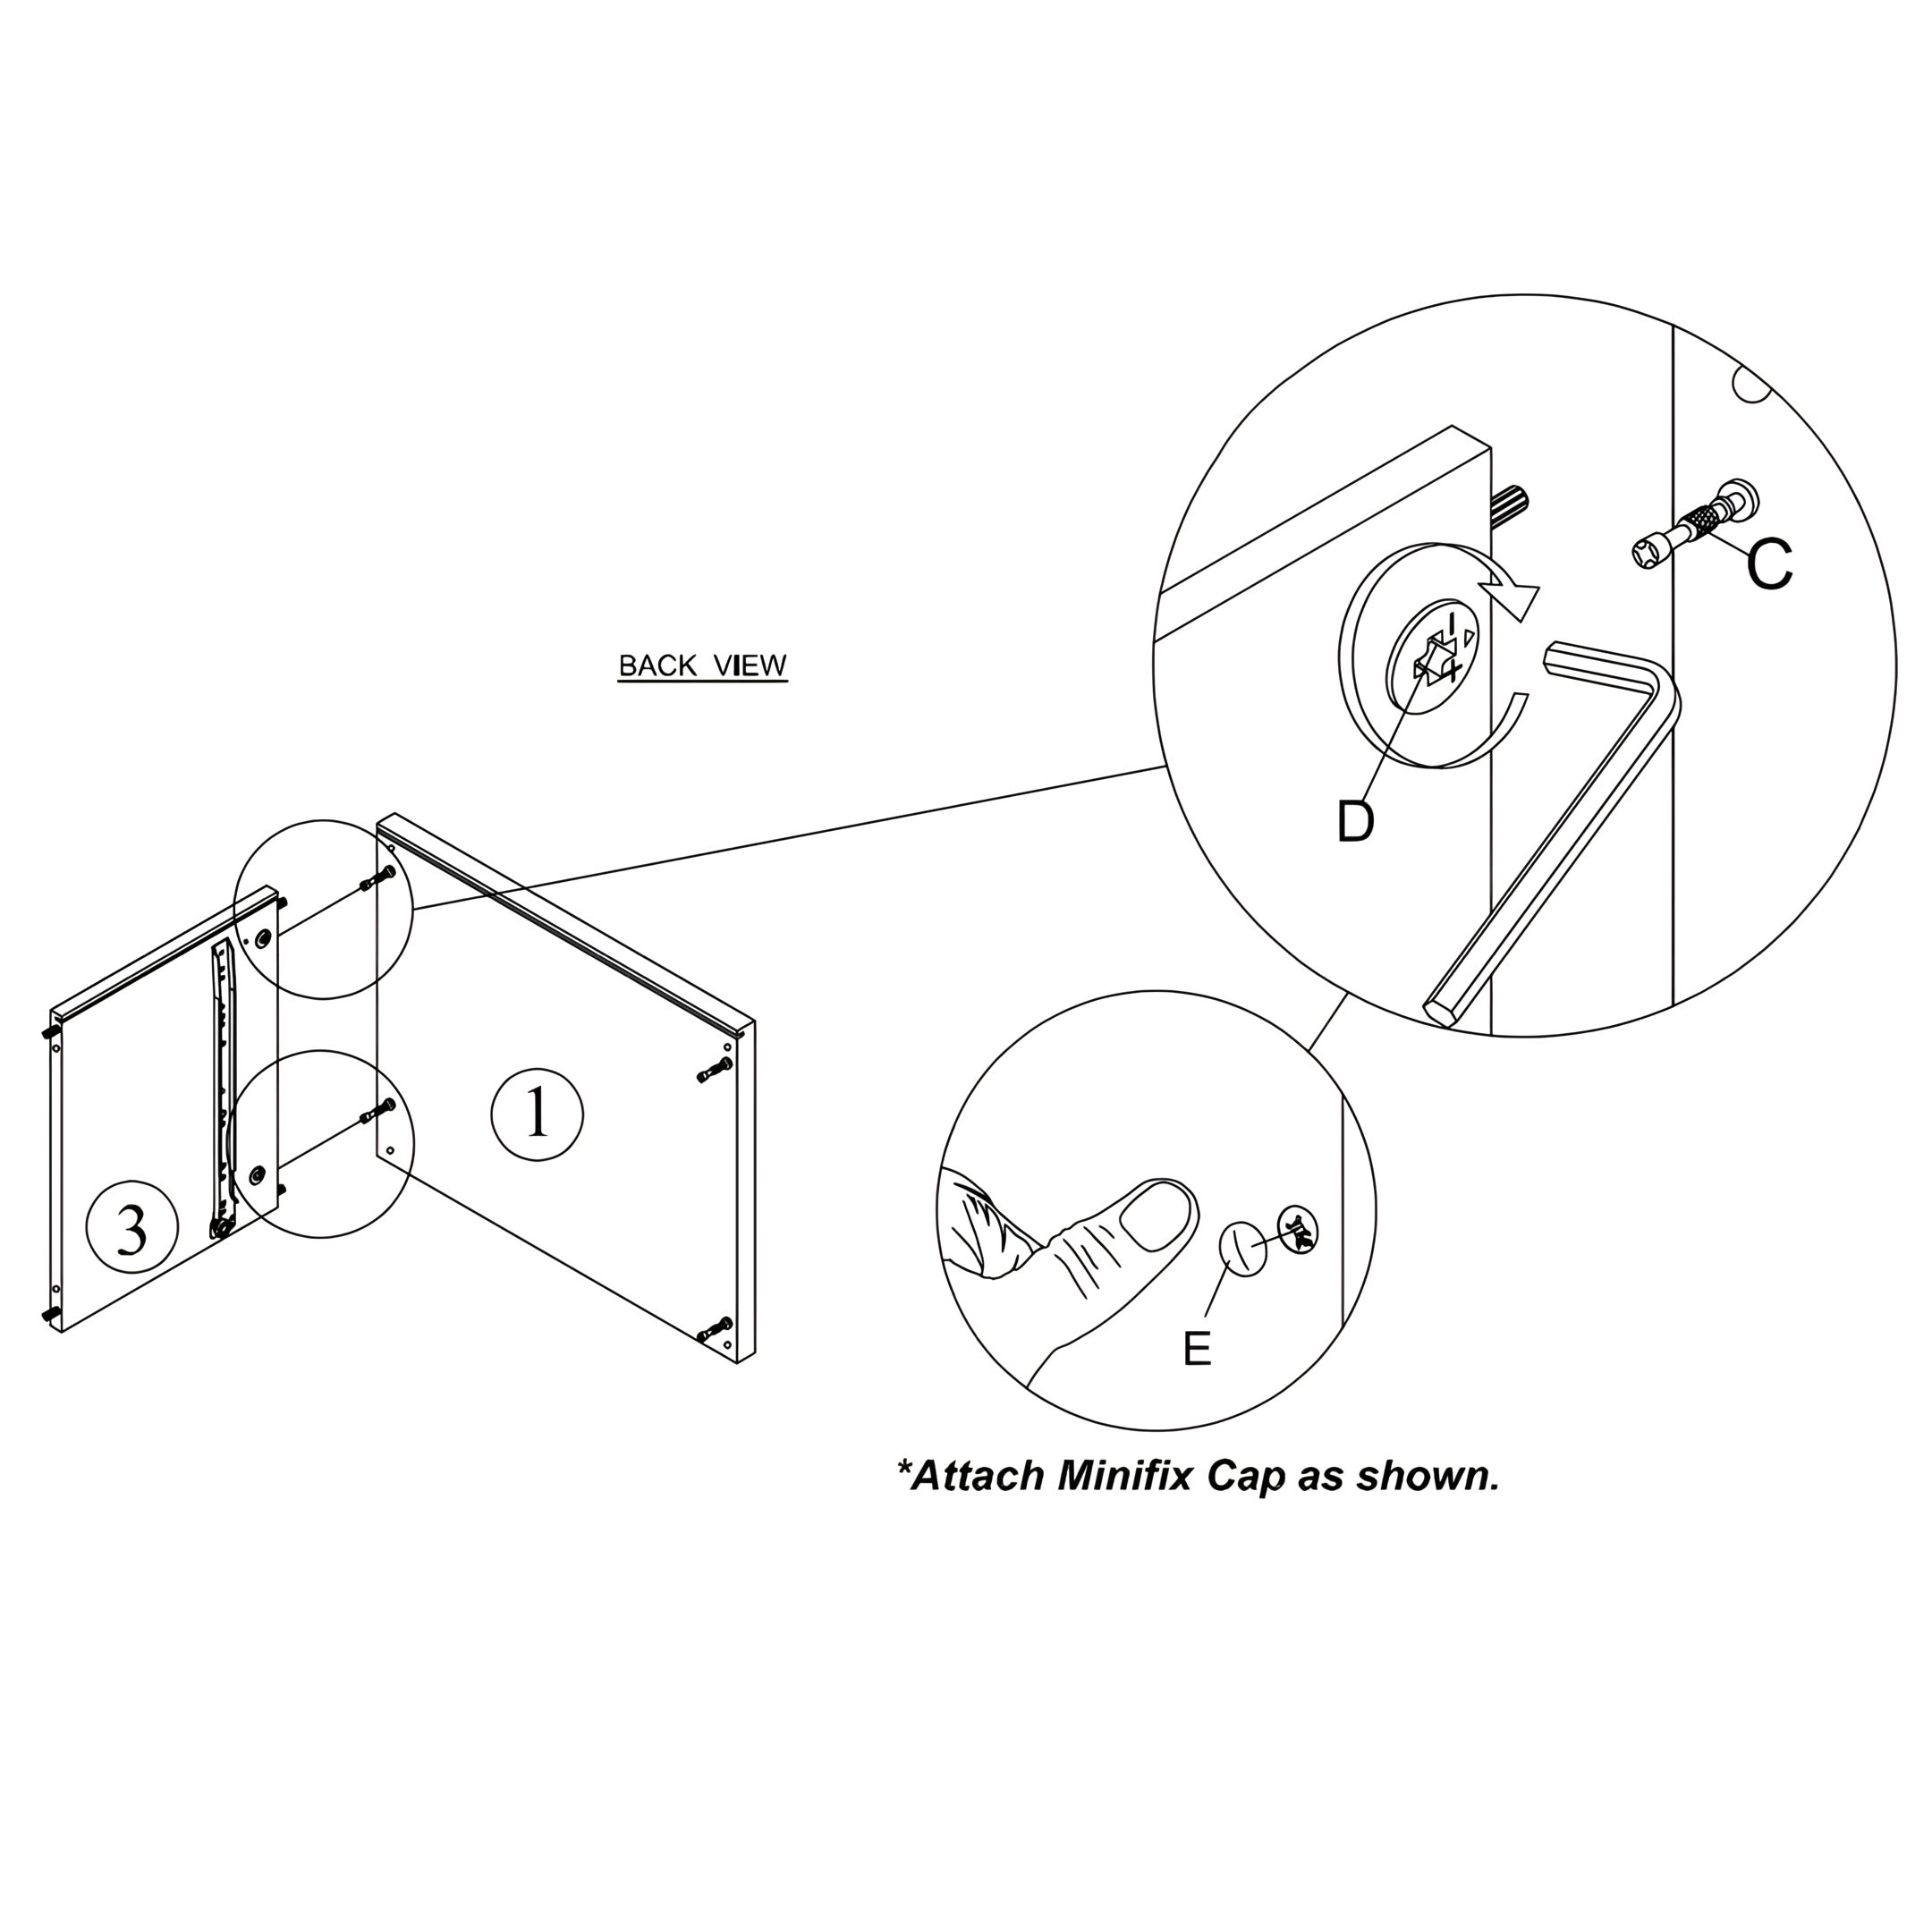
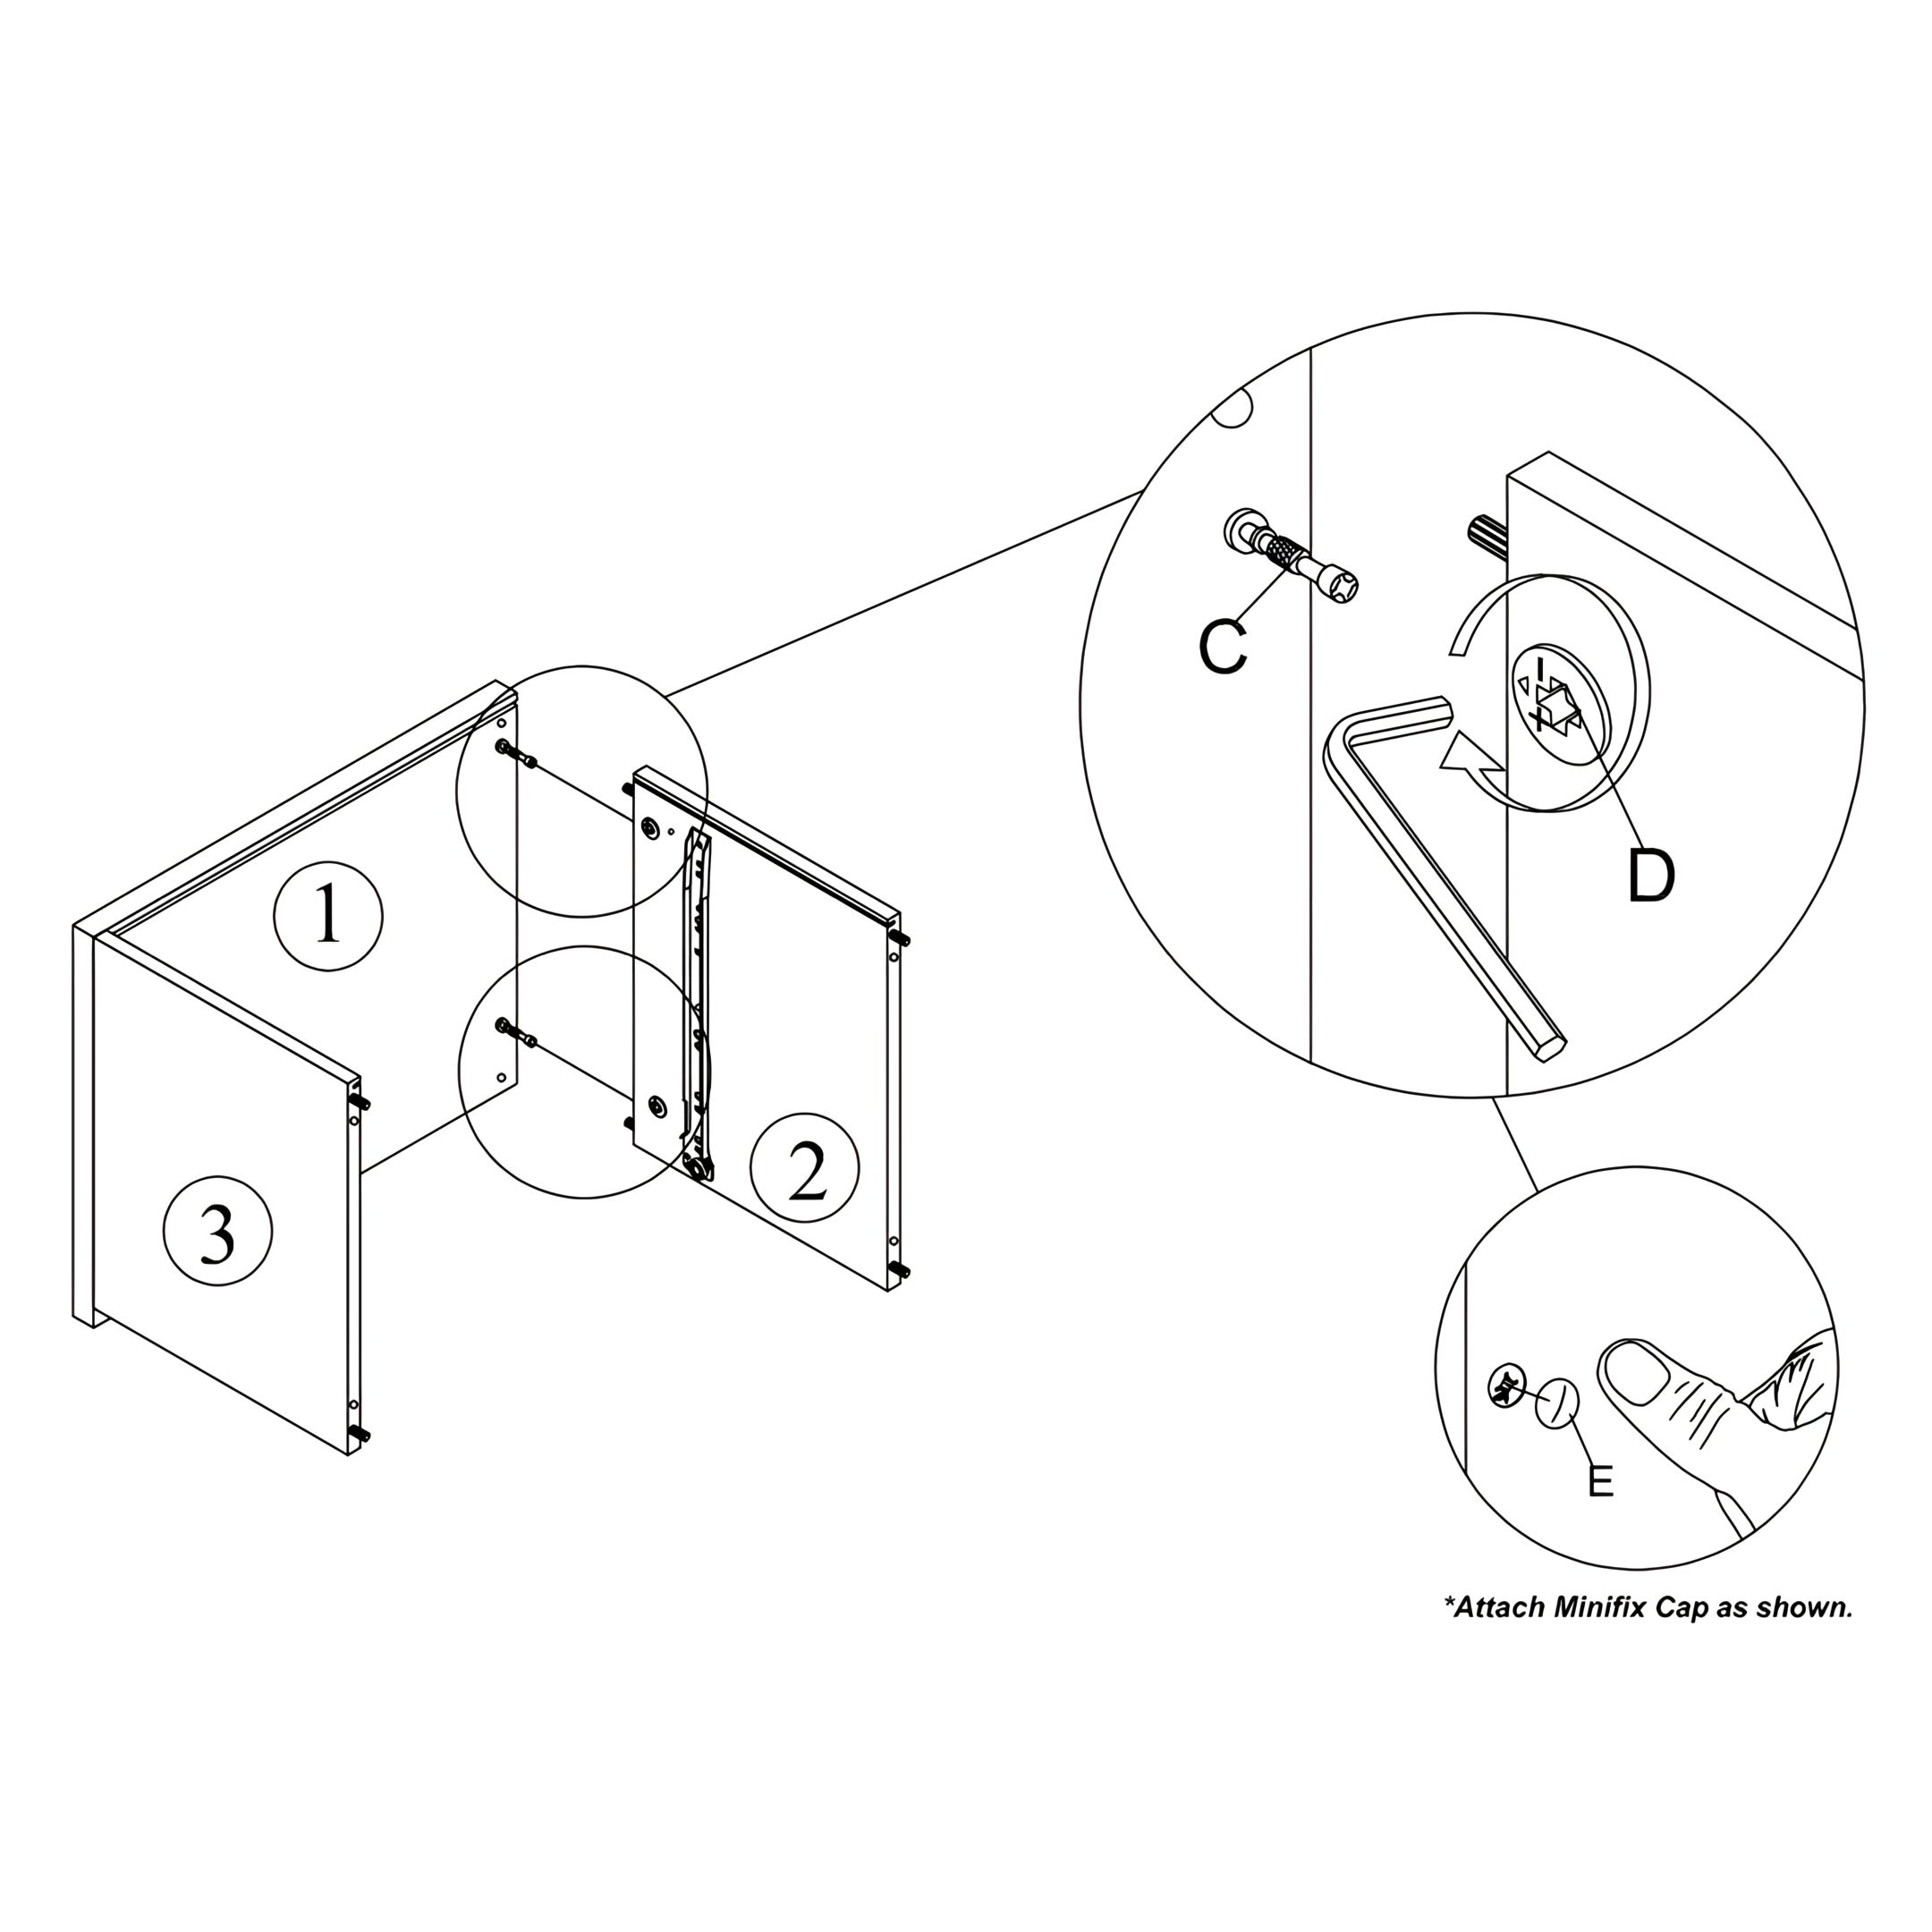
6. Attach the Right Side Panel to the Top Panel
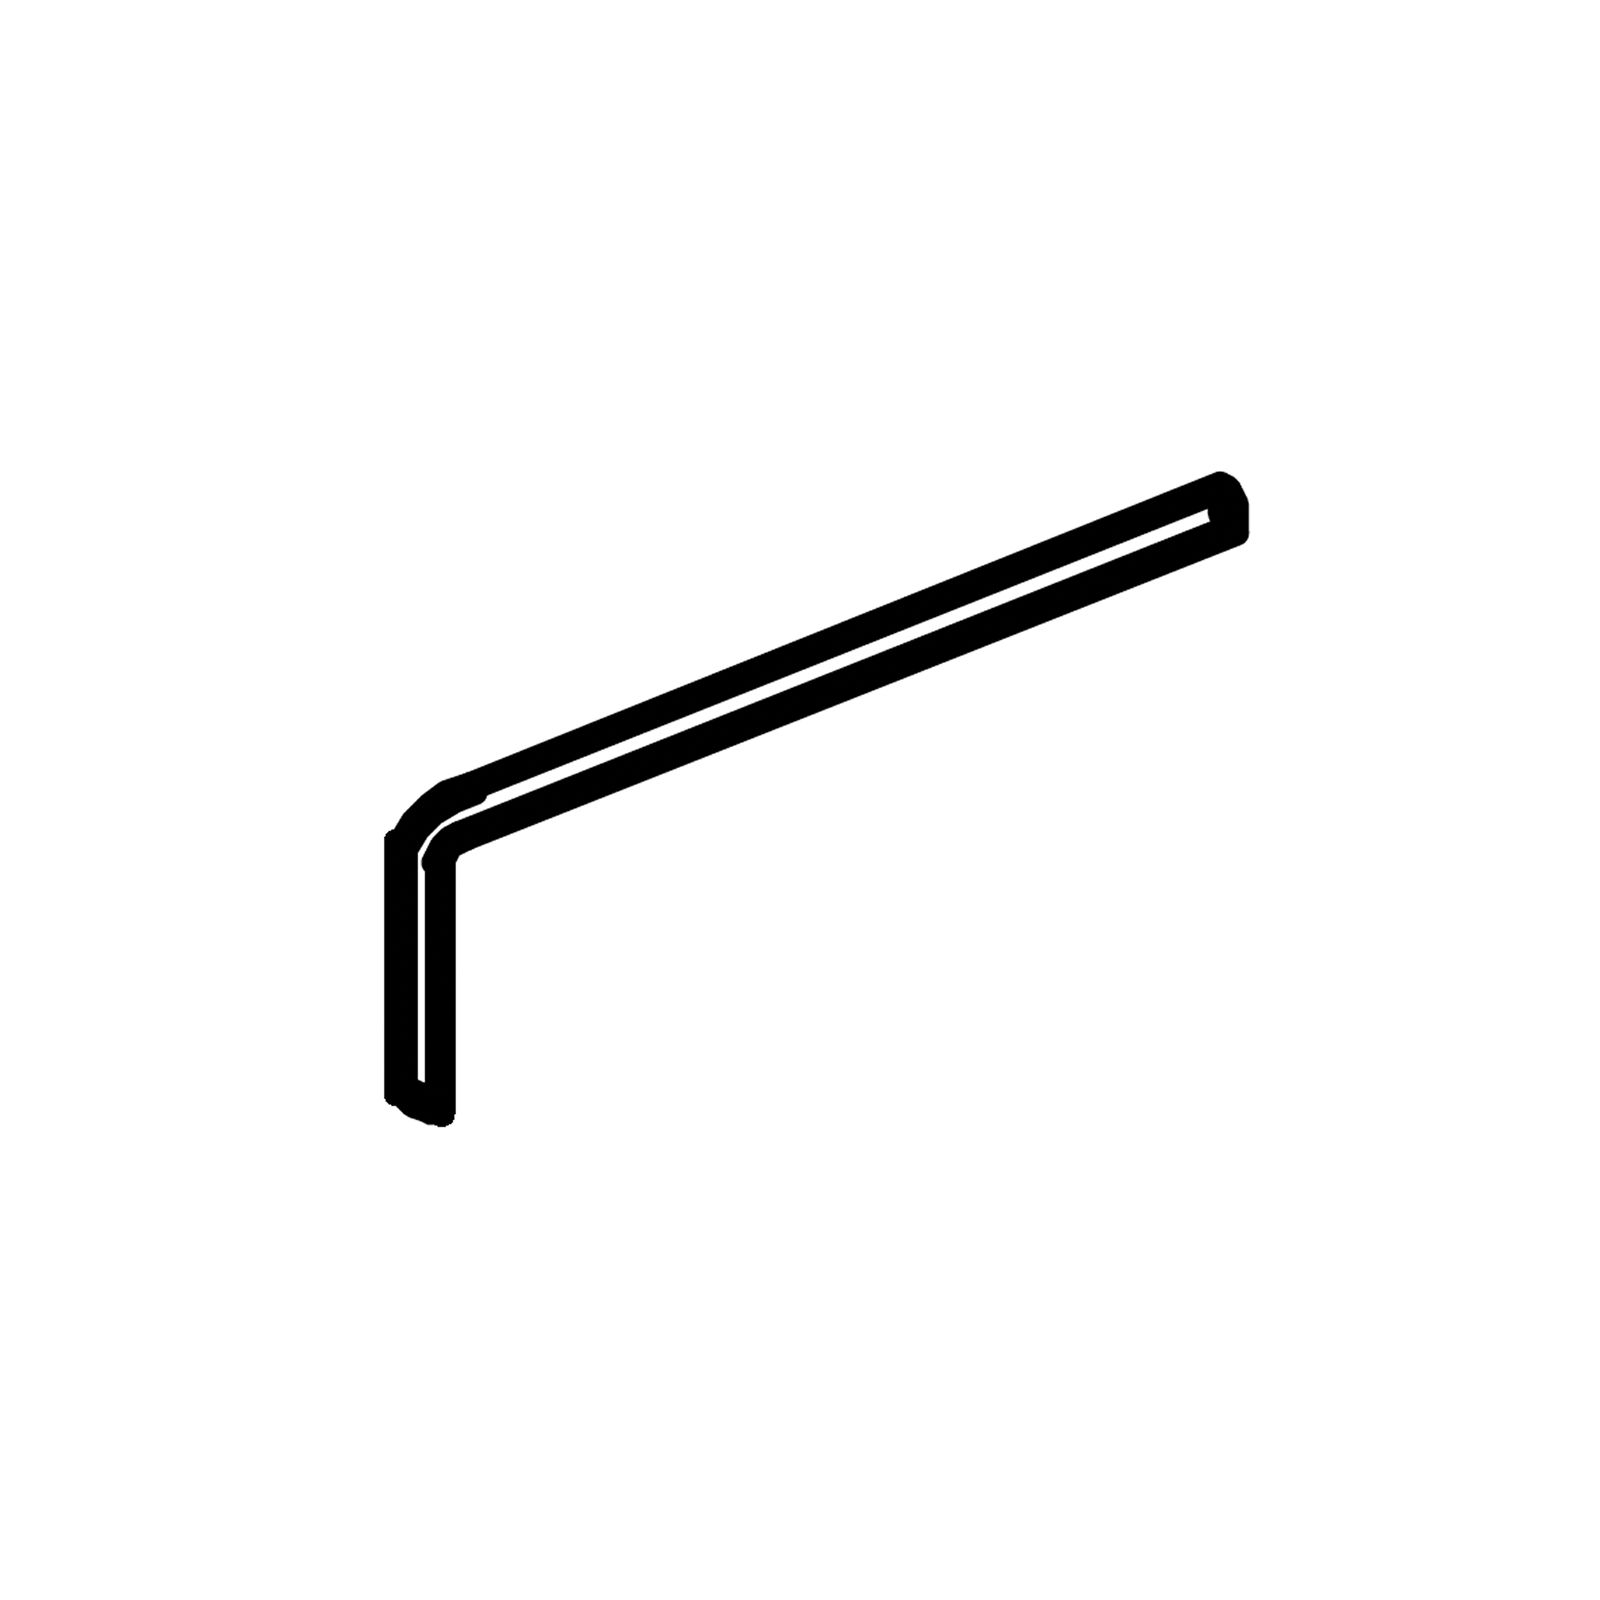
1. Connect the Right Side Panel (3) to the Top Panel (1) using the previously installed Mini Fix Bolts (C). 2. Insert the Mini Fix Housings (D) into the holes on Panel 3 and rotate them clockwise using the Allen Key (A) to lock the bolts in place. 3. Ensure the panels are flush at the corners. 4. Insert Mini Fix Caps (E) into the housings to cover the locking mechanism
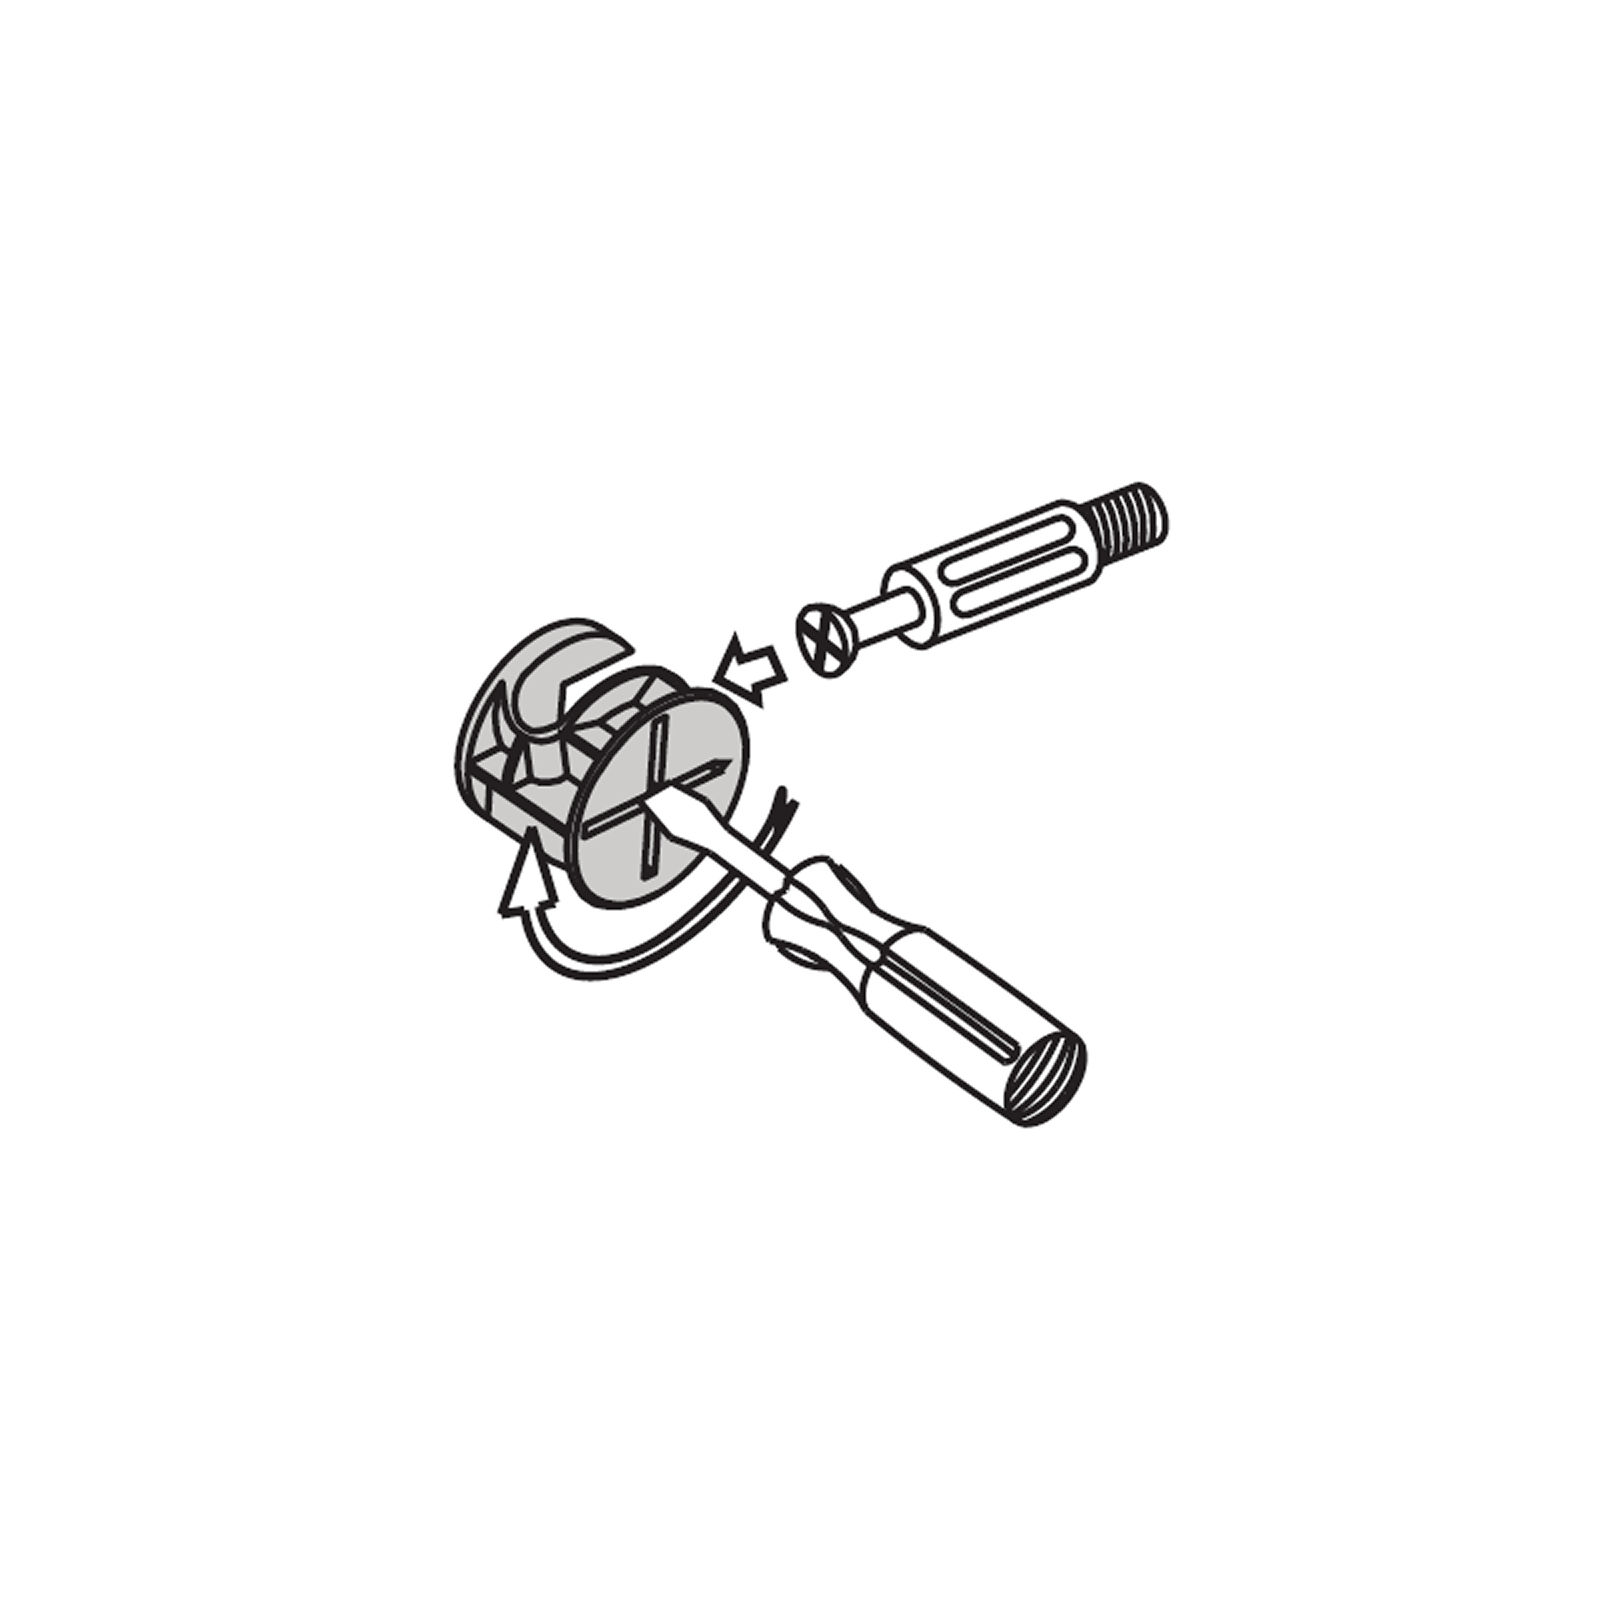
This is how a mini fix works:
The head of the mini fix housing goes into the open mouth of the mini fix bolt. You then turn the mini fix housing so it tightens over the mini fix bolt.
7. Attach the Left Side Panel
1. Align the Left Side Panel (2) with the Top Panel (1) and secure it using the pre-installed Mini Fix Bolts (C). 2. Insert the Mini Fix Housings (D) and tighten them with the Allen Key (A) by rotating clockwise until the joint locks. 3. Place the Mini Fix Caps (E) into each housing to conceal the fittings.
Mini Fix Reminder: The head of the mini fix housing goes into the open mouth of the mini fix bolt. You then turn the mini fix housing so it tightens over the mini fix bolt.
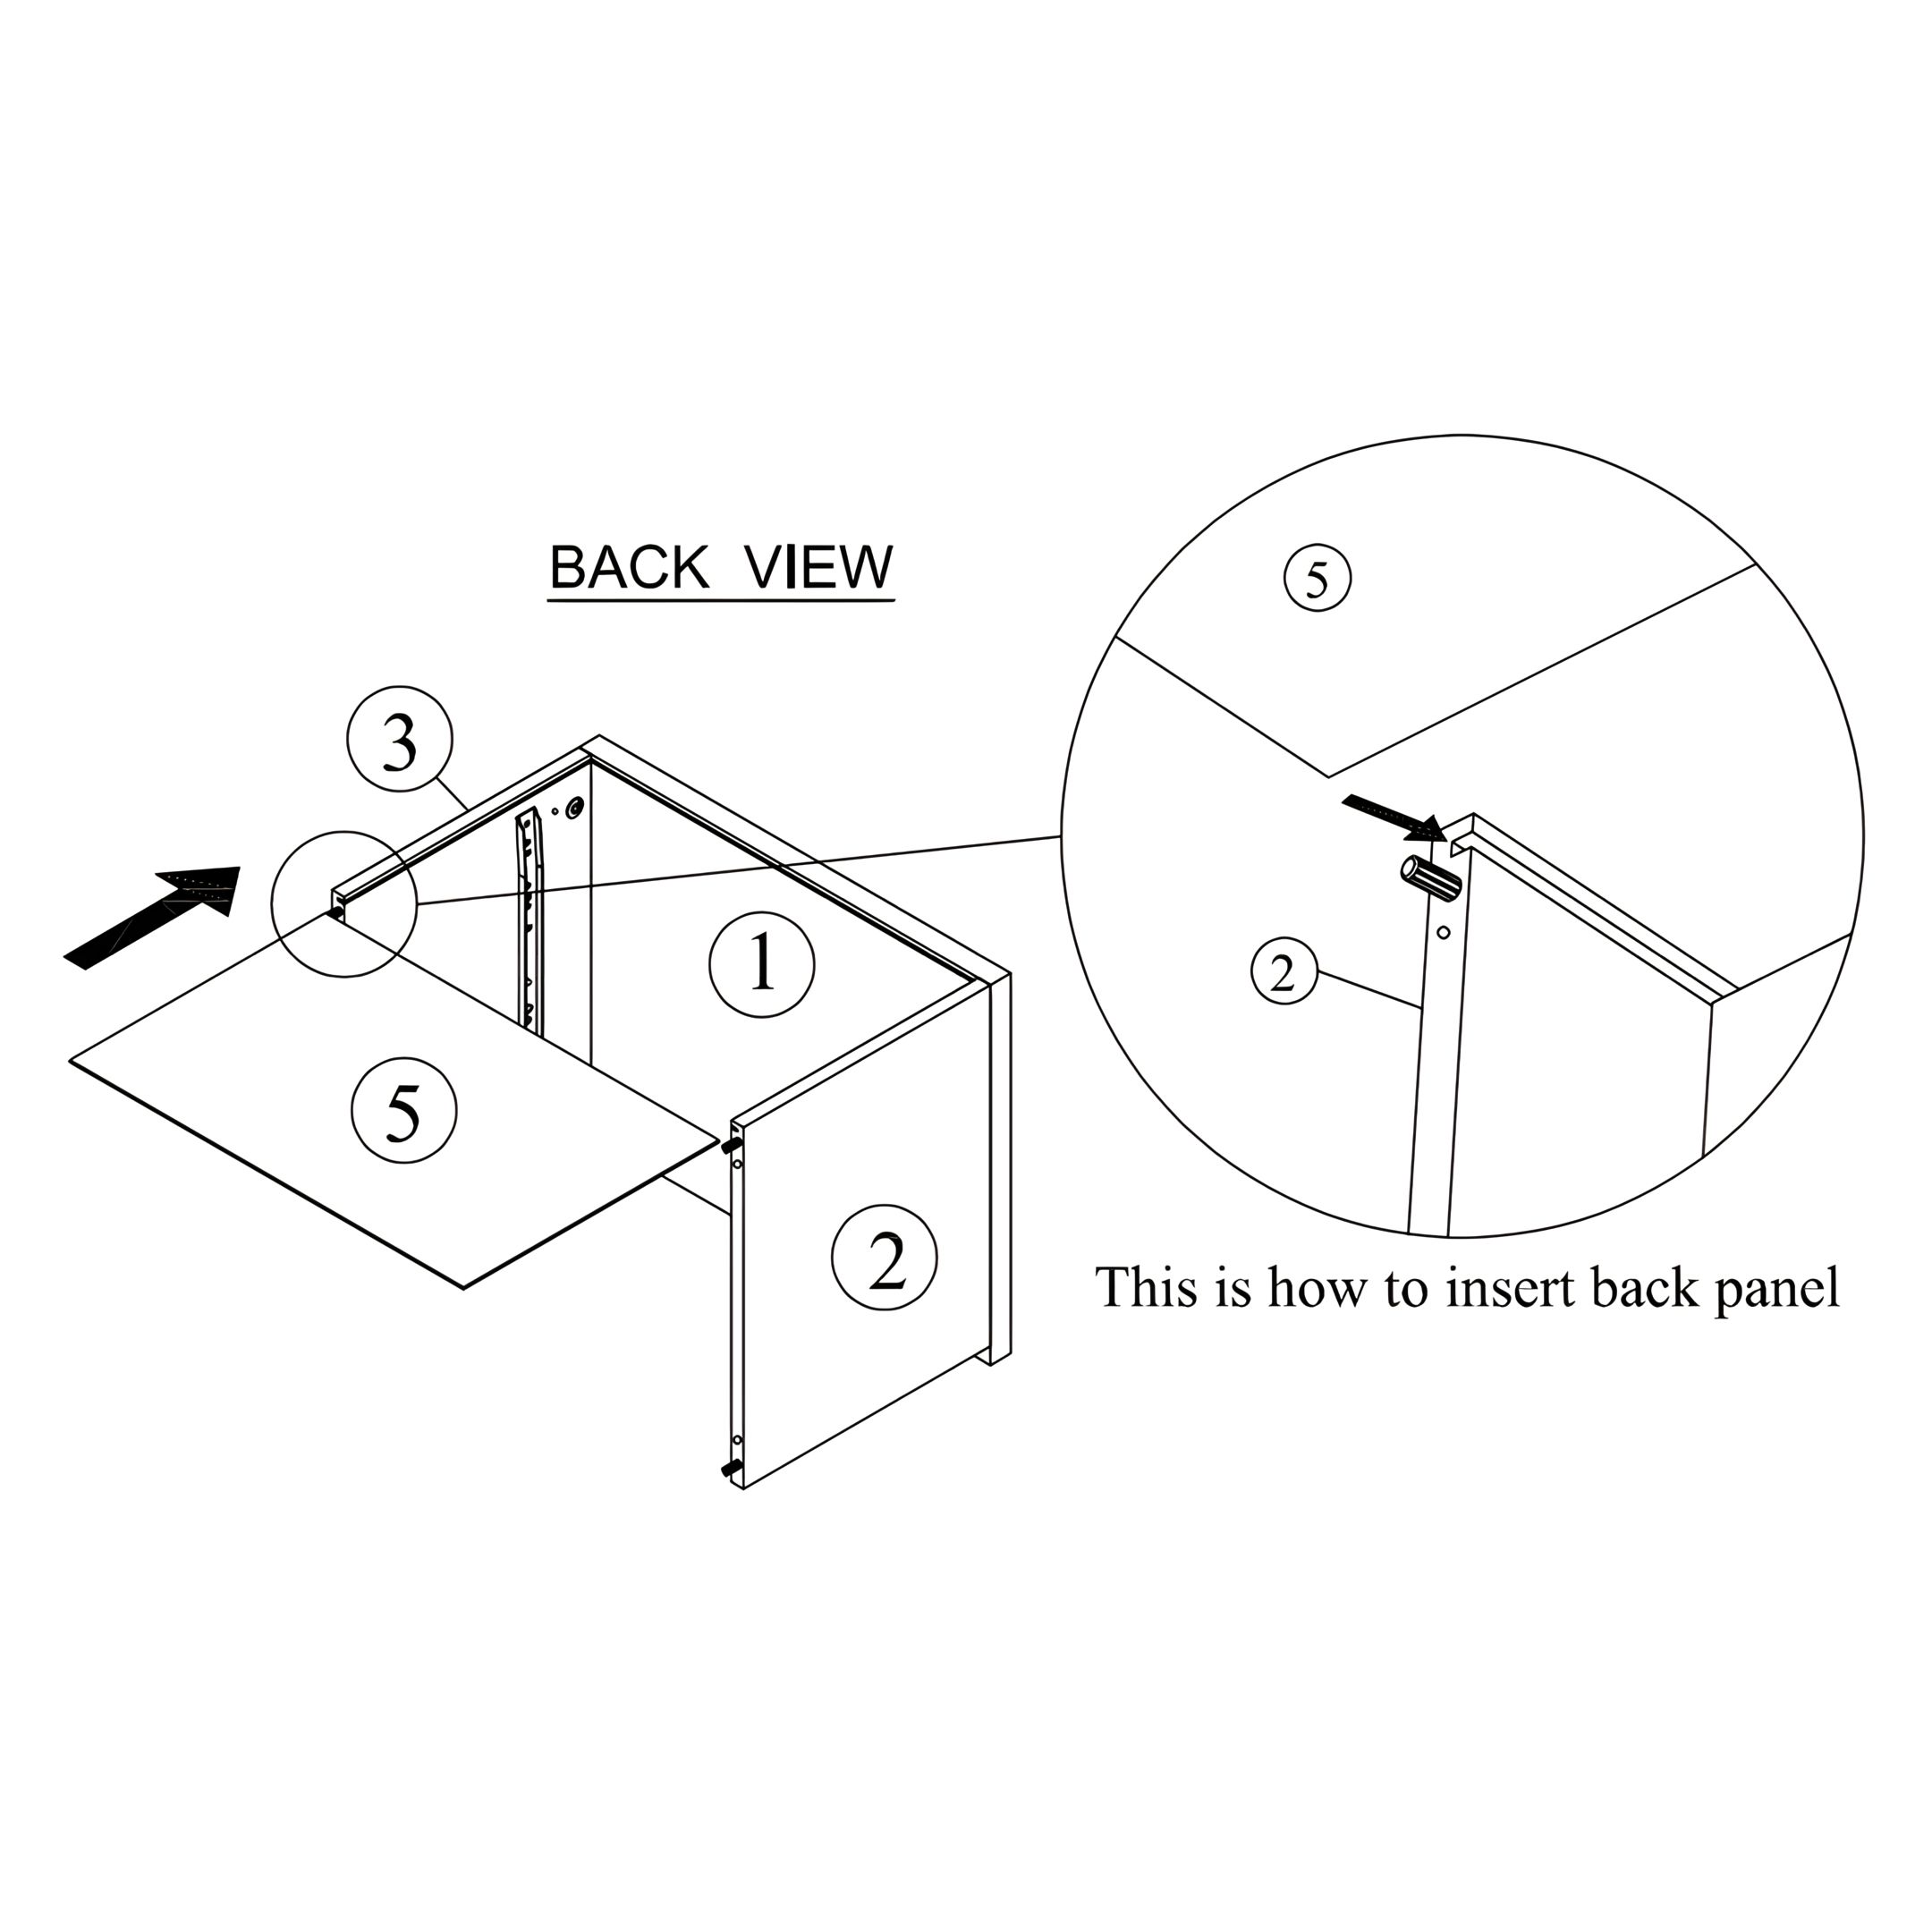
8. Insert the Back Panel
1. Slide the Back Panel (5) into the grooves on the Left Side Panel (2) and Right Side Panel (3). 2. Ensure it fits snugly into place at the rear of the frame.
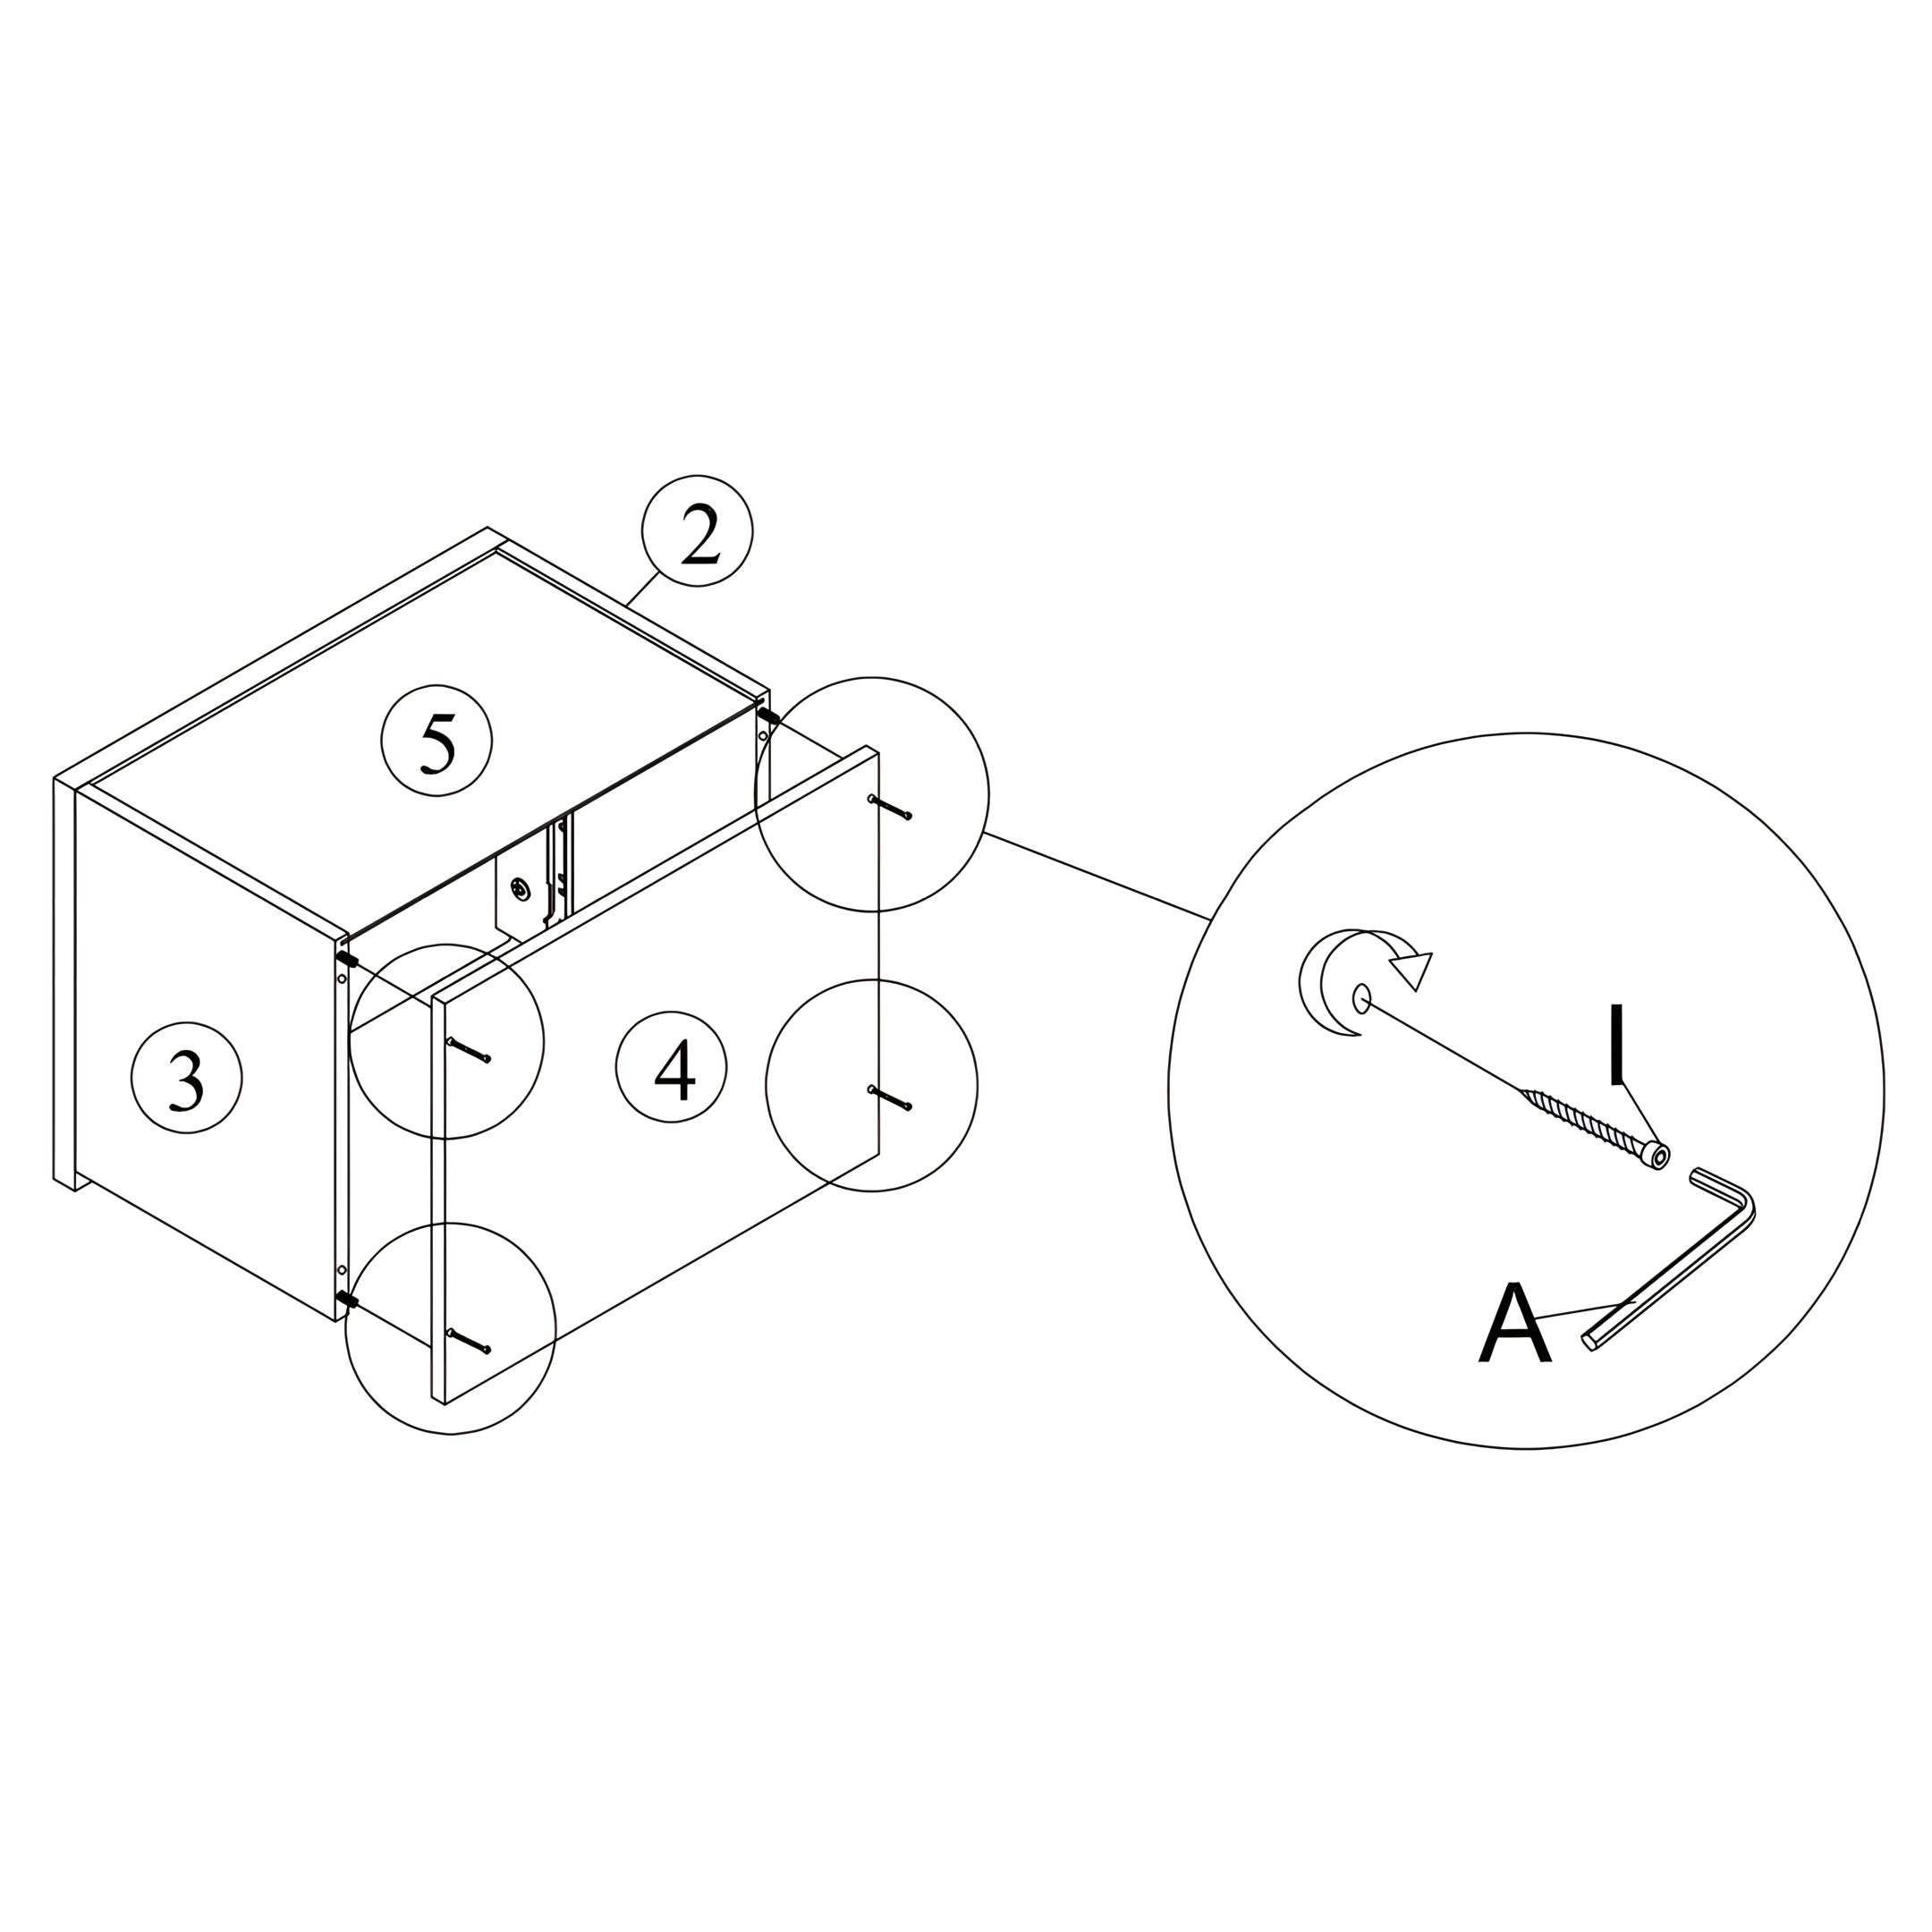
9. Attach the Bottom Panel
1. Position the Bottom Panel (4) between the Left Side Panel (2) and Right Side Panel (3), ensuring it aligns with the pre-drilled holes. 2. Secure the panel using 4 x JCBC W Screws M6x40 (I). 3. Use the Allen Key (A) to tighten each screw securely.
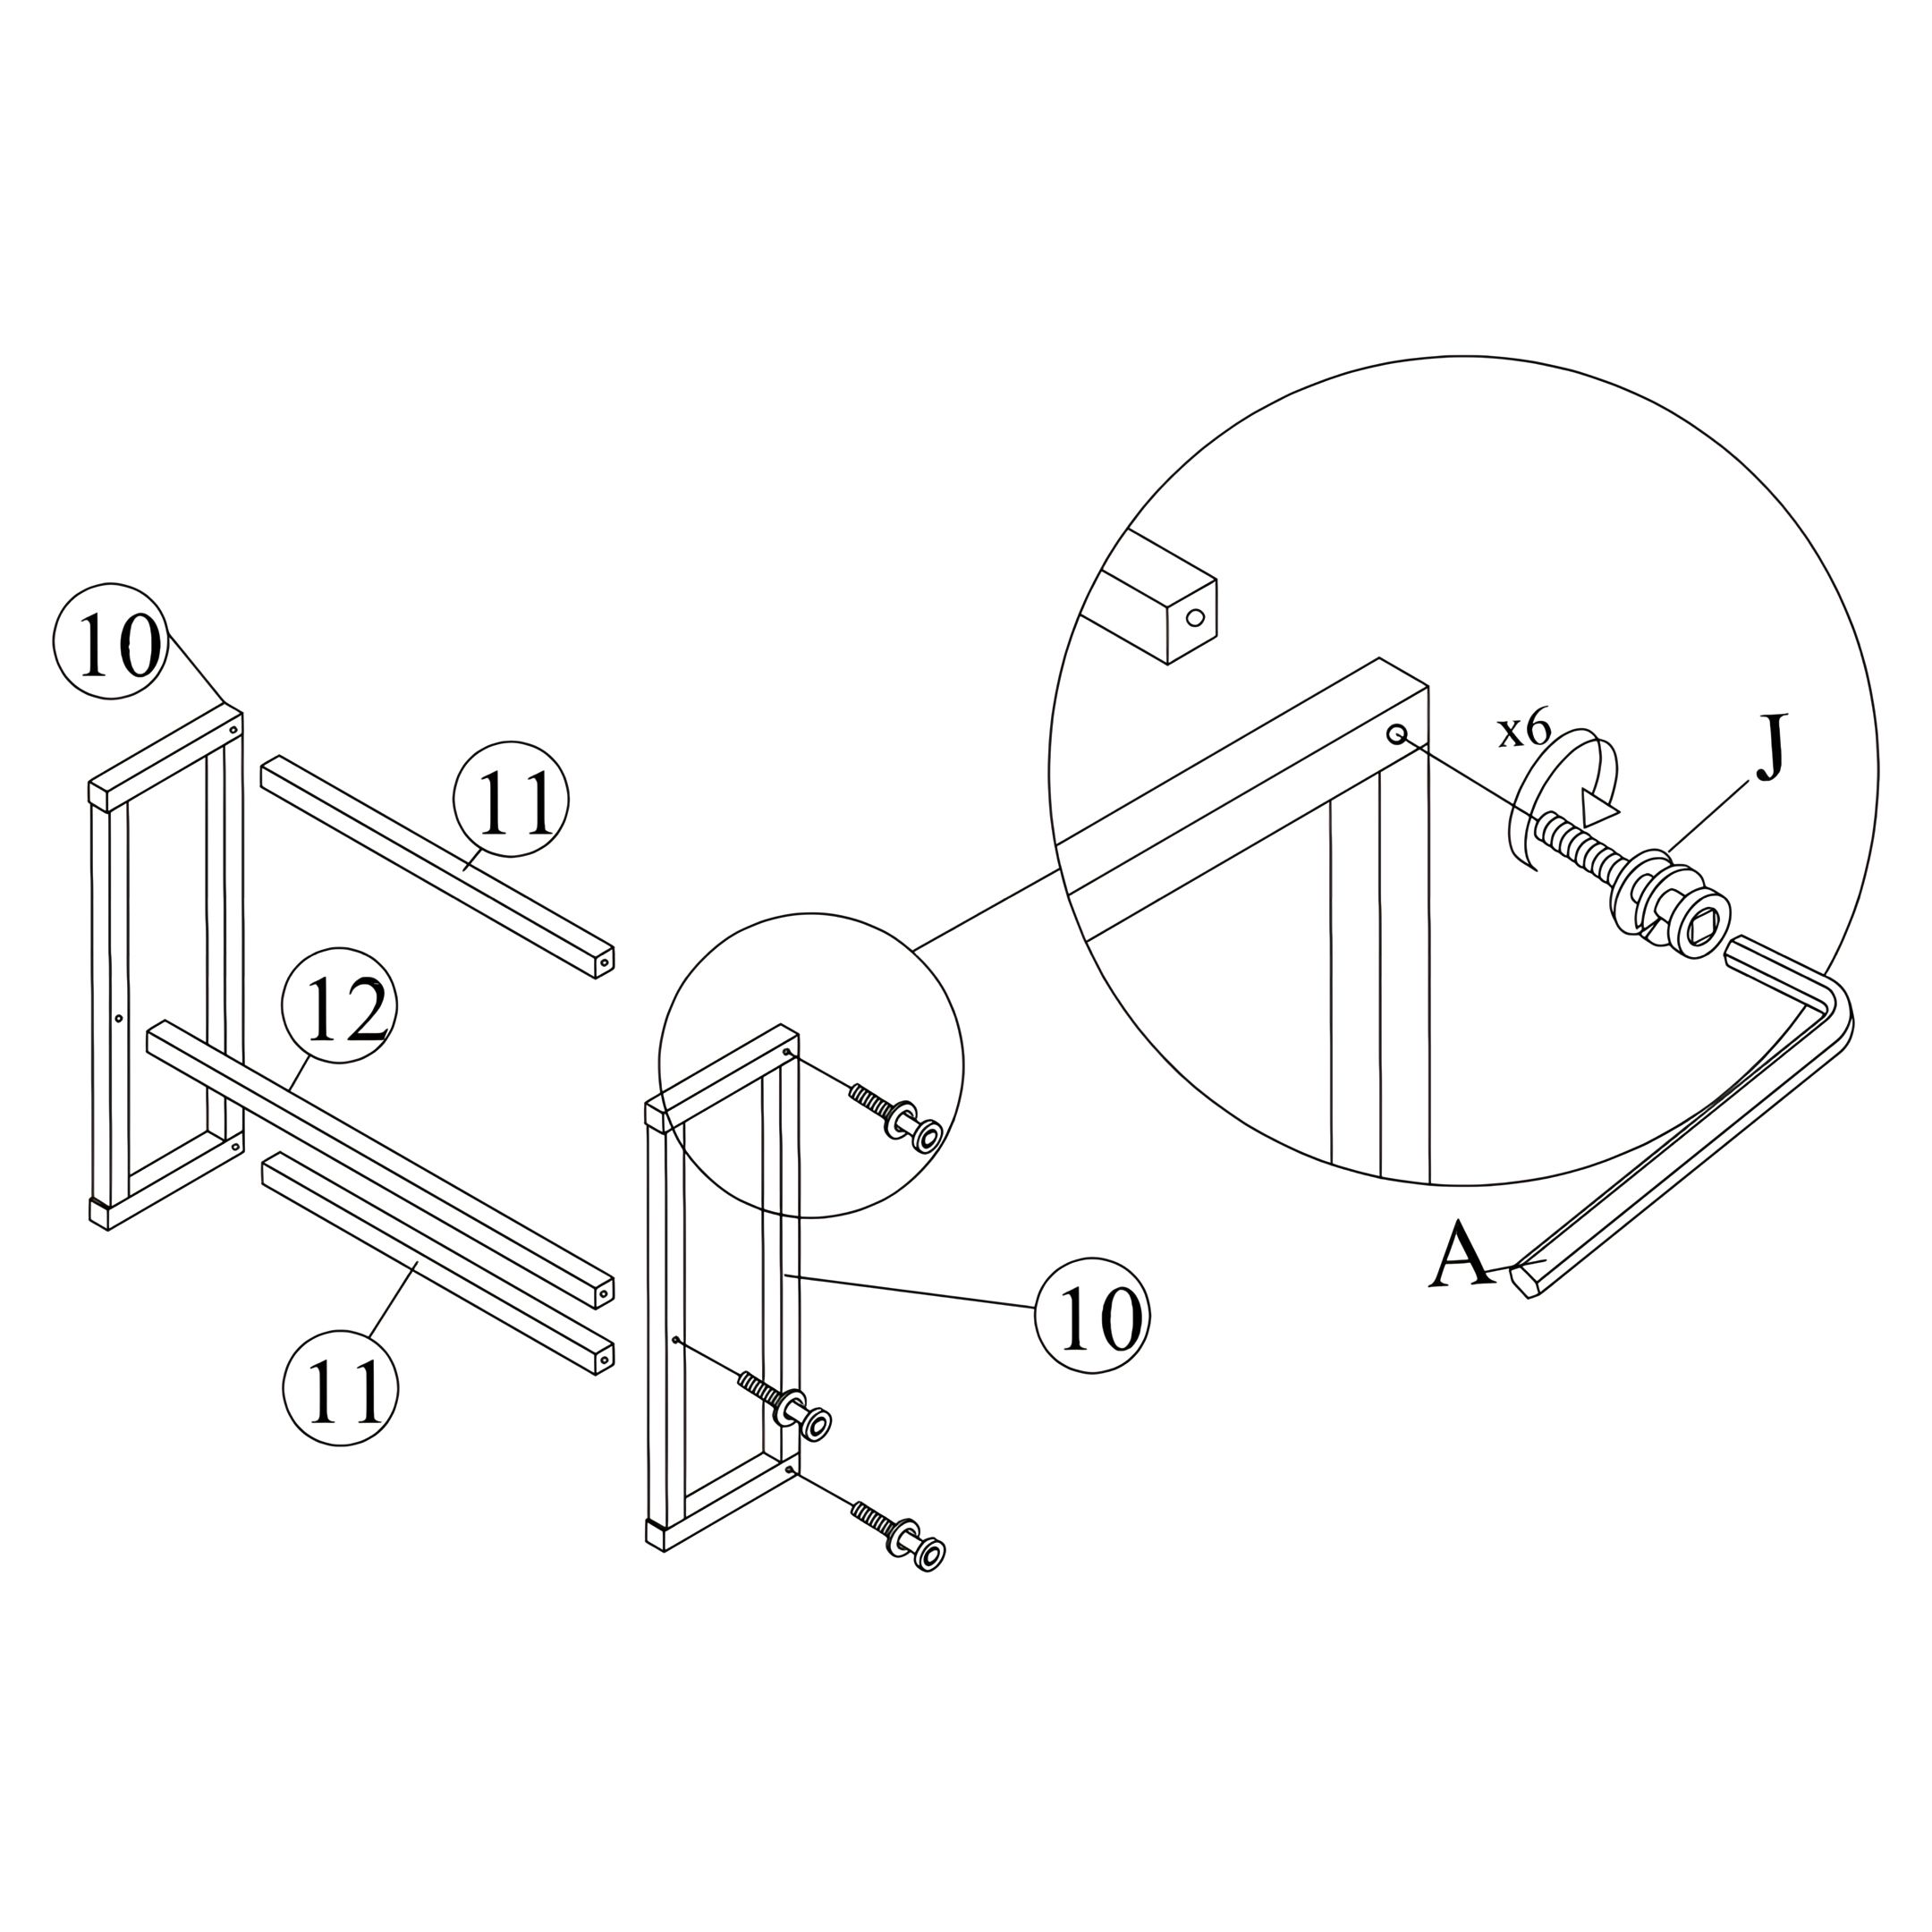
10. Assemble the Metal Base Frame
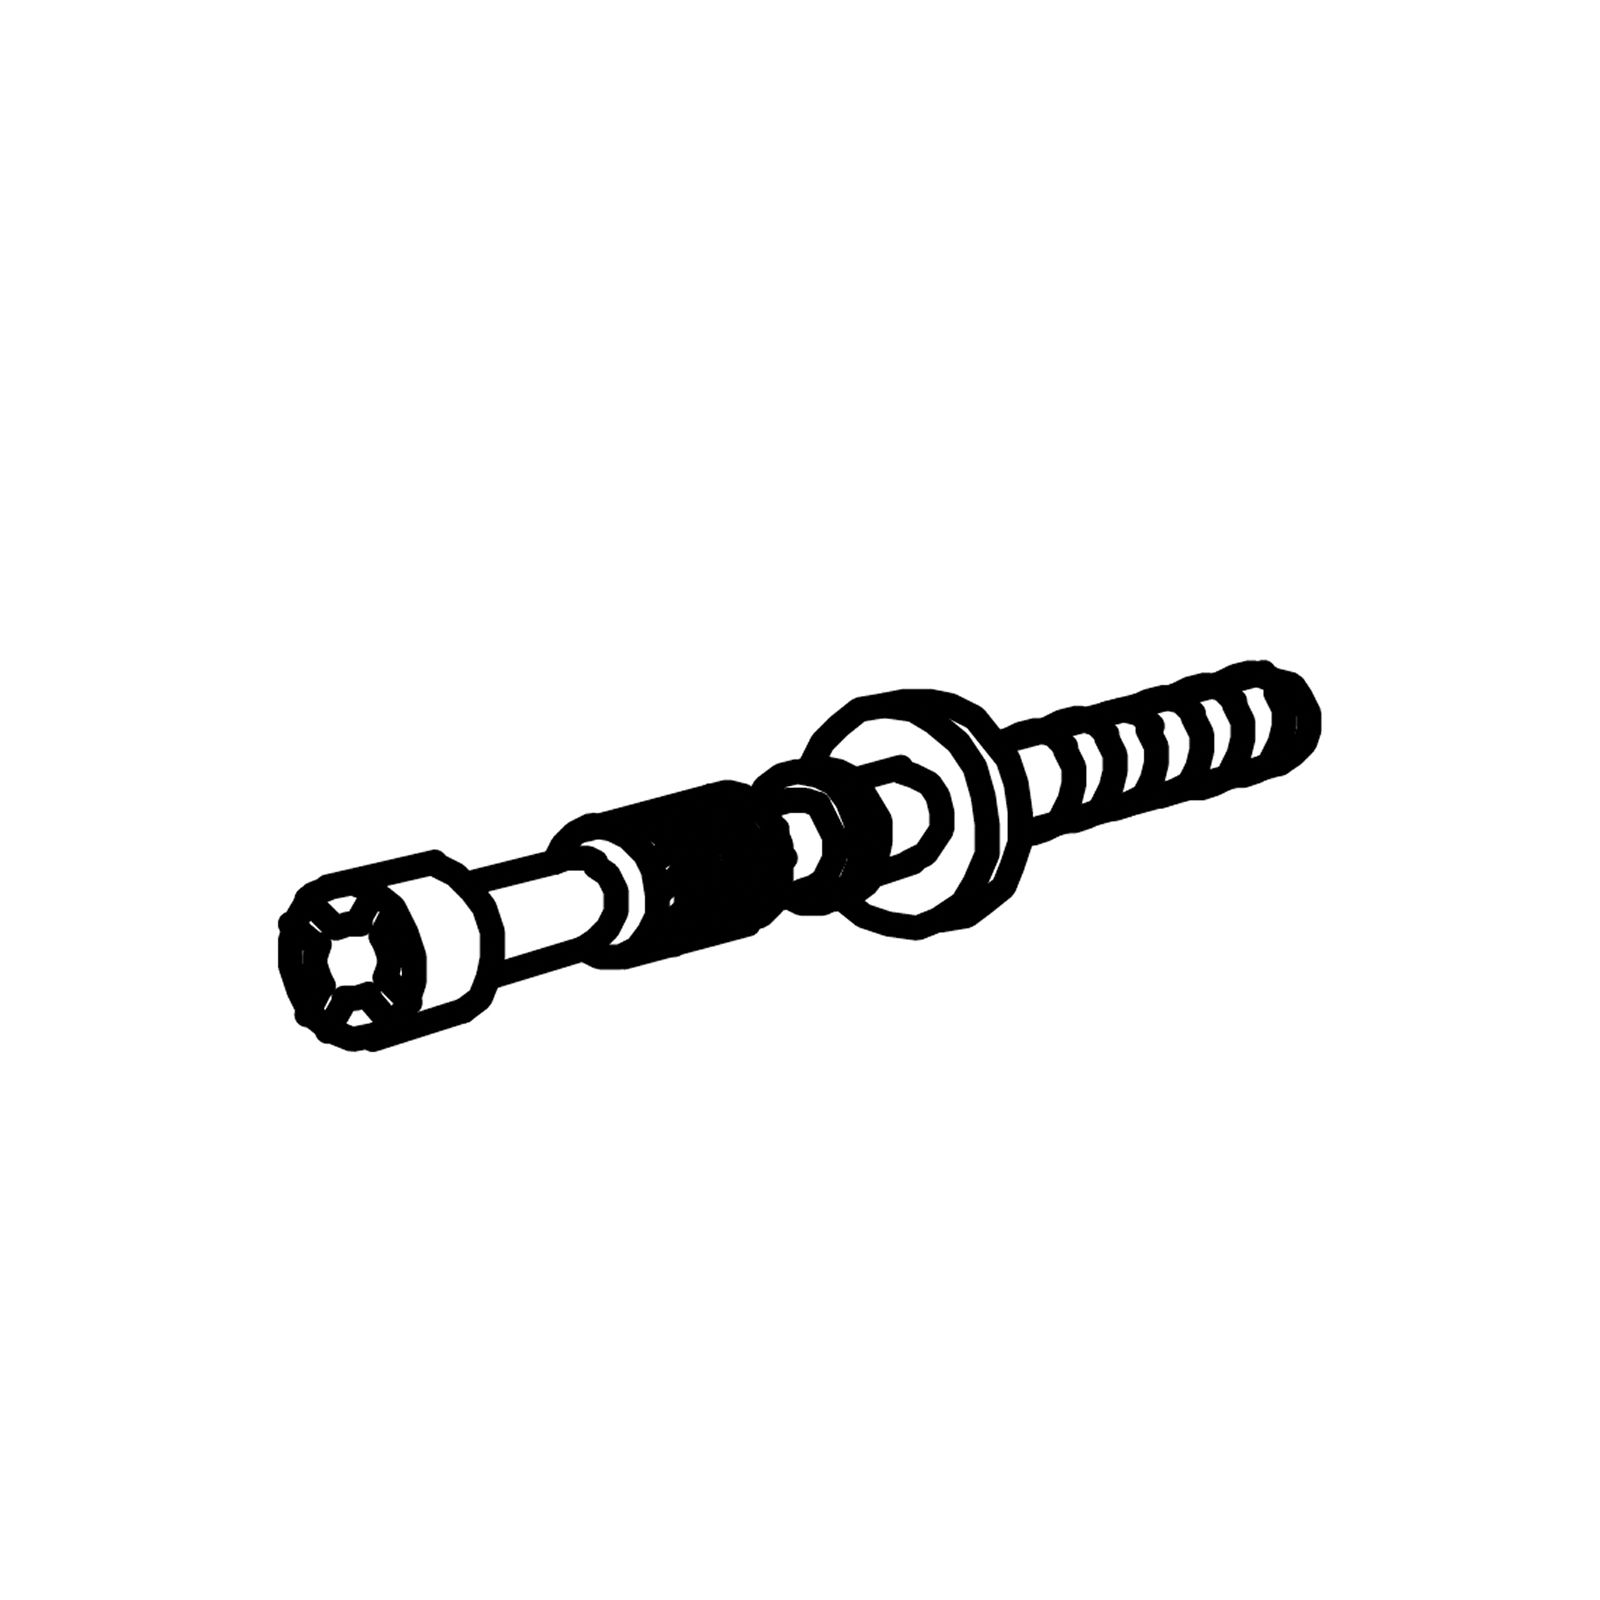
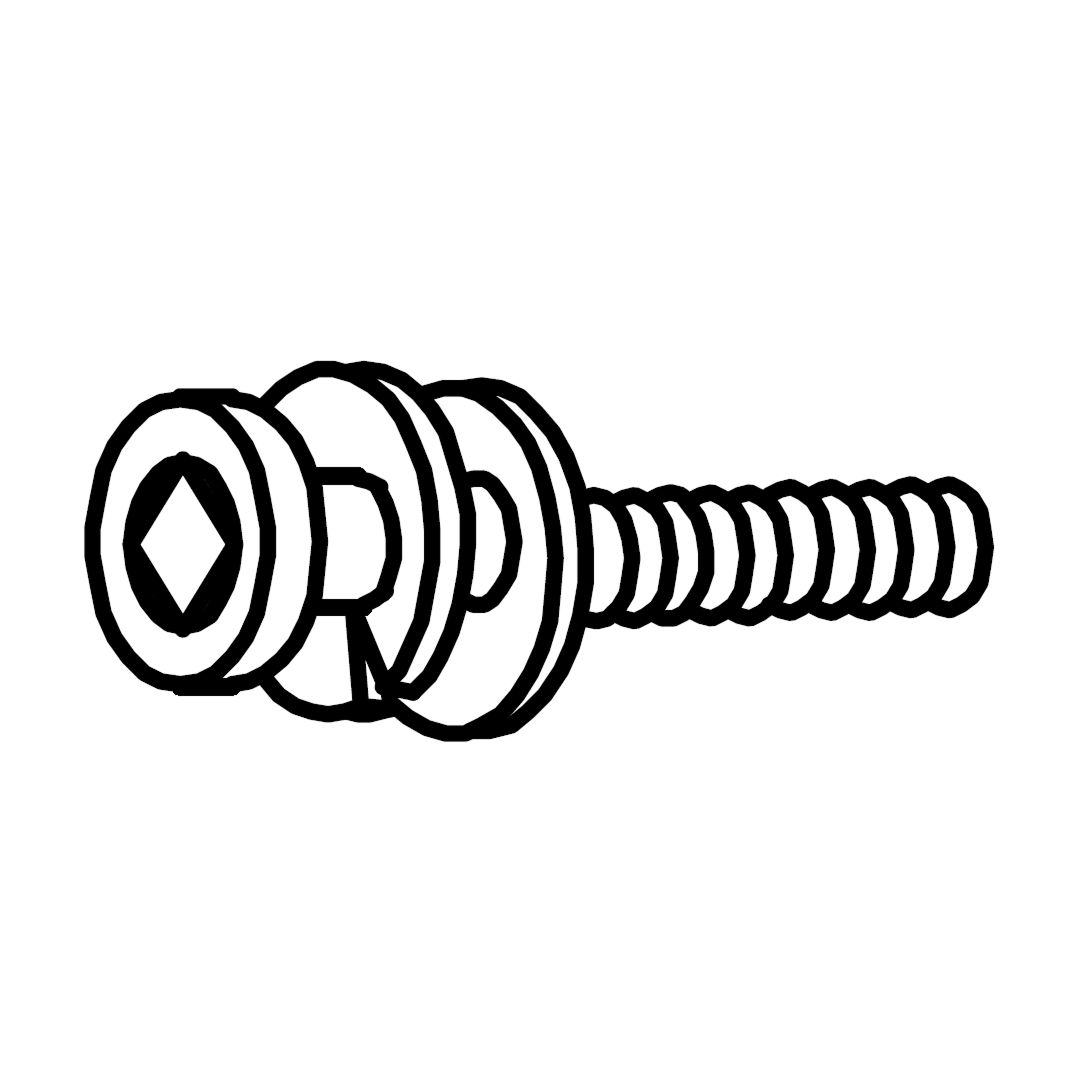
1. Connect the two Metal Frame Legs (10) by attaching the Metal Support Legs (11) and the Metal Centre Leg (12) between them. 2. Align each support leg and the centre leg with the corresponding holes on the inside of the frame legs. 3. Insert 6 x JCBC Screws M6x50 with Spring and Flat Washer (J) through the holes and tighten using the Allen Key M4 (A).
11. Attach the Metal Base to the Main Unit
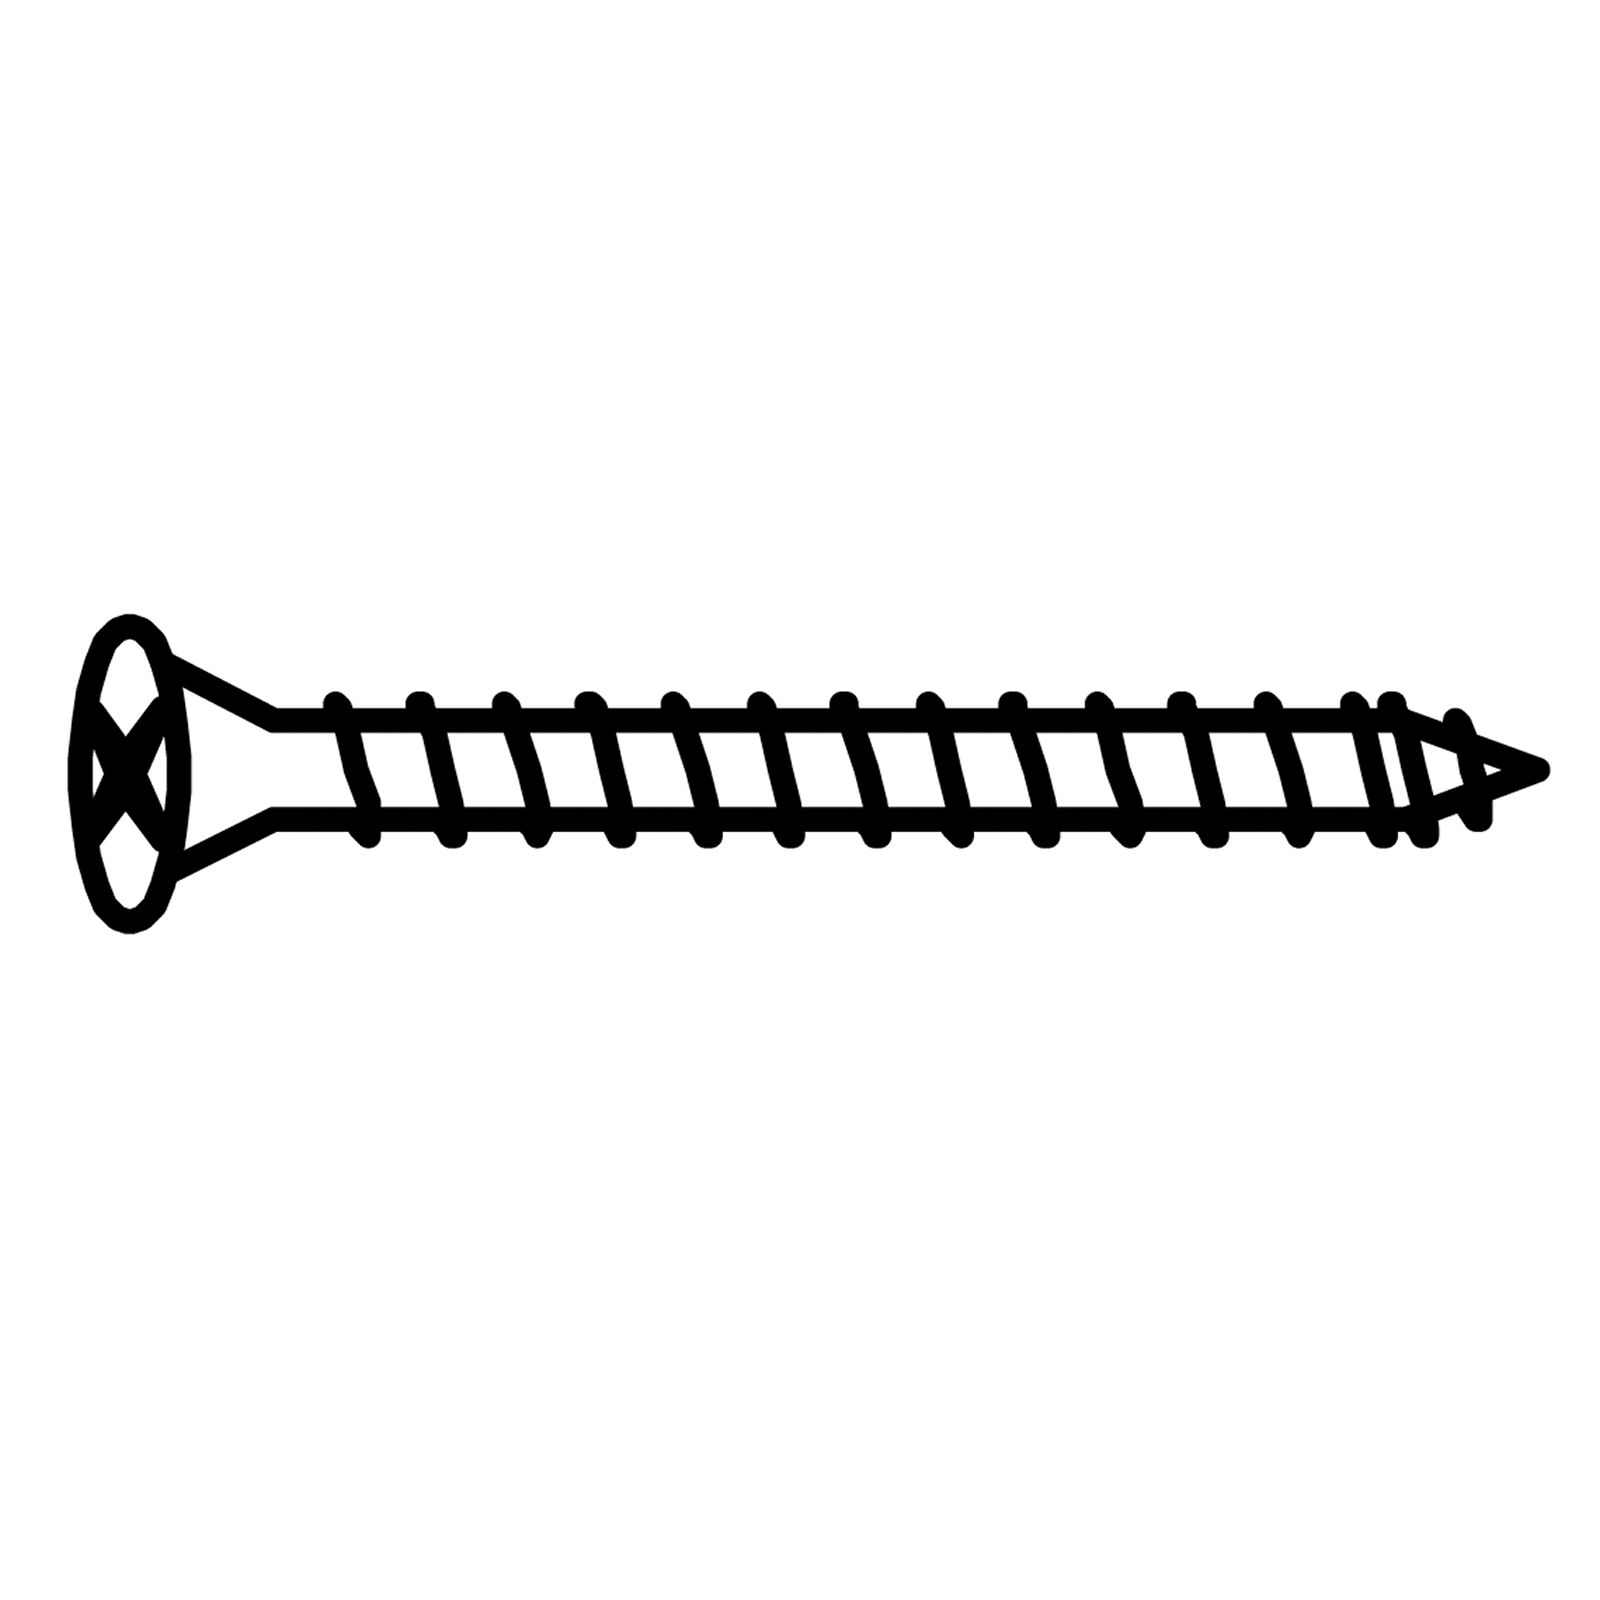
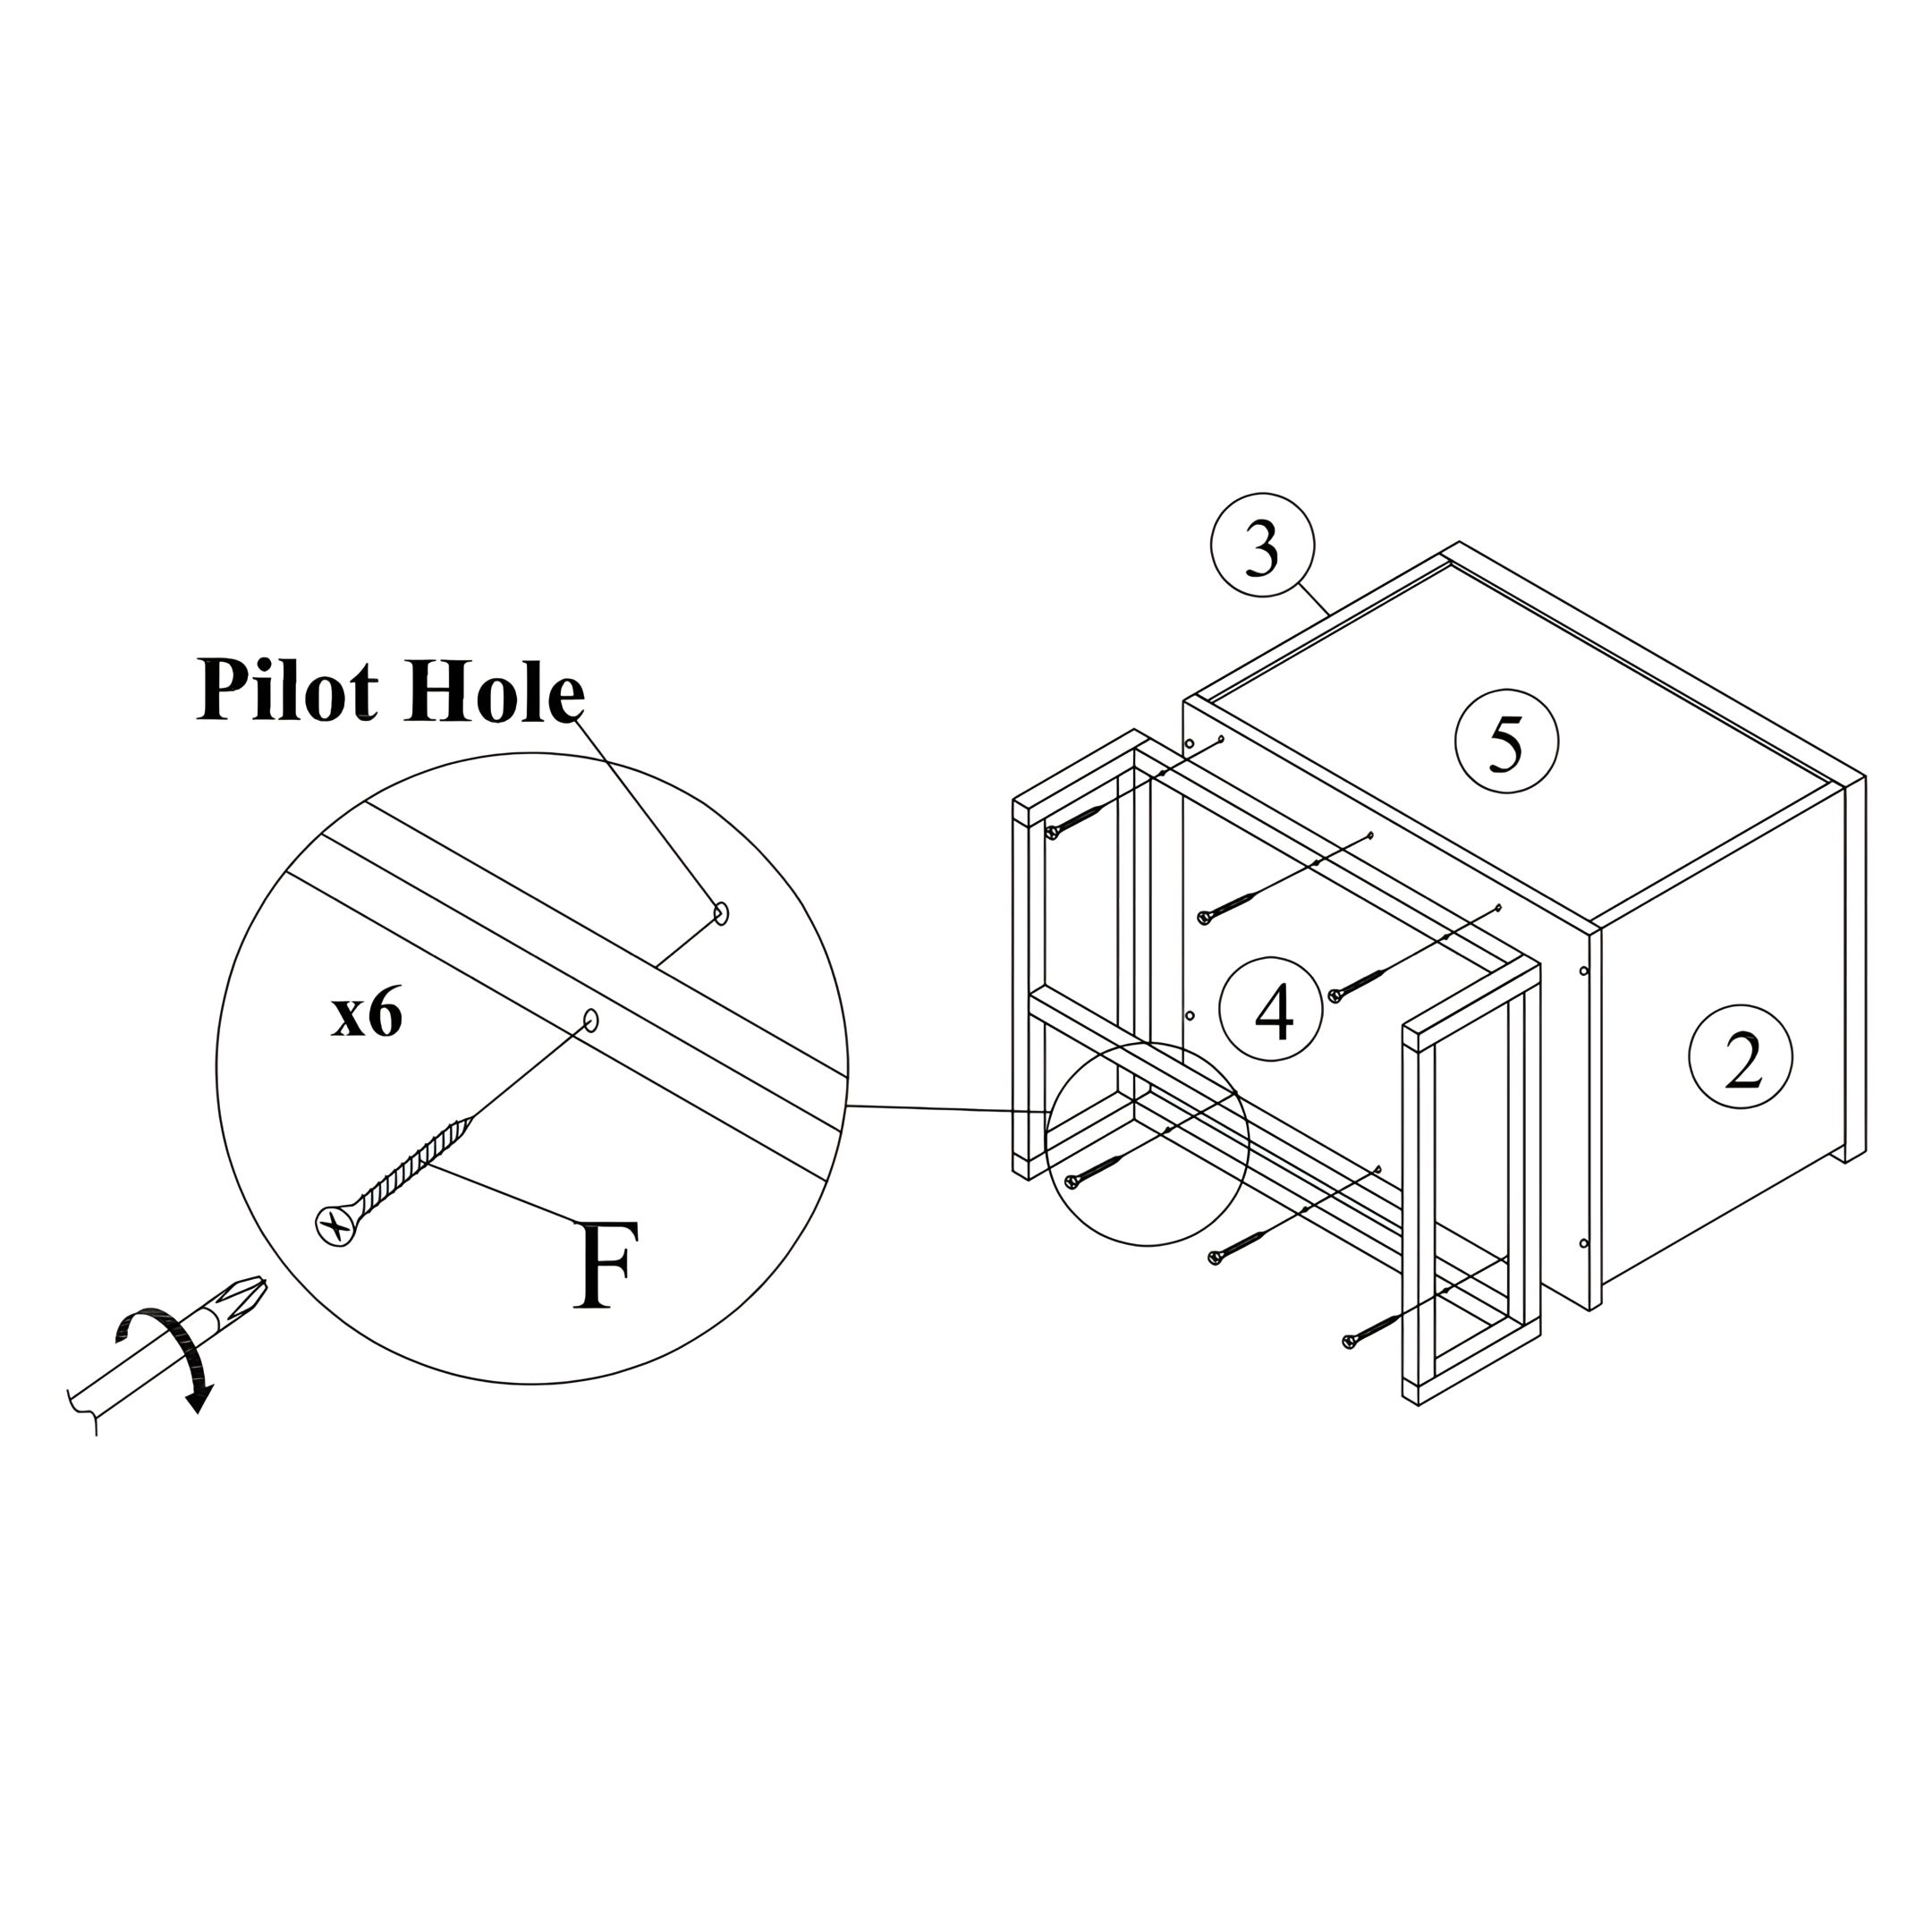
1. Position the fully assembled metal base frame (from Step 10) against the bottom of the main wooden unit. 2. Align the Metal Support Legs (11) with the pilot holes on the Bottom Panel (4). 3. Using 6 x CSK Screws M4x32mm (F), fasten the frame to the unit by driving screws through the pilot holes and into the wood.
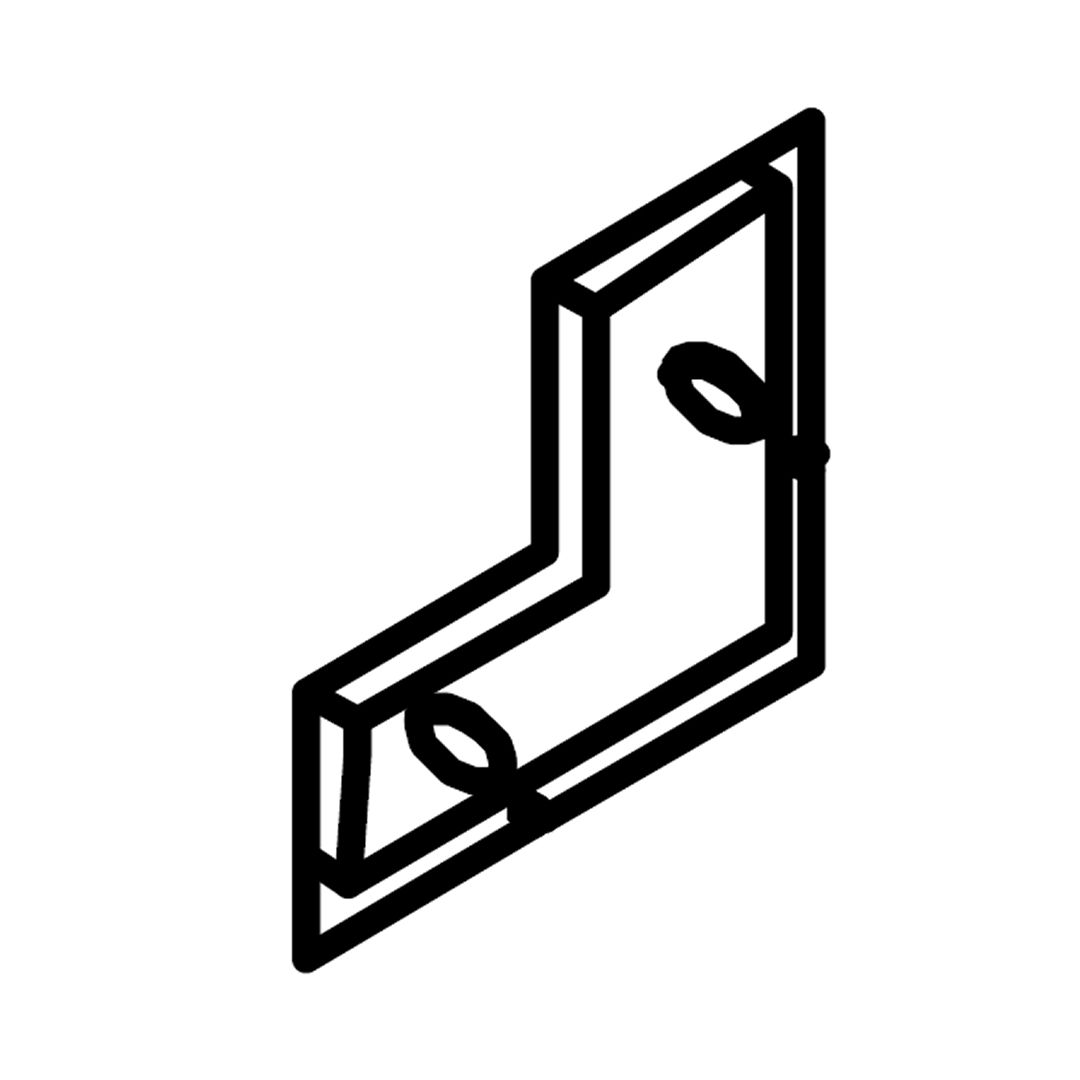
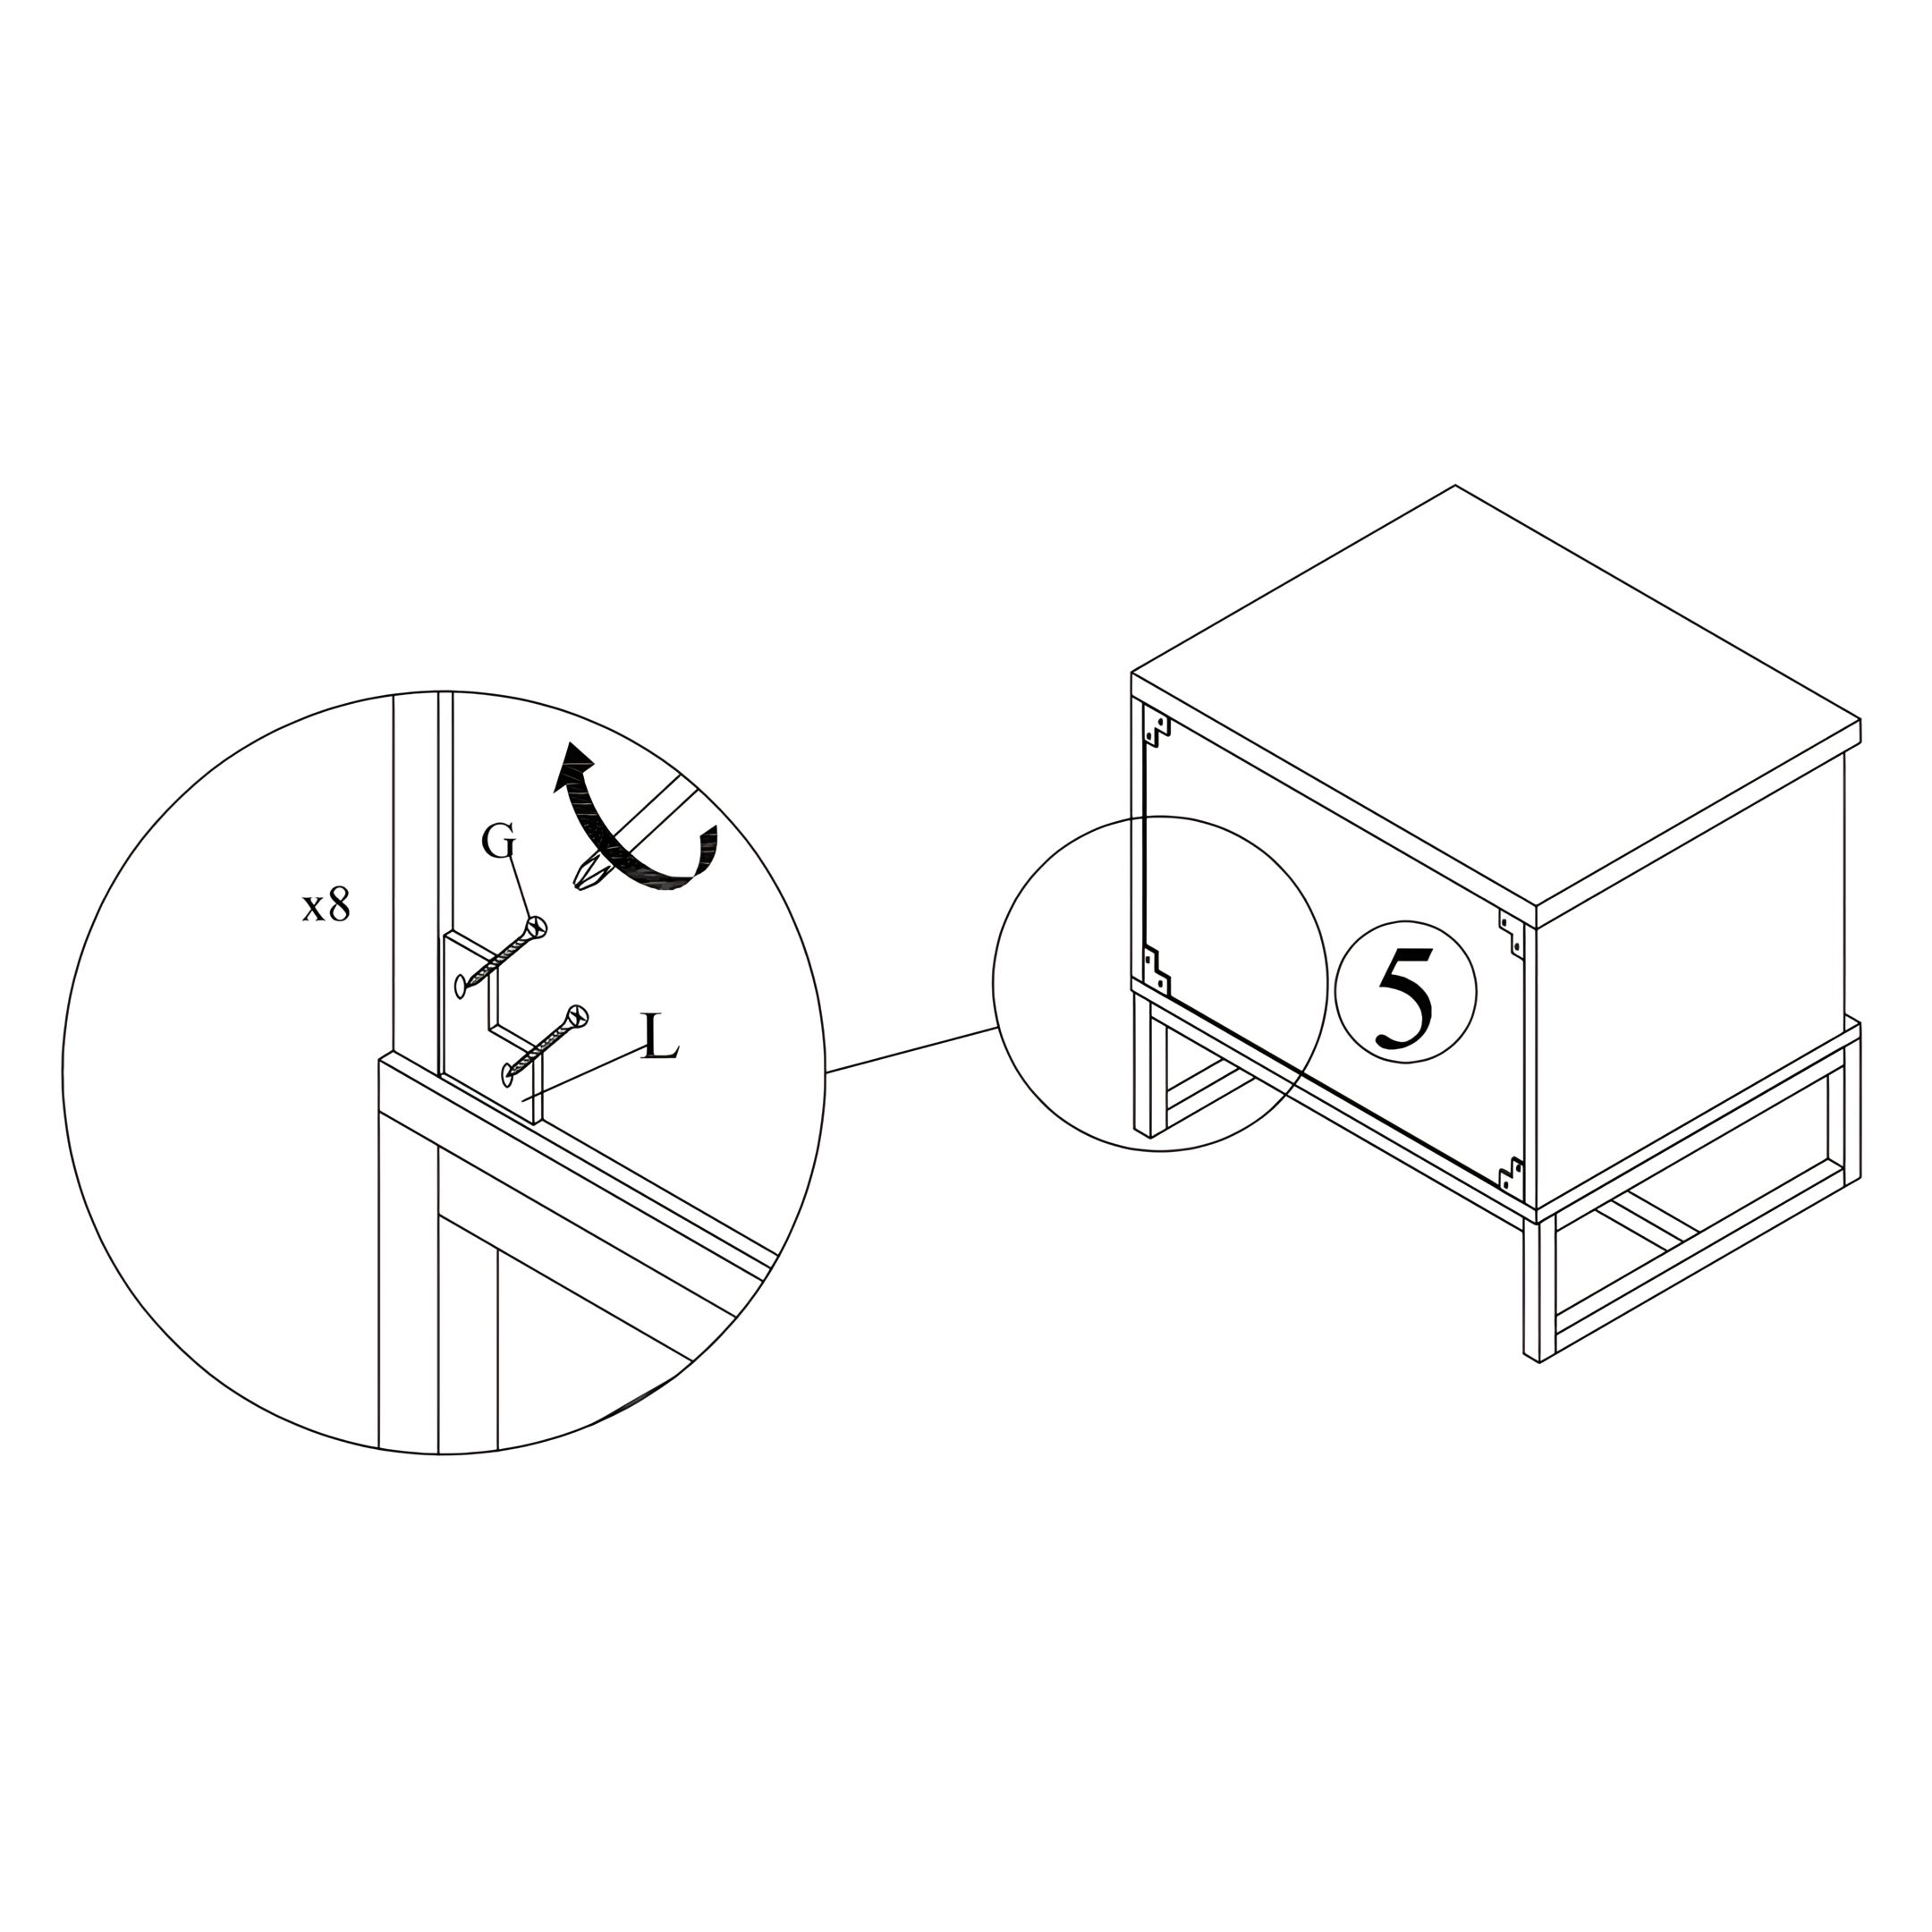
12. Secure the Frame with L Brackets
1. Attach 4 x L Brackets (L) to the inner corners where the Metal Frame Legs (10) meet the Bottom Panel (4). 2. Use 8 x CSK Screws M3.5x16mm (G) to fasten the brackets into place — two screws per bracket. 3. Make sure the brackets are flush and properly aligned for a sturdy frame.
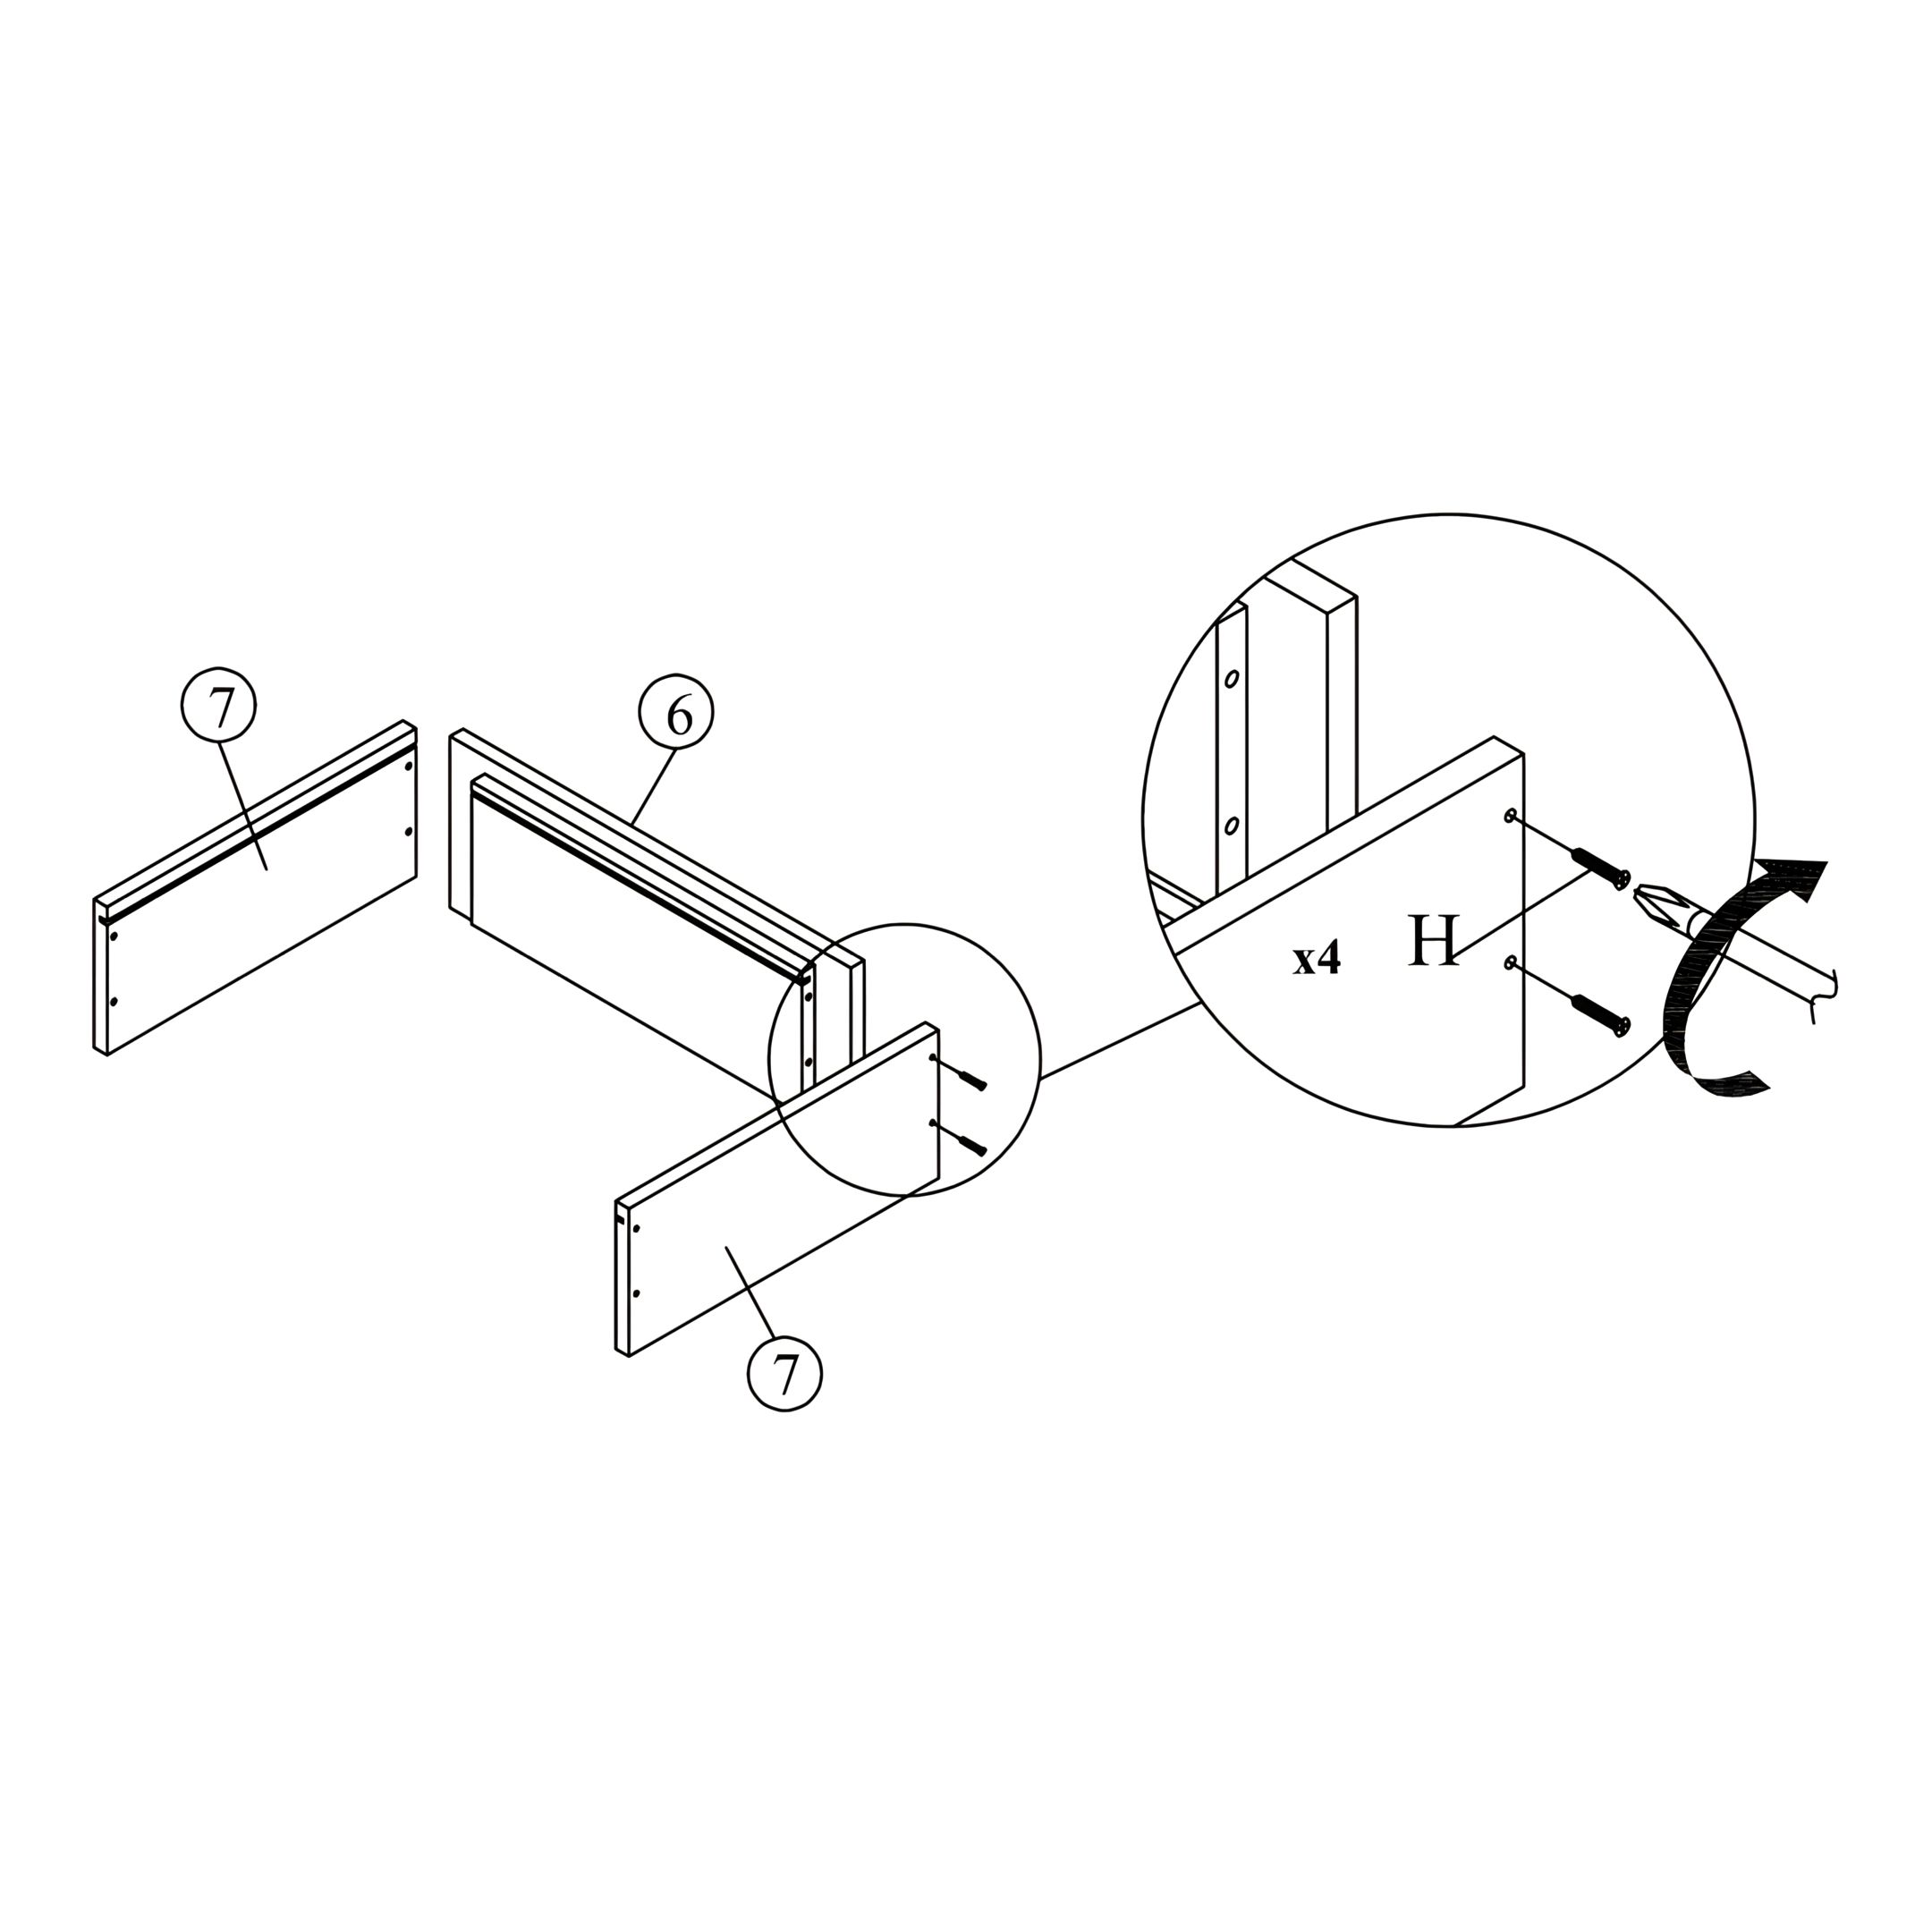
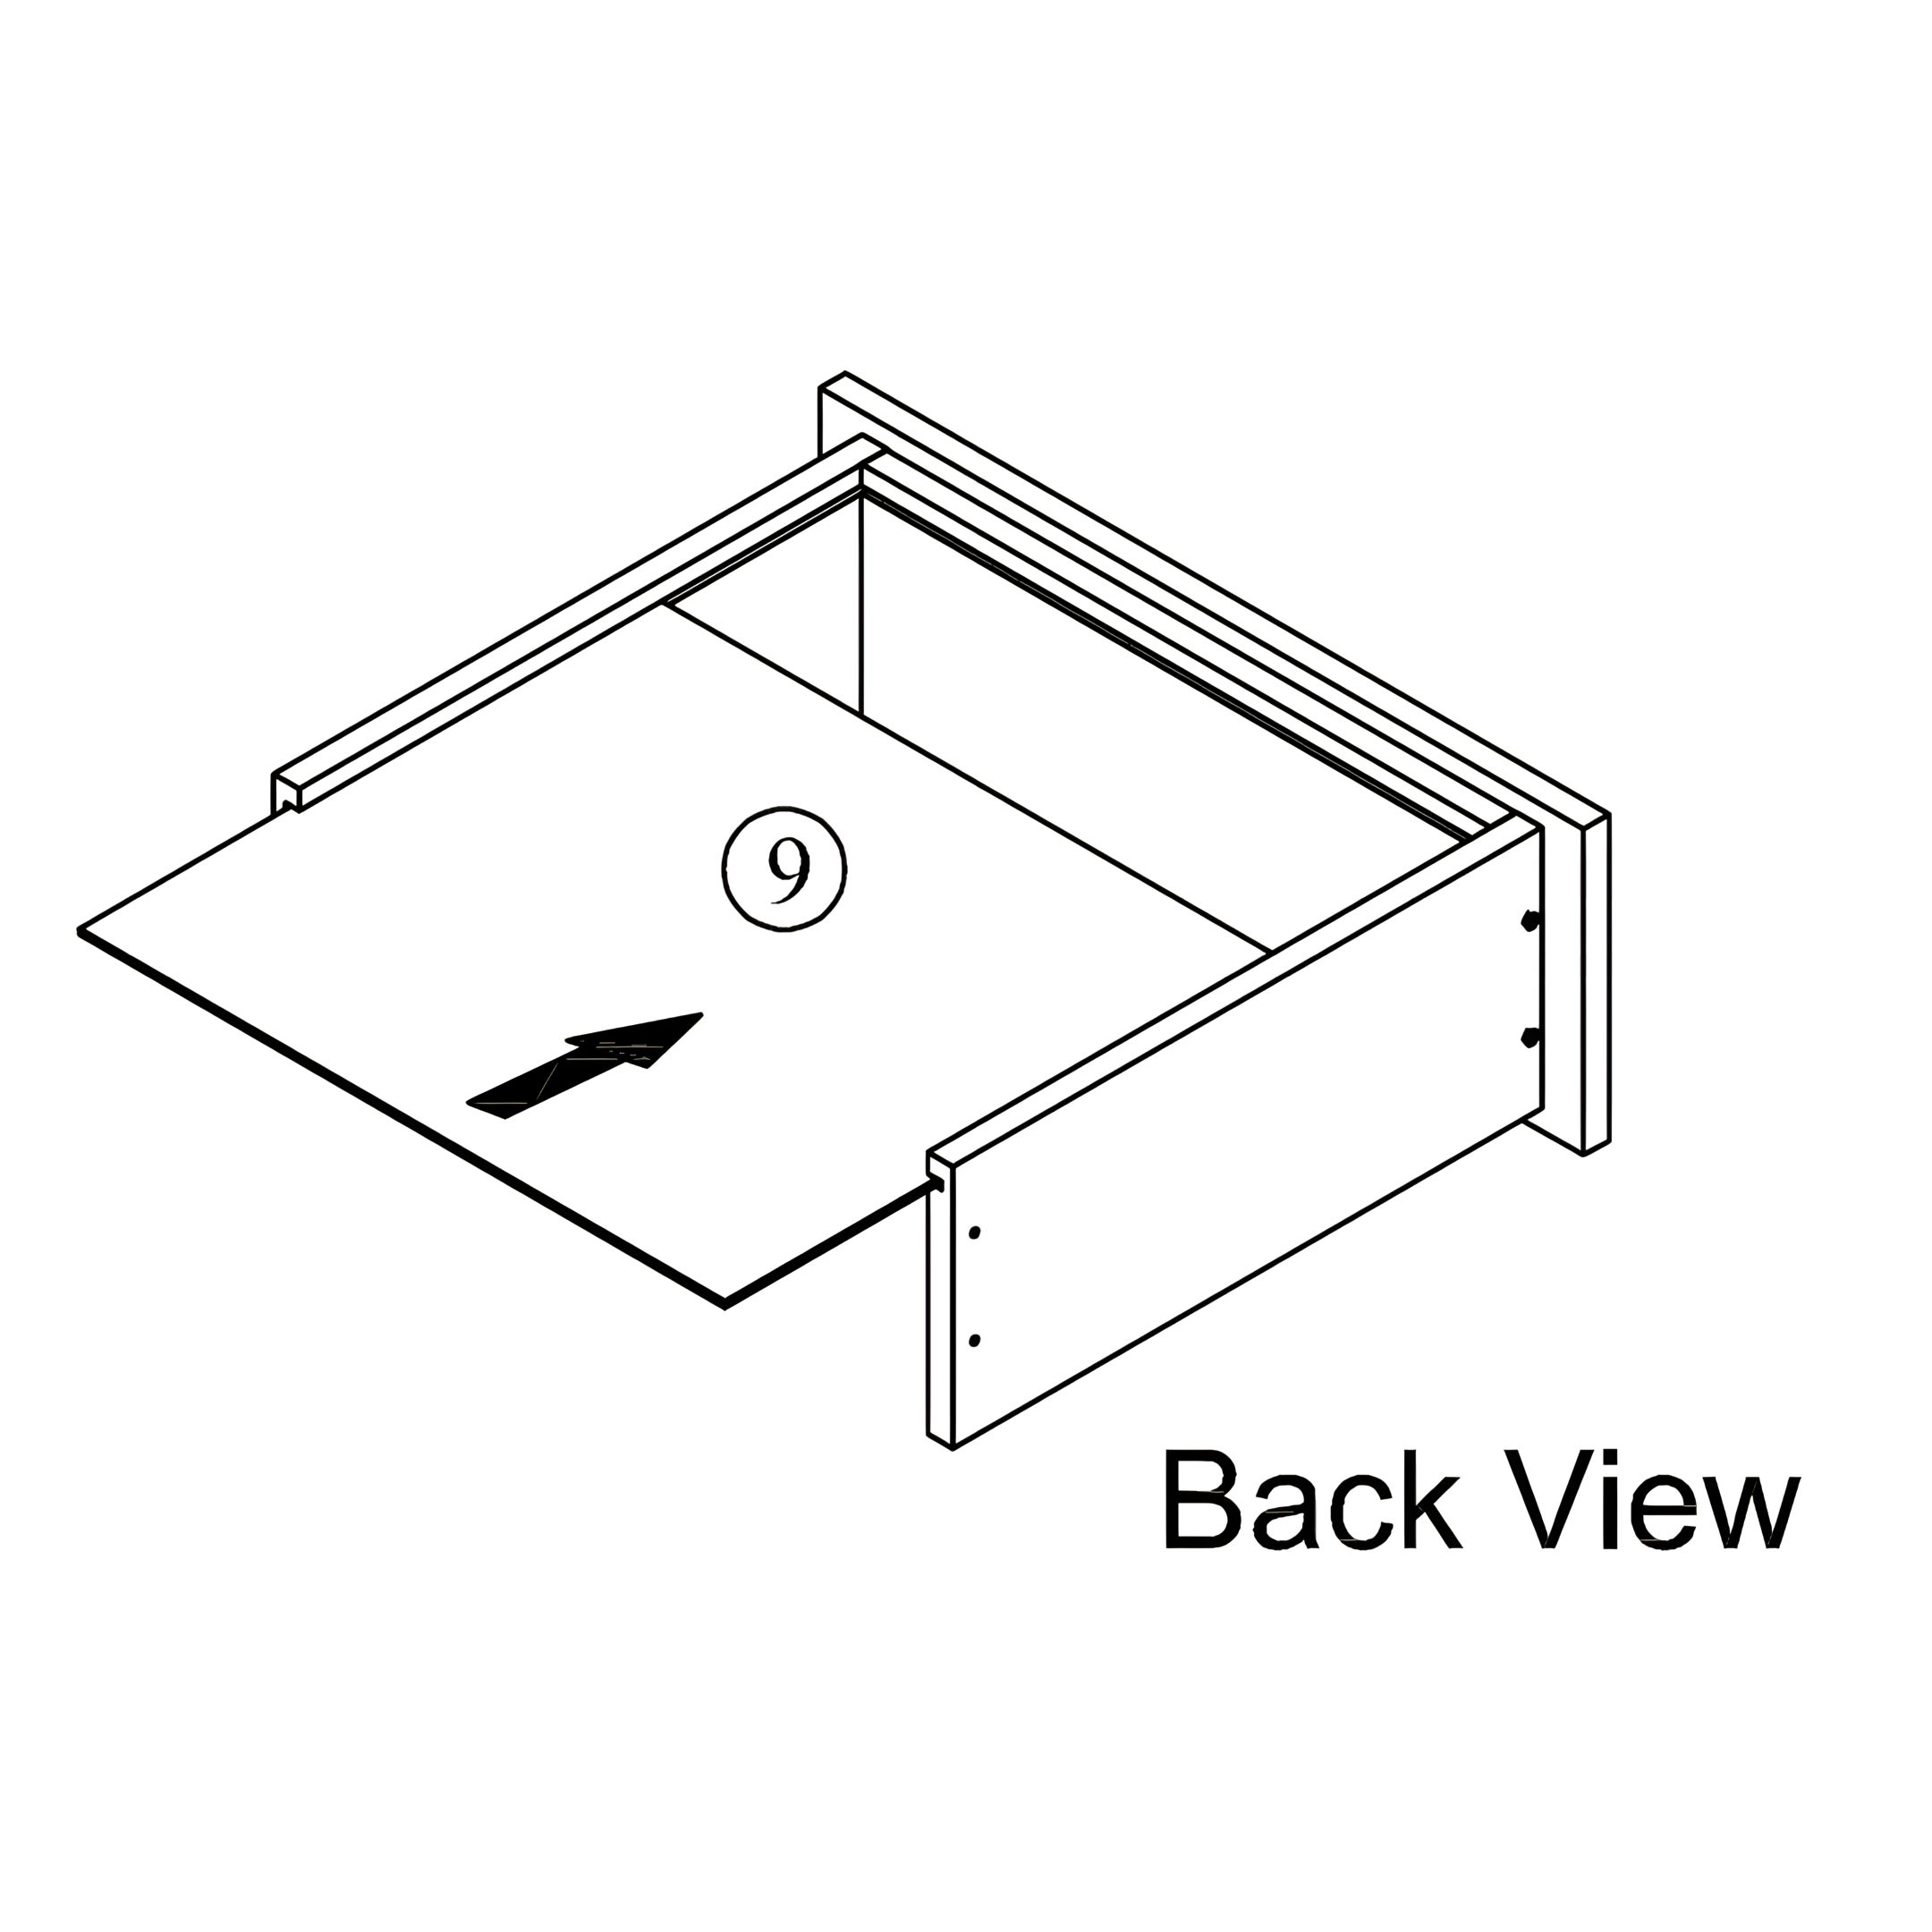
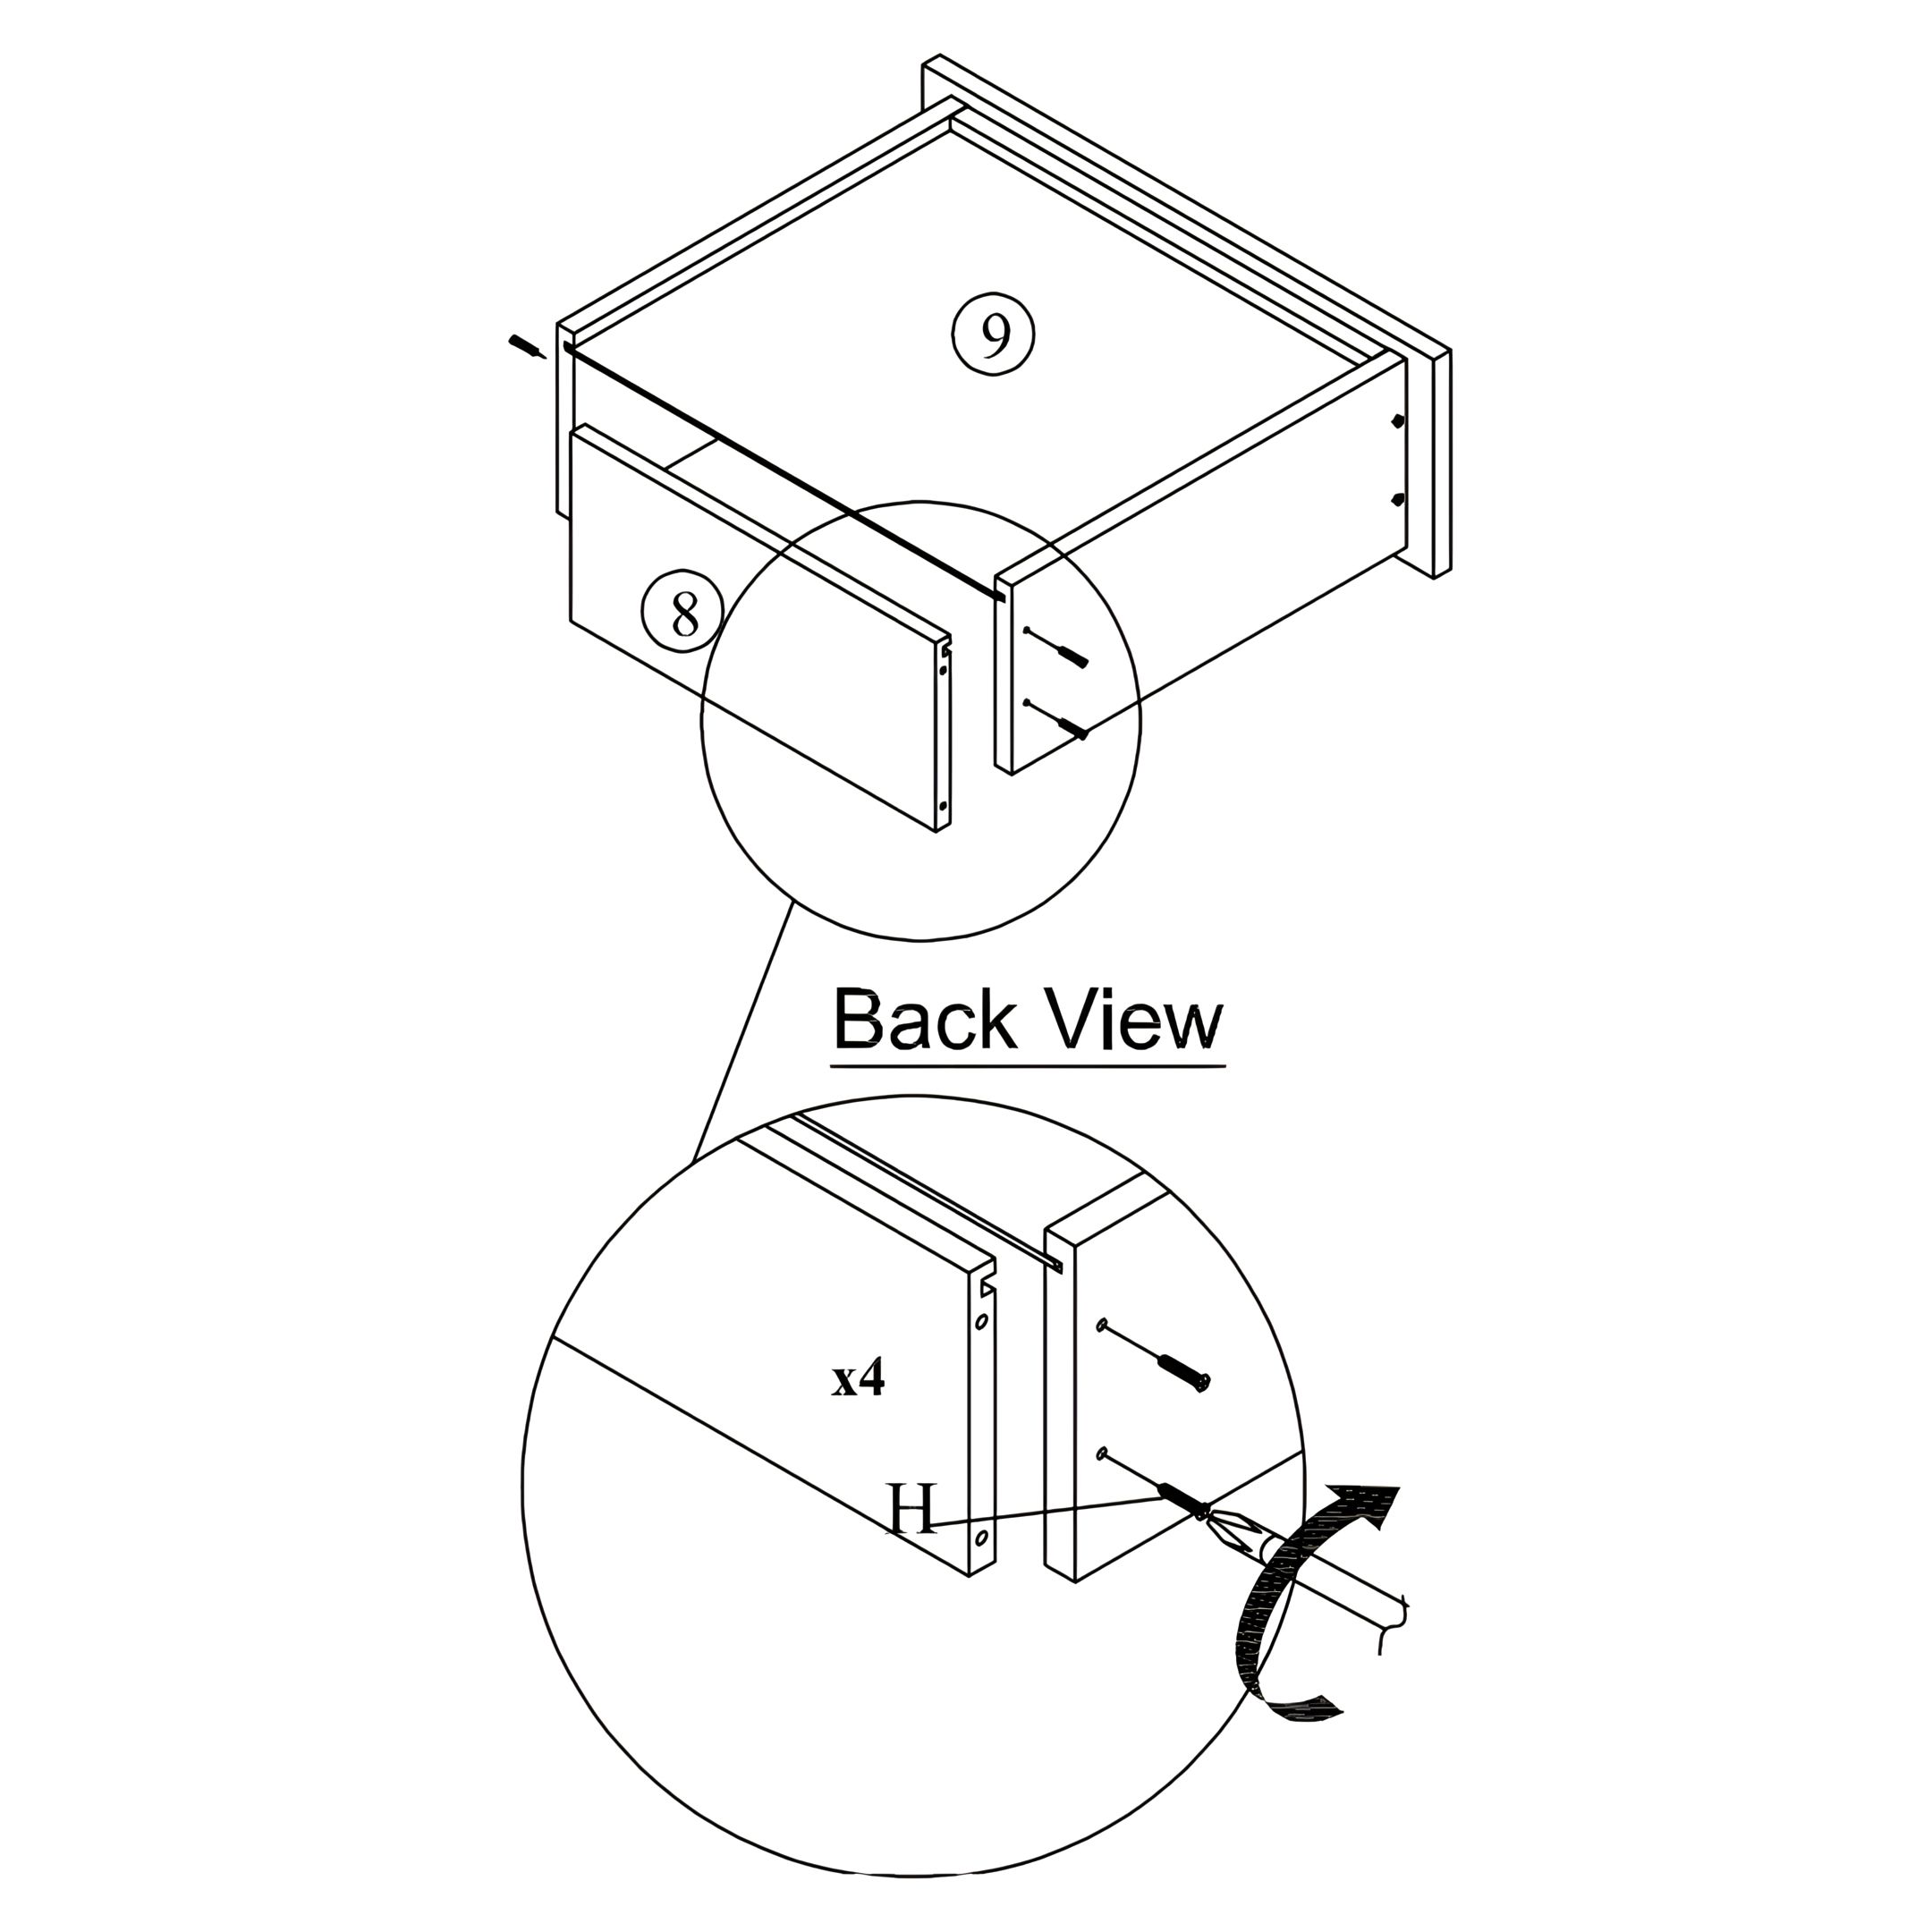
13. Assemble the Drawer
1. Attach the two Drawer Side Panels (7) to the Drawer Front Panel (6) using 4 CSK Screws M4x50mm (H). 2. Slide the Drawer Bottom Panel (9) into the grooves on the inner side of the drawer frame. 3. Secure the Drawer Back Panel (8) to the Drawer Side Panels using 4 more CSK Screws M4x50mm (H), as shown in the back view.
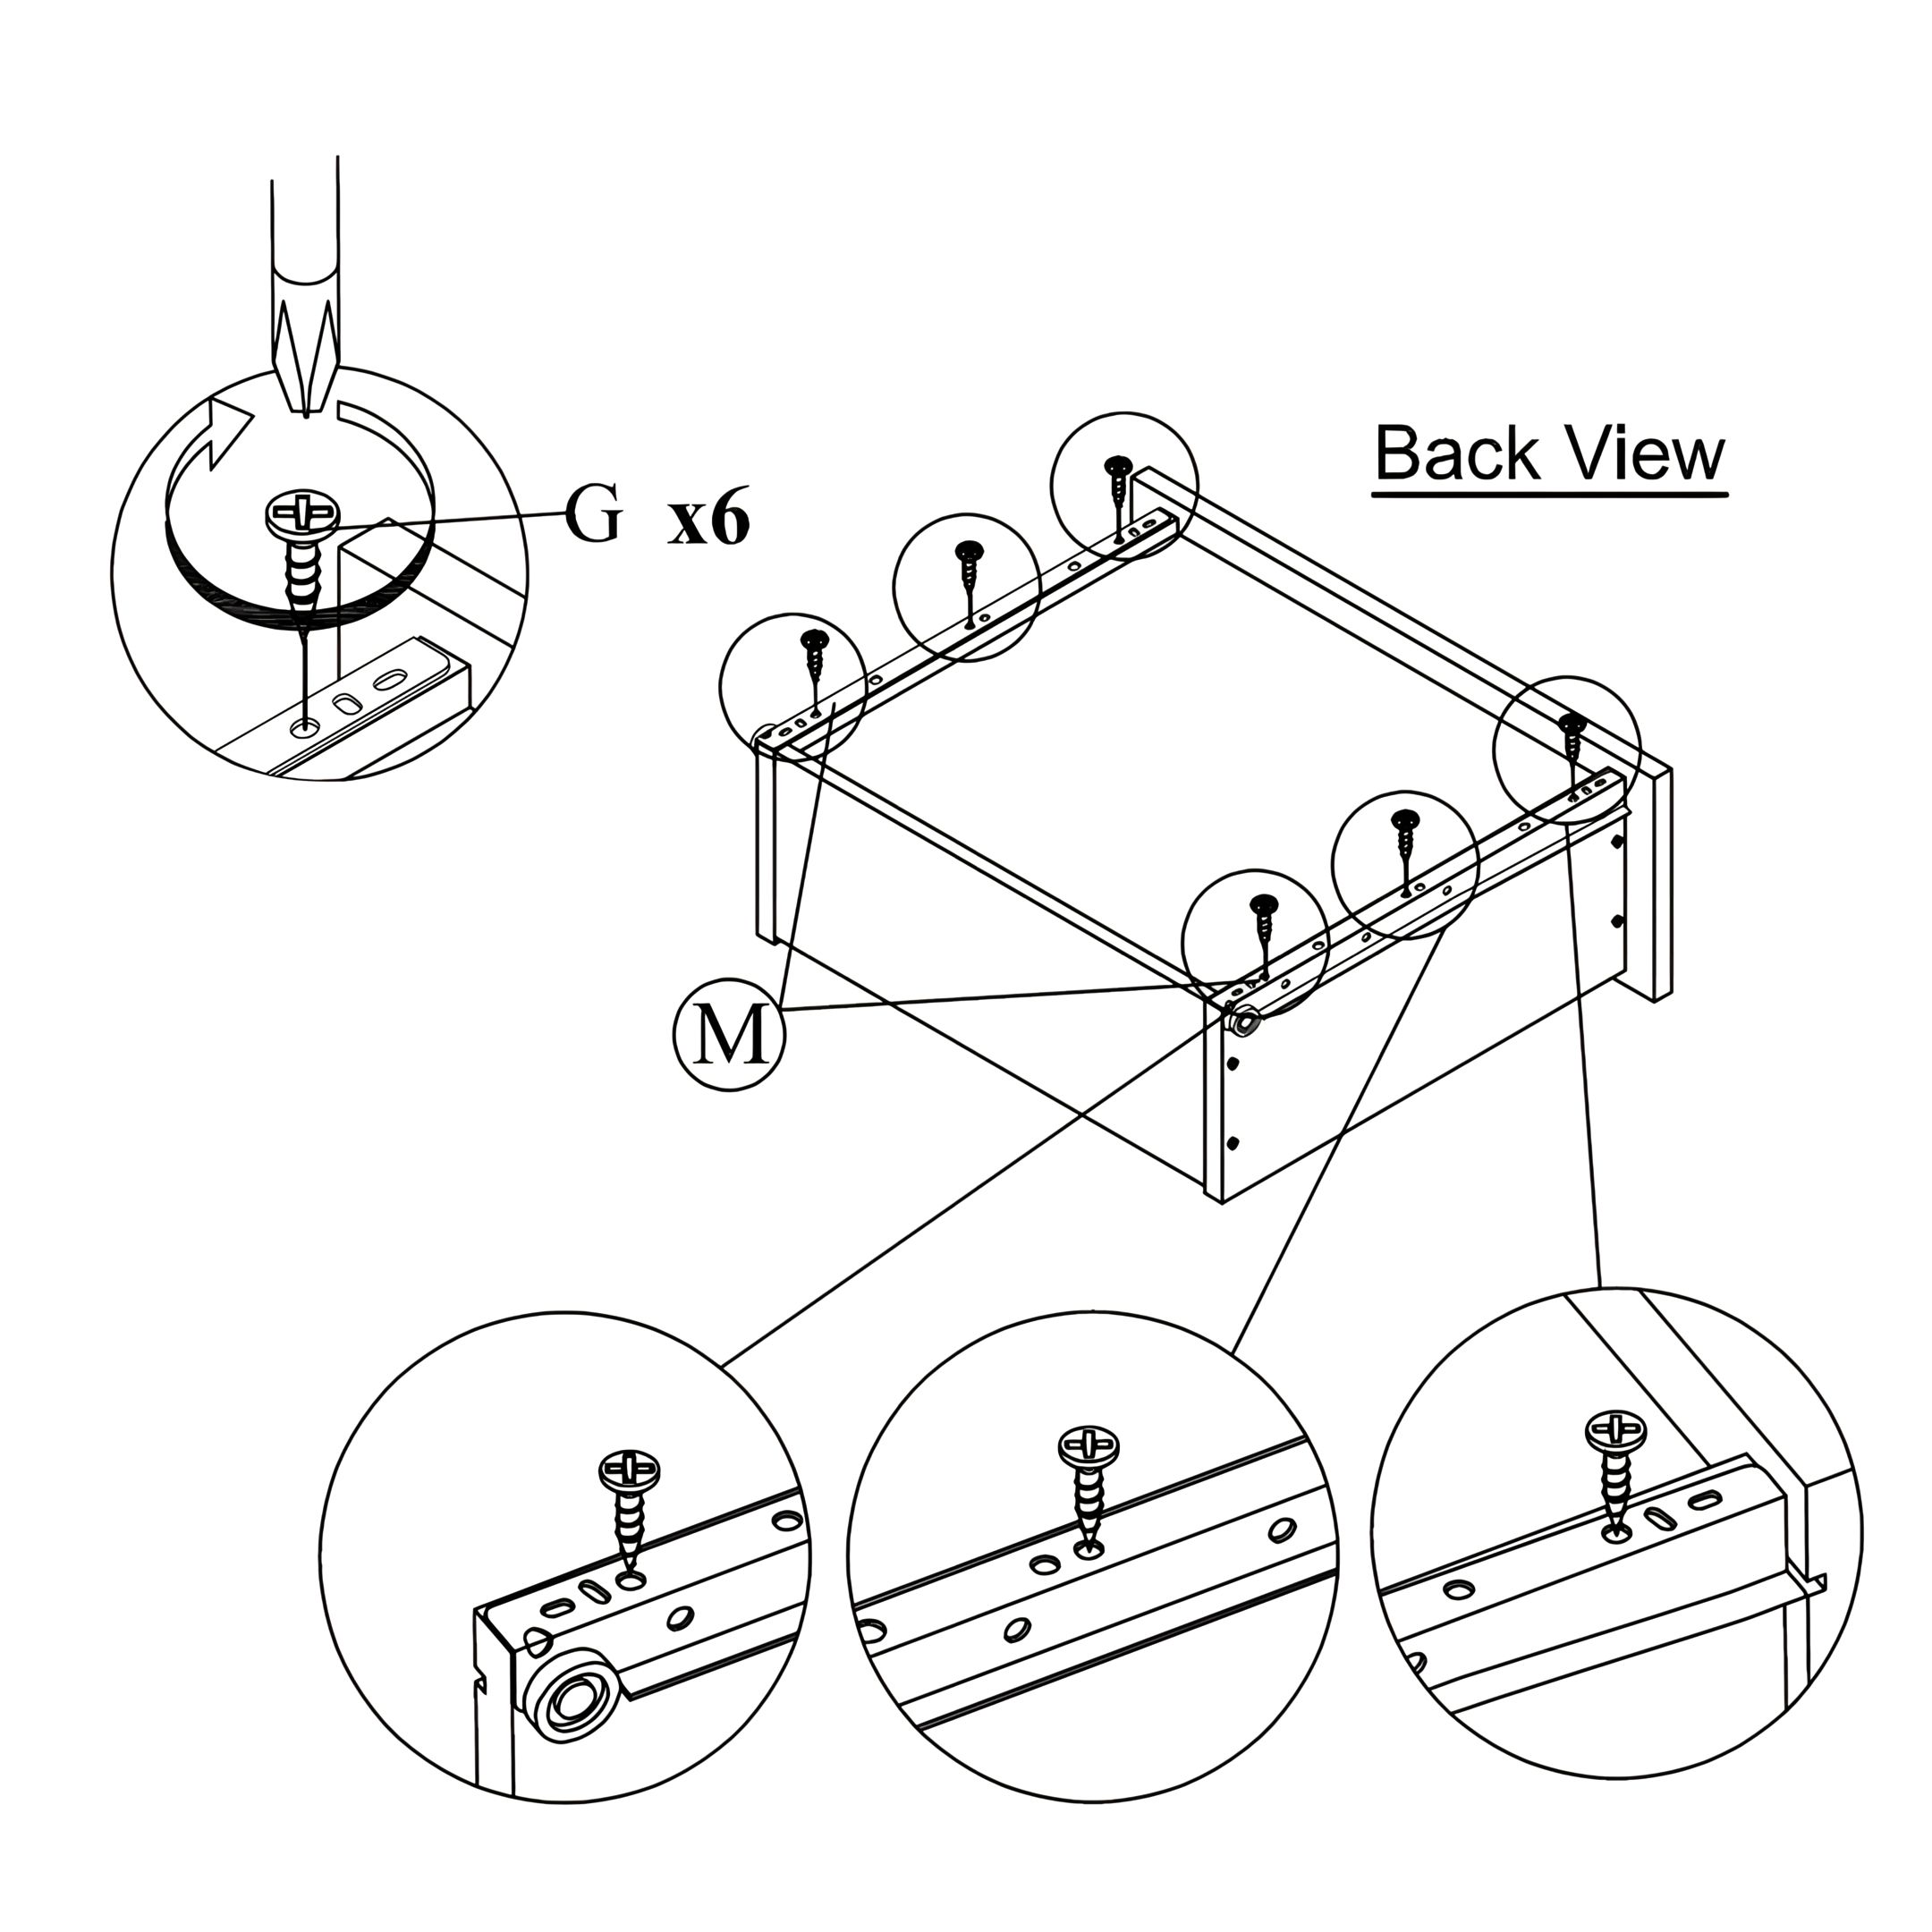
14. Attach the Drawer Slides
1. Flip the drawer unit to reveal the underside as shown in the back view. 2. Align the drawer slides (M) to the side panels. 3. Secure them using 6 CSK Screws M3.5x16mm (G), making sure they align properly with the holes.
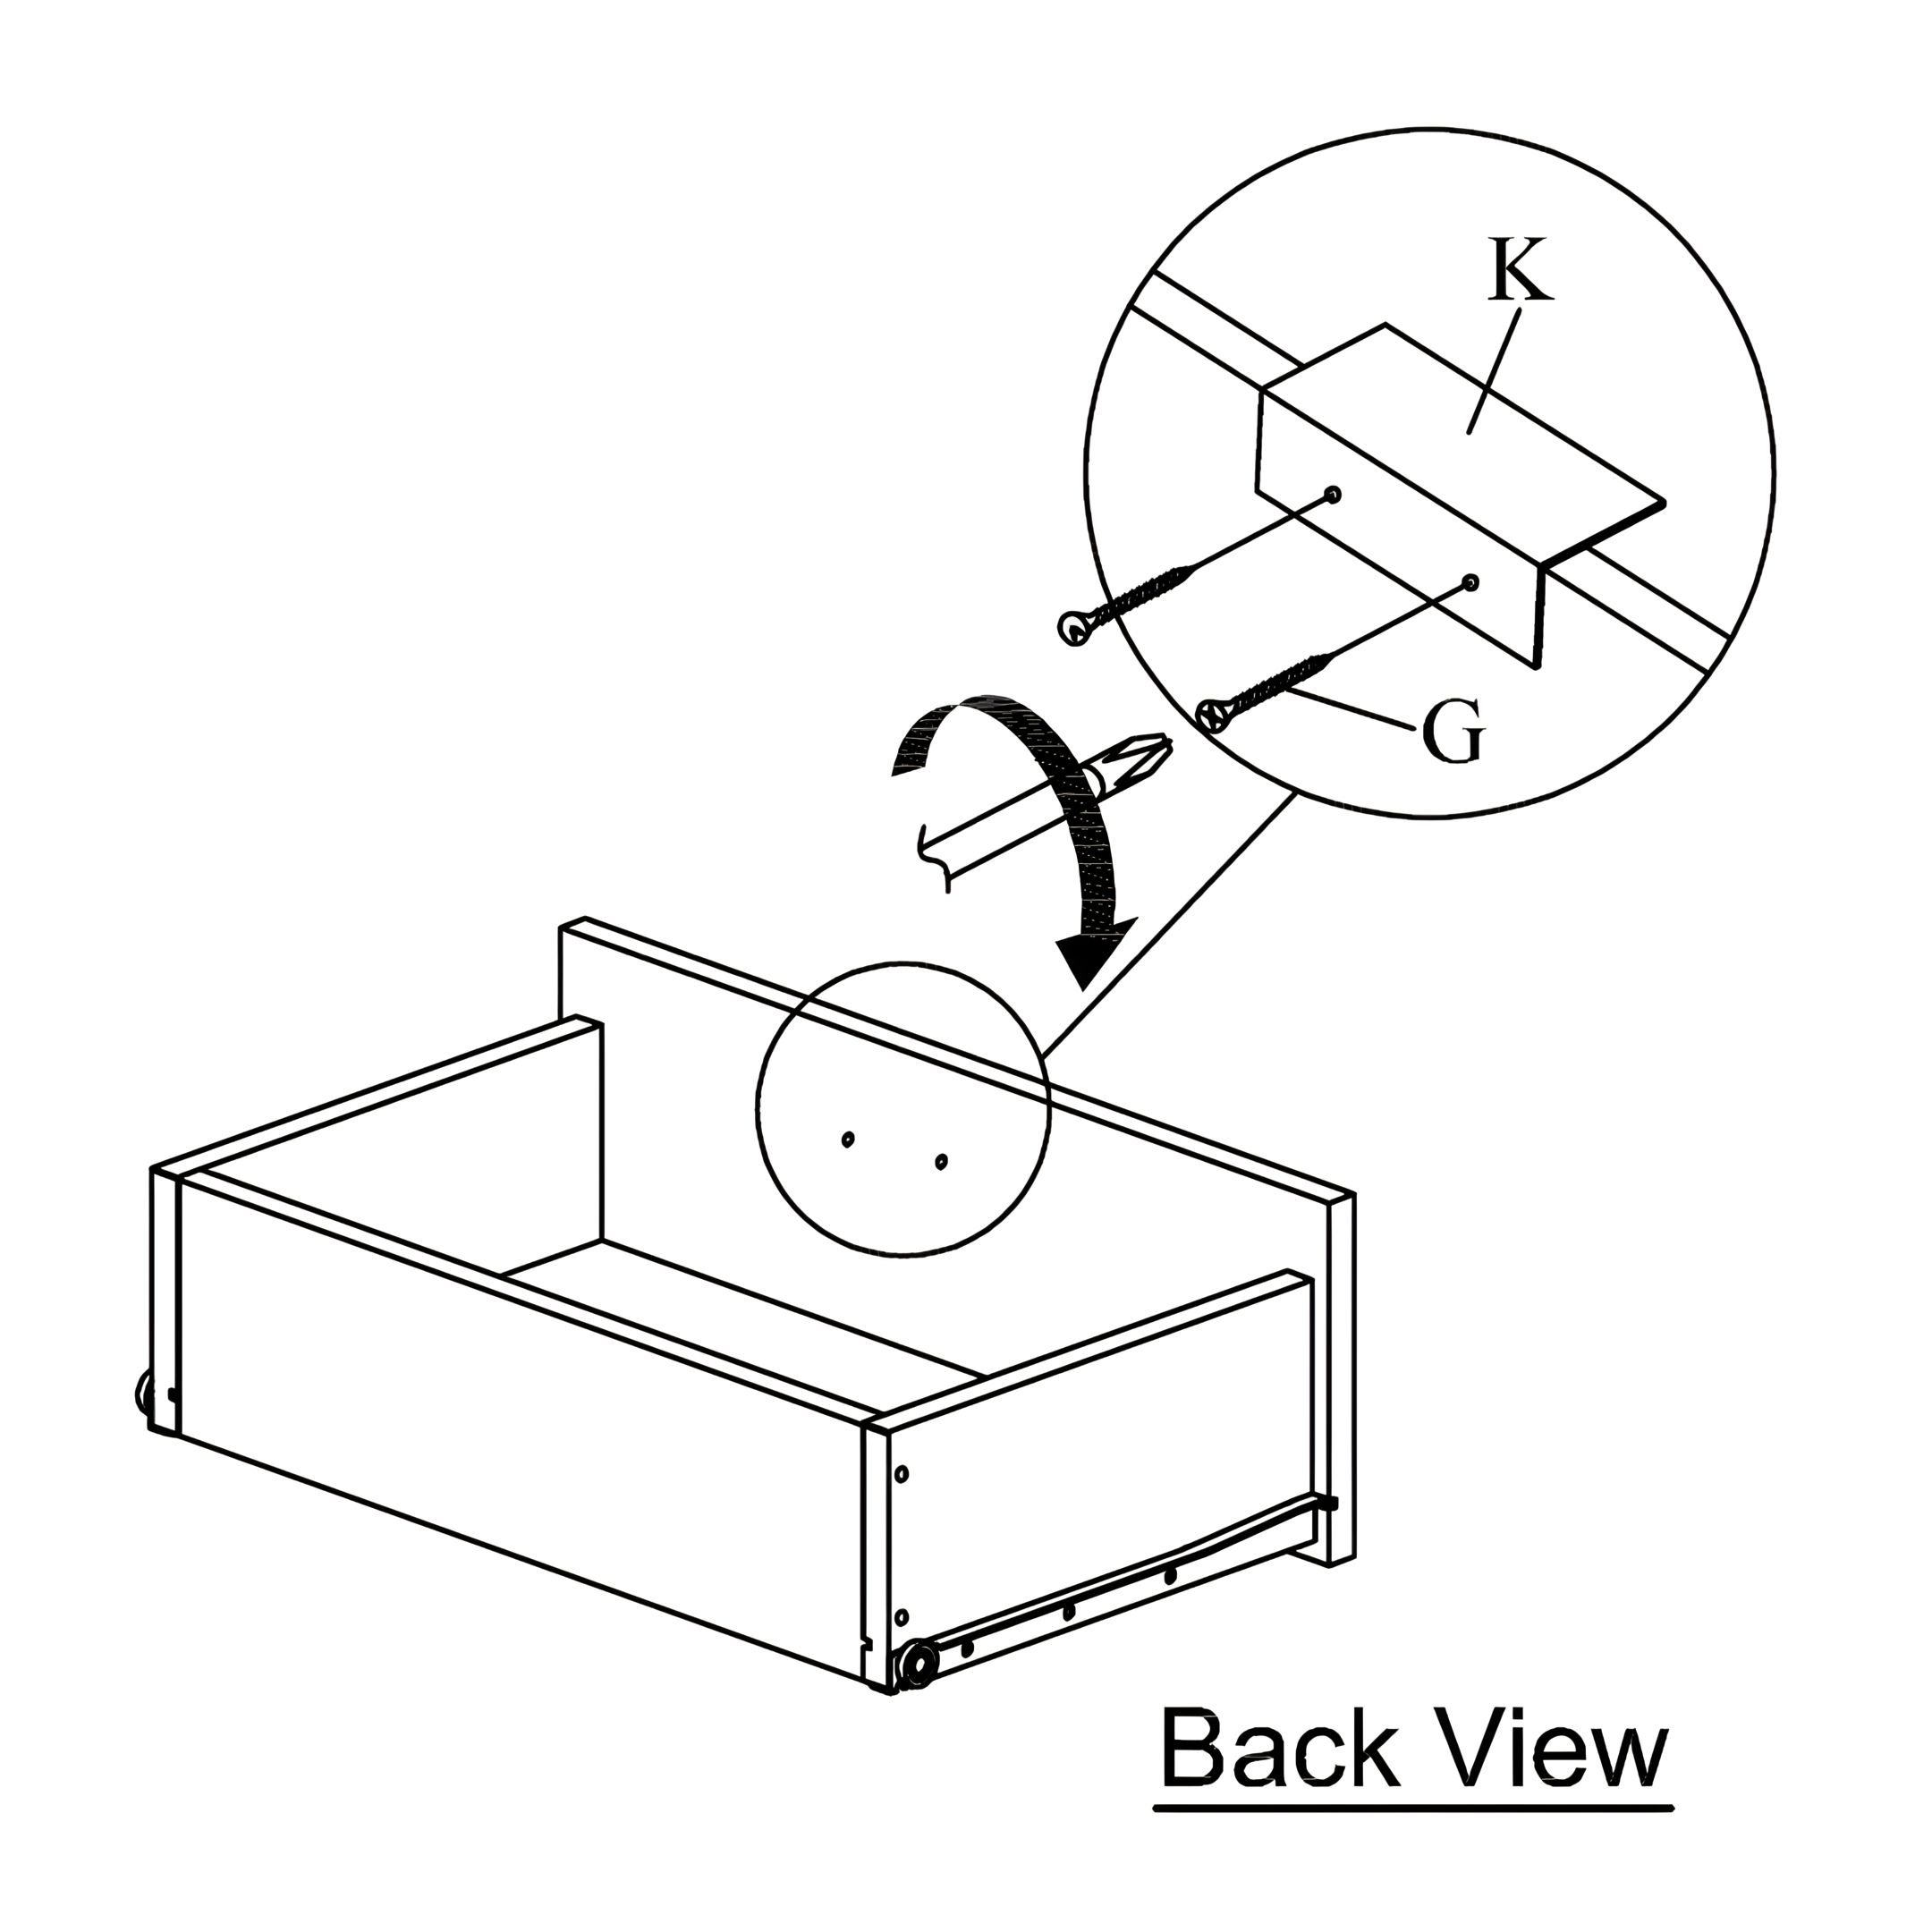
15. Attach the Handle
1. Flip the drawer to access the back of the front panel. 2. Align the L Bar Handle (K) with the pre-drilled holes. 3. Secure it using 2 CSK Screws M3.5x16mm (G). 4. Make sure the handle is straight and firmly attached.
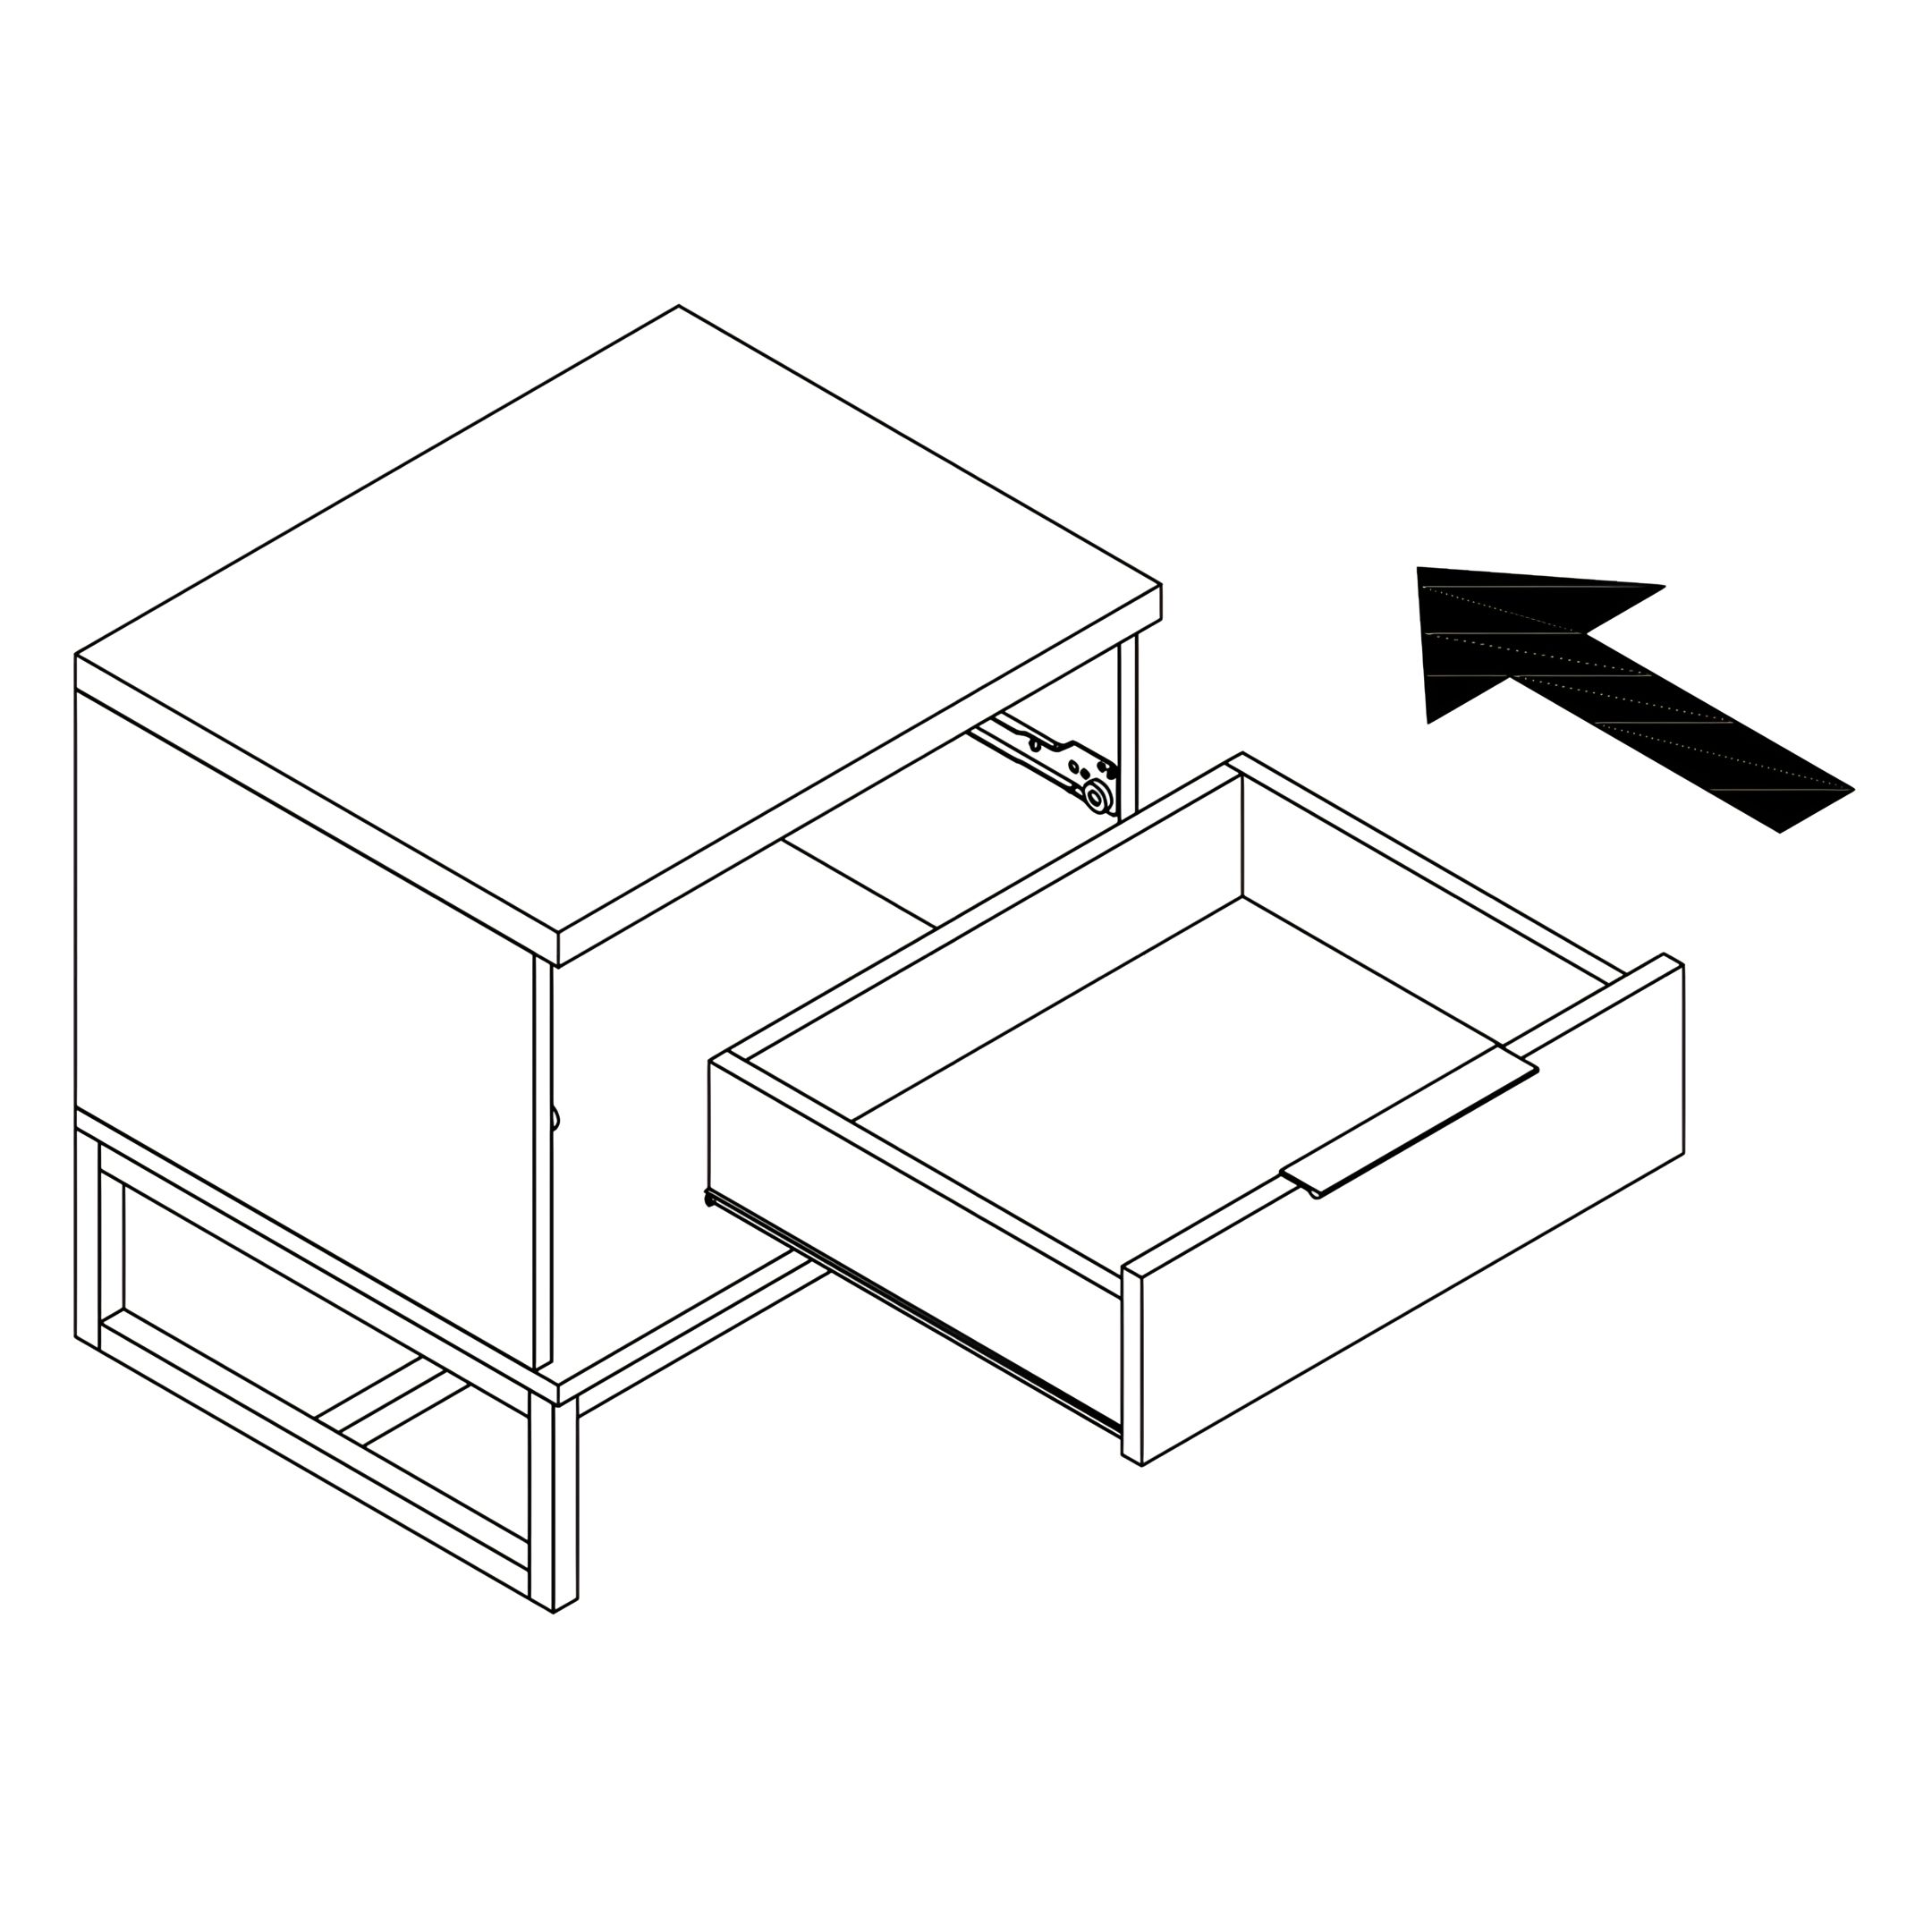
16. Insert the Drawer
1. Slide the drawer all the way in until it fits securely and moves smoothly. 2. Ensure it is properly aligned and flush with the front frame of the unit.
17. Final Check
Ensure all screws and fixings are securely tightened.
Confirm that both drawers slide smoothly and align properly.
Make sure the bedside unit stands evenly and feels stable.