1. Bolt Installation and Alignment
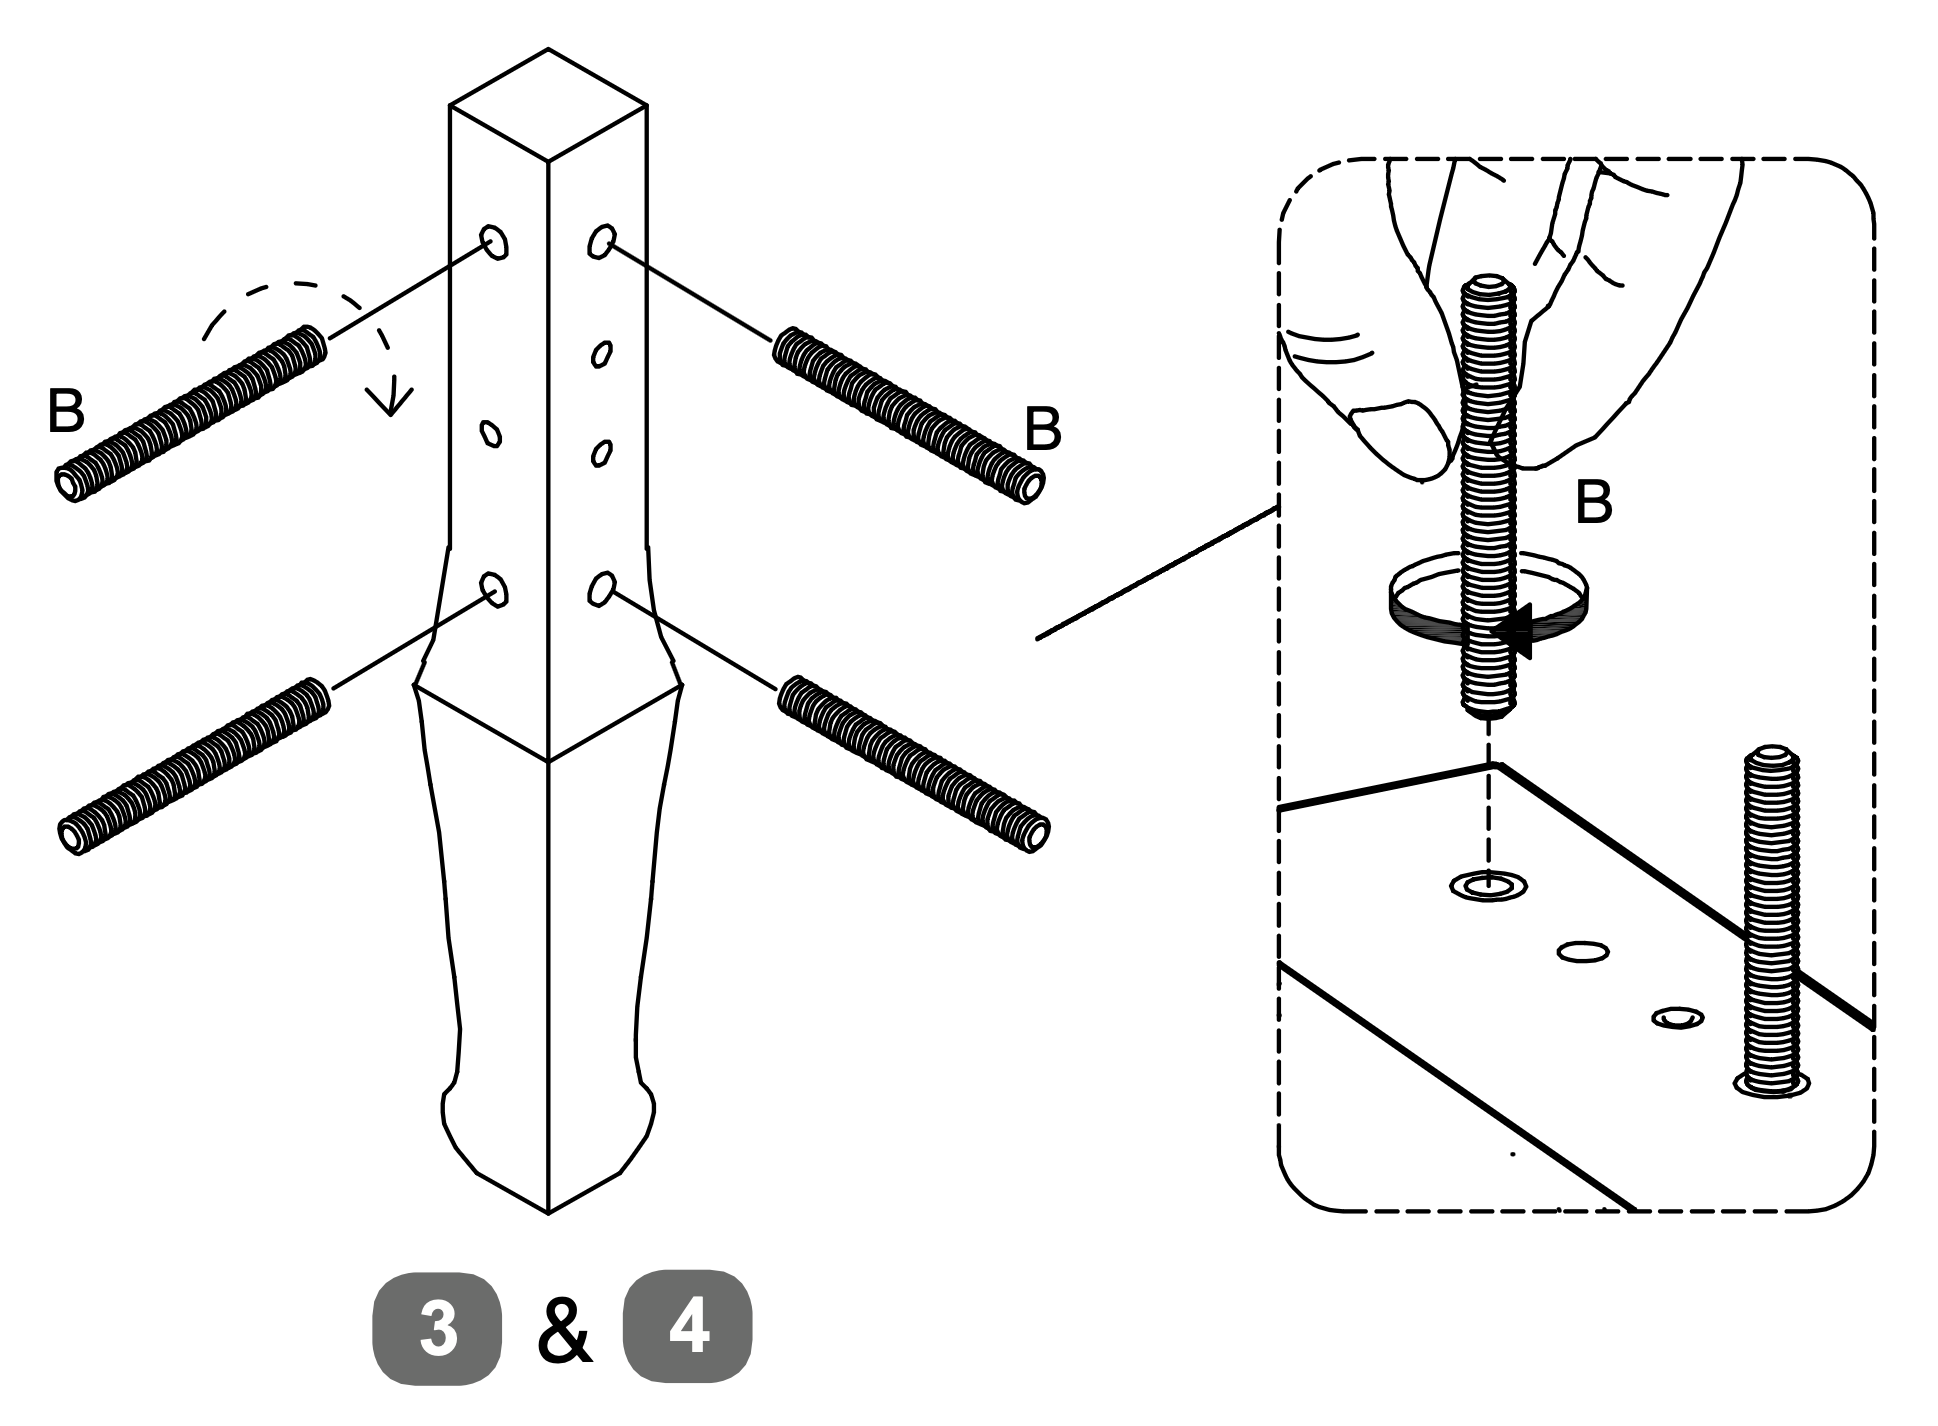
- Insert the Bolts M8x80mm (B) into the pre-drilled holes on the LH and RH Footboard Legs (3 & 4).
- Ensure the bolts are aligned correctly and tighten them securely.
 Instructions by time4sleep Classic French Rattan Bed FrameAssembly instructions for the Classic French Rattan Bed Frame Product Information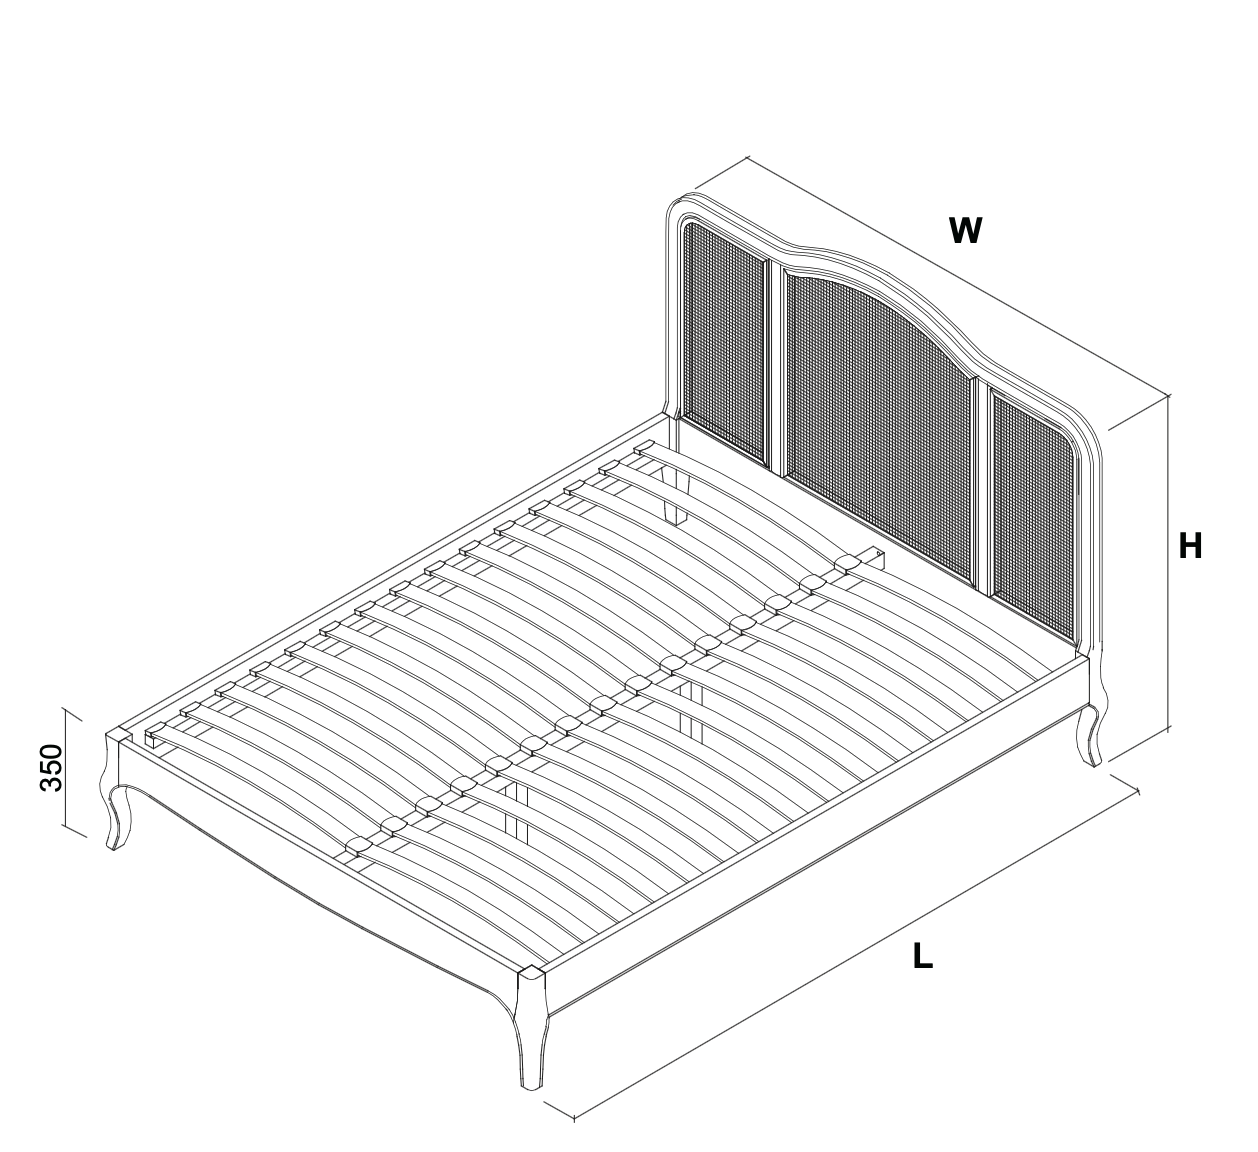 Classic French Rattan Bed FrameProduct description - Our Classic French inspired Rattan bed brings sophisticated European charm to your bedroom sanctuary.
Crafted with meticulous attention to detail, this stunning piece features beautiful rattan weaving that captures the essence of classical French design, while the warm dusted oak finish adds a contemporary touch that complements any décor style.
The bed's elegant curves showcases traditional craftsmanship whilst the rattan panels, creates visual texture and captivating focal point in your bedroom.
The rich dusted oak finish provides a sophisticated timeless finish. Designed with your comfort in mind, this bed comes complete with a premium sprung slatted base system that provides exceptional support and enhanced mattress ventilation. Whether your creating a traditional or more contemporary space, this rattan bed delivers exceptional quality and enduring beauty that will transform your bedroom into a luxurious retreat.
Under bed clearance approximately 20cm.
View product (opens in new tab)
Tools A - Bolts M8 x35mm for fitting centre rail support legs 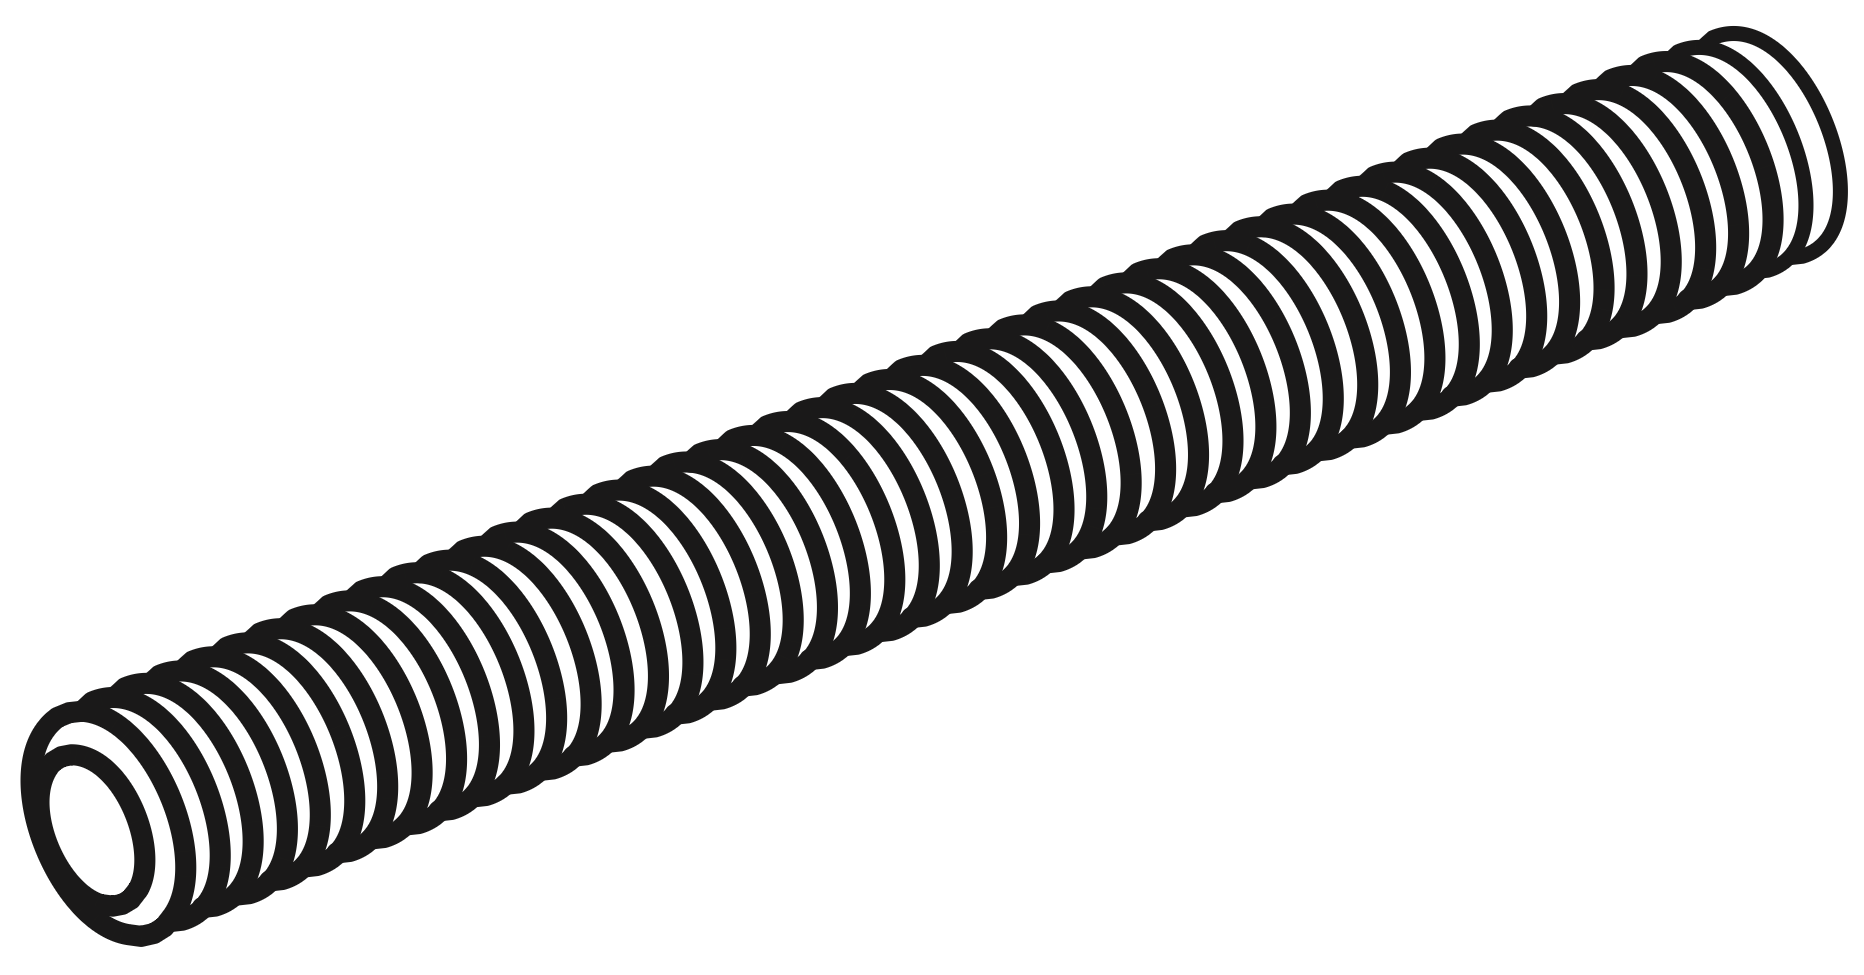 B - Bolts M8x80mm for fitting side rails (3&4) to headboard (1) and footboard (2)  C- Nuts for M8 Bolts  D - Flat Washers for M8 Bolts  E - Spring Washers for M8 Bolts  F - Bracket  G - Spanner for M8 bolts 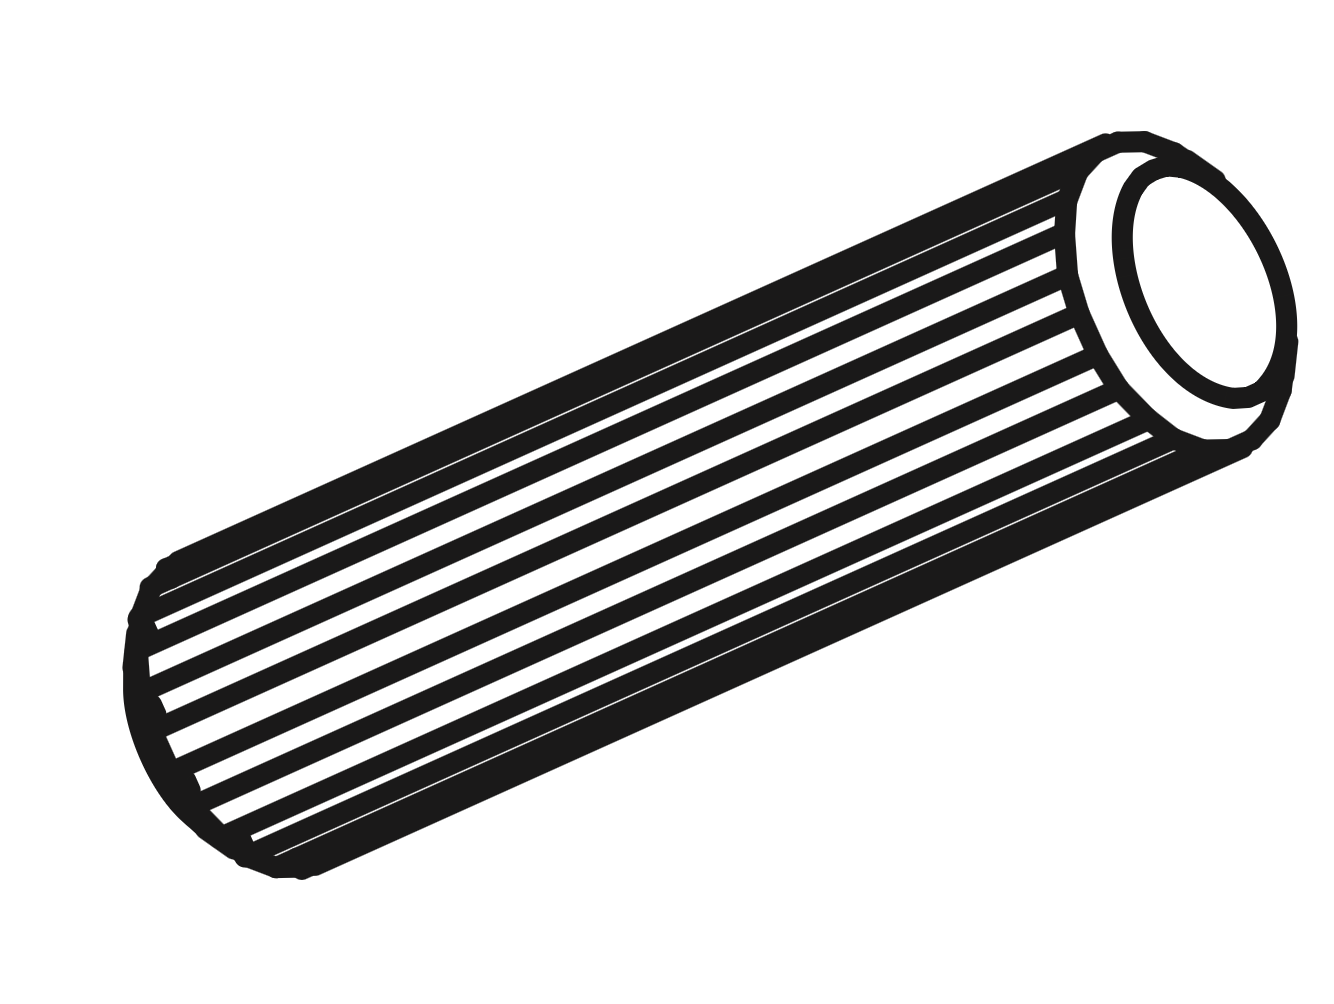 H - Dowel M10x 40mm 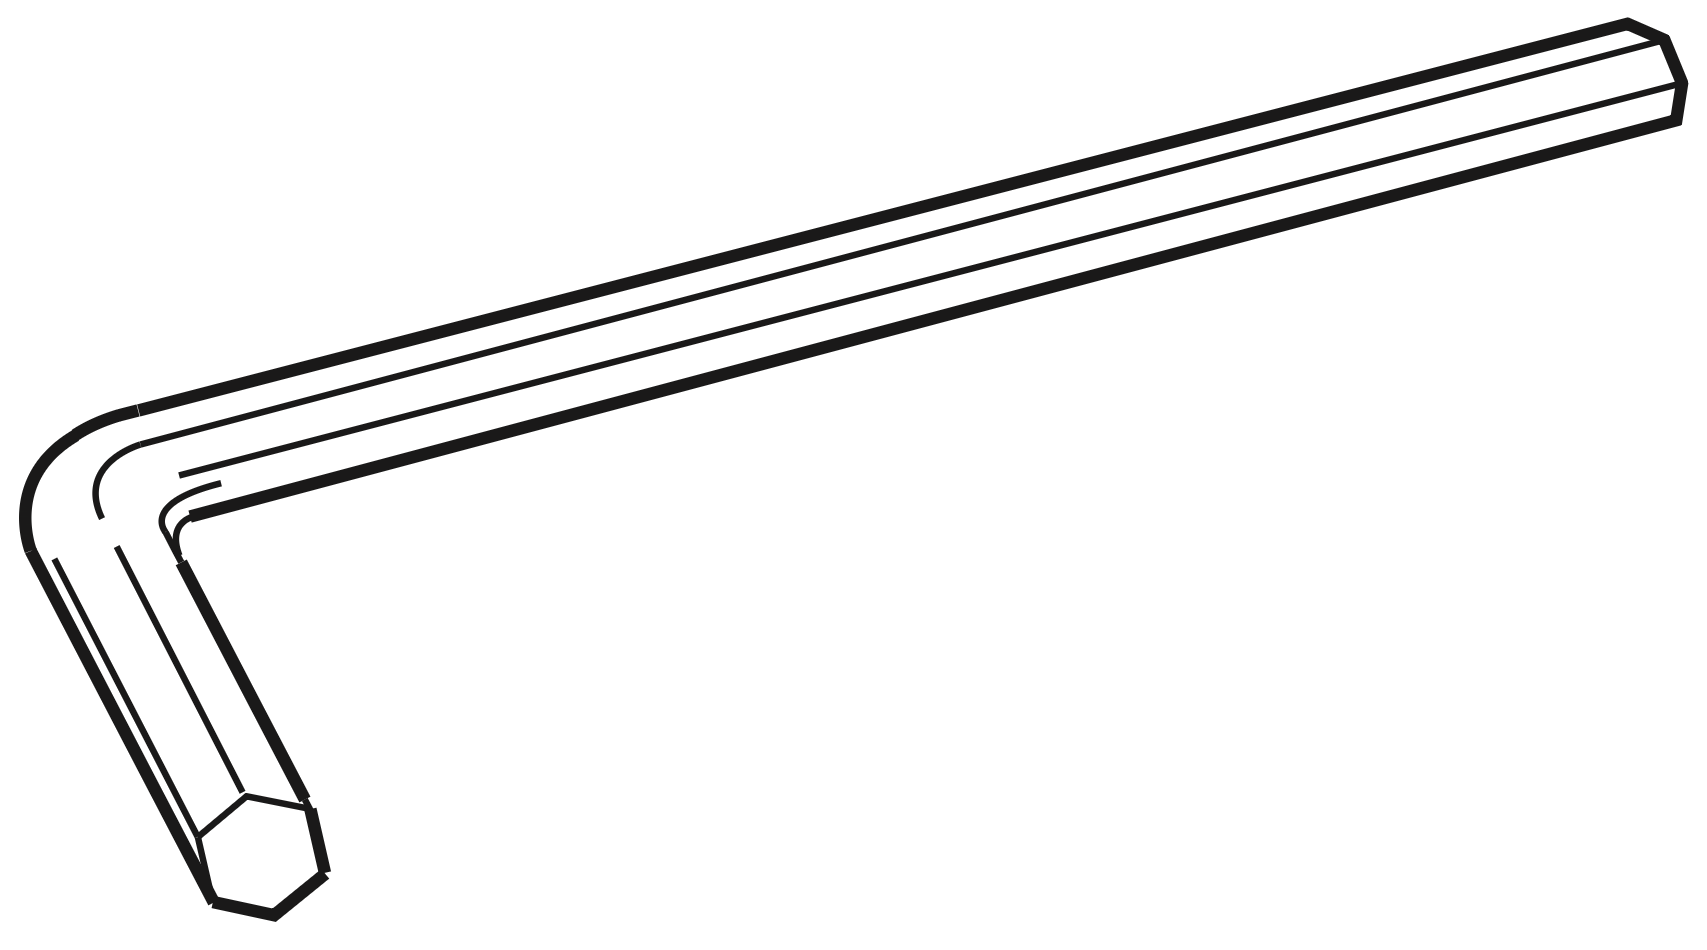 K - Allen Key for M8 Bolts  L - Bolt M8x20 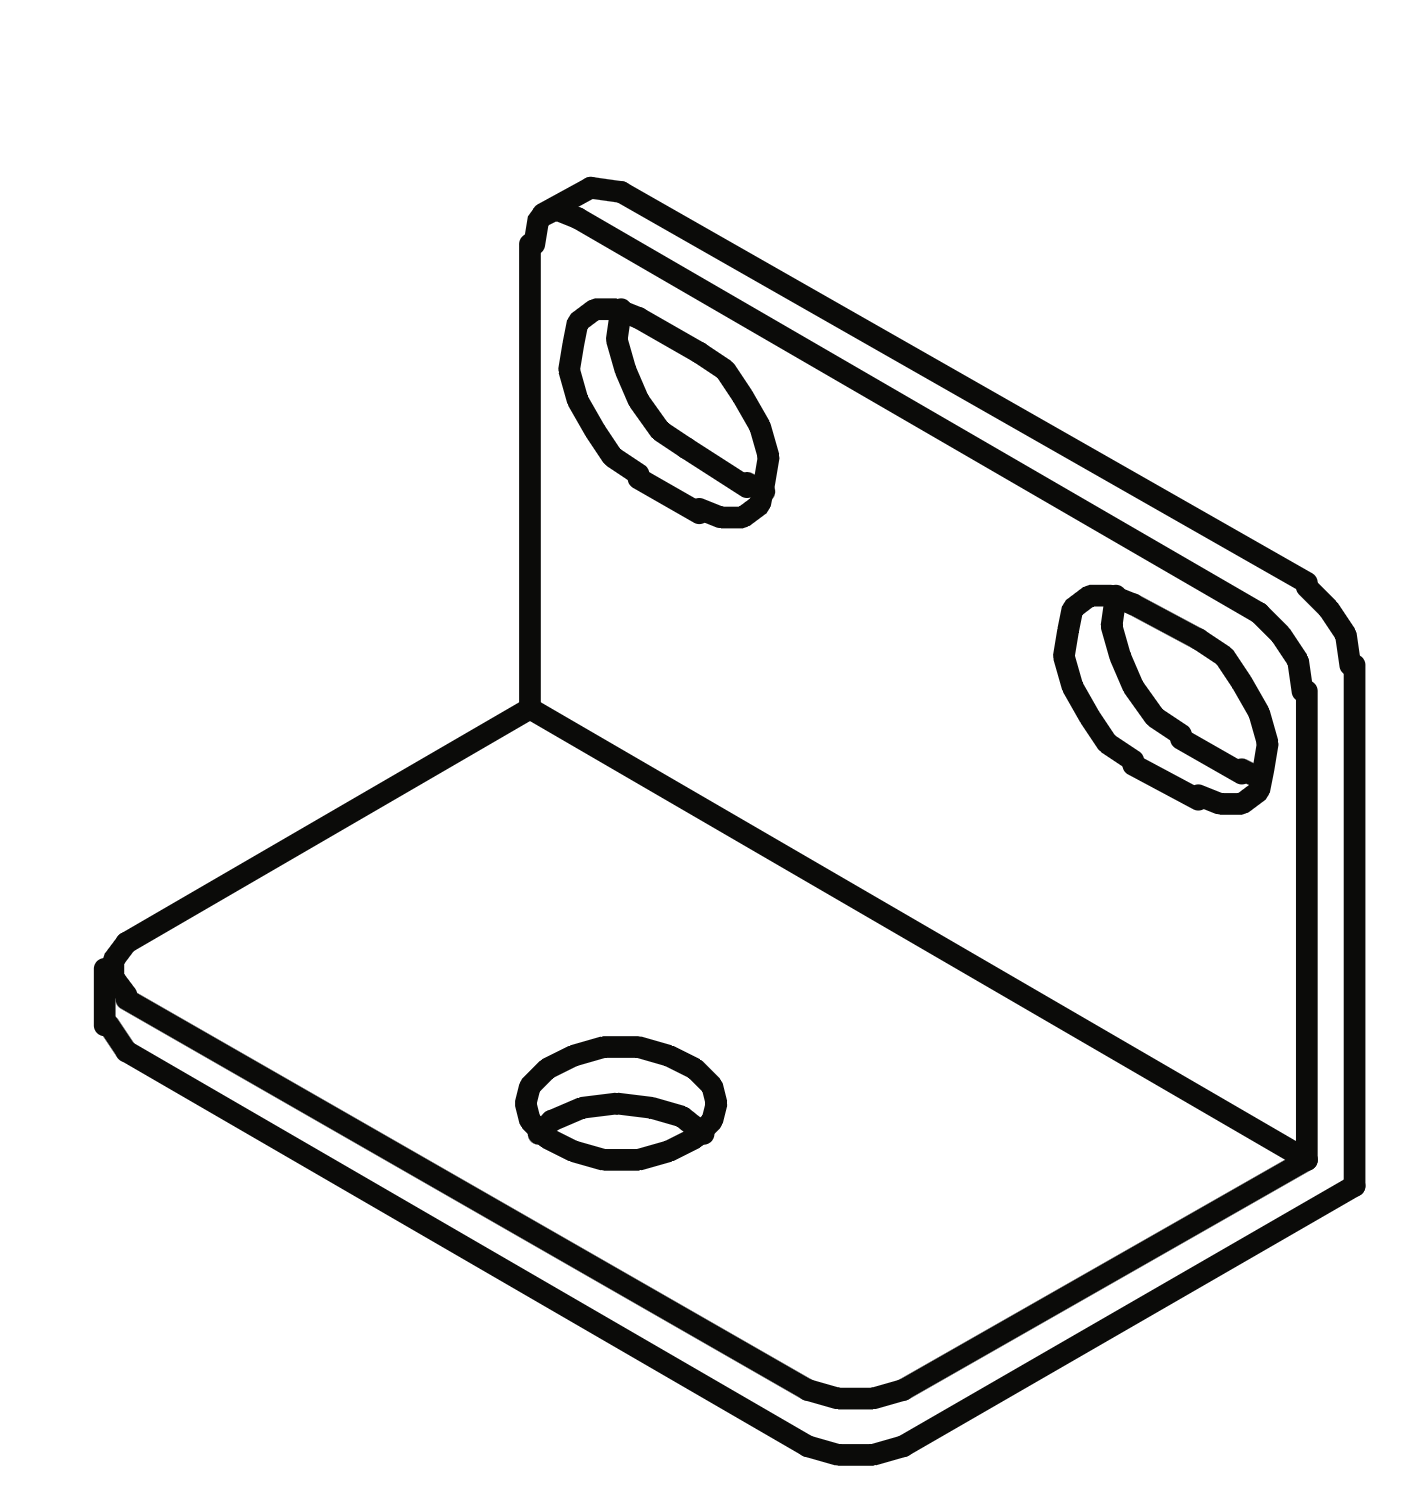 M - "L" Shape Bracket Parts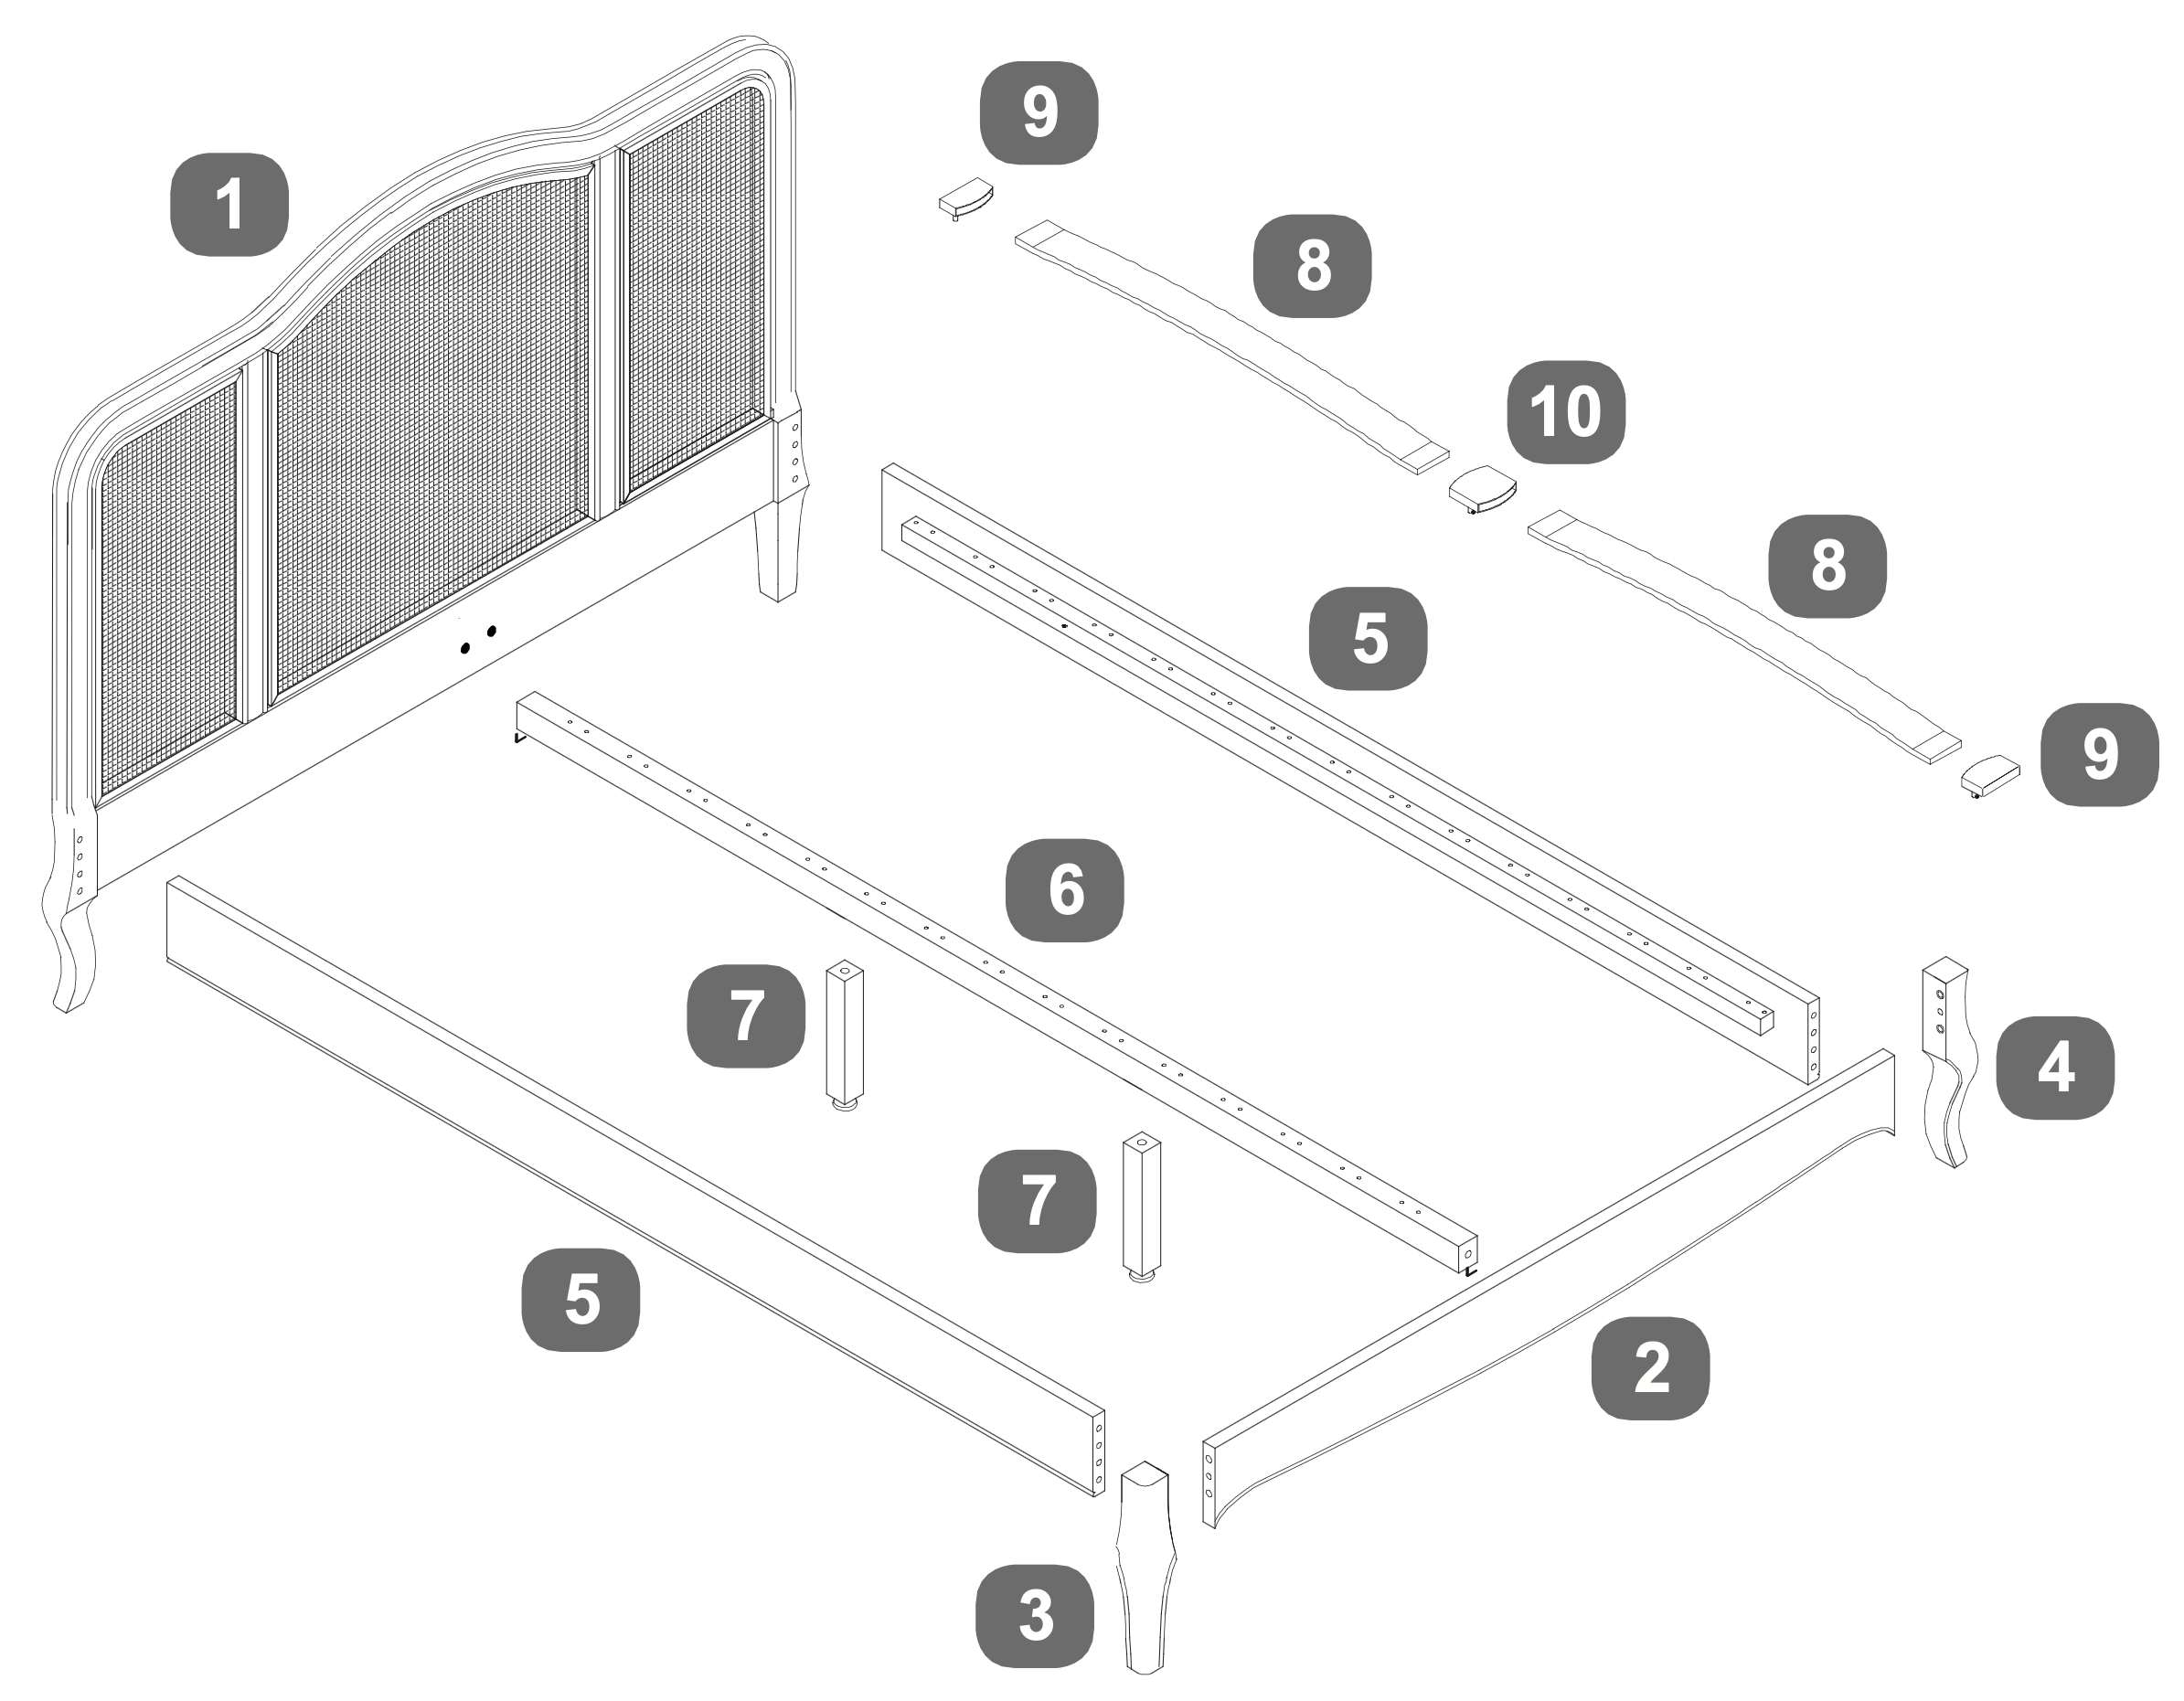 1Headboard - Box 1 2Footboard - Box 2 3LH Legs for FB - Box 2 4RH Legs for FB - Box 2 5Side Rails - Box 2 6Centre Rail - Box 2 7Centre Rail Support Legs - Box 2 8Bentwood Slats - Box 2 (28 Double, 30 King) 9Single Plastic Caps - Box 2 (28 Double, 30 King) 10Double Plastic Caps - Box 2 (14 Double, 15 King) 1. Bolt Installation and Alignment
2. Footboard and Side Rail Assembly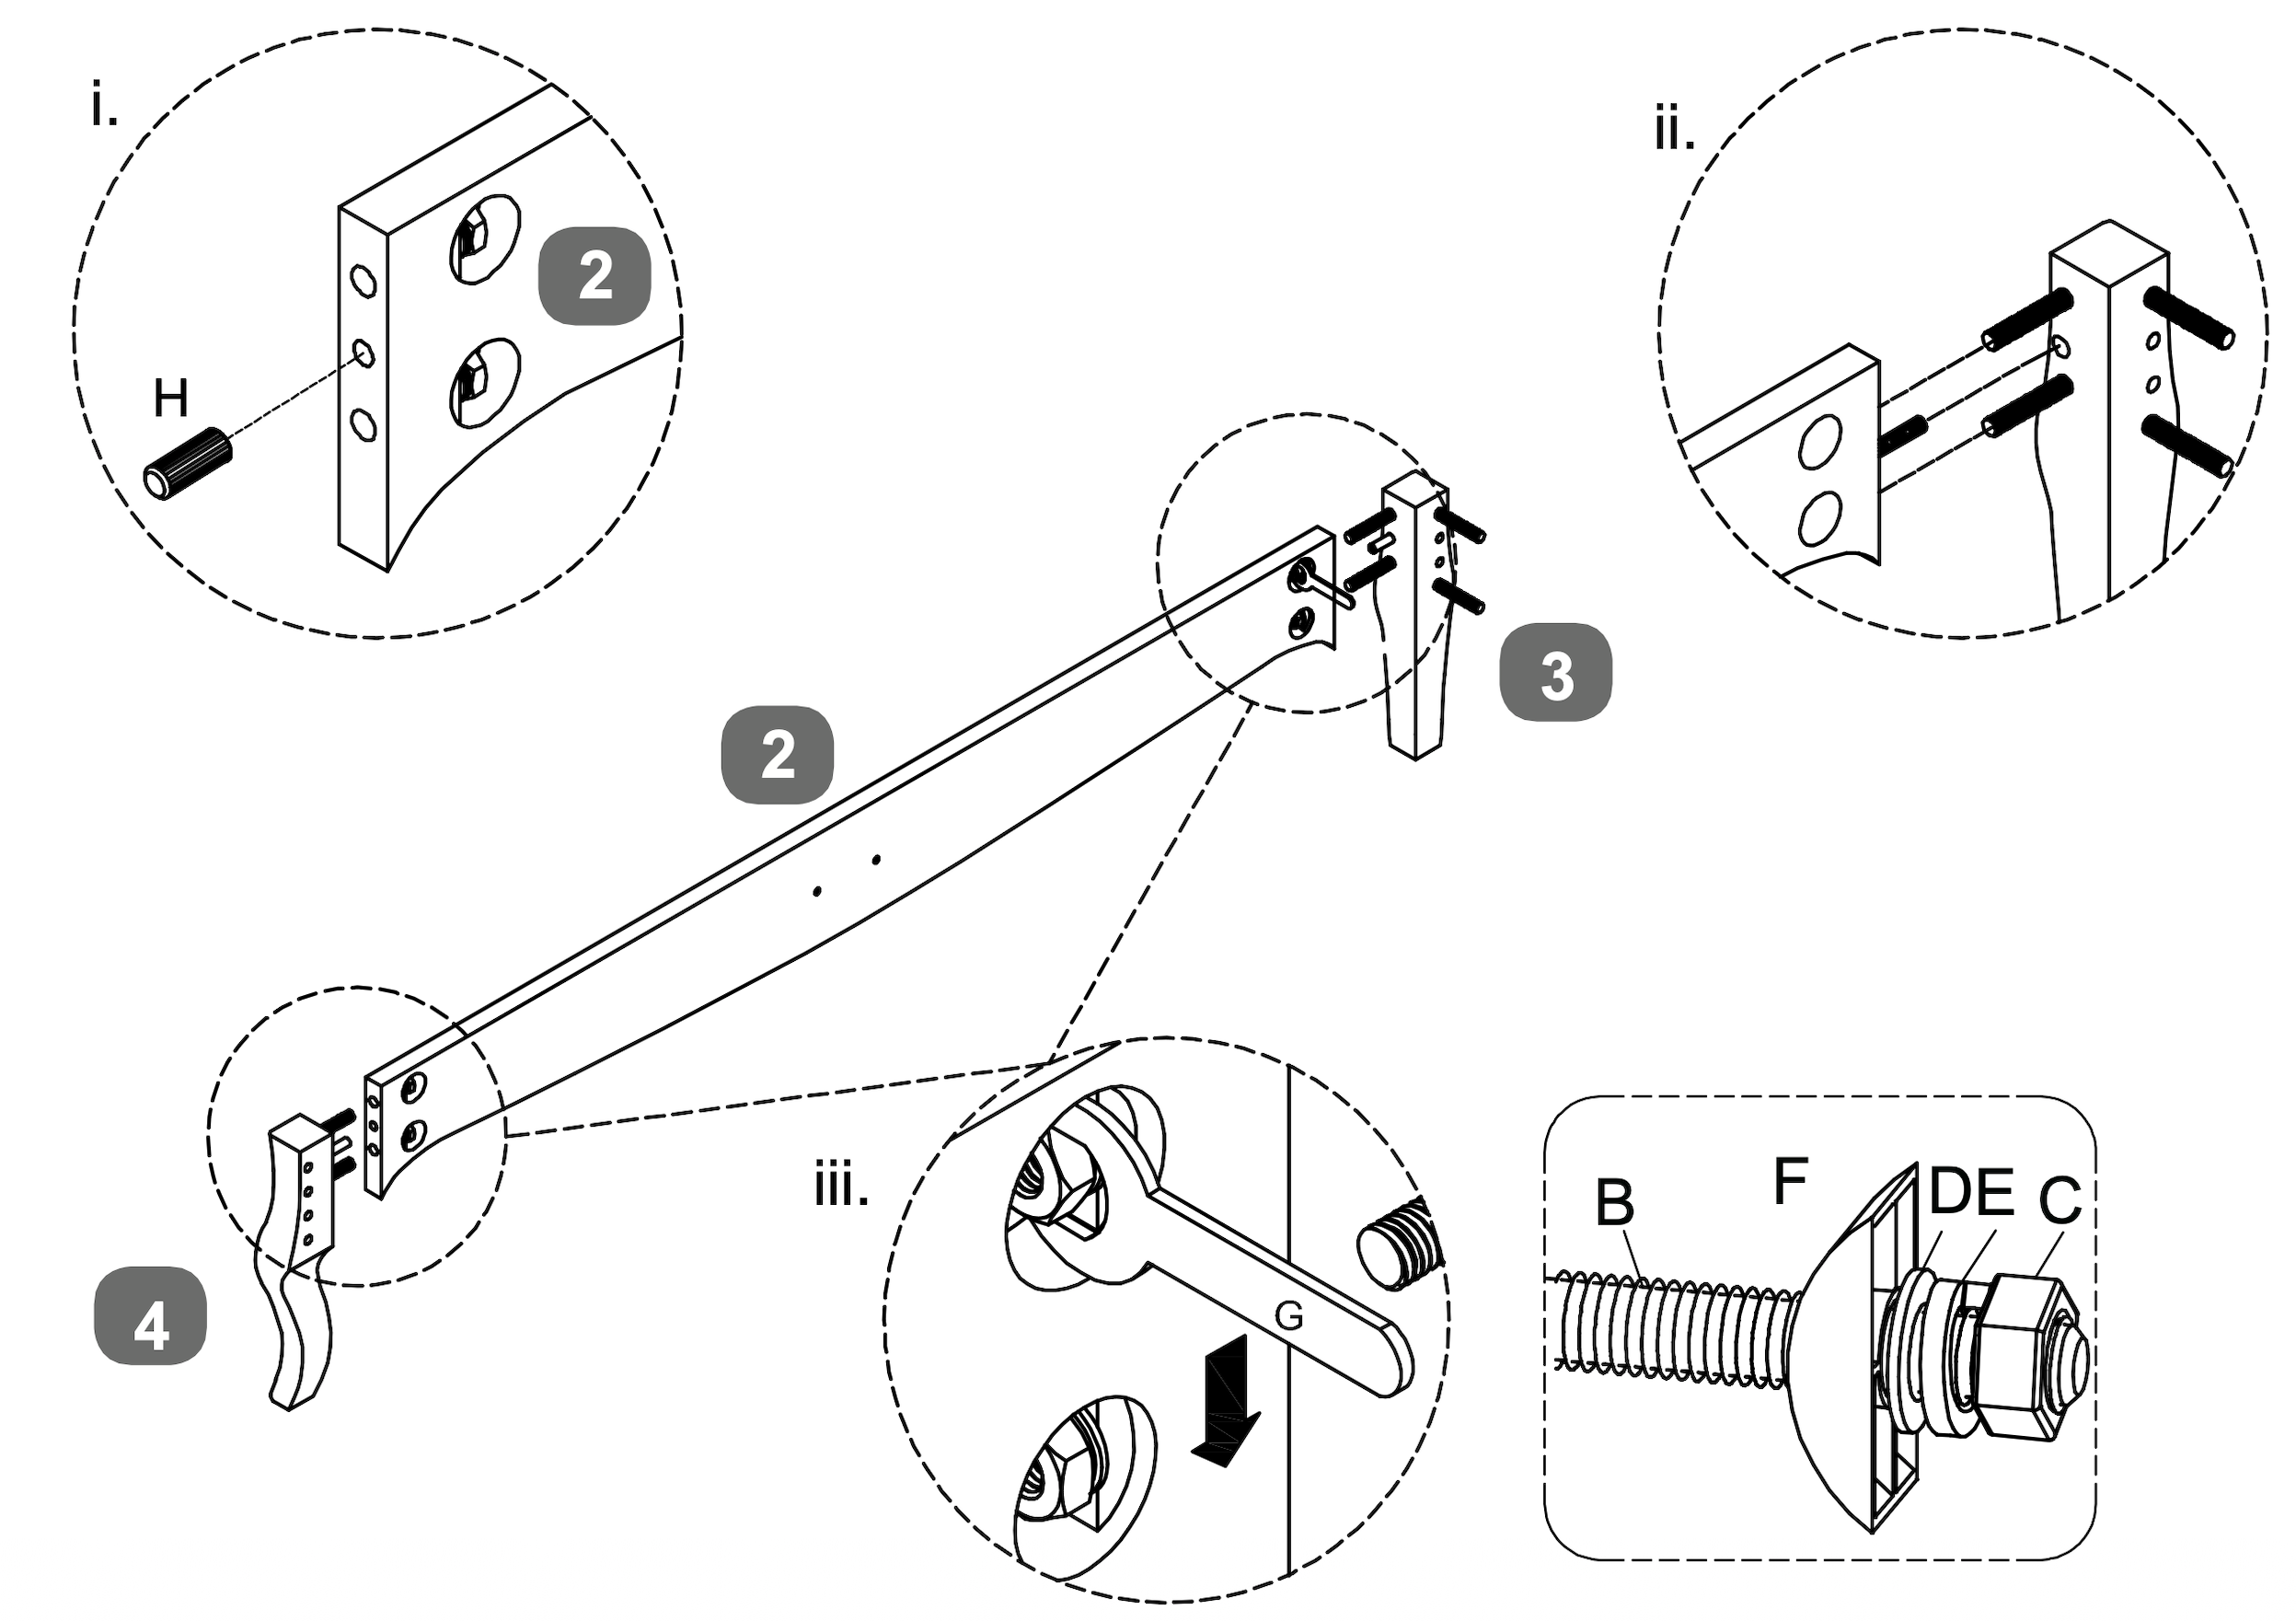
3. Headboard Fastening Procedure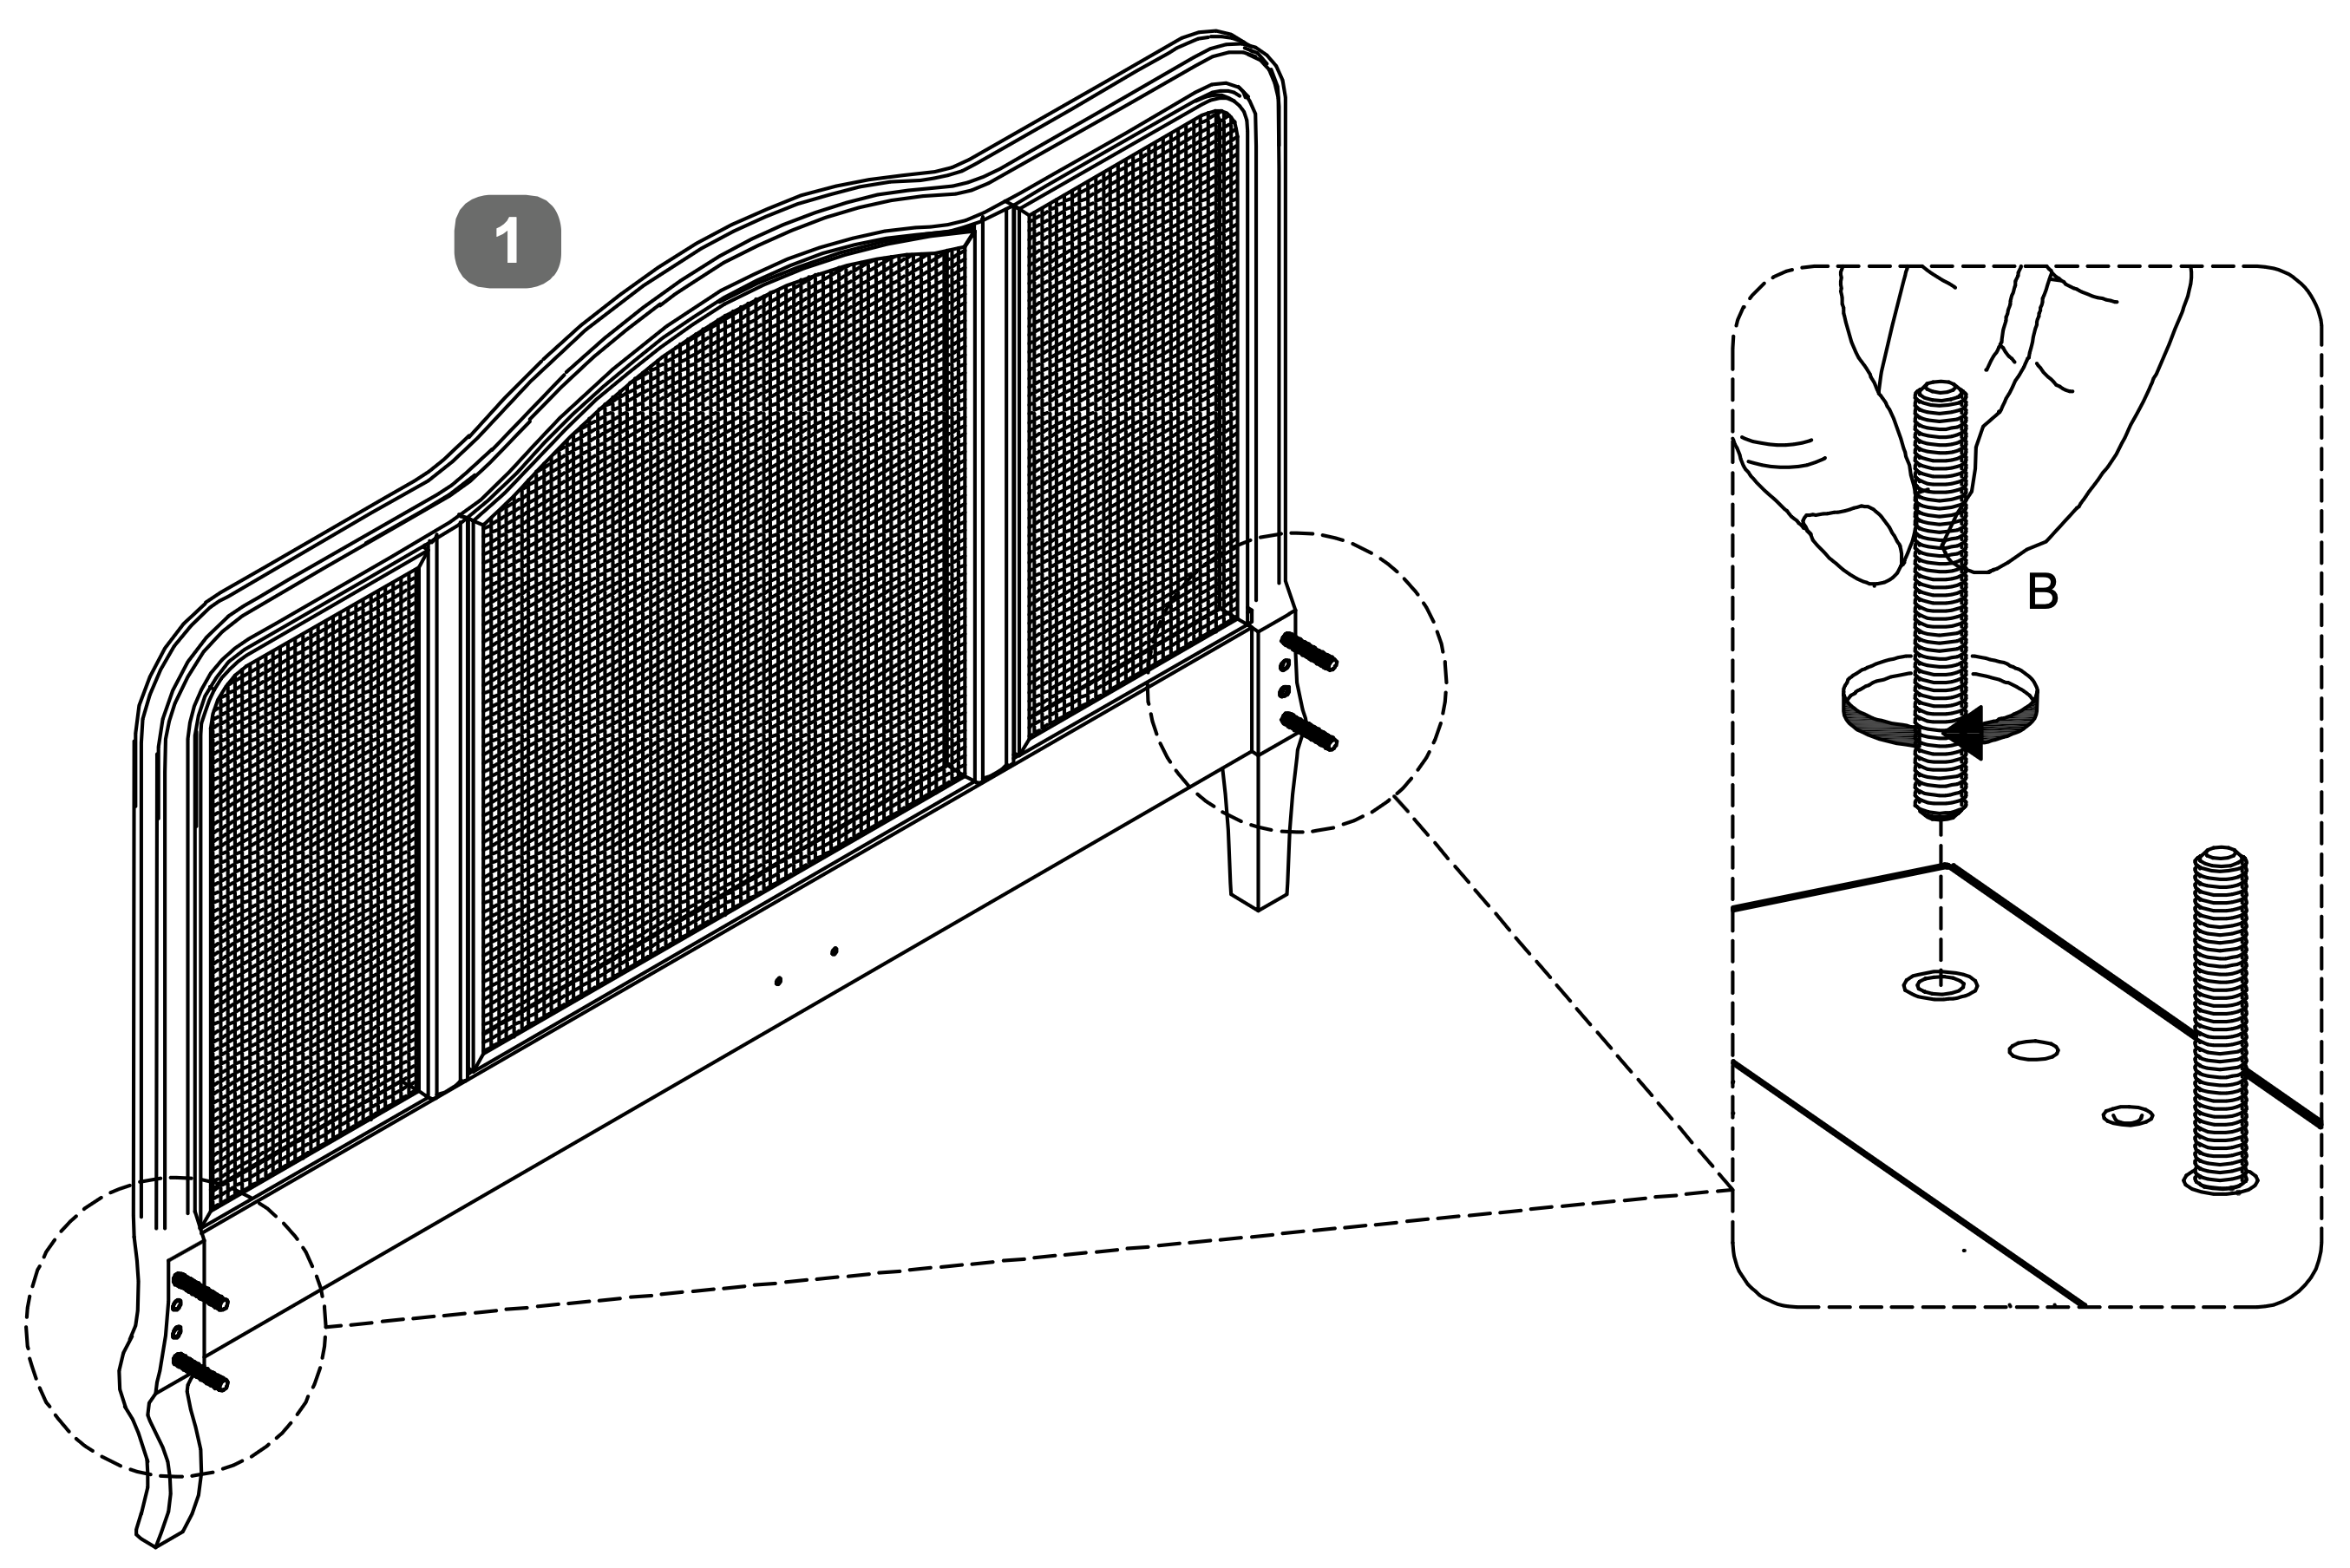
4. Structural Assembly and Stabilization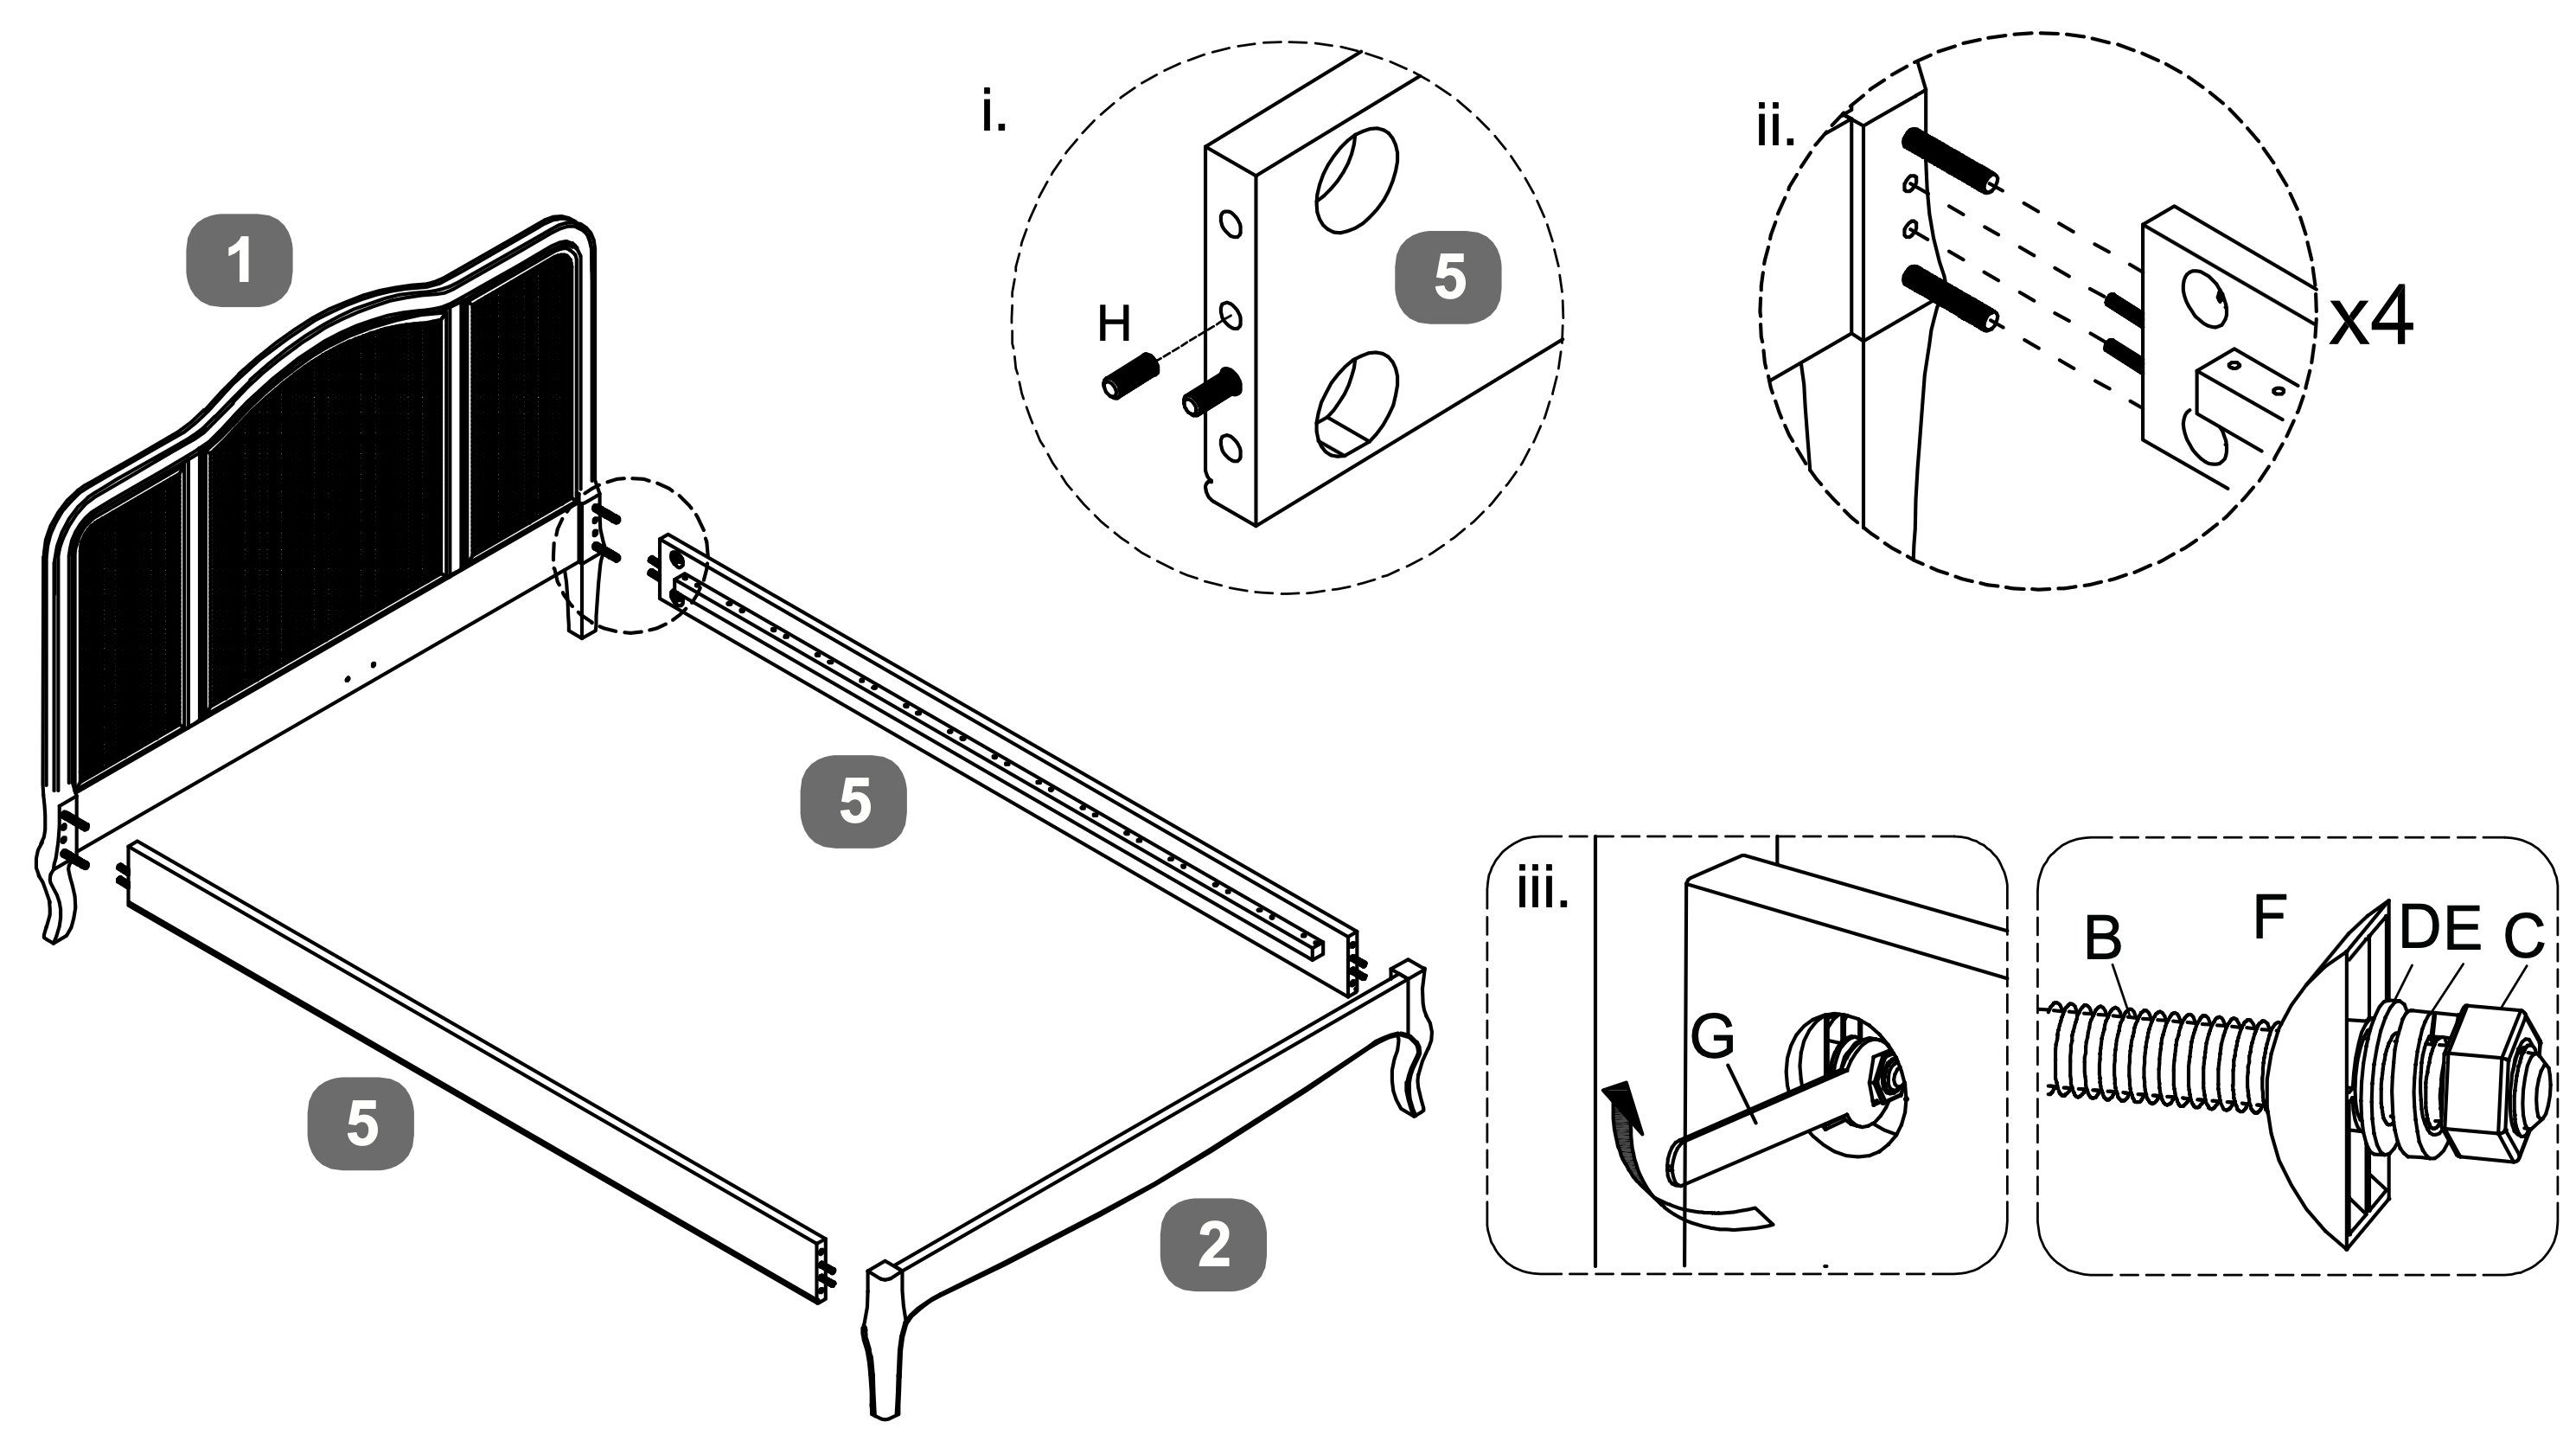 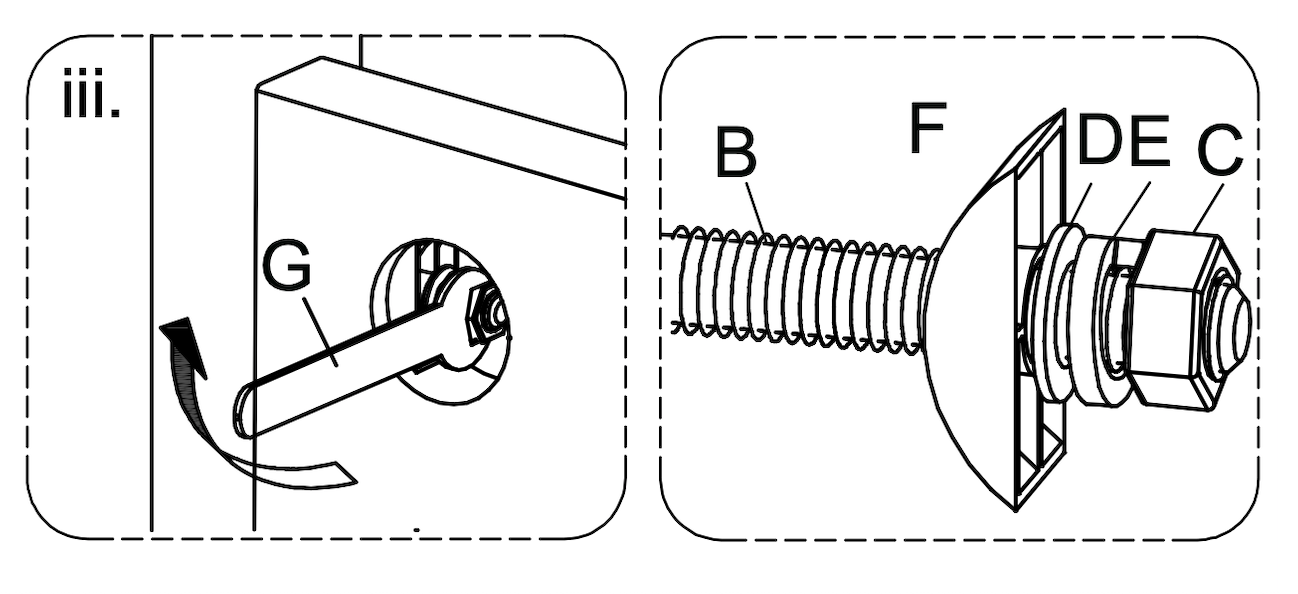 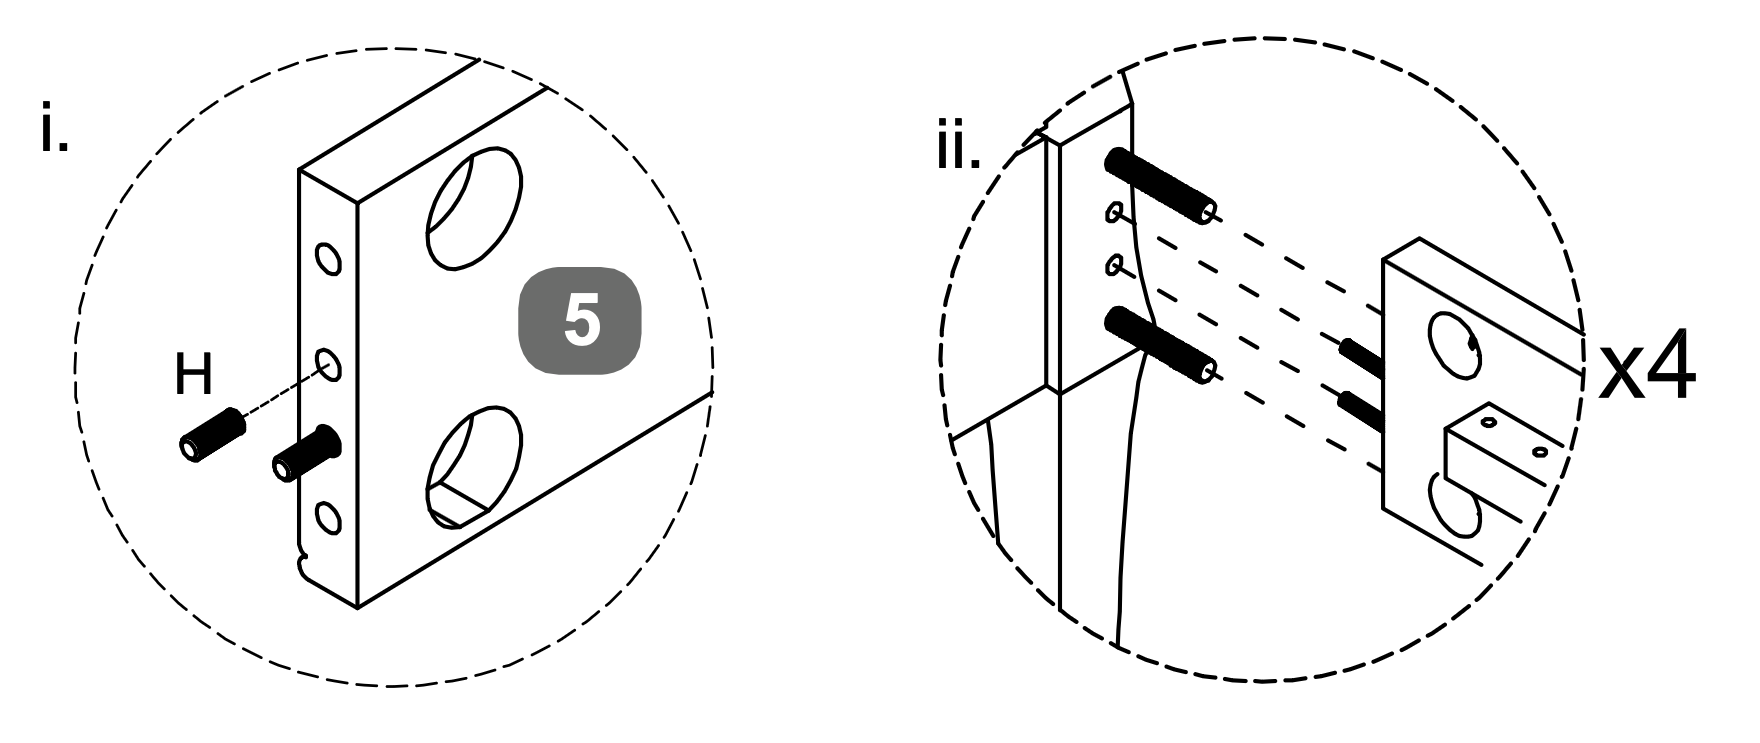
5. Bracket Attachment and Alignment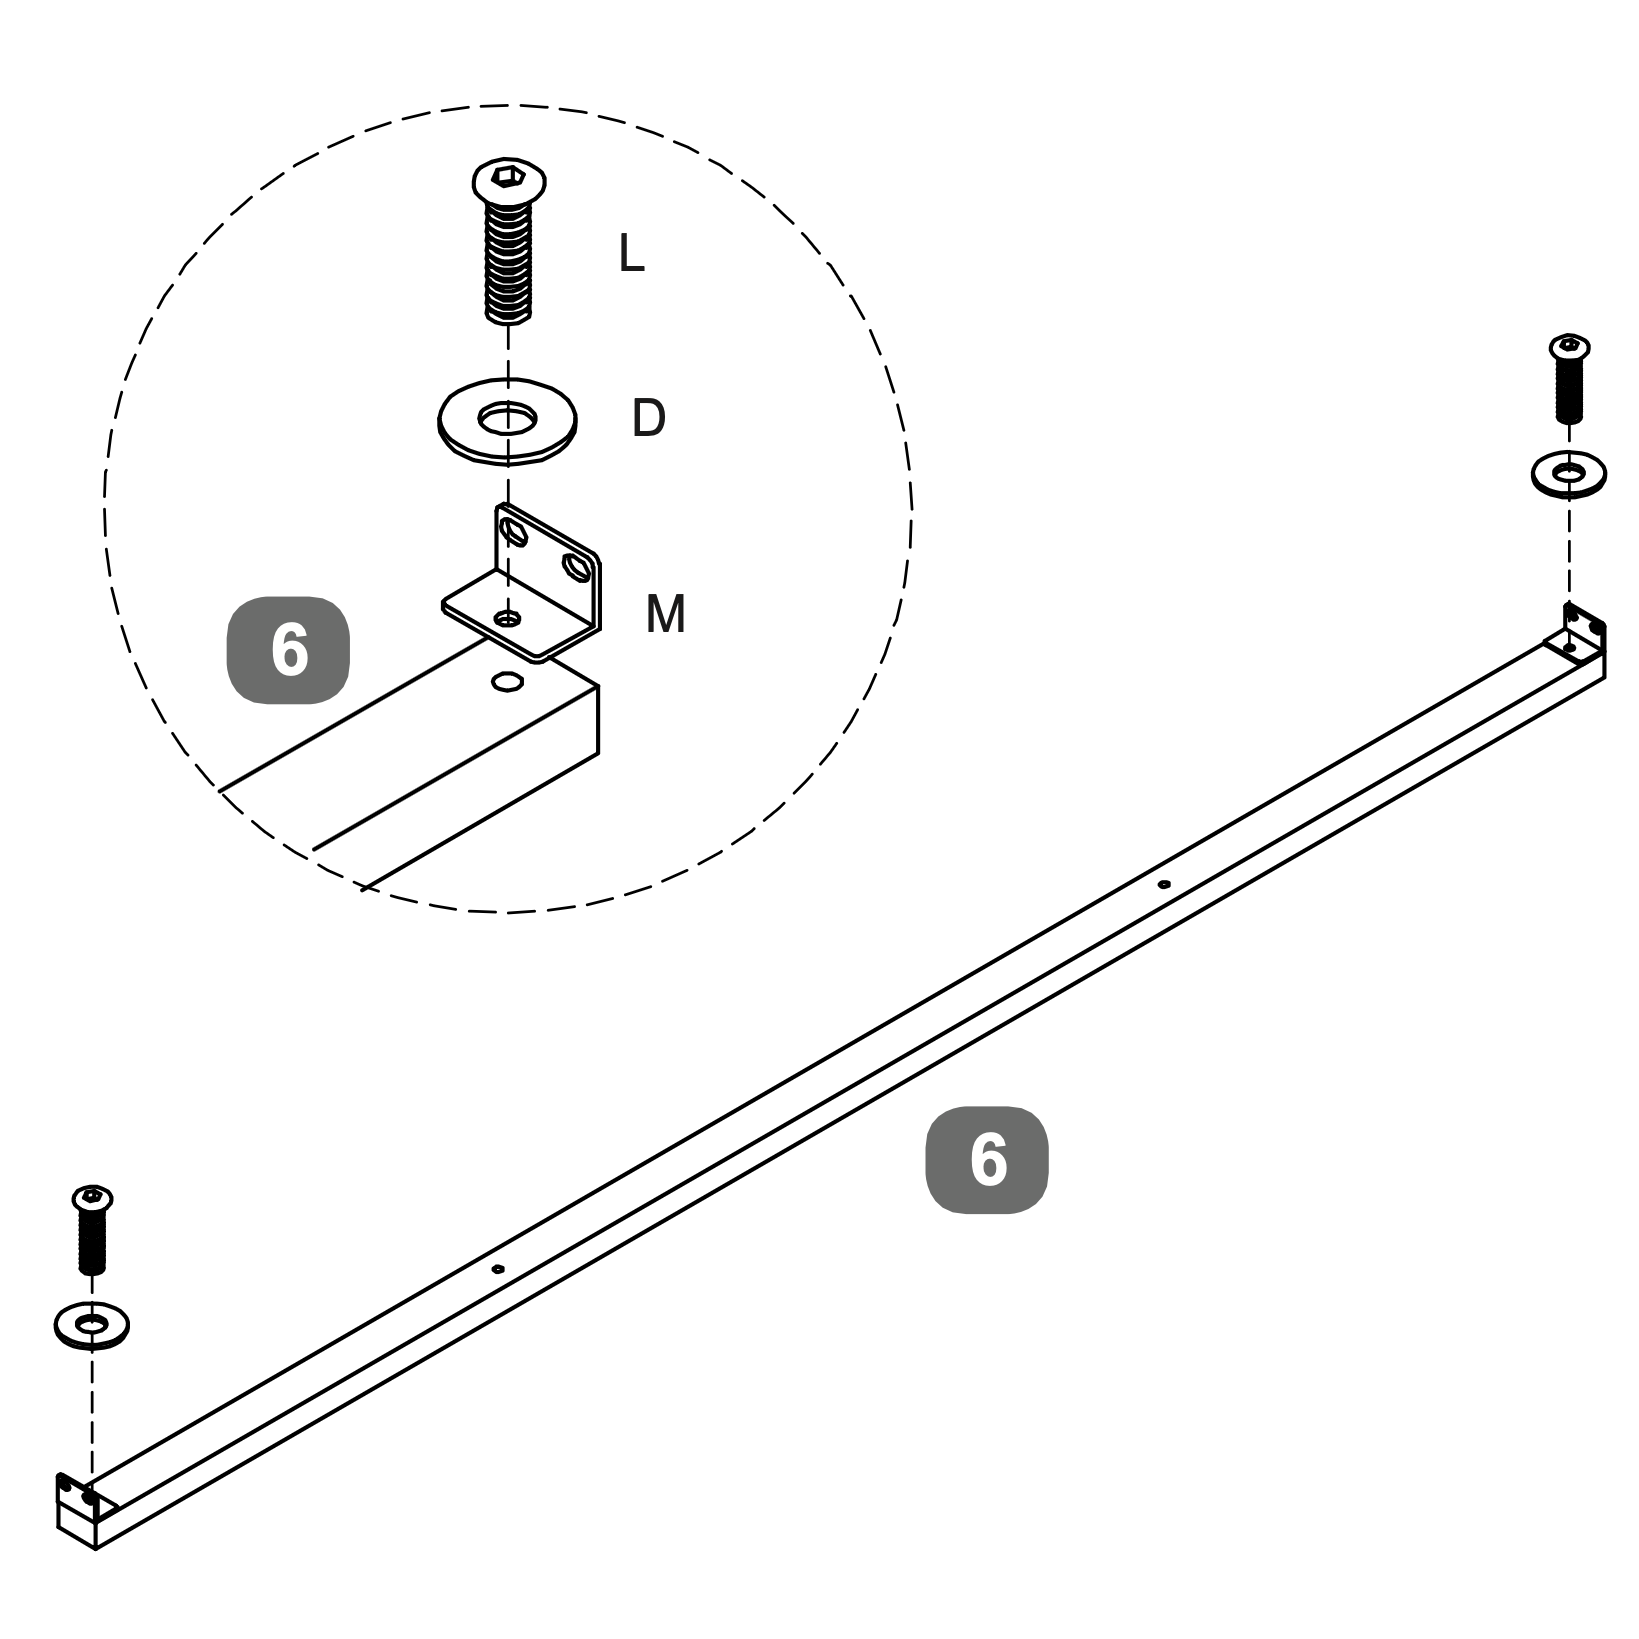
6. Centre Rail Positioning and Stabilization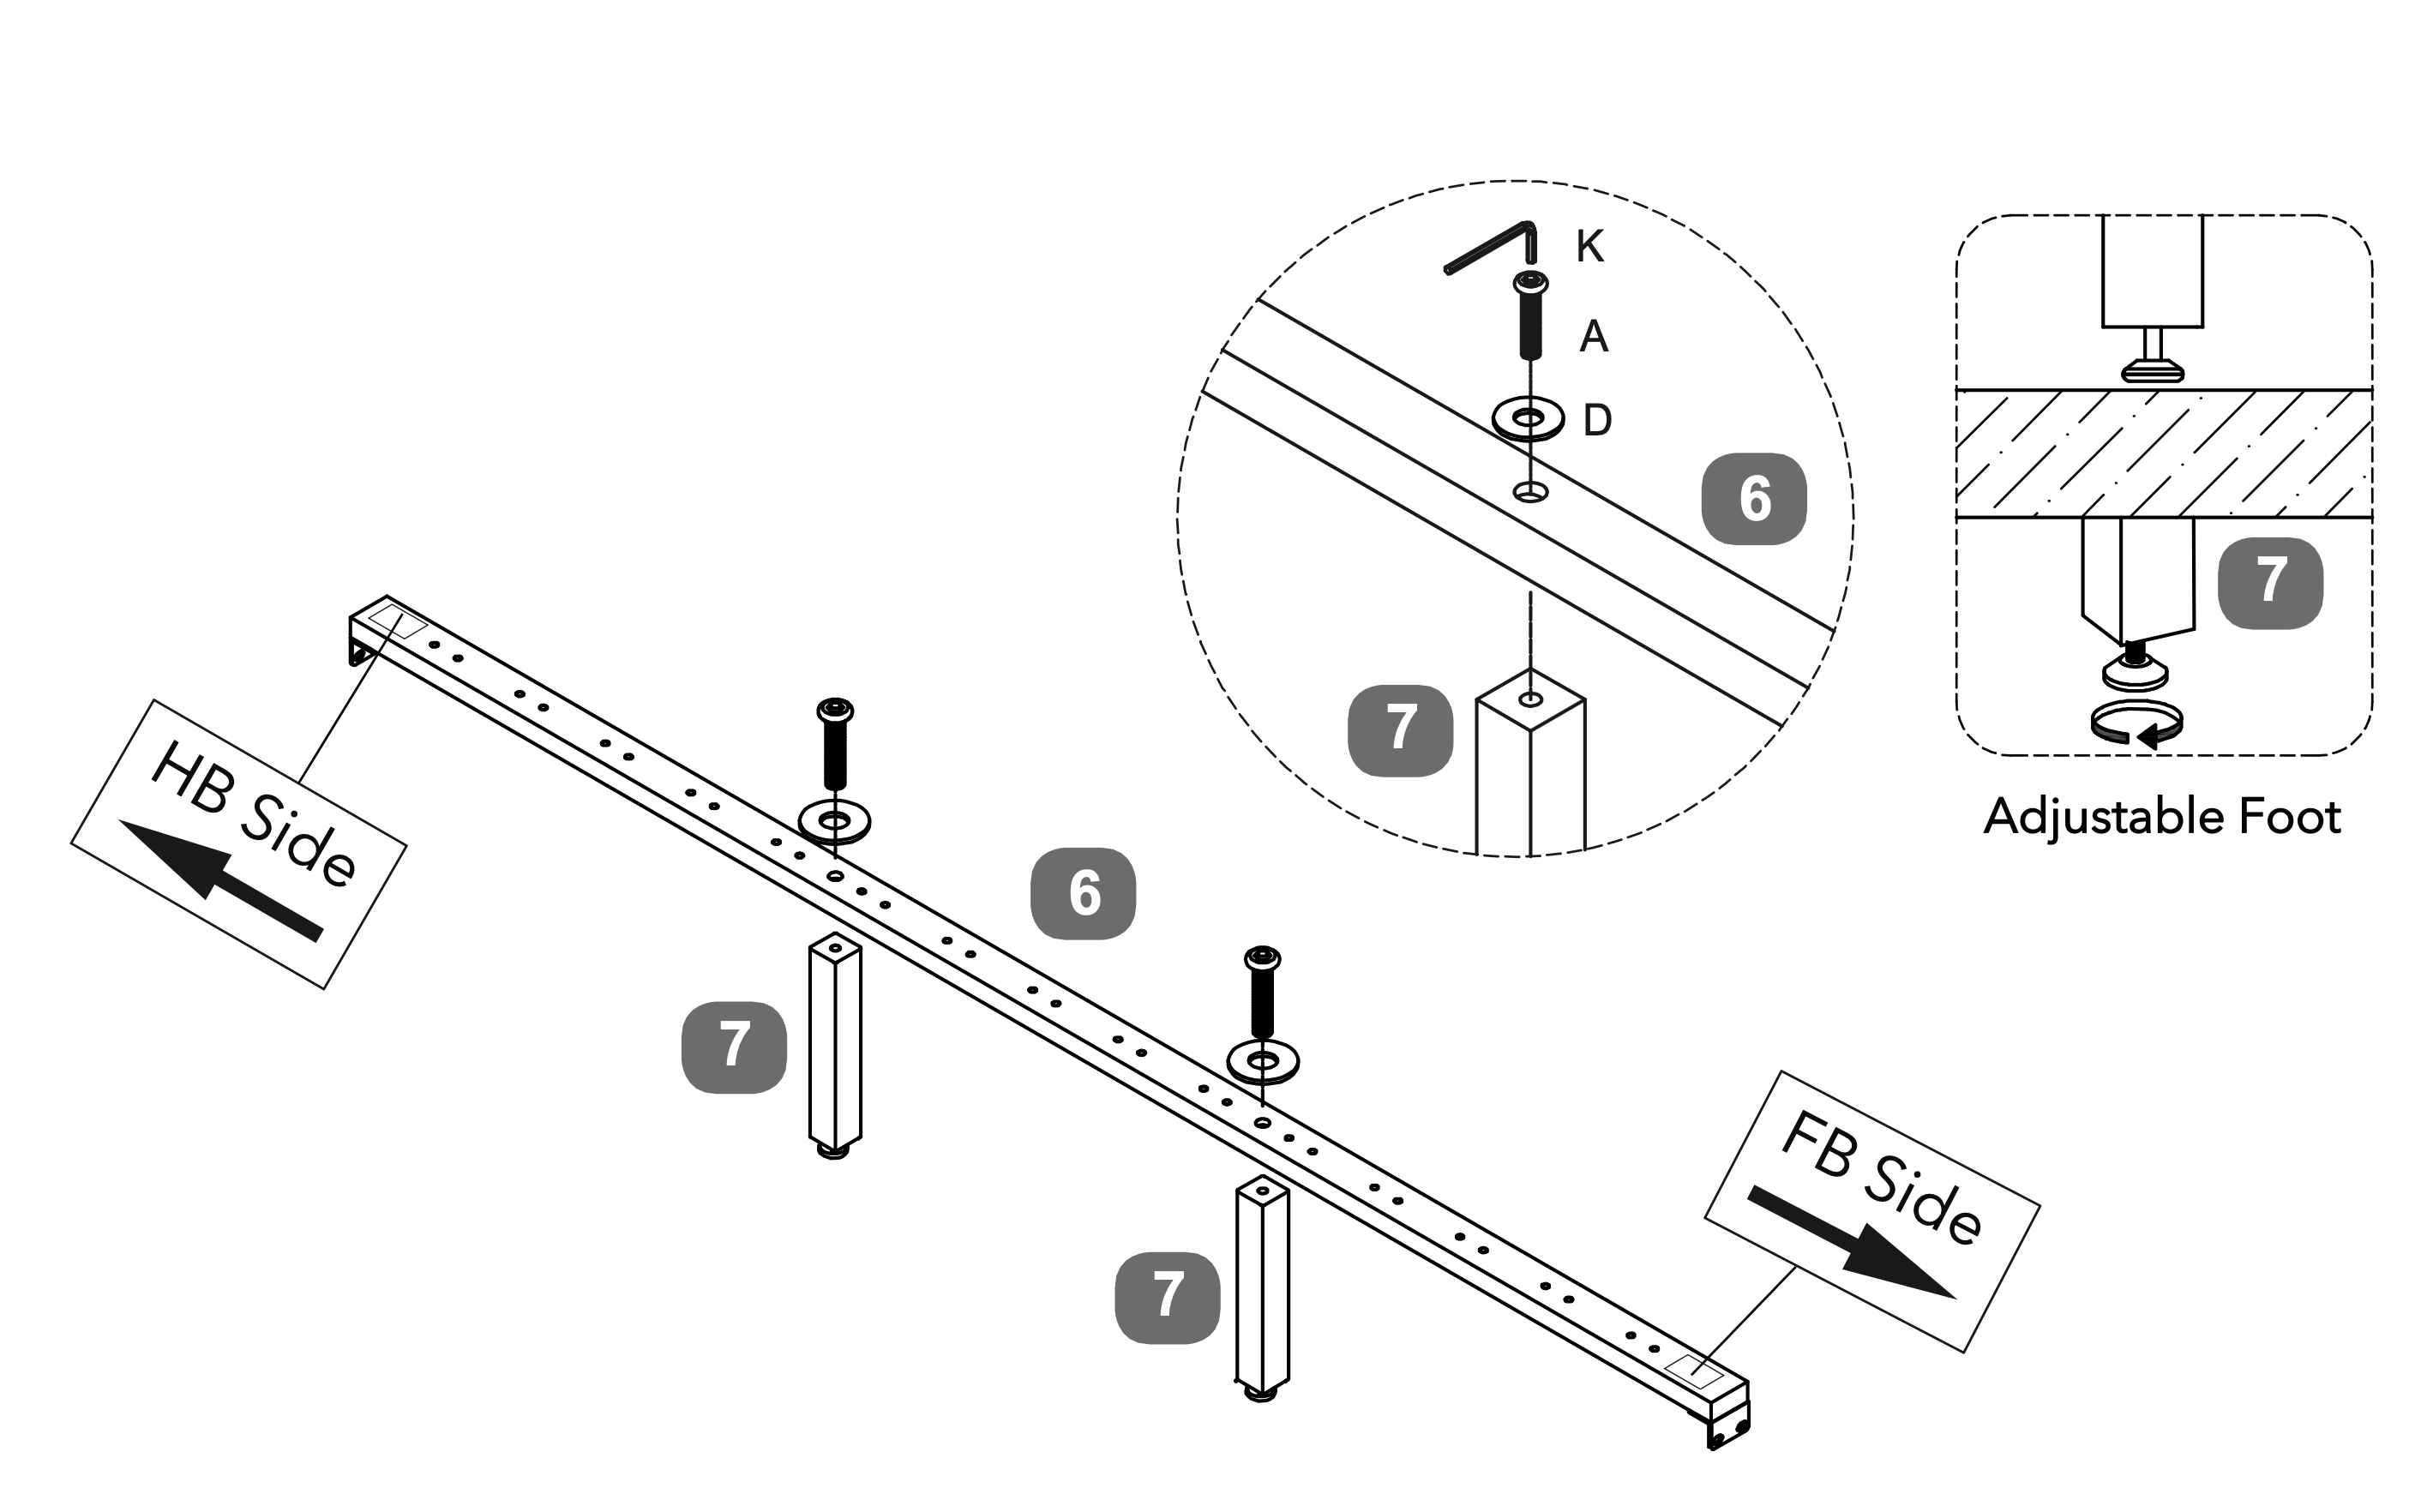 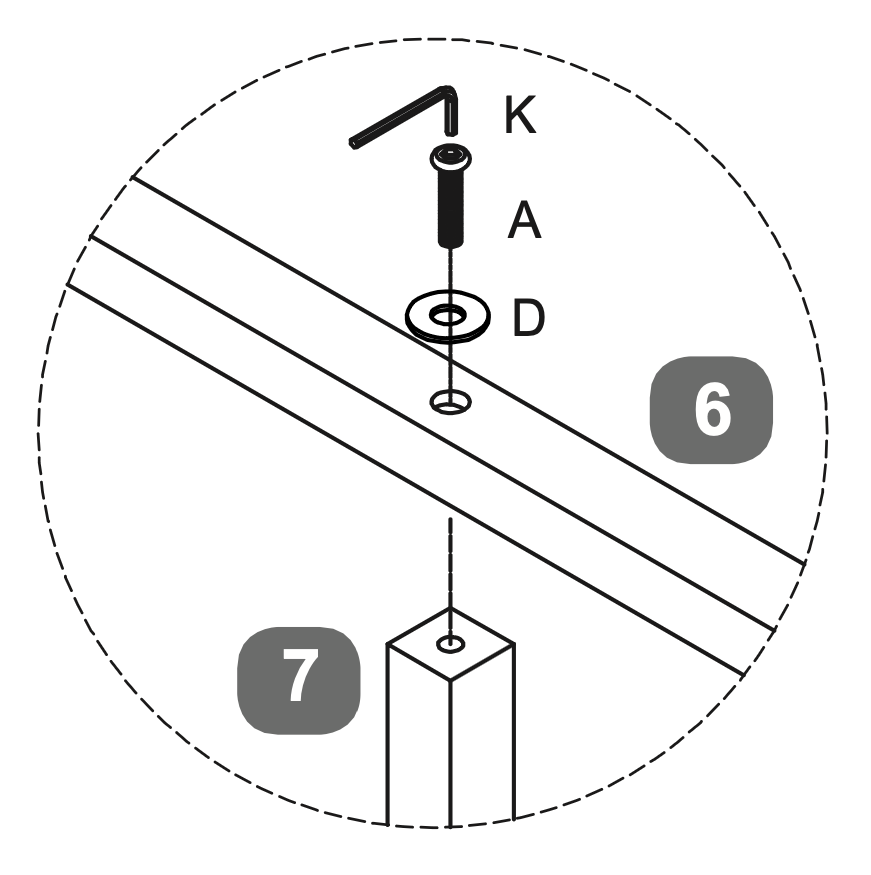 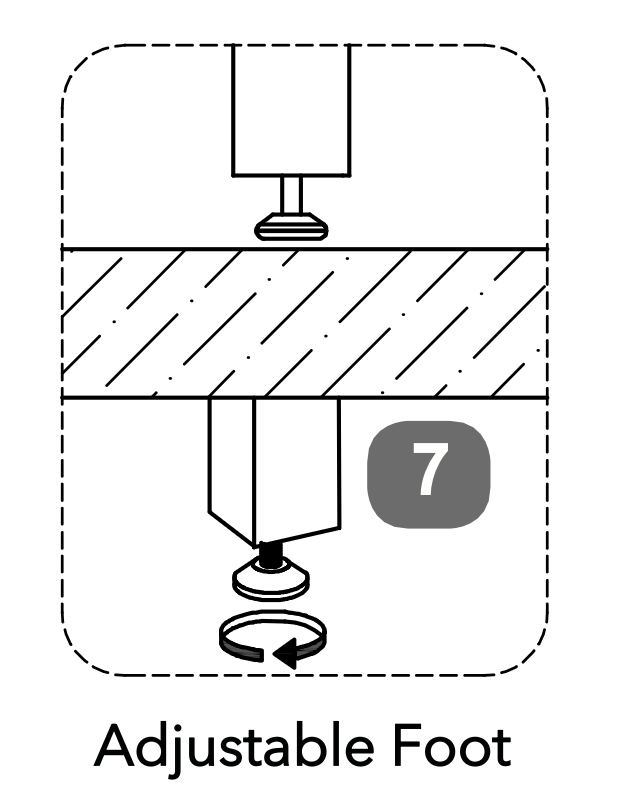
7. Frame Alignment and Securement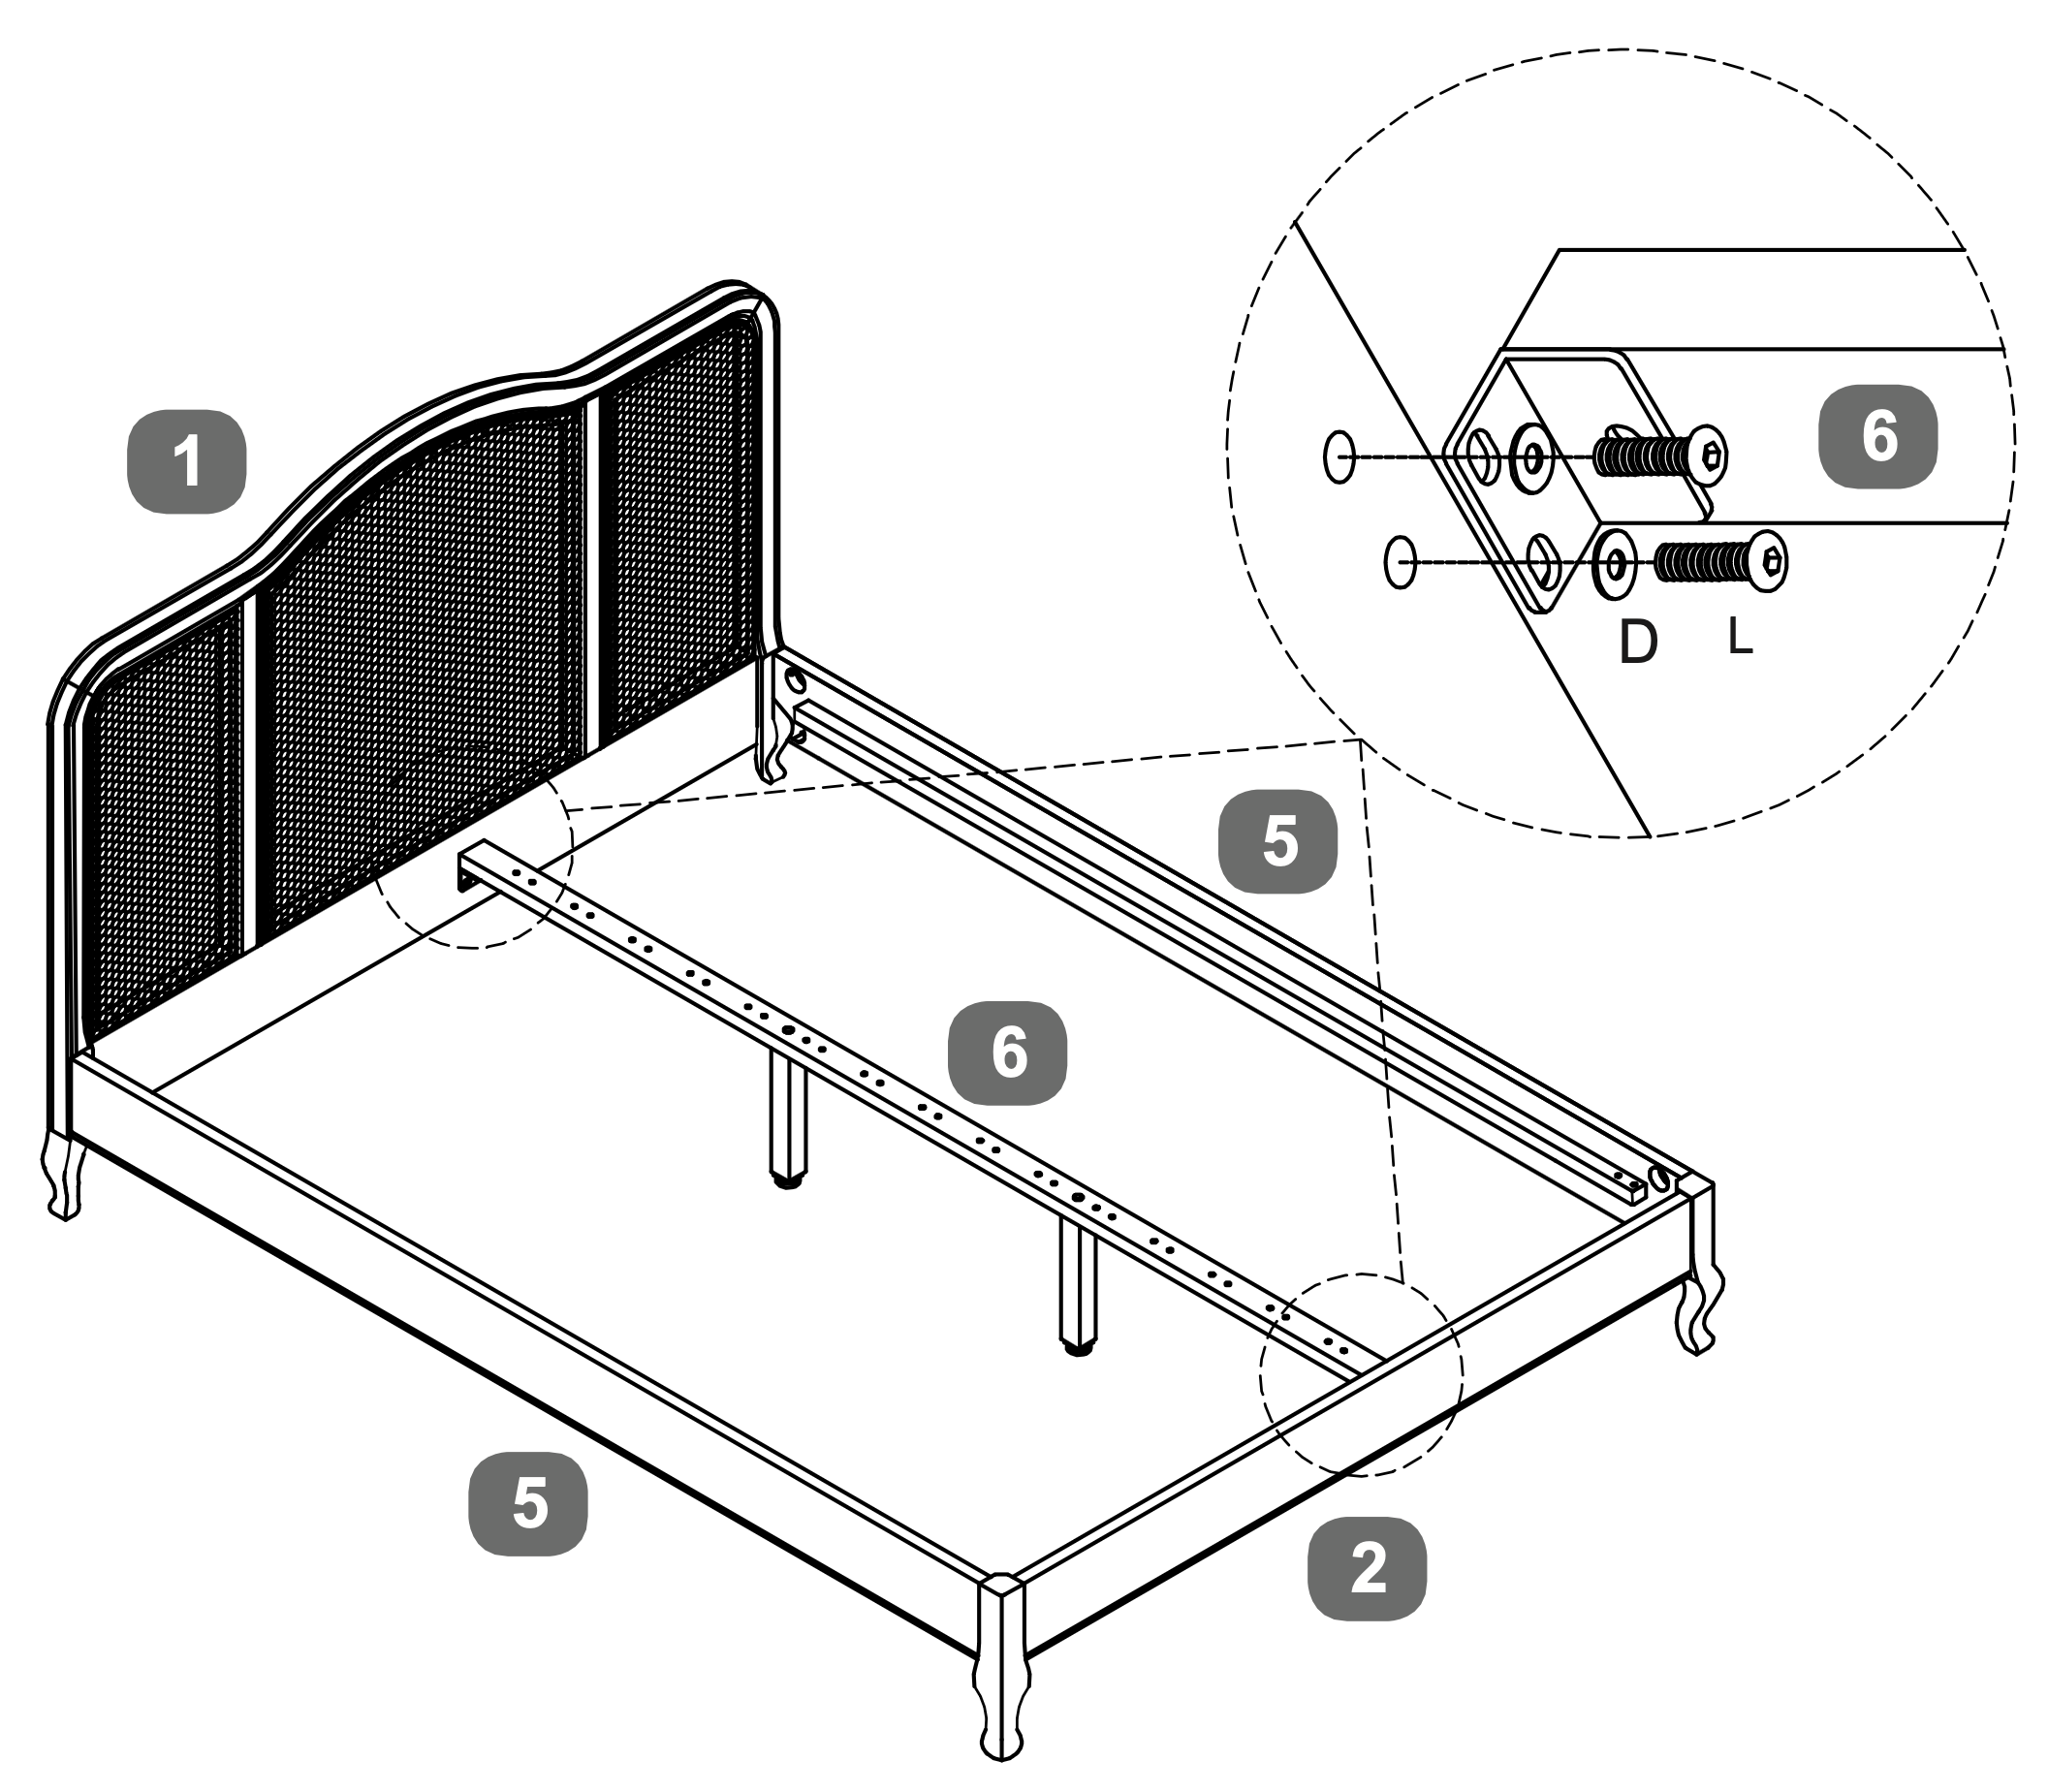 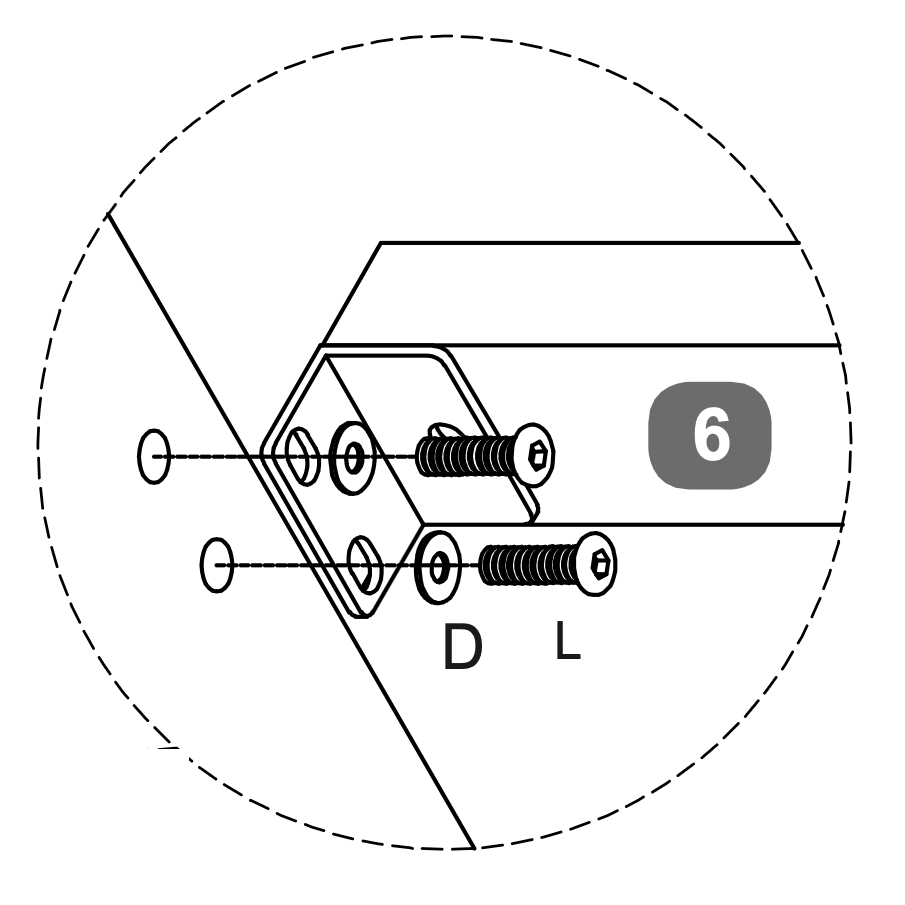 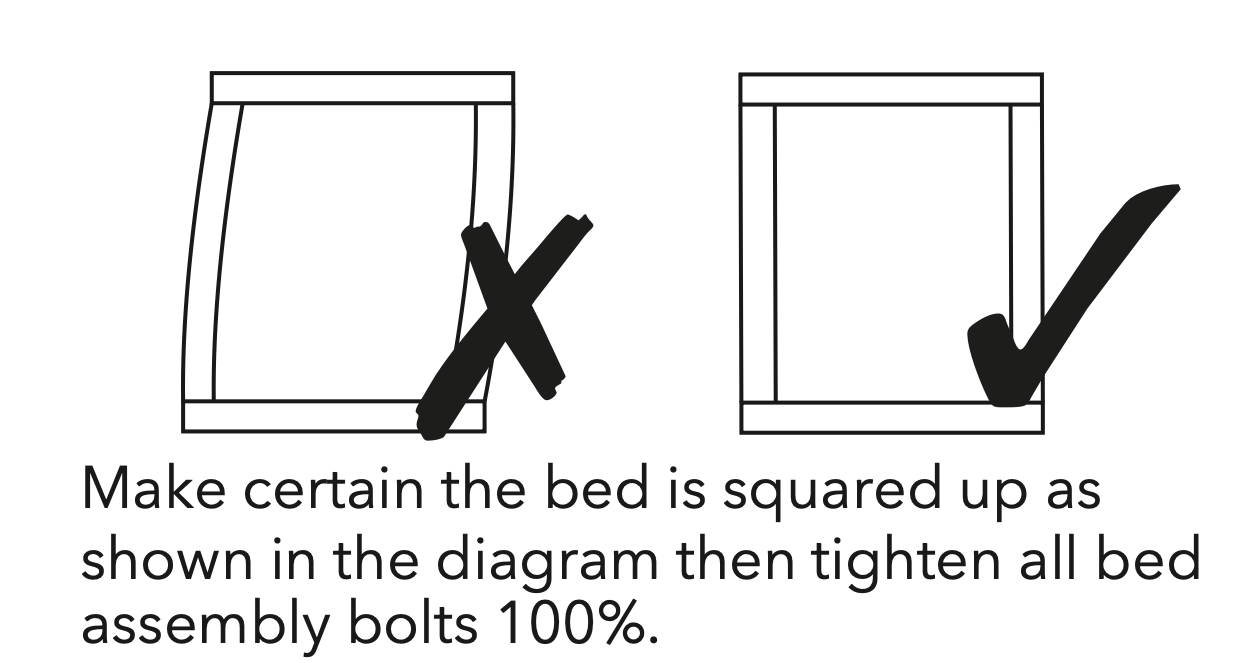
8. Slat Insertion and Securement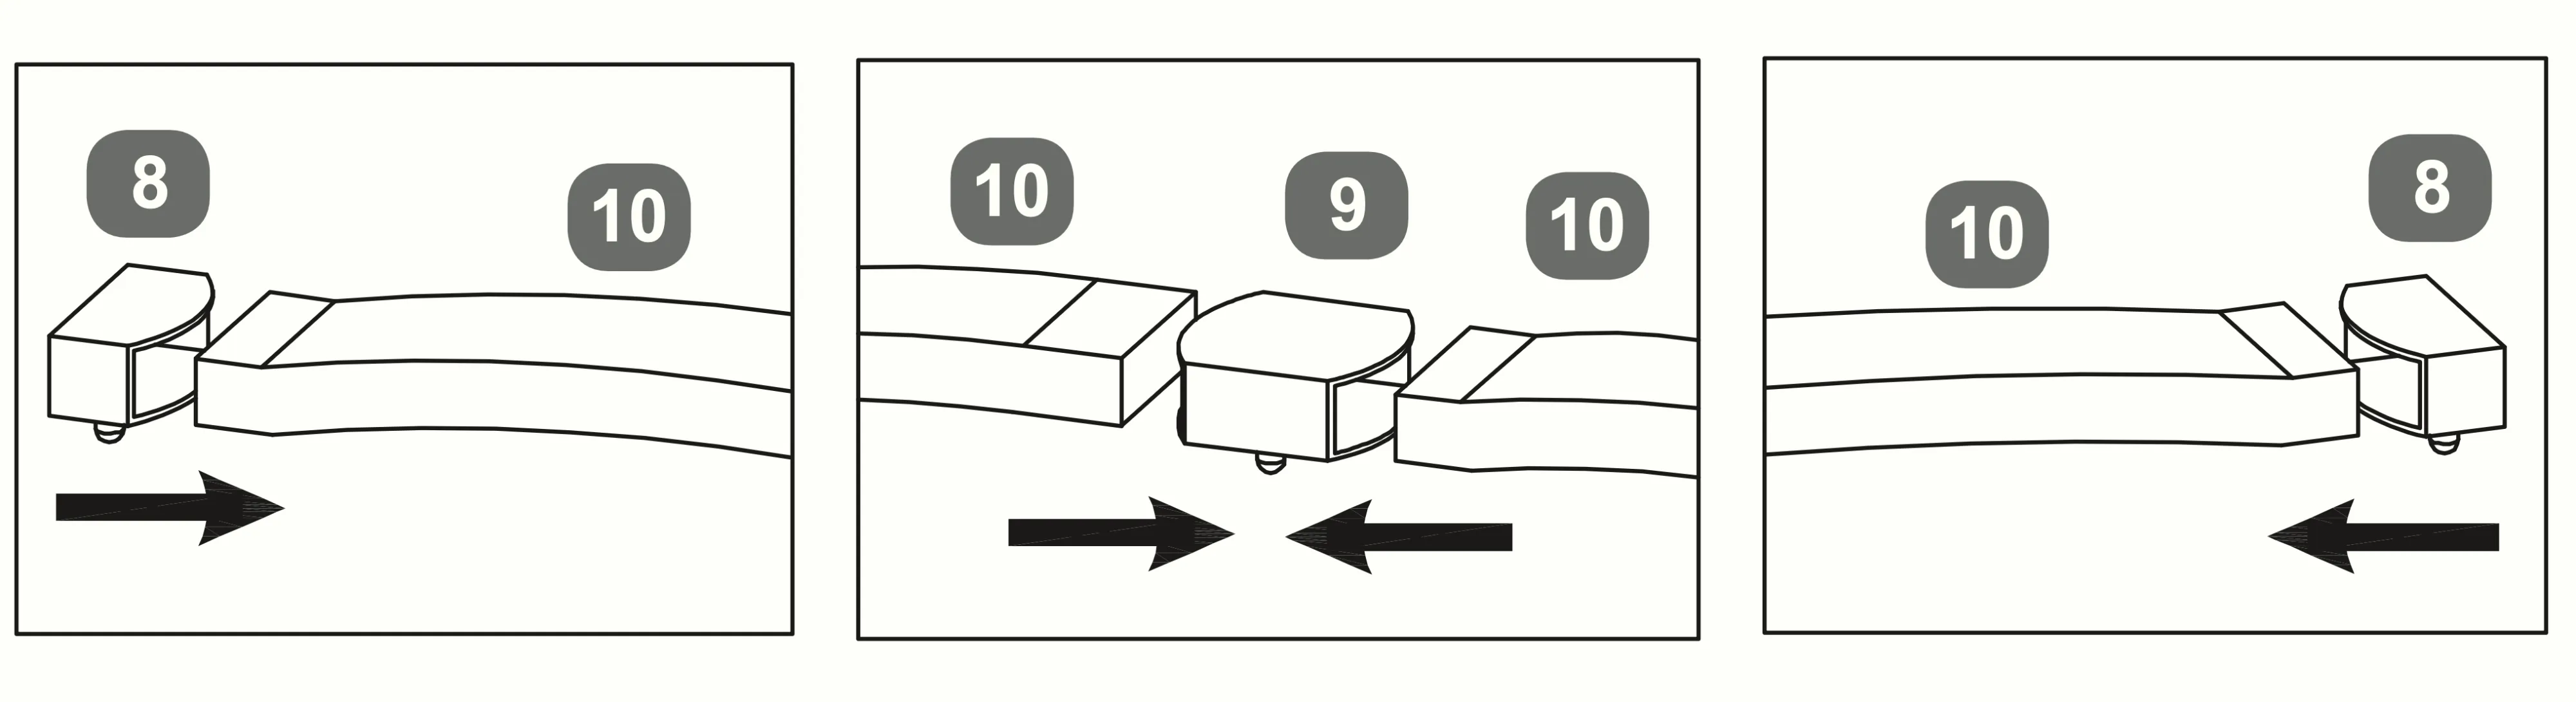 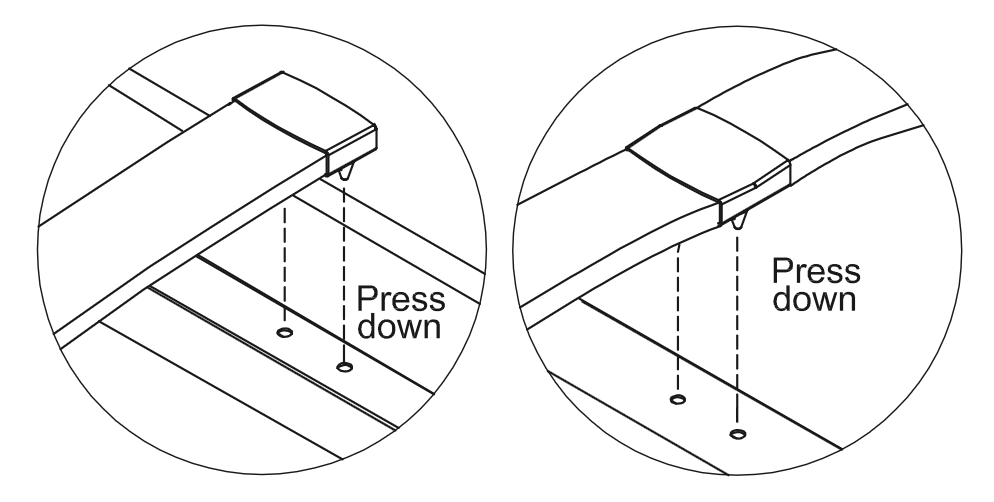 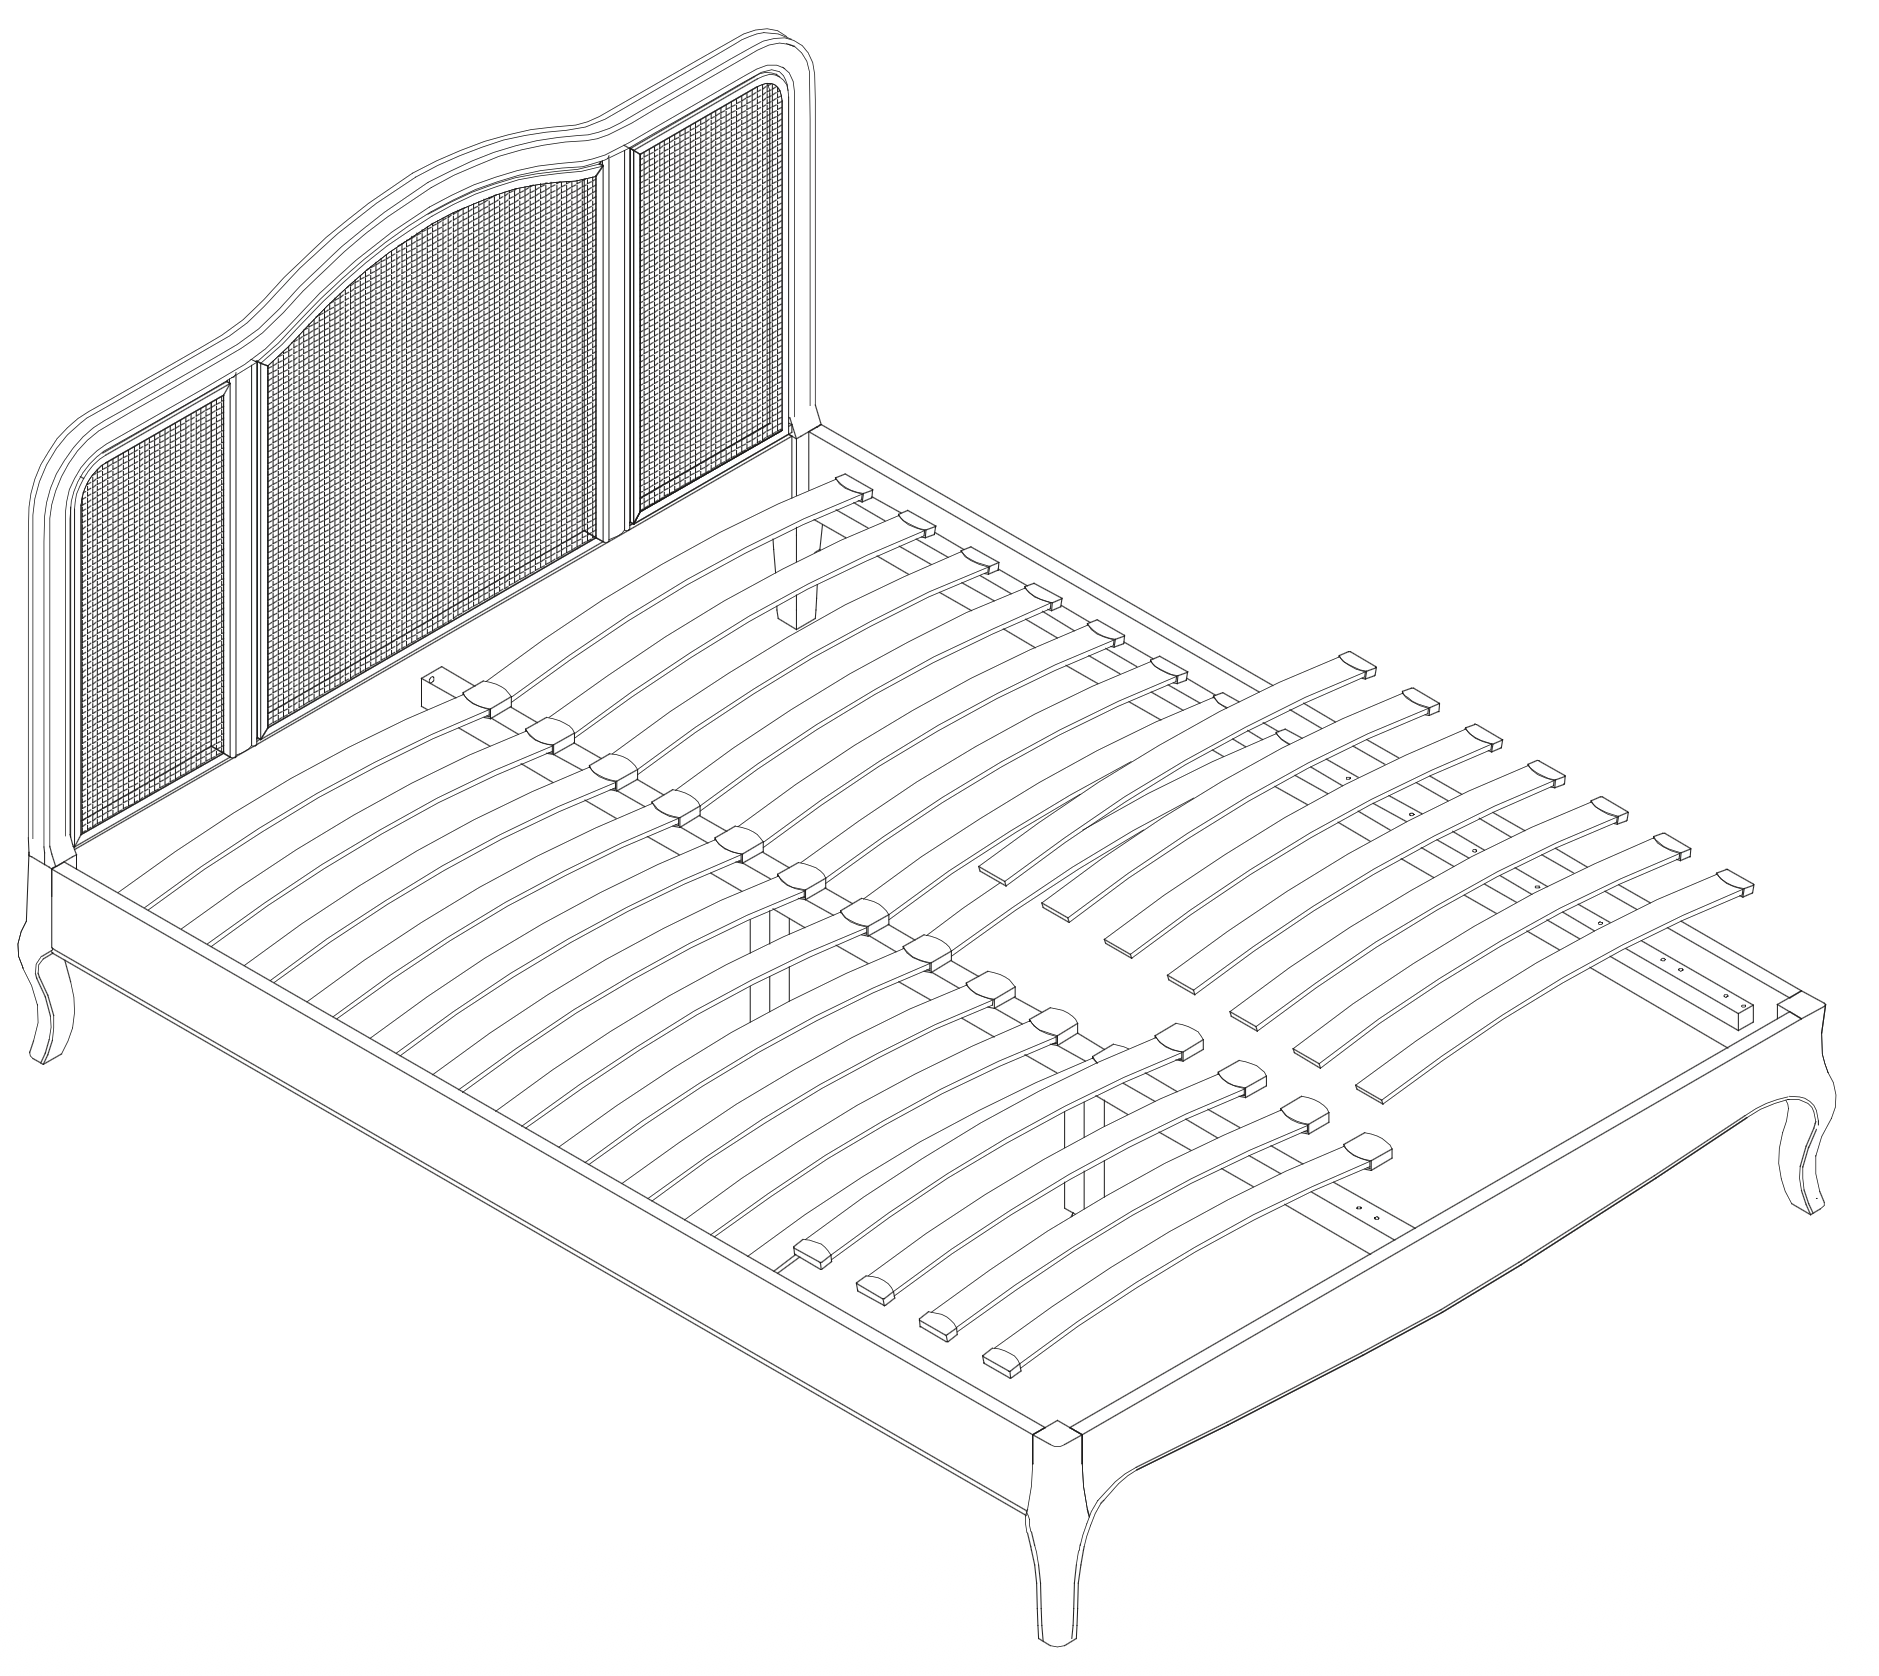
|