


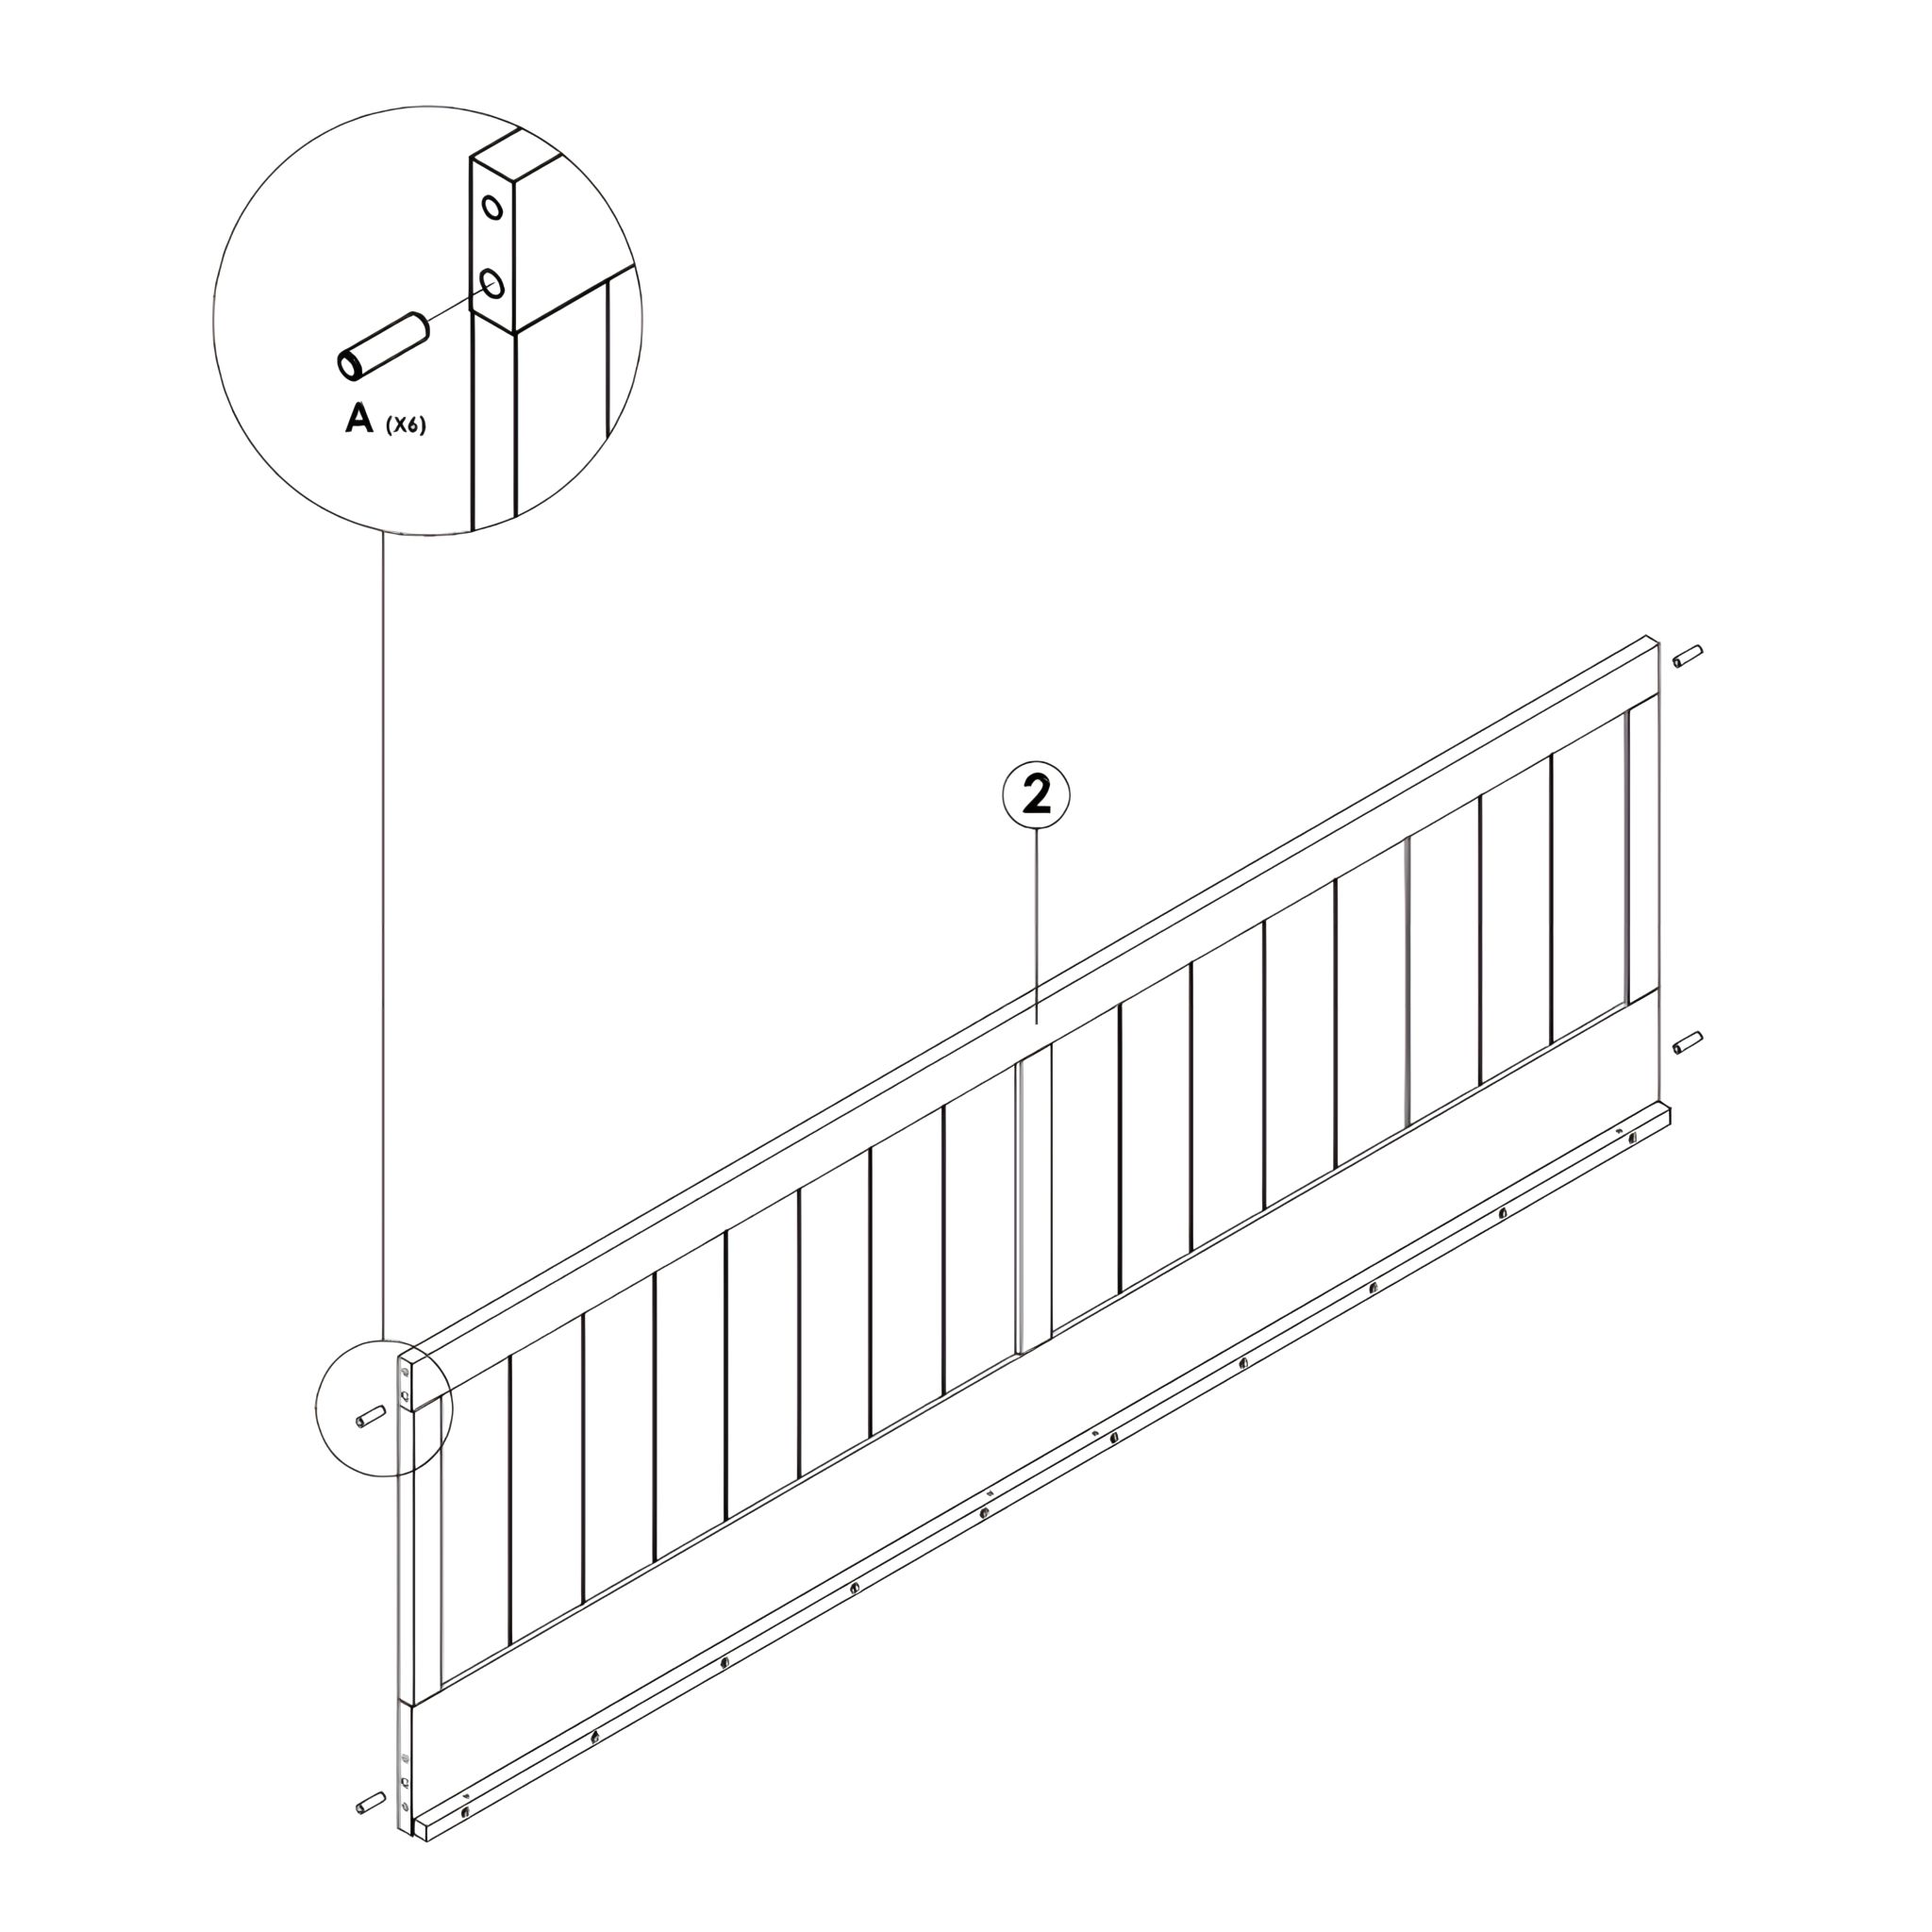
1. Insert Plastic Dowels
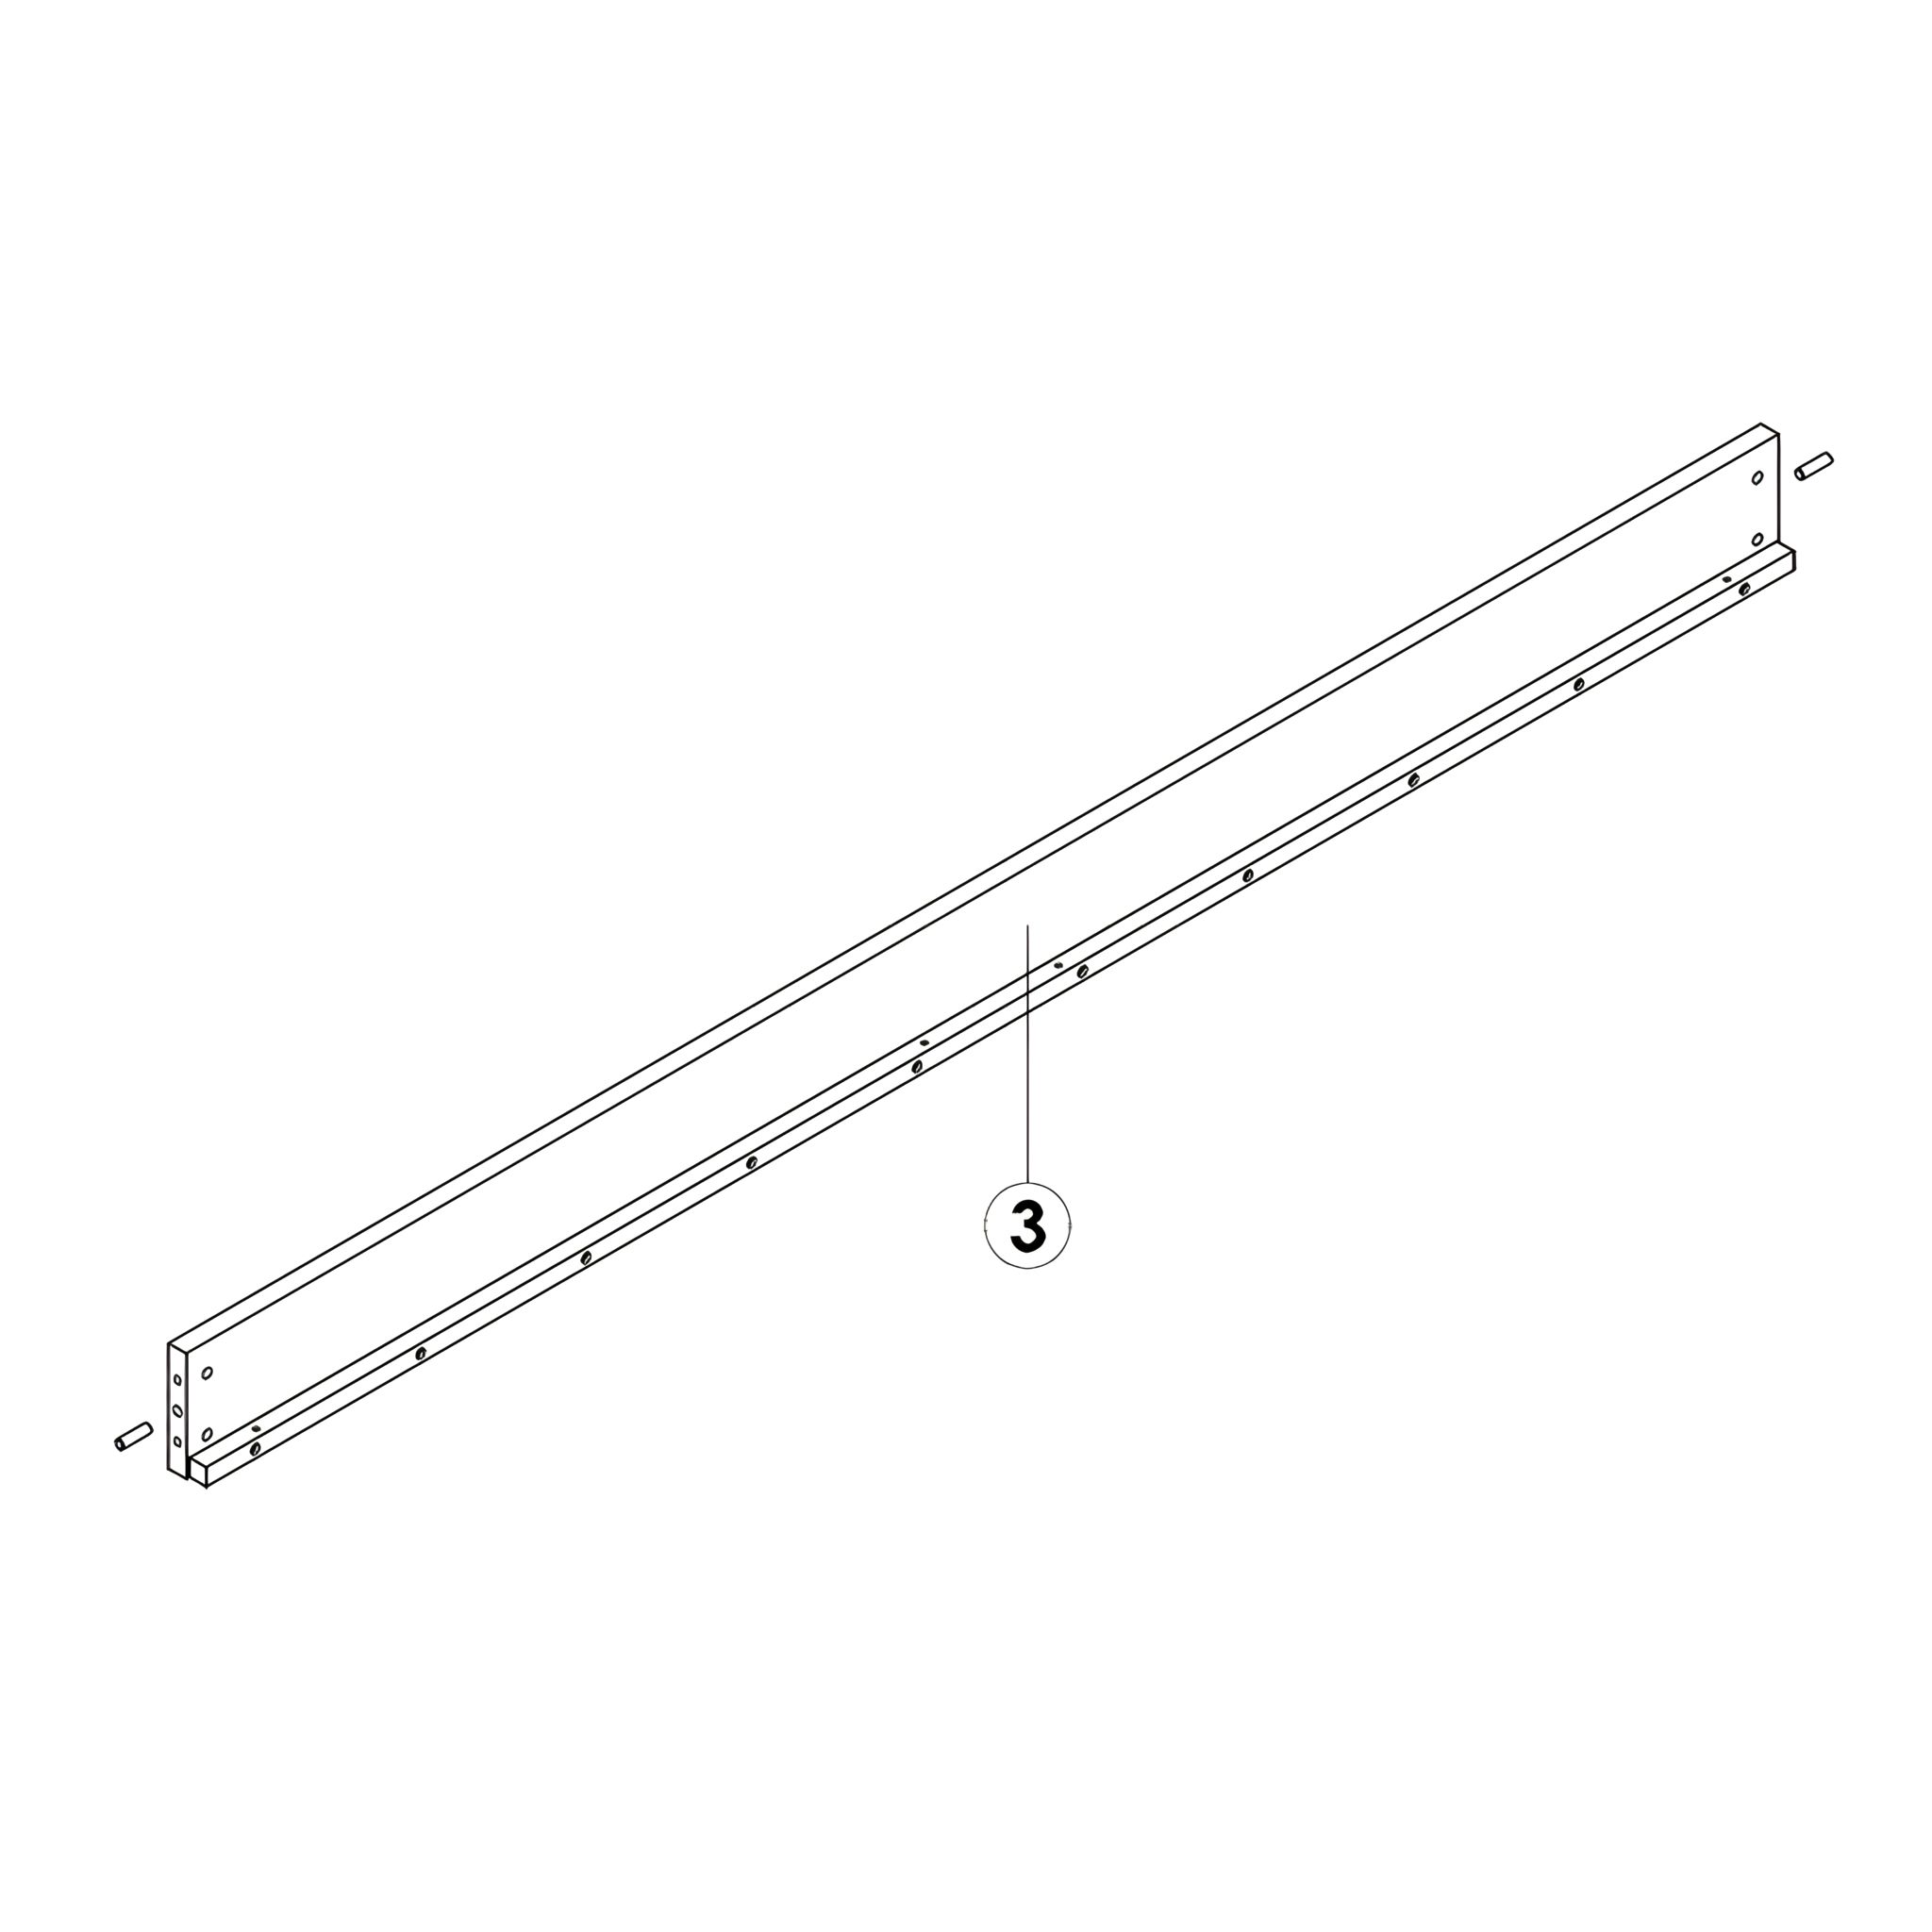
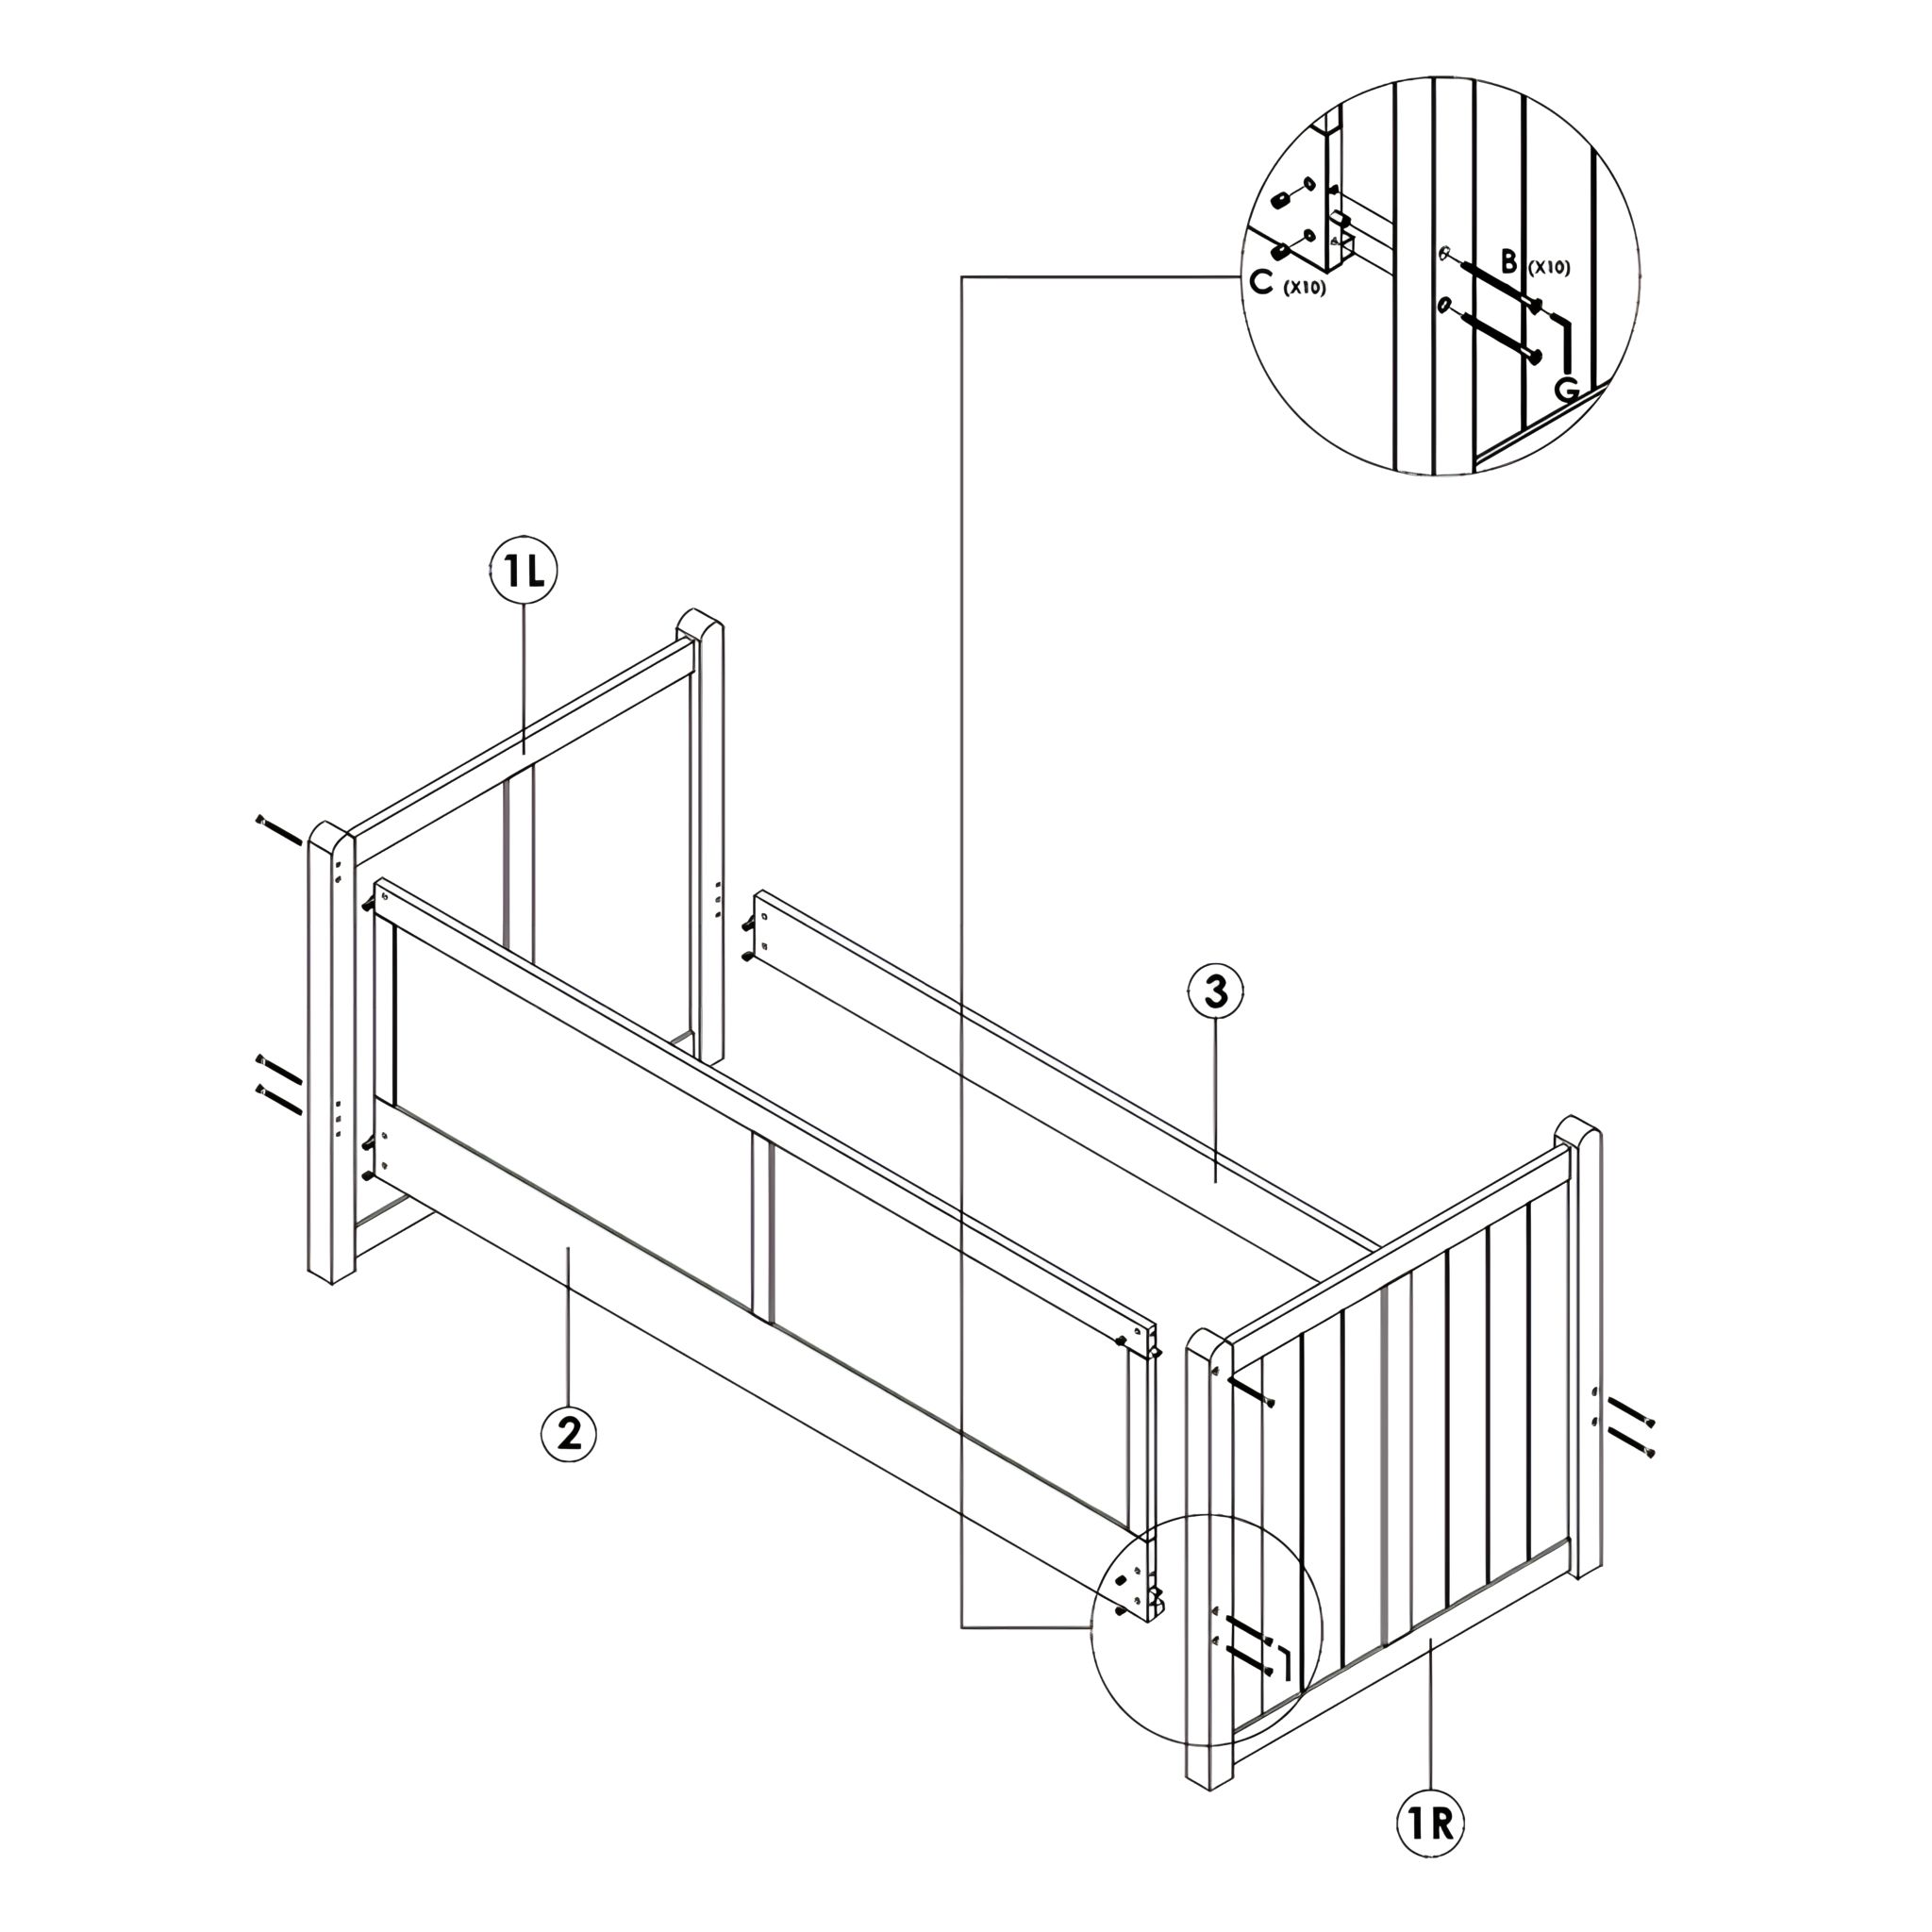
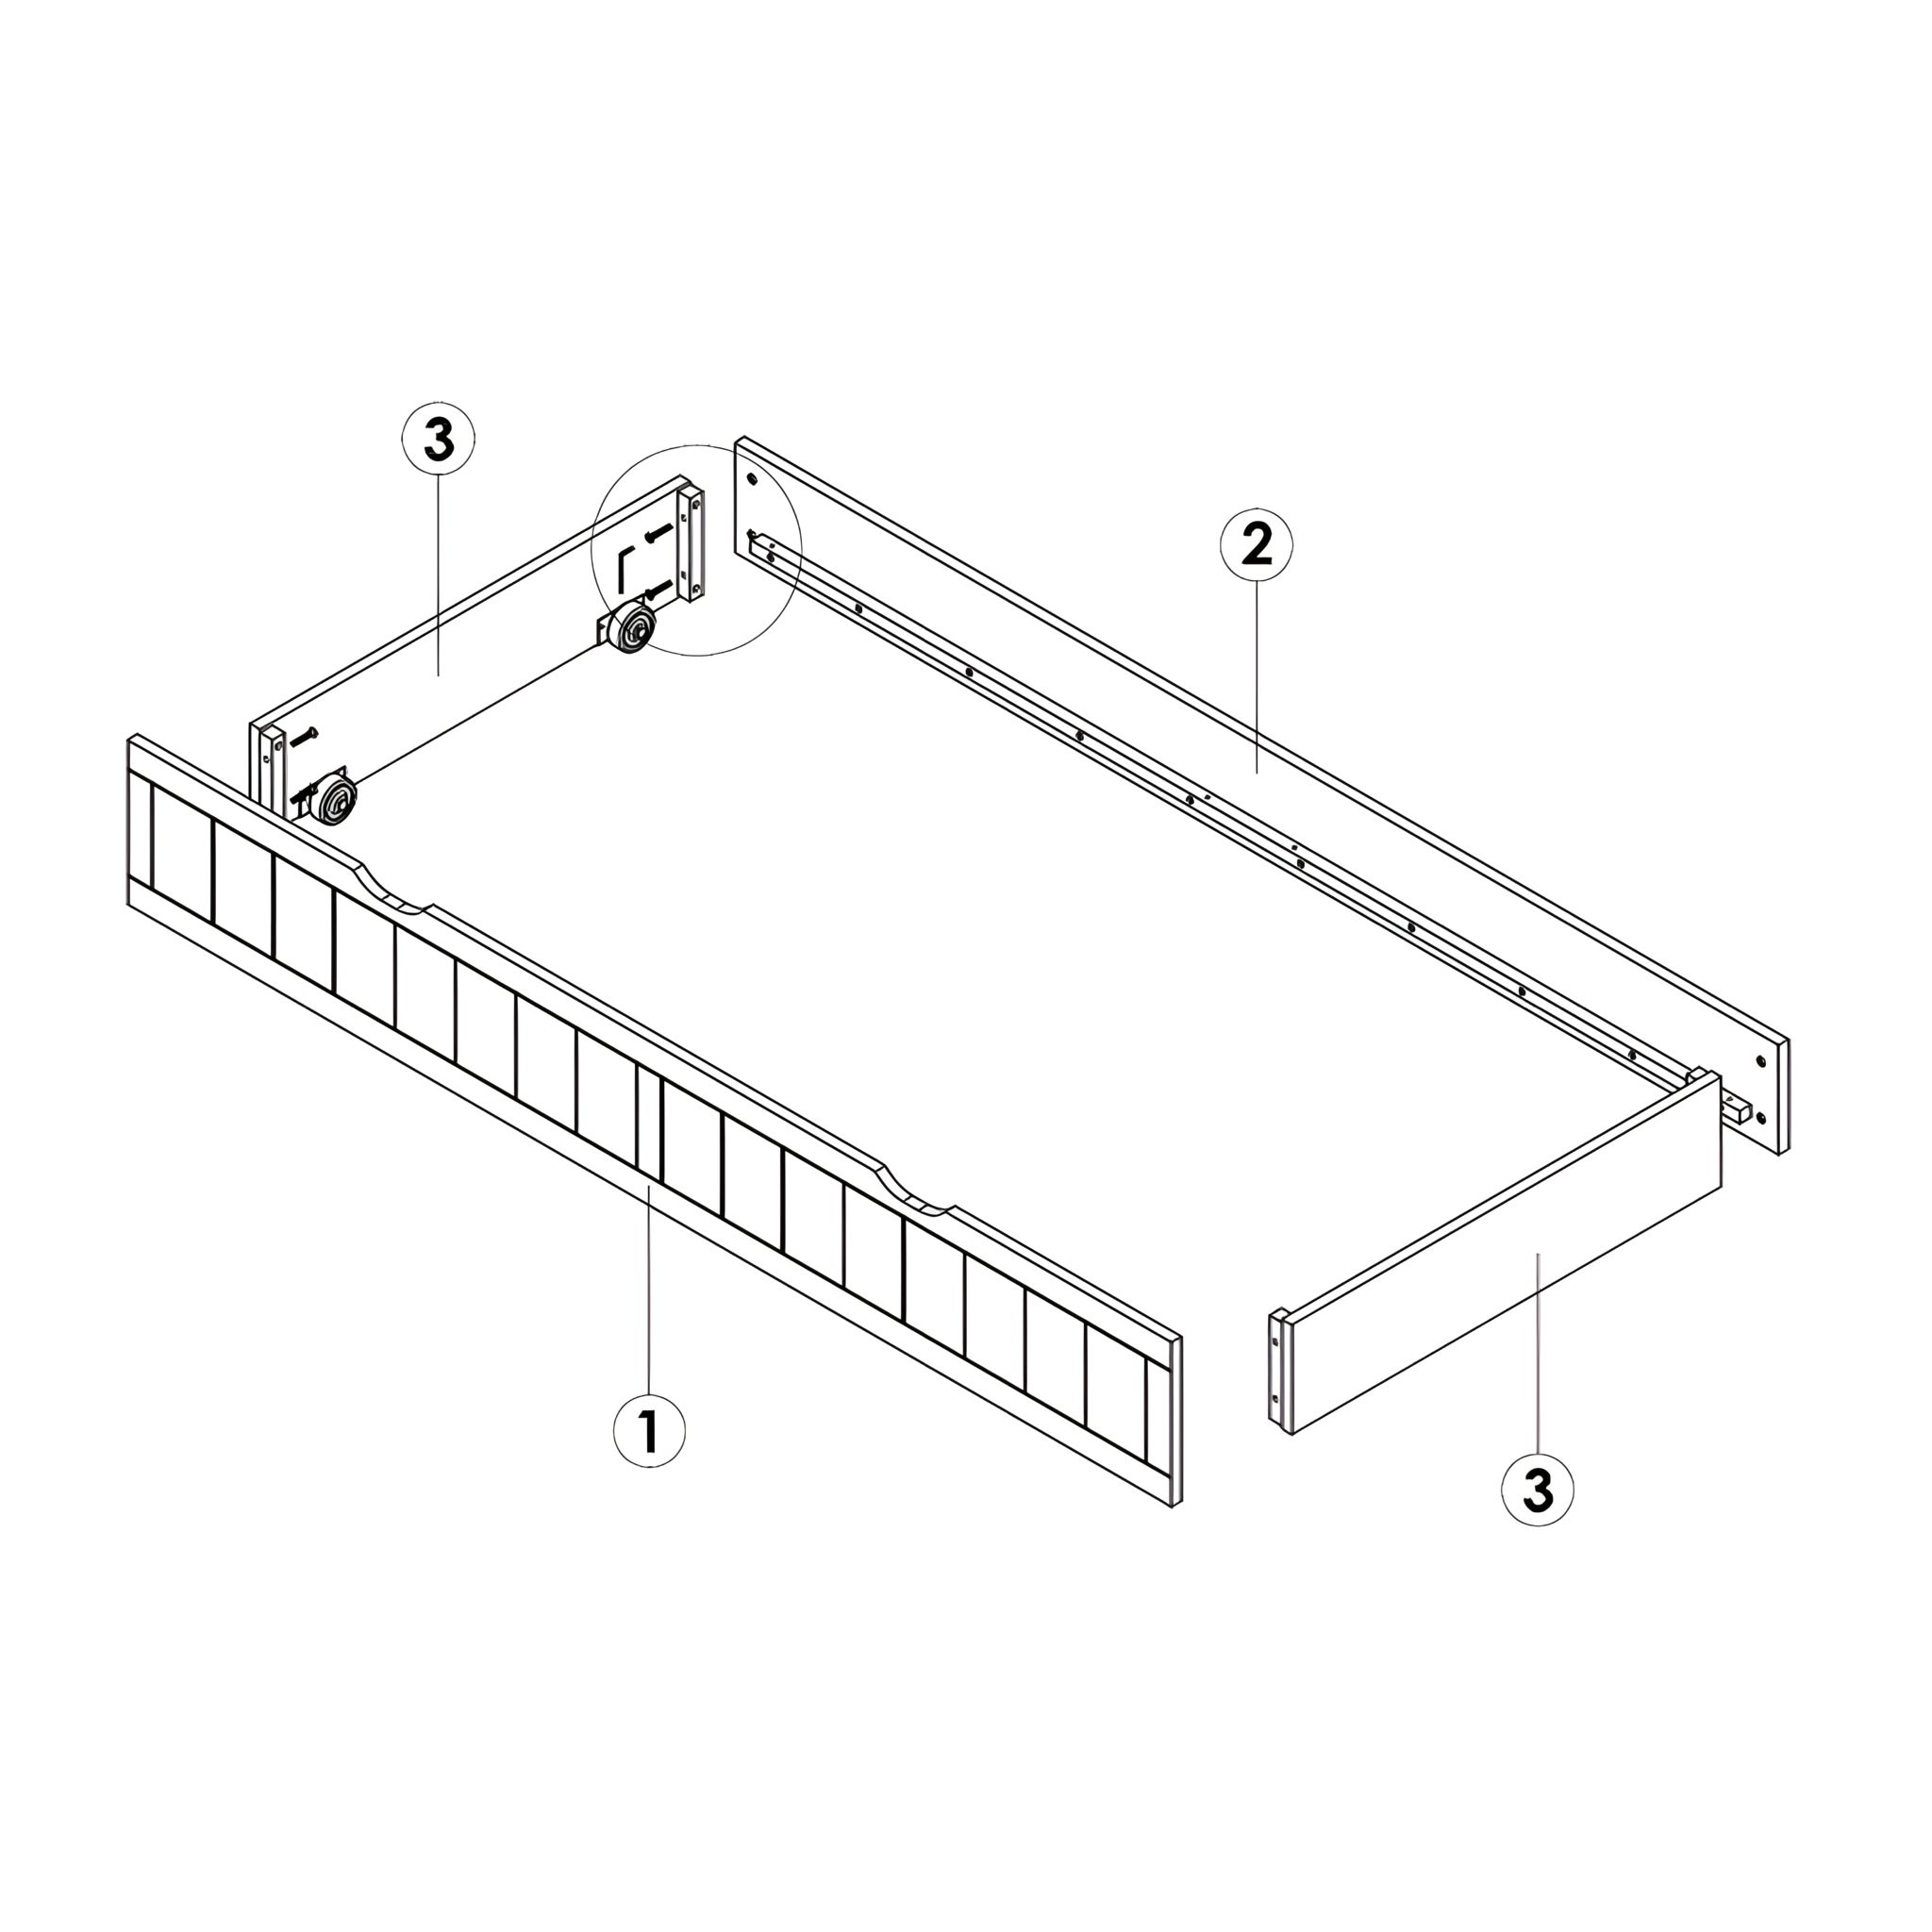
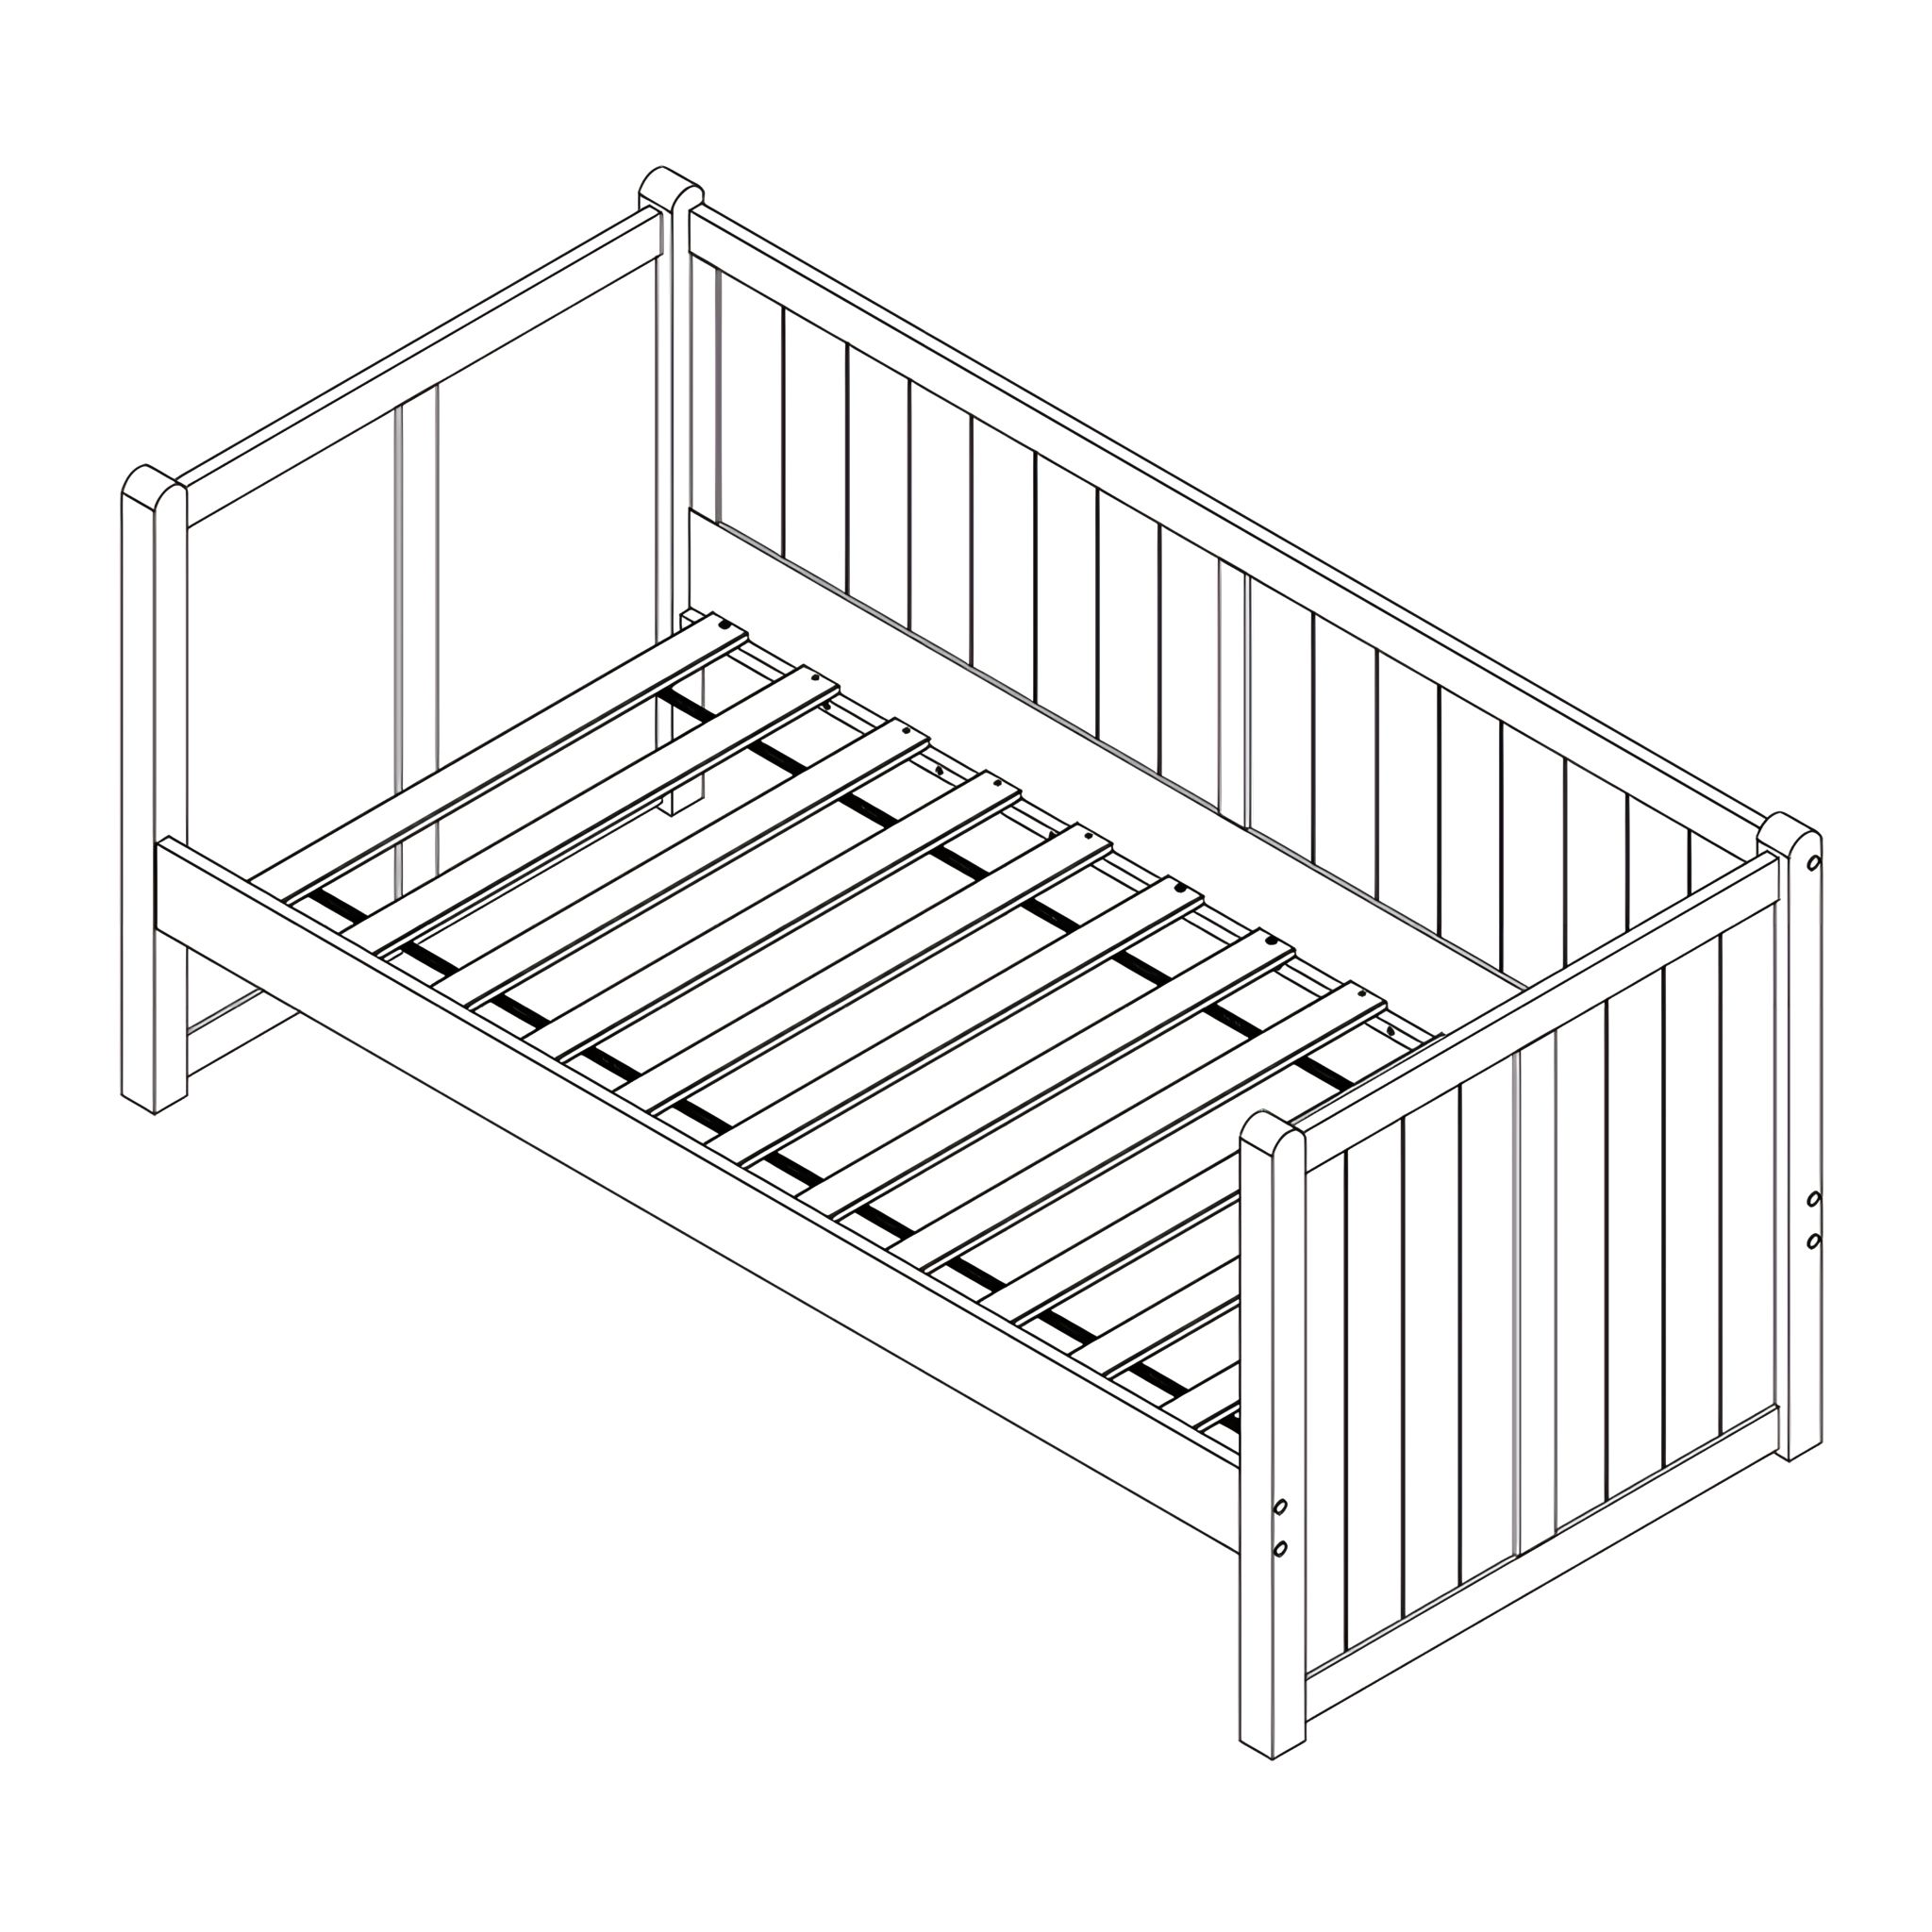
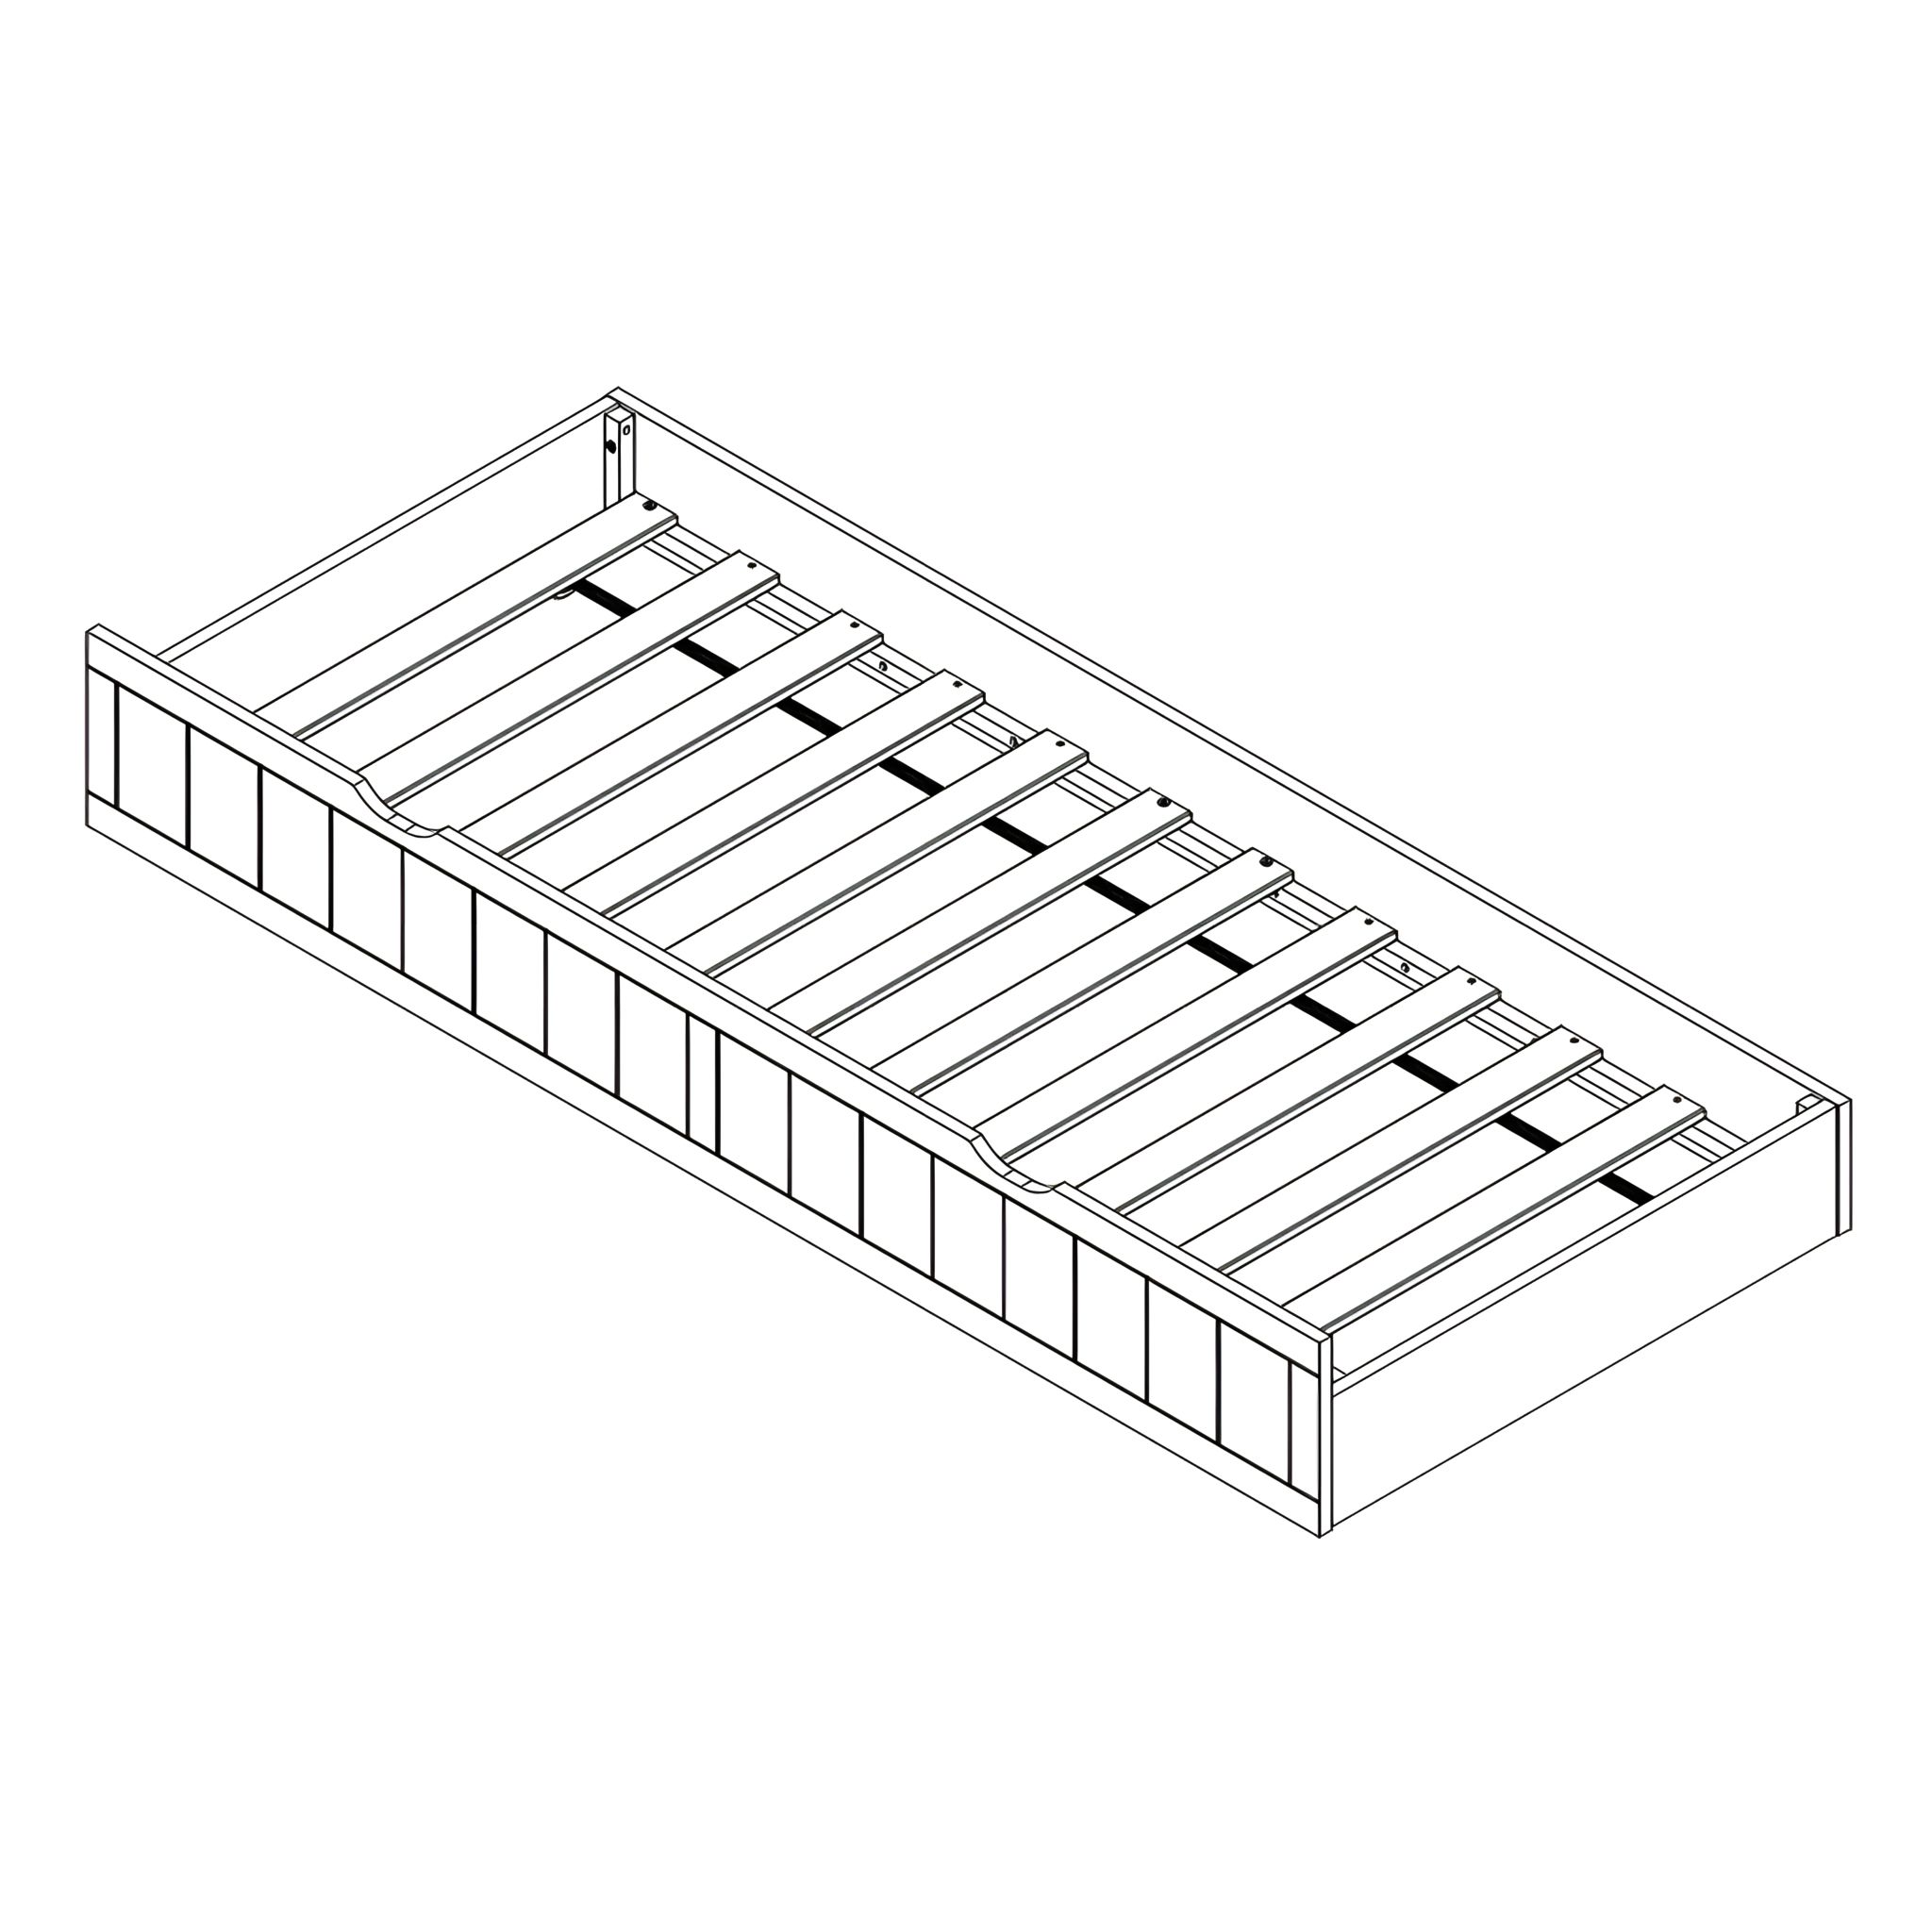
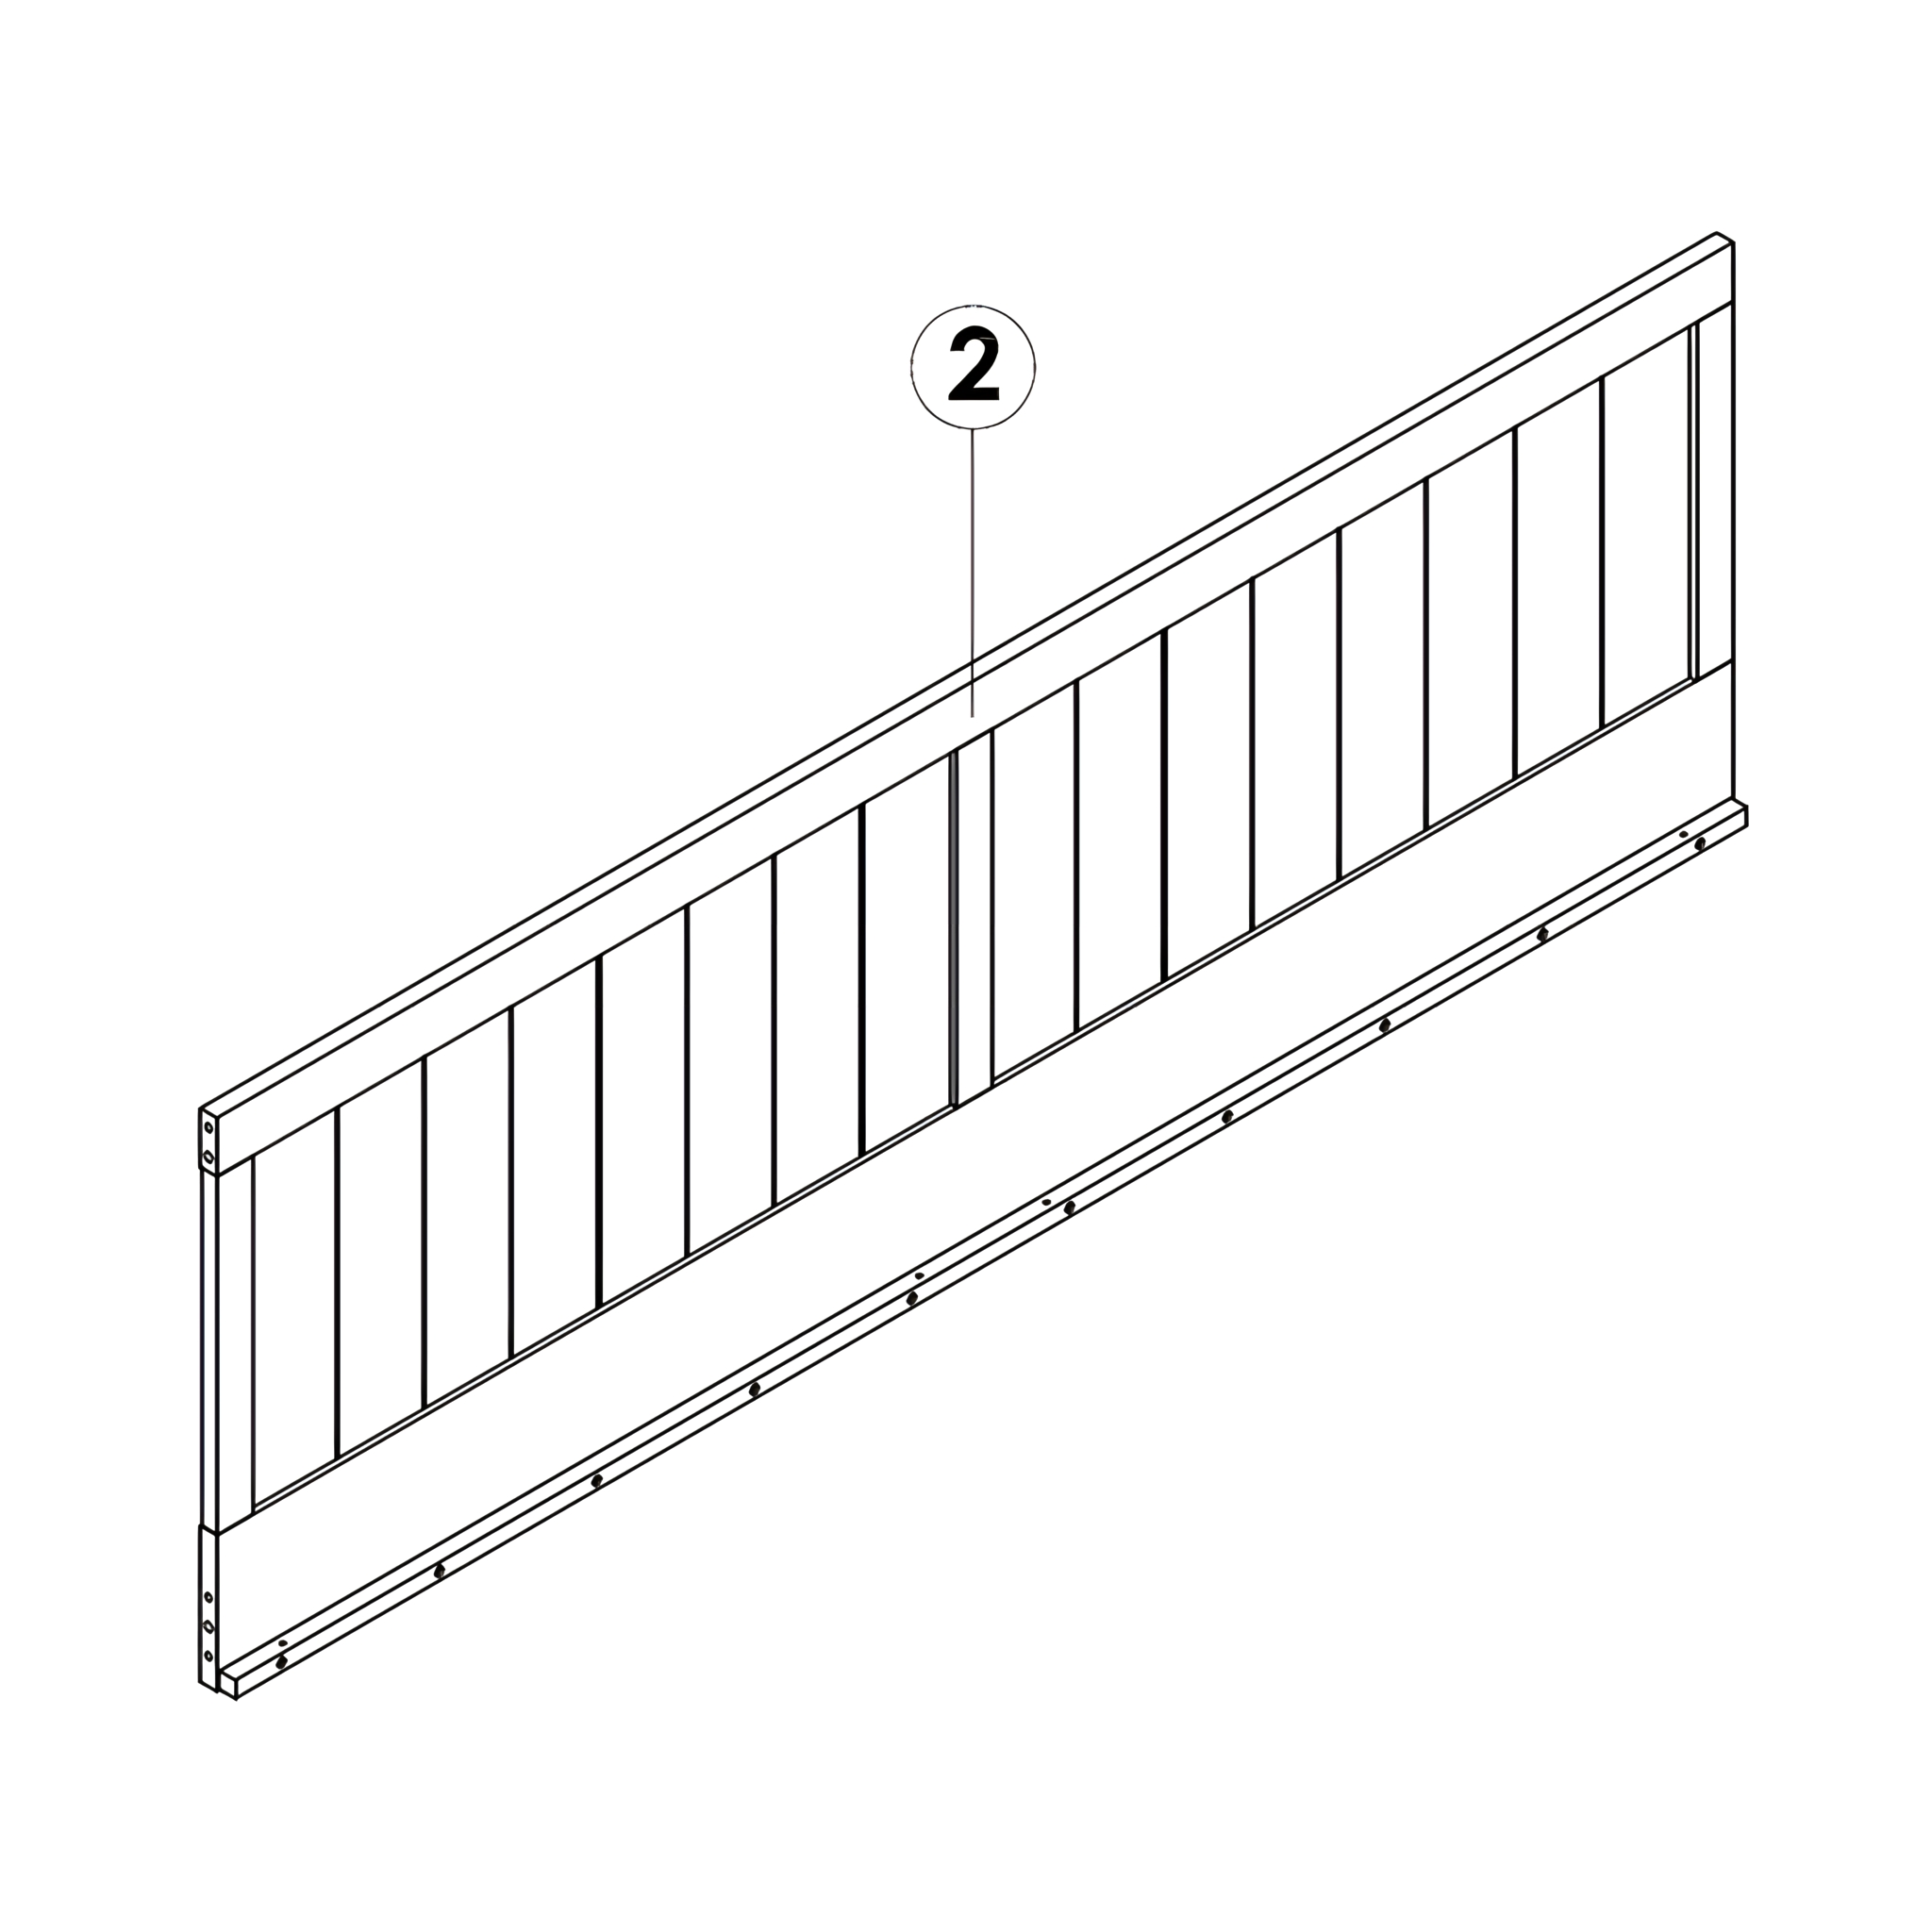
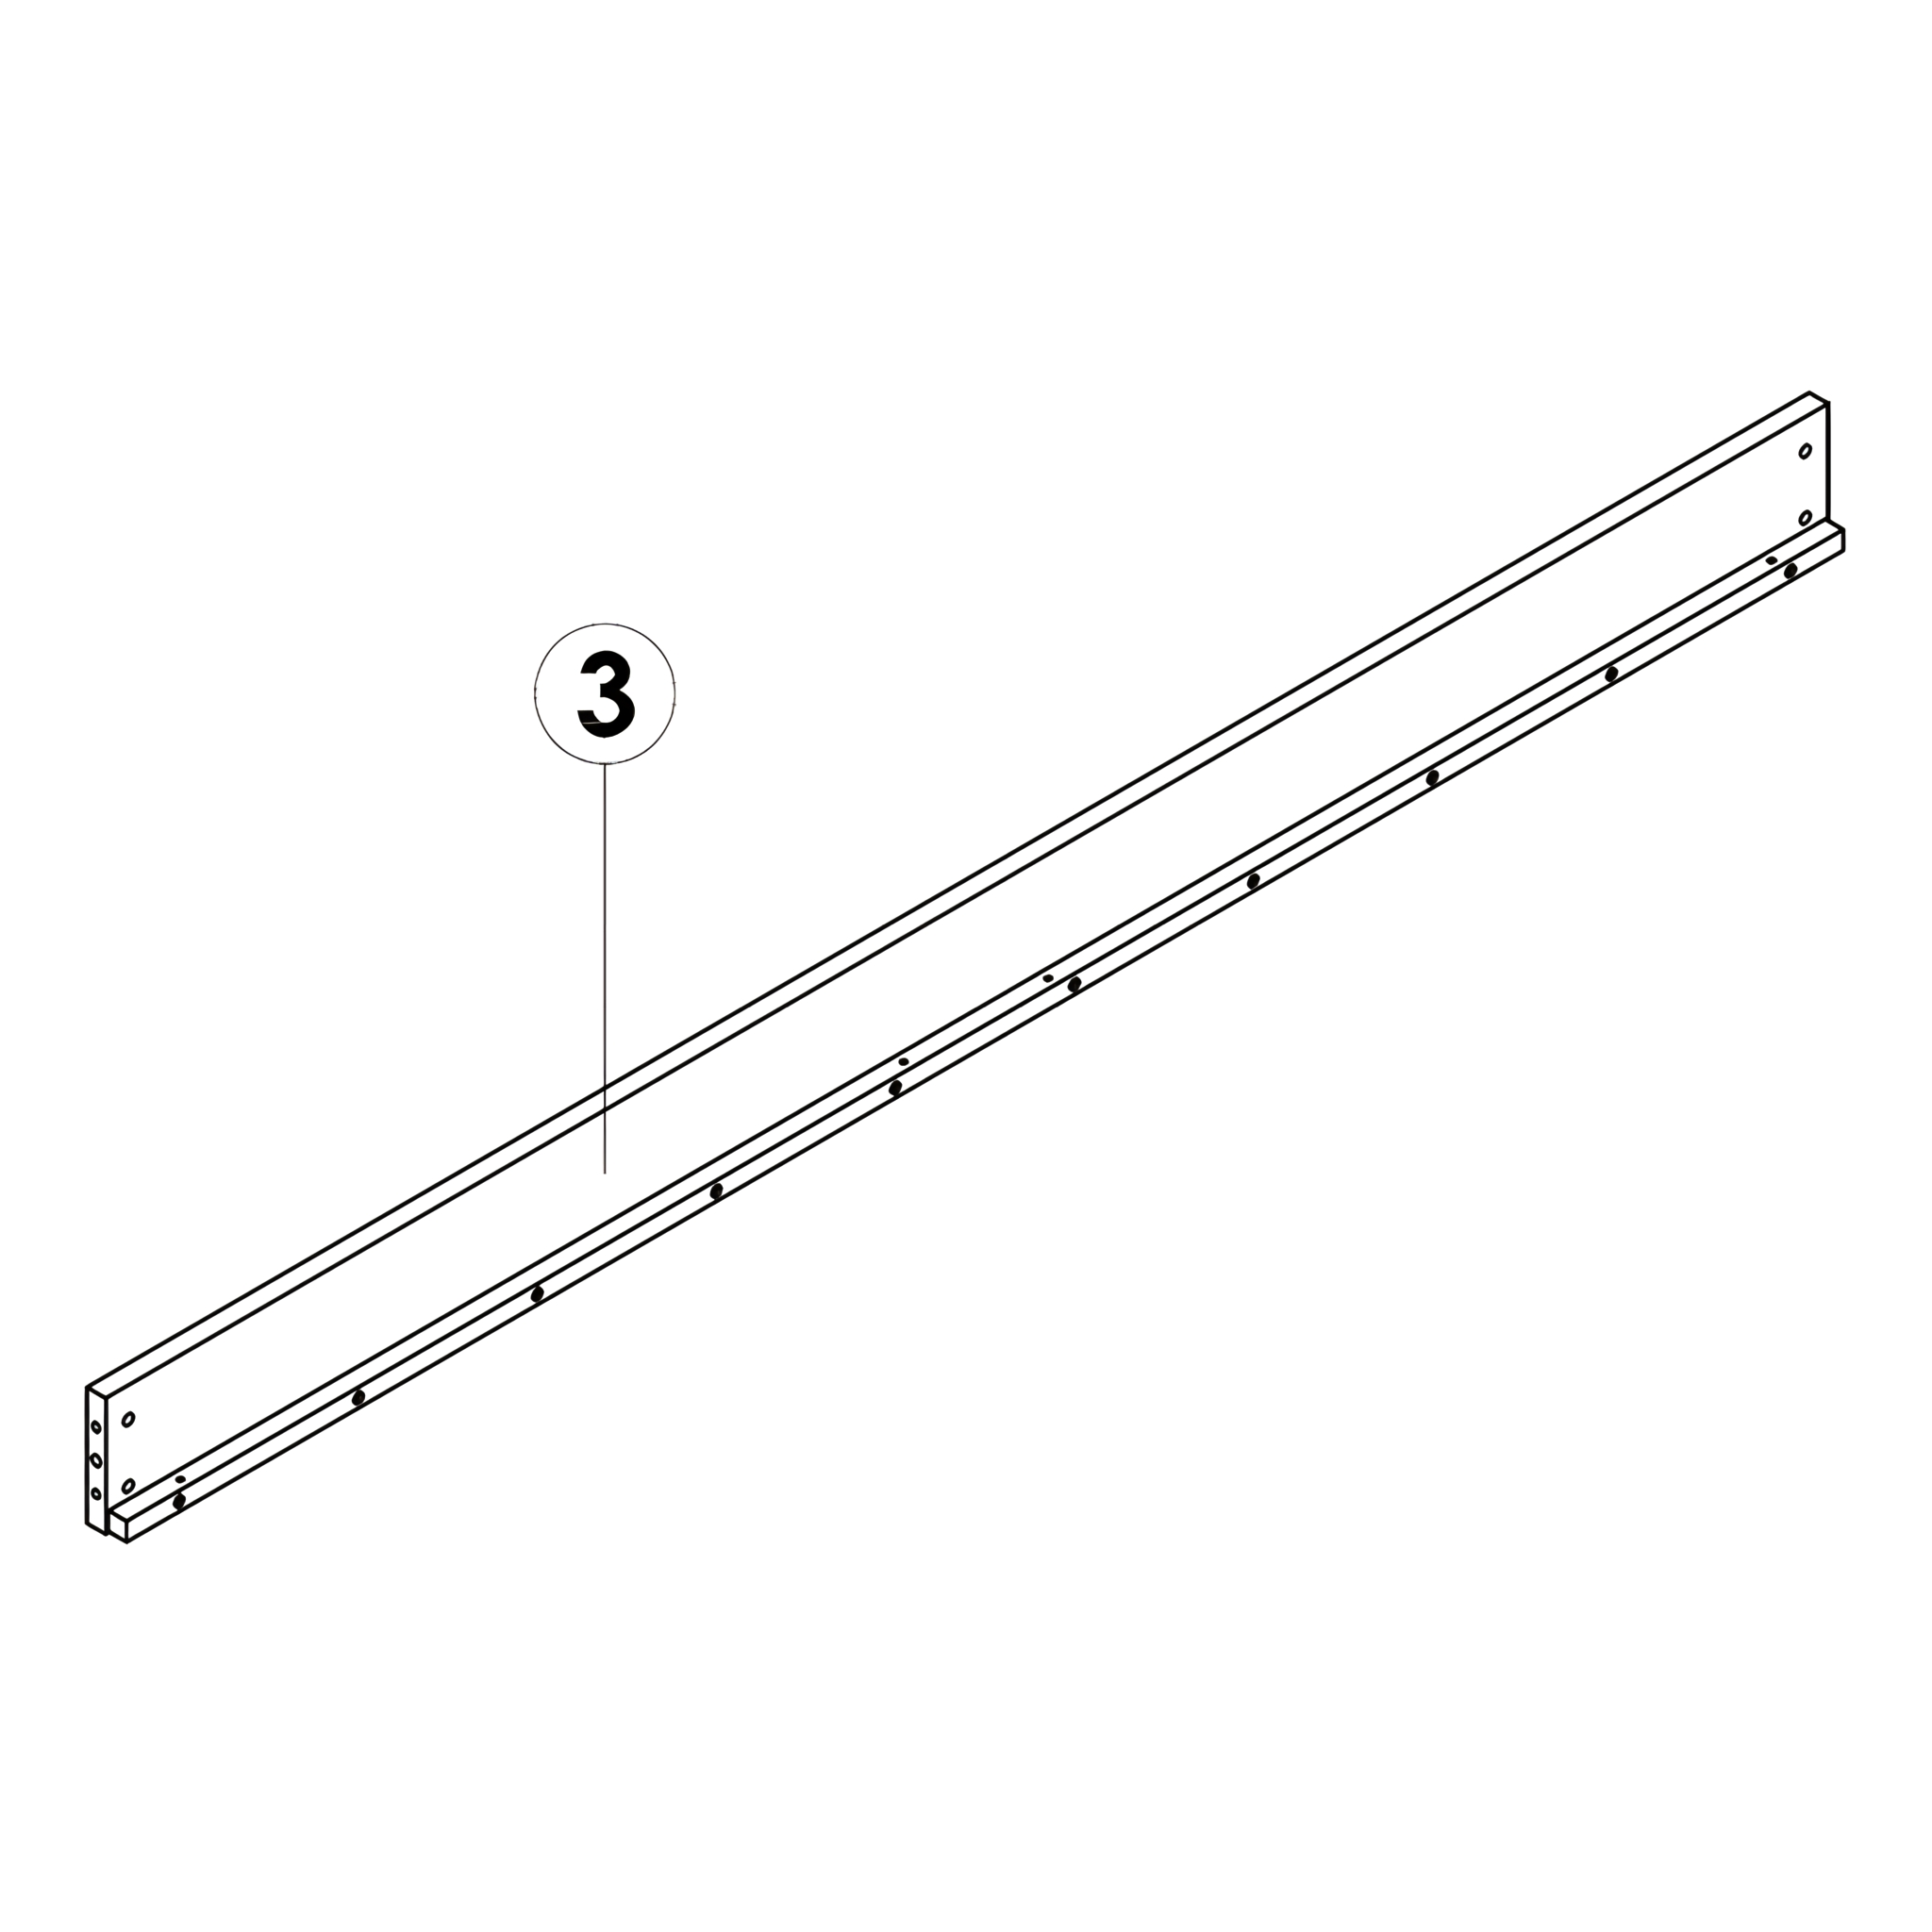
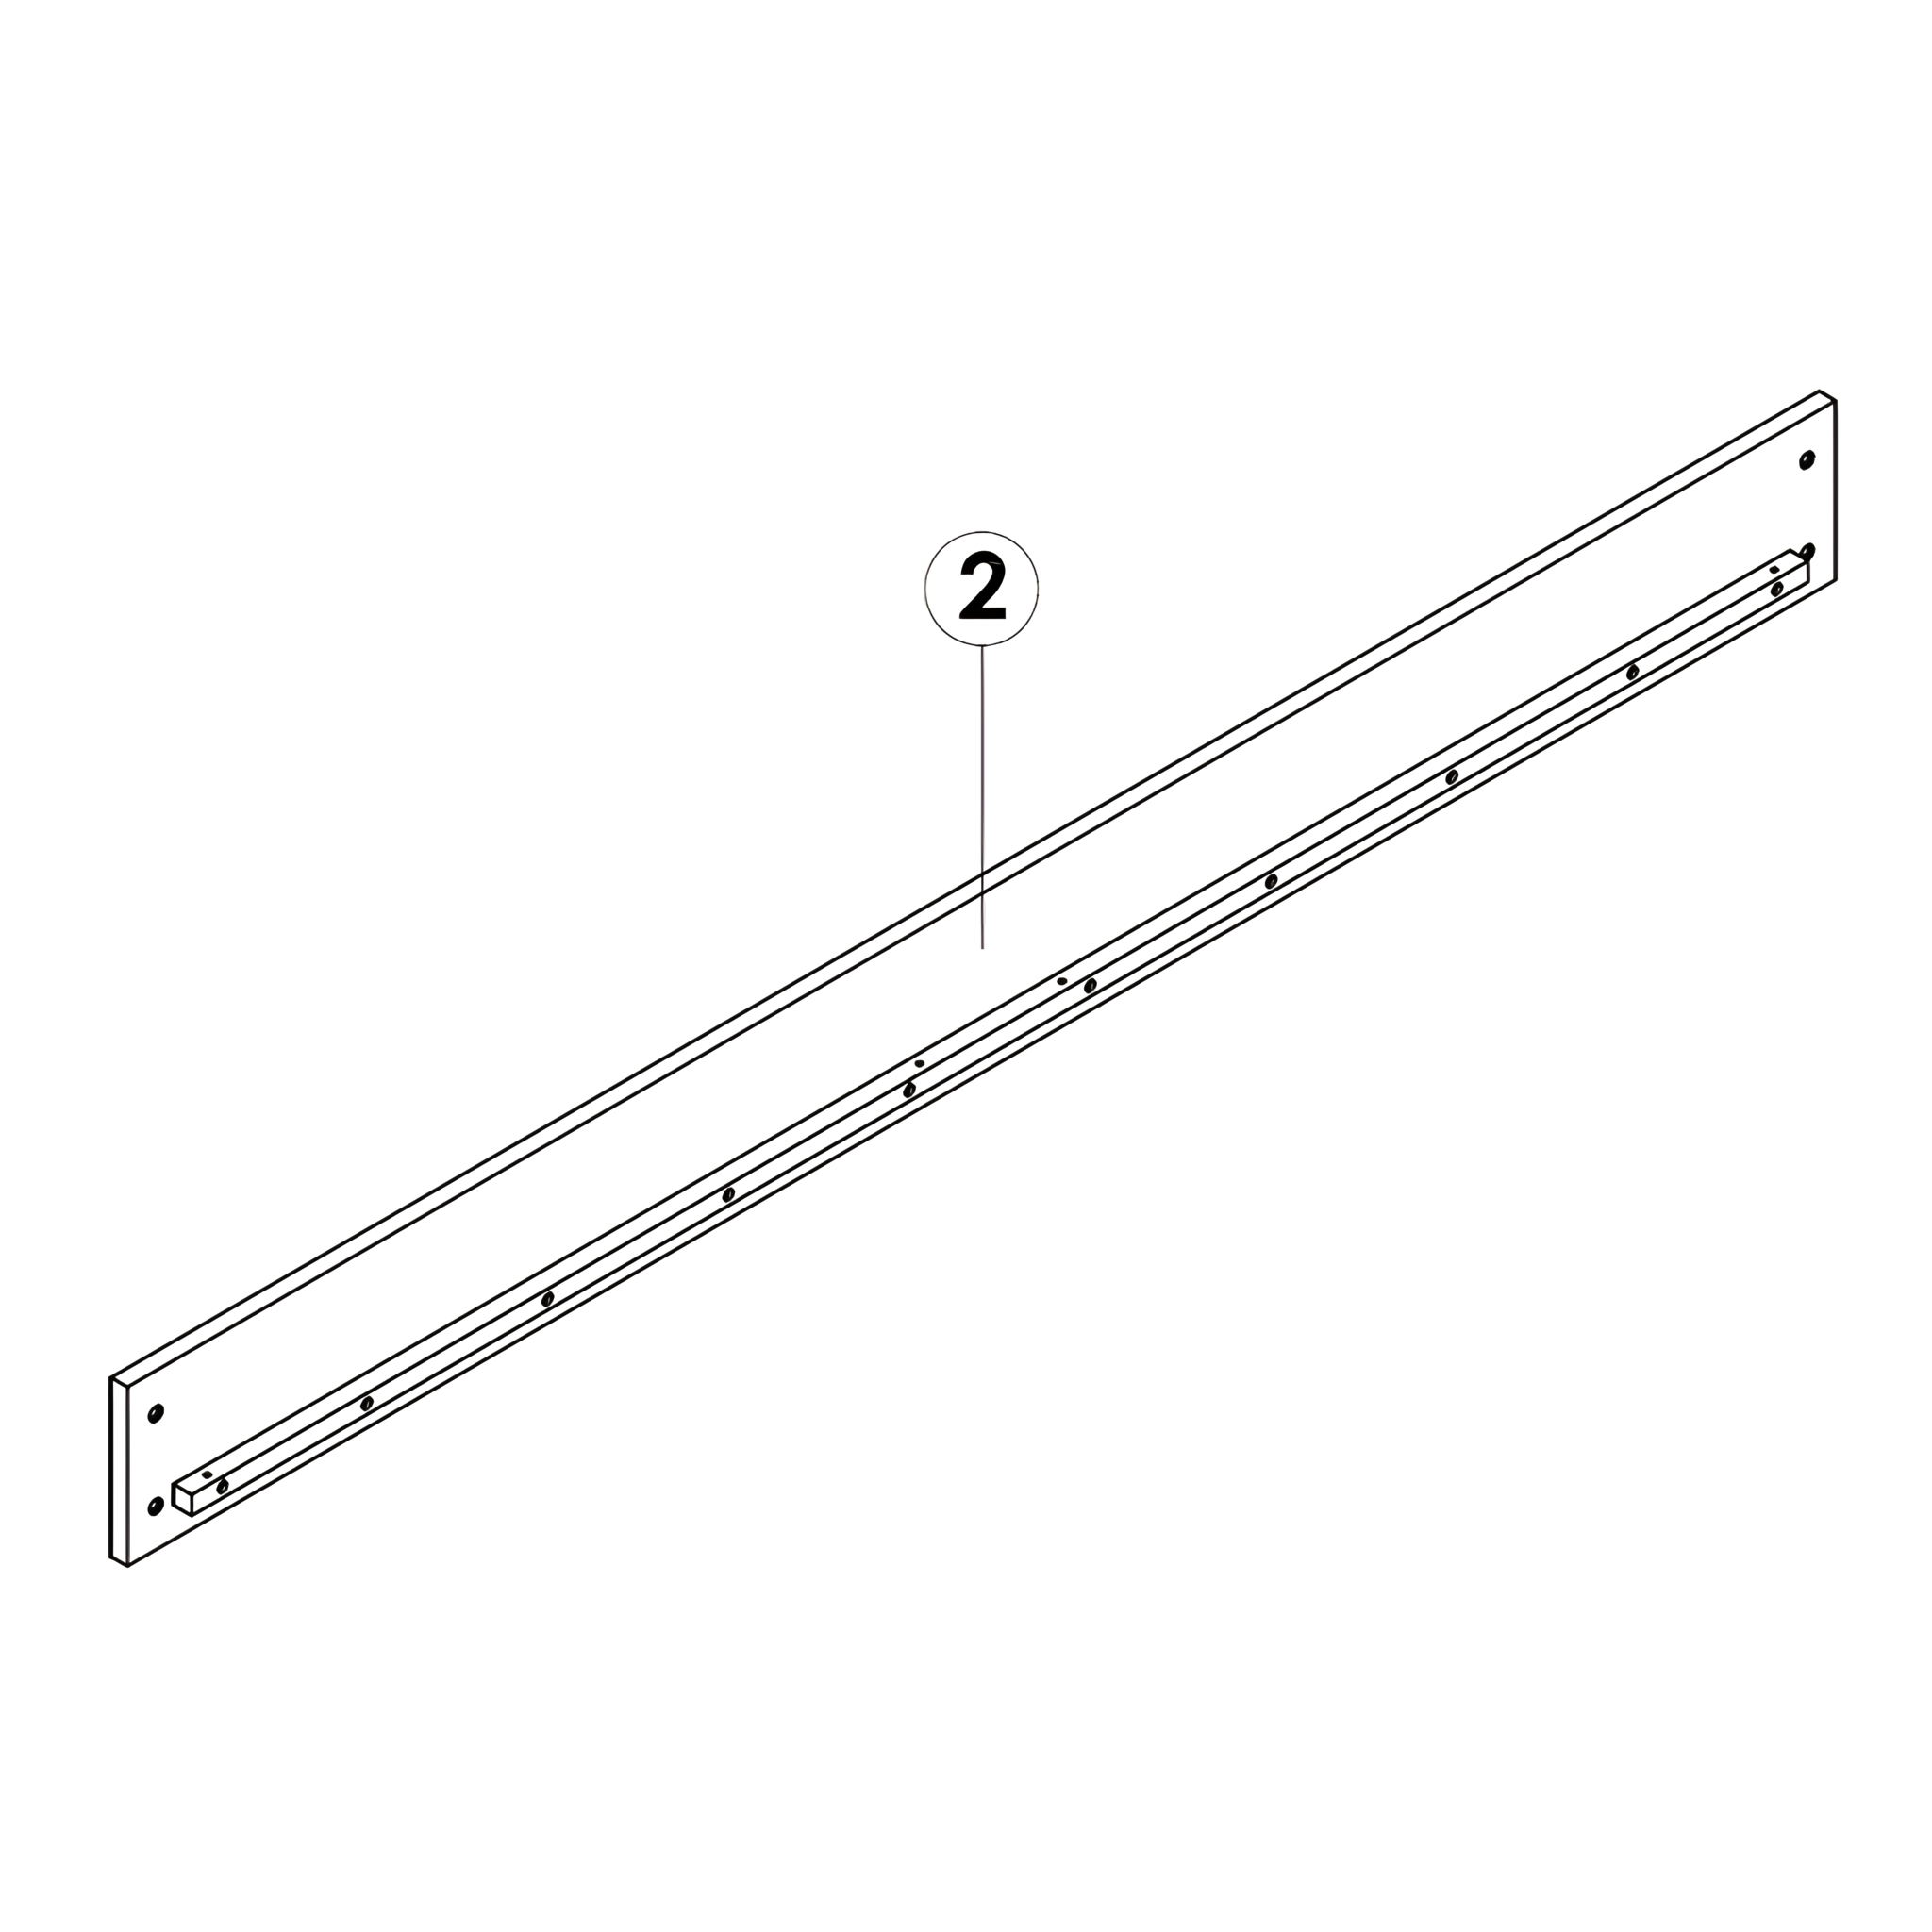
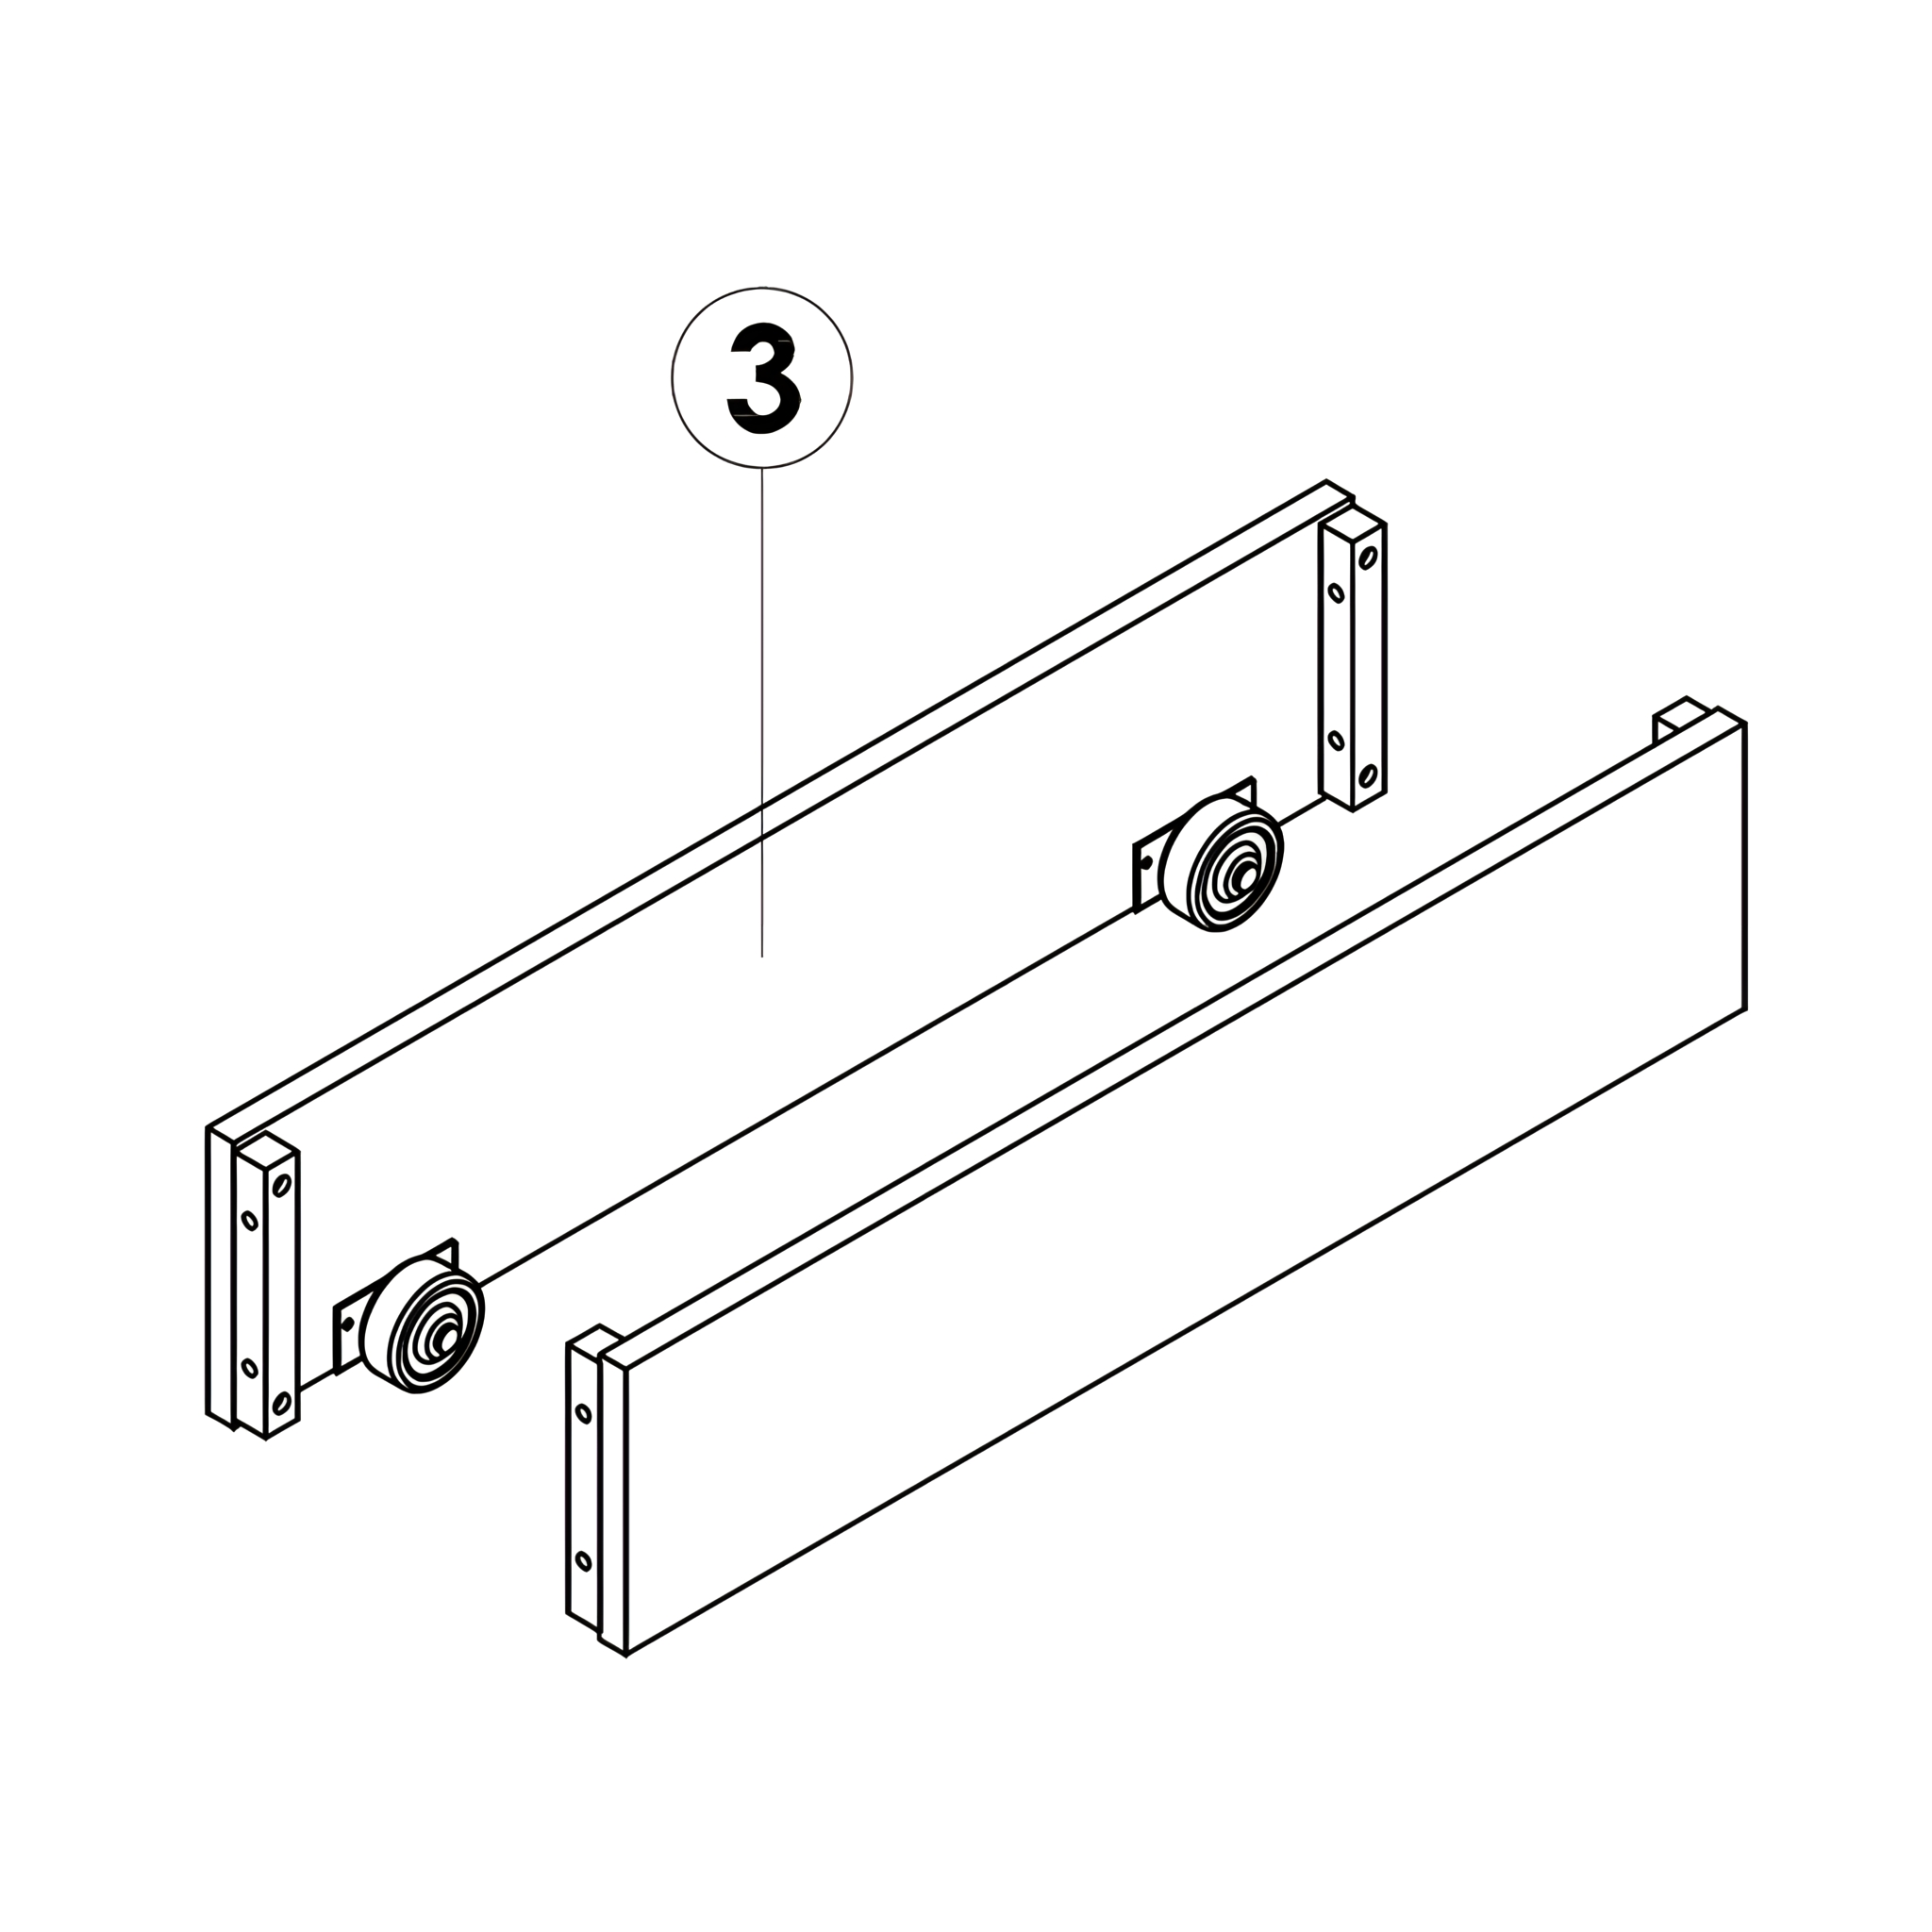
1. Locate the Backrest (2) and Side Rail (3).
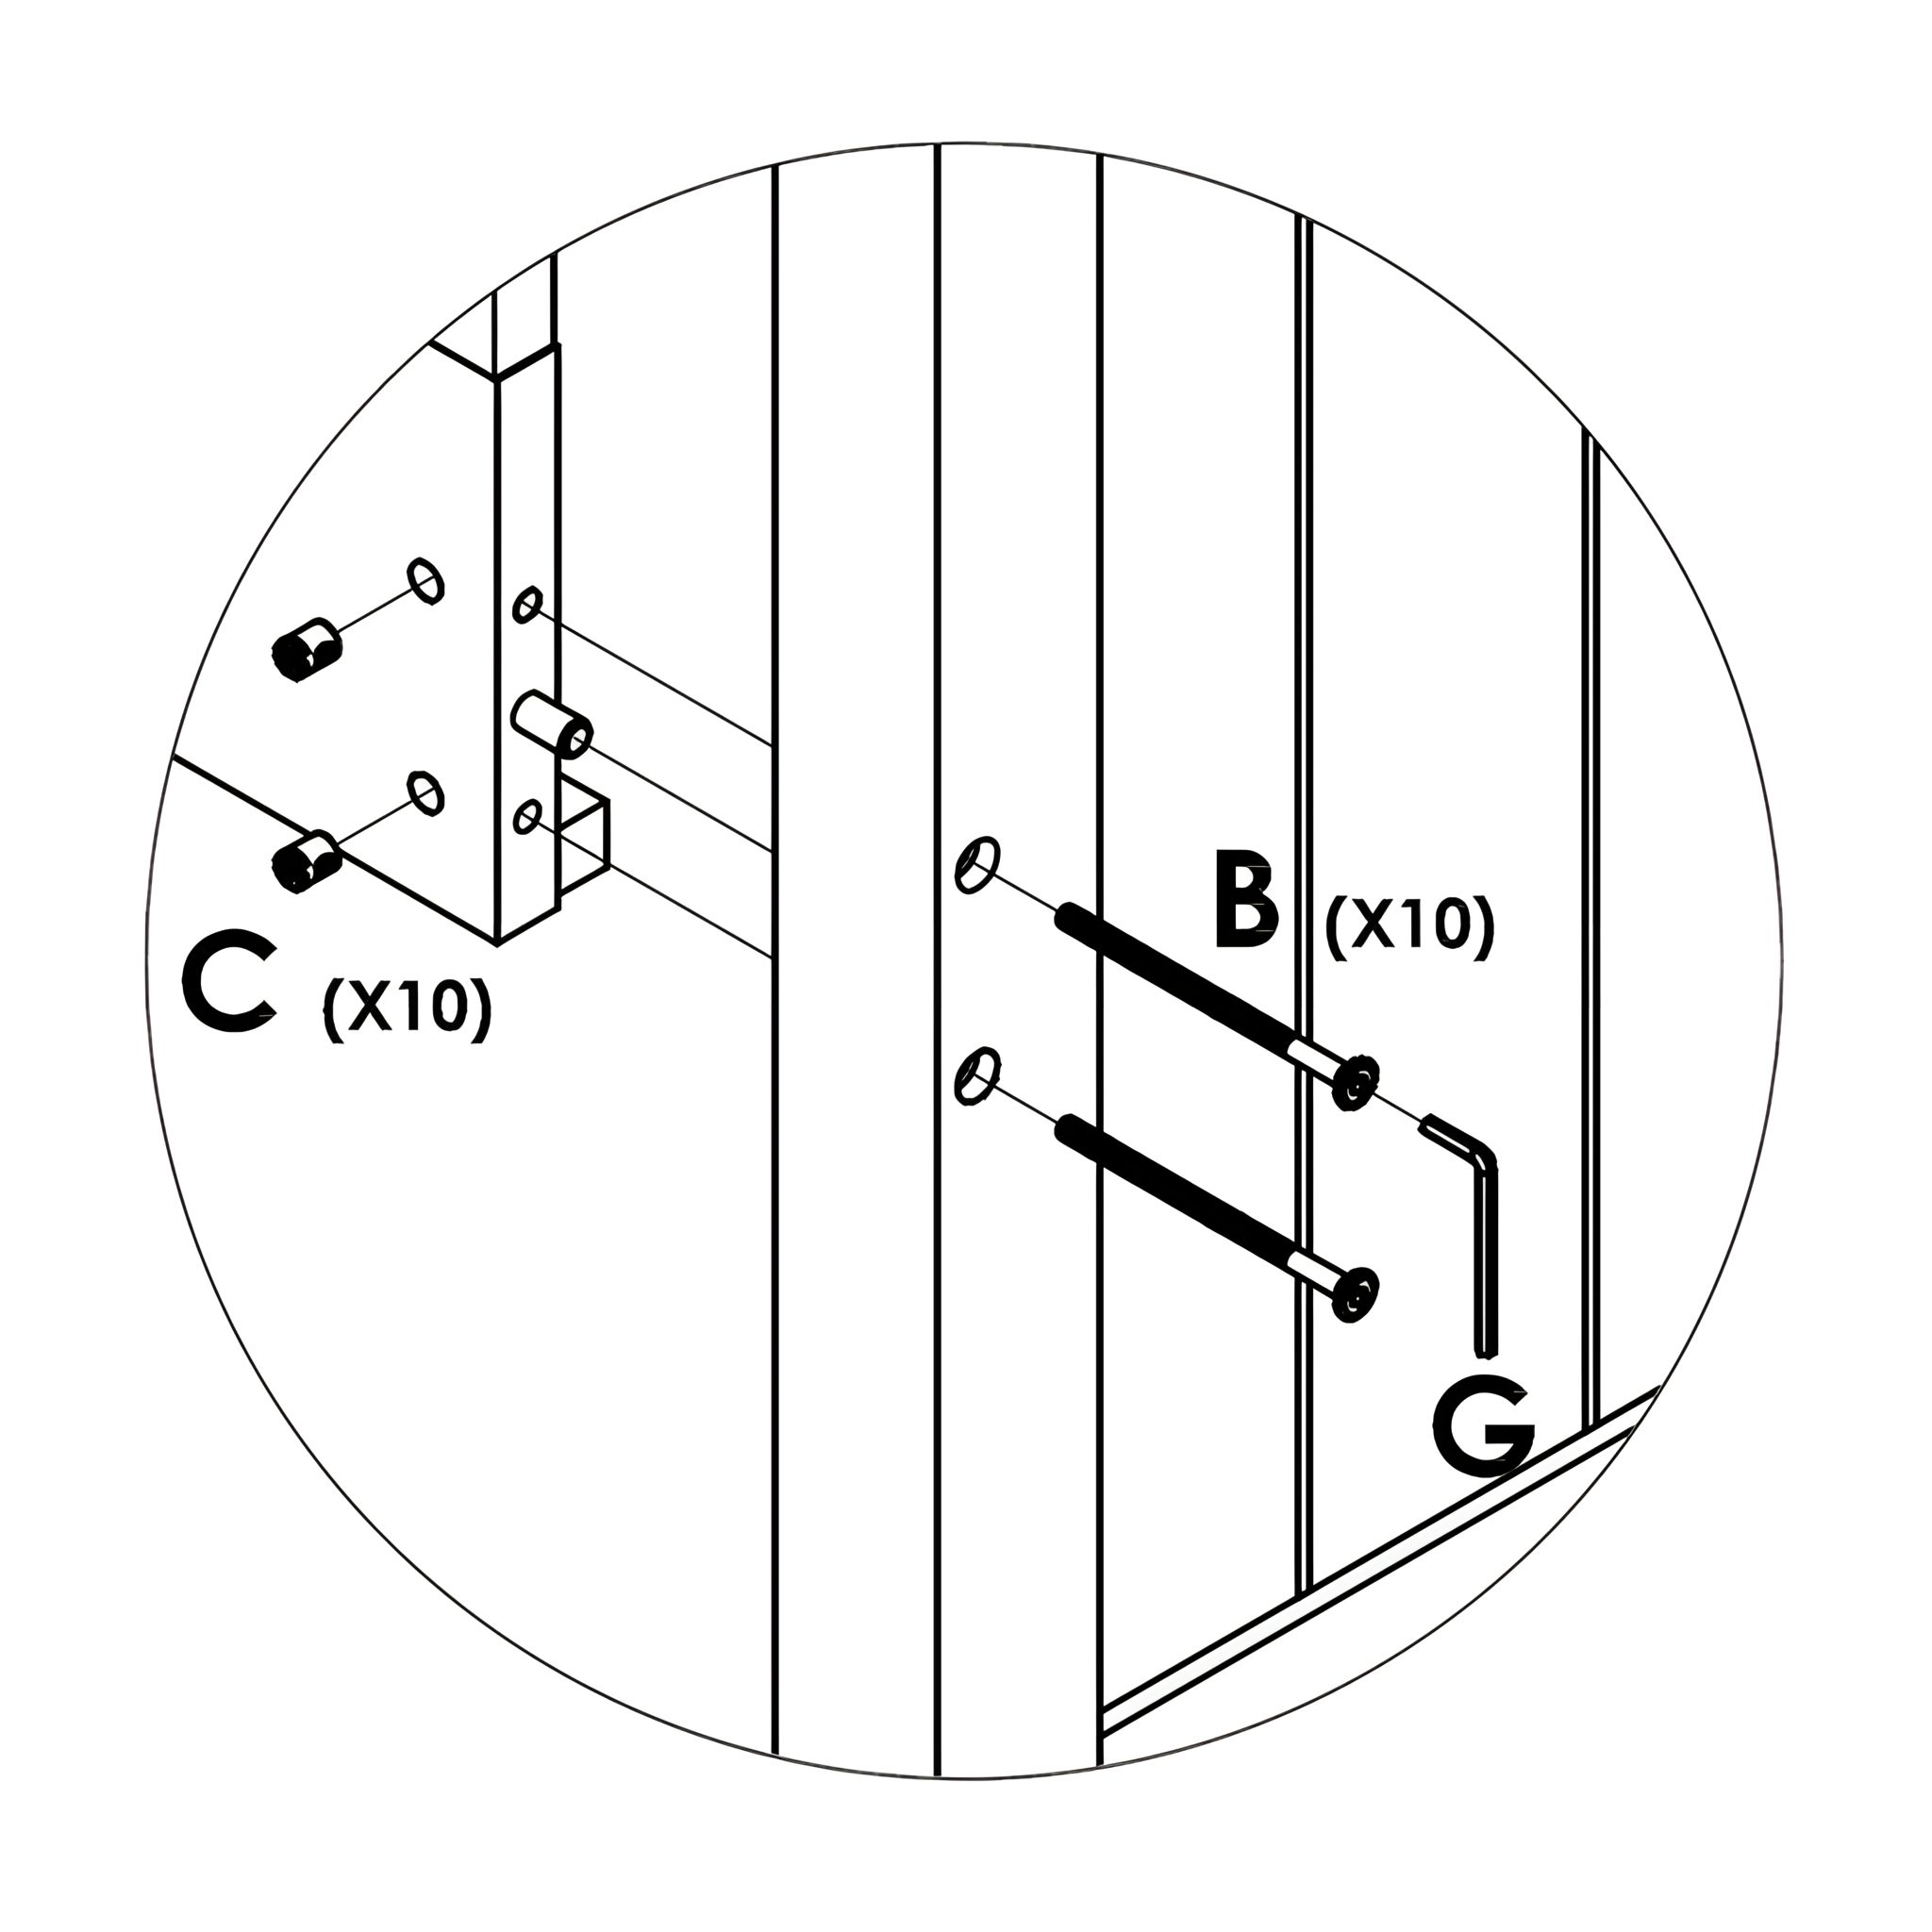
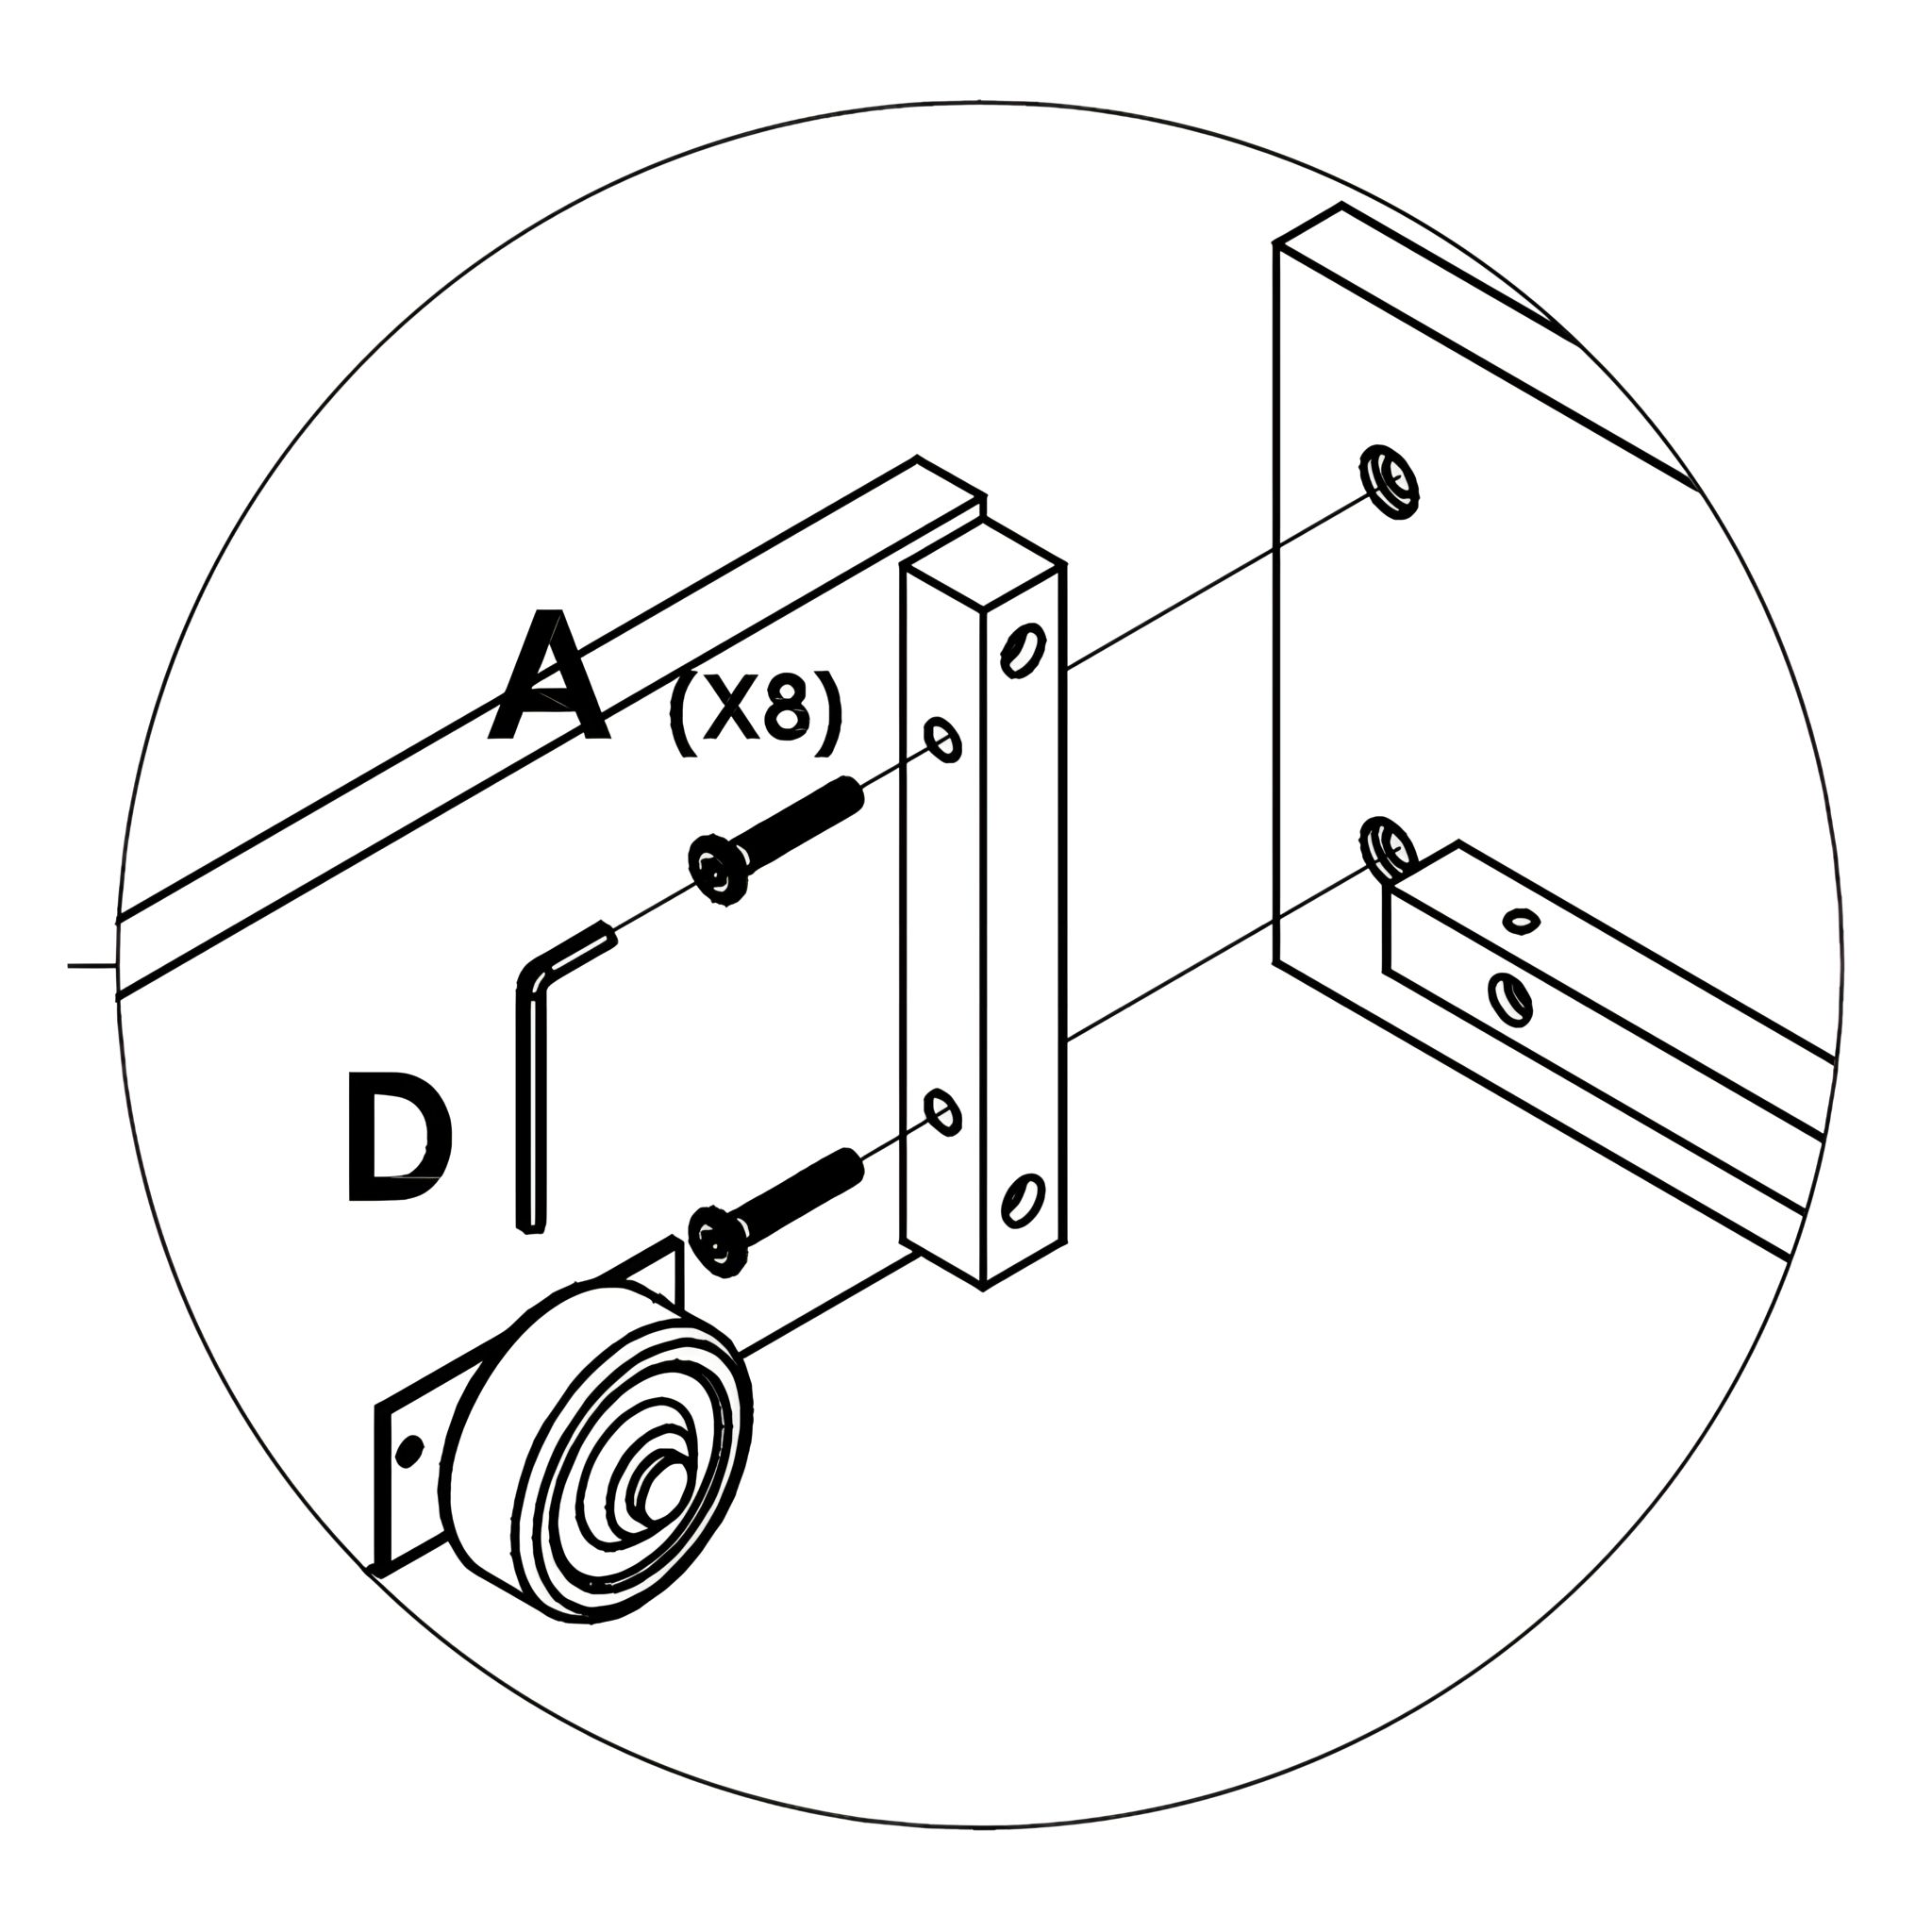
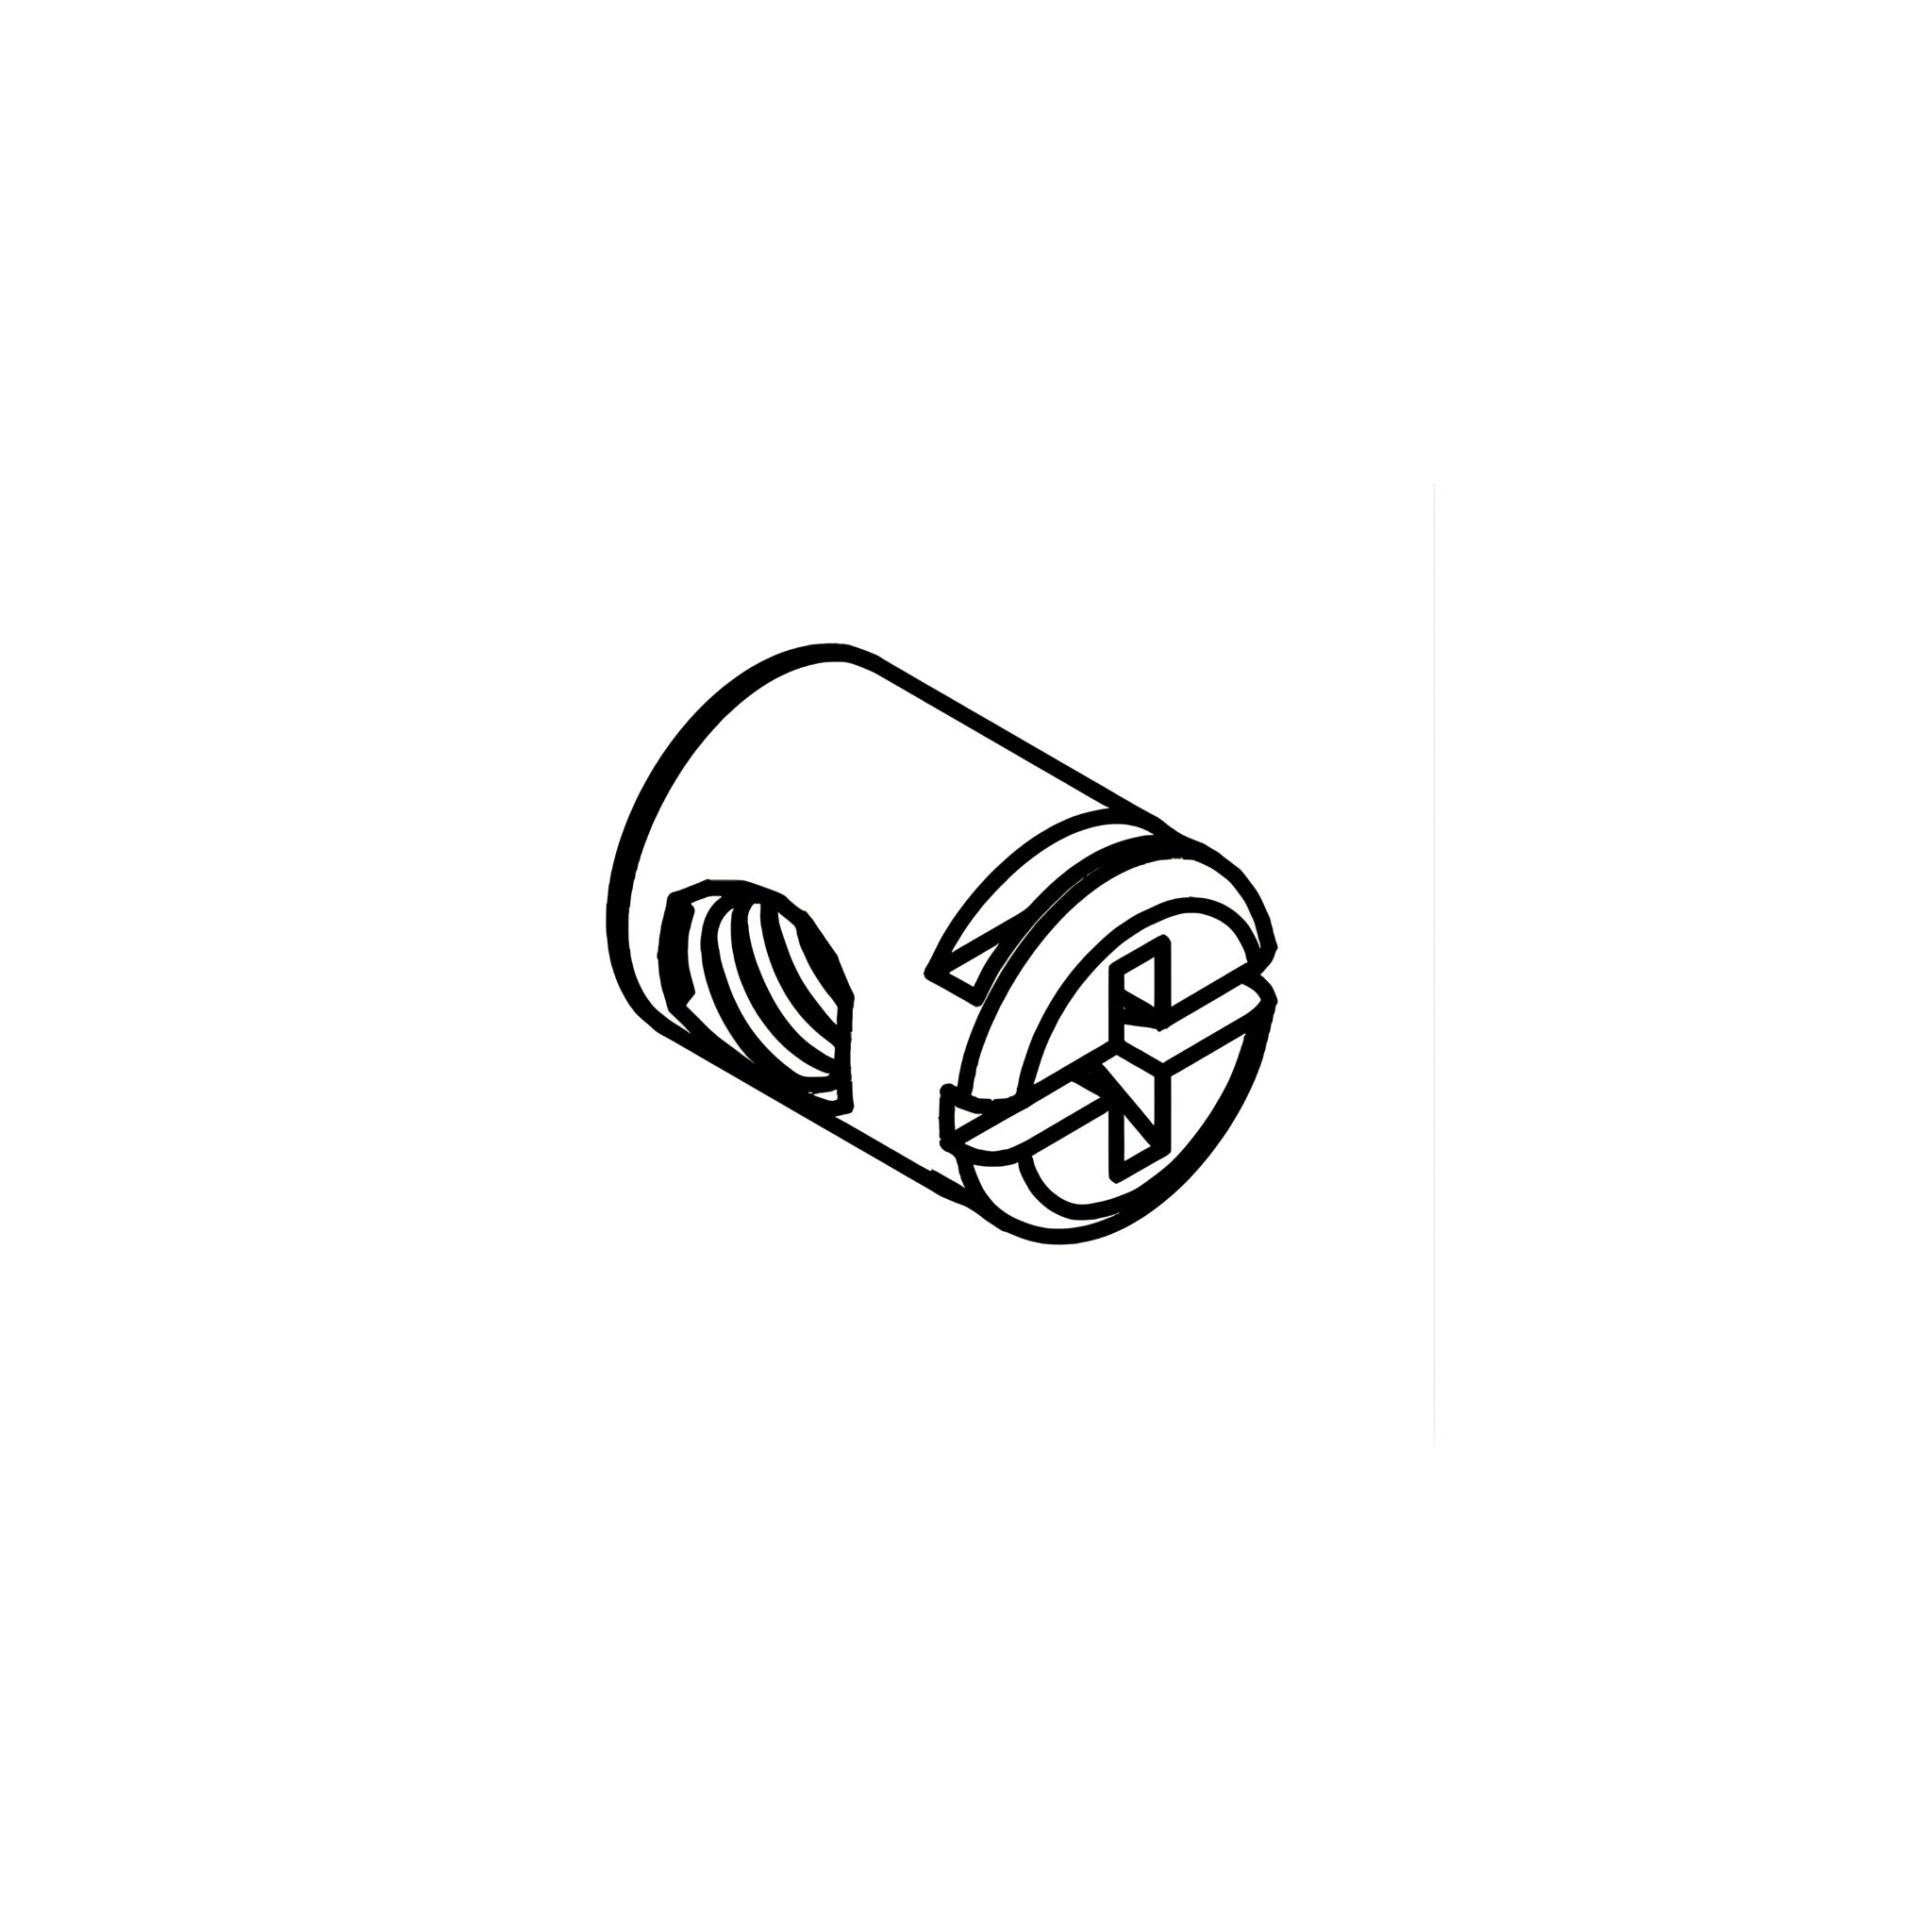
2. Insert Plastic Dowels (A) into the pre-drilled holes at both ends of the backrest and side rail.
3. Ensure the dowels are fully inserted and aligned properly to connect with other components in the next steps.