


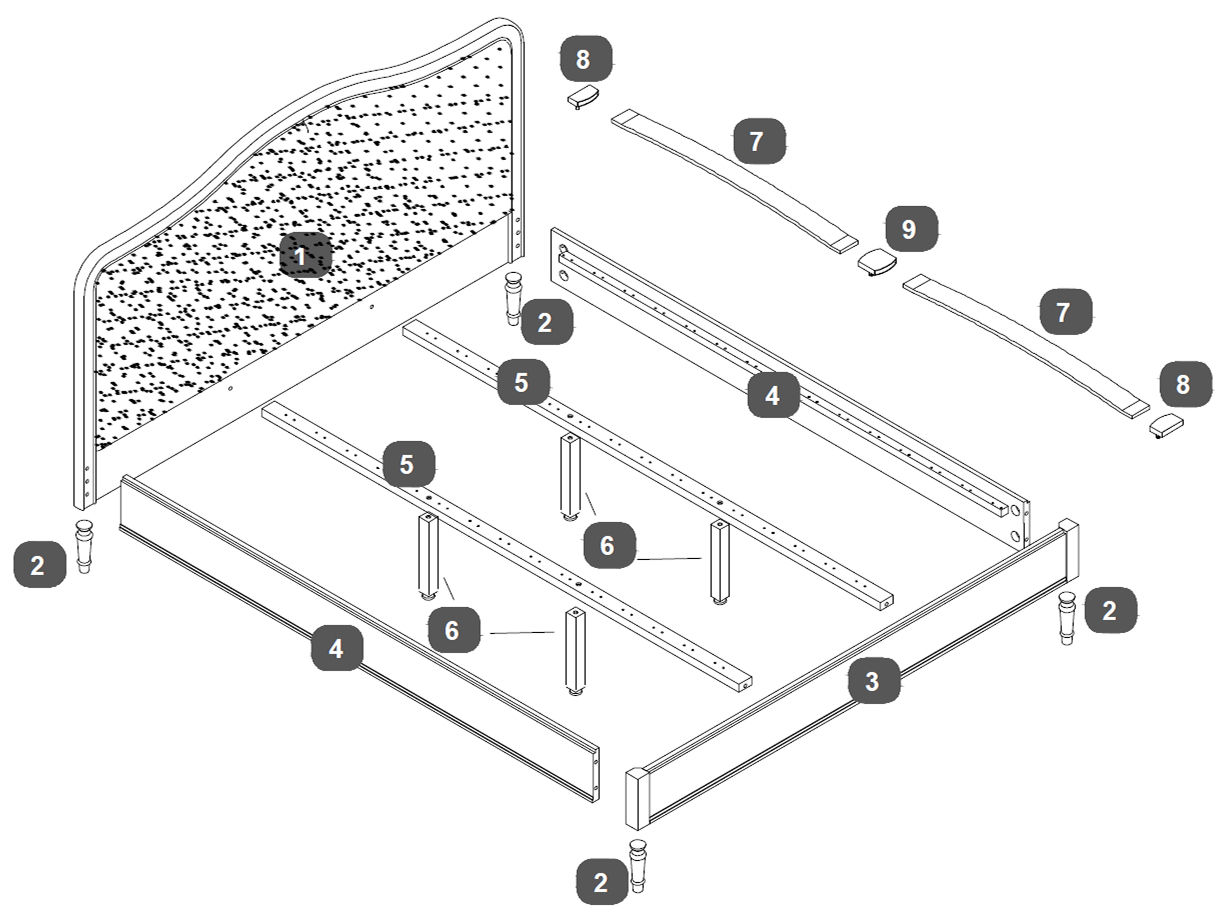
1. Attach the Centre Rail Support Legs

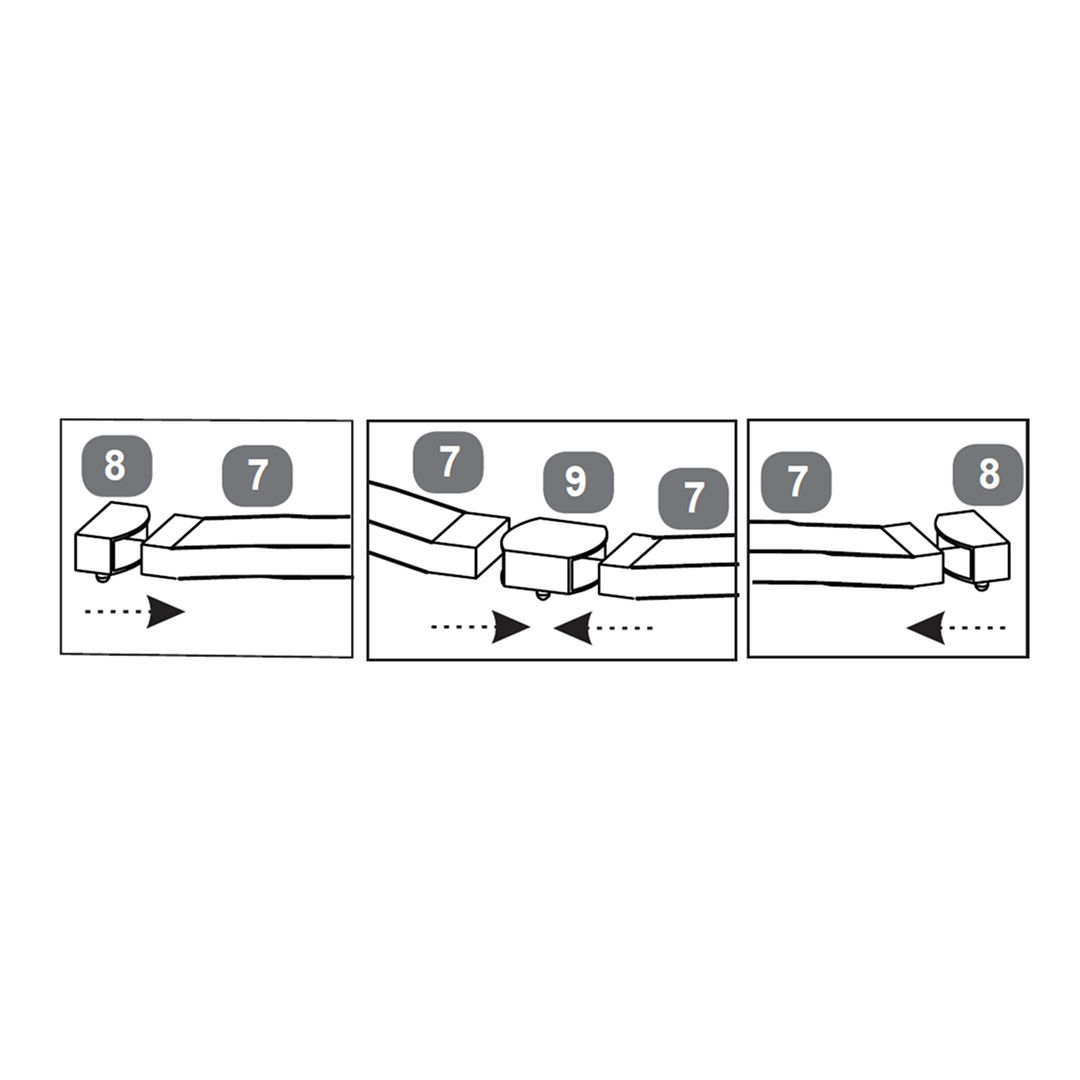
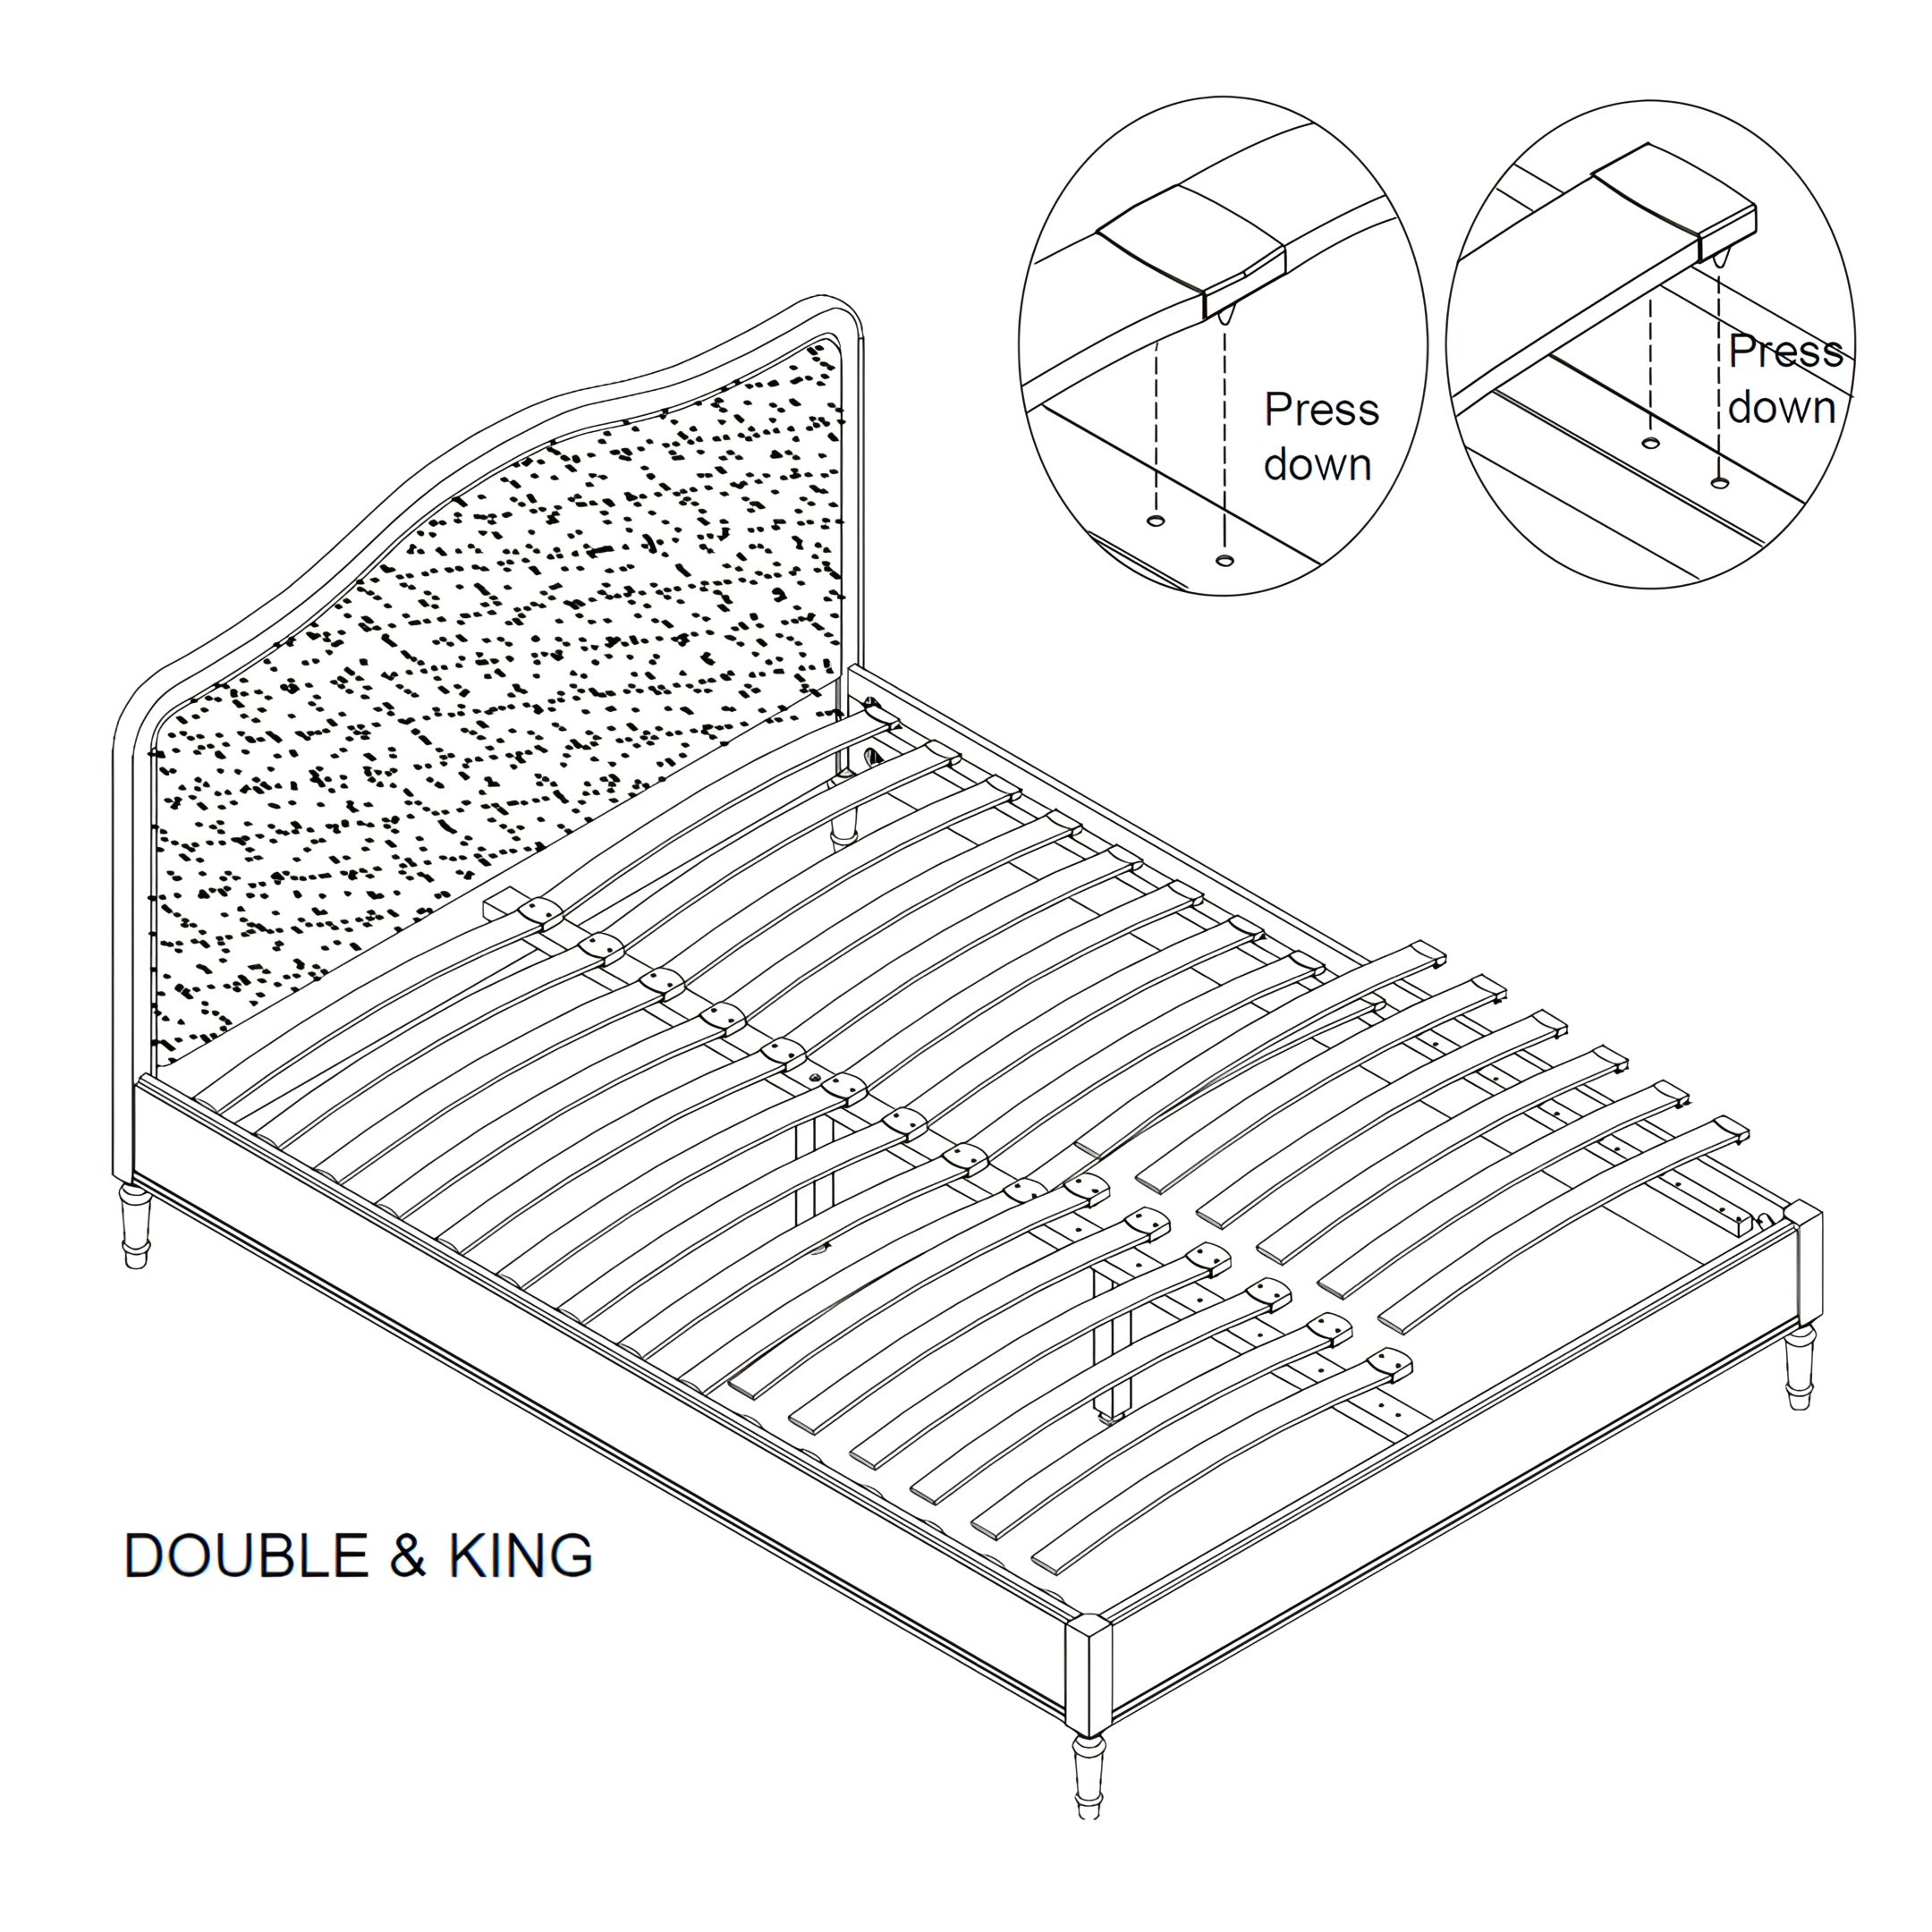
1. Align the Centre Rail Support Legs (6) with the pre-drilled holes on the Centre Rail (5).
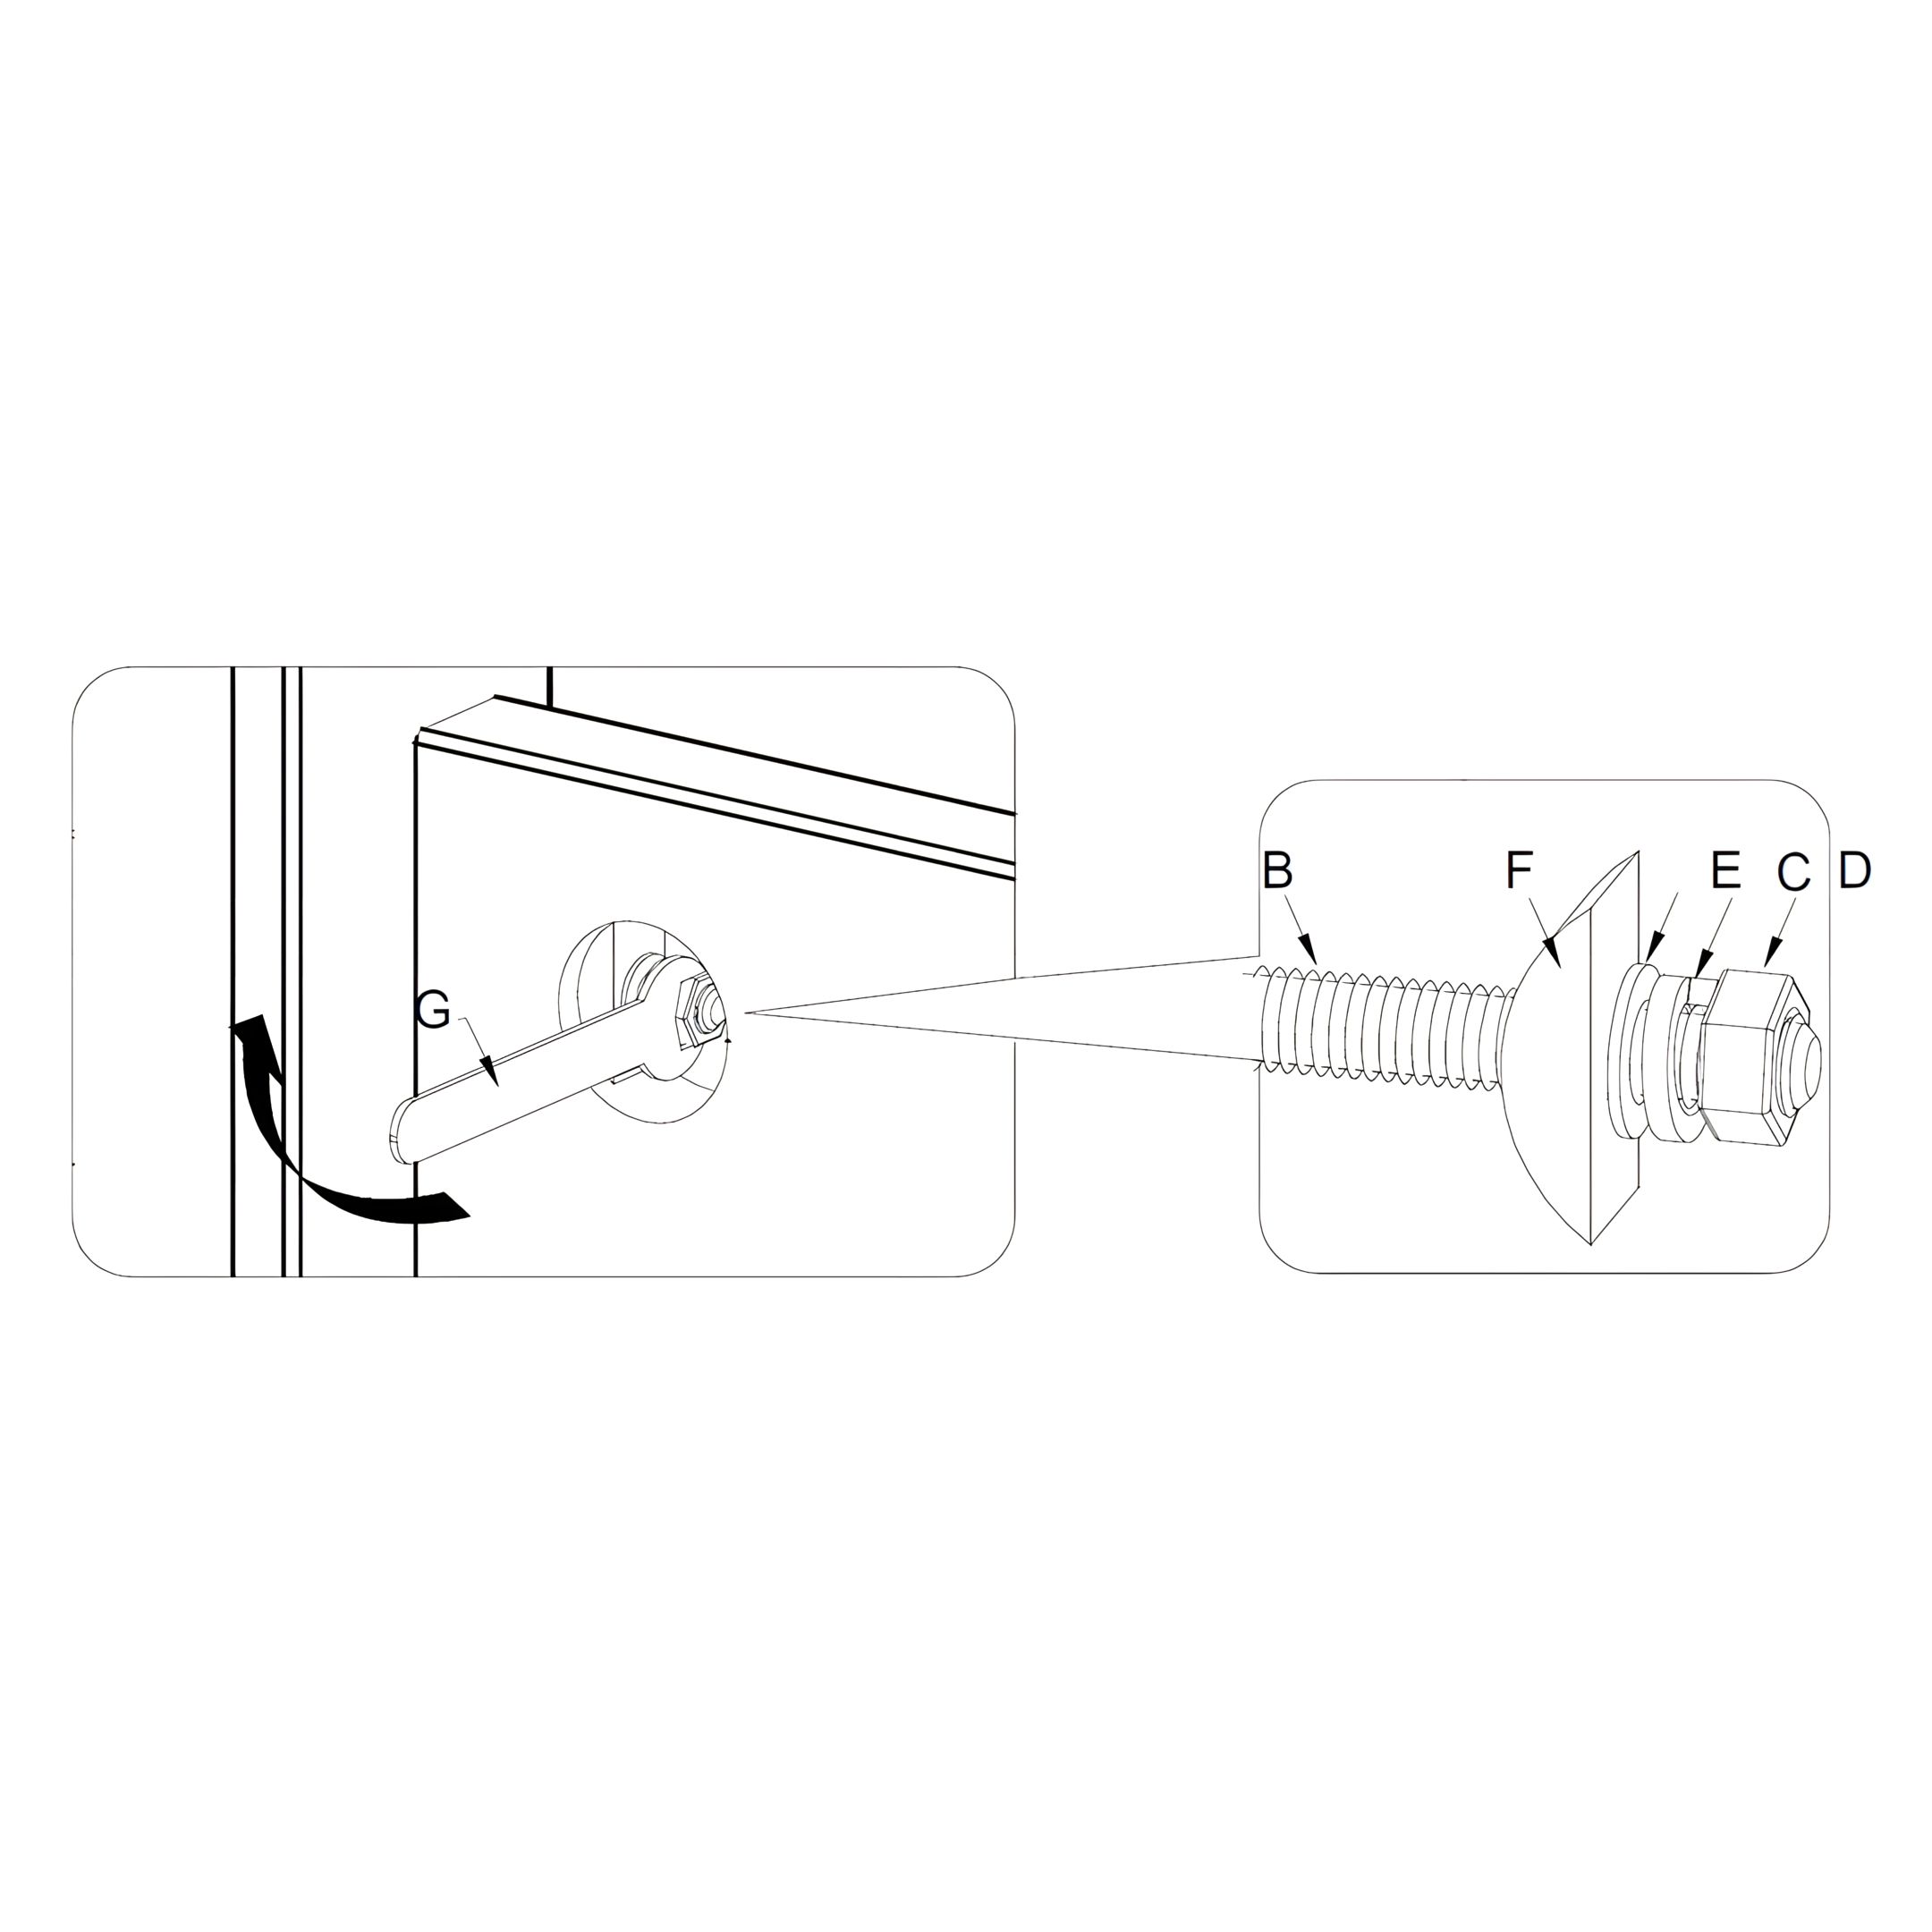
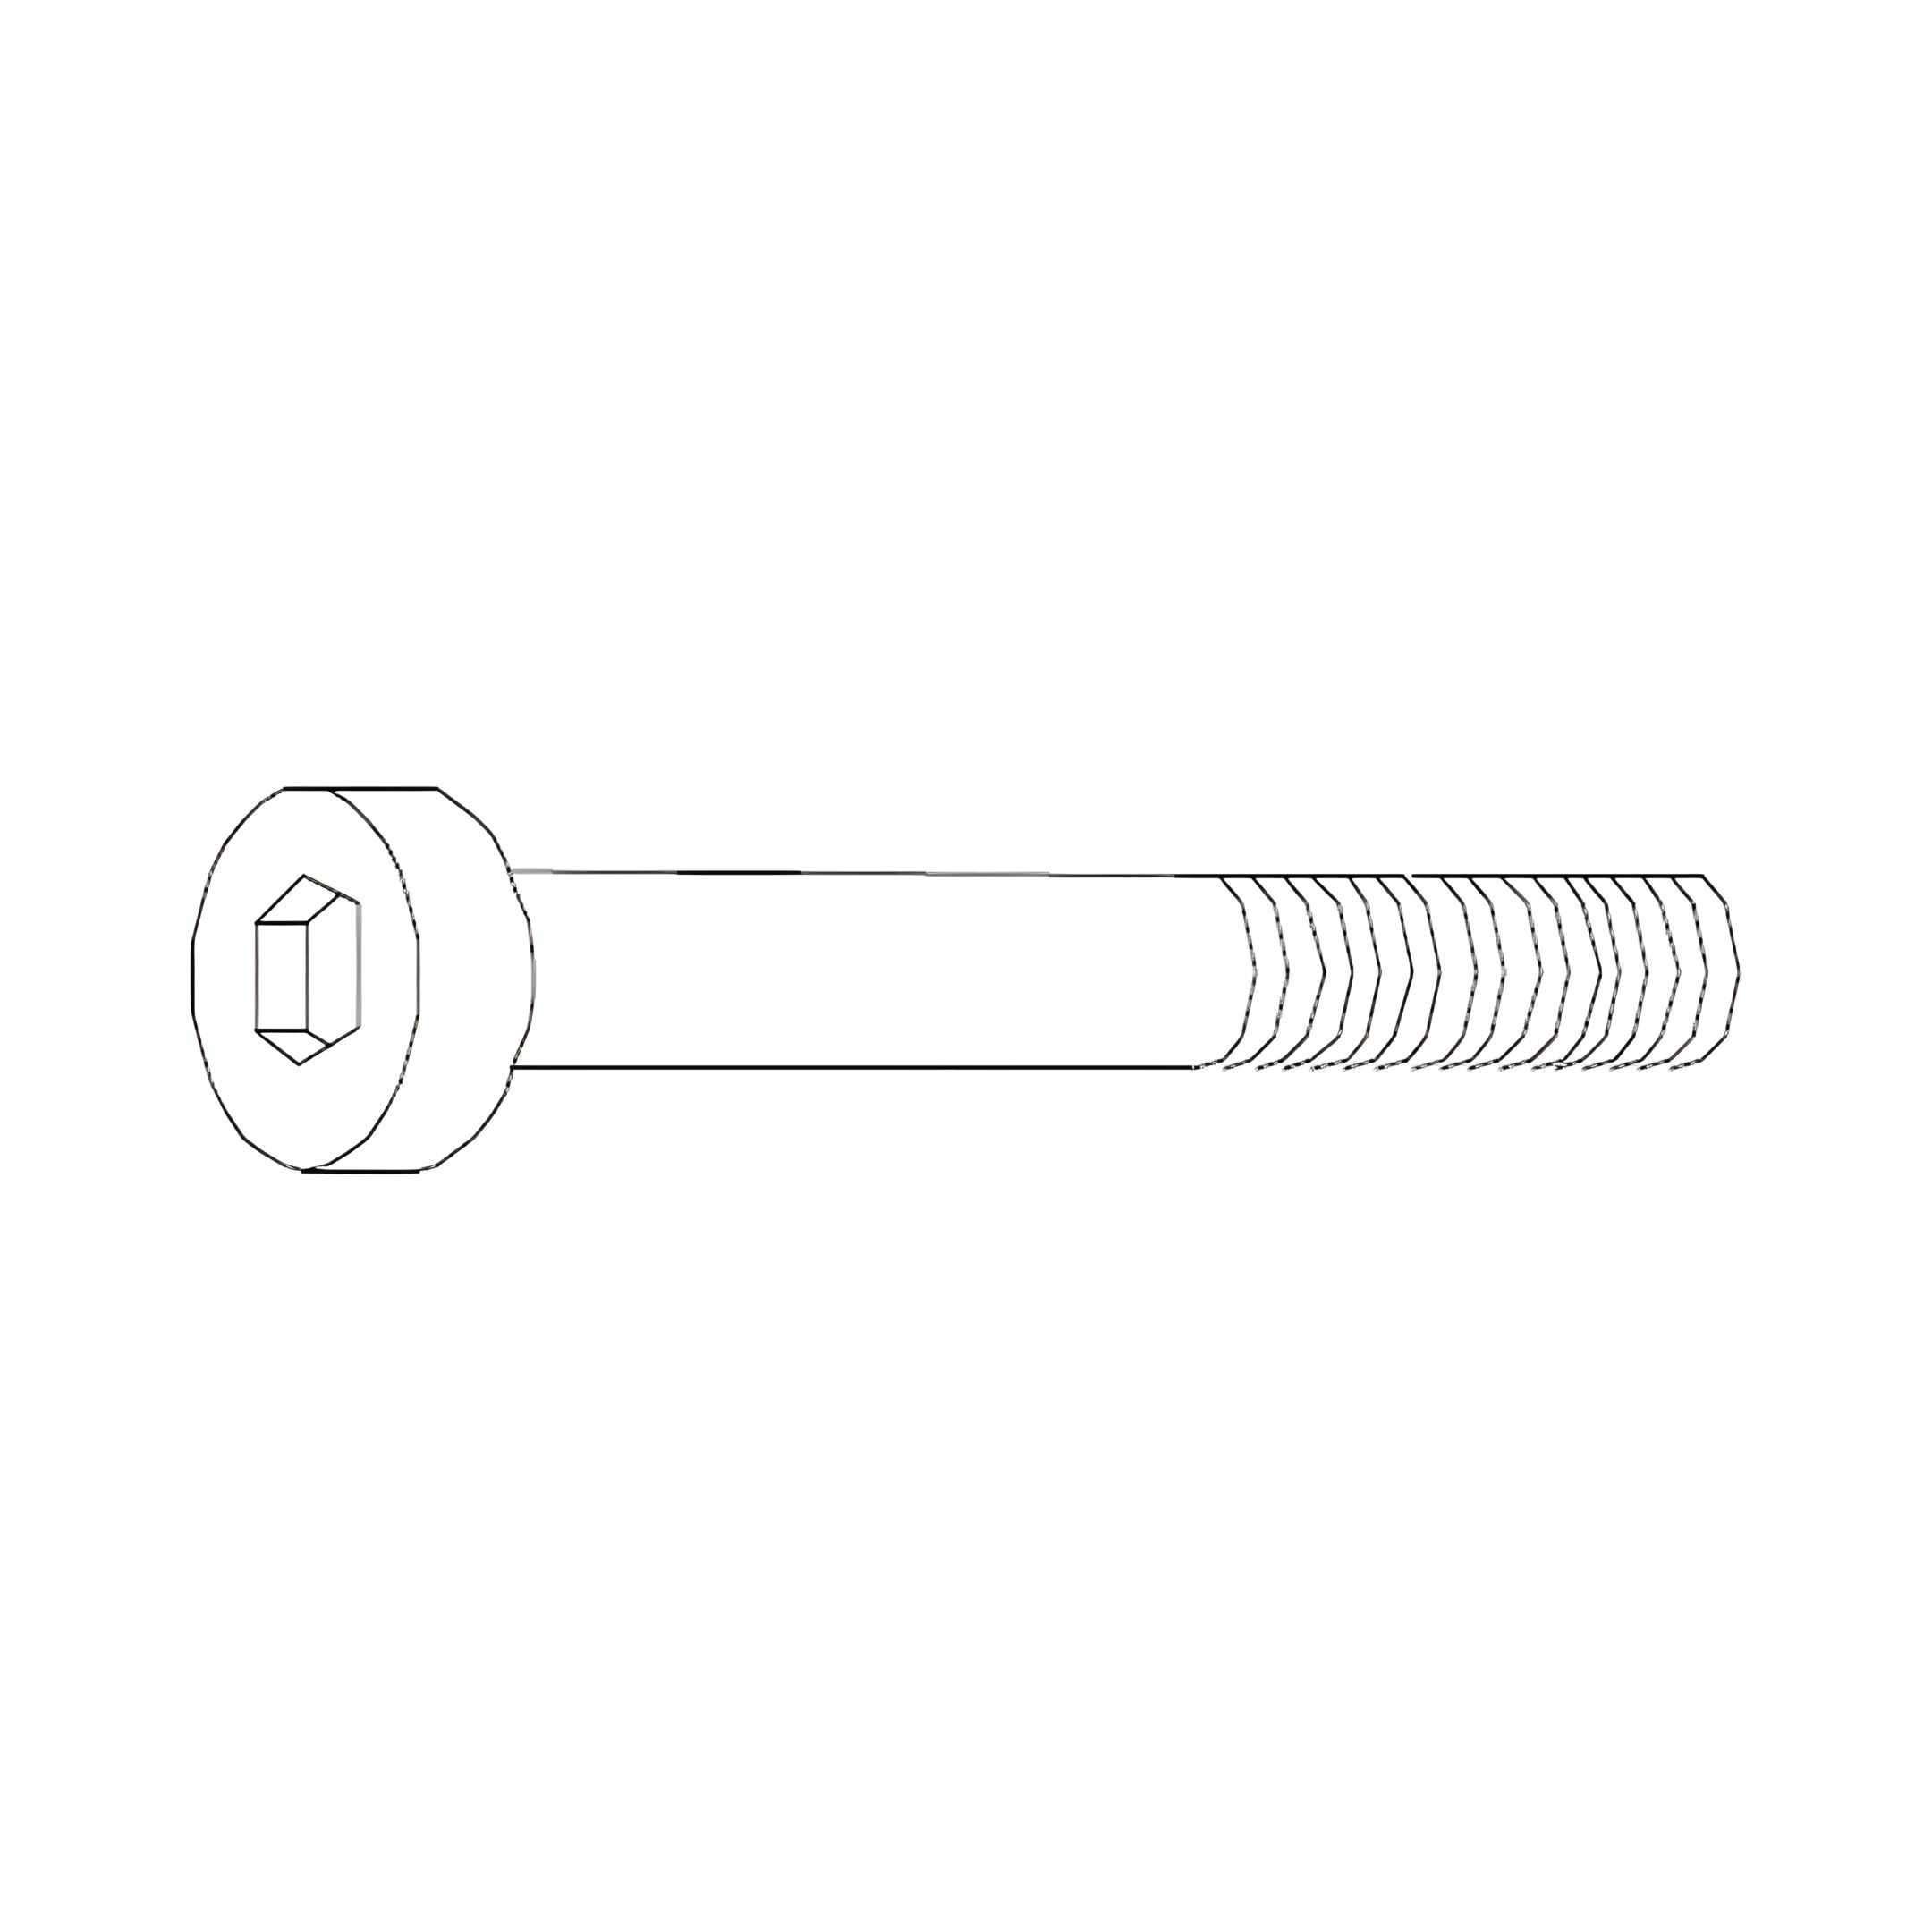
2. Insert an M8x35mm Bolt (A) through the entre rail and into the support leg.
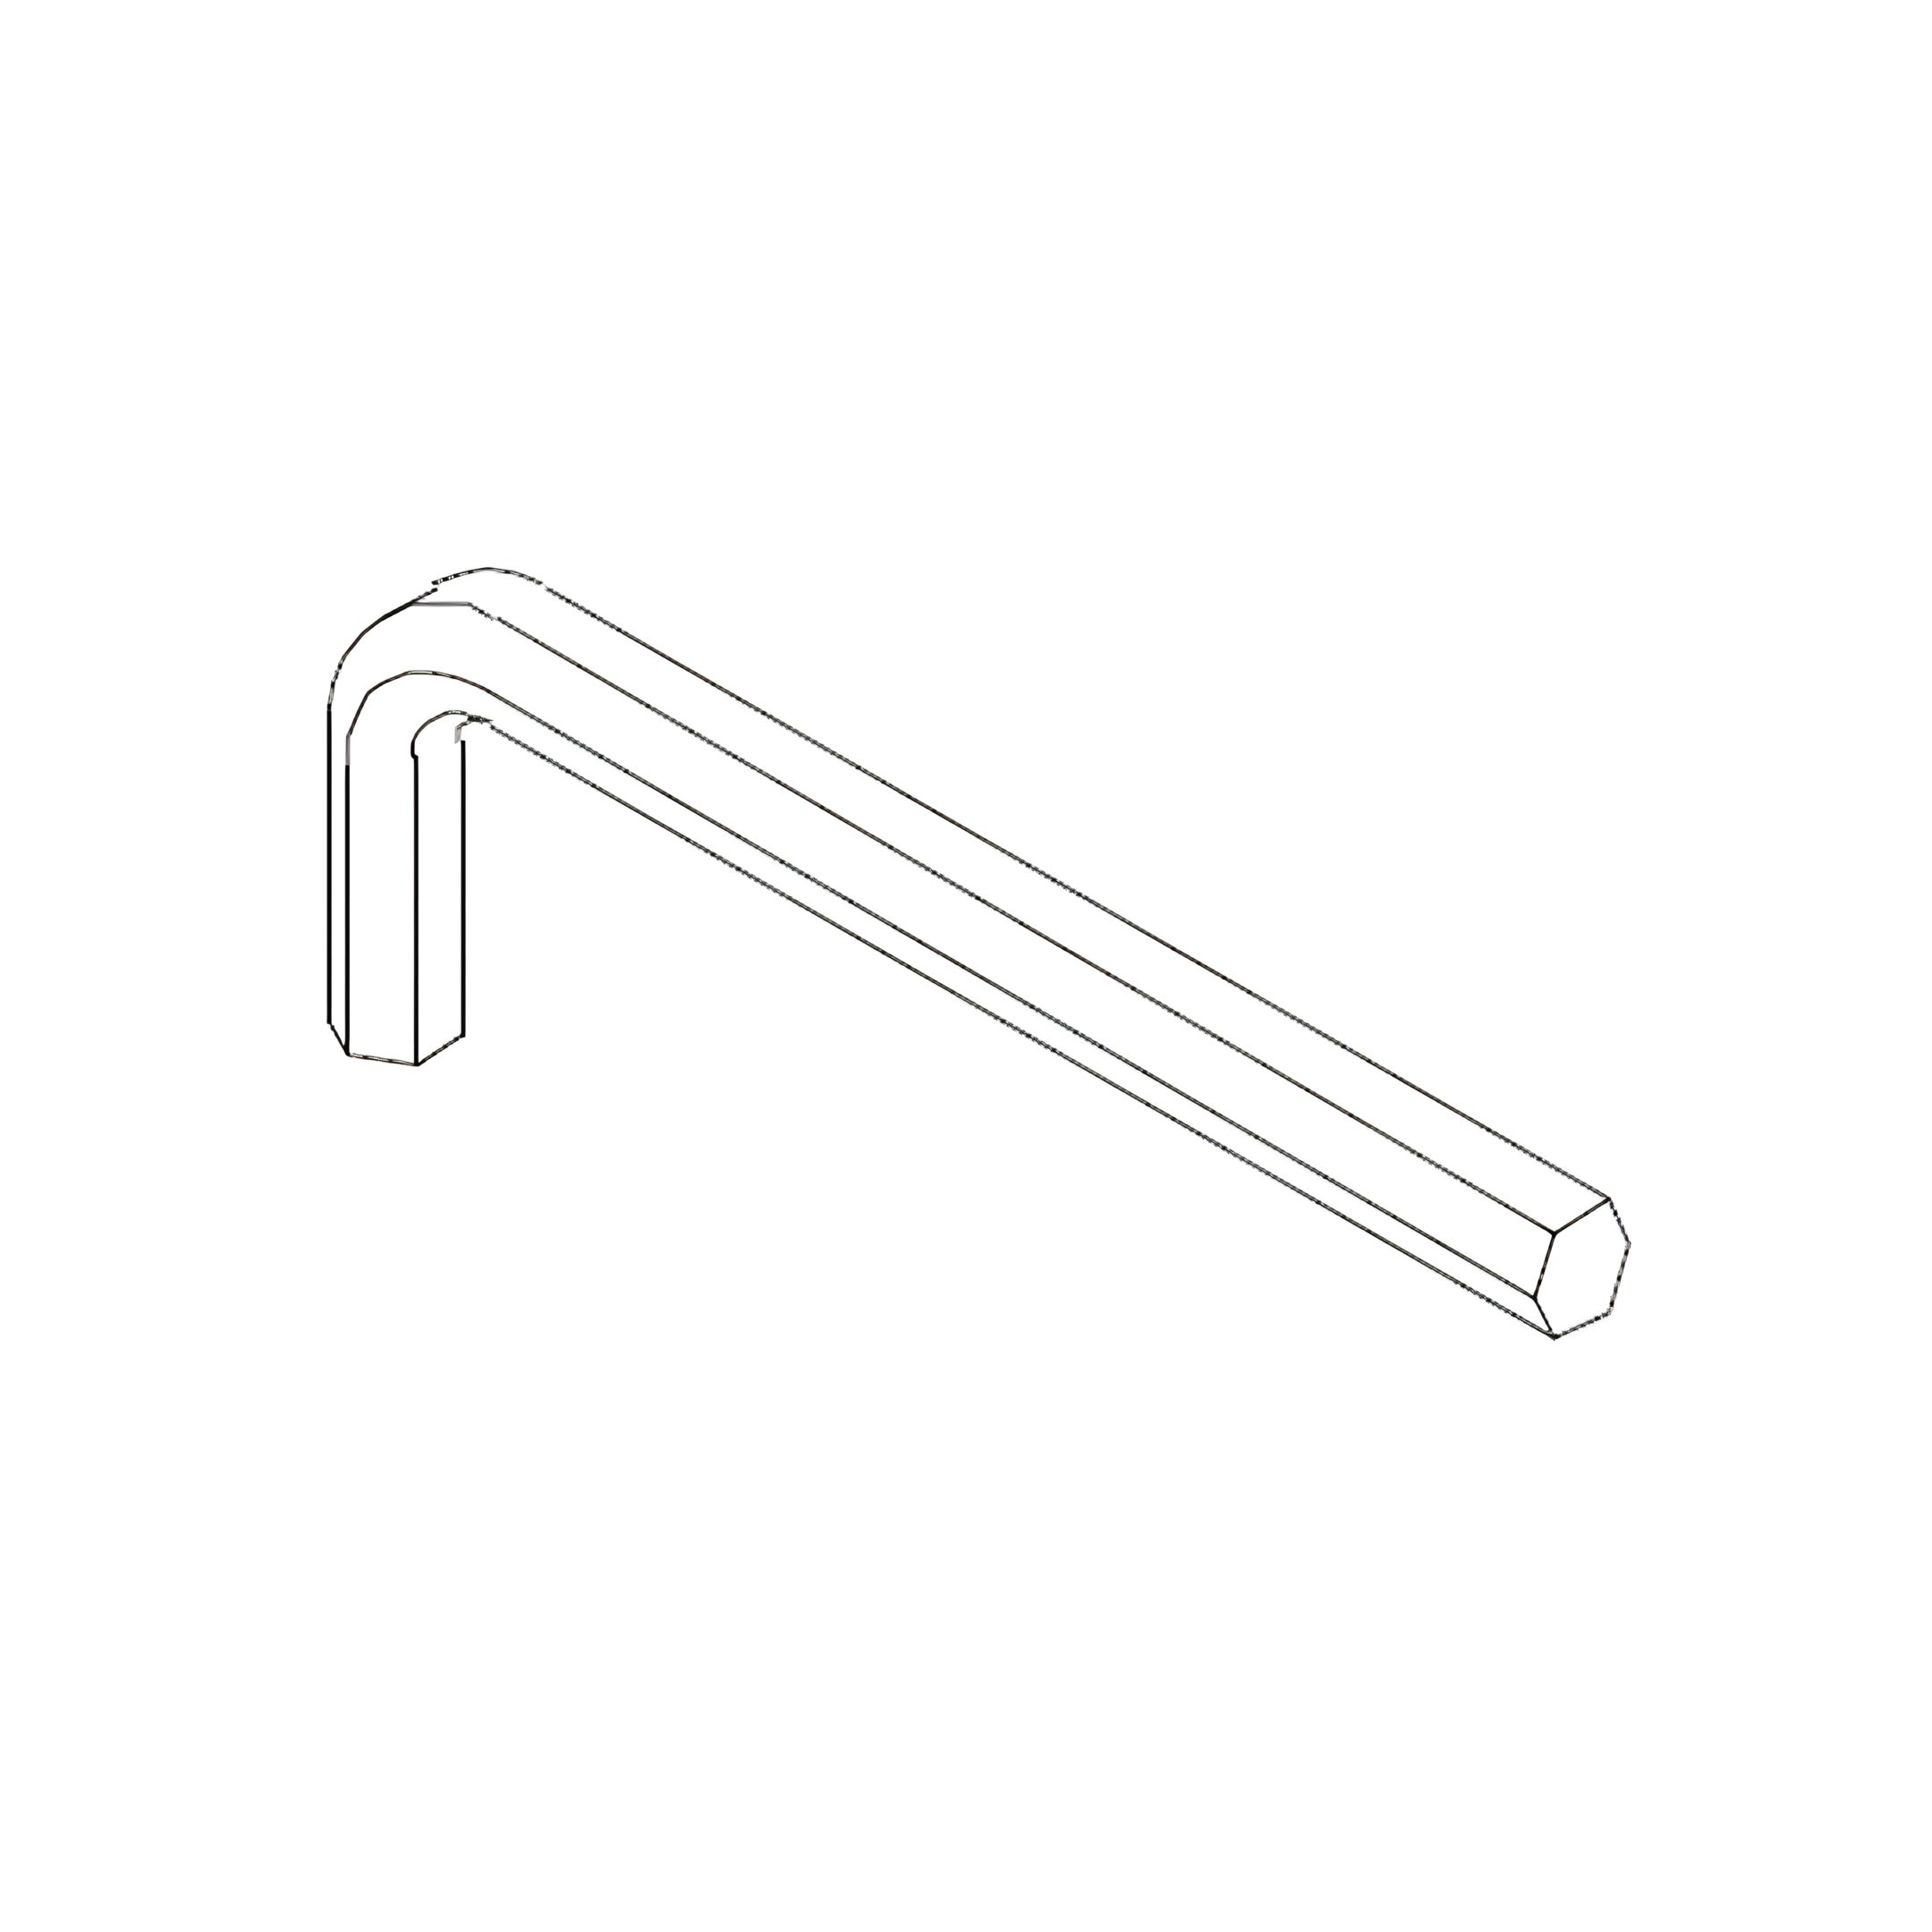
3. Use the Allen Key (K) to tighten the bolt securely.
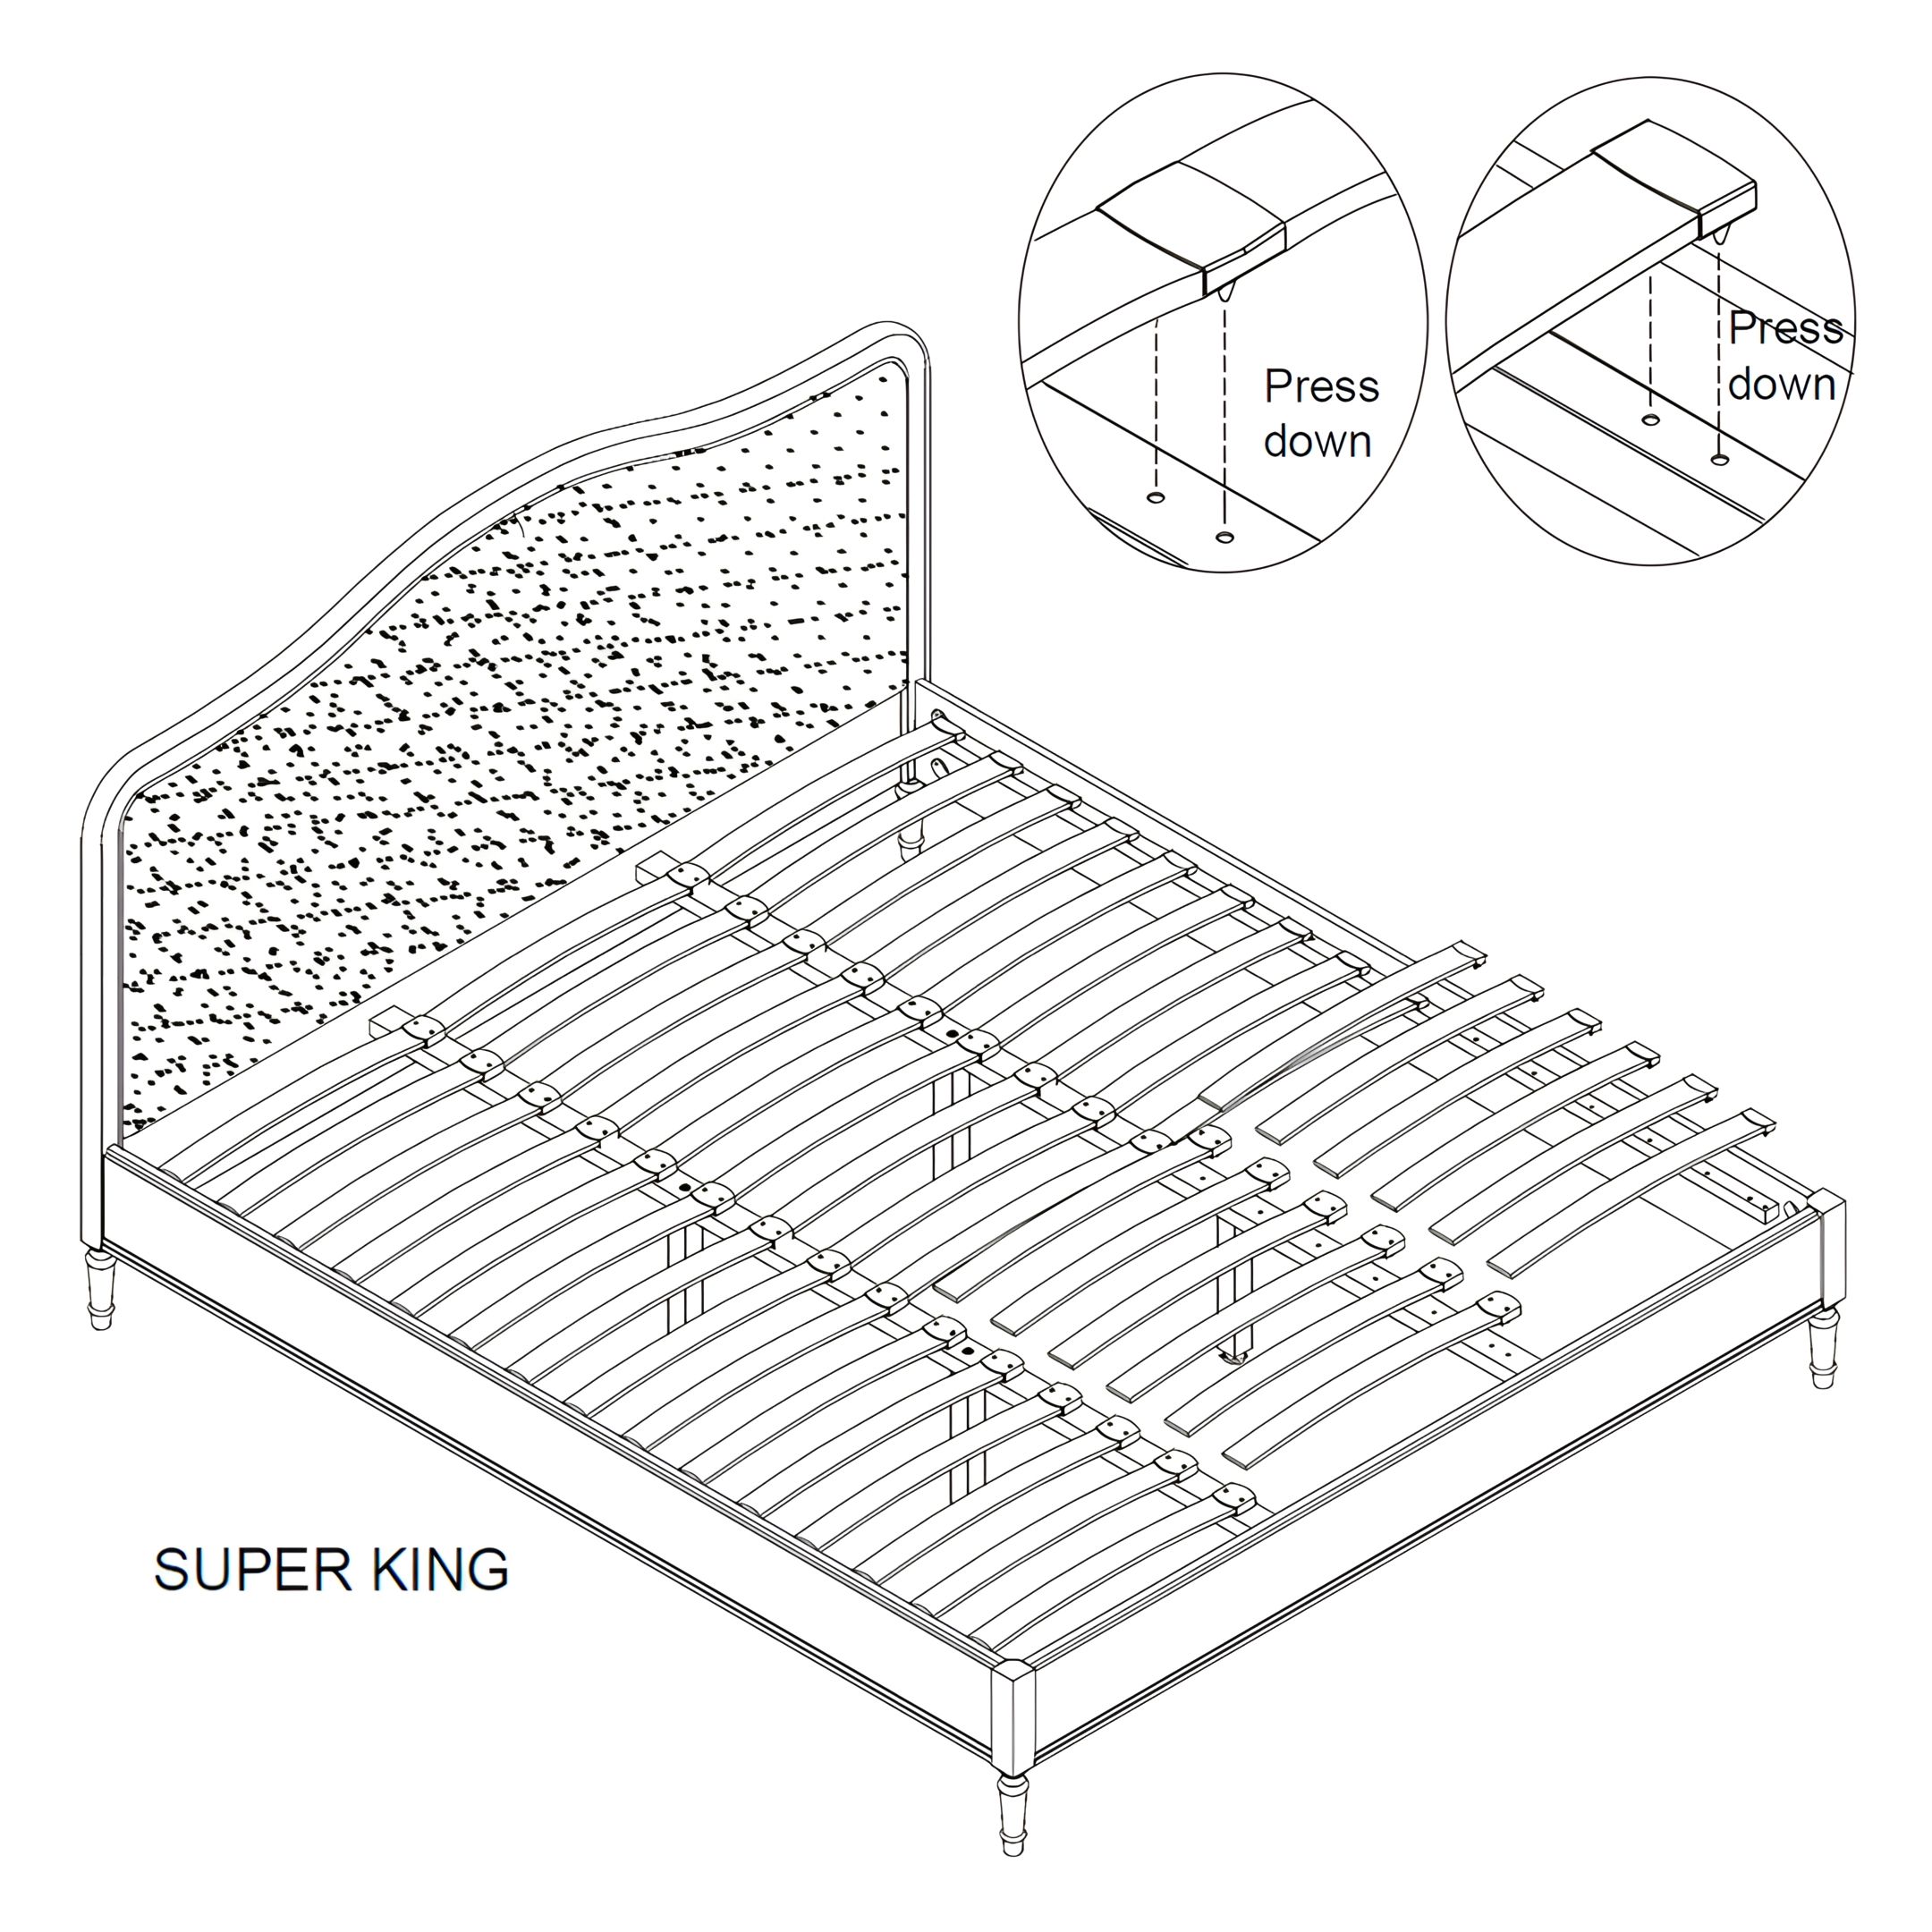
4. Repeat for all support legs.
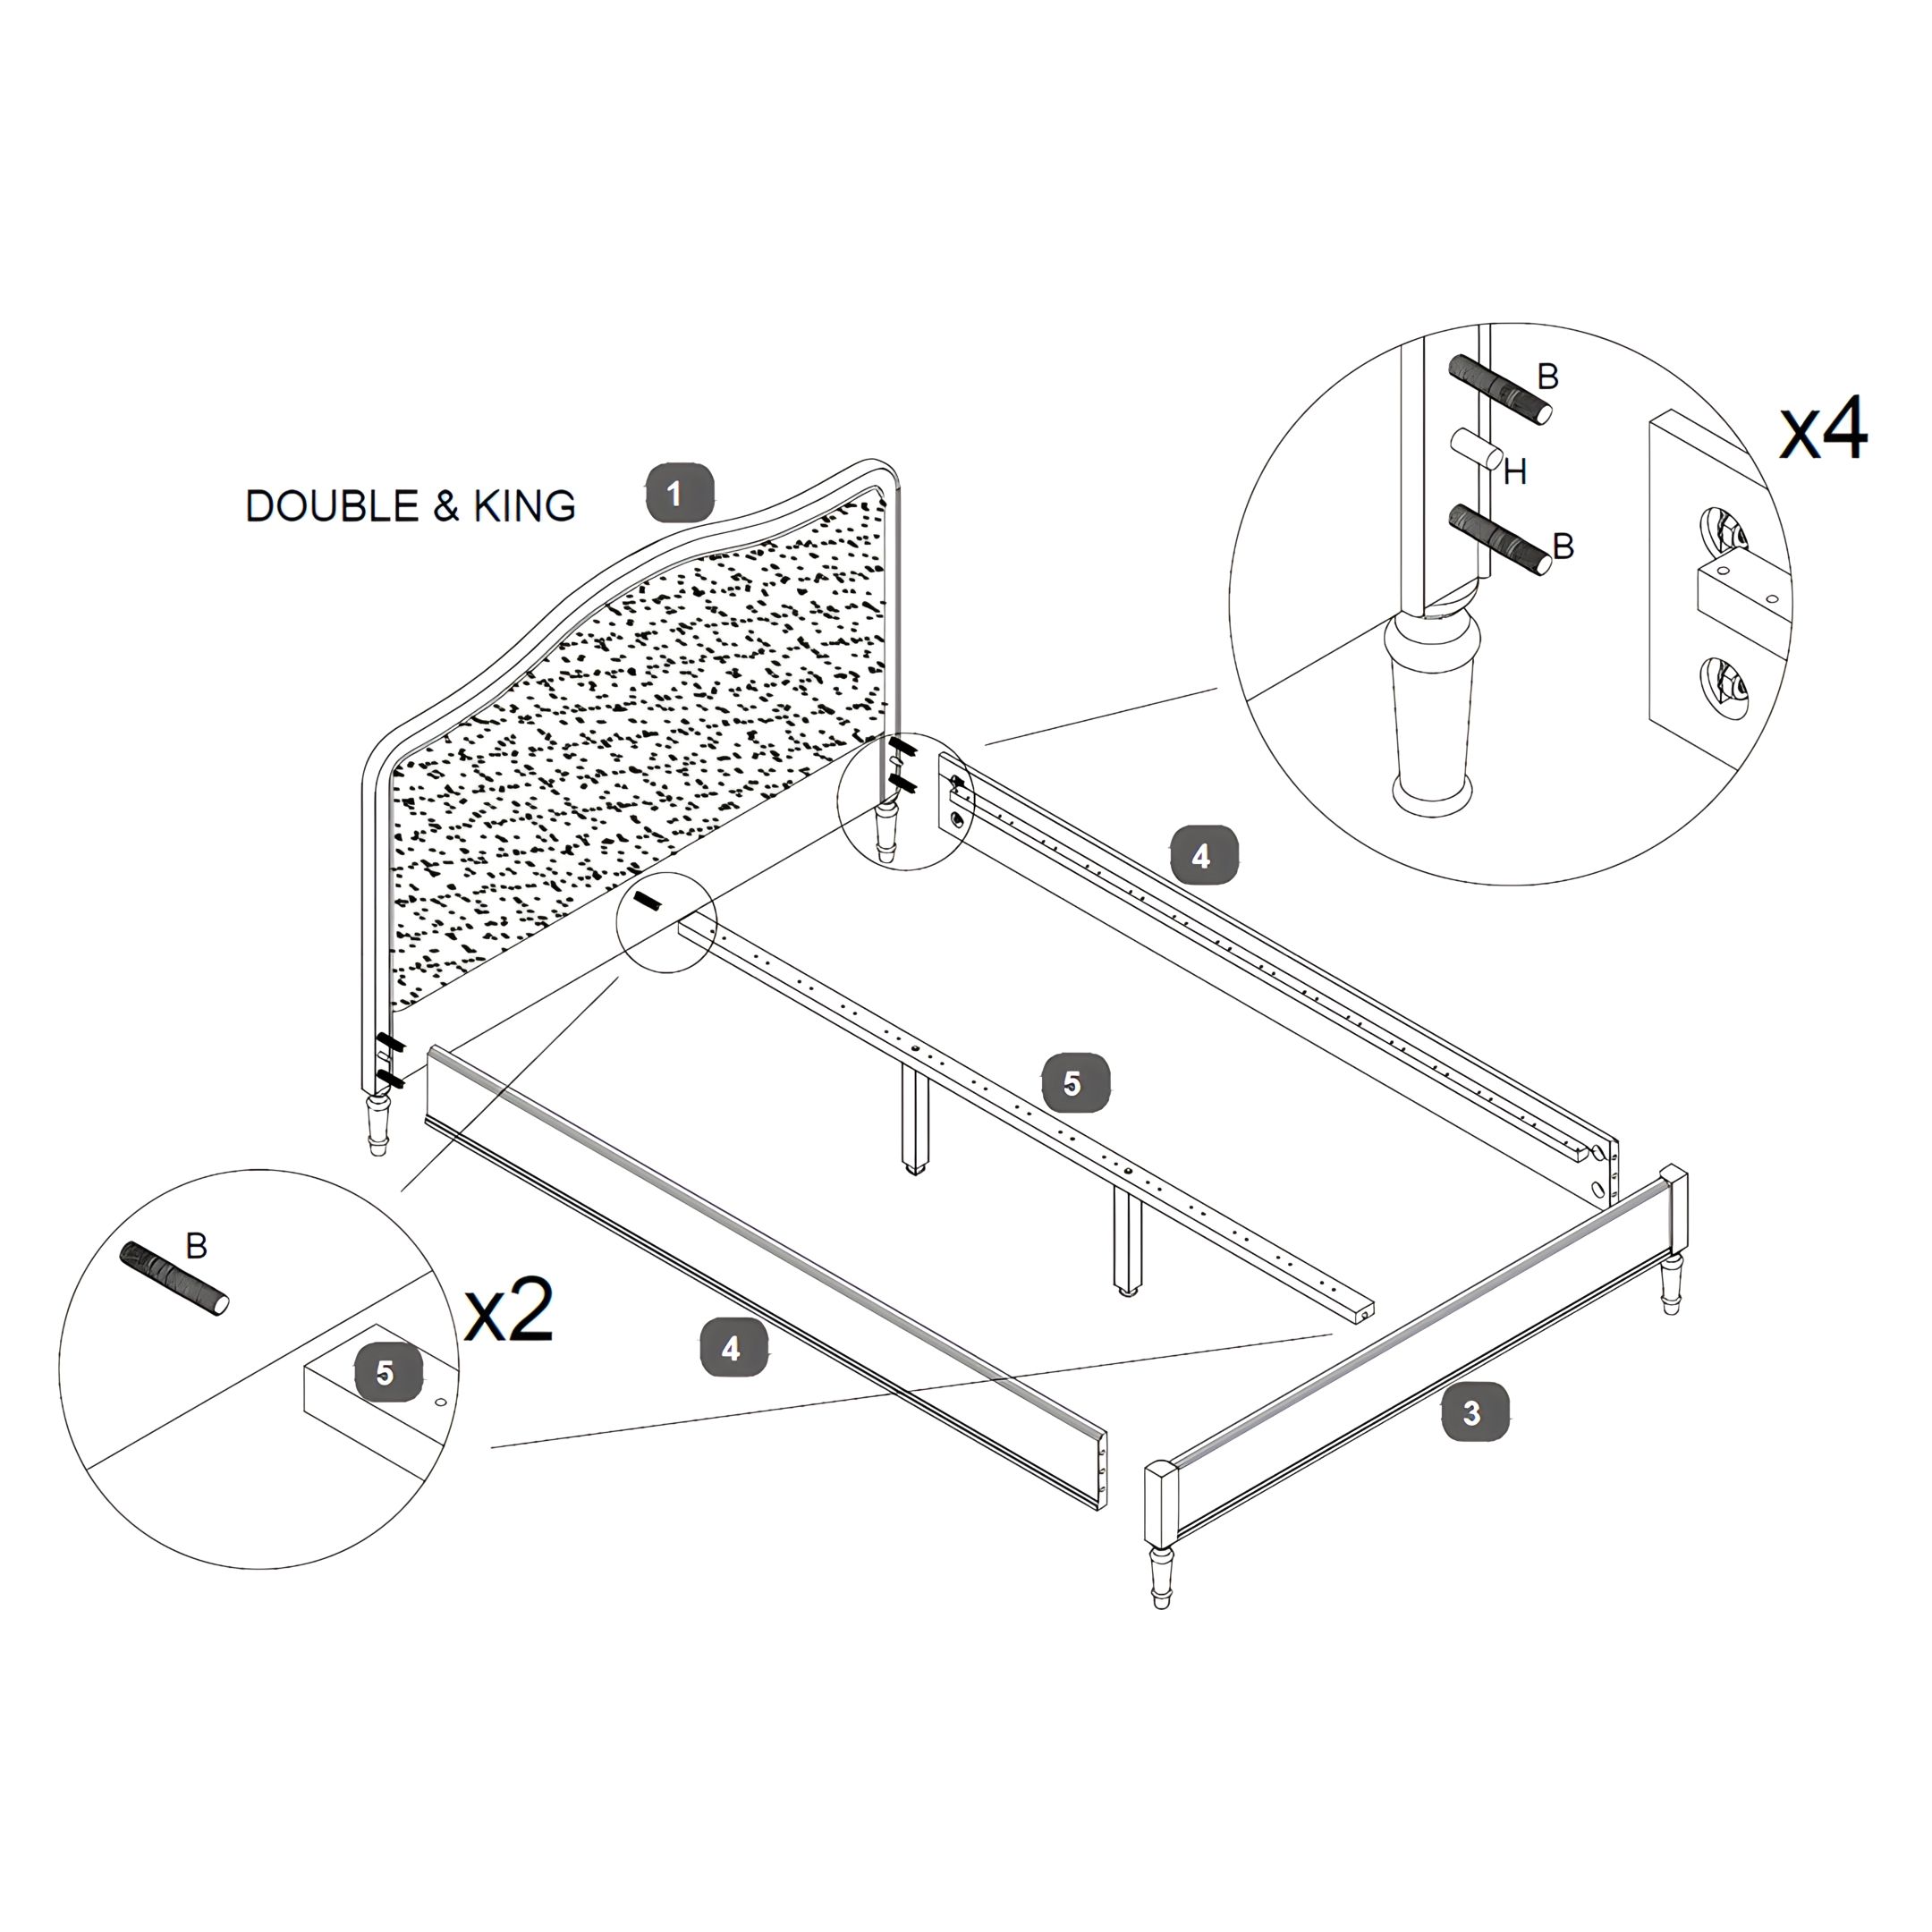
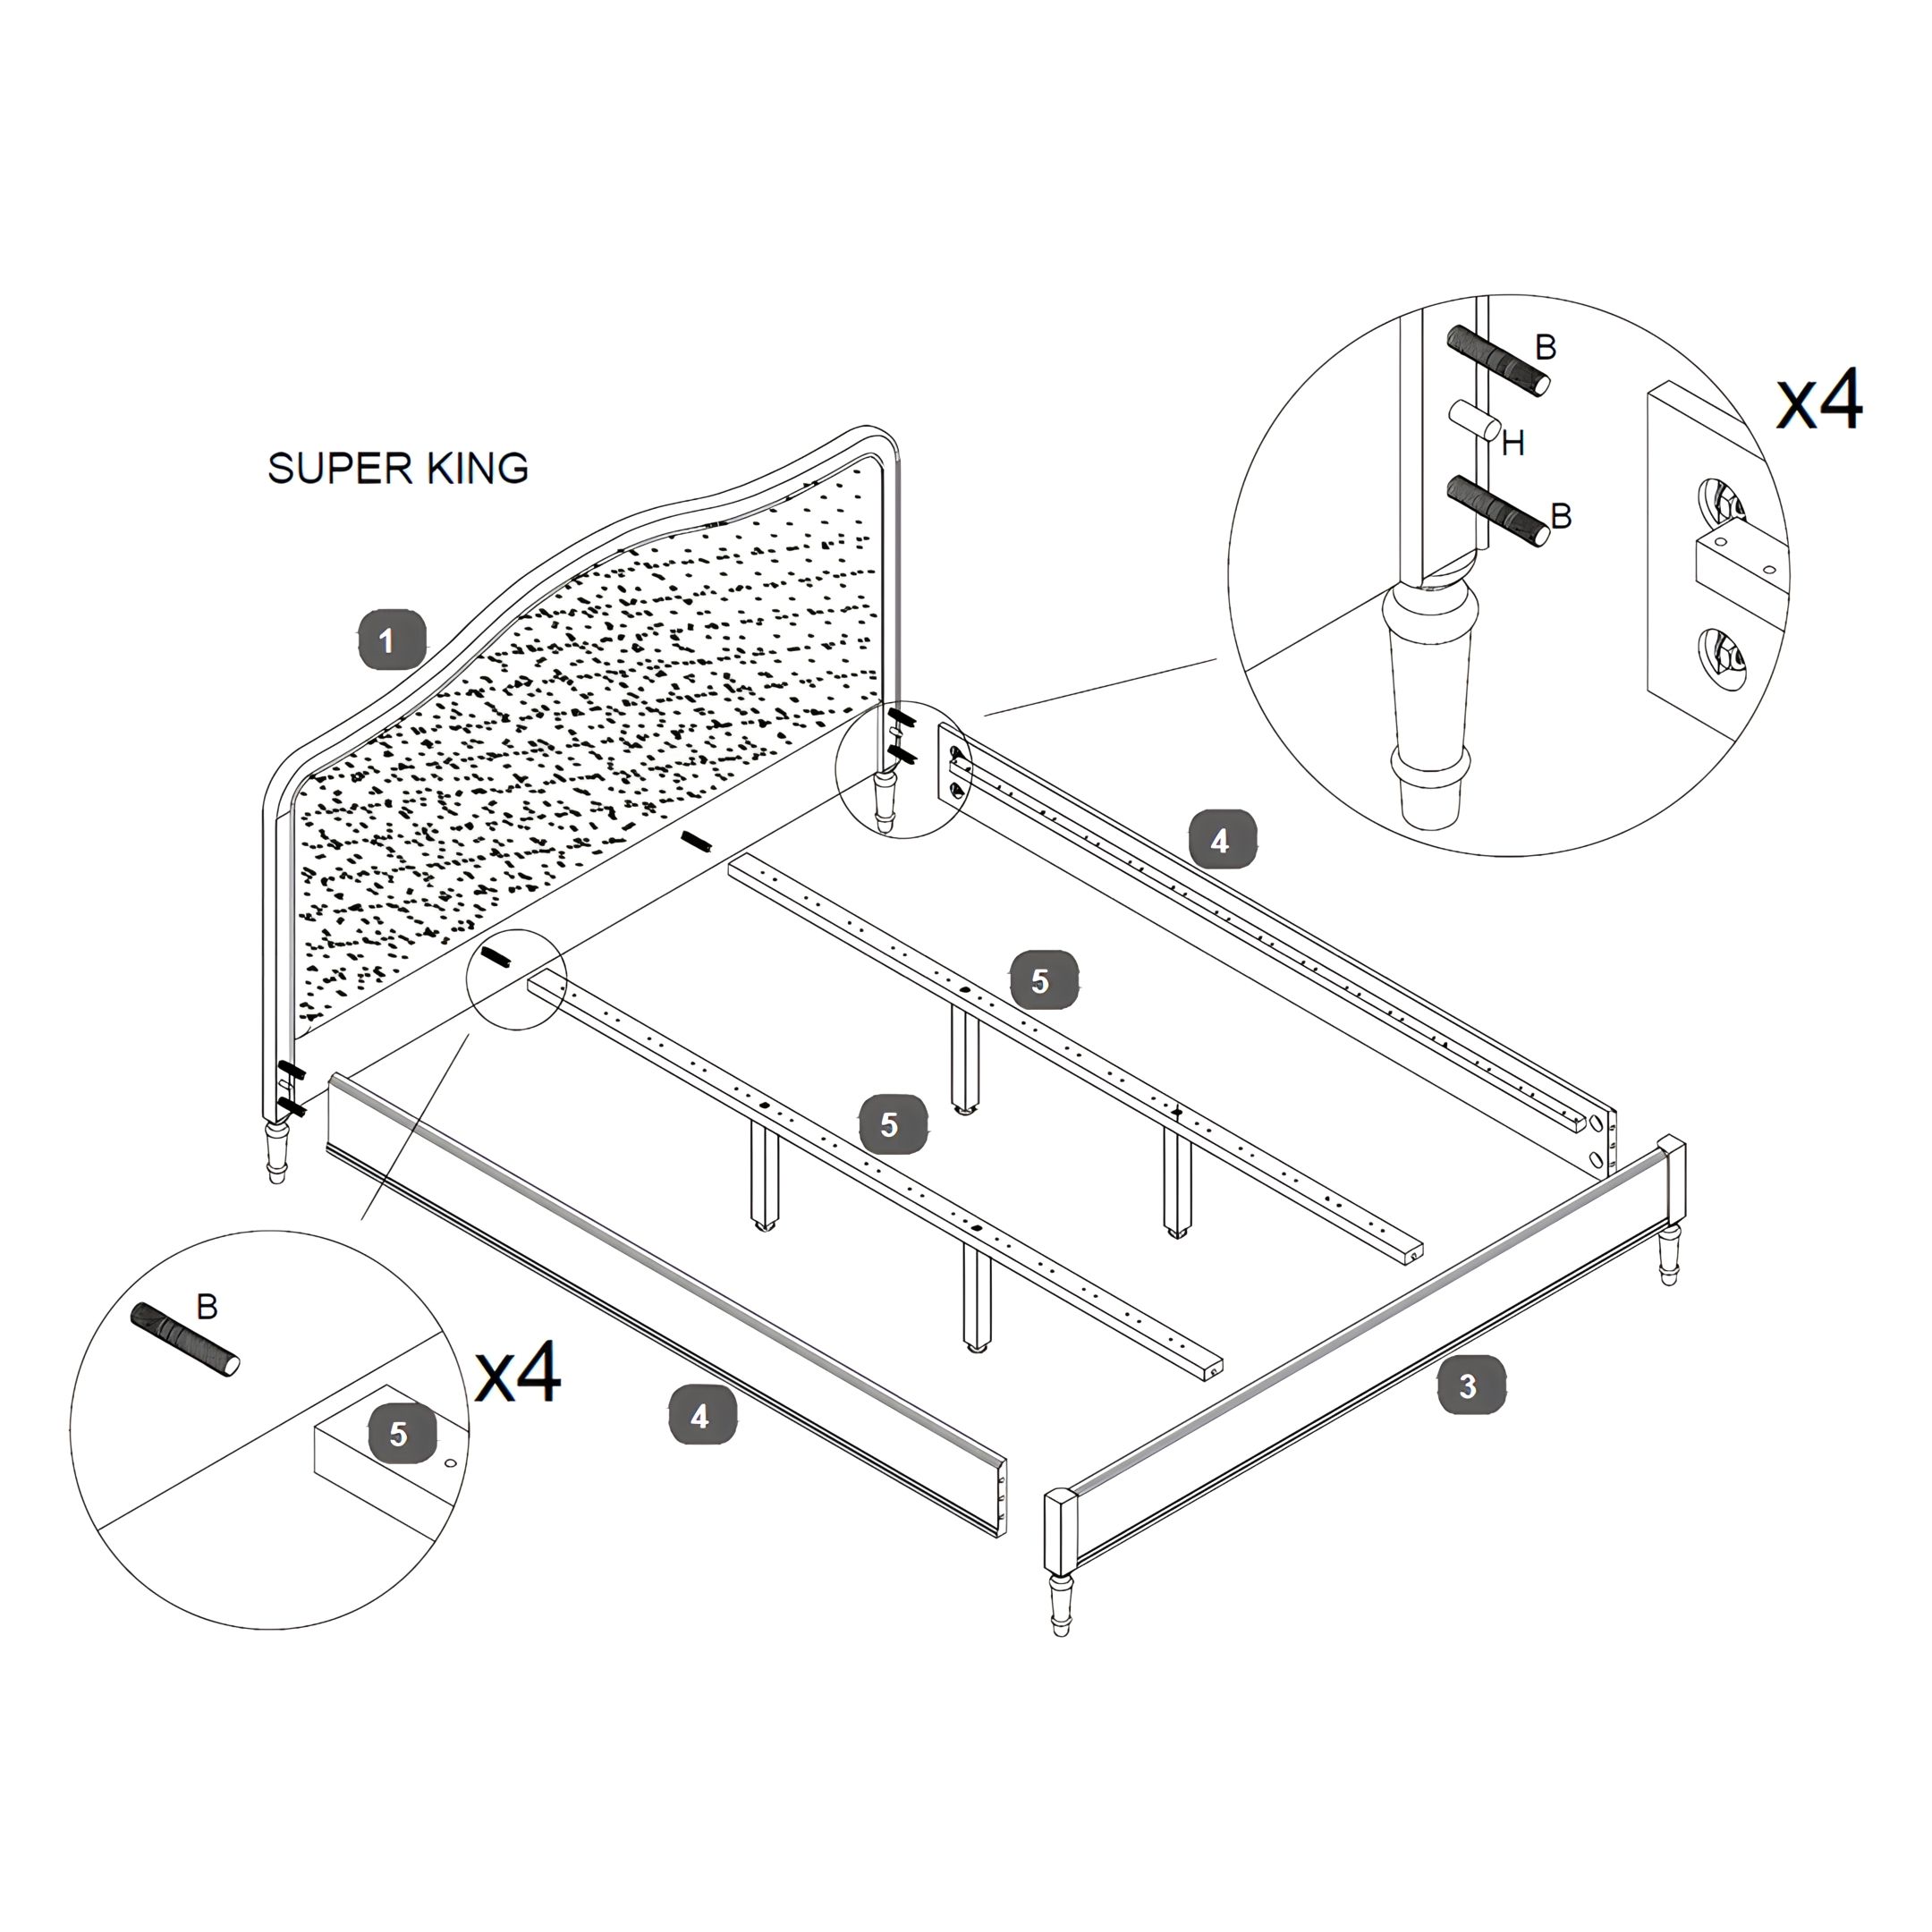
Note: If assembling the Super King size, there are two Centre Rails (5) instead of one. Each rail will require two Centre Rail Support Legs (6), totaling four legs.