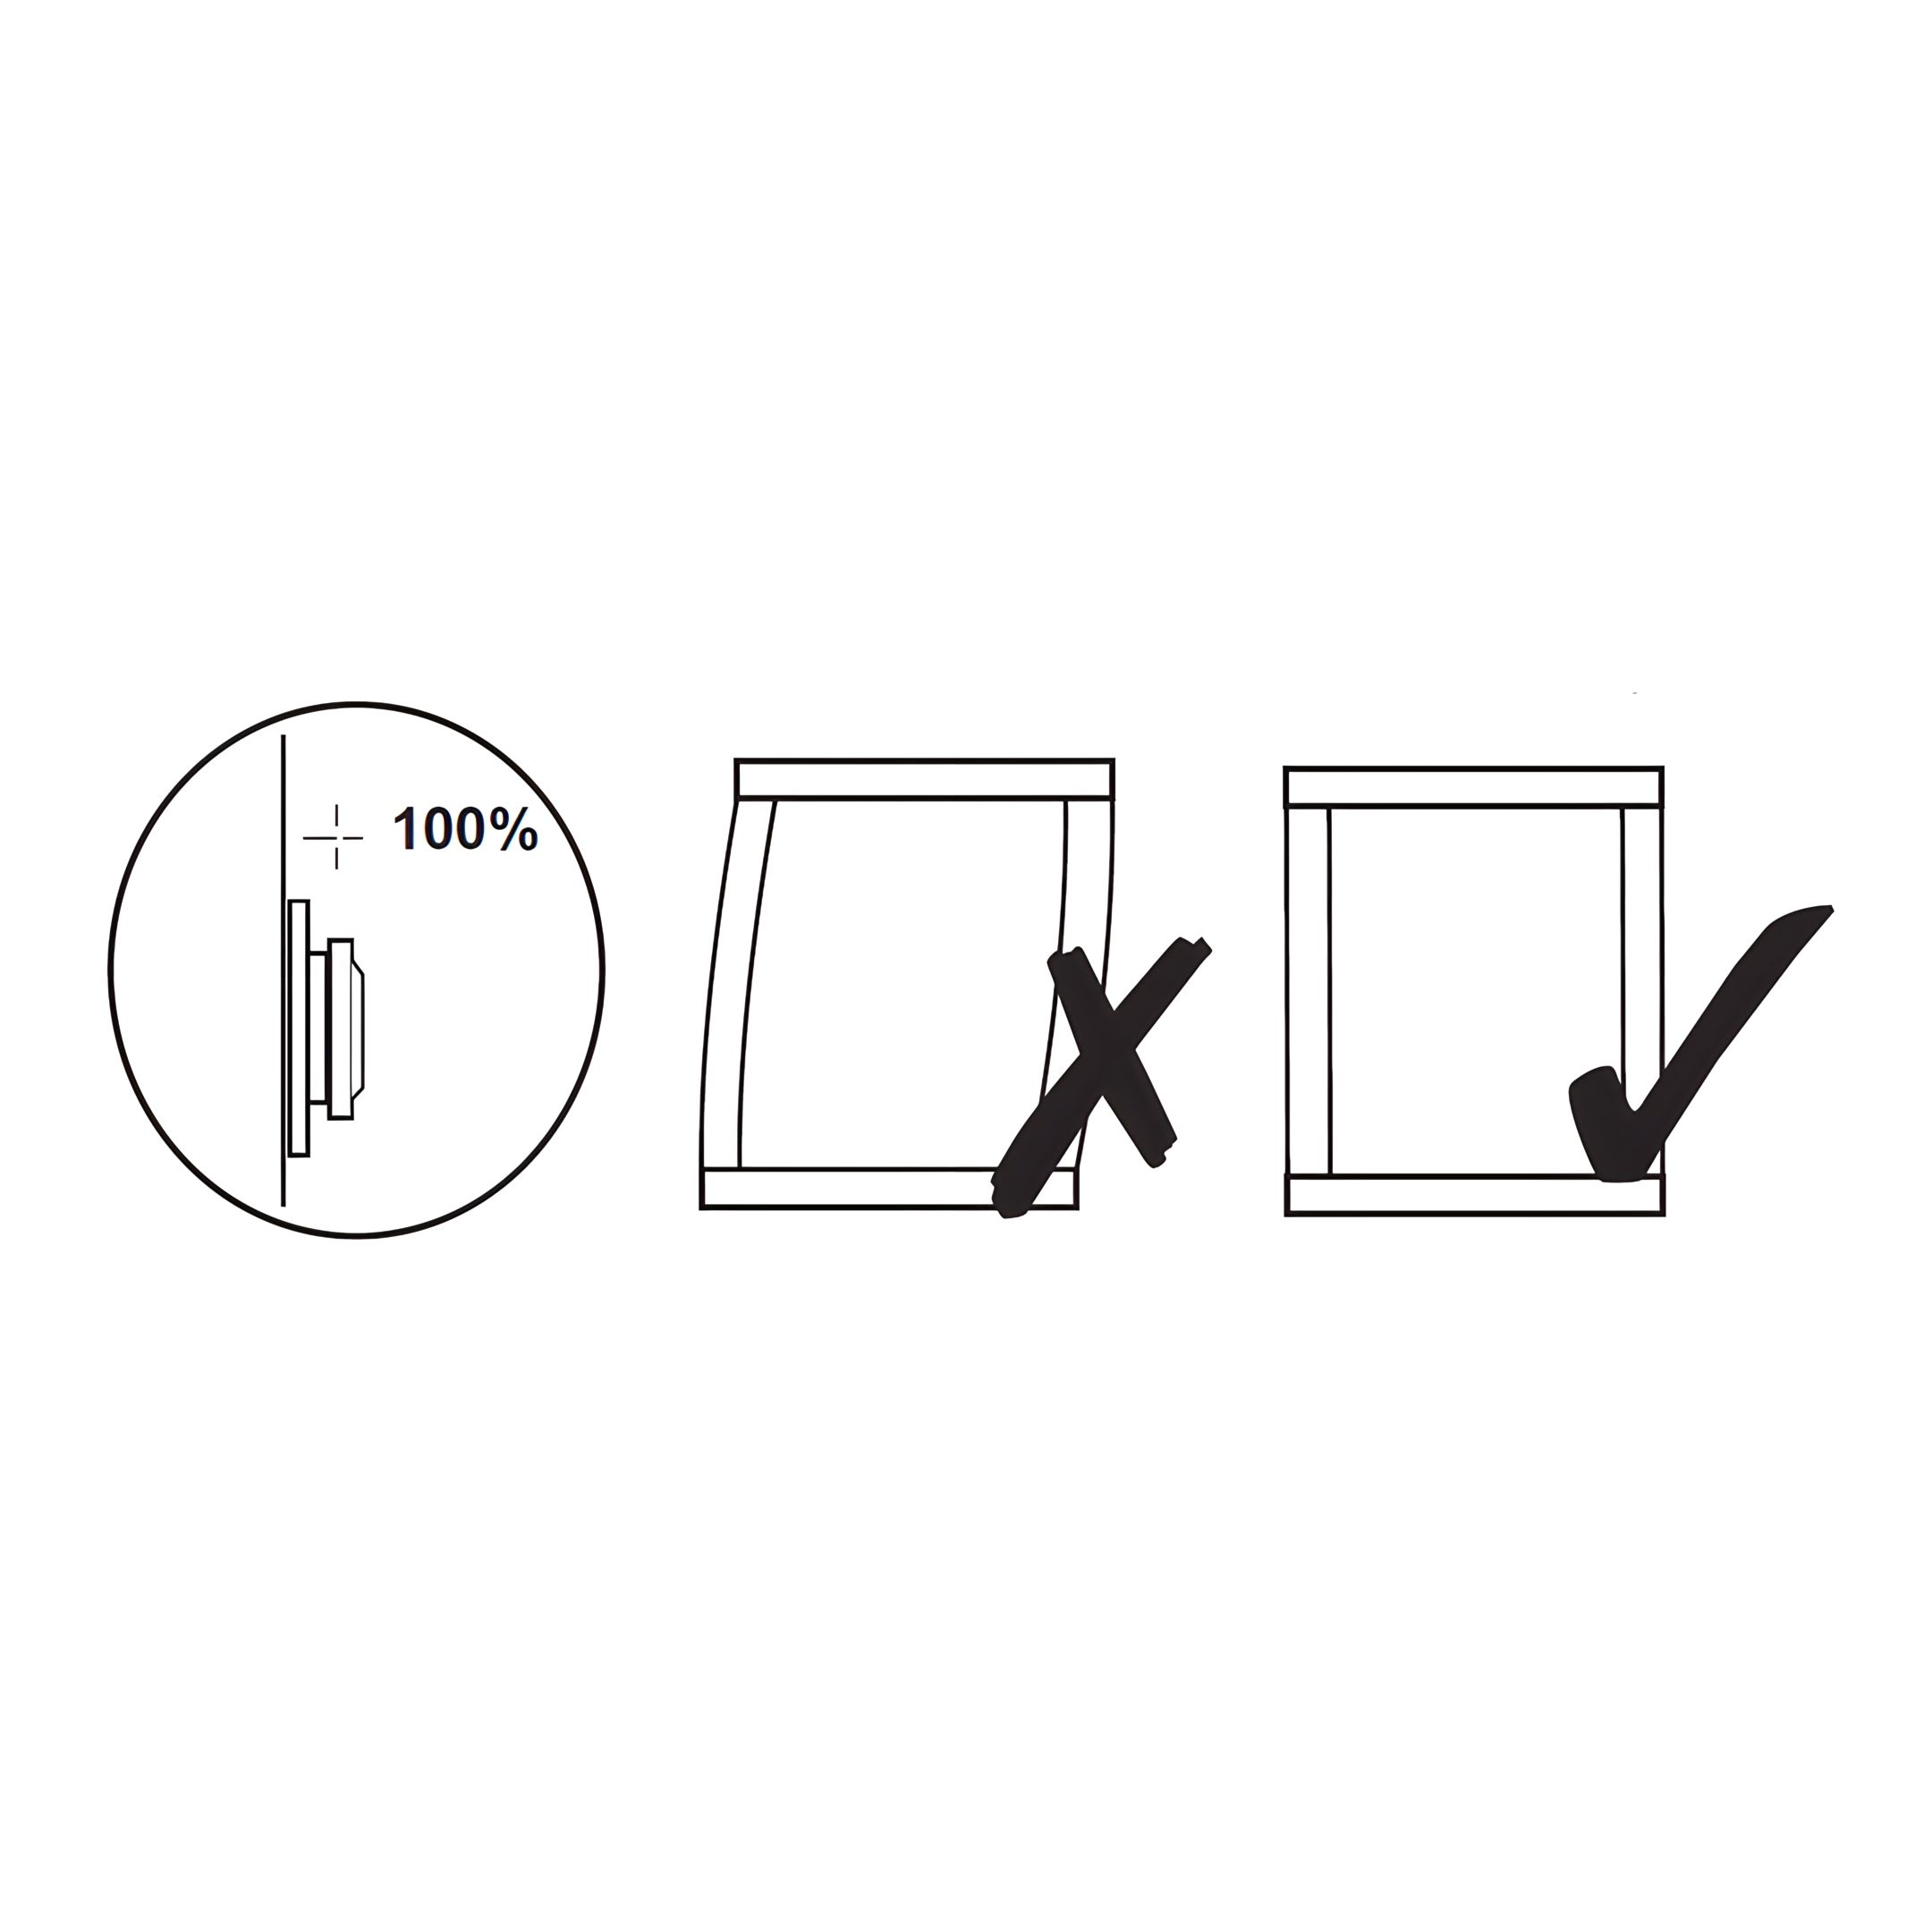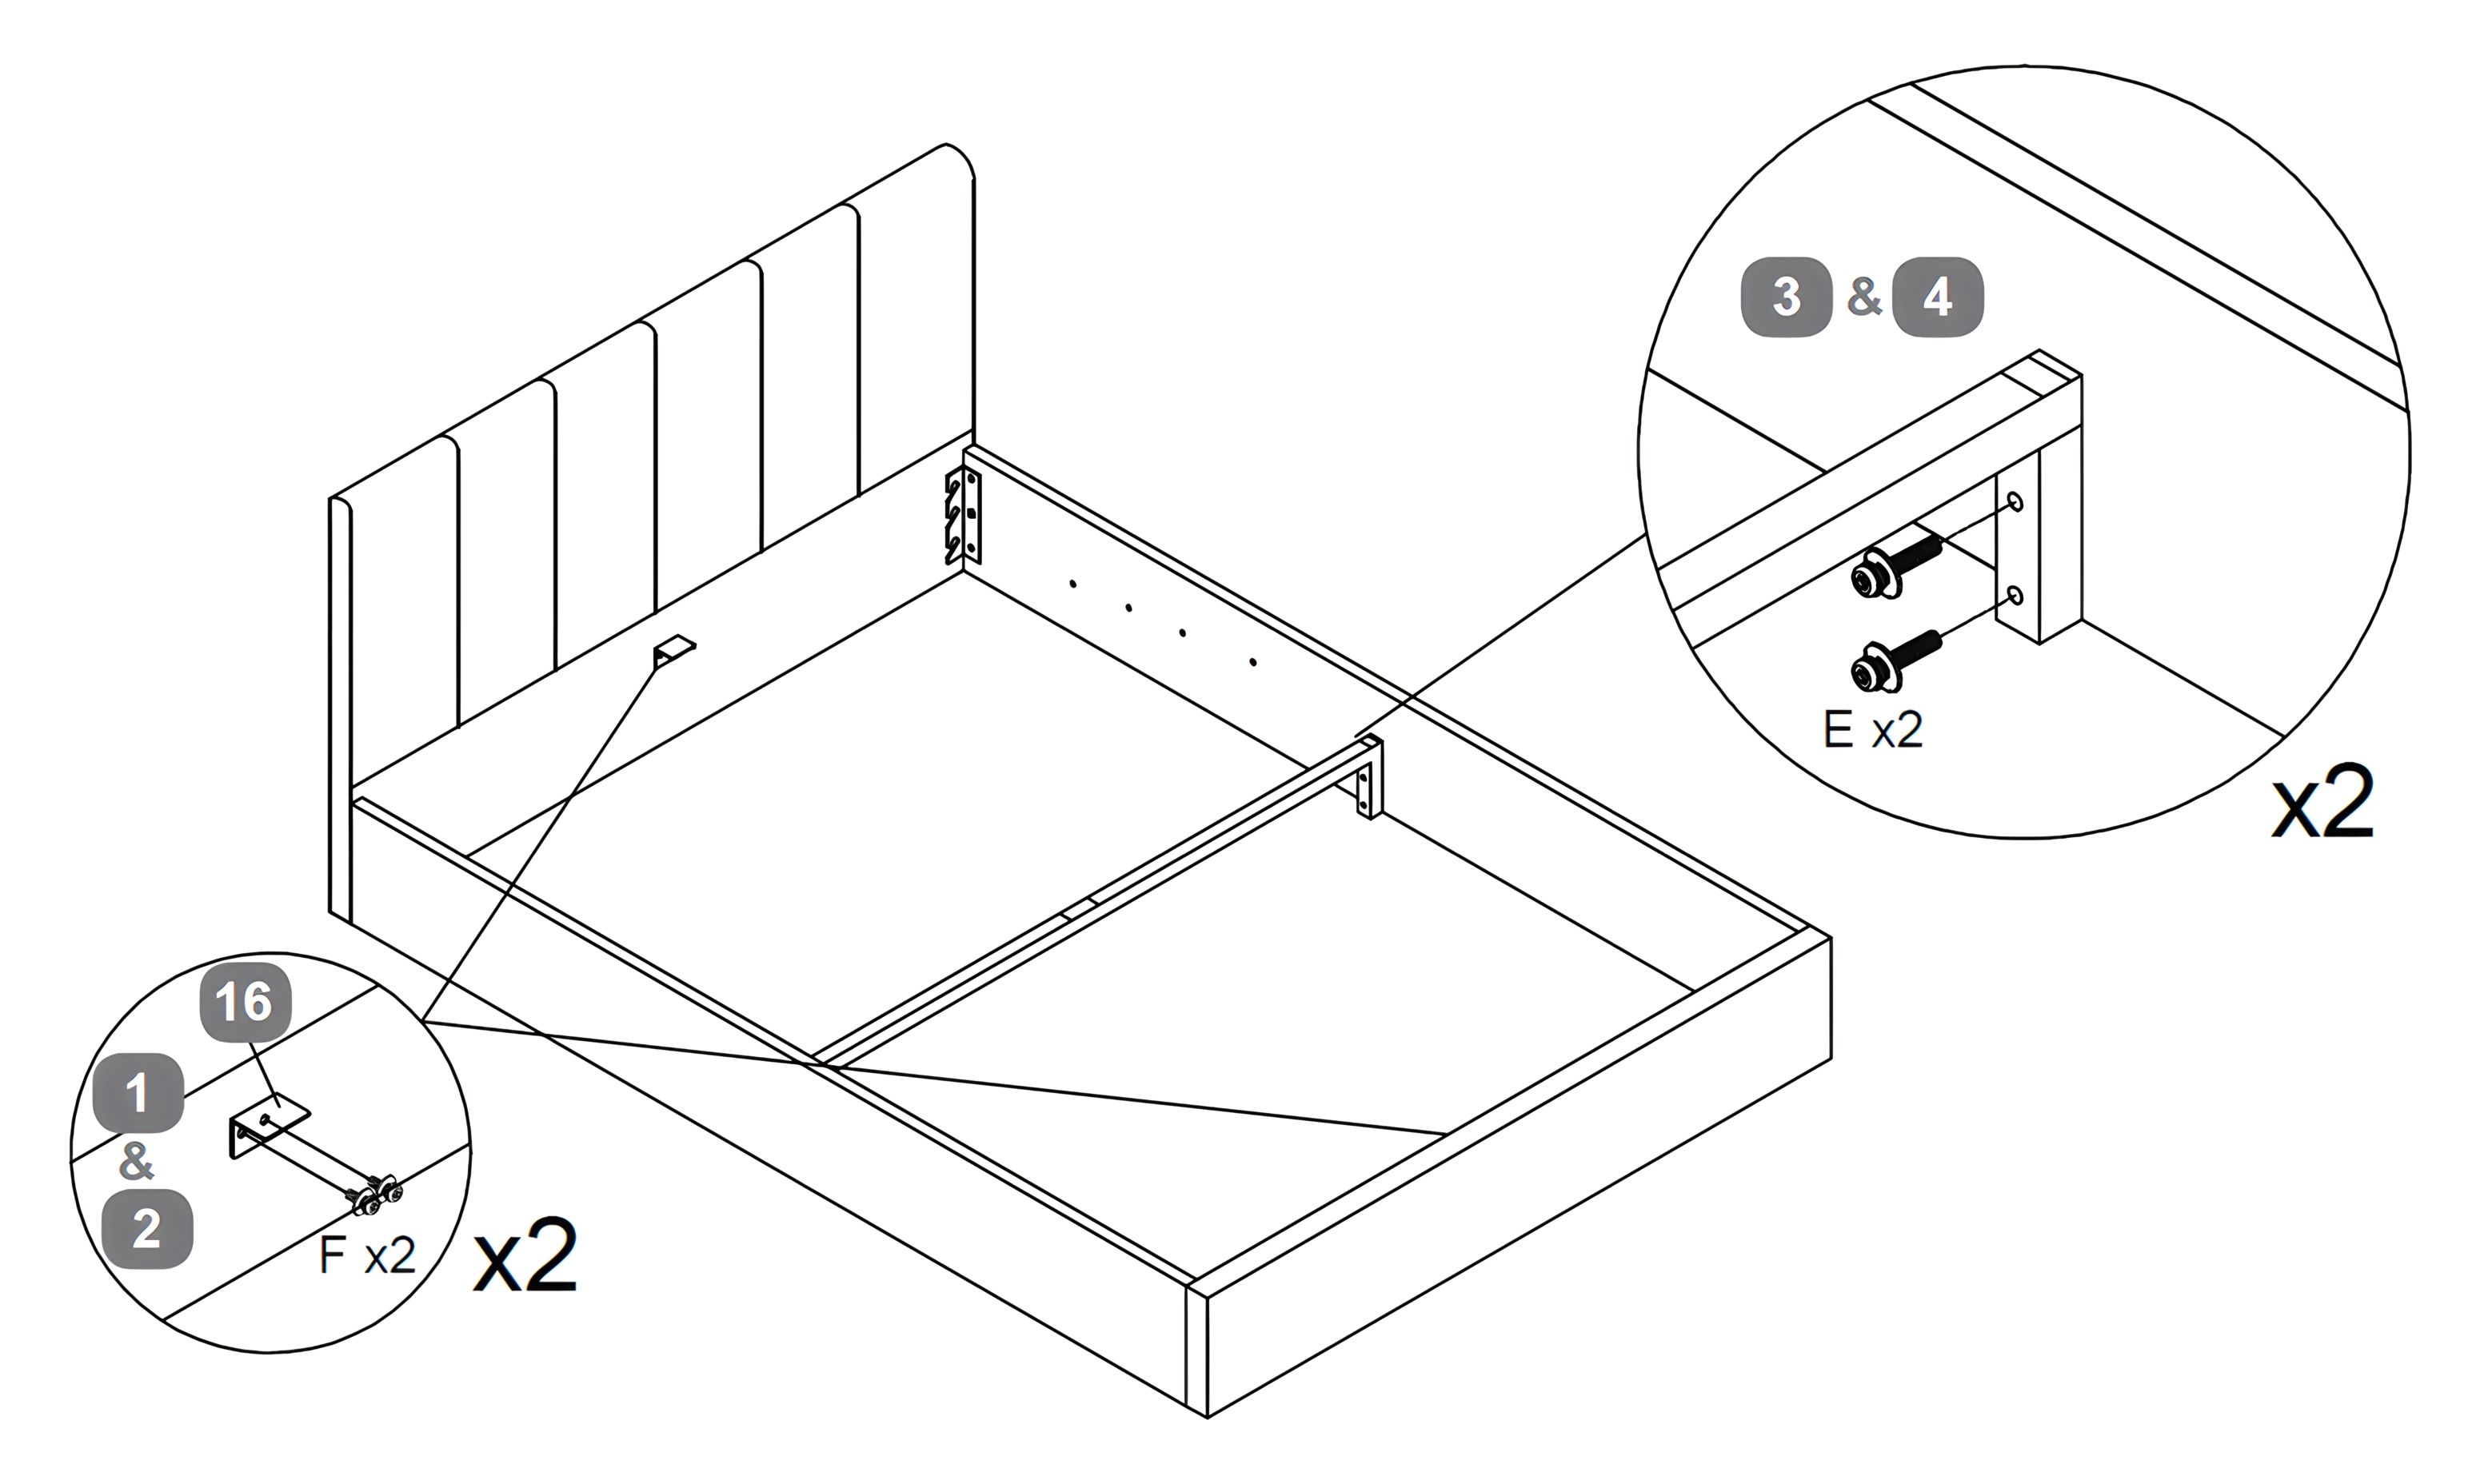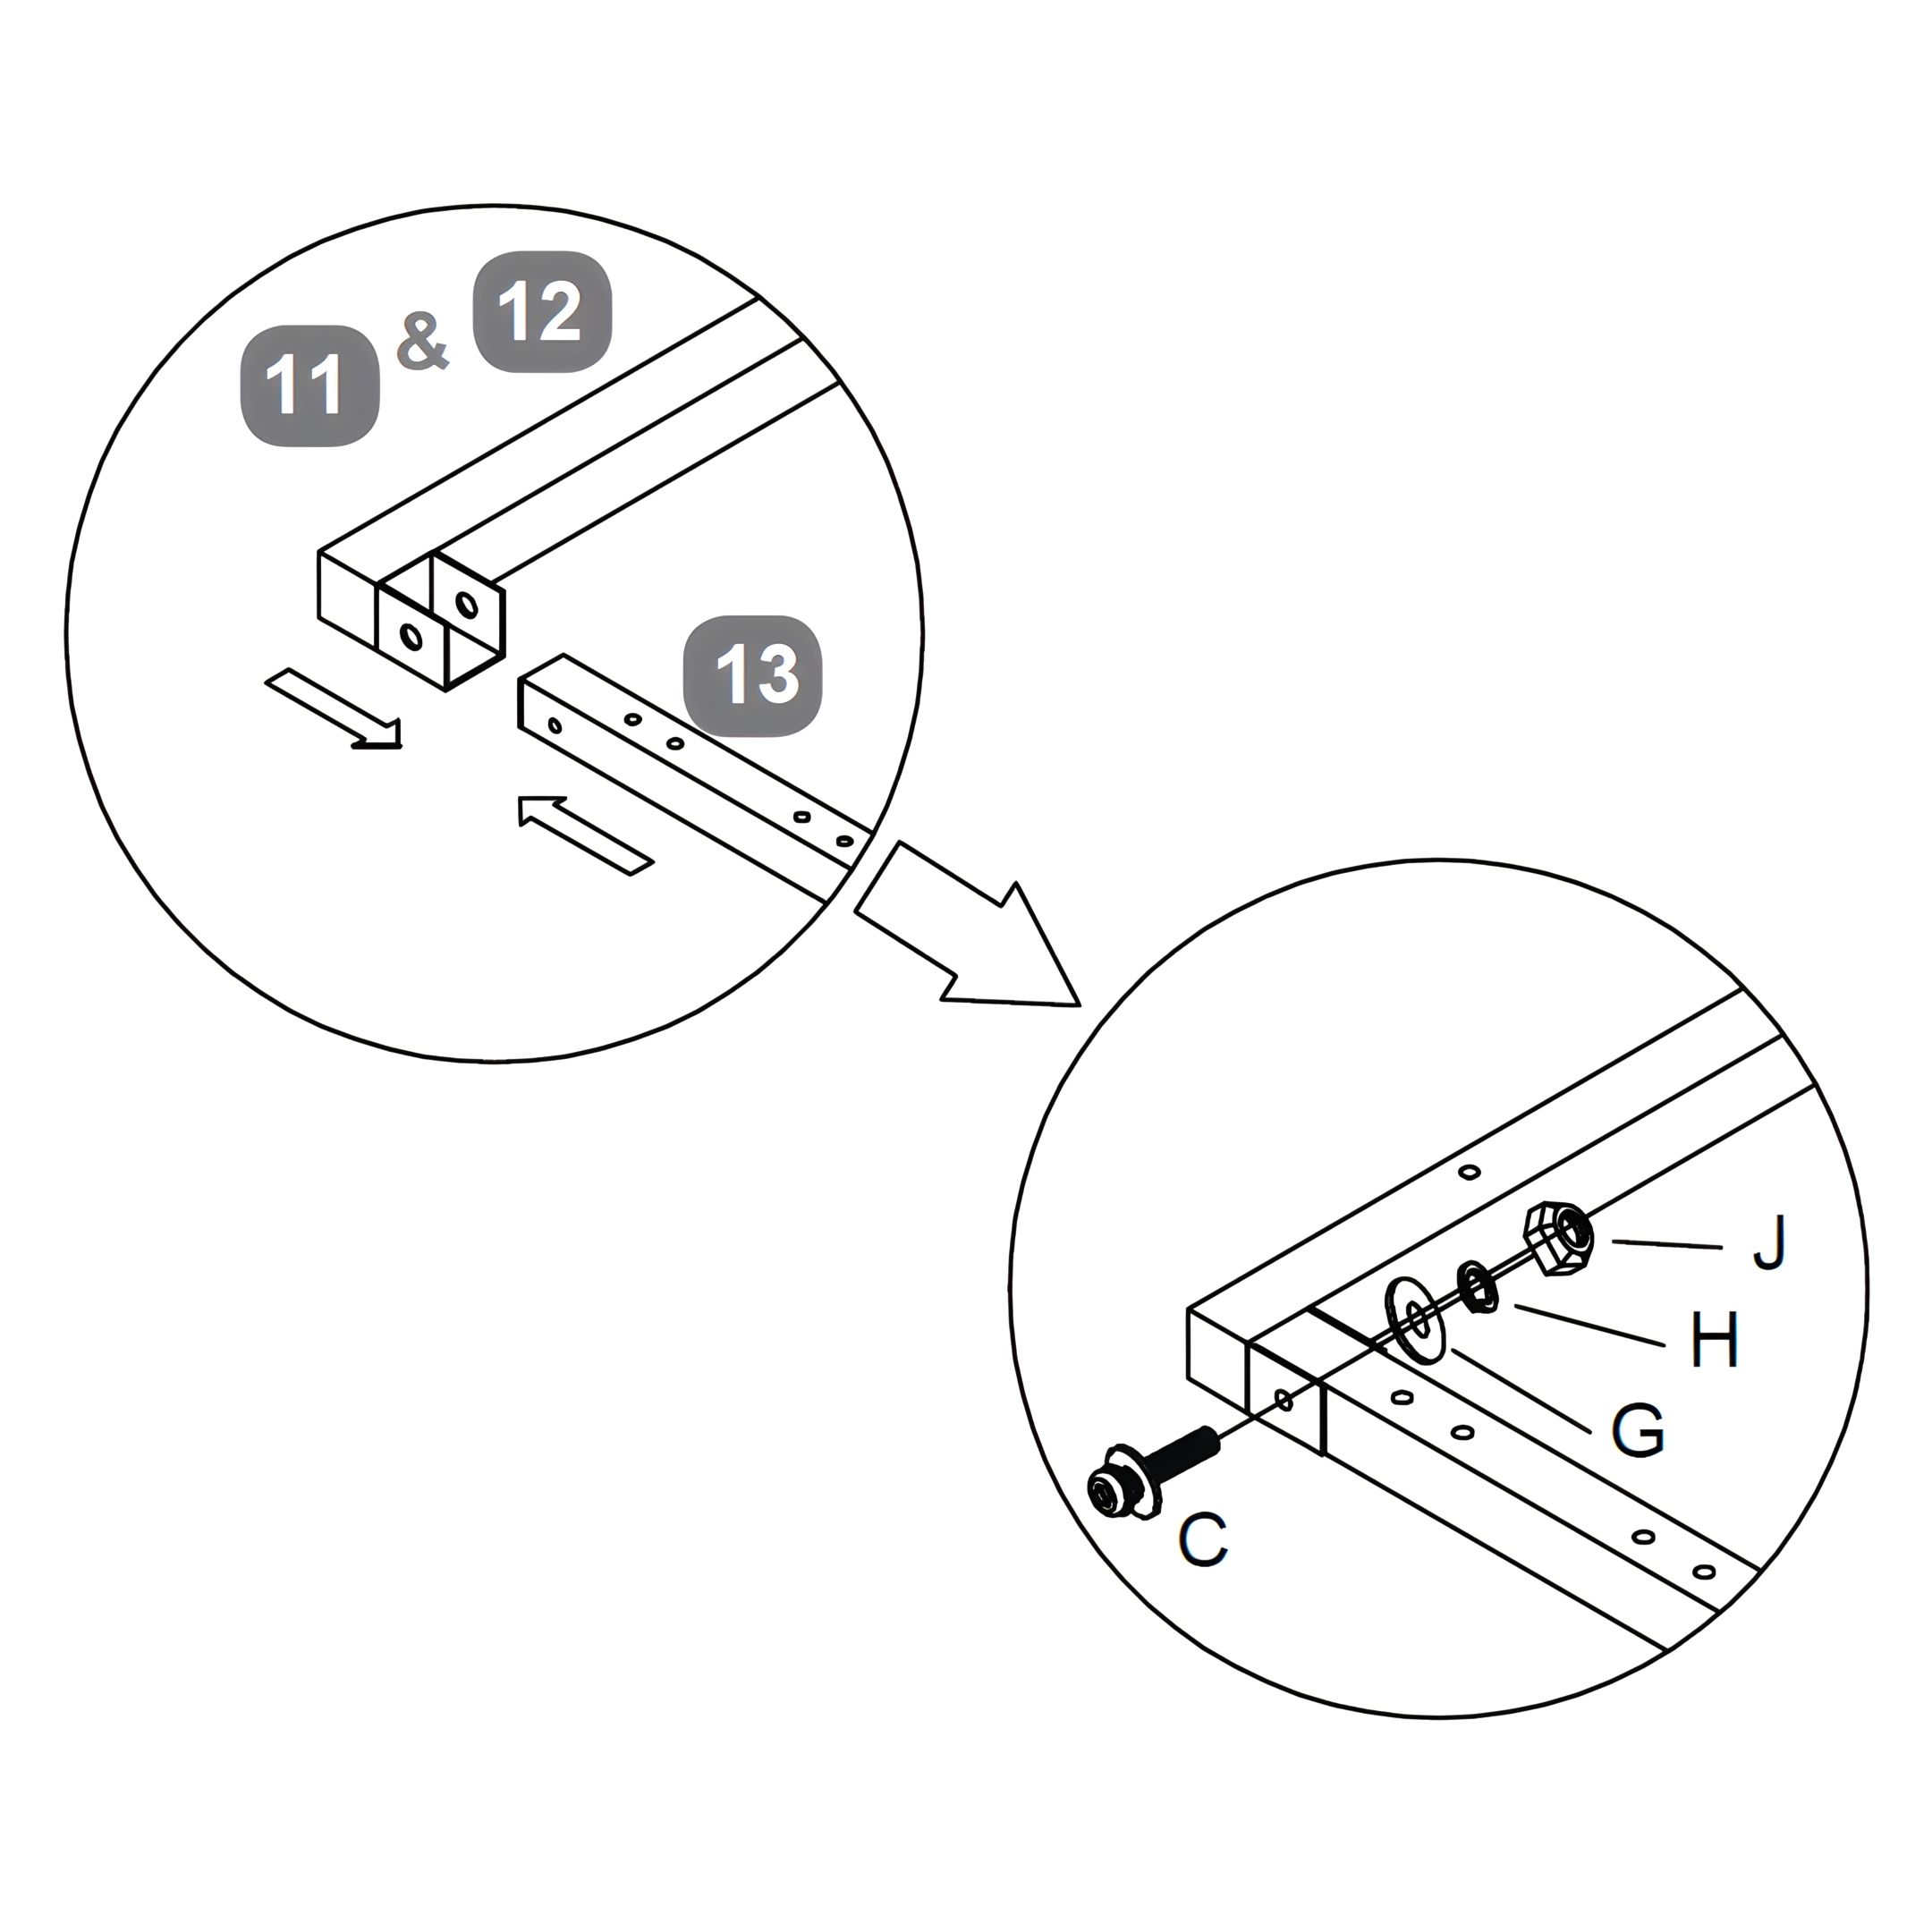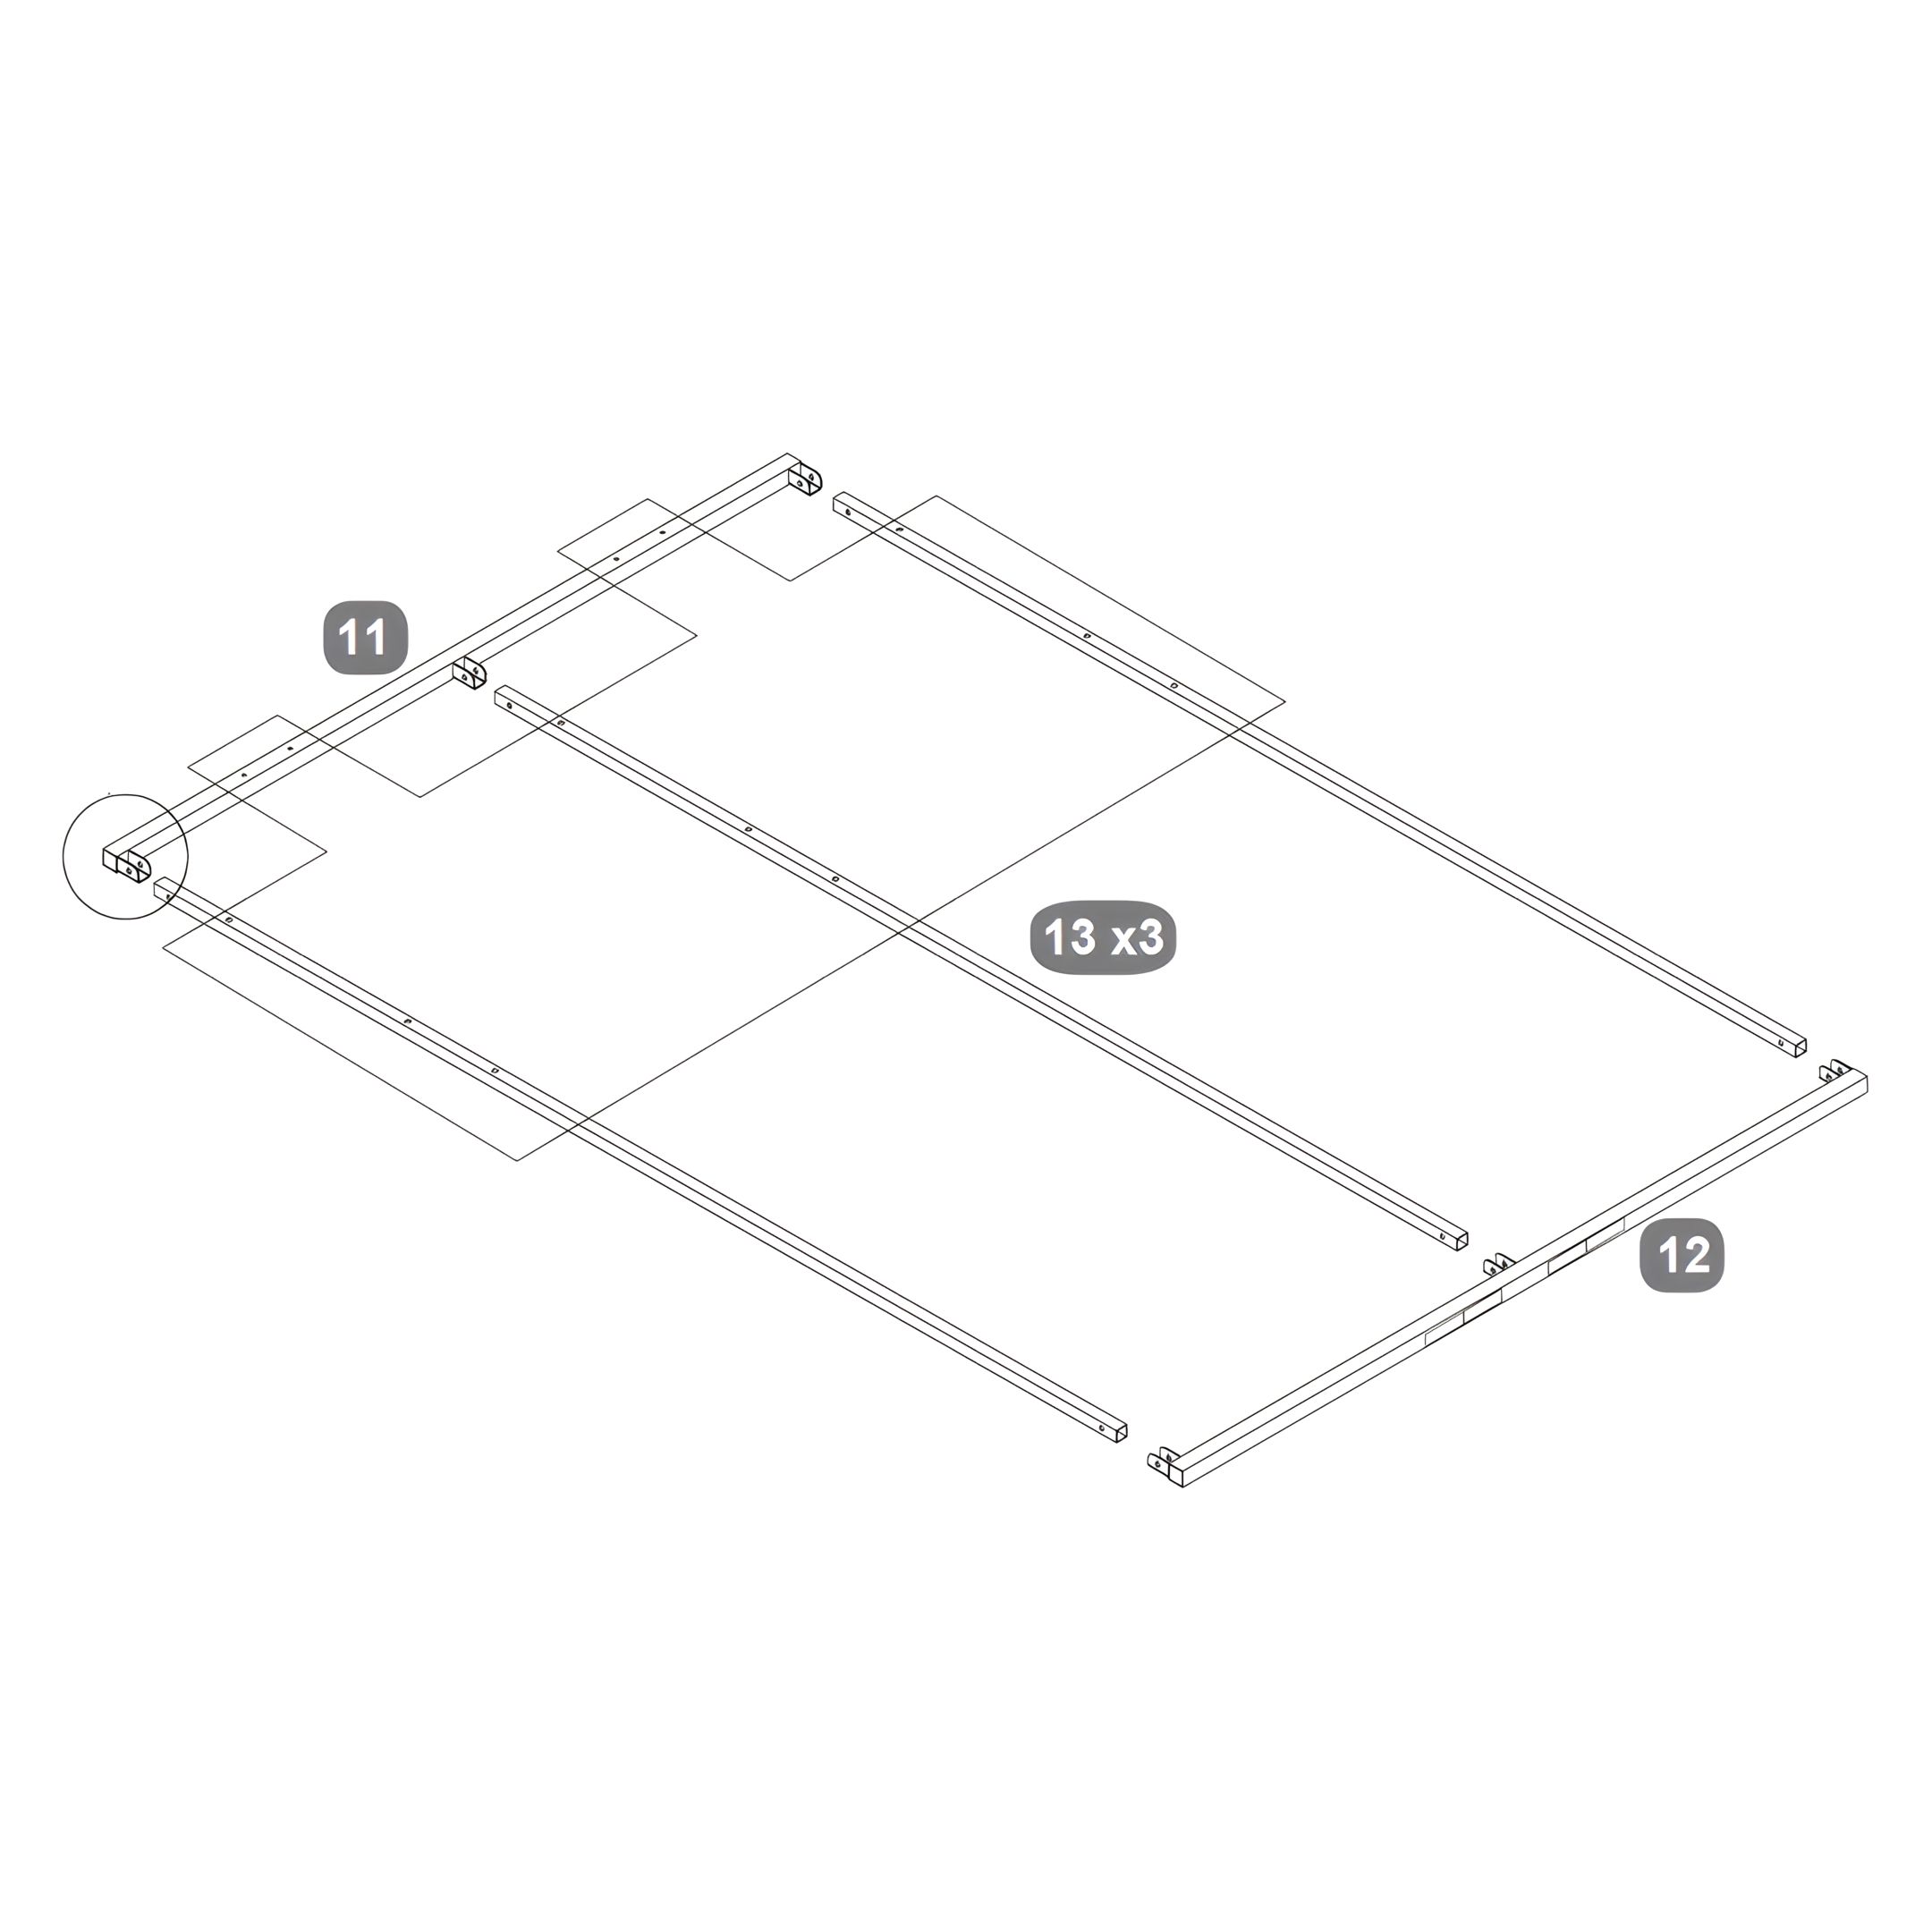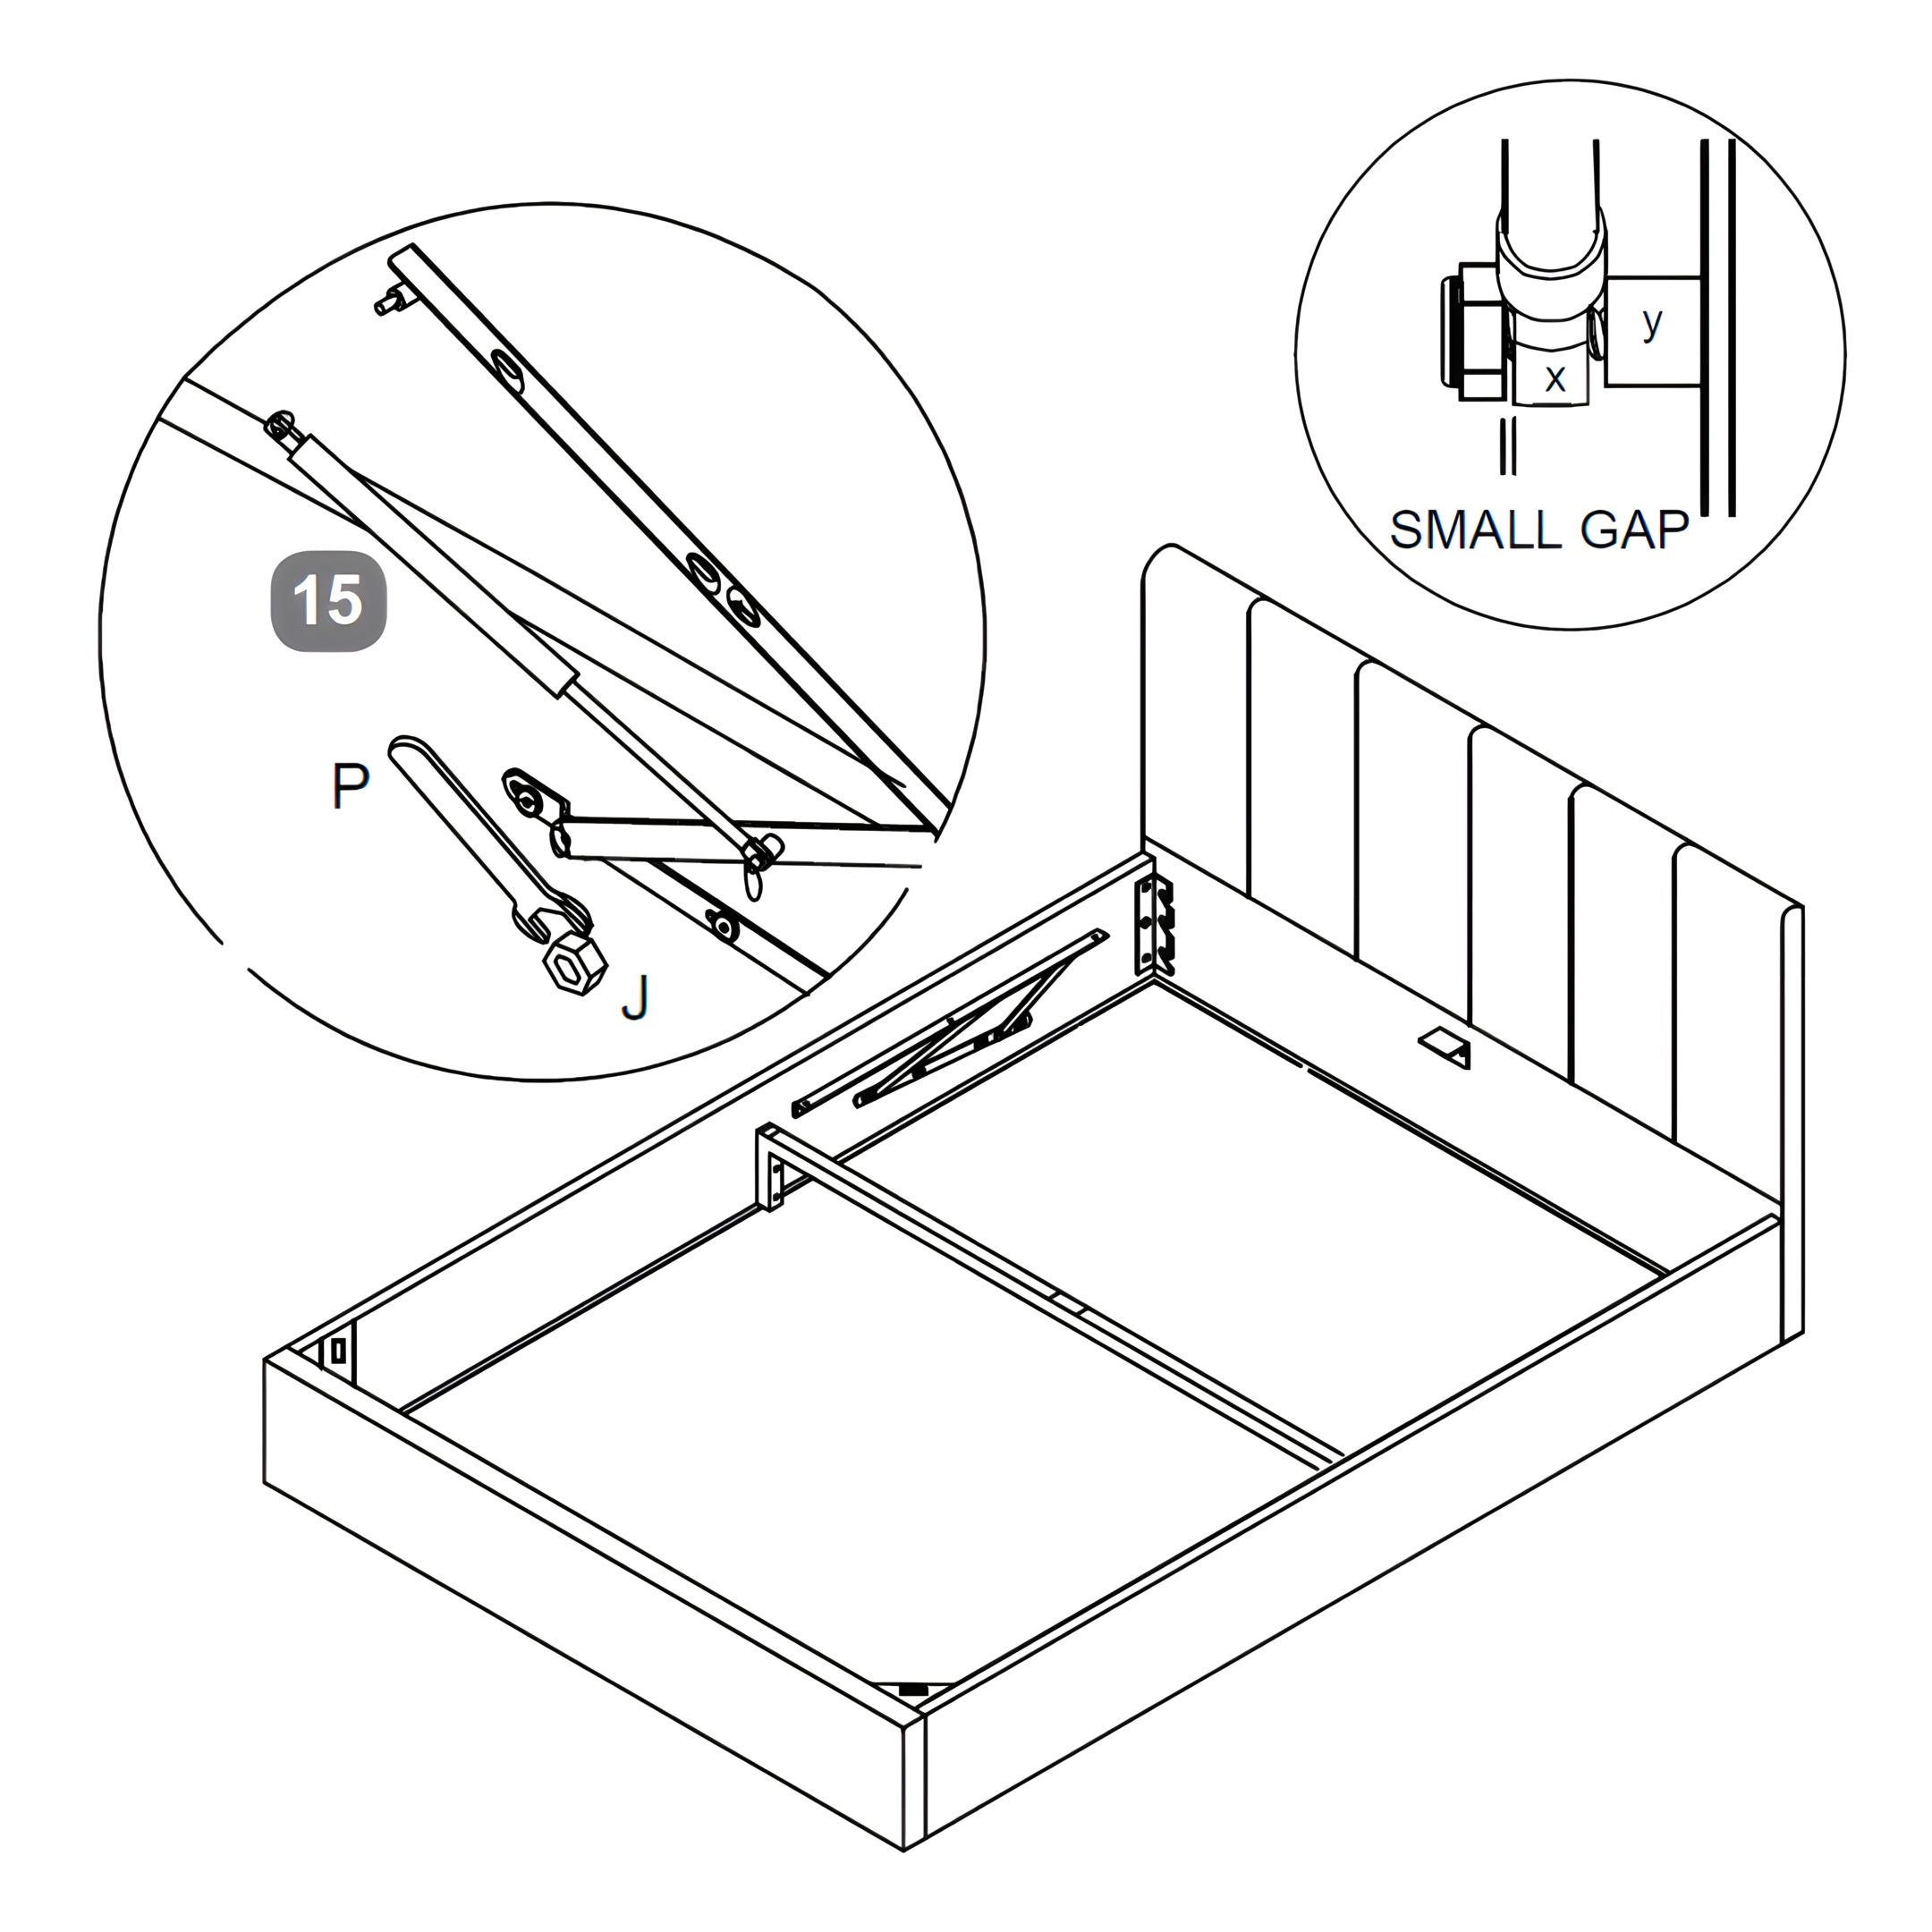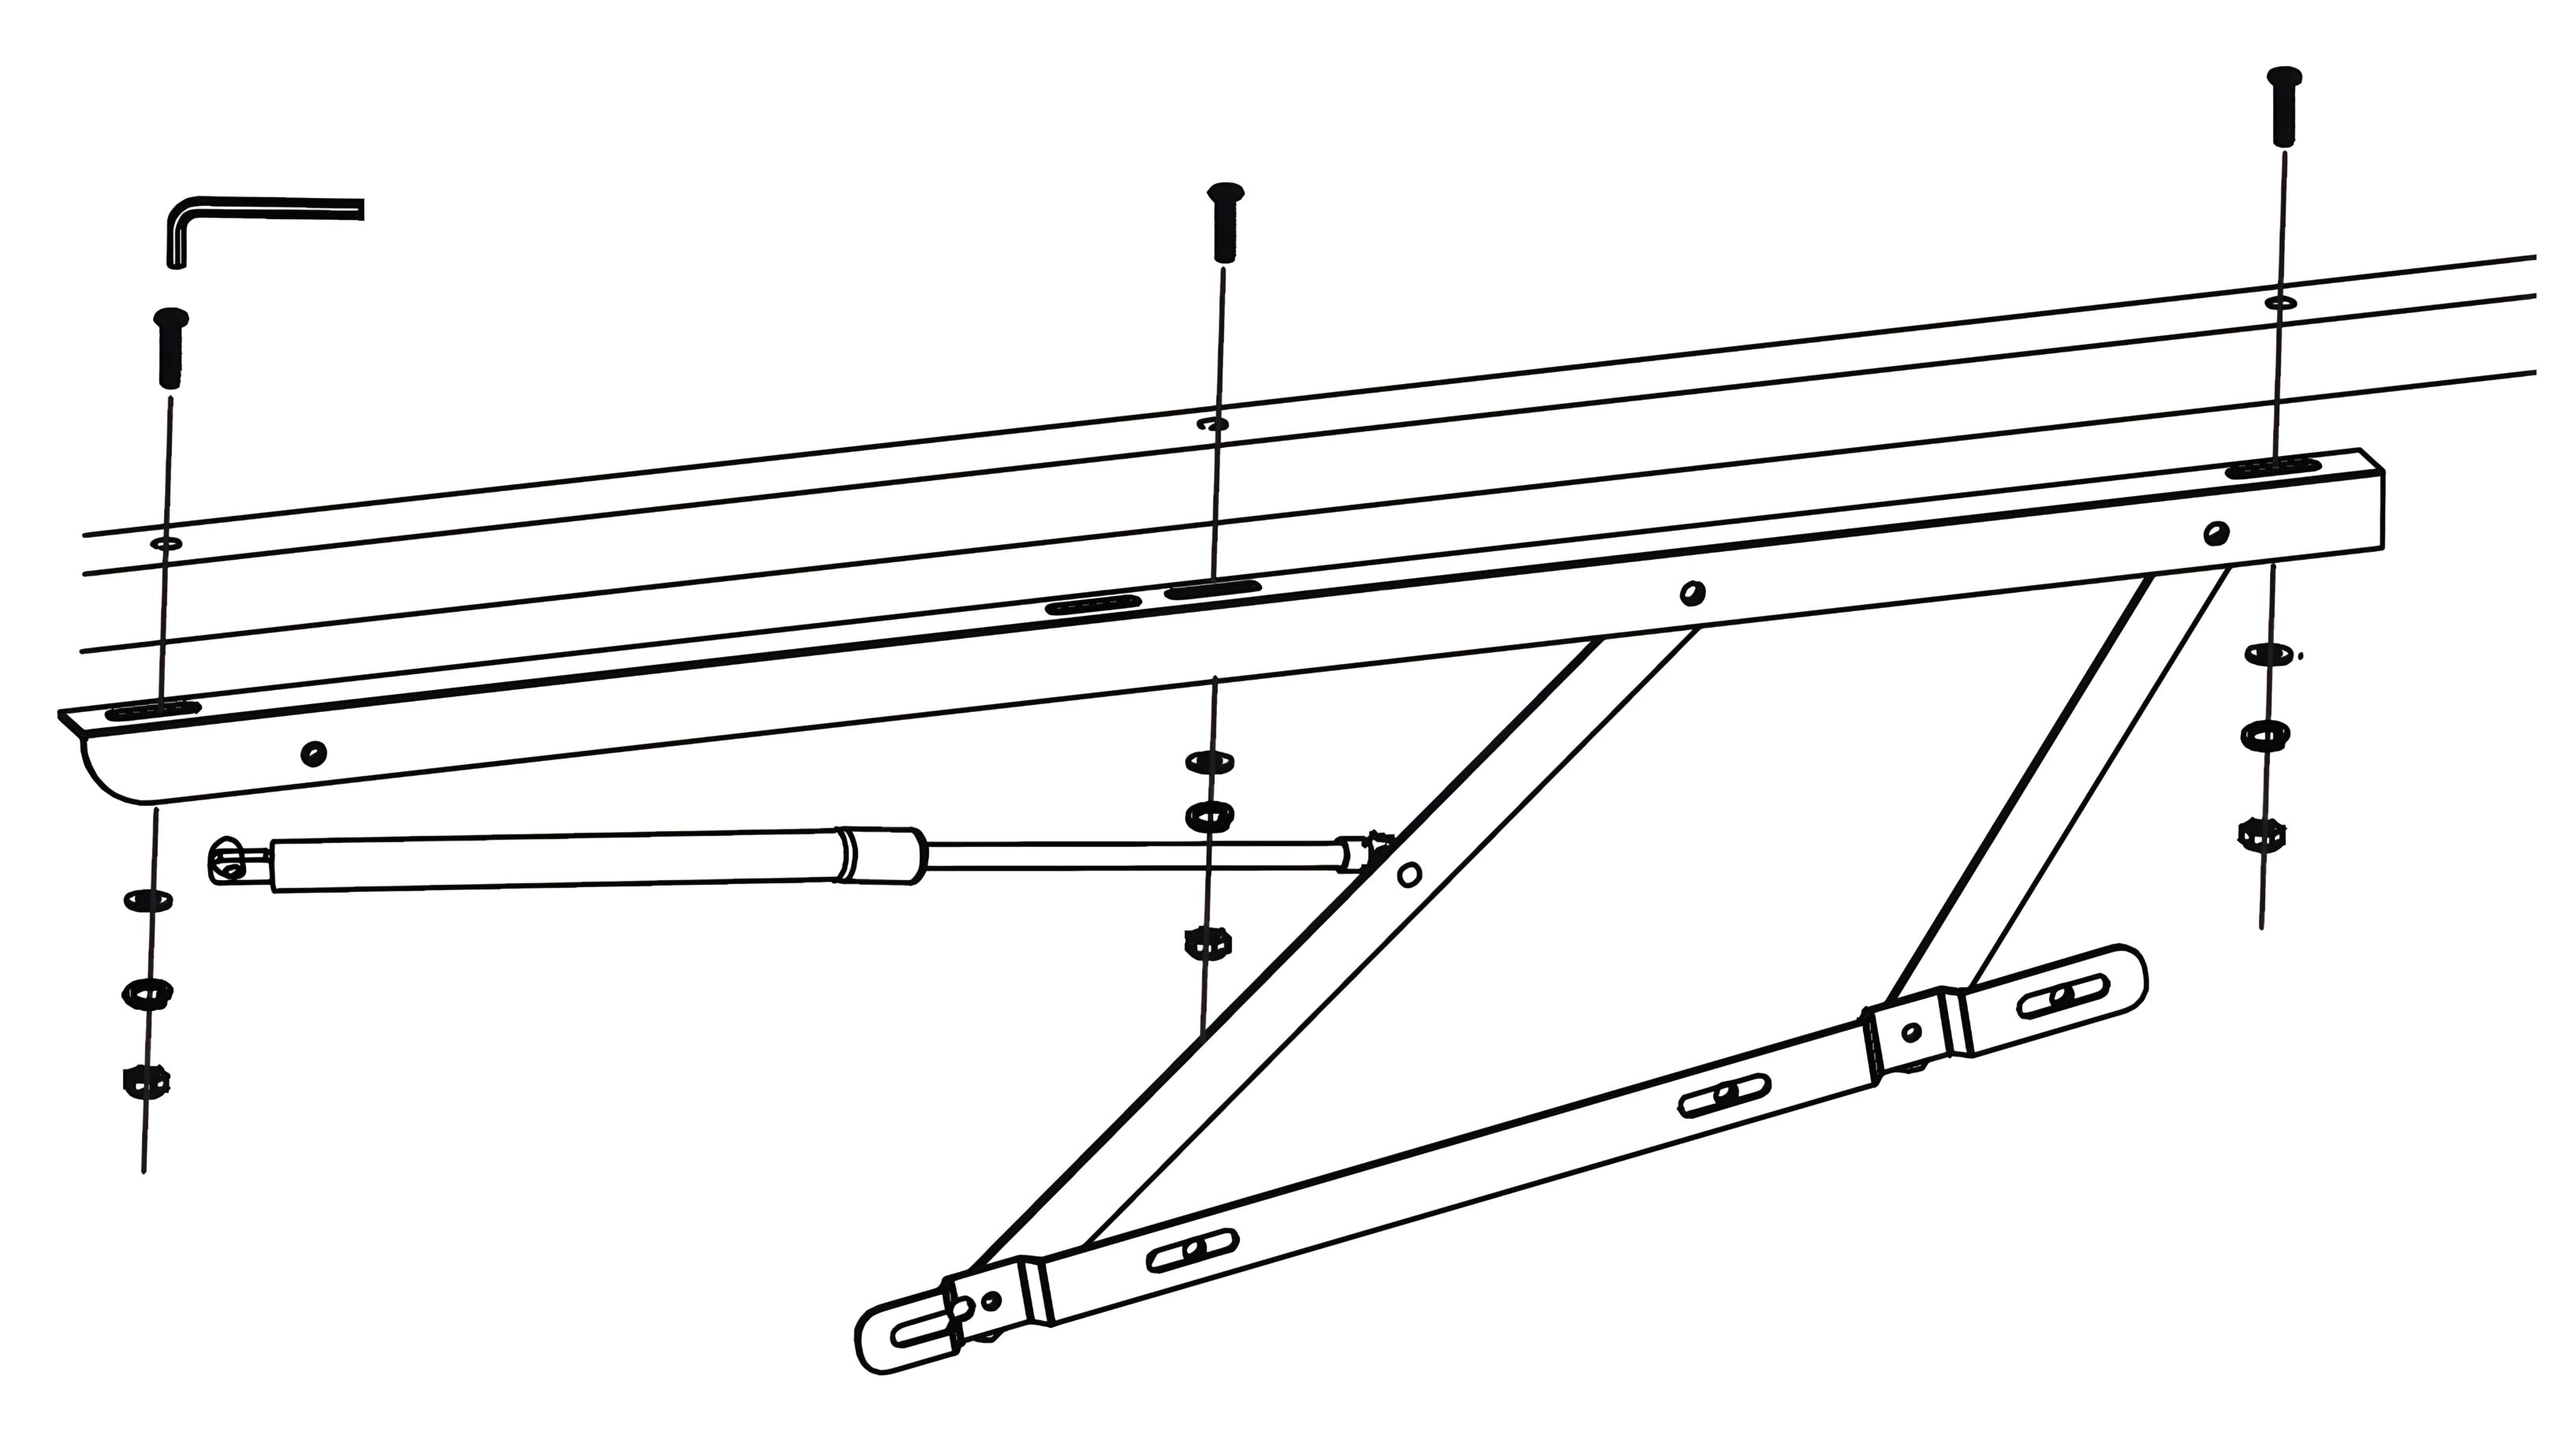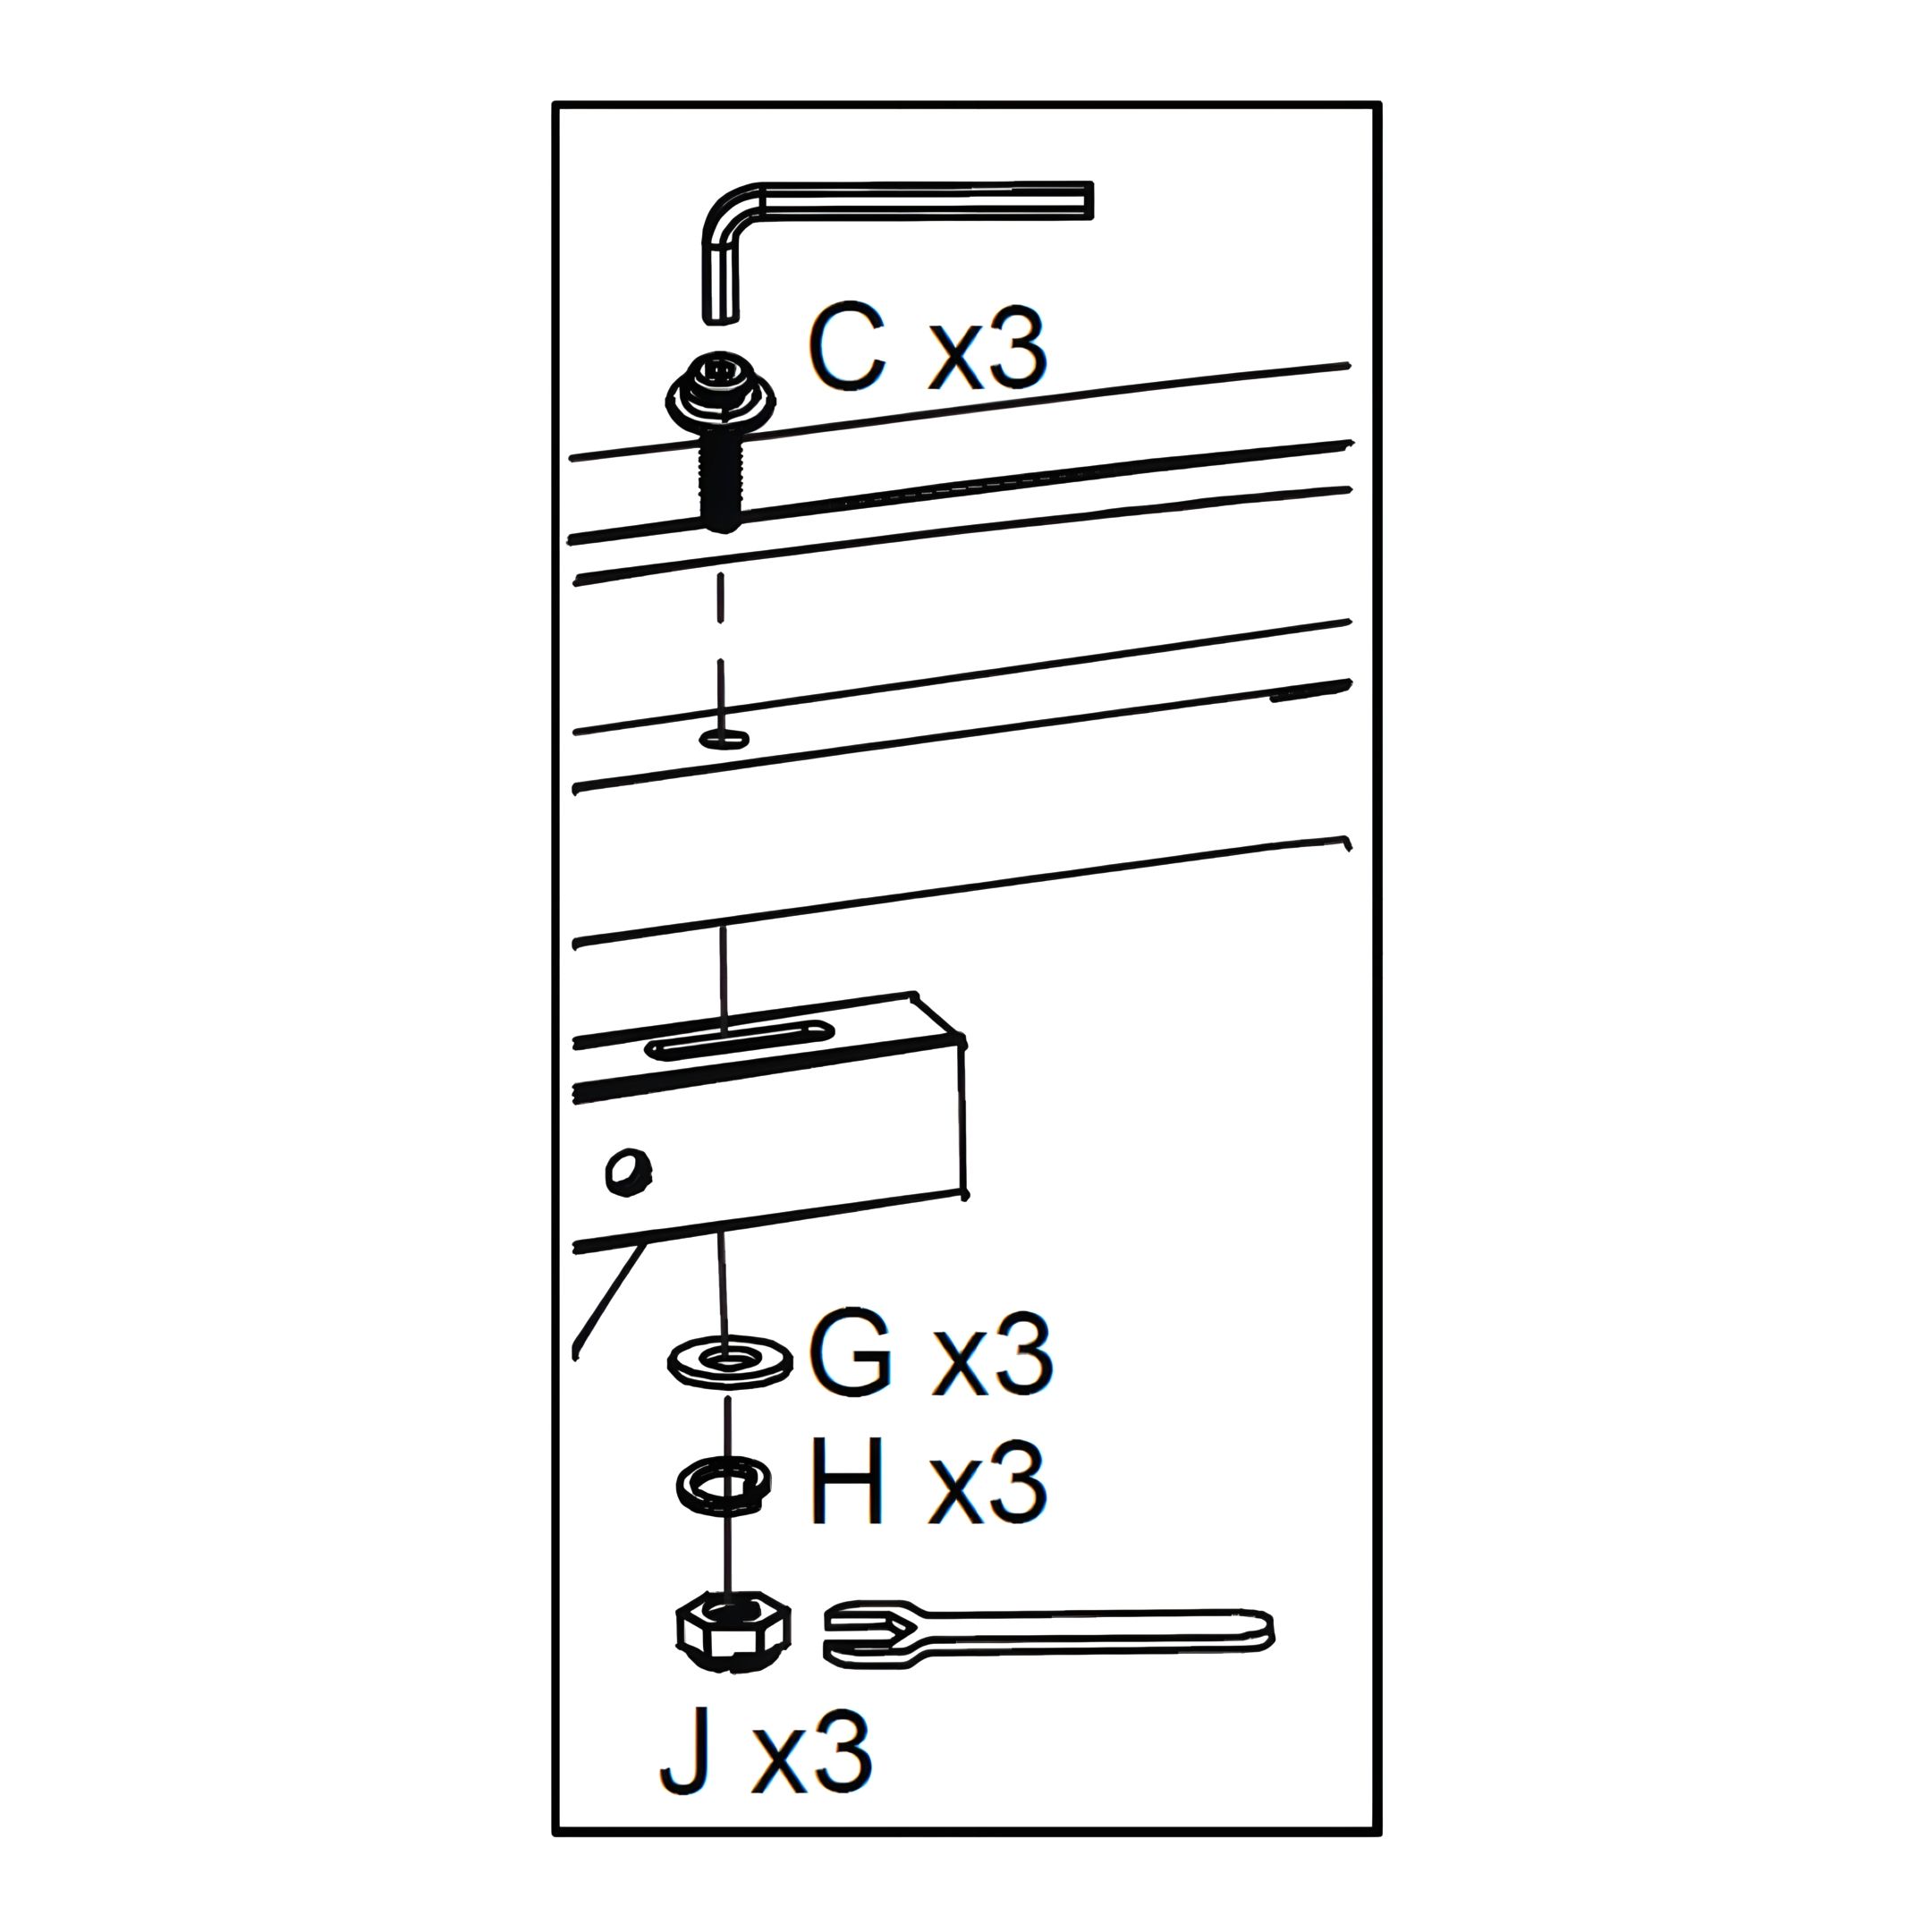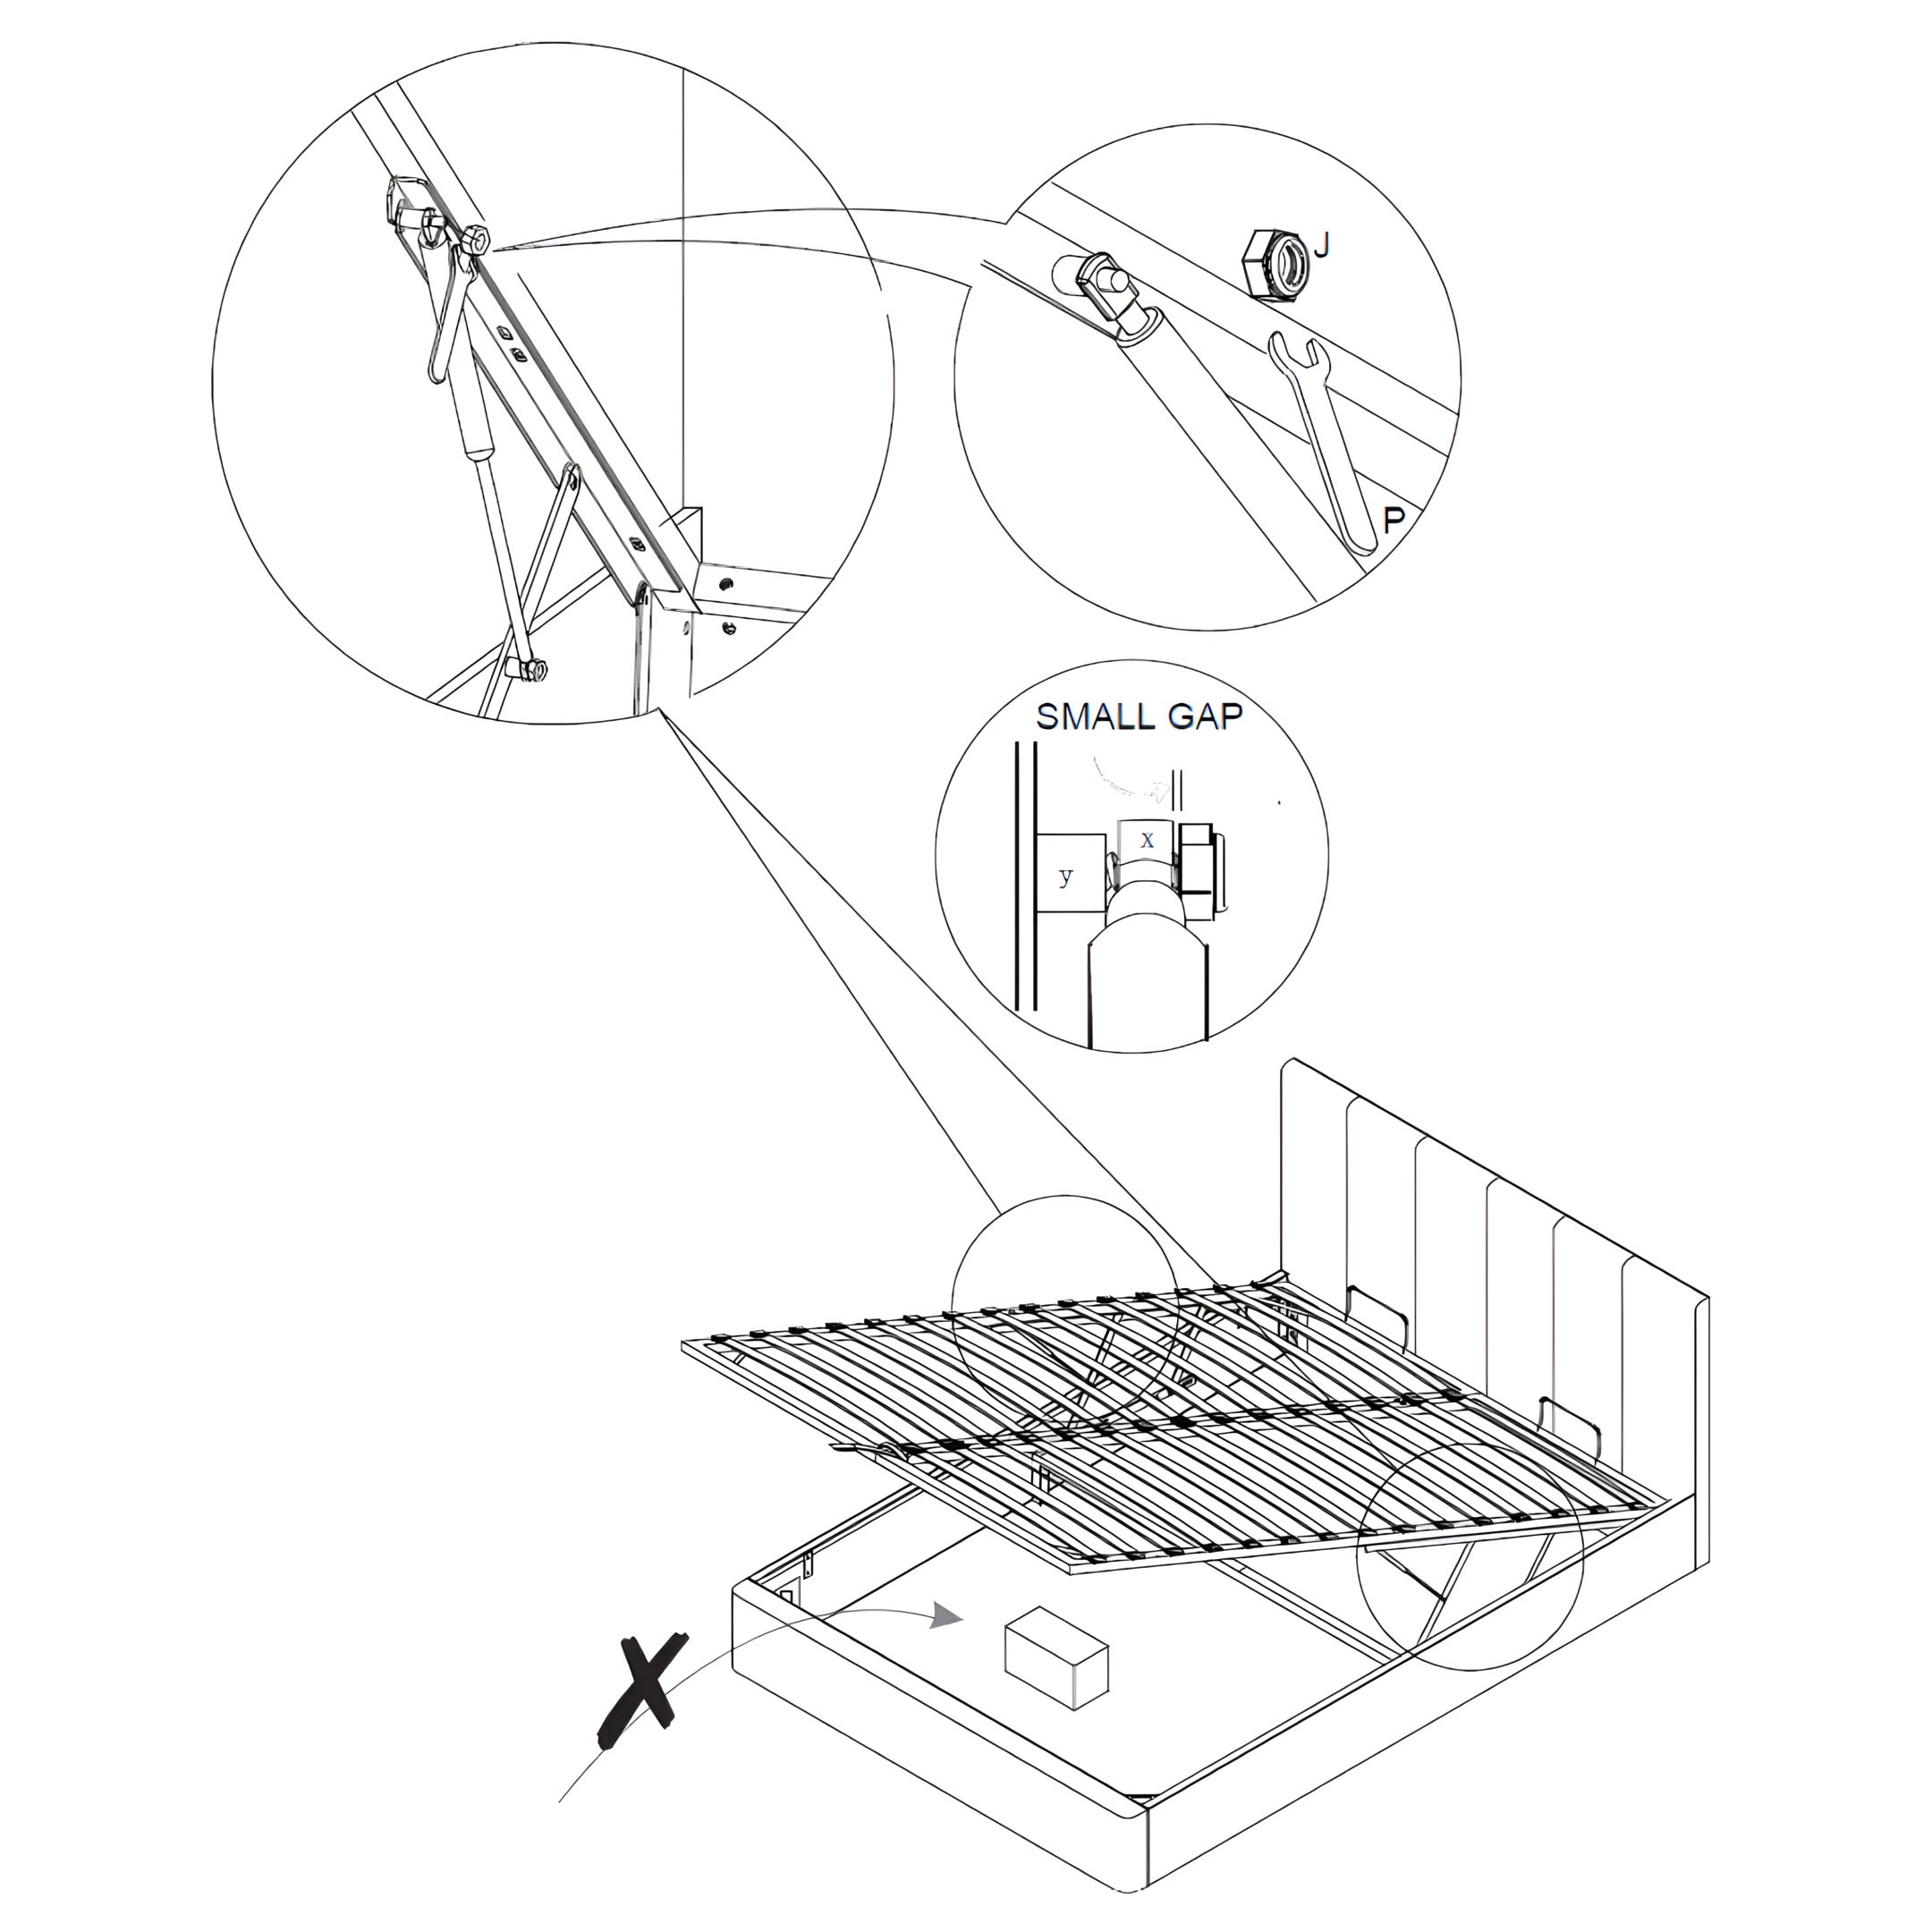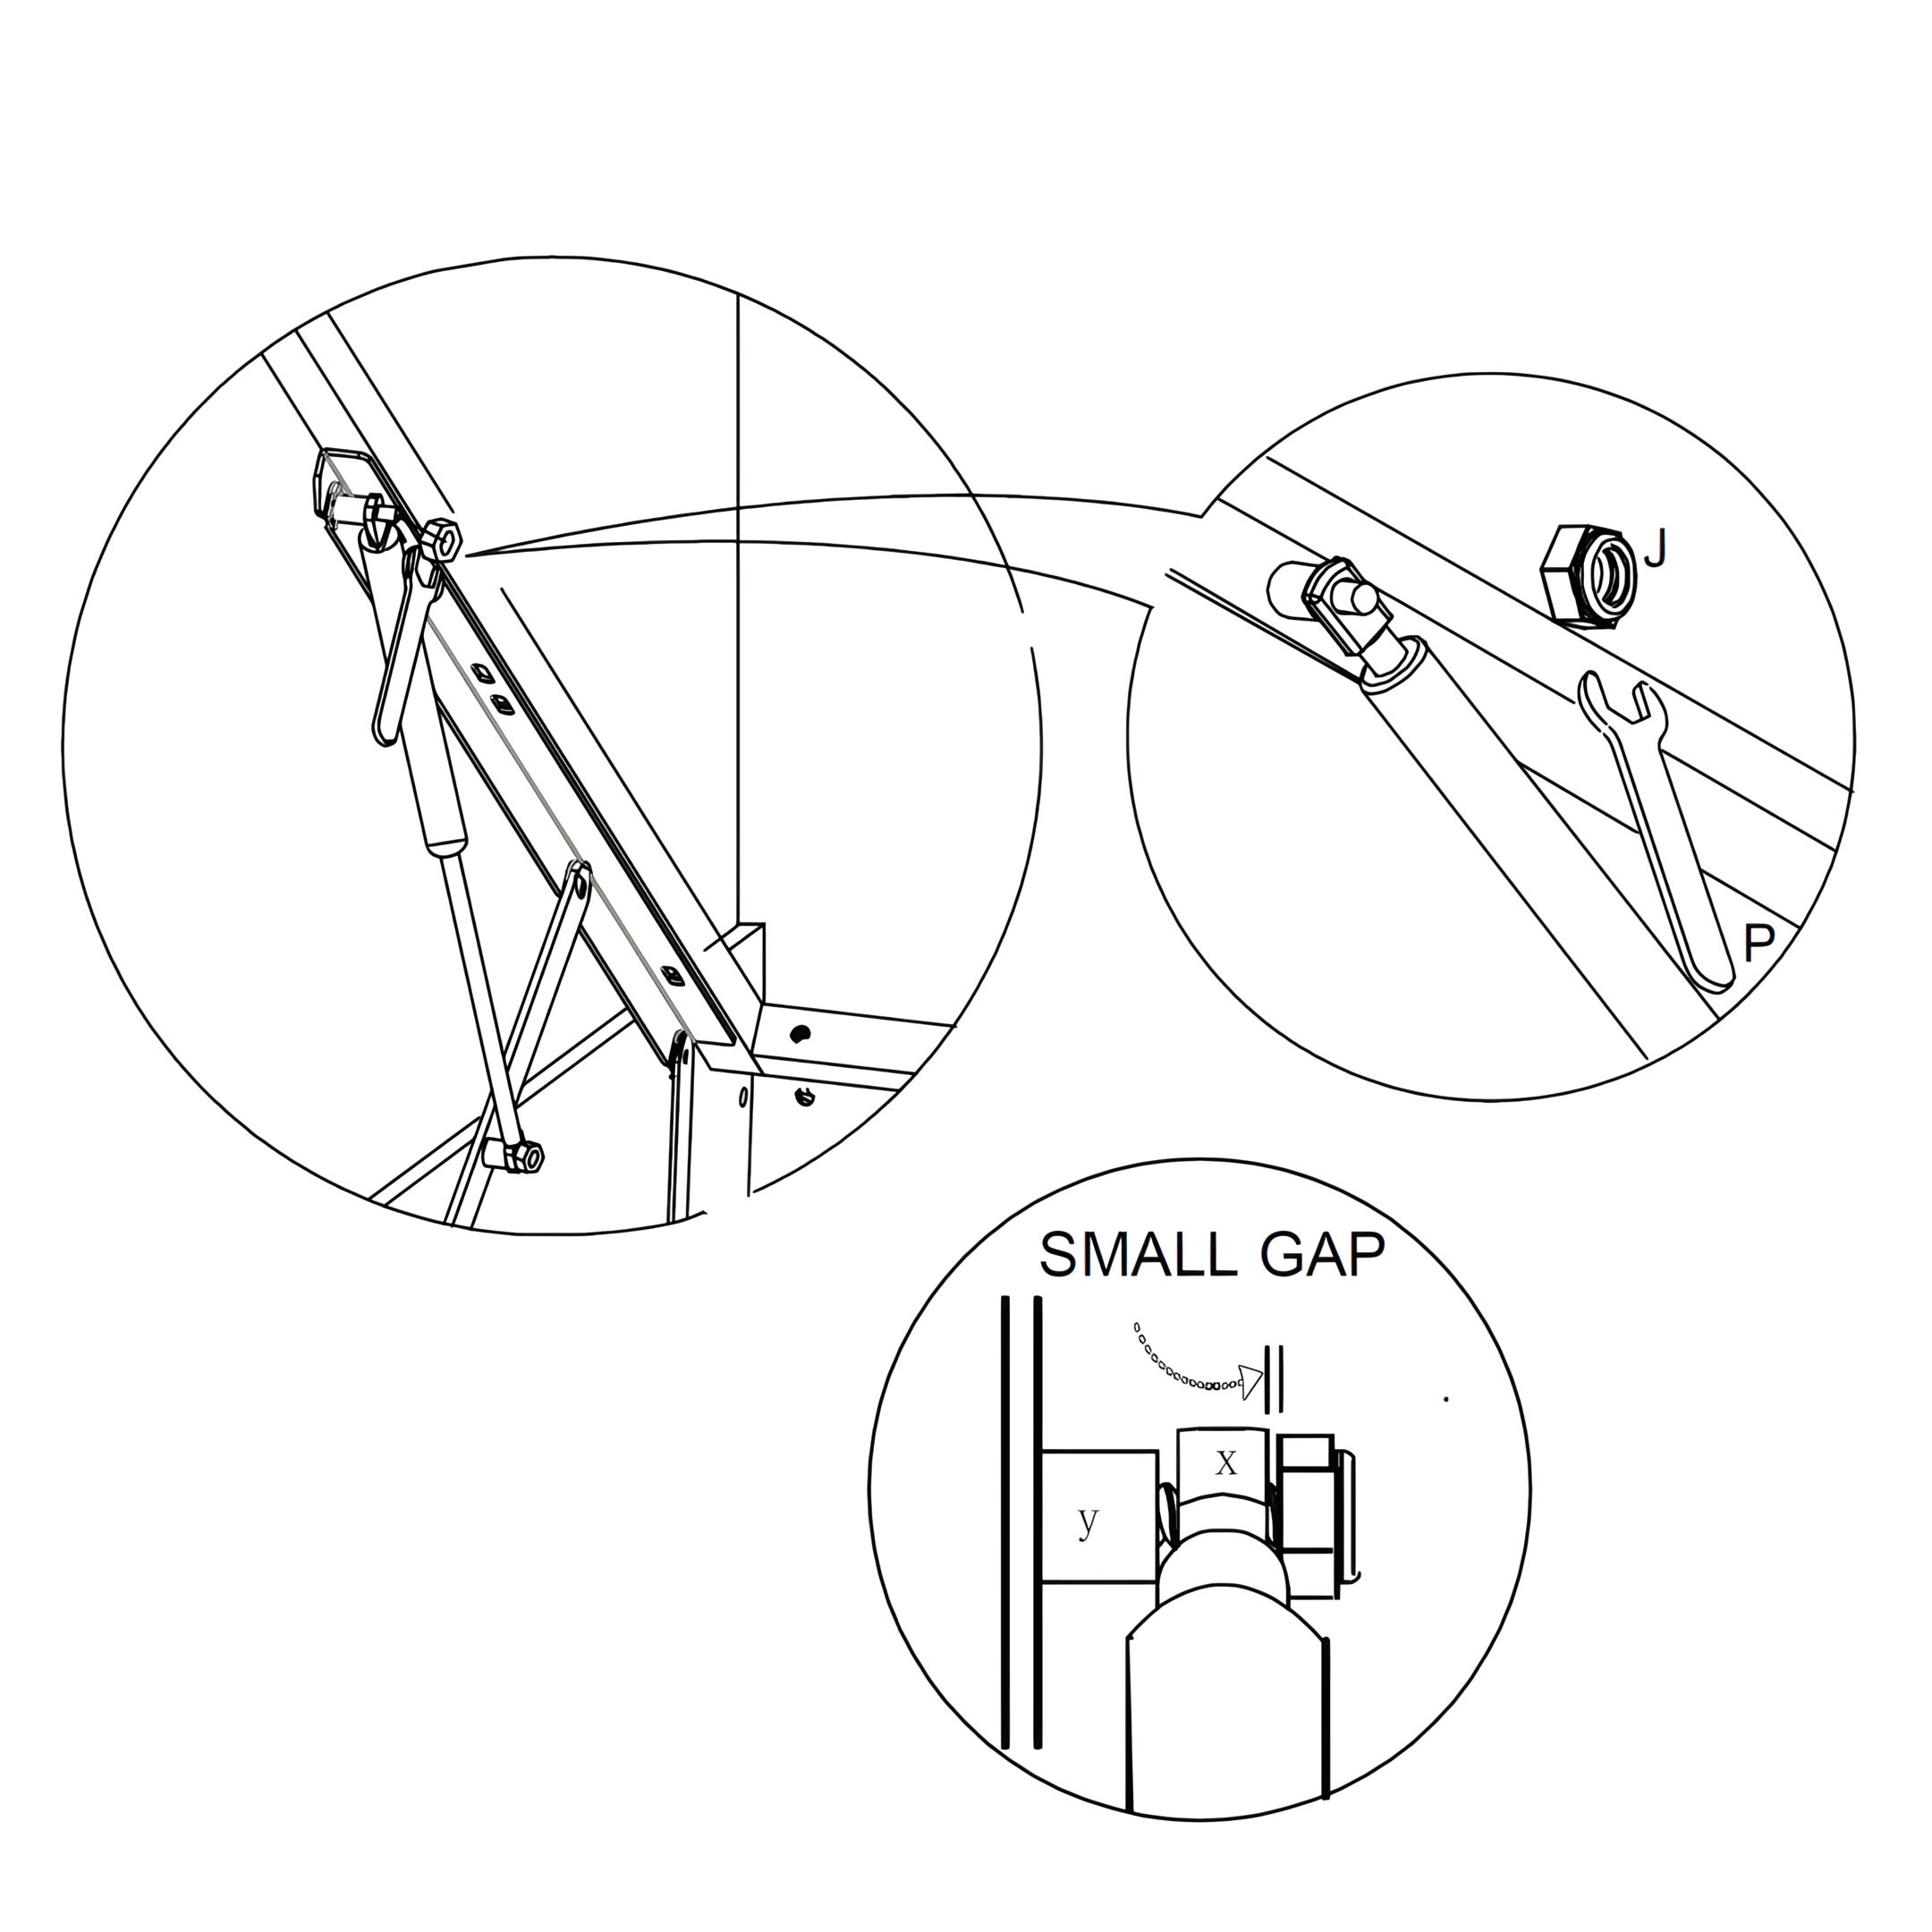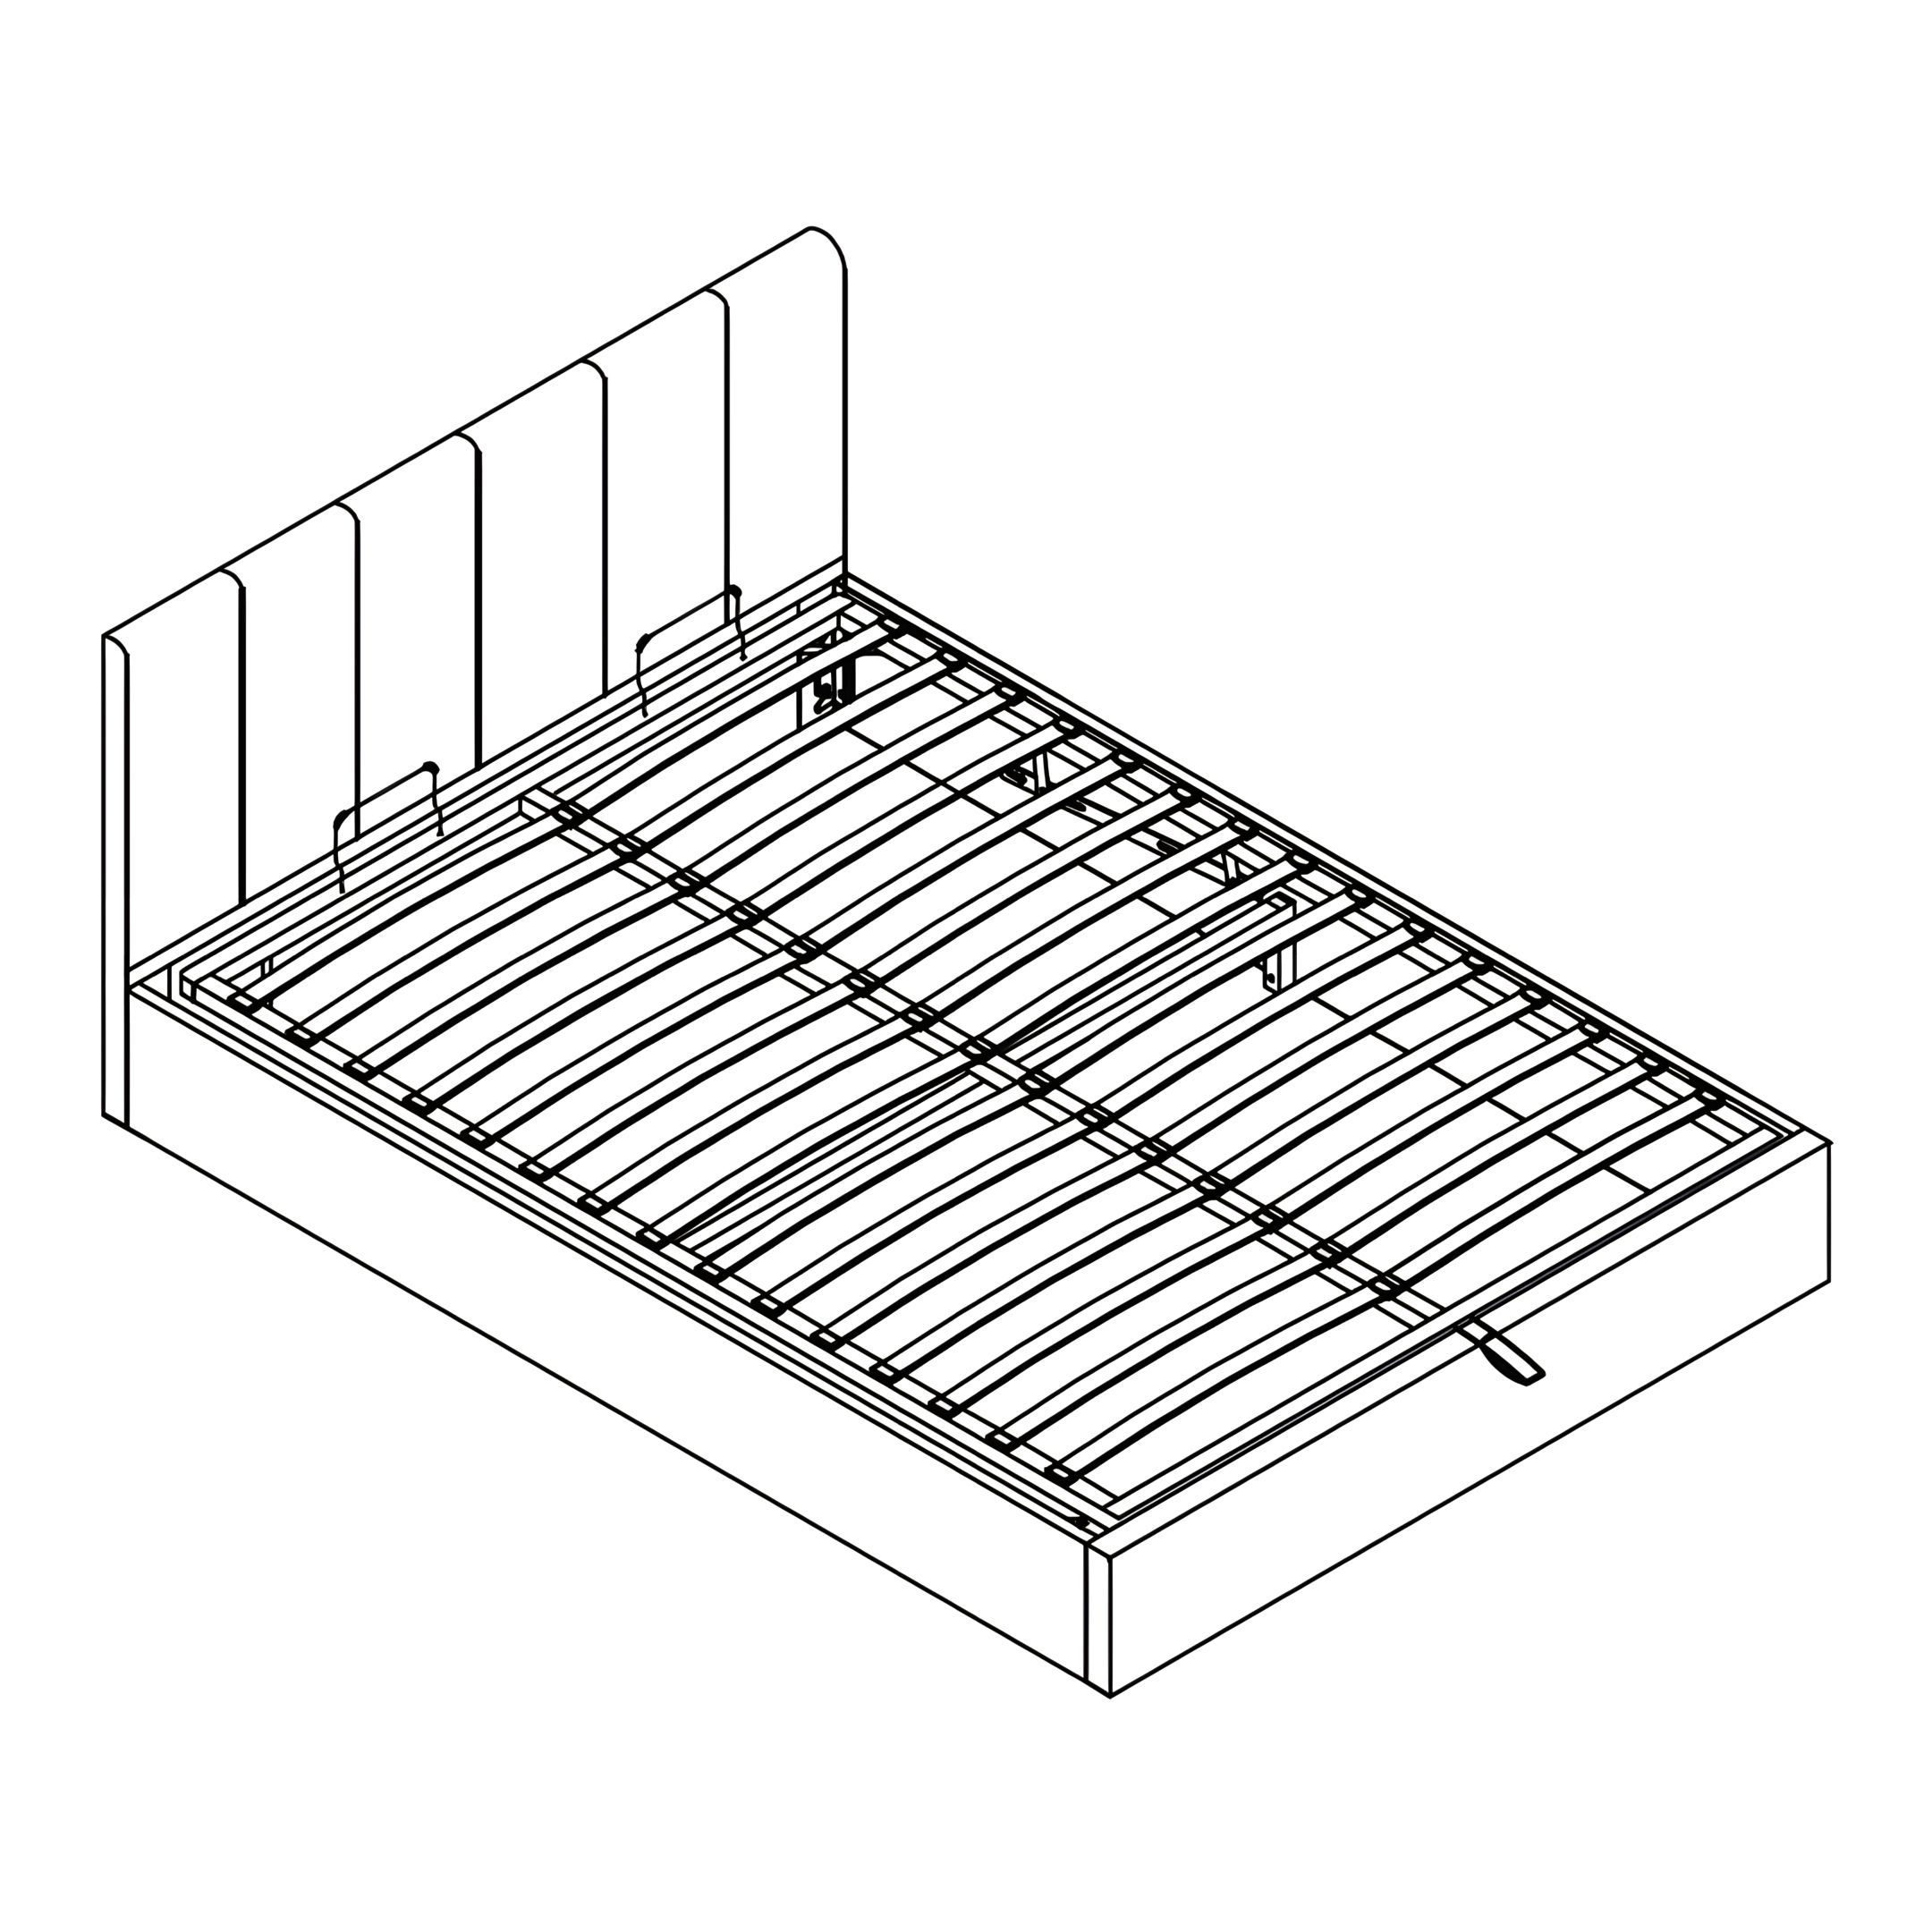
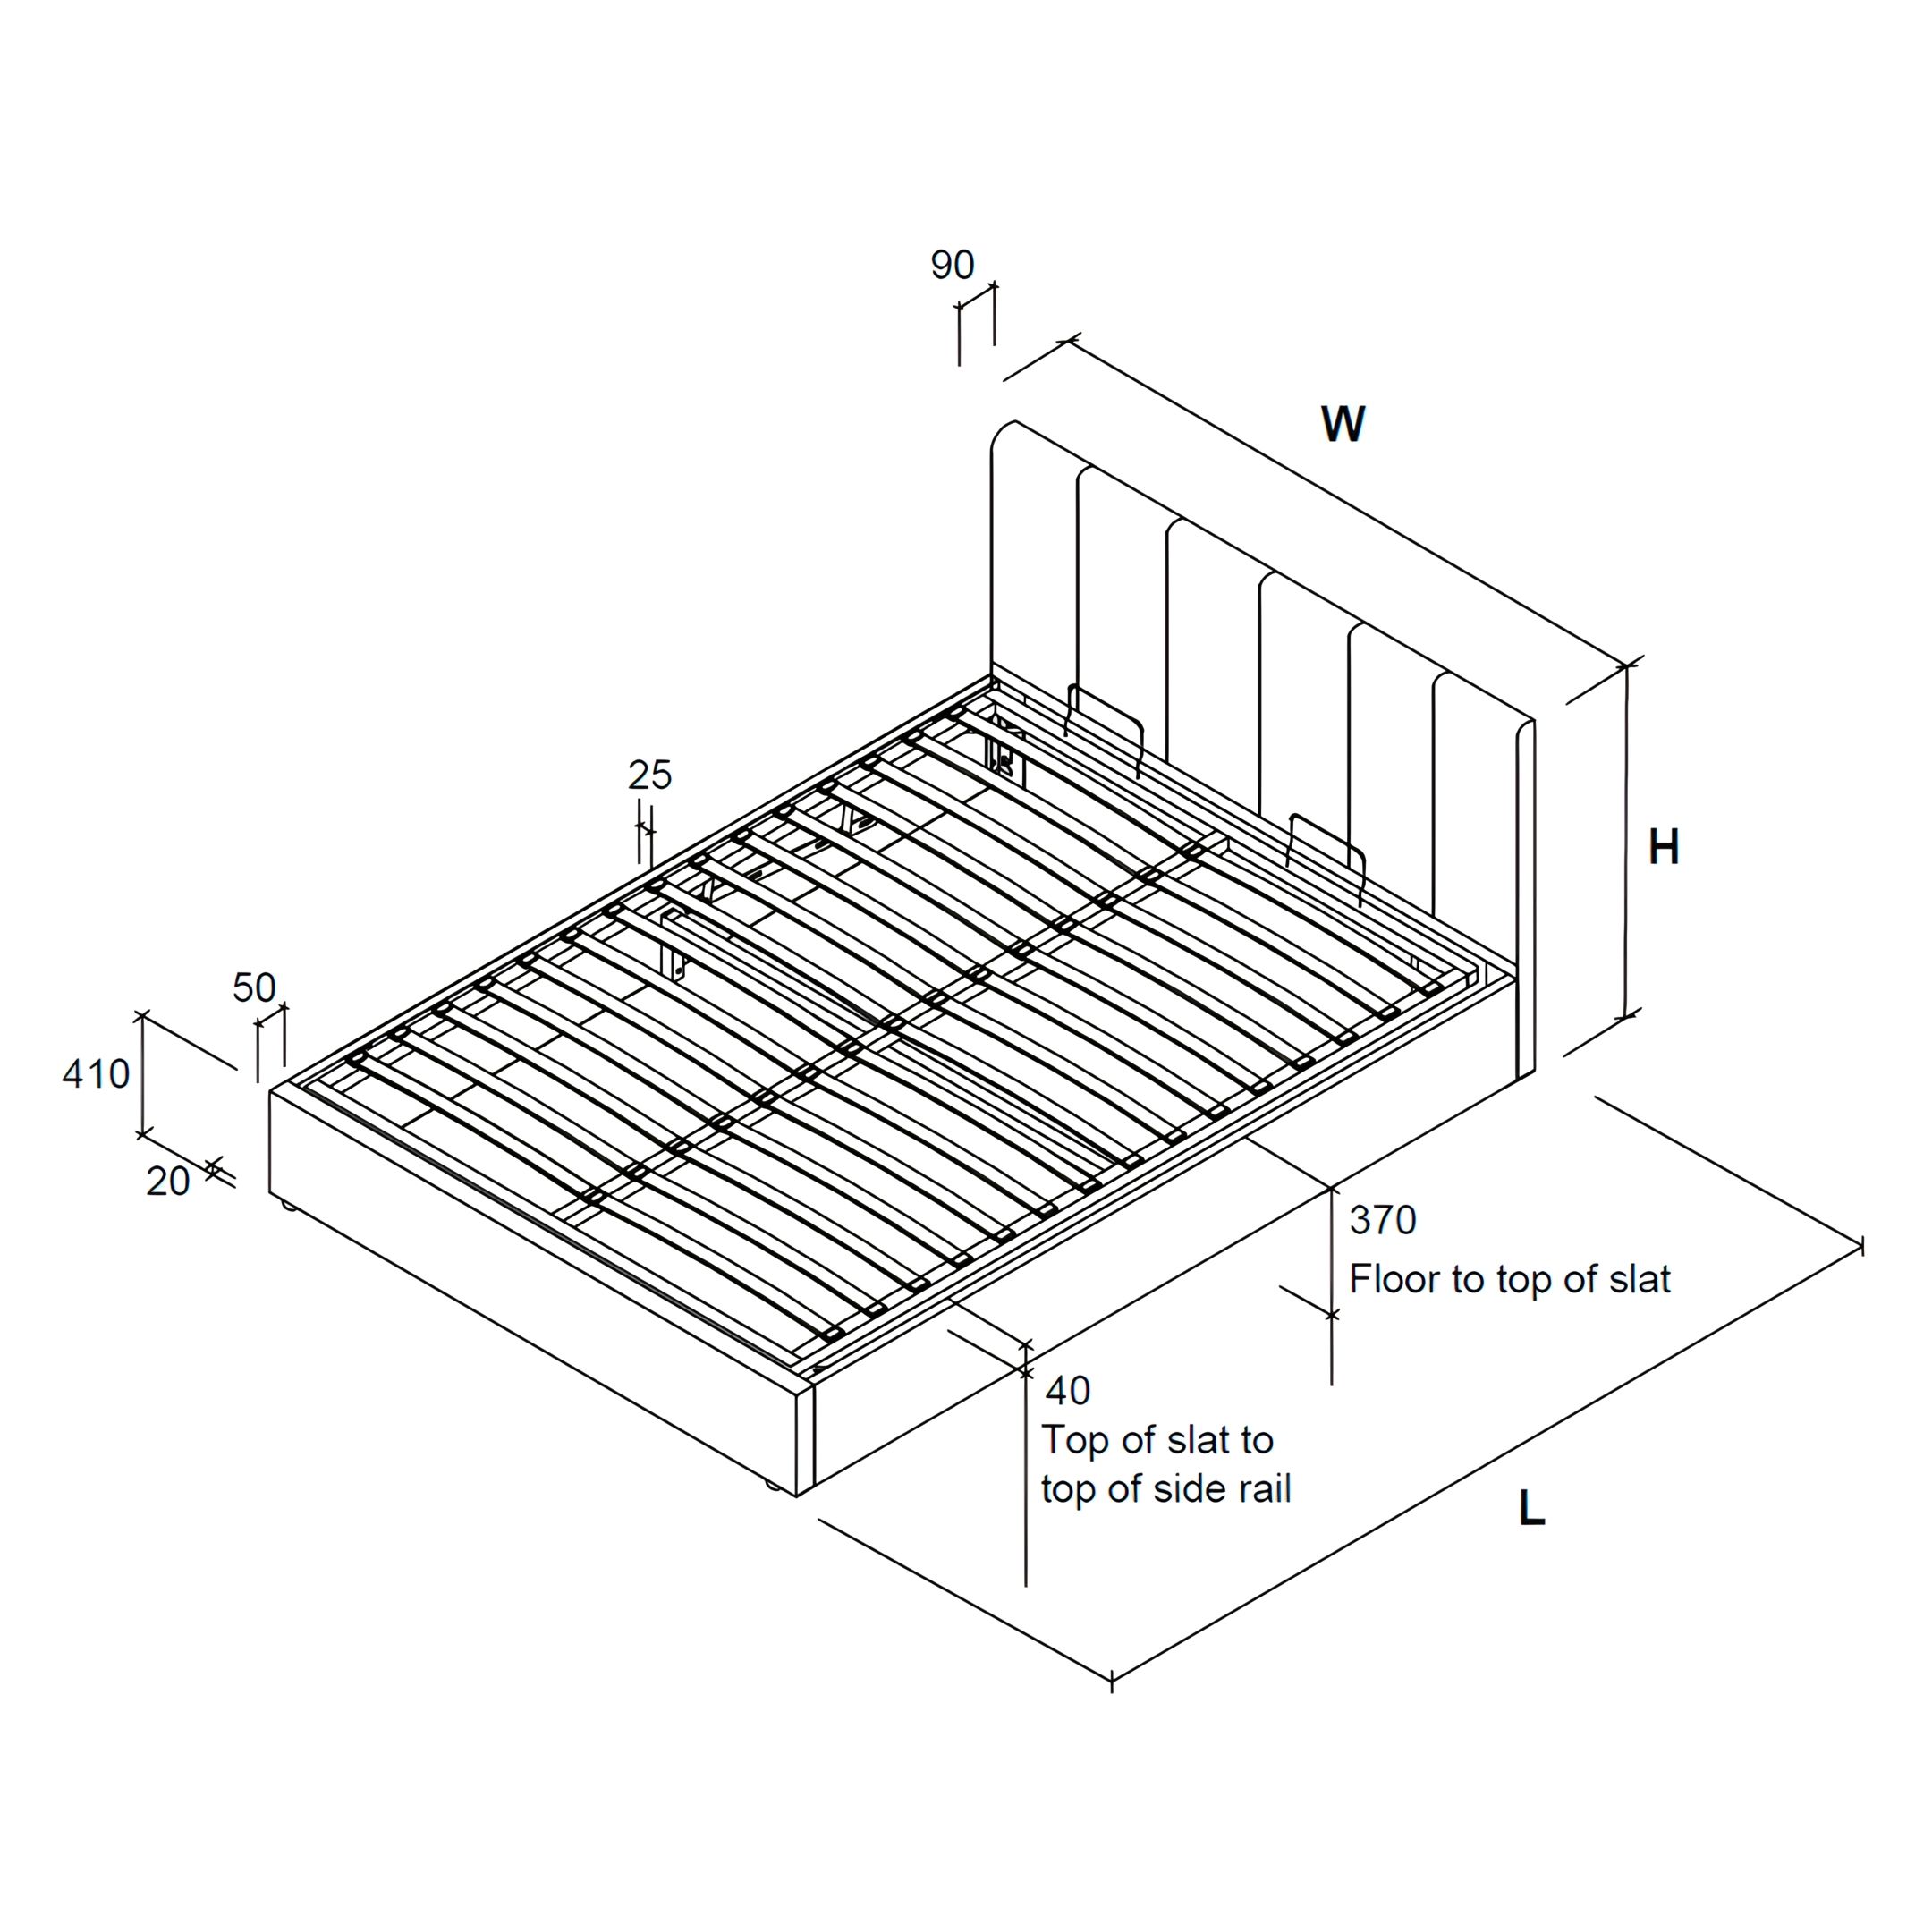


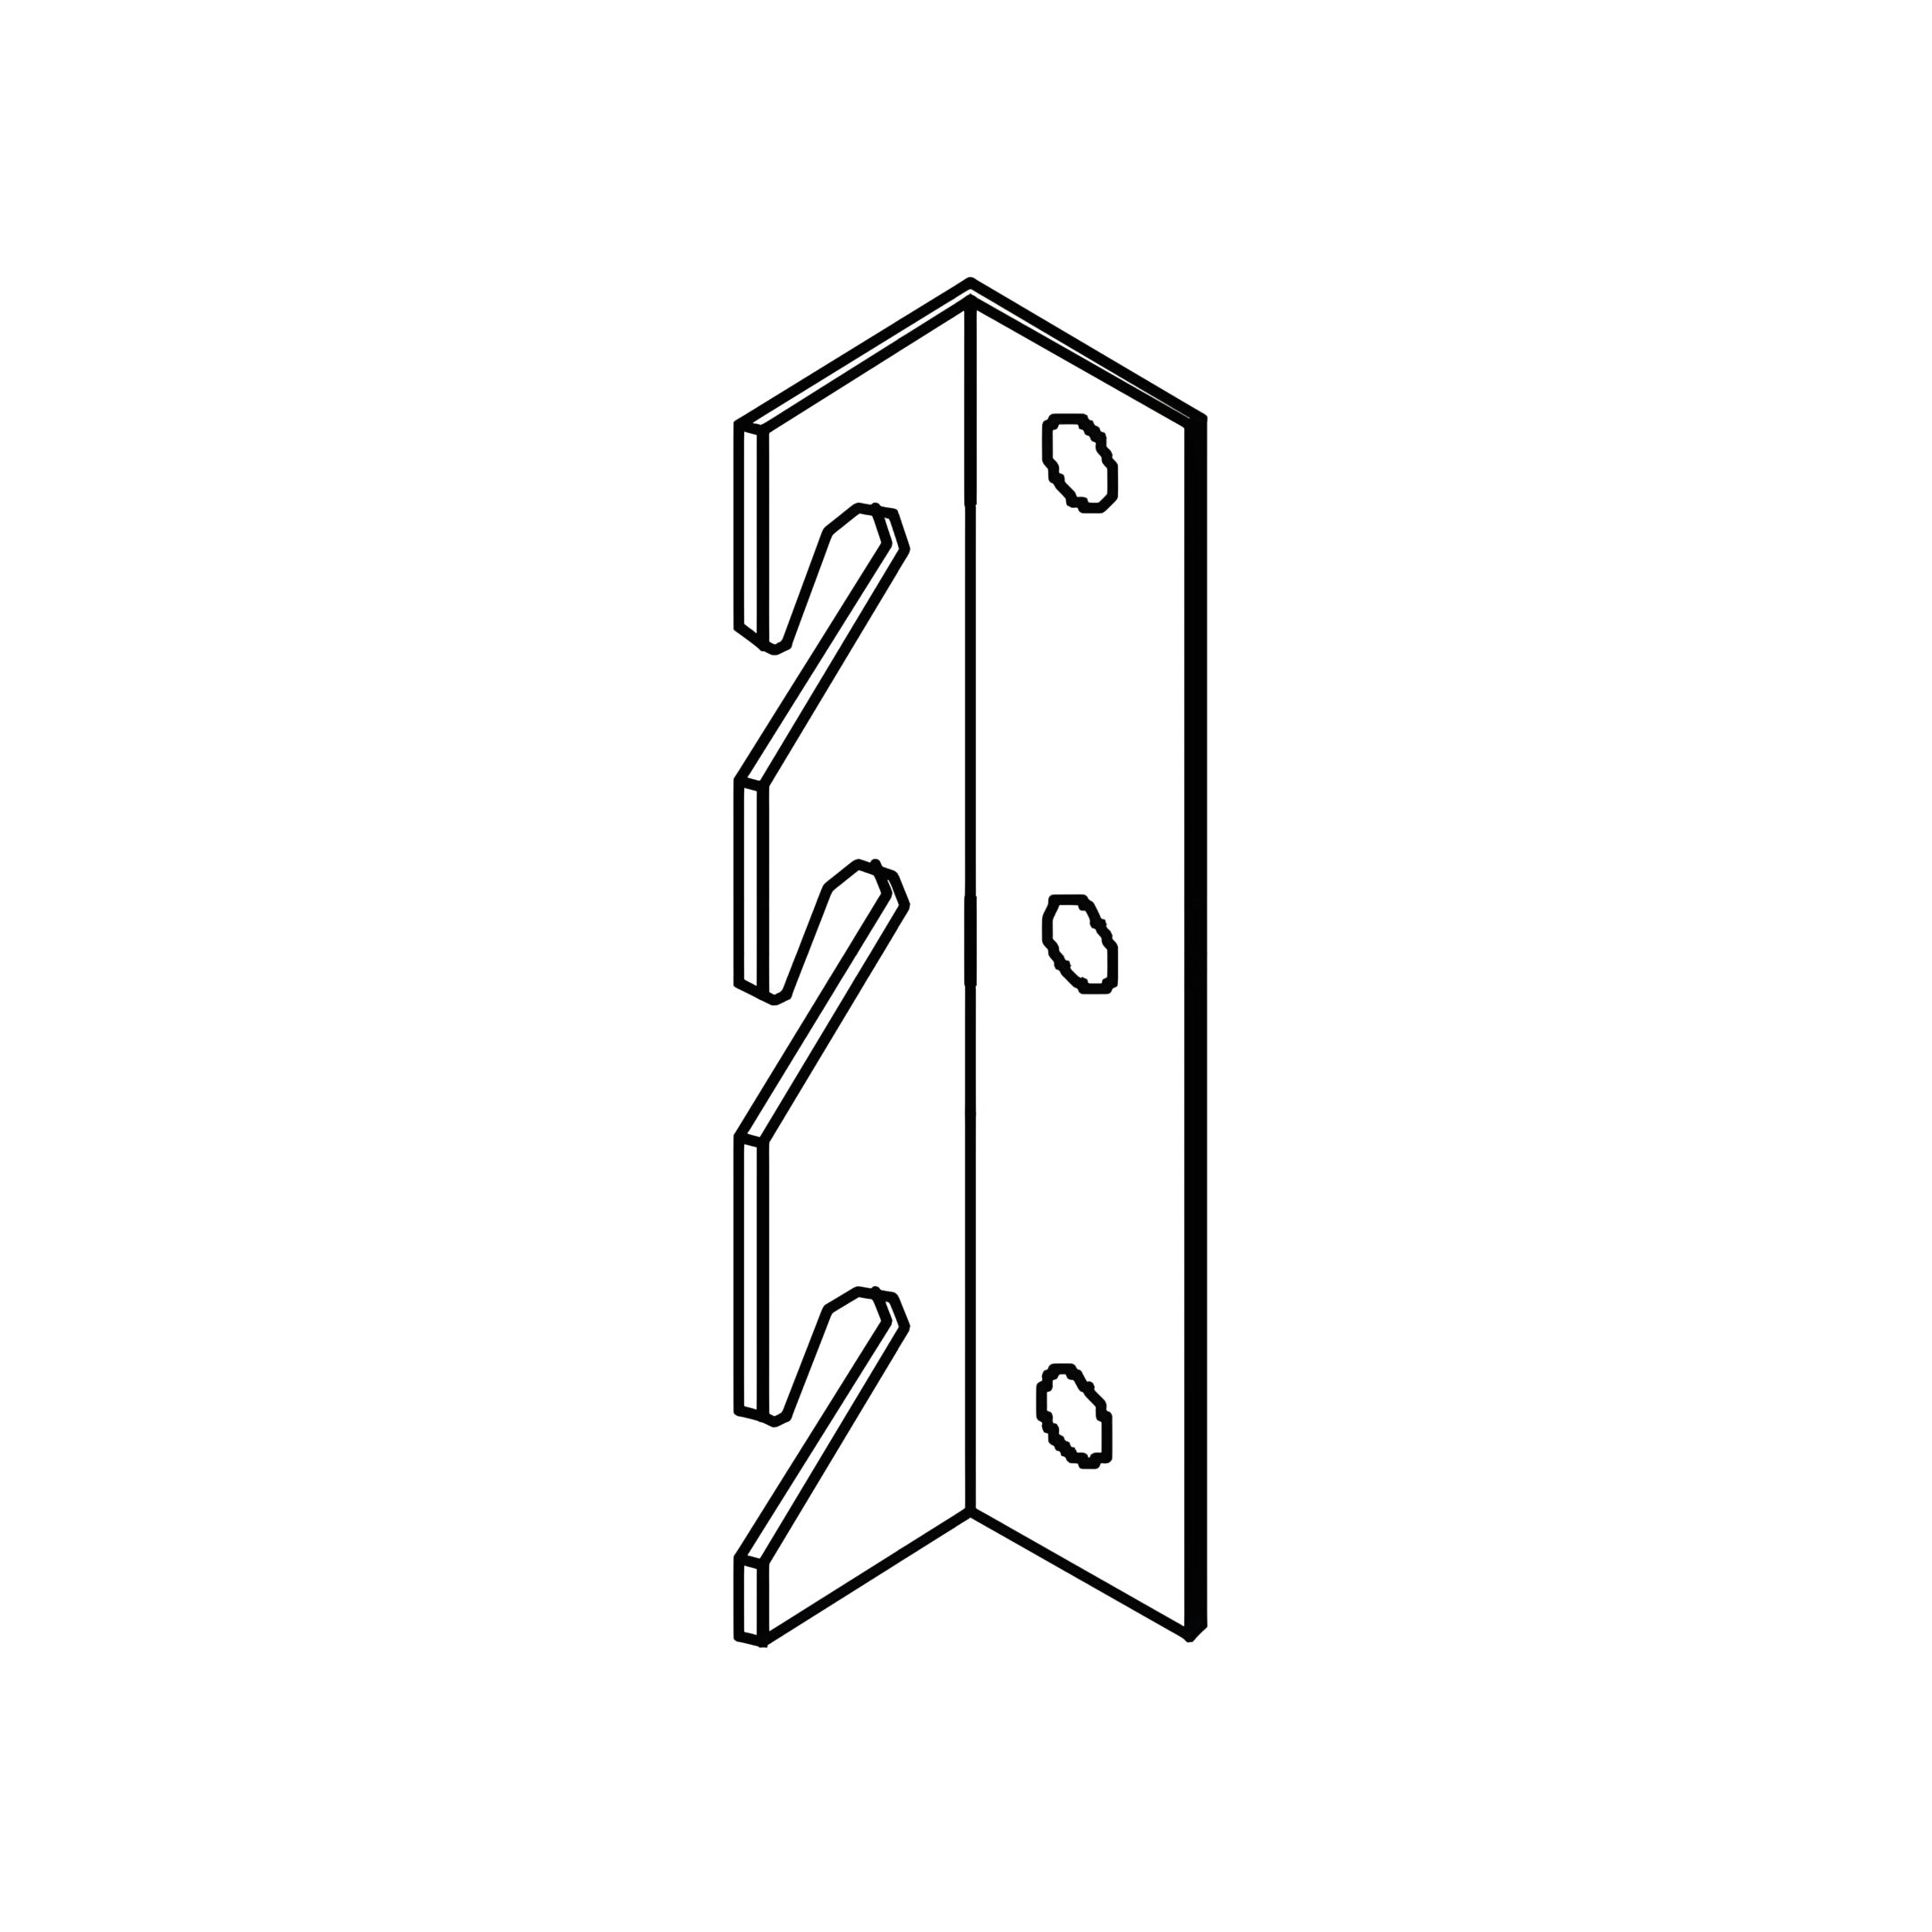
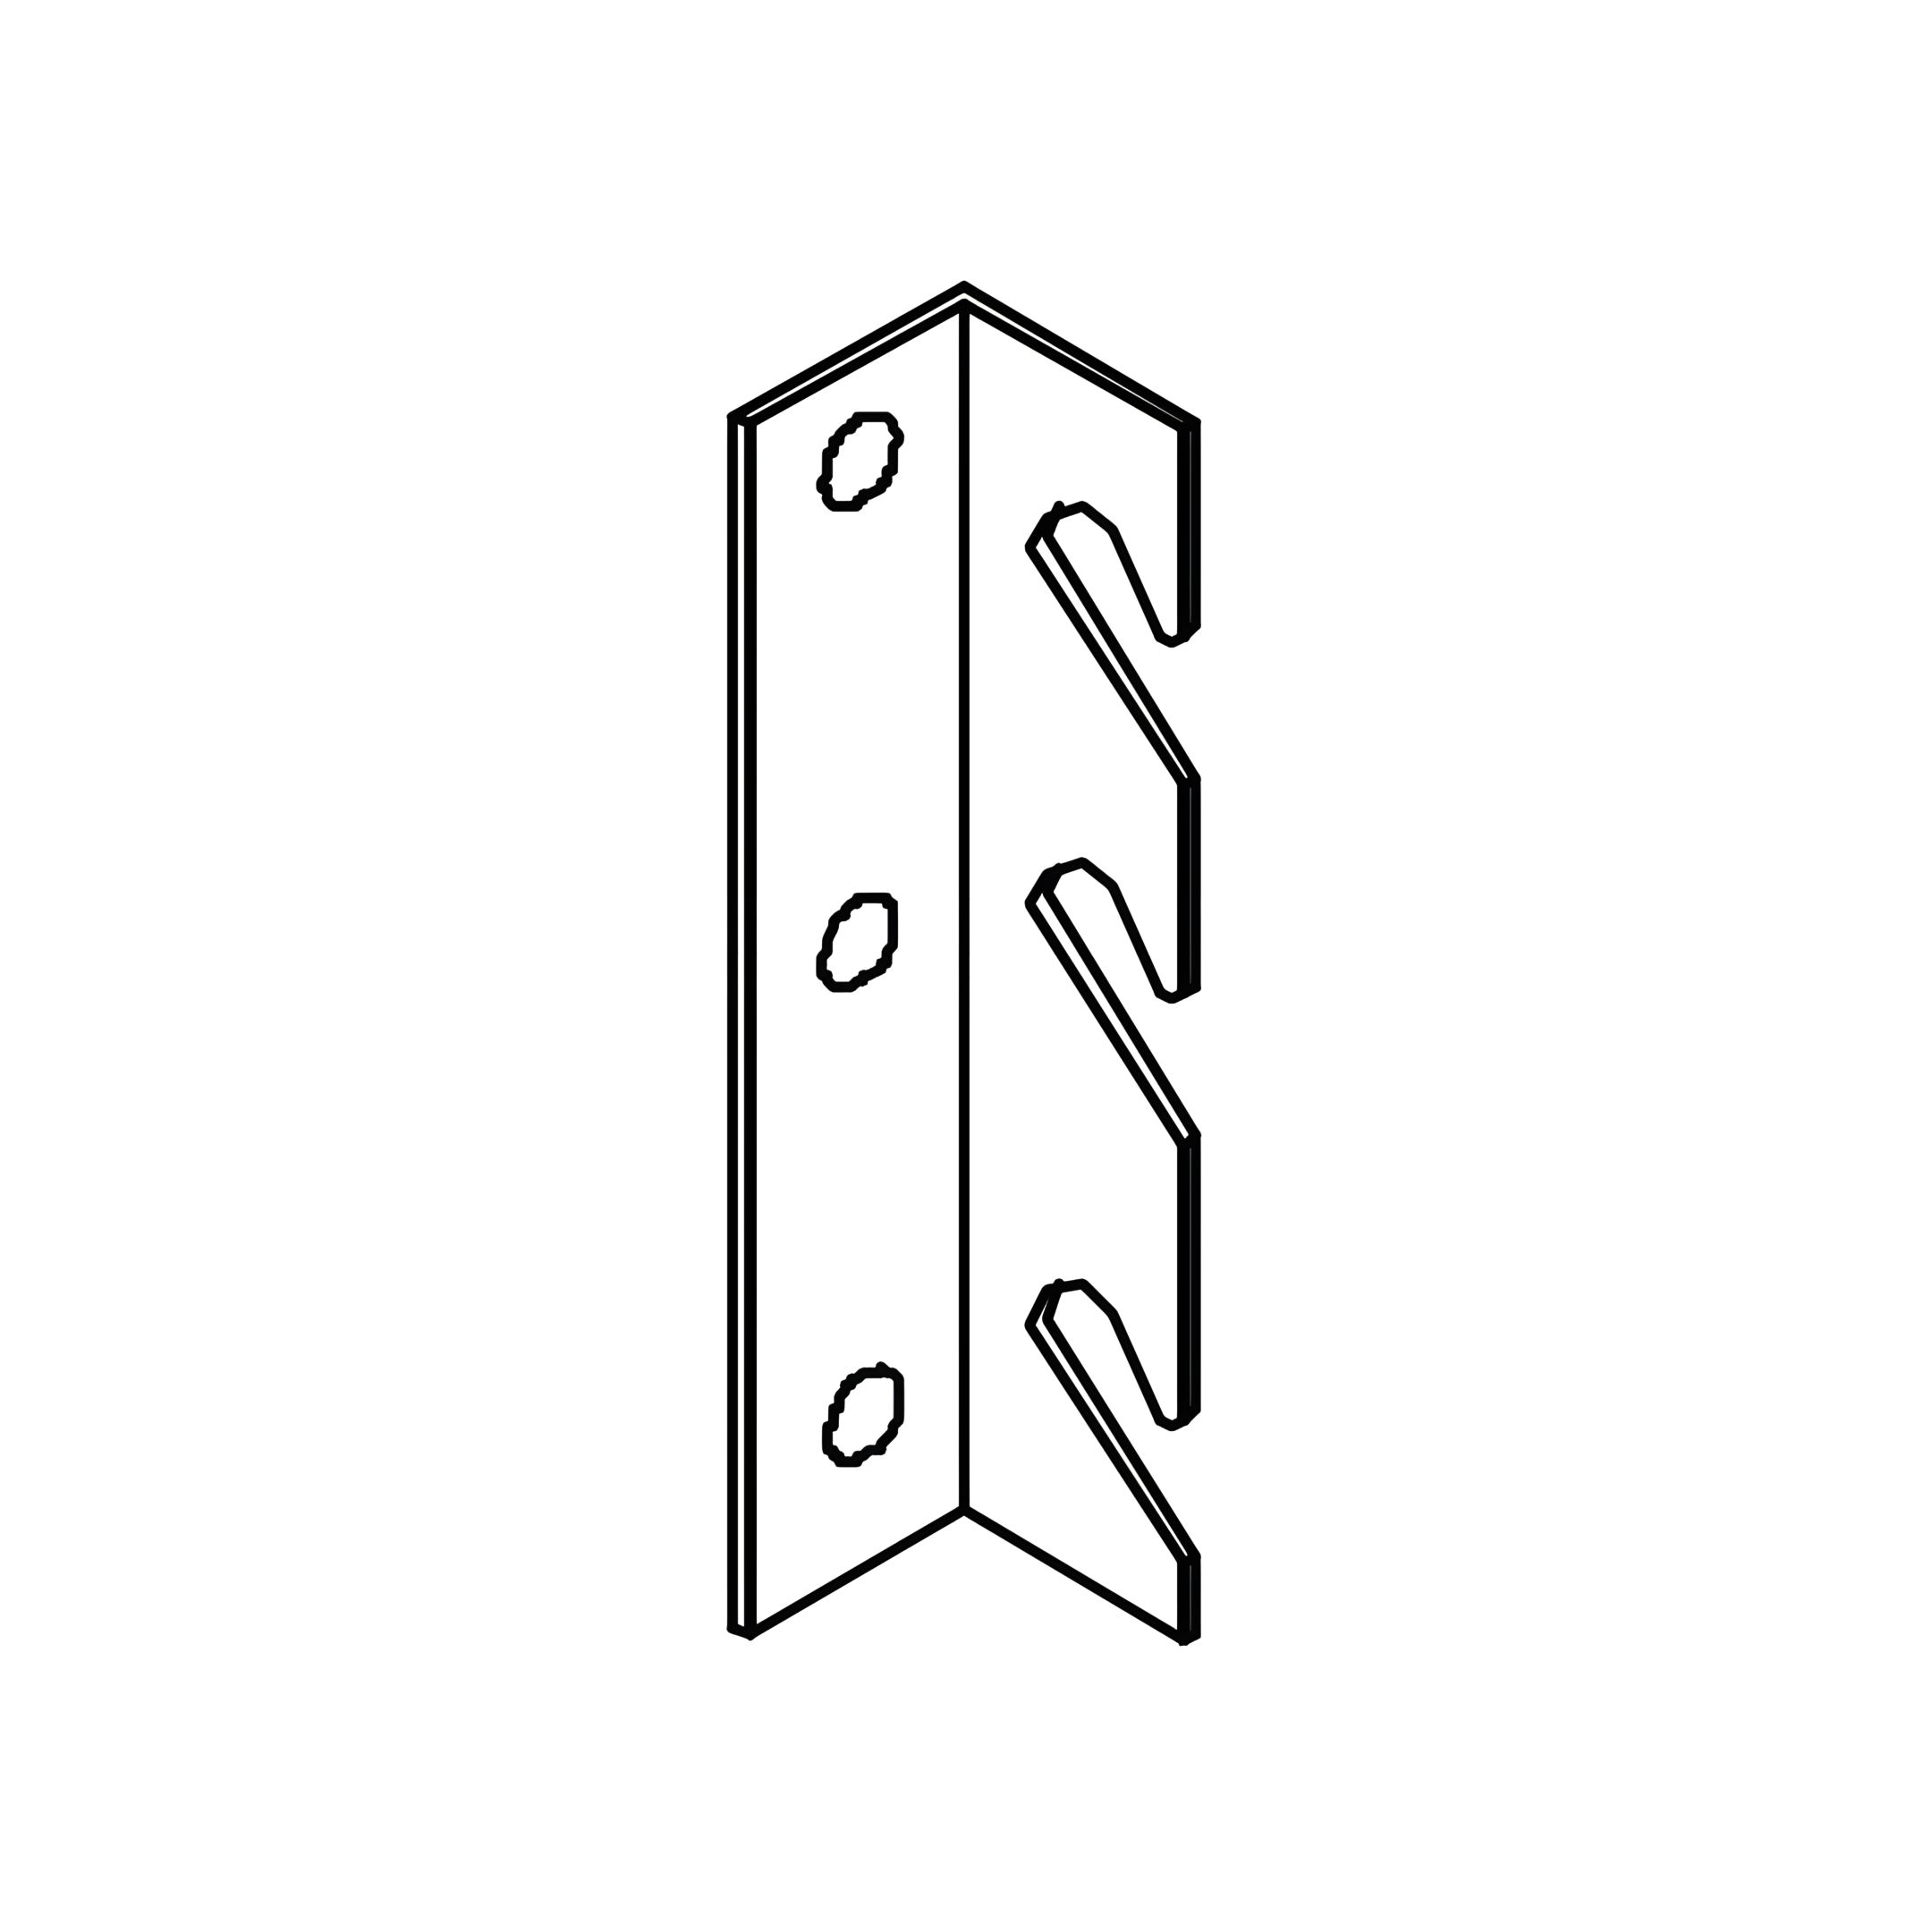
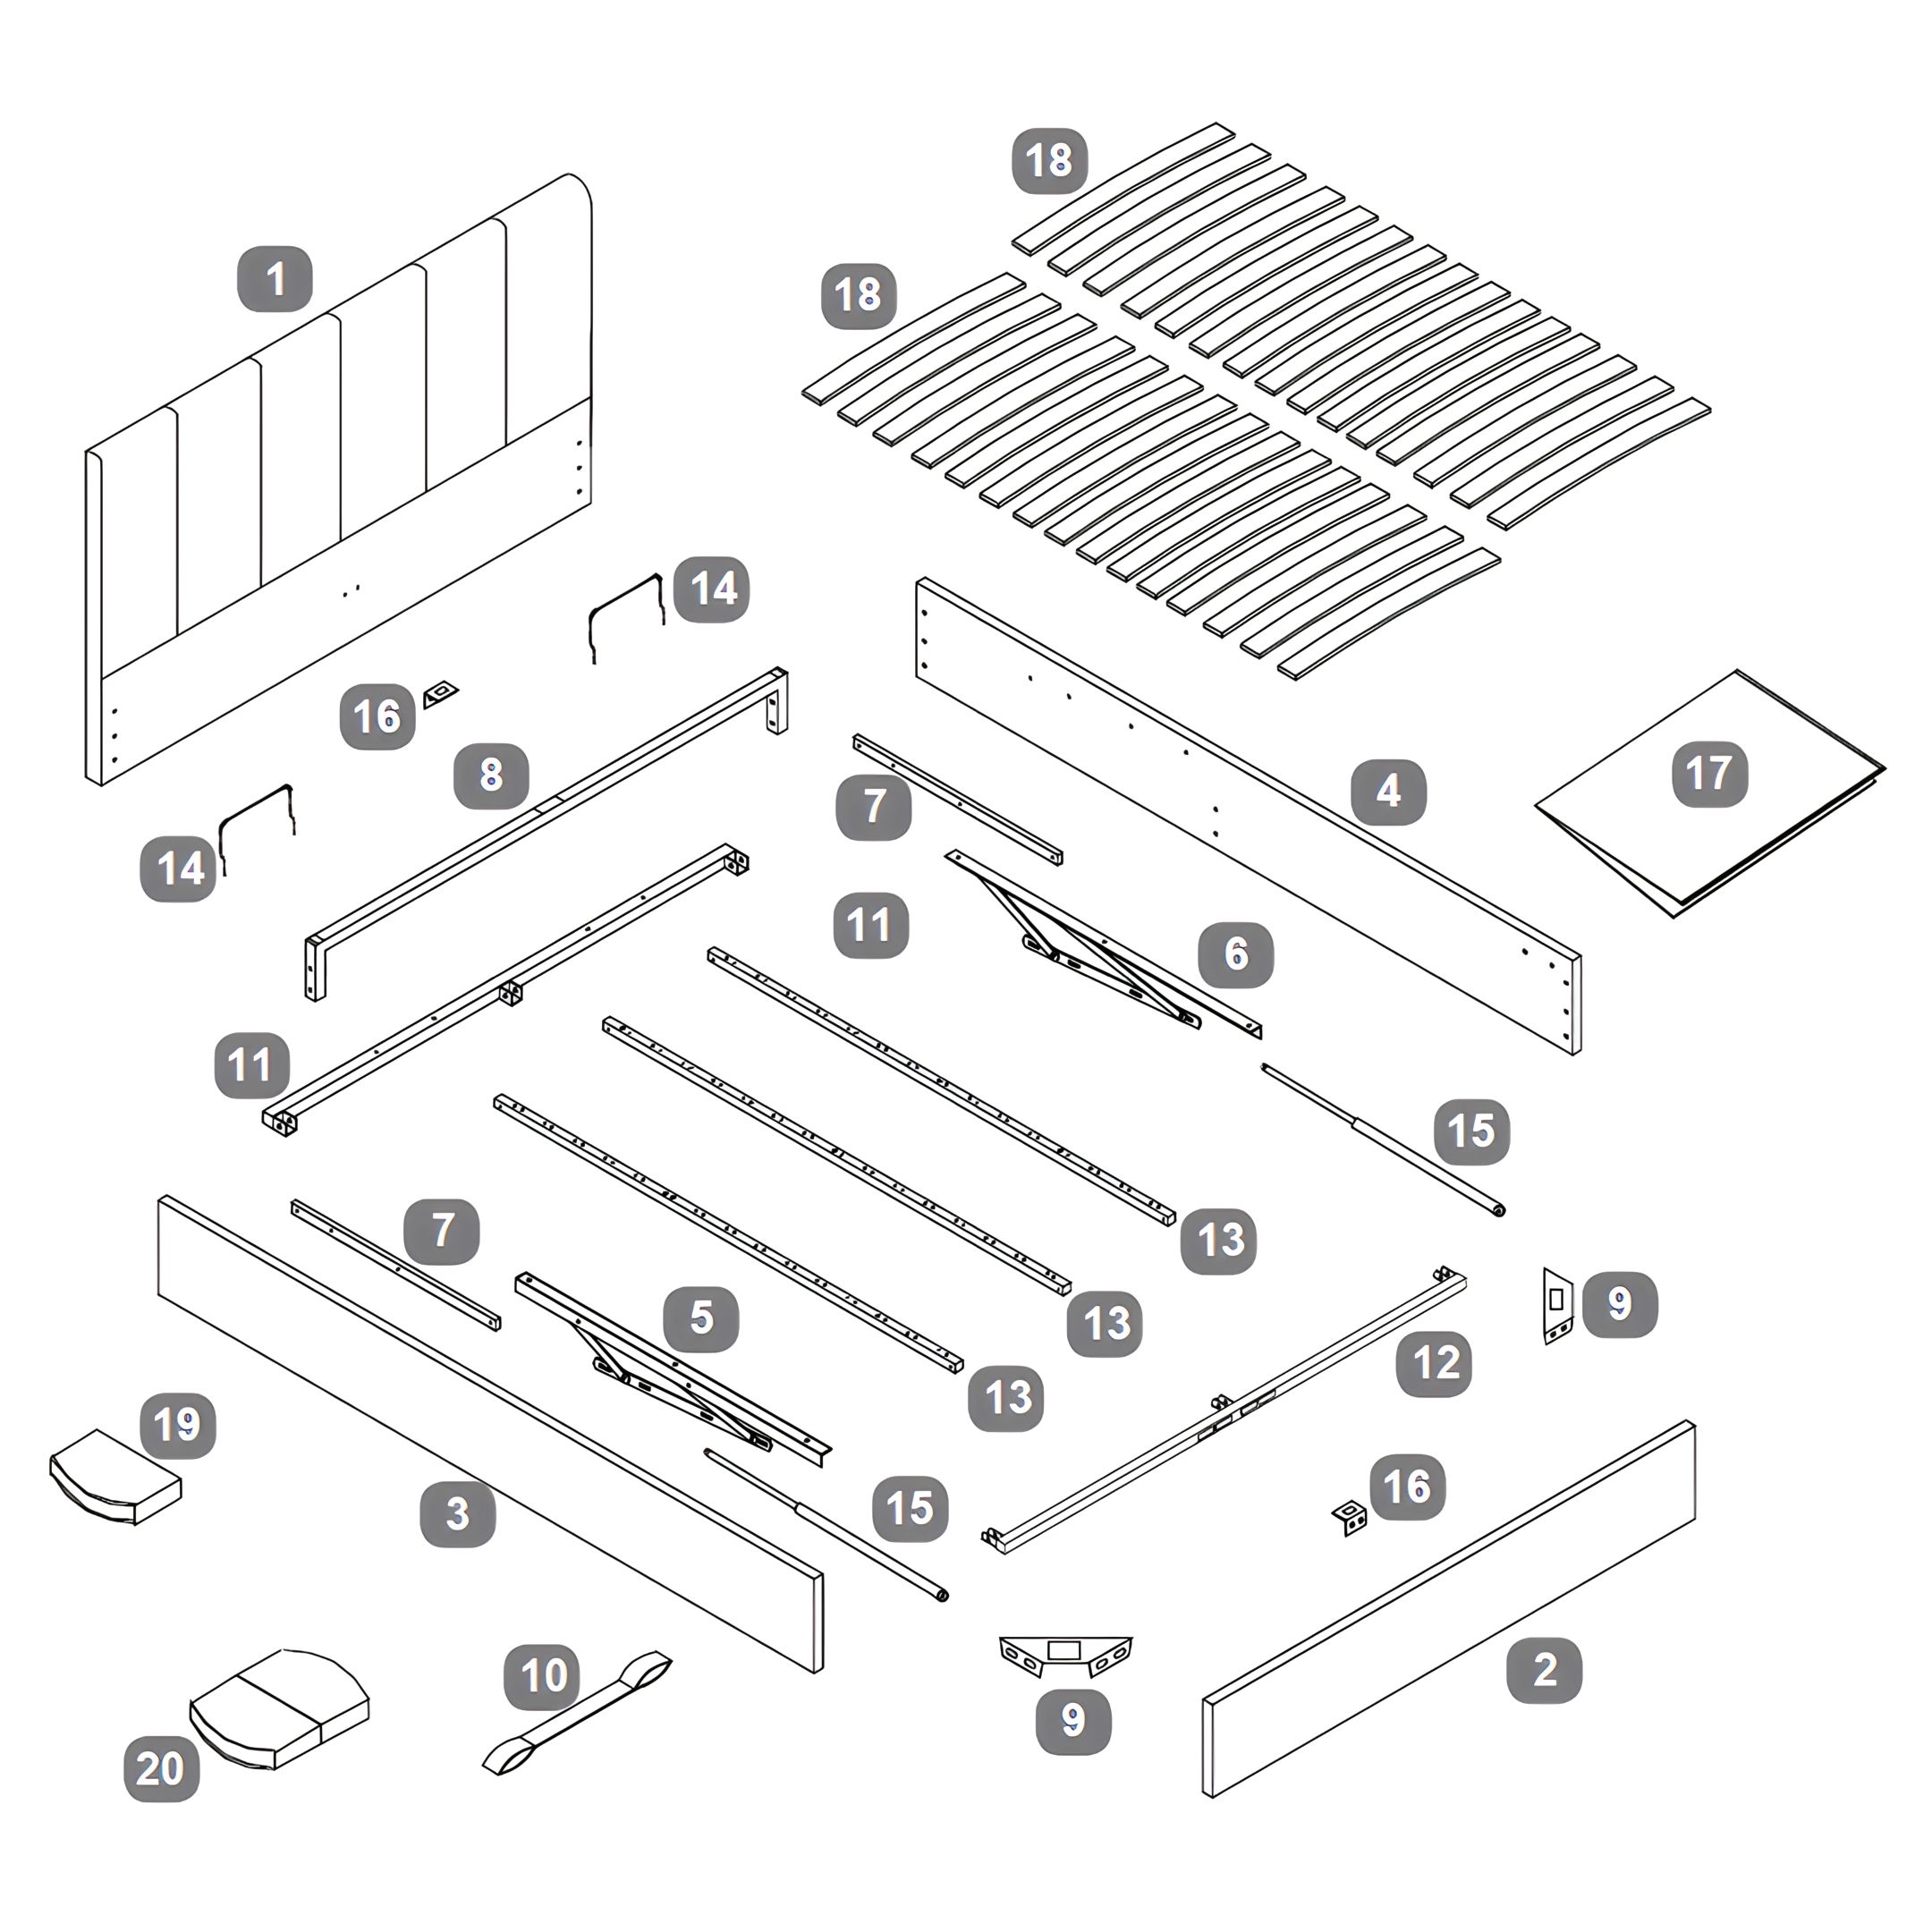
1. Attach Angle Brackets to Side Rails
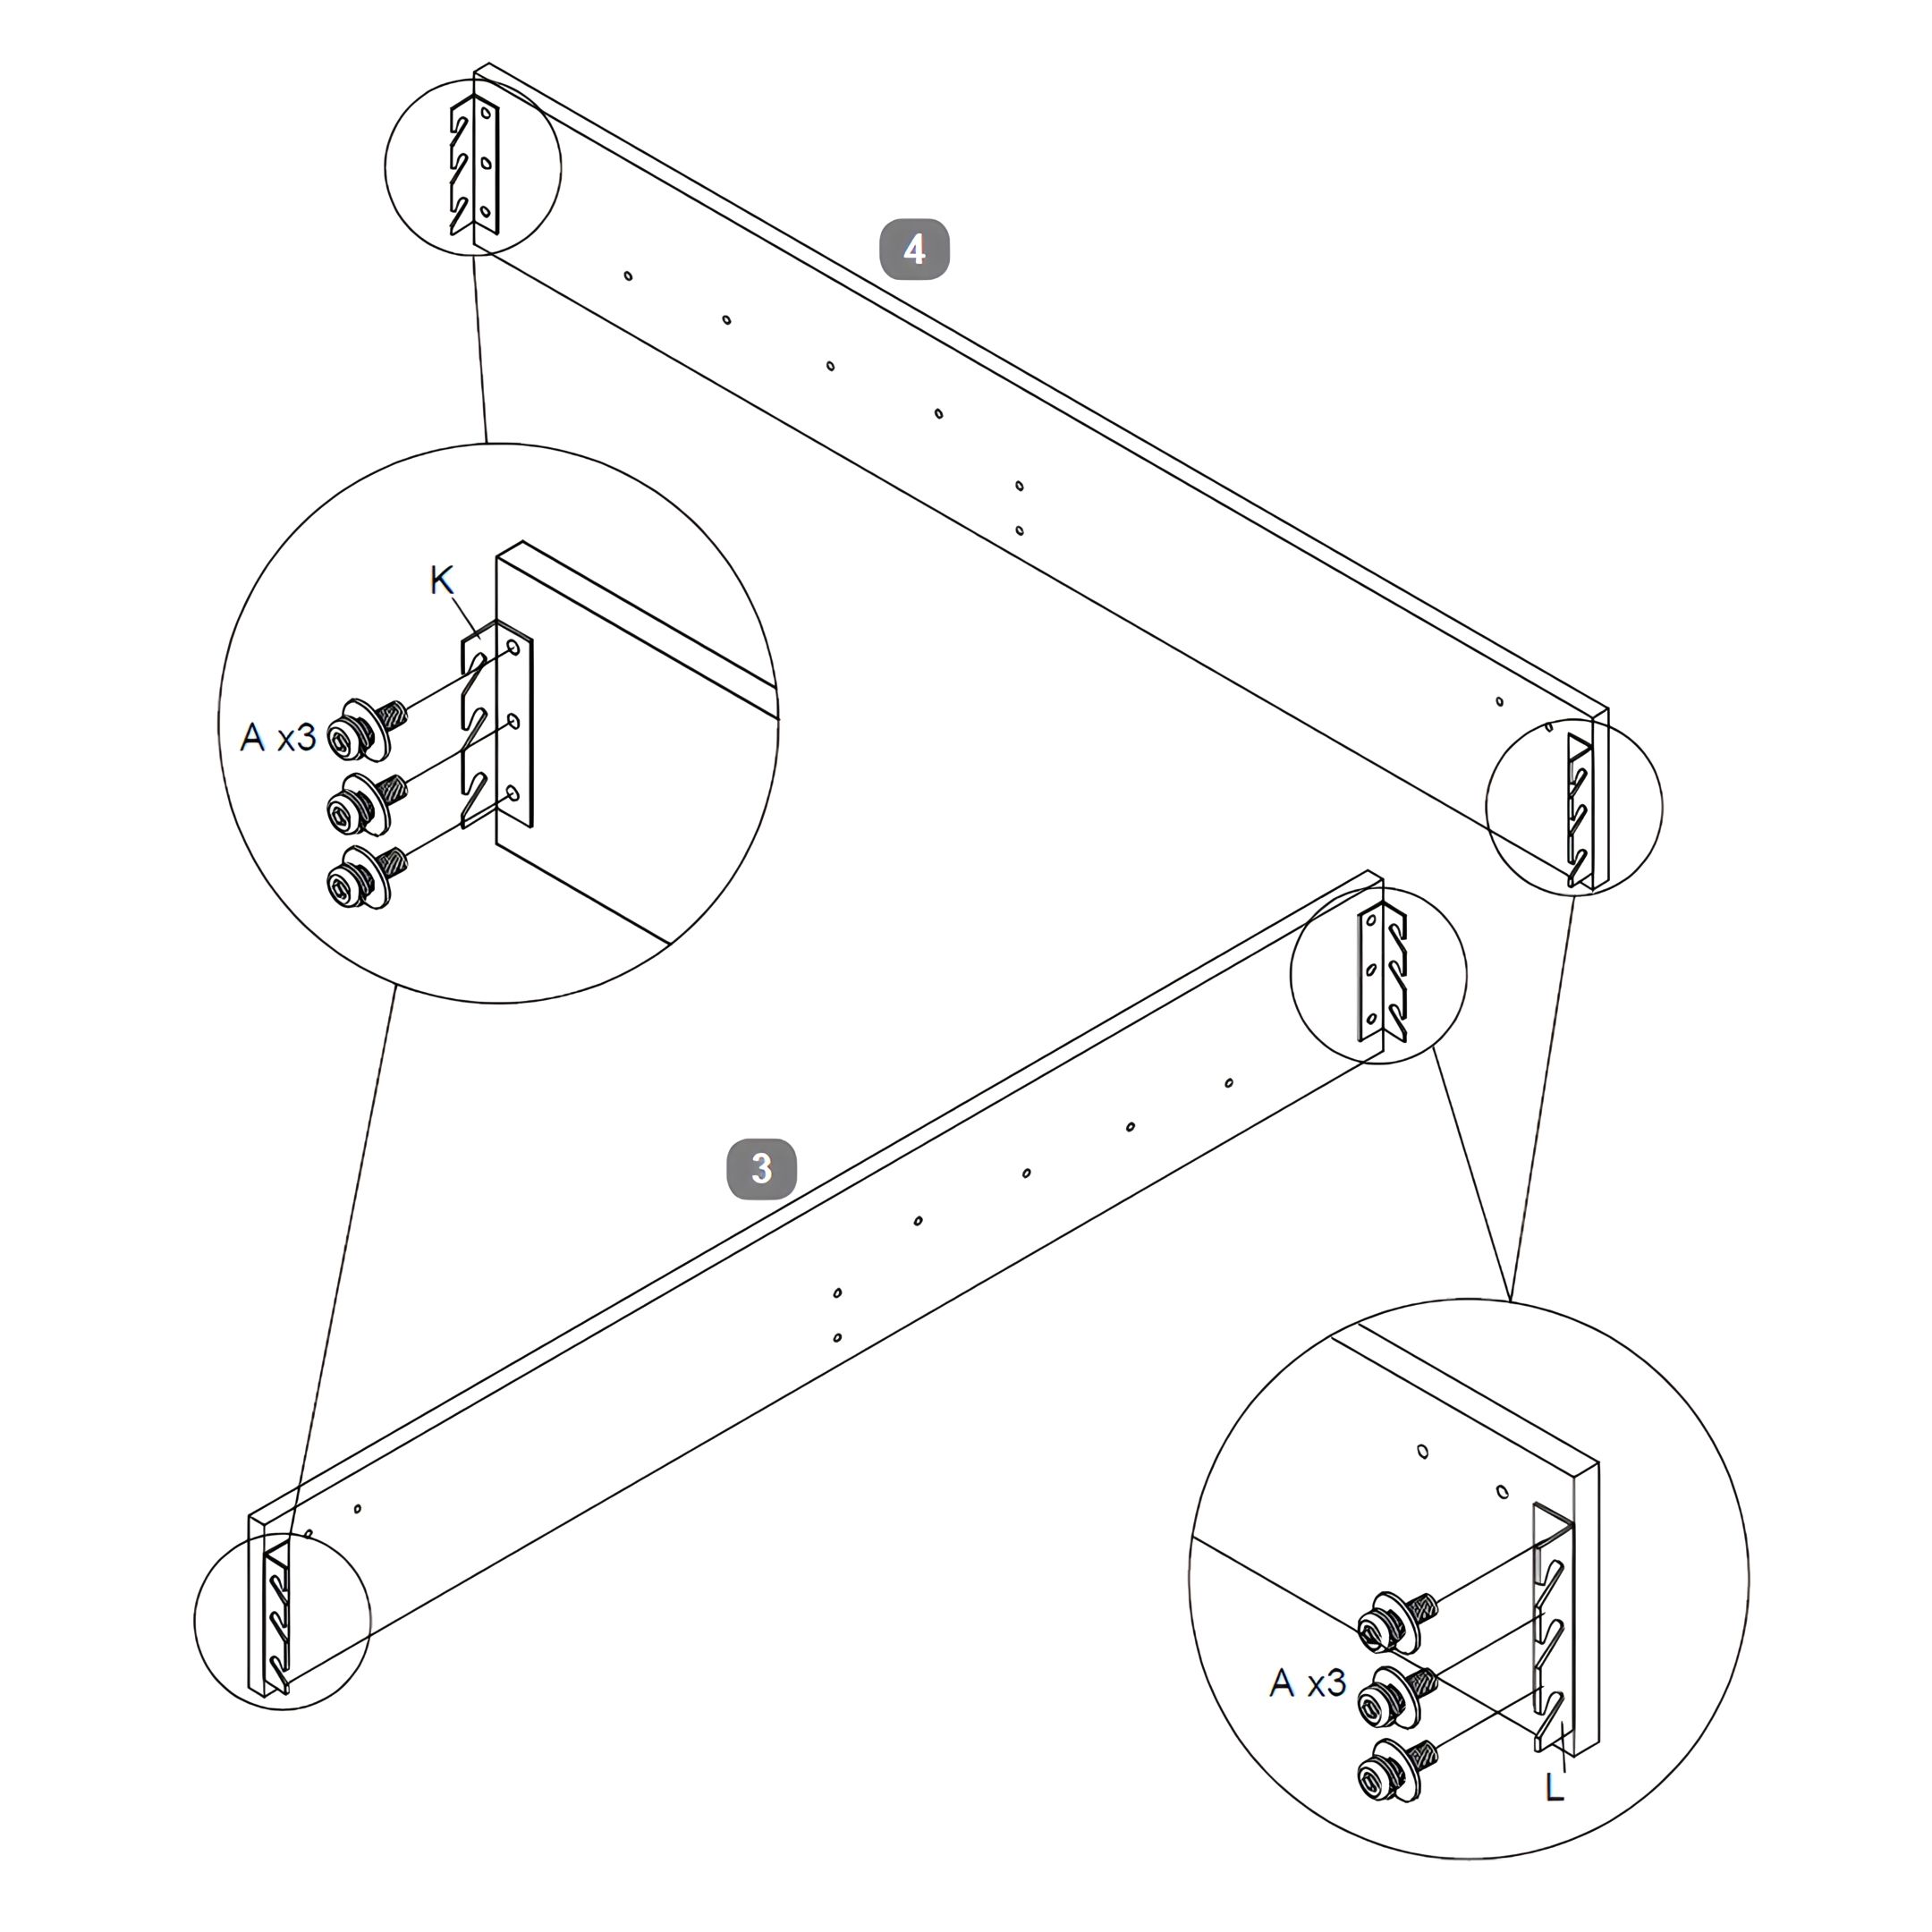
1. Position each Left Side Rail (3) and Right Side Rail (4) on a flat surface.
2. Align the Angle Brackets (K, L) with the pre-drilled holes on both ends of the side rails.
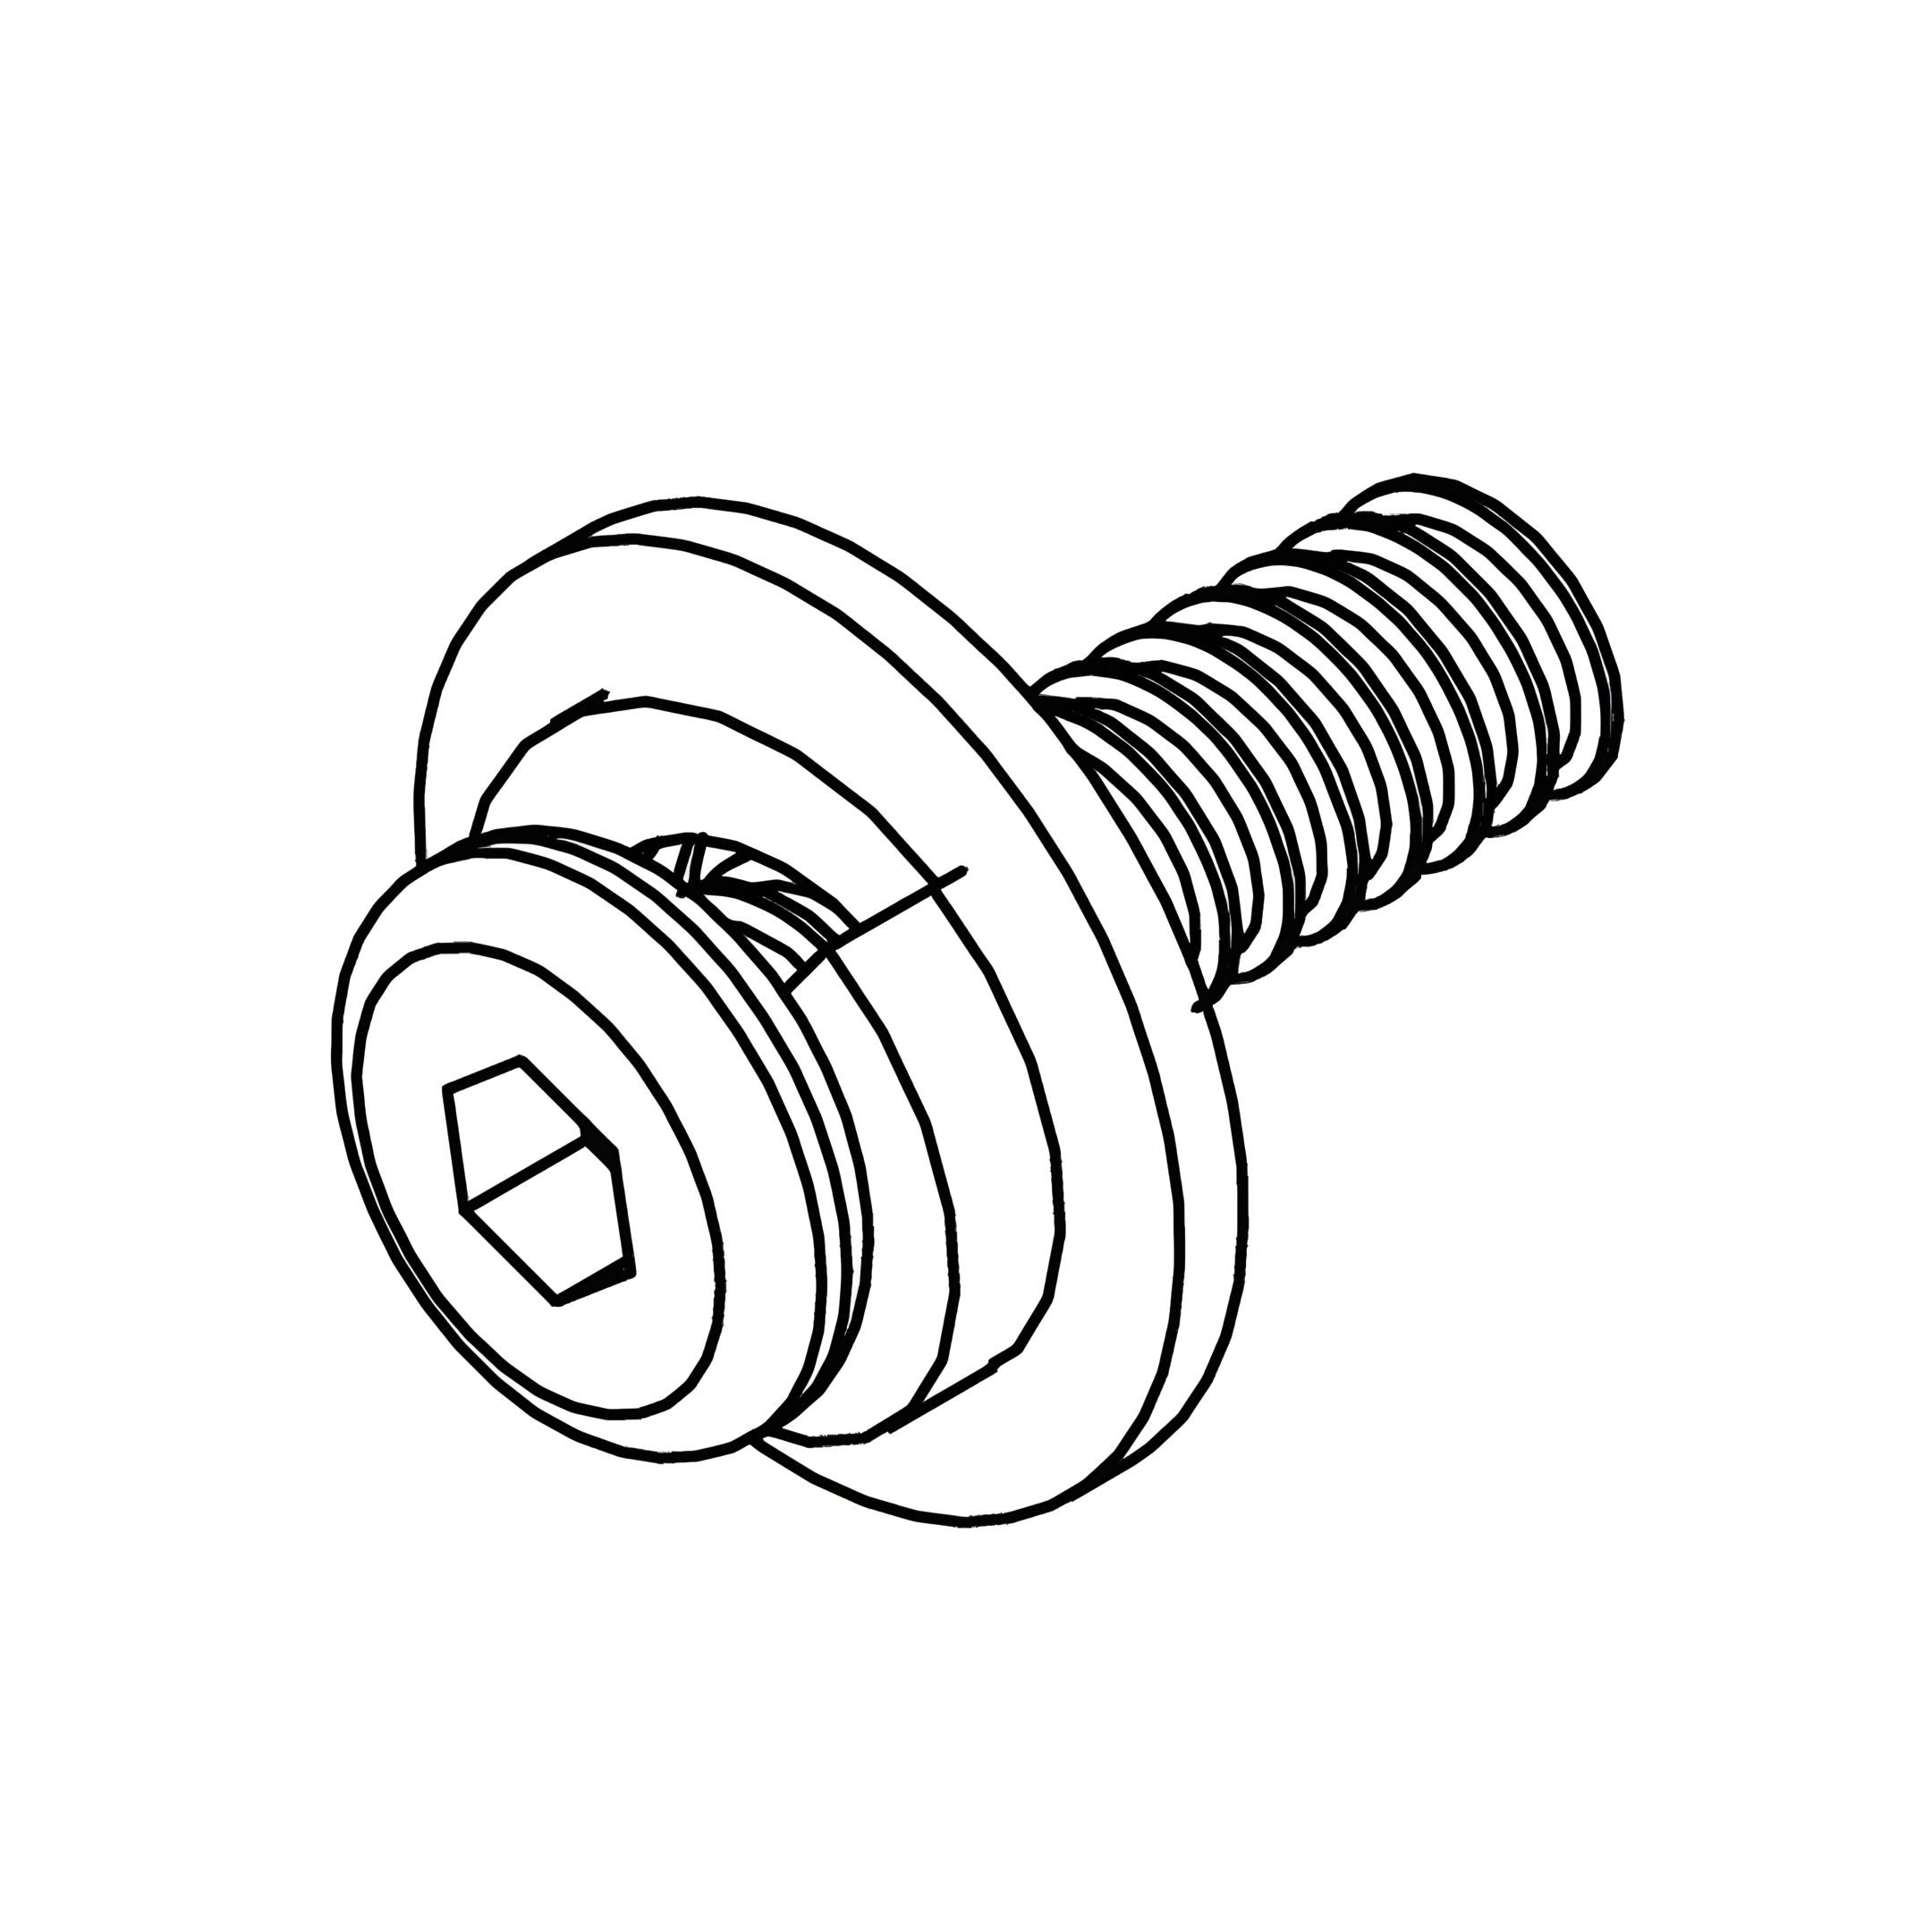
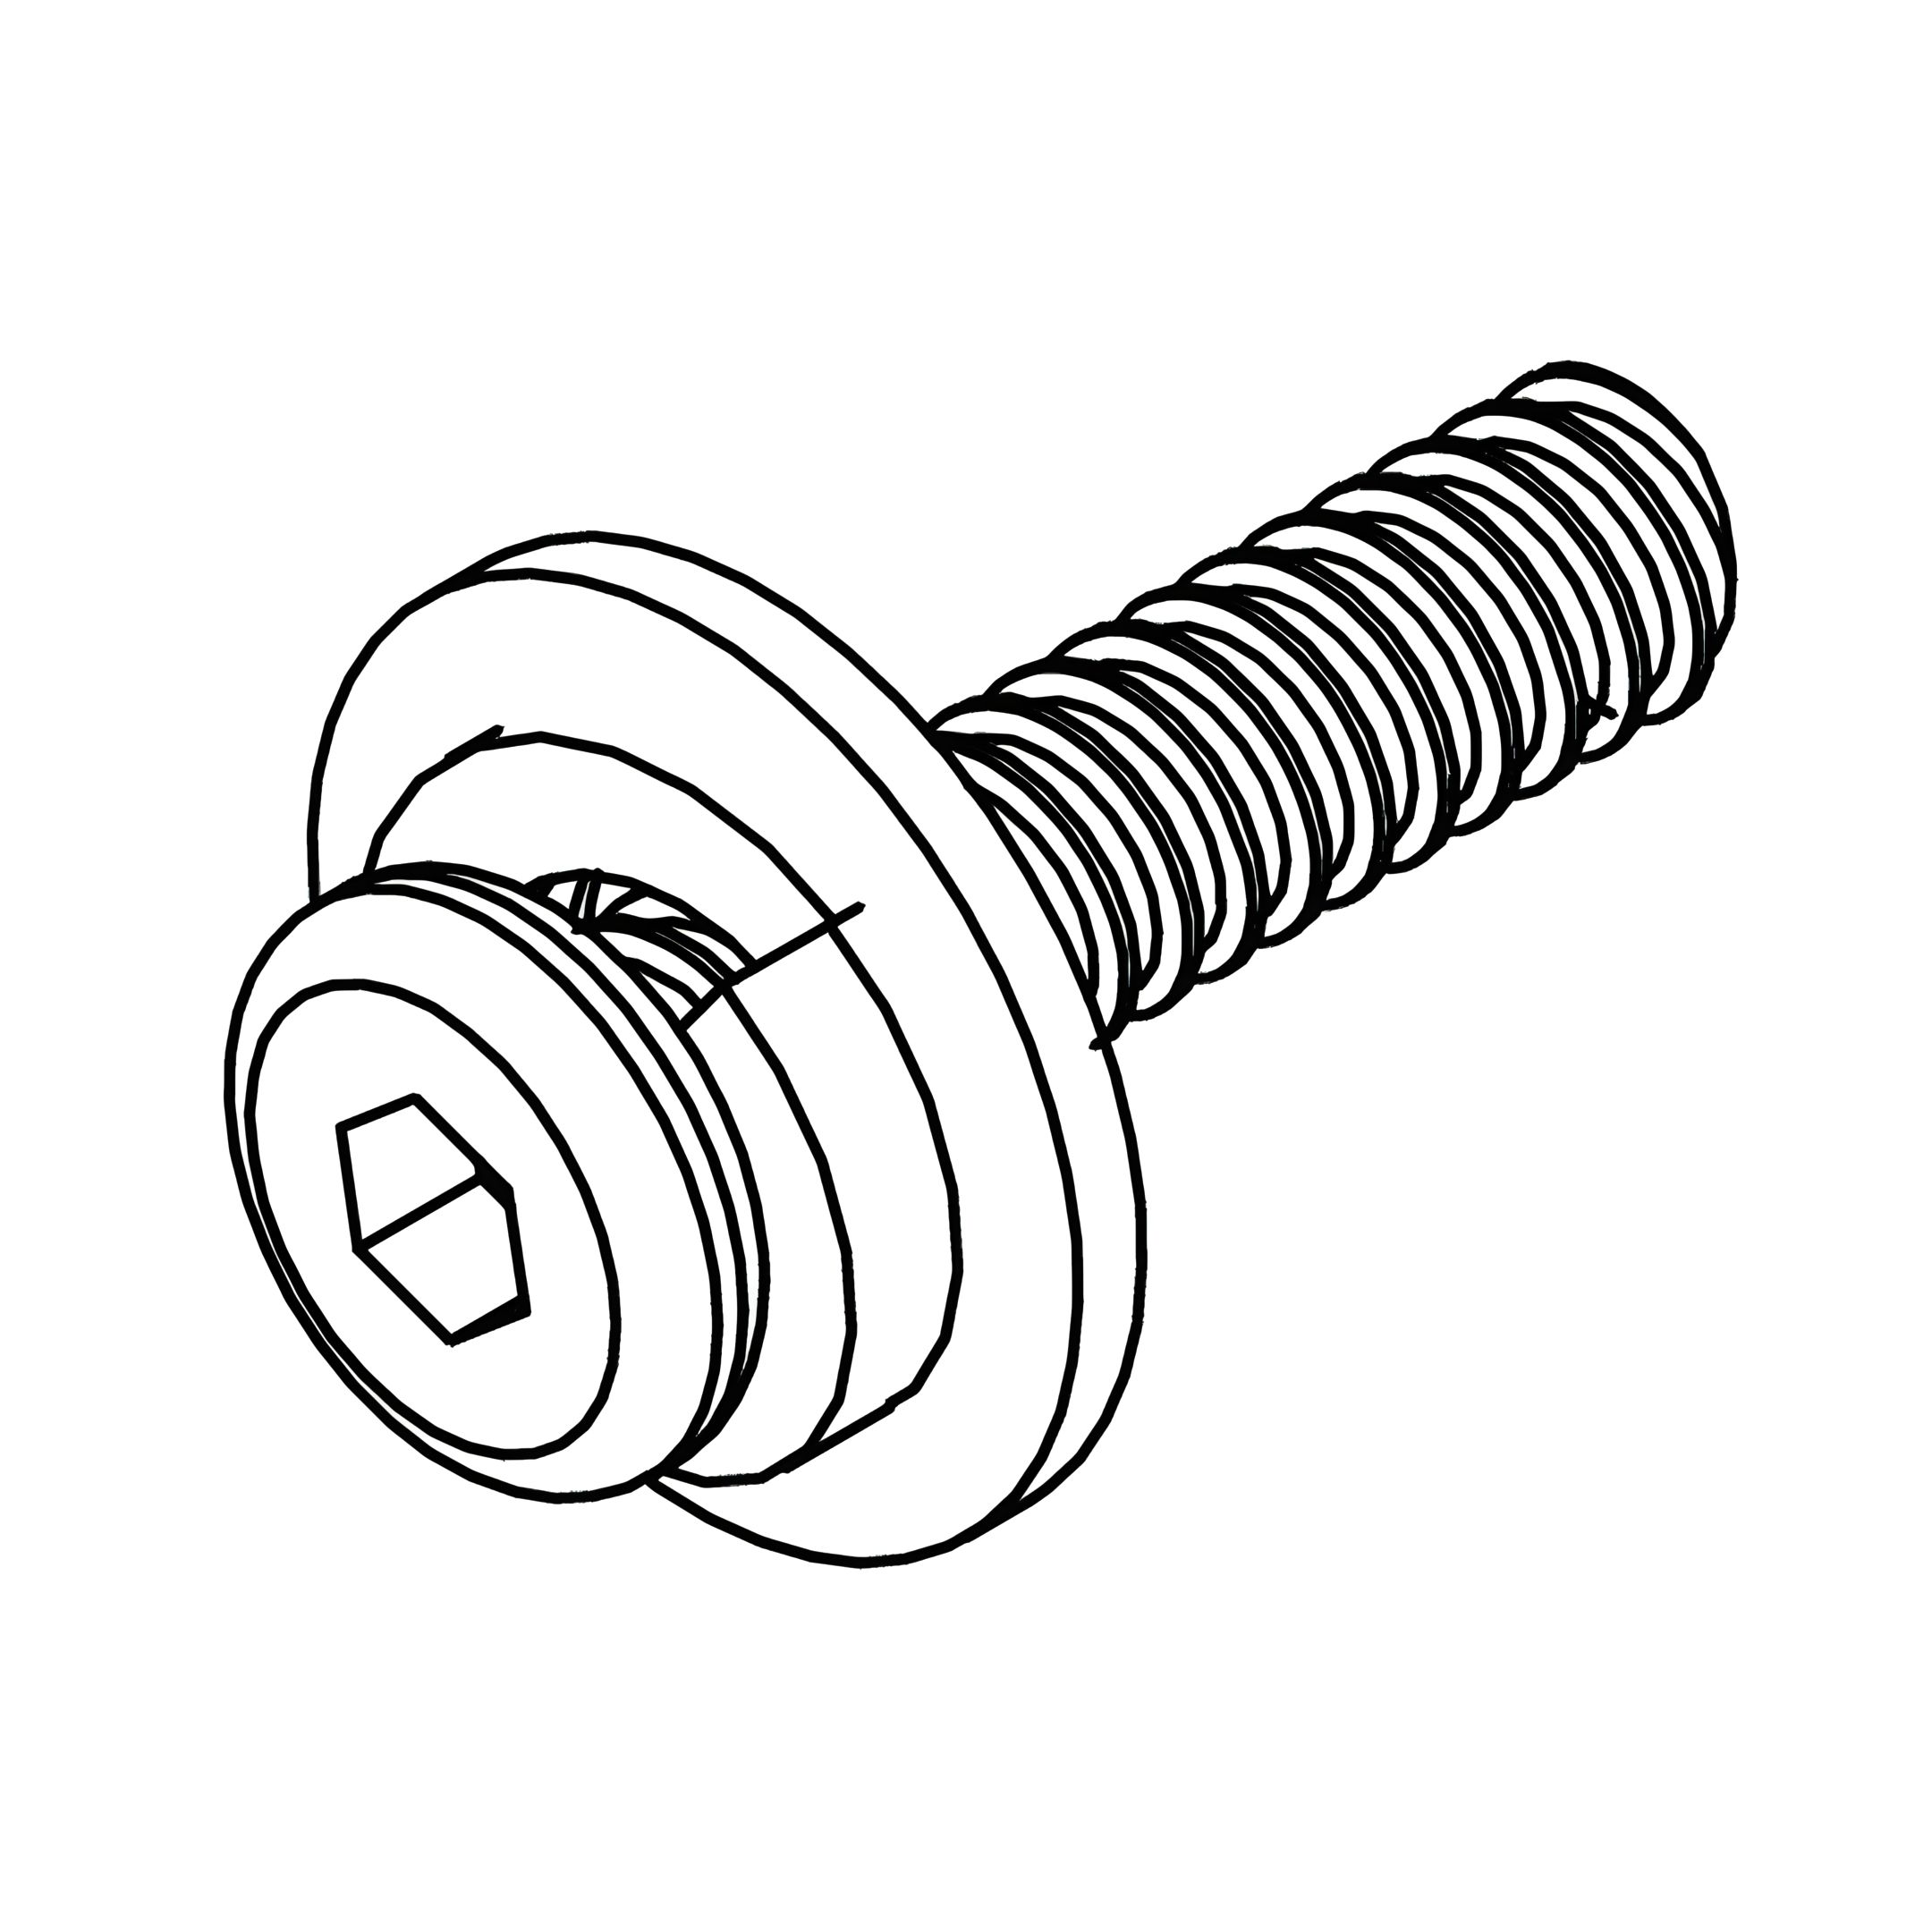
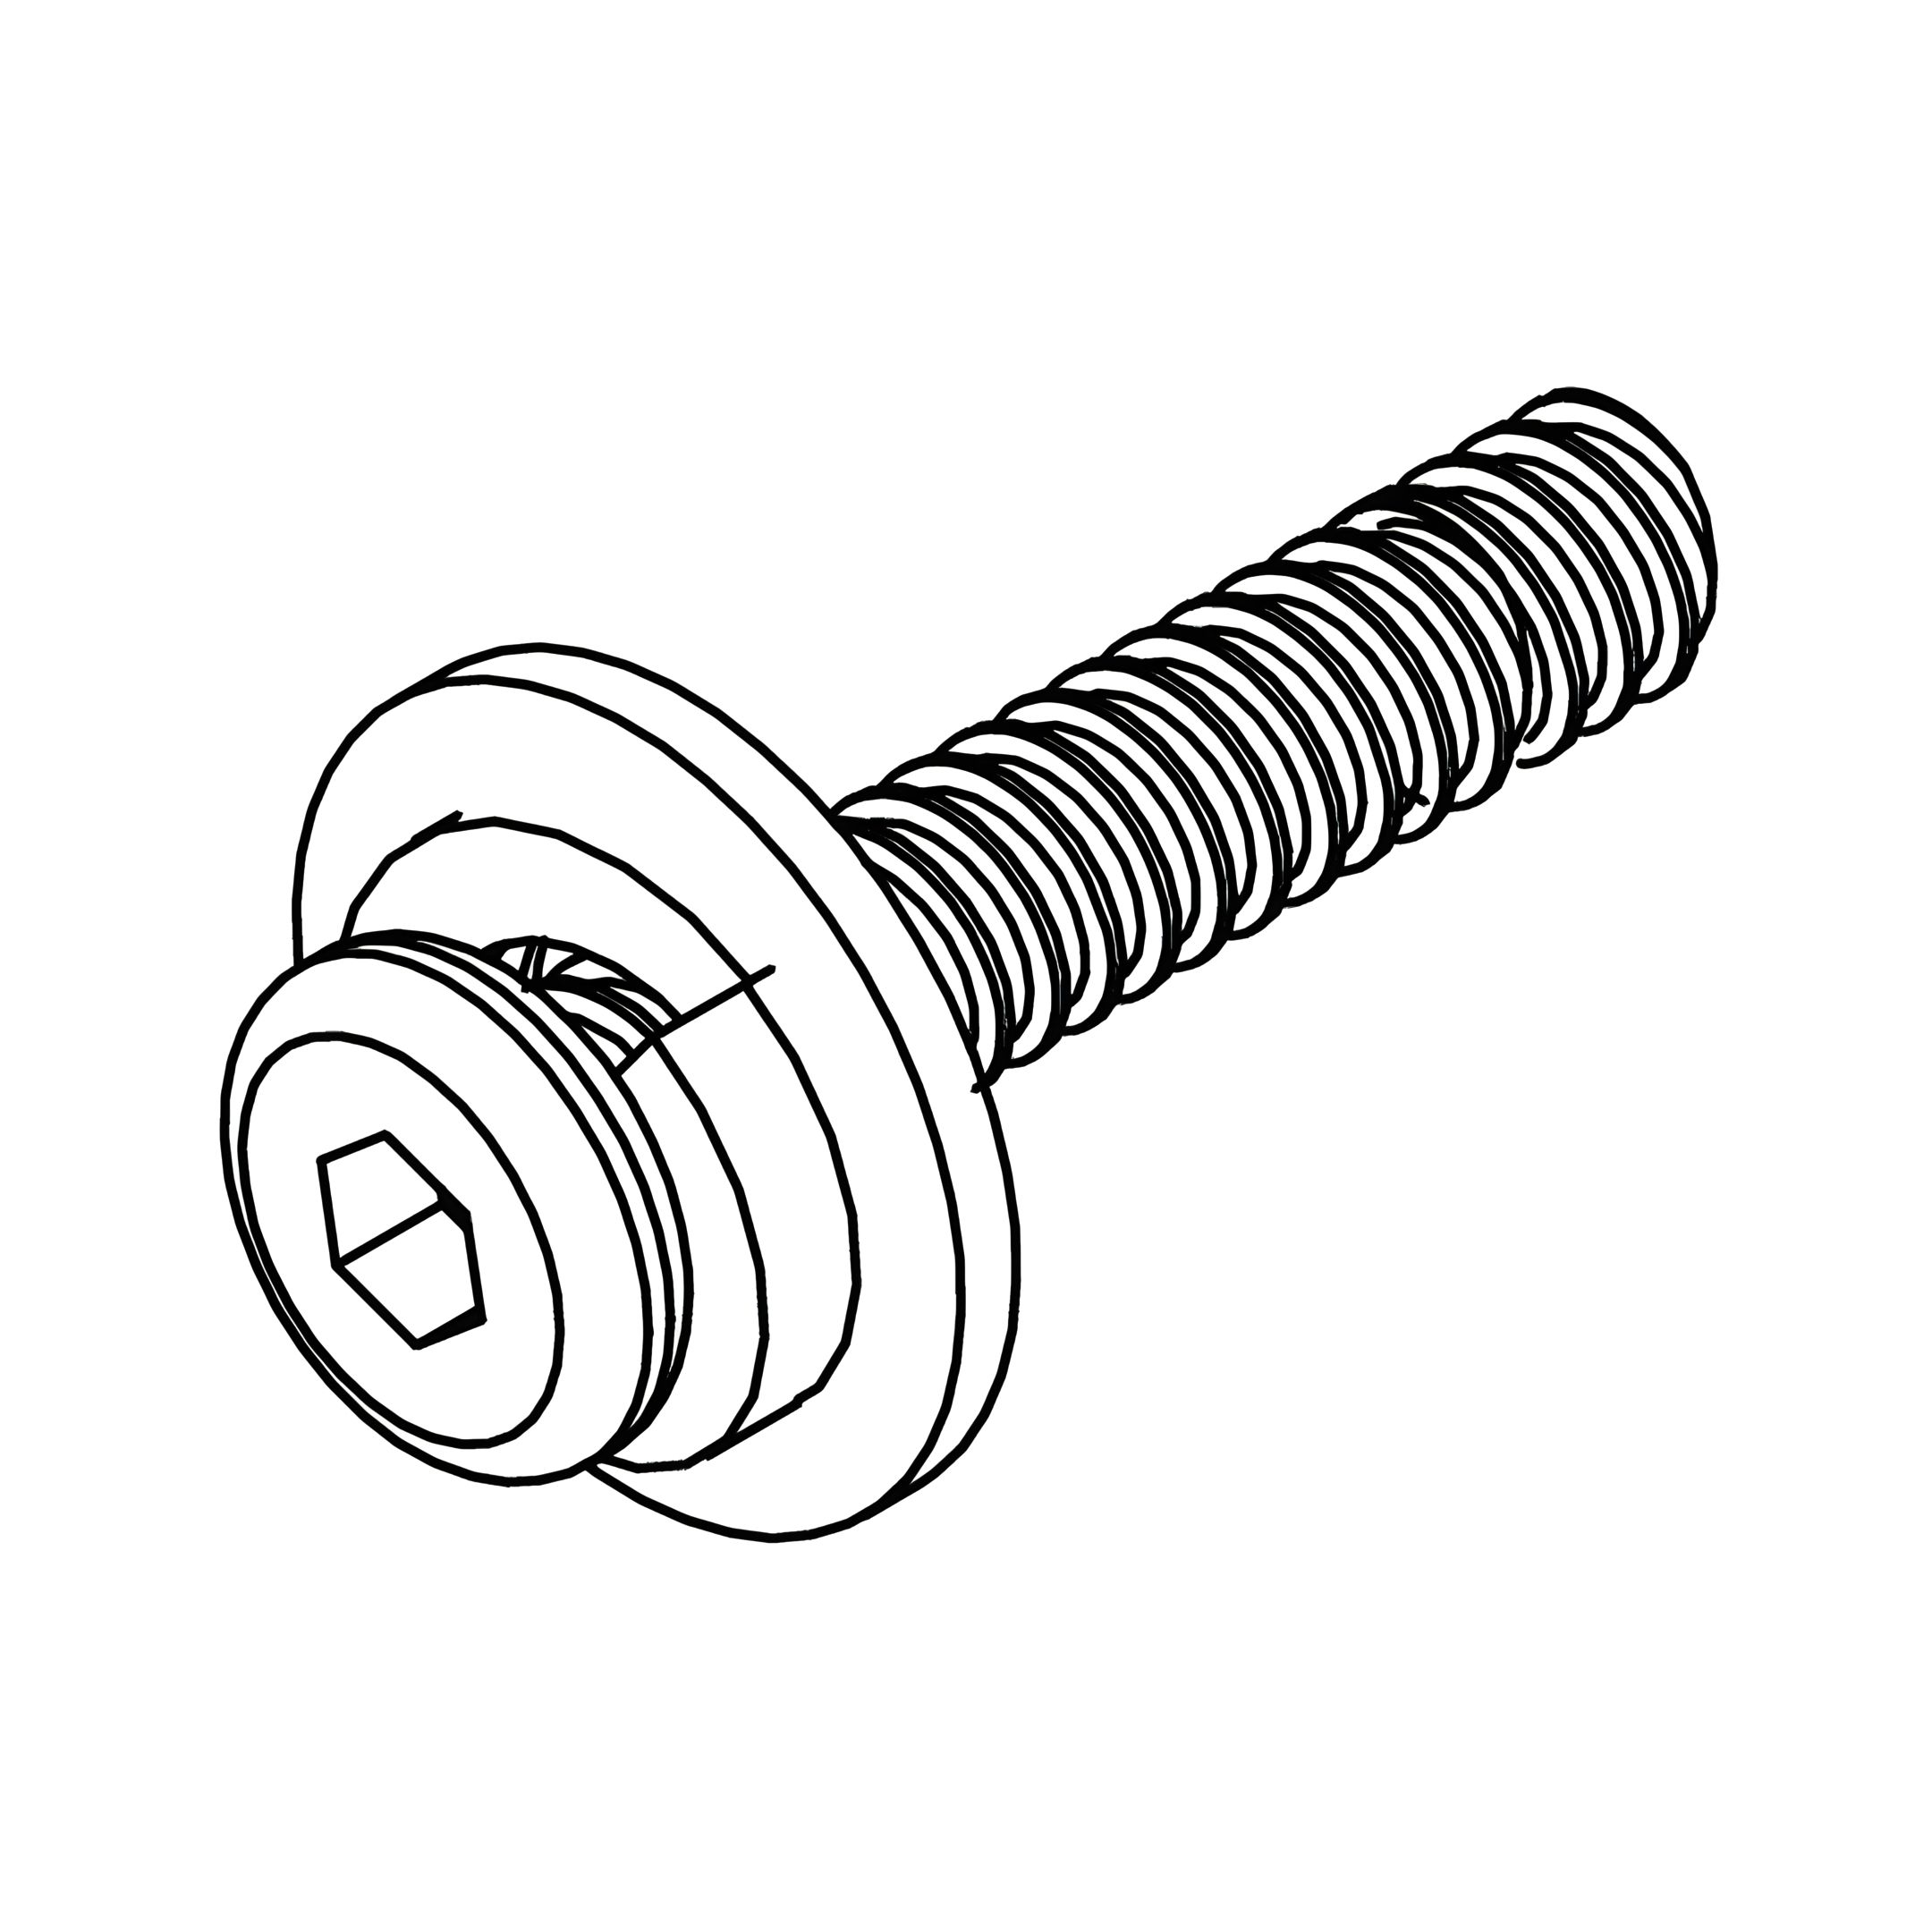
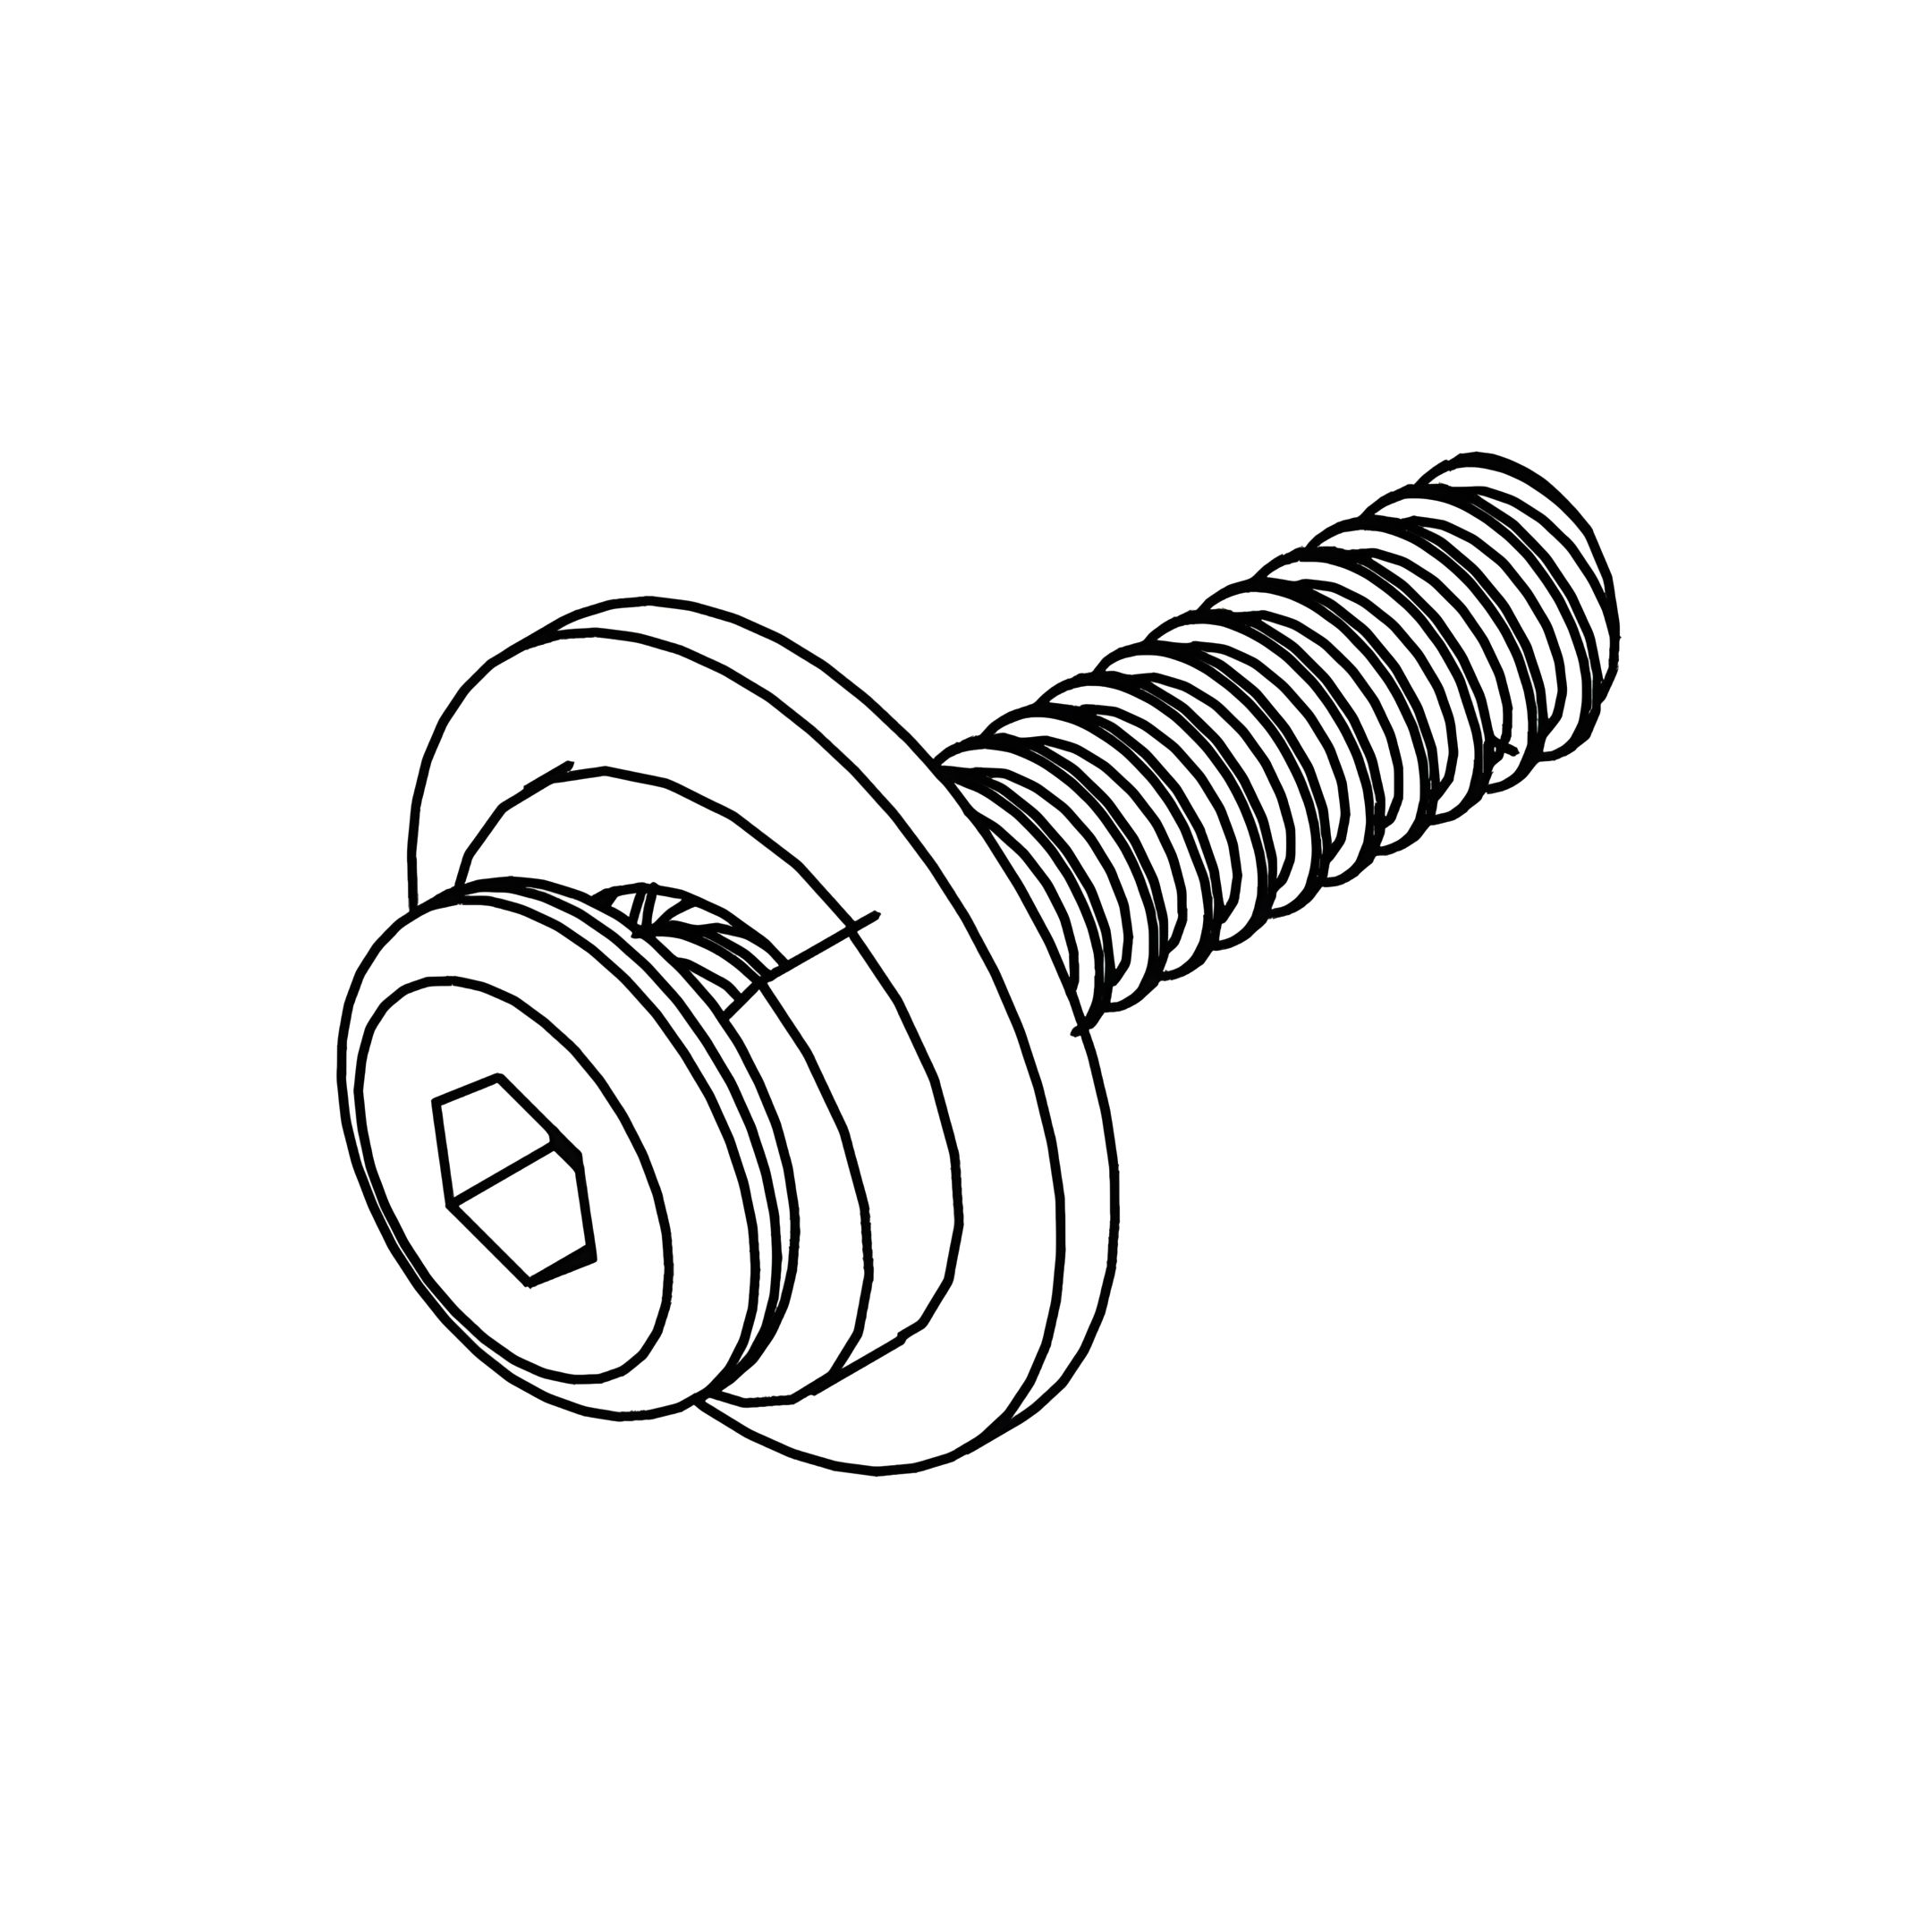
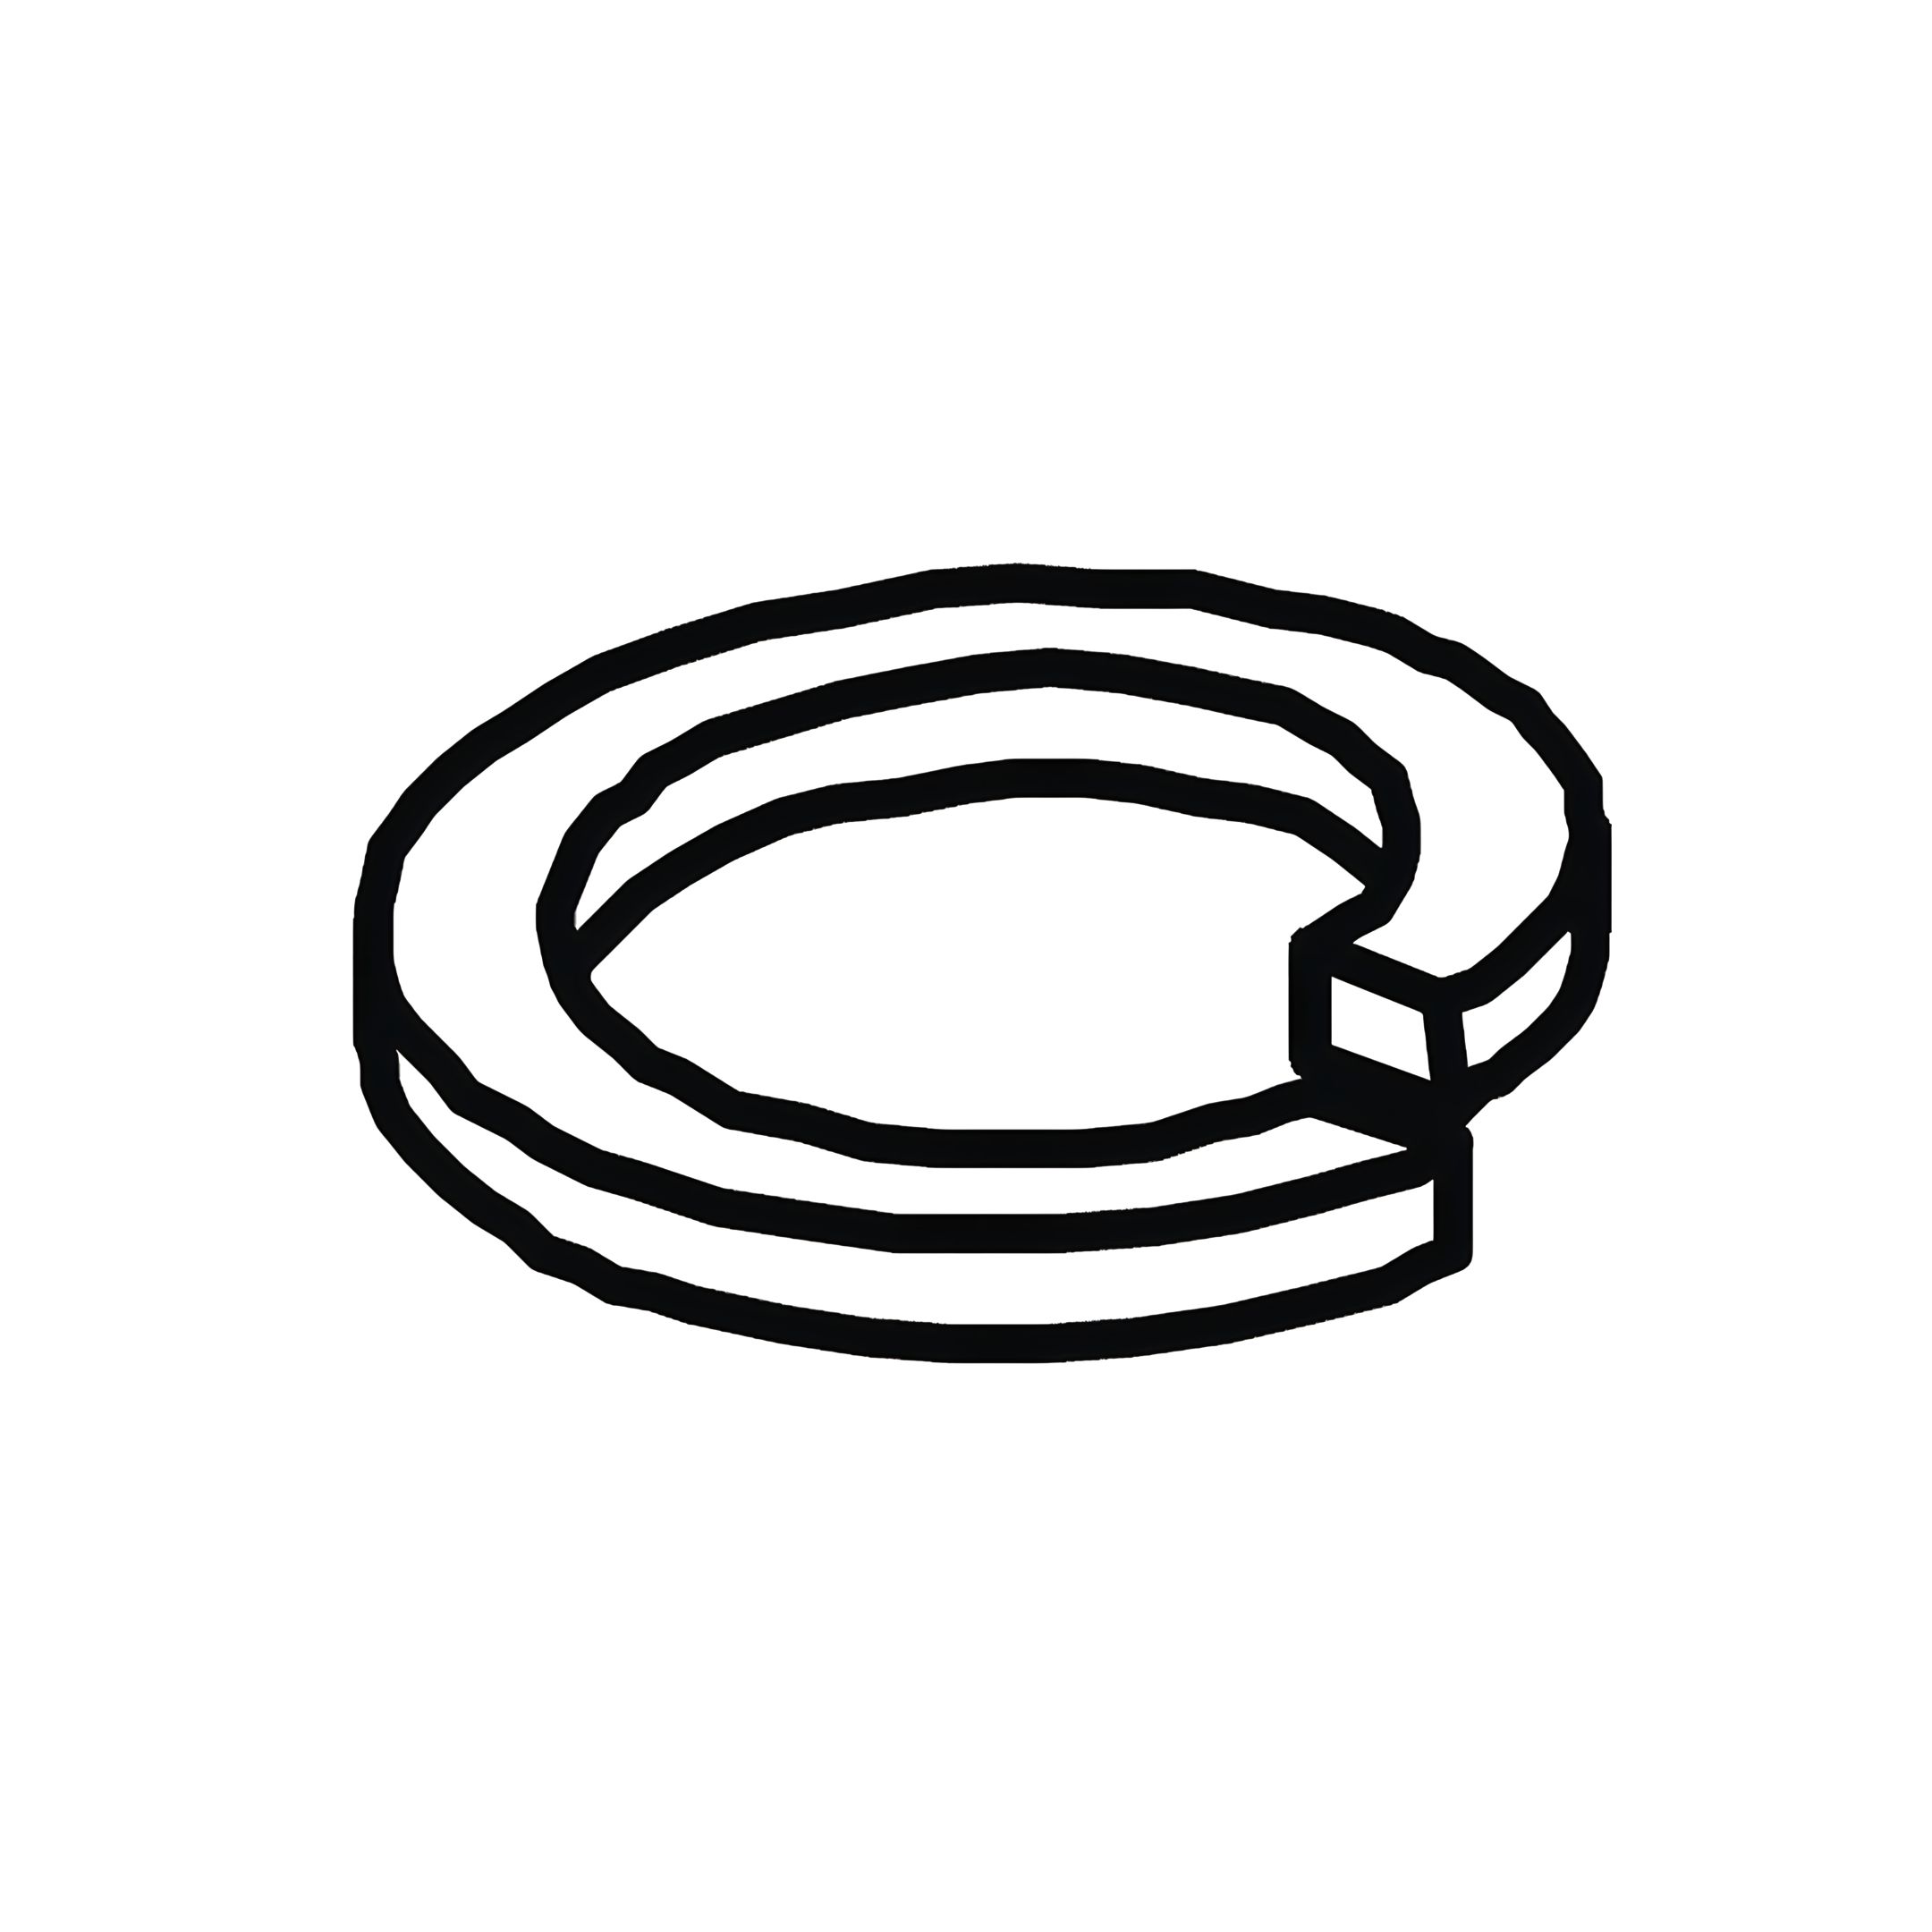
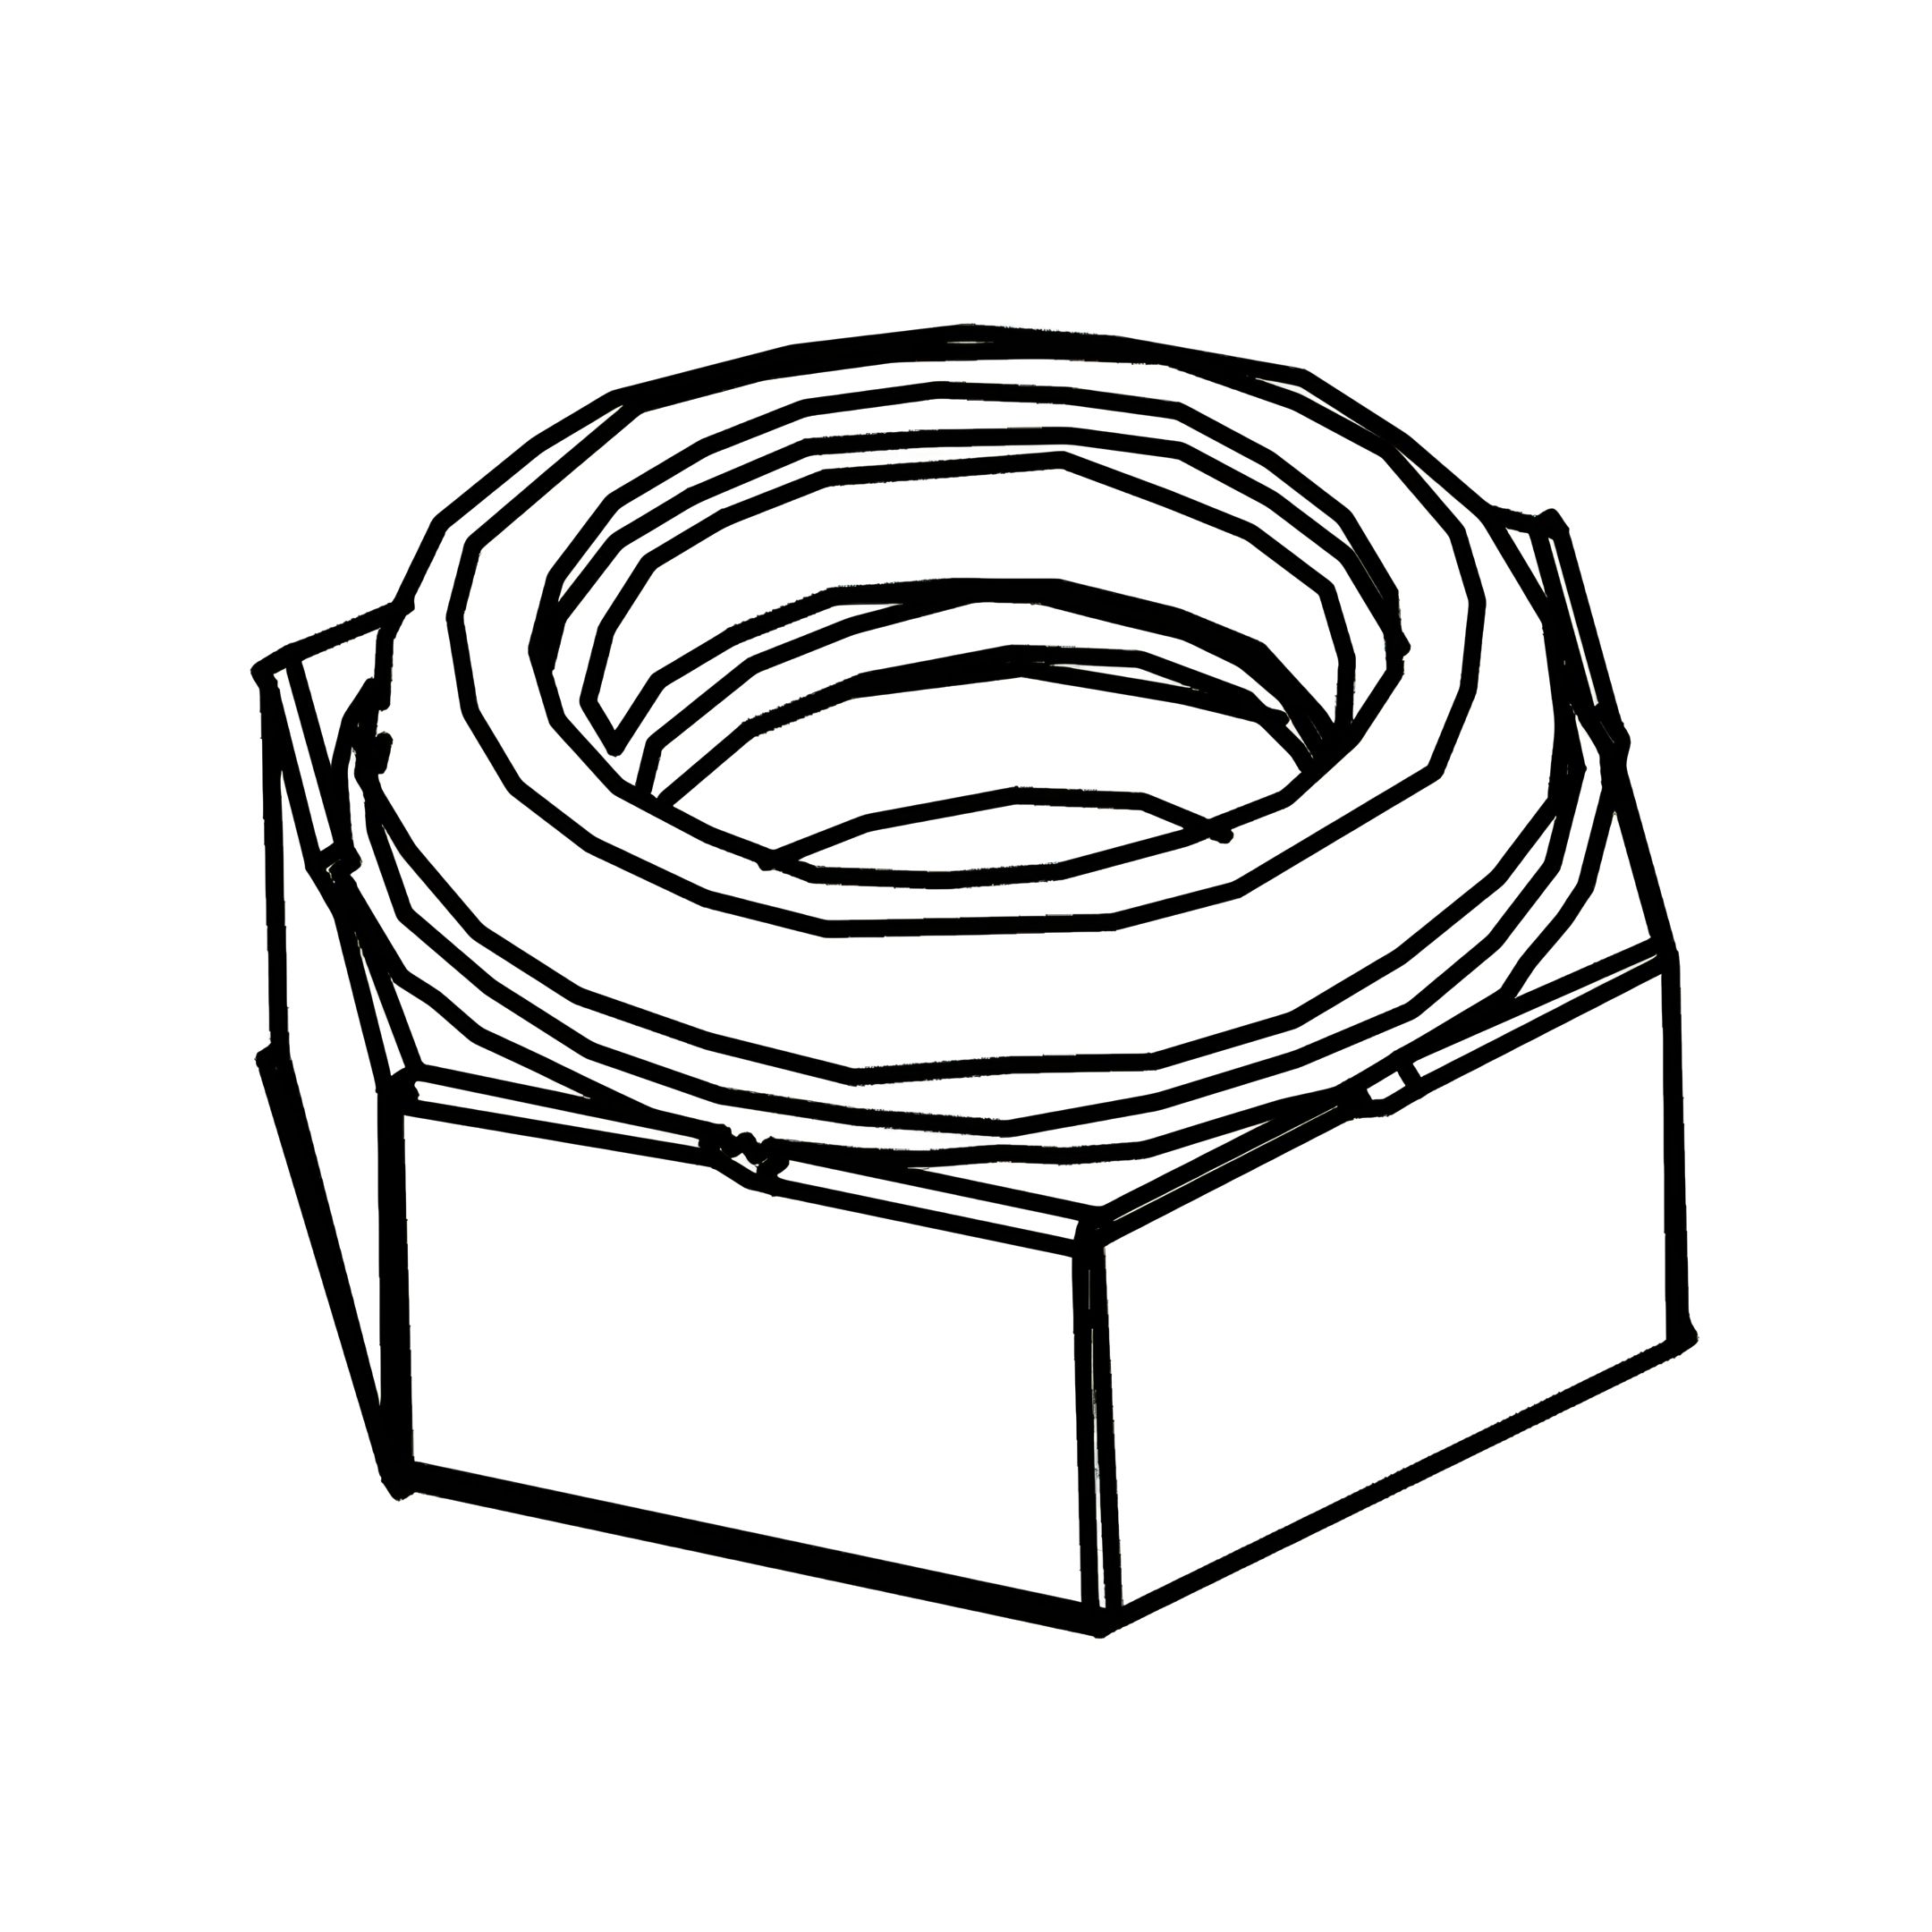
3. Secure each bracket using 3x Bolt Sets (A) on each side.
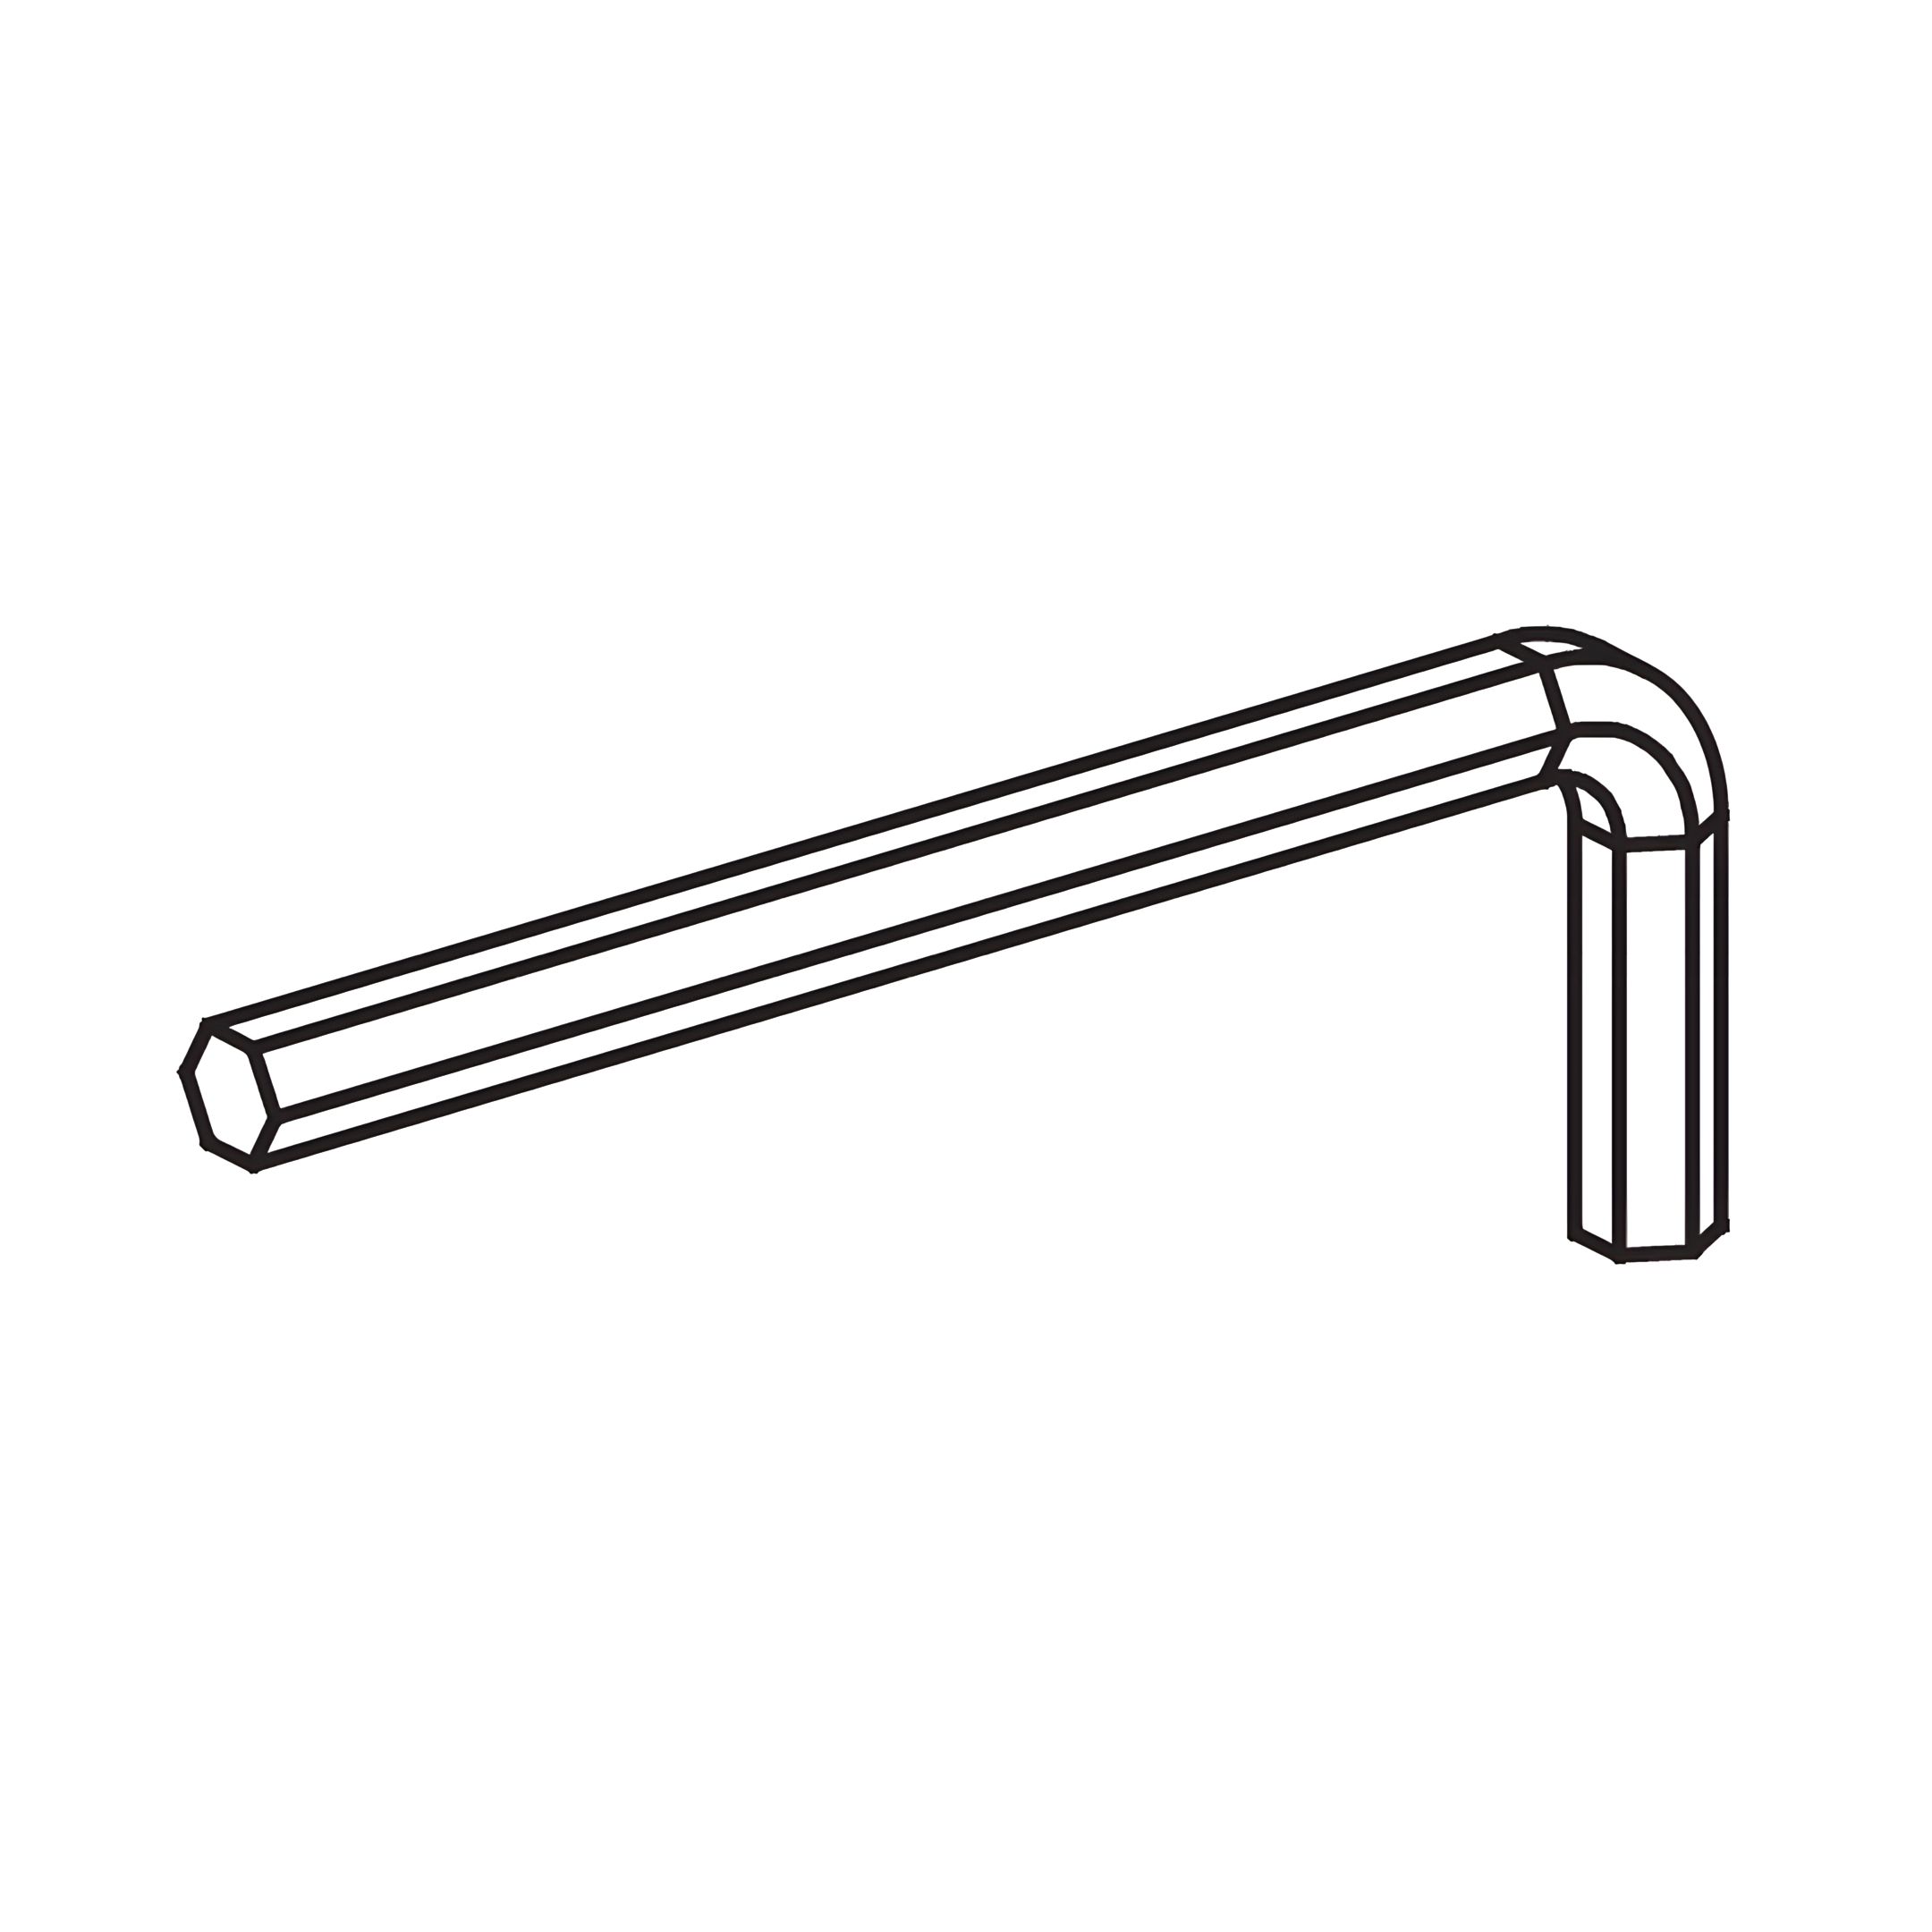
4. Tighten the bolts securely with the Allen Key (M).