time4sleepwww.time4sleep.co.uk
Instructions by time4sleepMaxistore 3 Door Wooden Storage Single Bed Frame
time4sleep

Maxistore 3 Door Wooden Storage Single Bed Frame

Maxistore 3 Door Wooden Storage Single Bed Frame
Before you start
Important - Please read these instructions fully before starting assemblyGlue safety - Take care when using glue, please follow the advise belowCare and maintenancePartsTools
Steps
1. Attach Side Rails to Headboard & Footboard2. Install the Doors and Back Panel3. Position and Secure Slats

No results

time4sleep
time4sleep / Maxistore 3 Door Wooden Storage Single Bed Frame
Maxistore 3 Door Wooden Storage Single Bed Frame
time4sleep

Instructions by

time4sleep

Maxistore 3 Door Wooden Storage Single Bed Frame

Assembly instructions for Maxistore 3 Door Wooden Storage Single Bed Frame by Time4Sleep.

Product Information

Maxistore 3 Door White Wooden Storage Single Bed Frame

Maxistore 3 Door White Wooden Storage Single Bed Frame

Fun and function is the name of the game with our Maxistore bed.   With this bed there is no need to compromise. Stylish New England looks blended with a dash of colour – shown here in all white. This bed is all about simplicity and practicality the slide store doors can be easily opened to reveal a large capacity storage area.  There are 3 doors on one side of the bed and you can choose which side these sit on when you assemble the bed frame. The bed is constructed from a rubberwood frame and engineered timber and is finished in a high quality painted finish, with traditional wooden slats. This versatile design will work well in any design scheme and would be perfect guest rooms and teenage bedrooms alike. Simply one of the best value wooden storage beds available on the market today!
View product (opens in new tab)
SKU
Maxistore30White1, Maxistore30Black1, Maxistore30Blue1, Maxistore30Pink1
Single
Width98.5 cm
Length195.5 cm
Height100 cm
Head End Height100 cm
Foot End Height57 cm

Important - Please read these instructions fully before starting assembly

  • Check you have all the components and tools listed.
  • Remove all fittings from the plastic bags and separate them into their groups.
  • Keep children and animals away from the work area, small parts could choke if swallowed.
  • Make sure you have enough space to lay out the parts before starting.
  • Do not stand or put weight on the product, this could cause damage.
  • Assemble the item as close to its final position (in the same room) as possible.
  • Assemble on a soft level surface to avoid damaging the unit or your floor.
  • Parts of the assembly will be easier with 2 people.
  • We do not recommend the use of power drills/drivers for inserting screws as this could damage the unit. Only use hand screwdrivers.
  • Dispose all packaging carefully and responsibly.
  • The packaging and contents can be a choking hazard, therefore keep them away from small children and babies as they may choke on them.

Glue safety - Take care when using glue, please follow the advise below

  • Skin contact: Remove contamination by washing with soap and water. This procedure should also be followed prior to eating and drinking.
  • Eye contact: Rinse immediately with clean water for 15 minutes and seek medical advise.
  • If swallowed: Seek medical advise immediately.

Care and maintenance

  • Only clean using a damp cloth and mild detergent, do not use bleach or abrasive cleaners
  • From time to time check that there are no loose screws on this unit.
  • This product should not be discarded with household waste. Take to your local authority waste disposal center.

Tools

A - JCBB Bolt (M8 x 16MM)
B - JCBC W Screw (M7 x 32MM)
C - Allen Key (M4 x 60mm)
D - Allen Key (M5 x 60mm)
Crosshead Screw Driver

Parts

Headboard
Headboard
Footboard
Footboard
Top Side Rail
Top Side Rail
Bottom Side Rail
Bottom Side Rail
Back Panel
Back Panel
Wooden Slat
Wooden Slat
Doors
Doors

1. Attach Side Rails to Headboard & Footboard

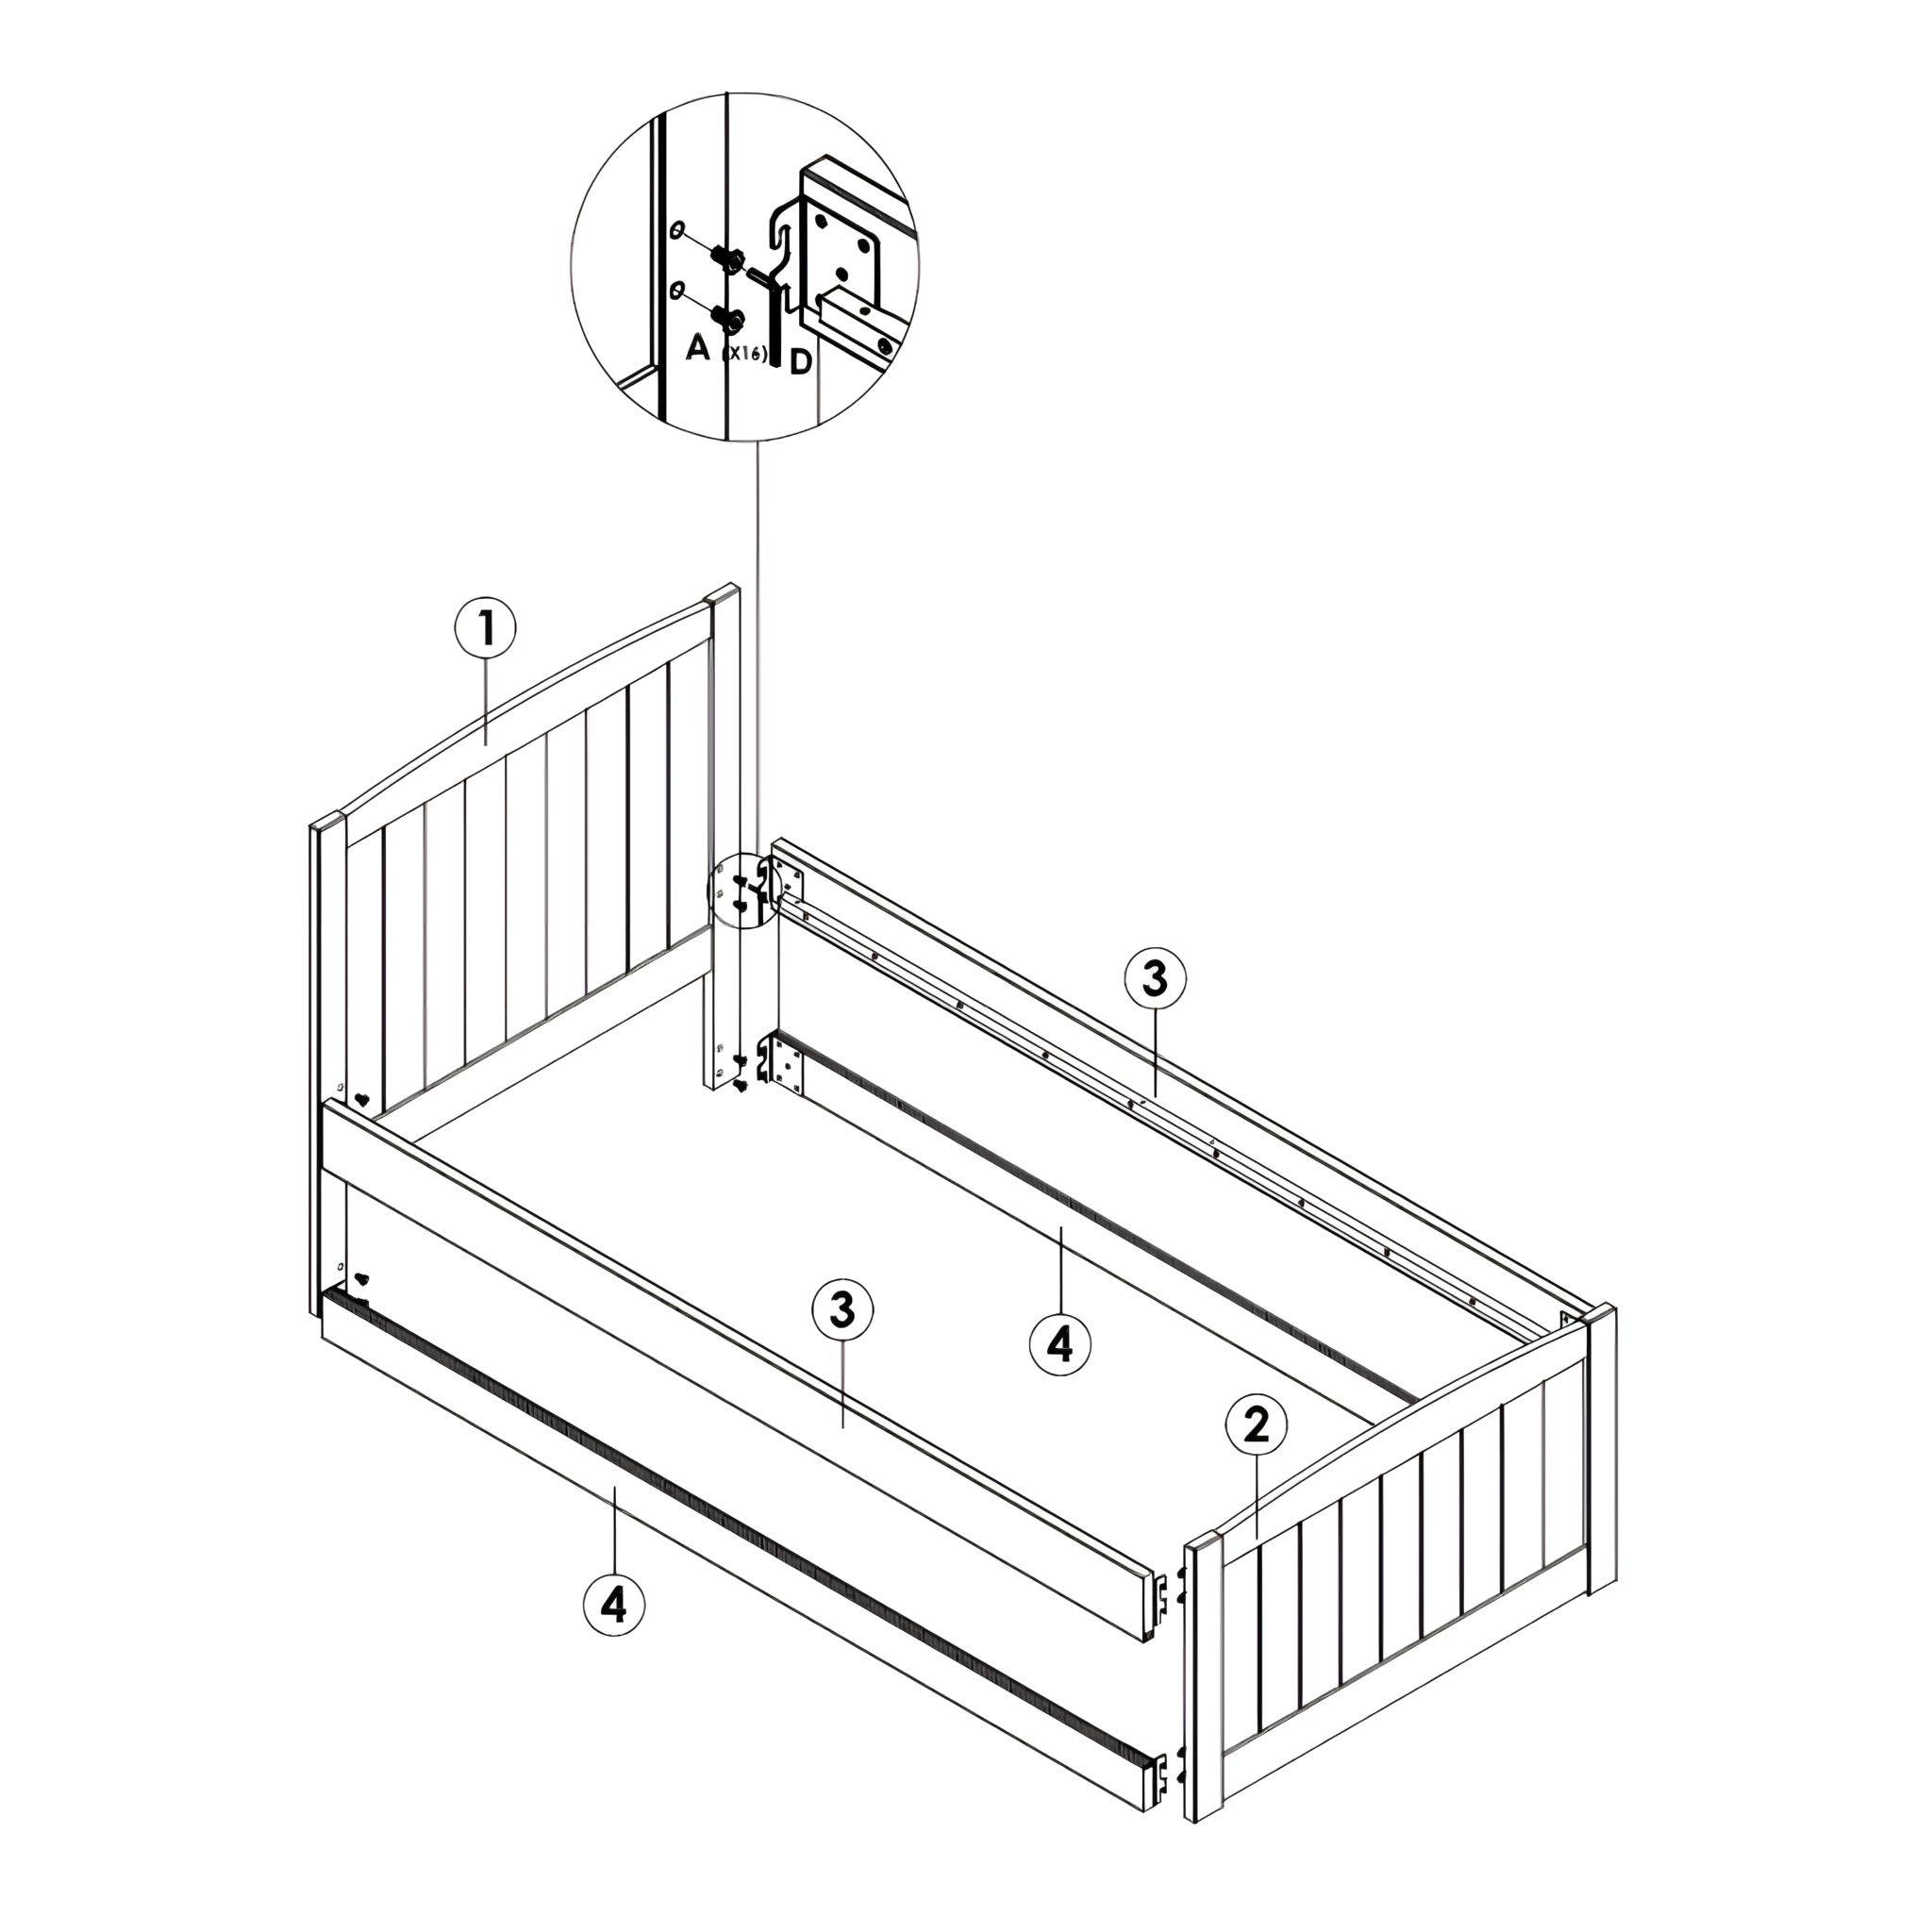
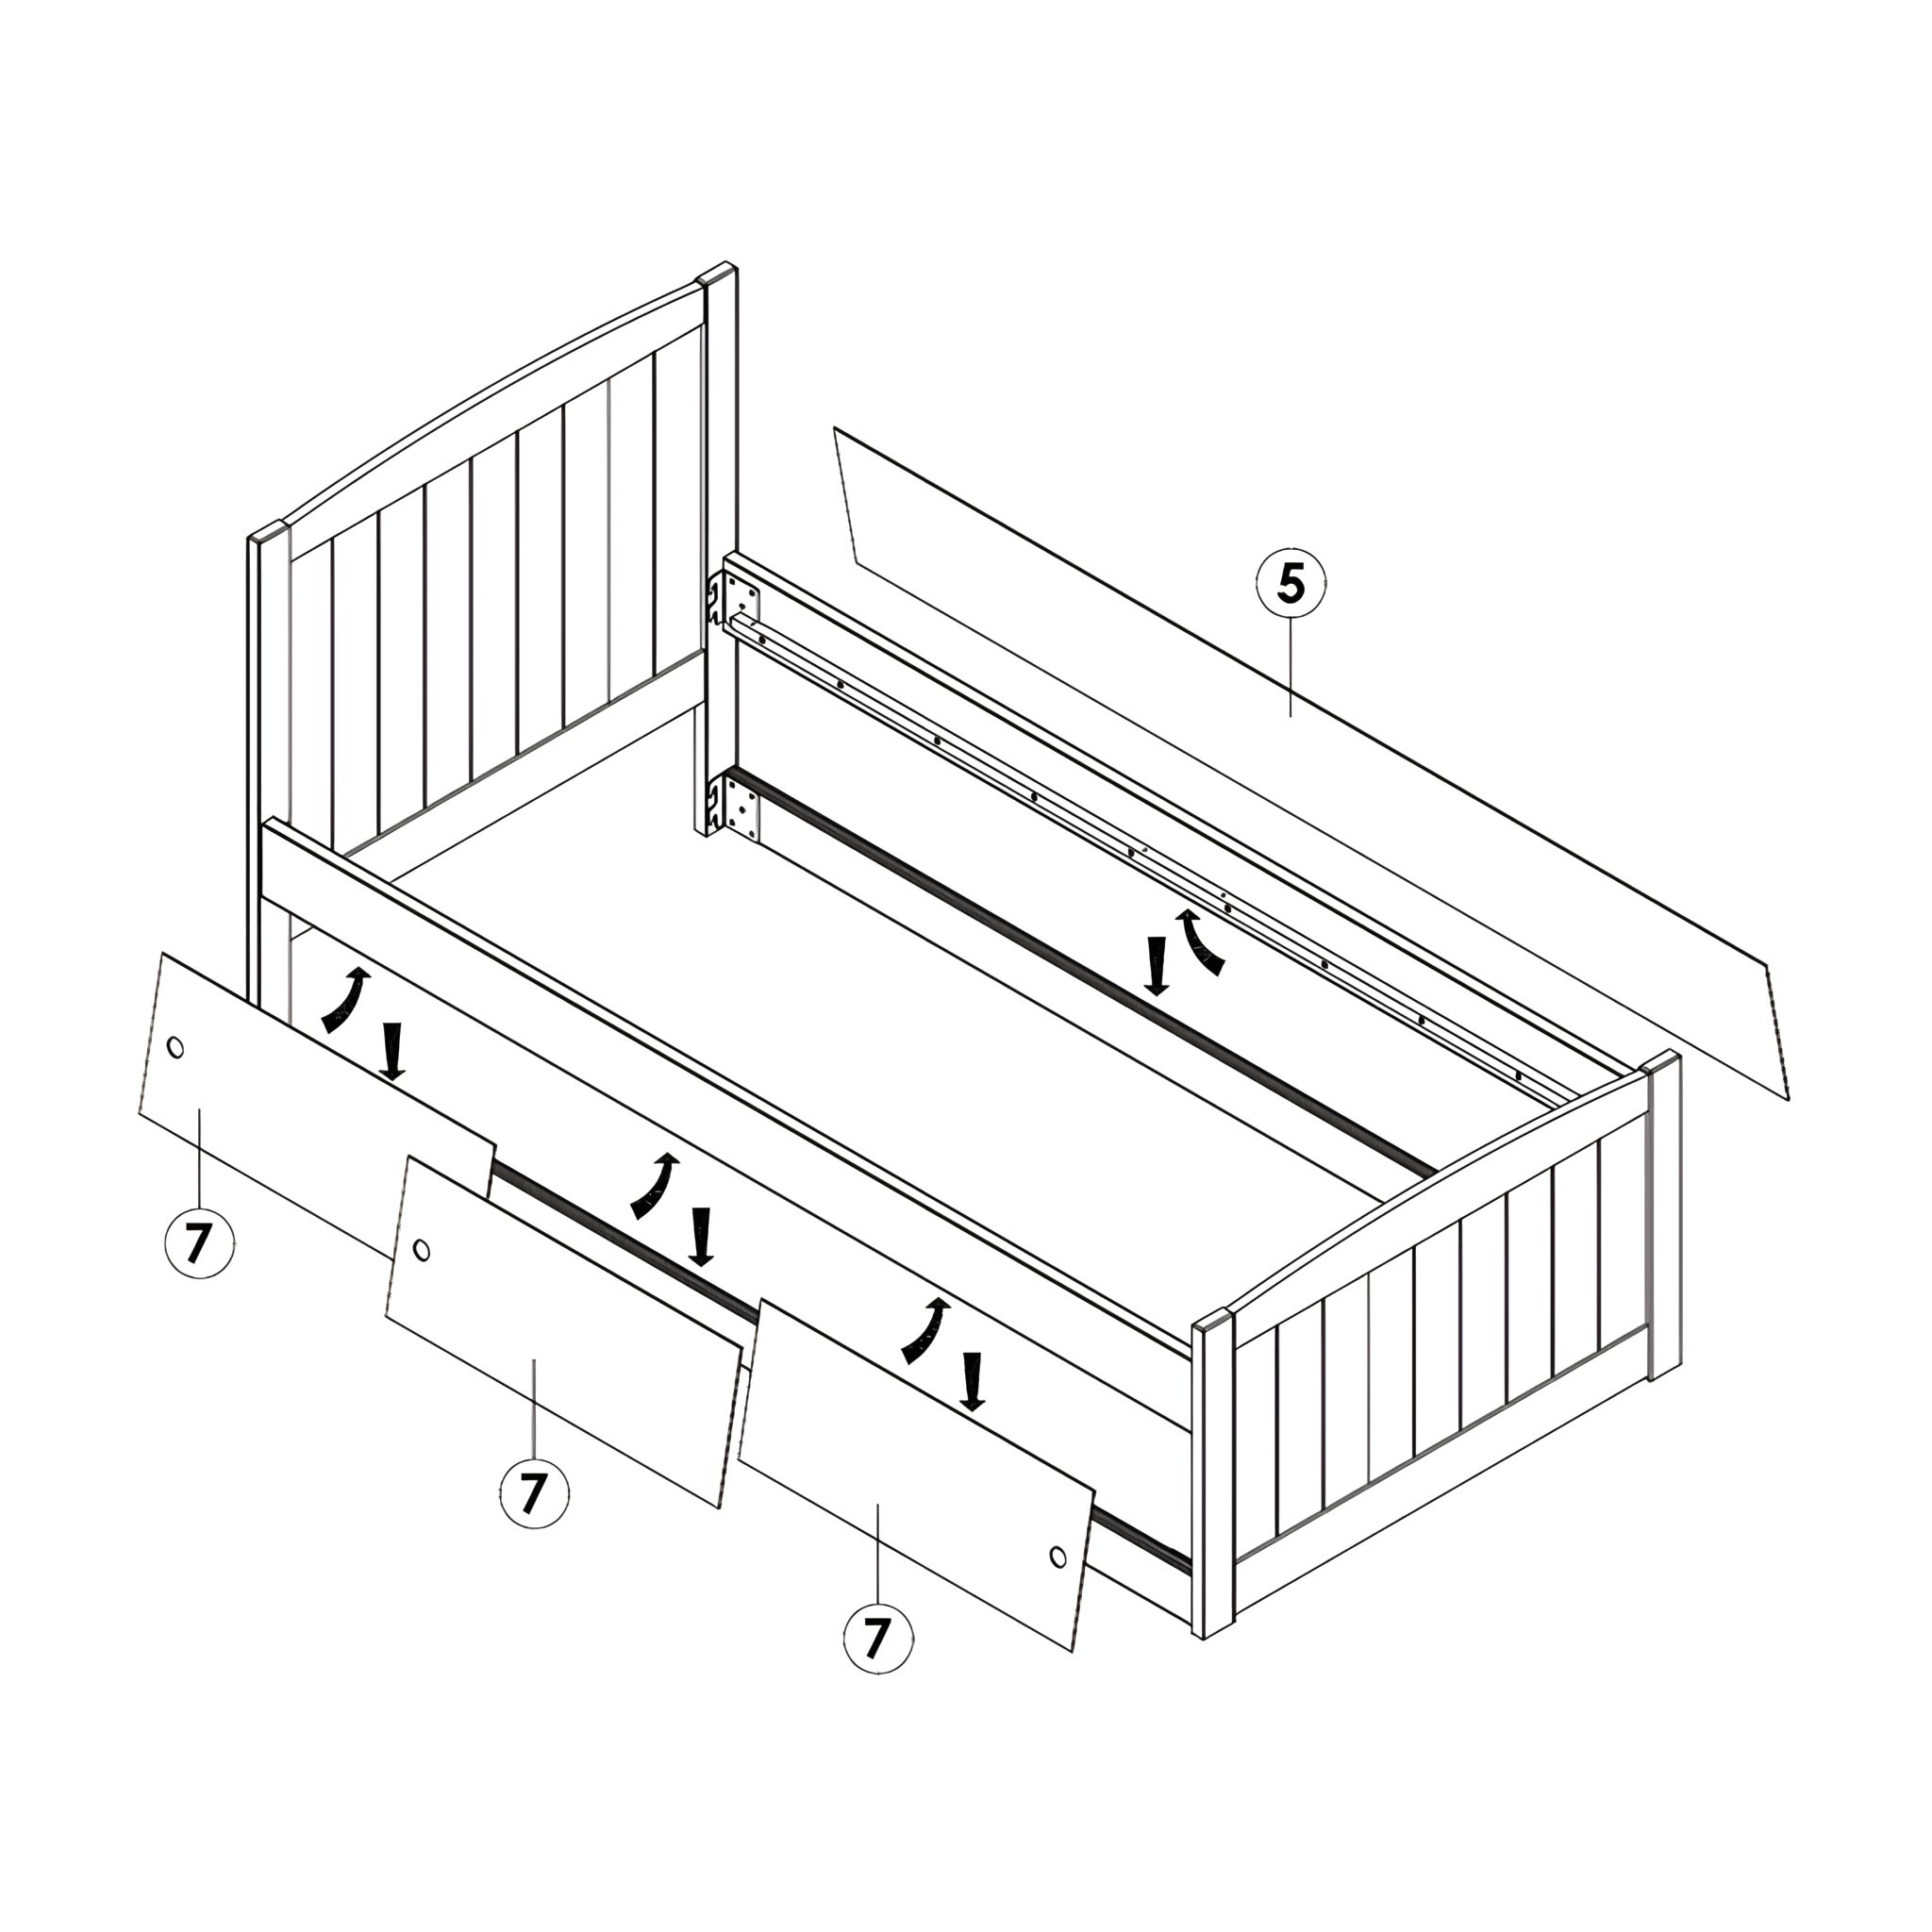
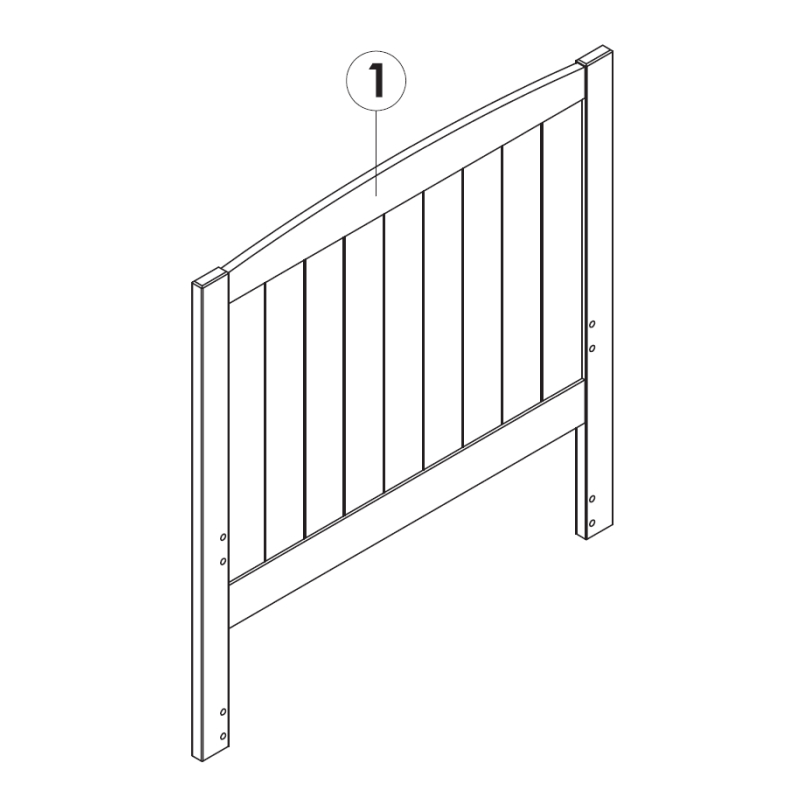
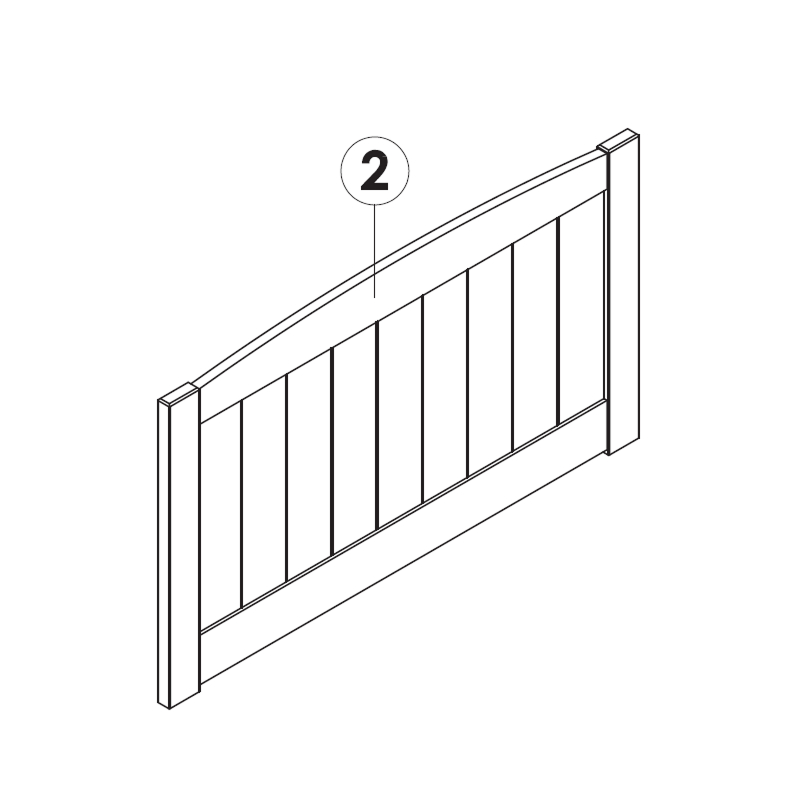
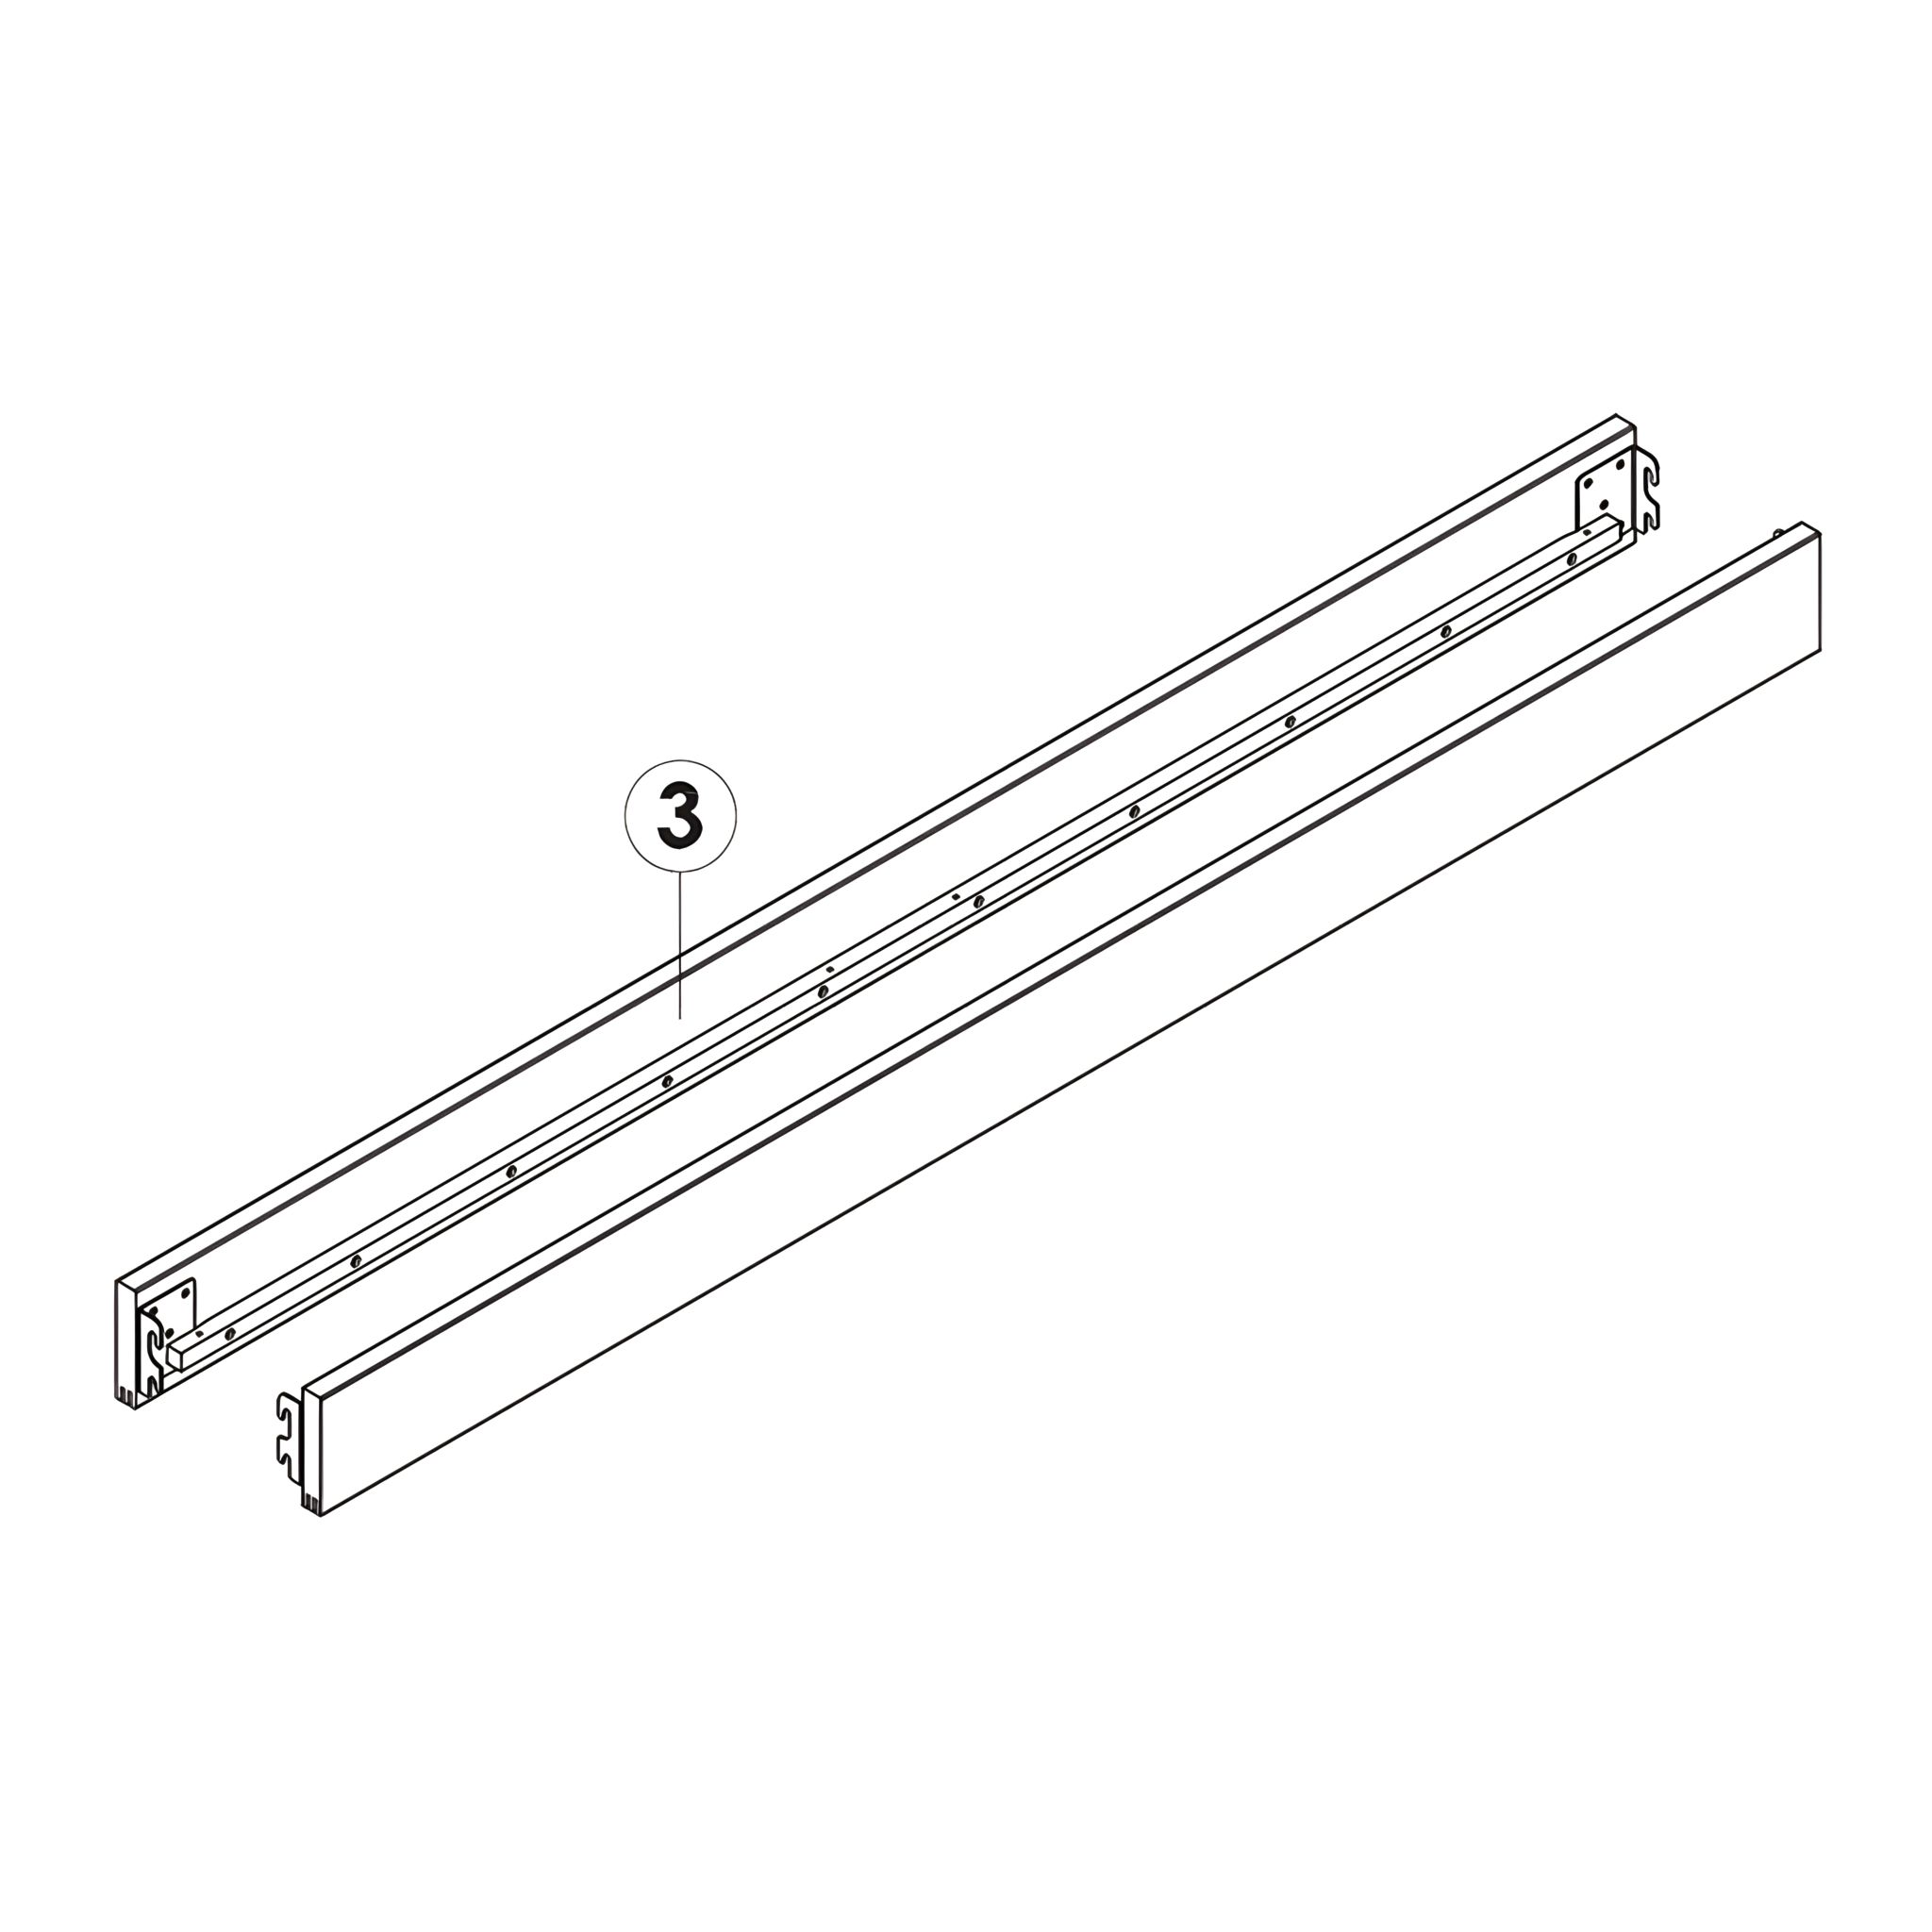
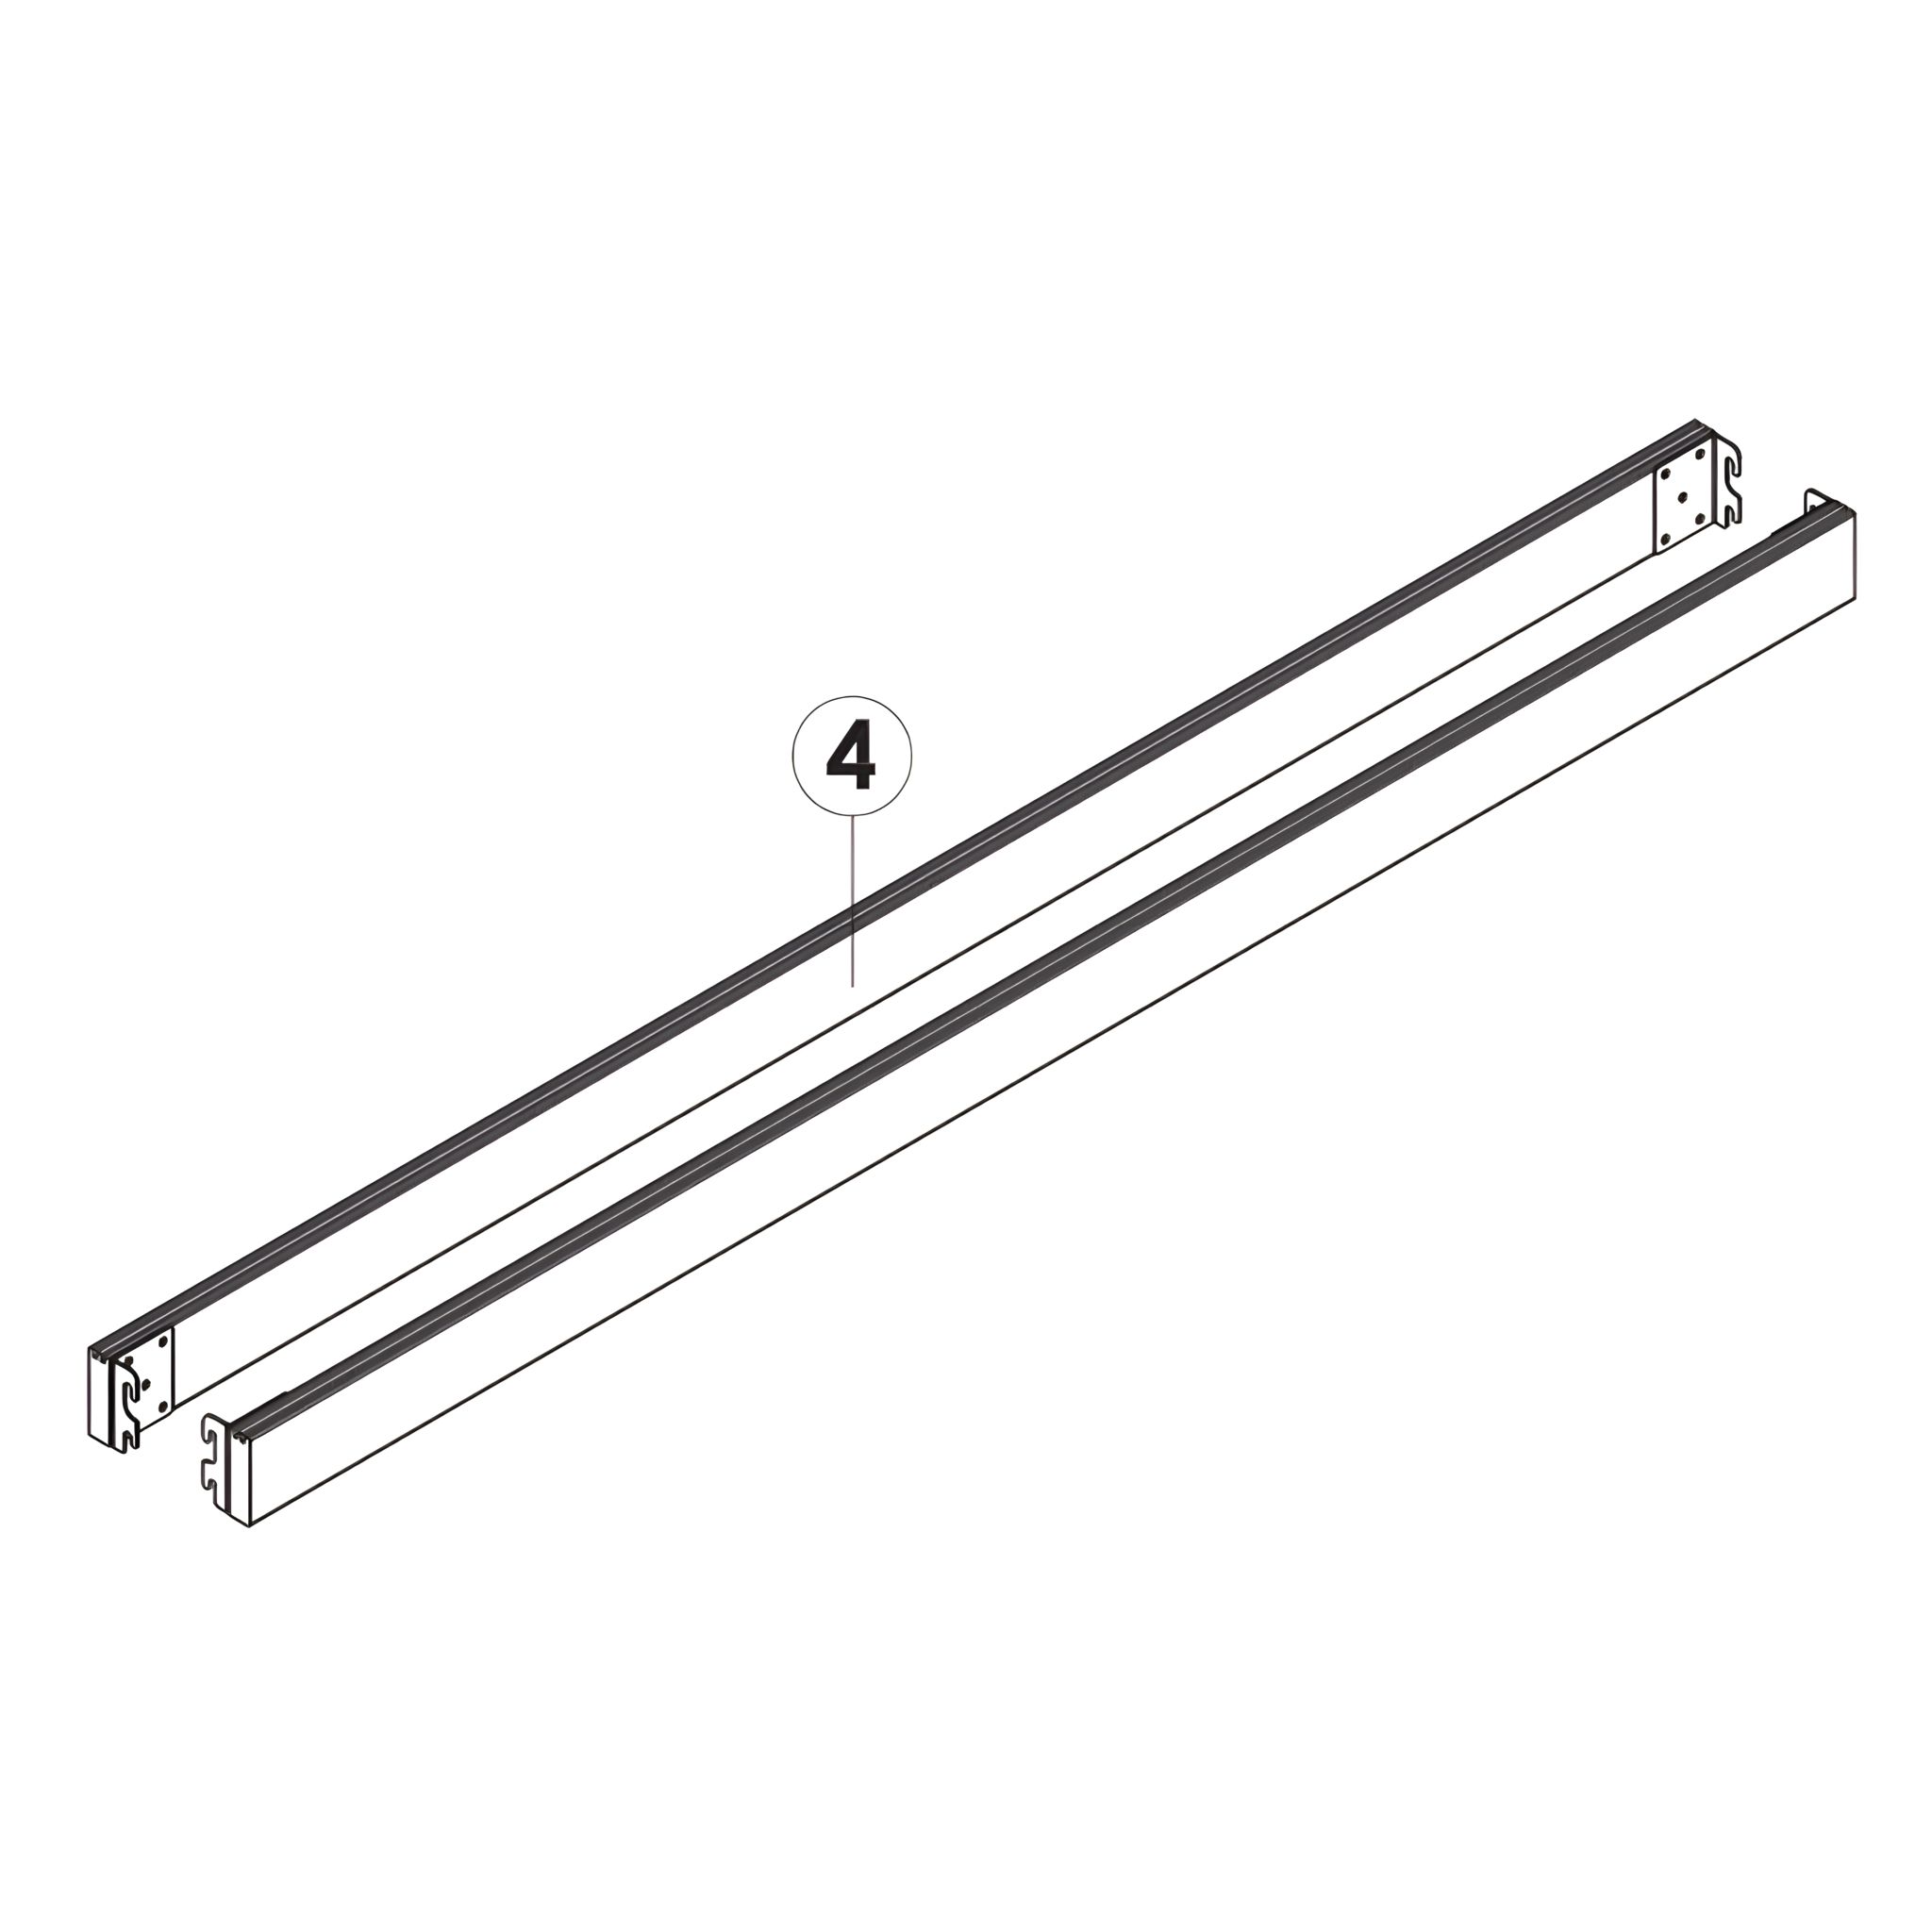
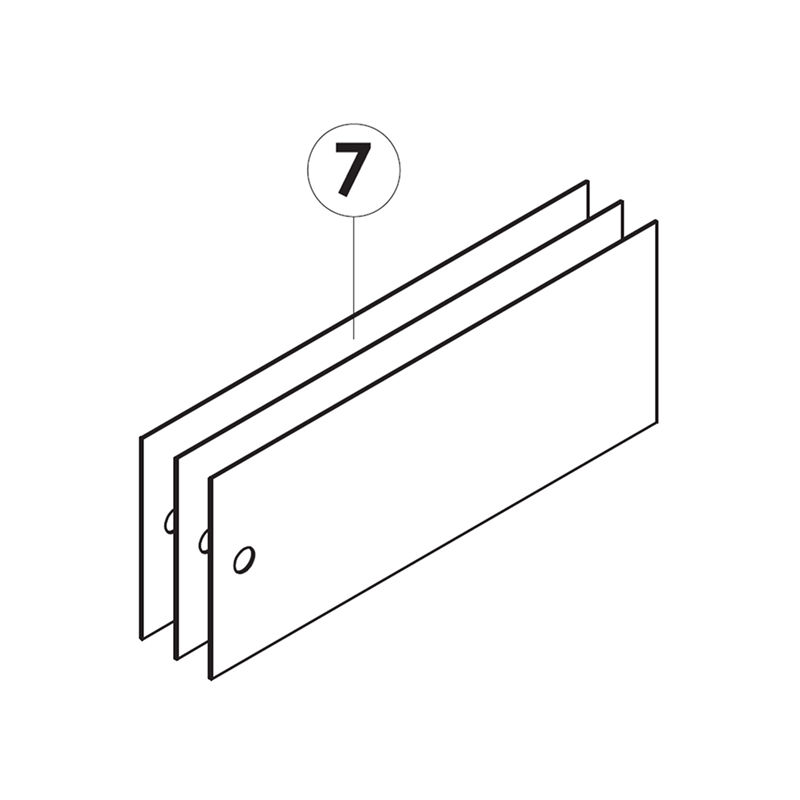
1. Position the headboard (1) and footboard (2) upright. Align the side rails (3) with the pre-drilled holes on the headboard and footboard.
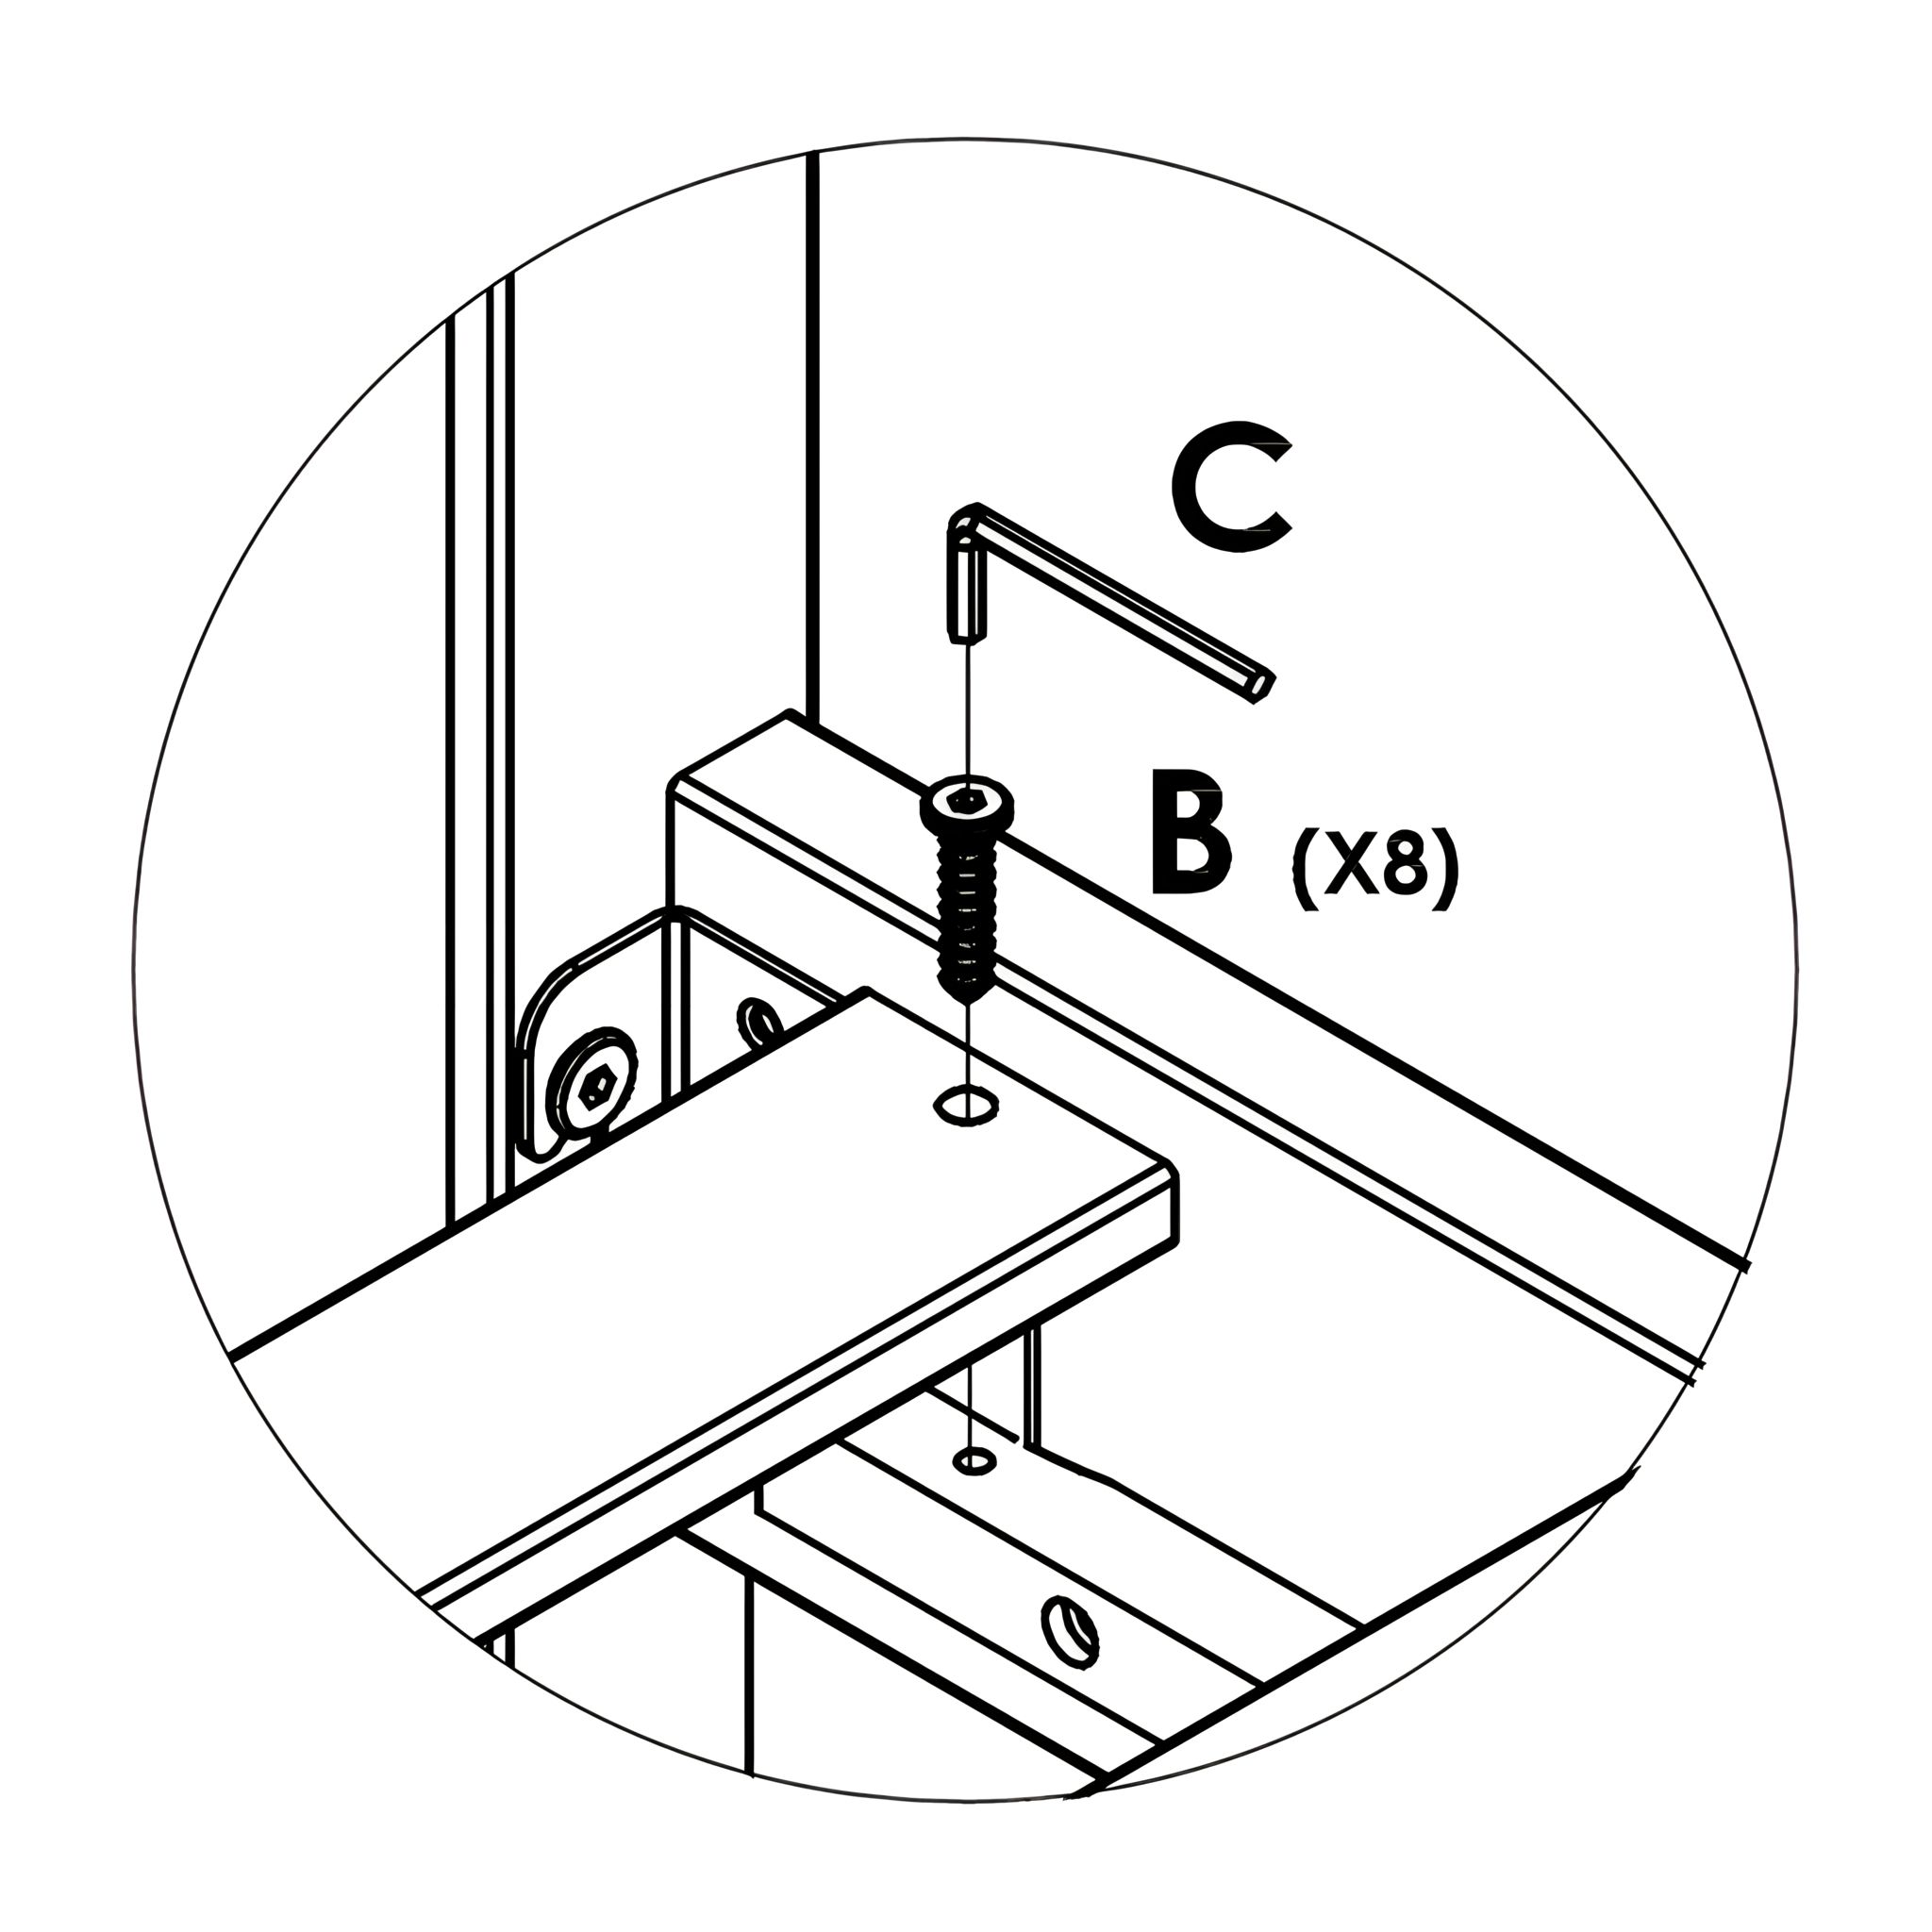
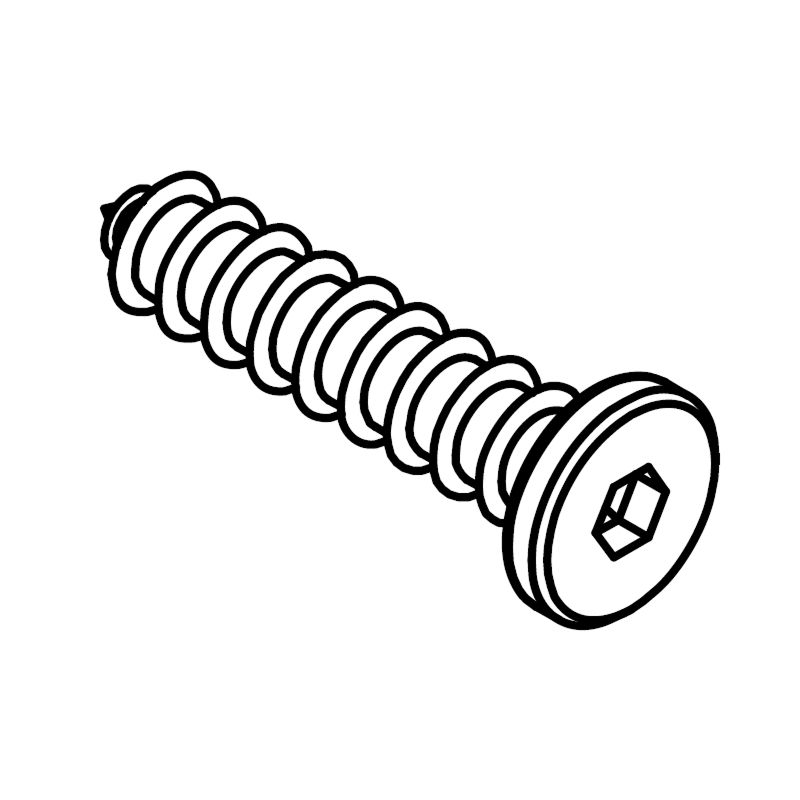
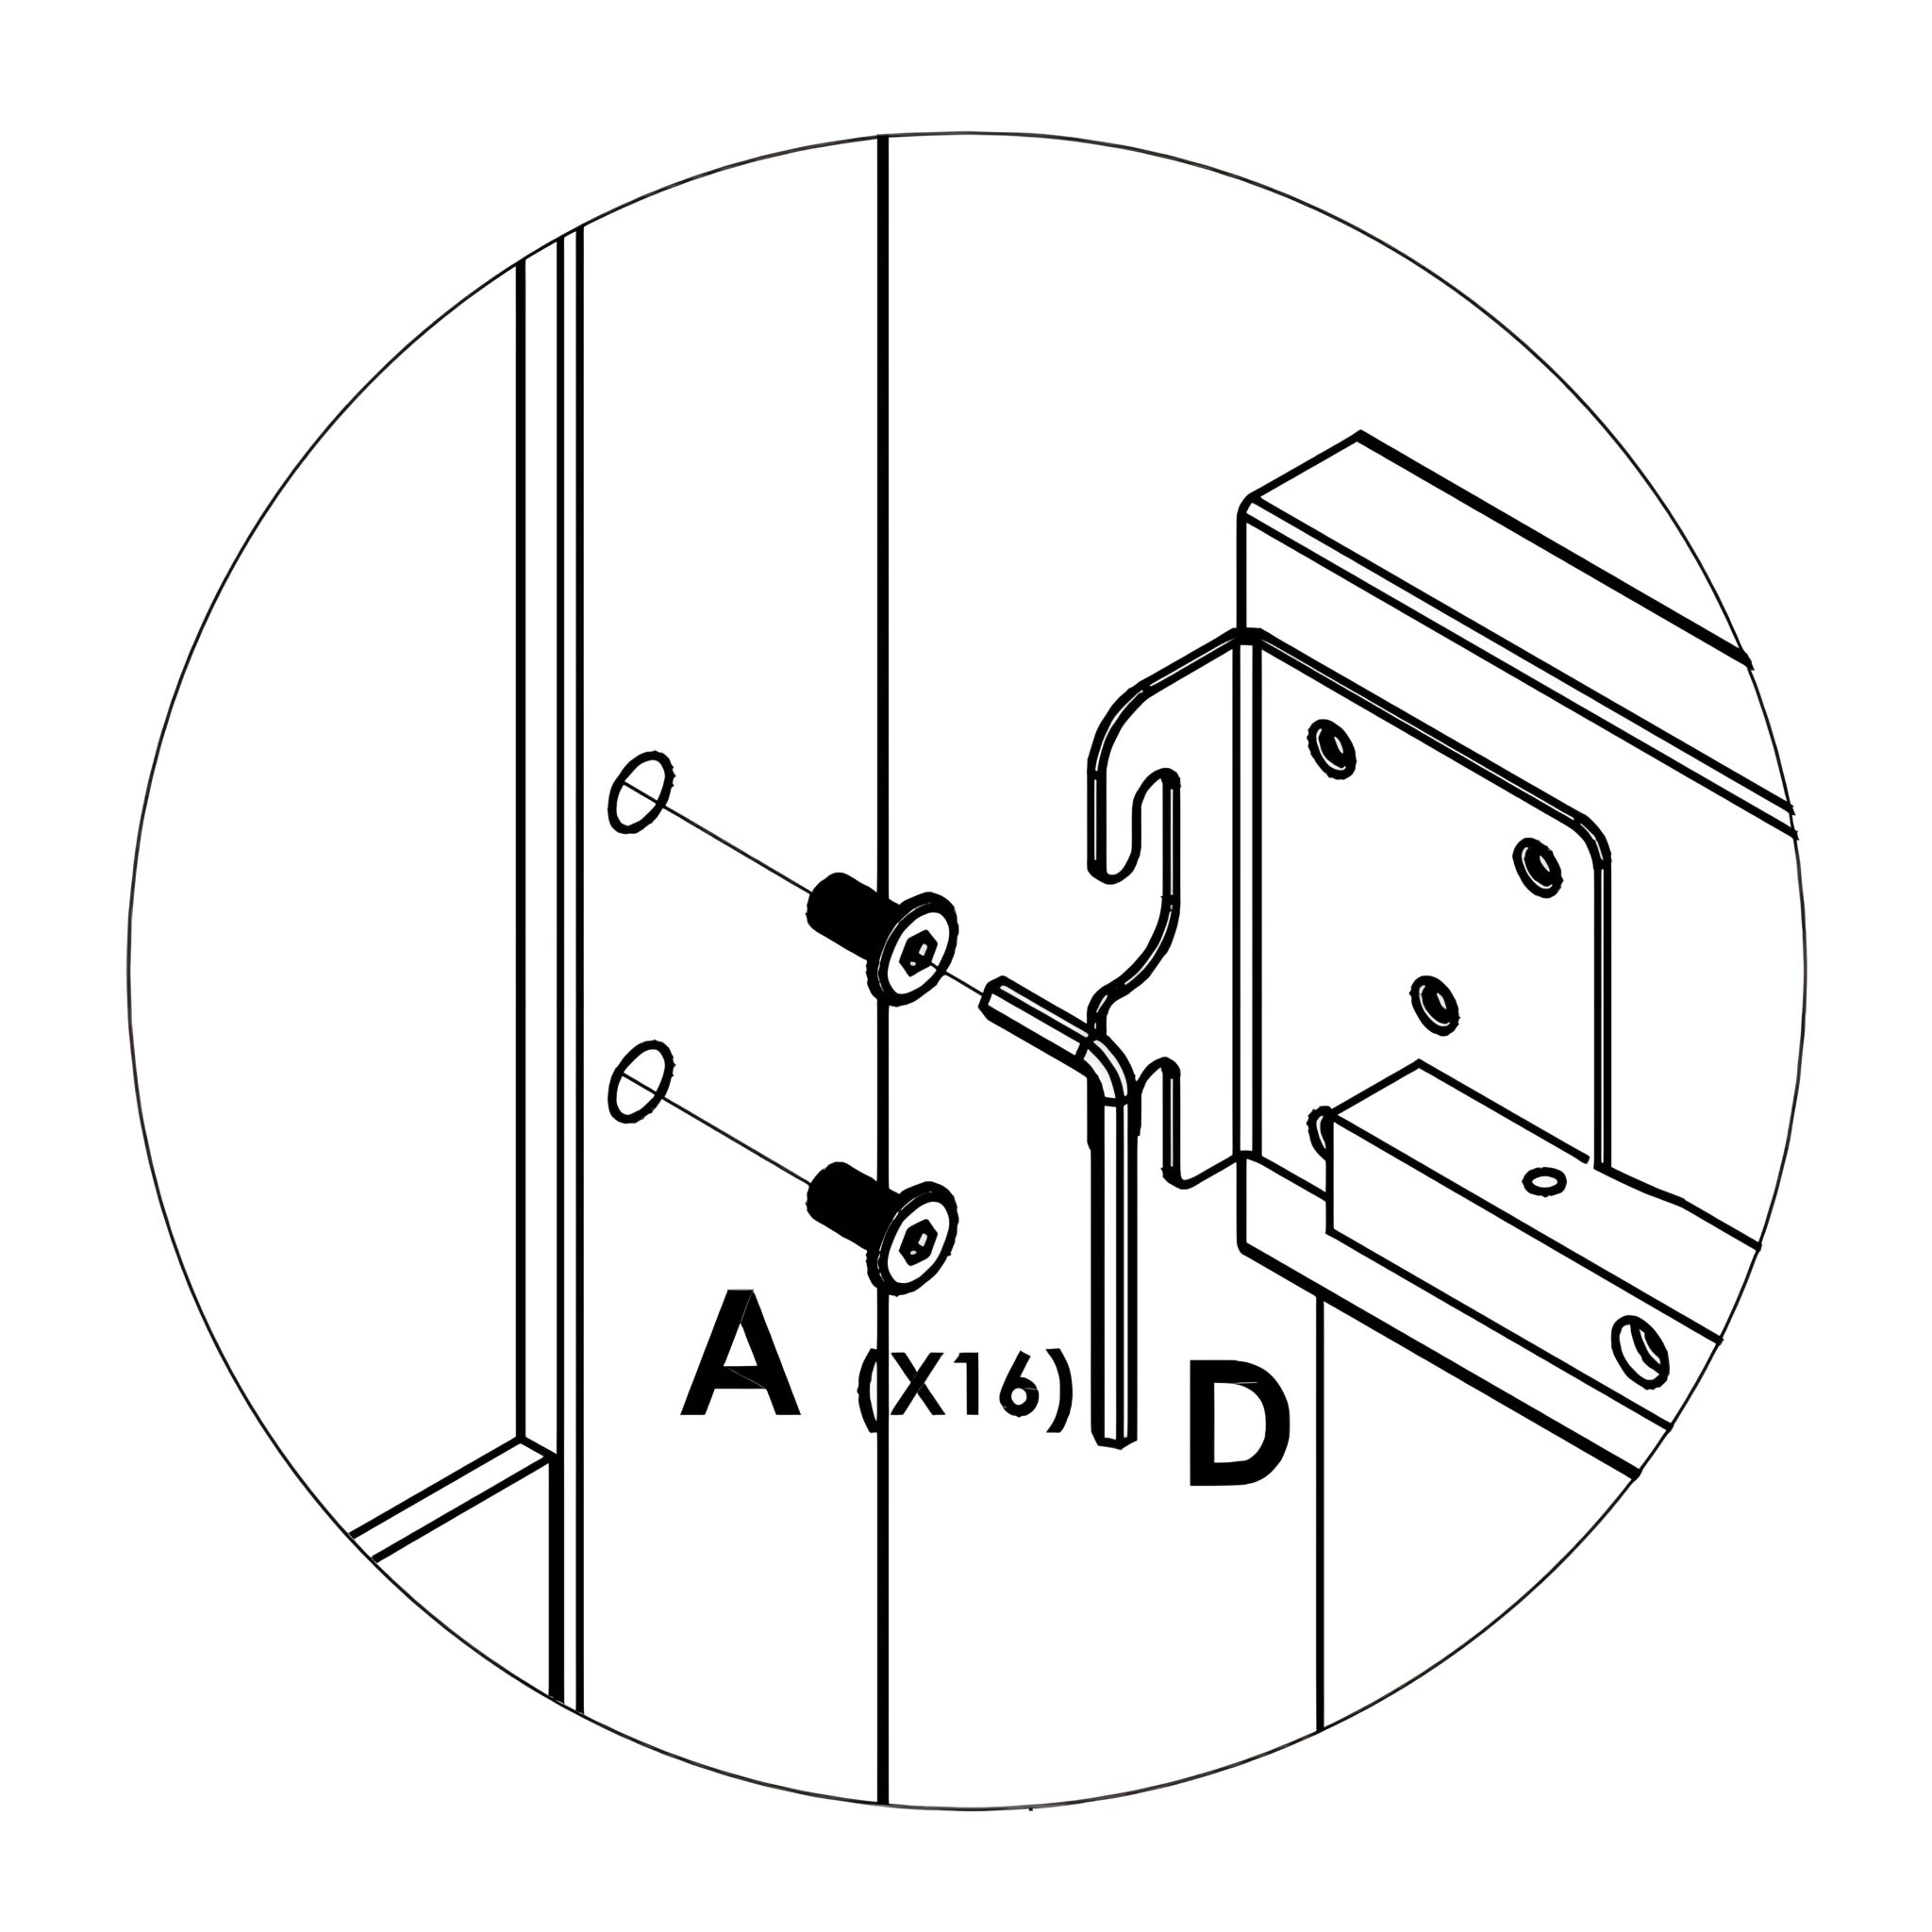
2. Insert JCBB Bolts (A) into the designated holes on the Headboard and Footboard, but DO NOT fully tighten them yet.
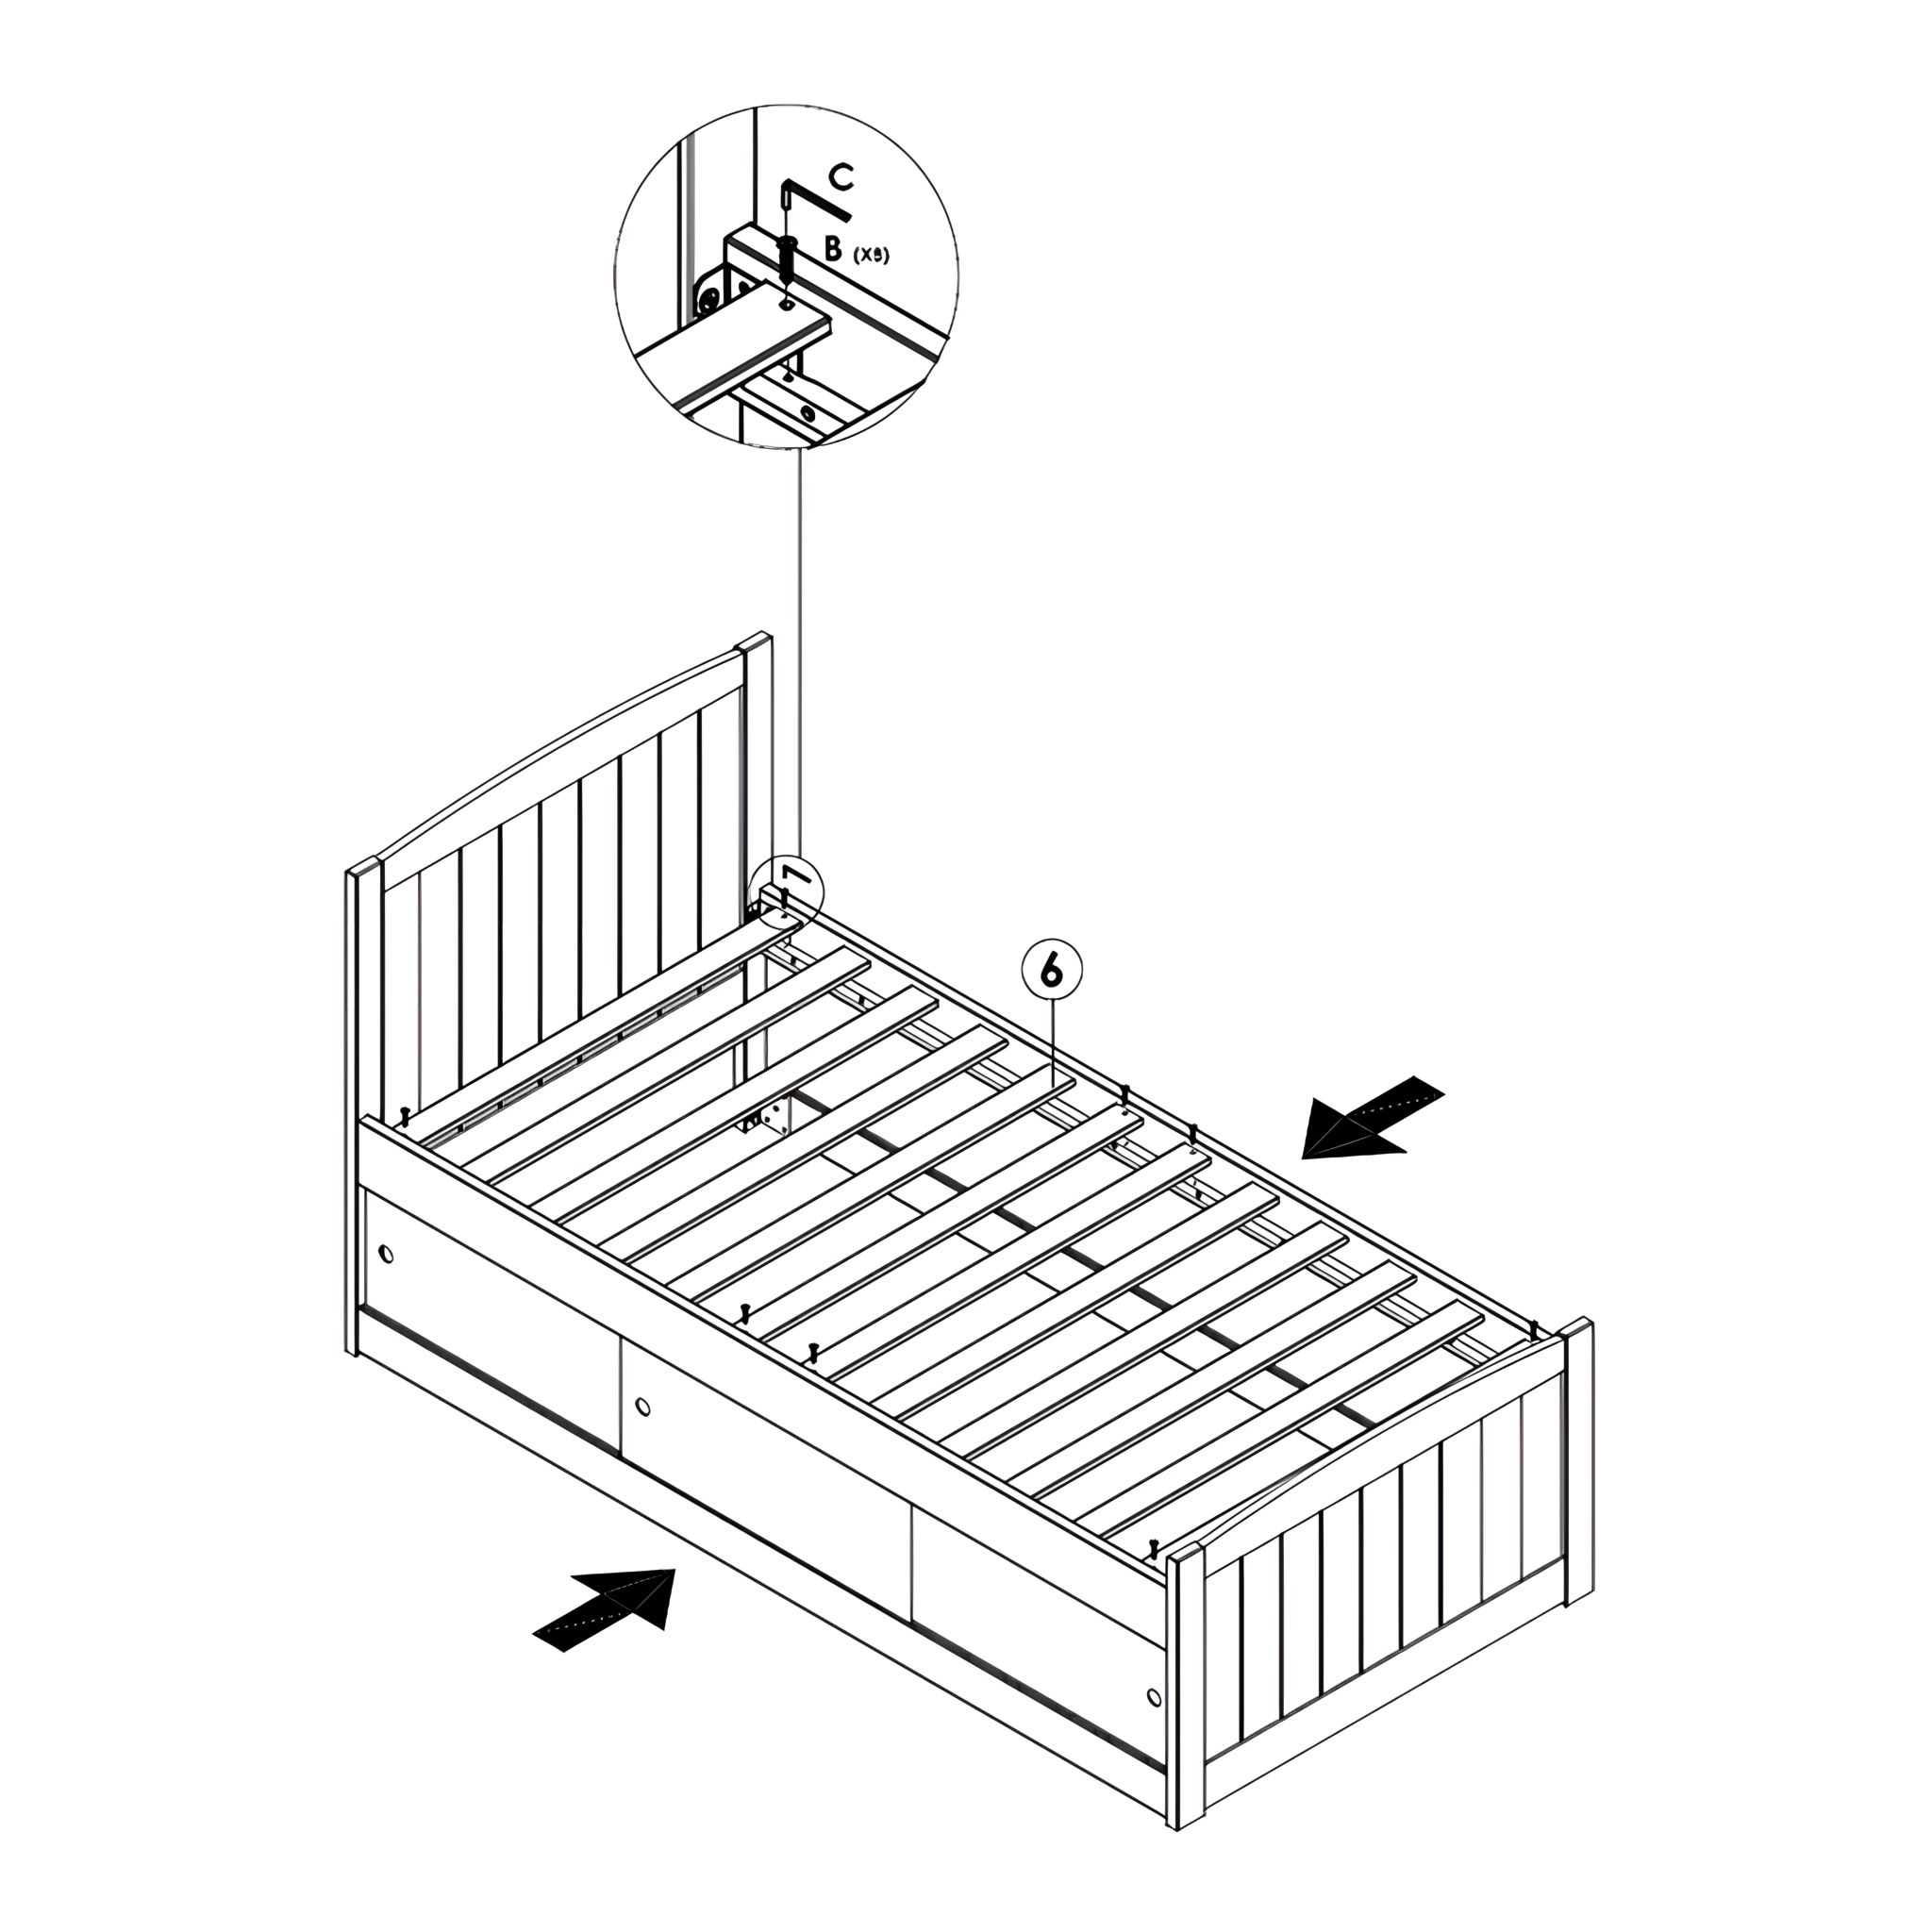
3. Align the Side Rails with the bolts and slot them into place.
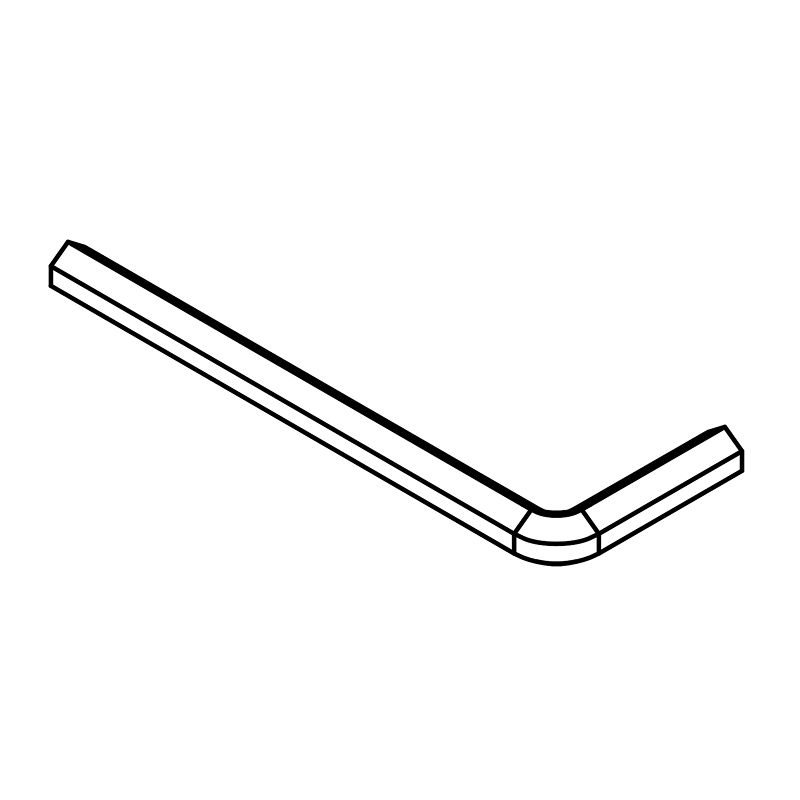
4. Once the rails are properly positioned, use the Allen Key (D) to fully tighten the bolts.

2. Install the Doors and Back Panel

1. Install the Doors (7) (left & right) by inserting in the Top Side Rail (3) inside track groove on an angle. Straighten the doors and lower into the Bottom Side Rail (4) inside track groove.
2. After that insert the door (center) inserting in the outside track groove with the same way. 
3. Install the Back Panel (5) by inserting the top front track groove on an angle. Straighten the Back Panel and lower into the bottom front track groove

3. Position and Secure Slats

1. Lay out the Wooden Slats evenly across the bed frame, ensuring they align with the Side Rails.
2. Using the JCBC W Screws (B), fasten the eight slats with pre-drilled holes to the side rails.
3. Use the Allen Key (C) to tighten the screws, making sure the slats are firmly attached.

time4sleep
time4sleep (opens in new tab)Terms (opens in new tab)Privacy (opens in new tab)