Assembly instructions for Montpellier Winged Rattan Oak Bed Frame by Time4Sleep
Product Information
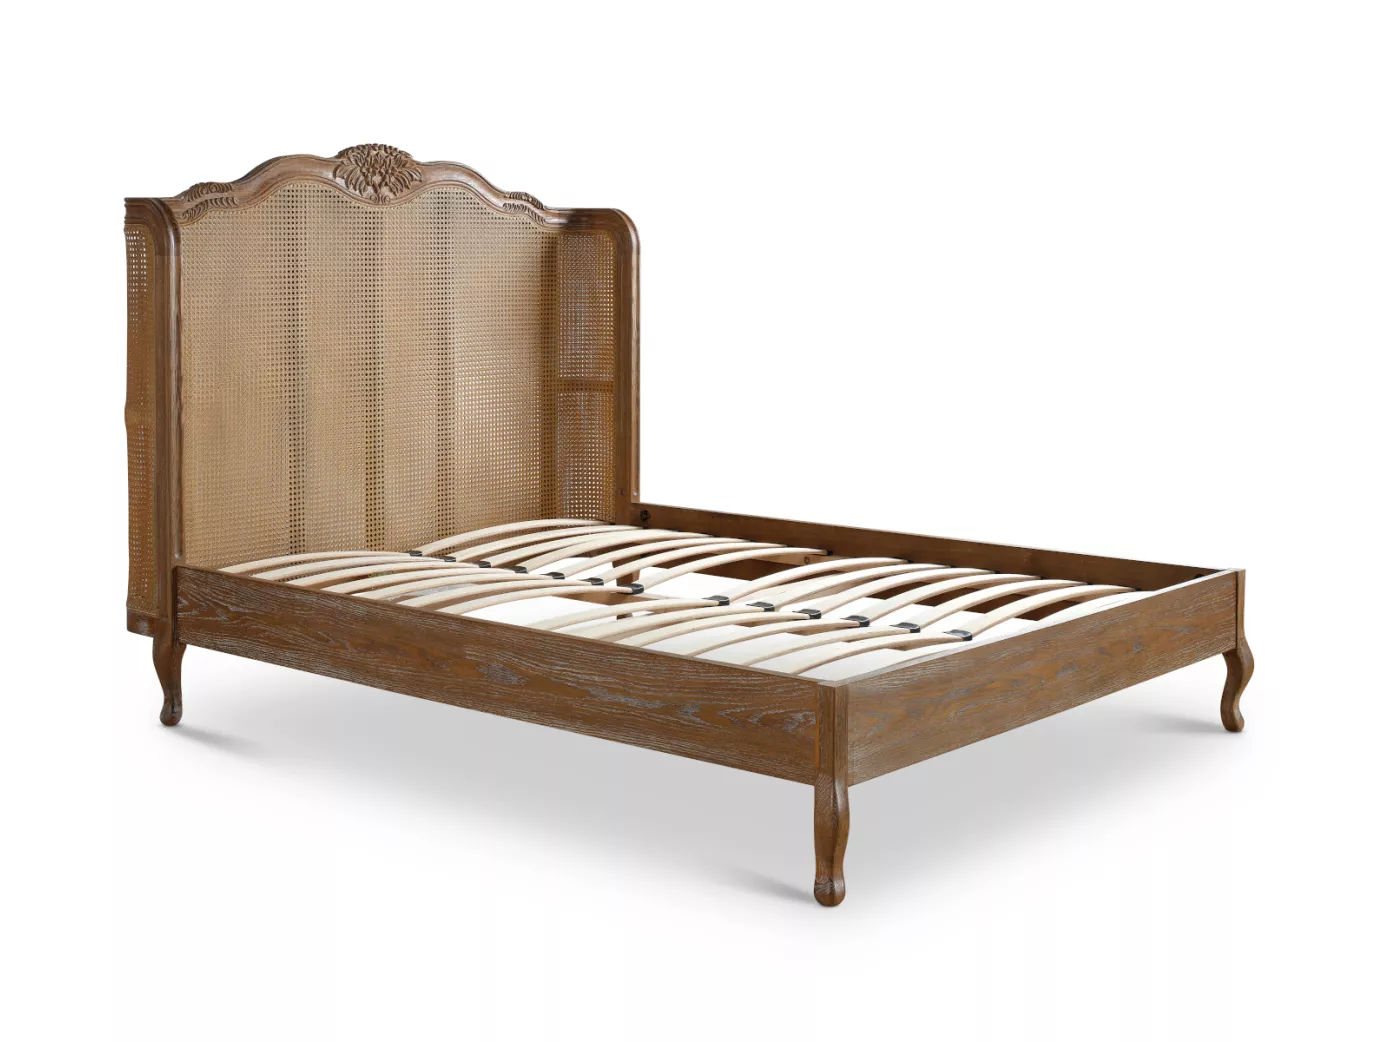
Montpellier Winged Rattan Oak Bed Frame
Indulge in the charm of this French inspired oak rattan bed frame.
Crafted with exquisite detail, this rustic bed frame features carved details that elevate its timeless appeal. The generously proportioned double layered winged back rattan headboard is sure to make an impressive statement in your bedroom whilst creating an authentic French antique feel.
Made from solid oak and engineered timber, the bed highlights the natural beauty of the wood through its purposely rustic finish. Organic knots, cracks, grains, and other unique characteristics shine through, celebrating the raw elegance of this timeless statement bed.
Inspired by the effortless charm of French country homes, this bed embodies pared-back romantic styling. Its rustic wood finish adds a cozy warmth, making it a perfect fit for both fresh, airy white bedrooms and classic, refined French-style interiors.
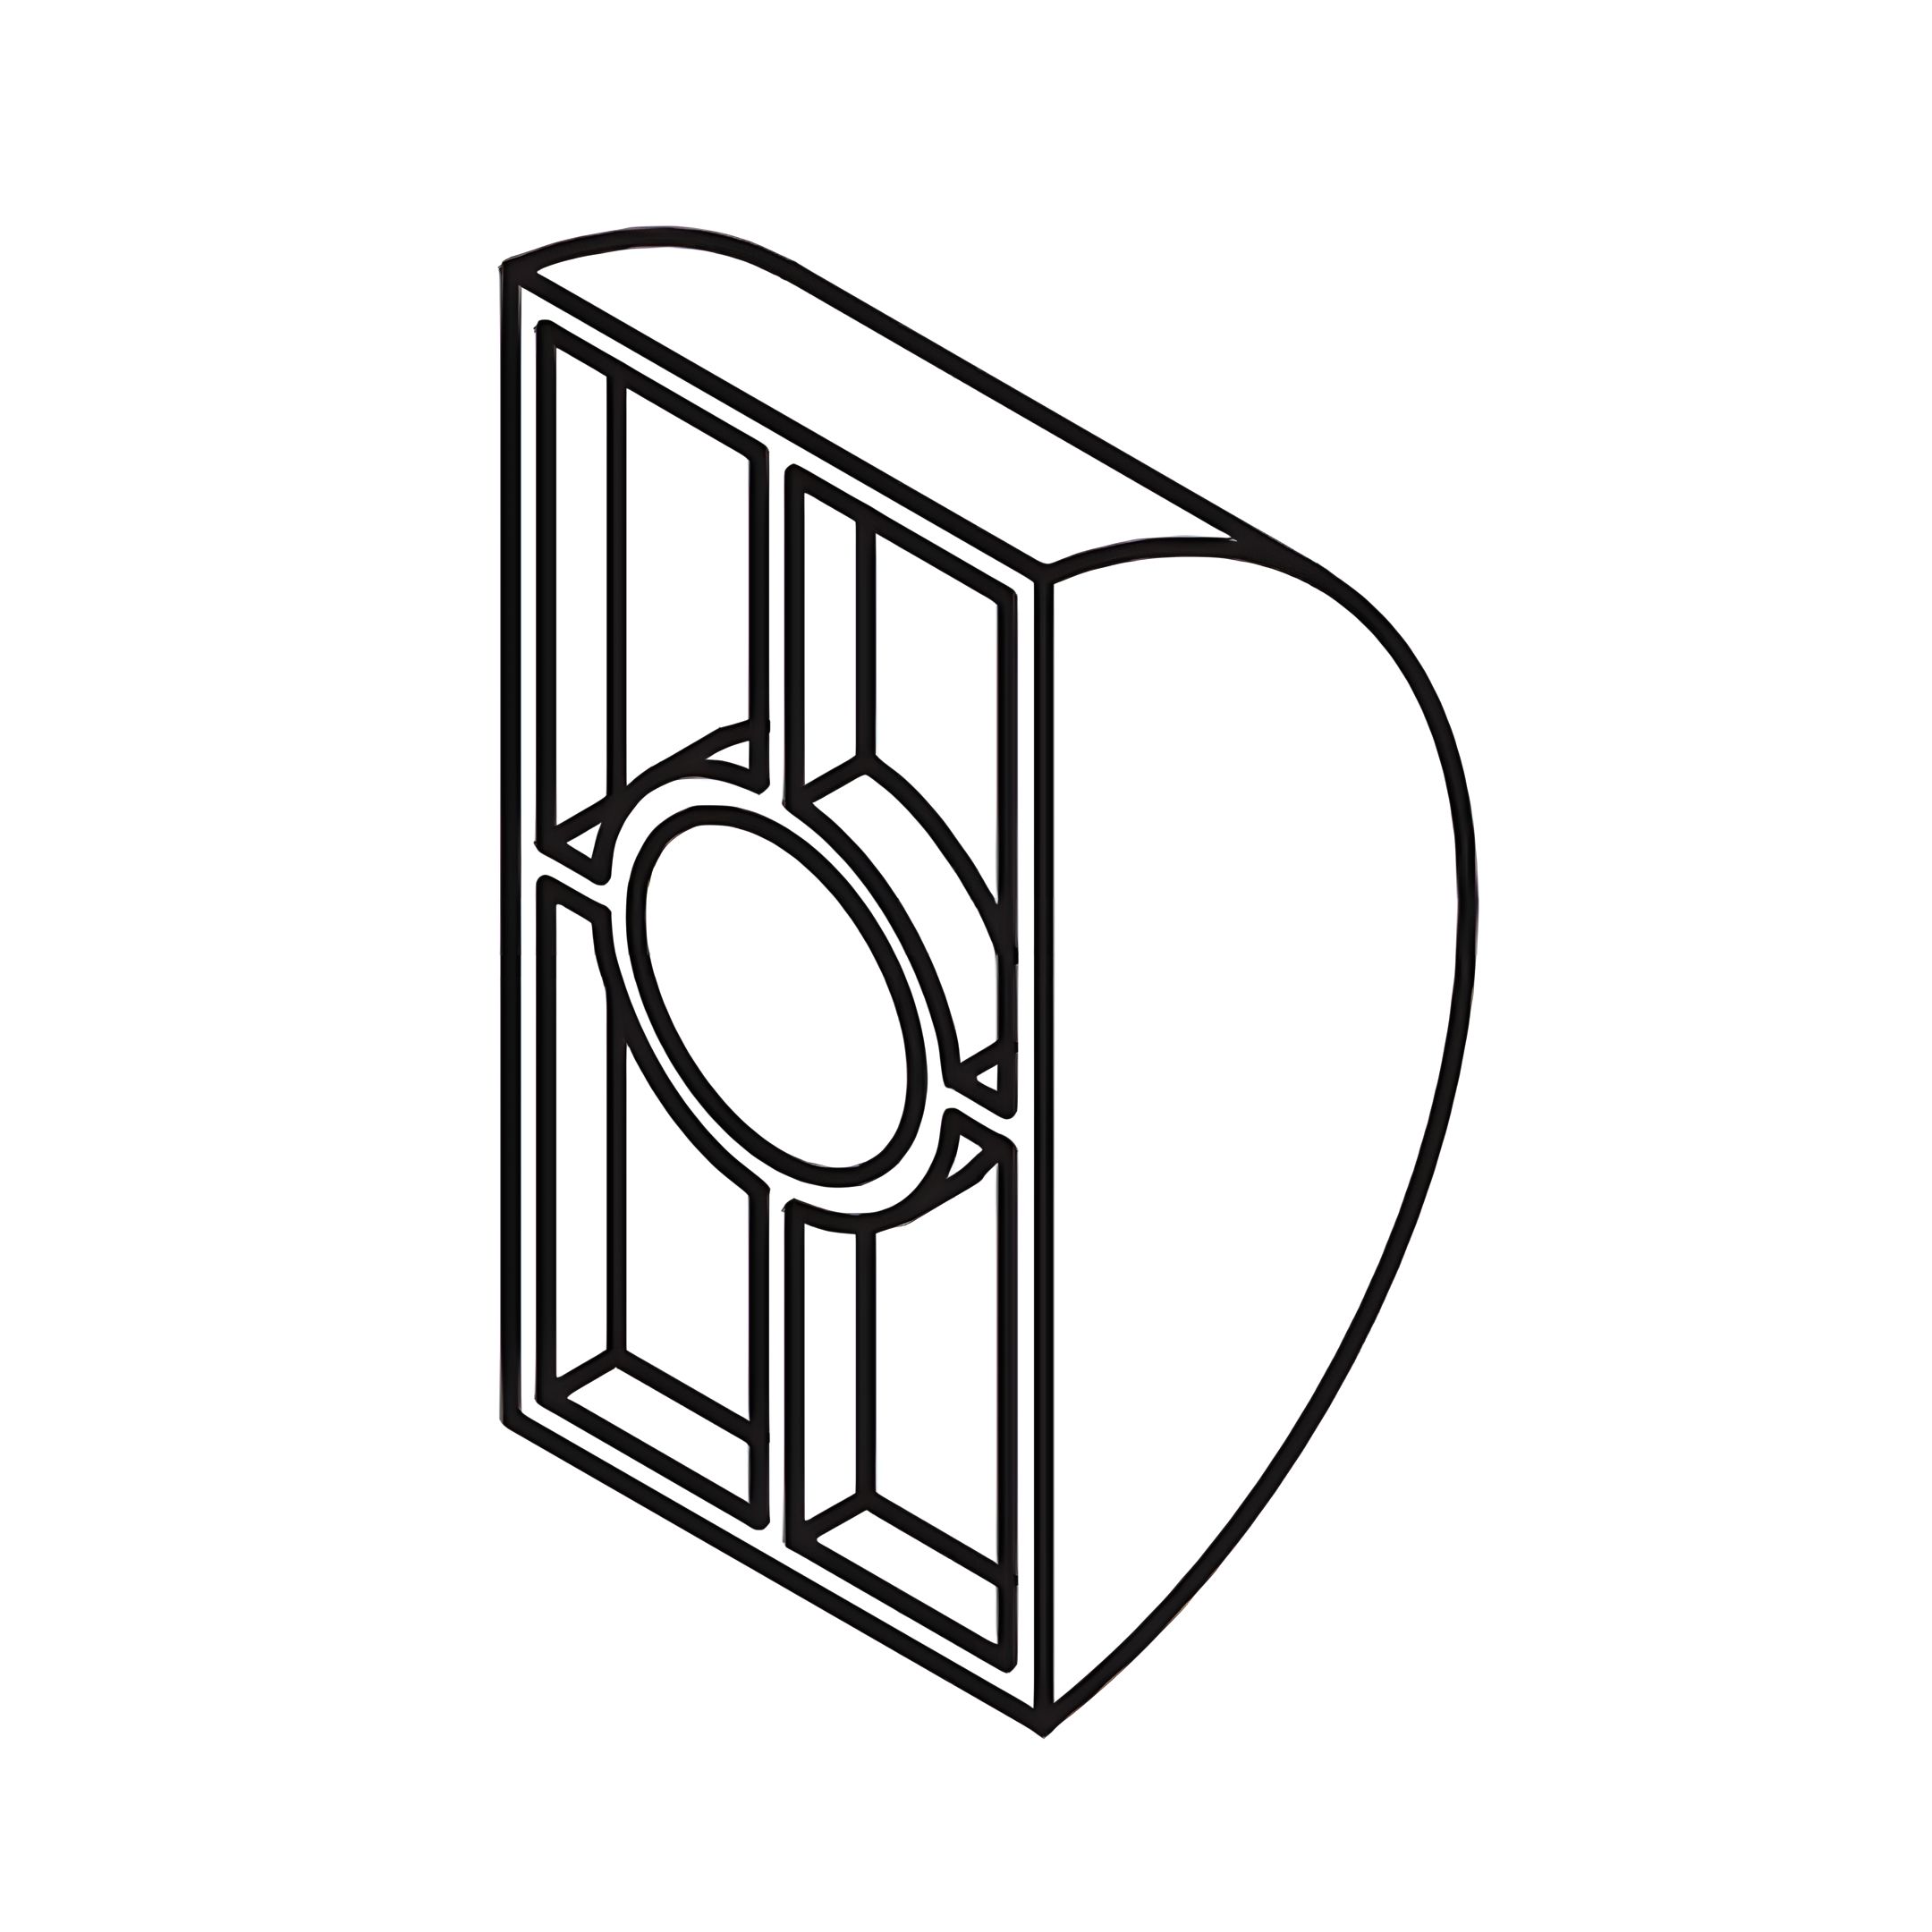
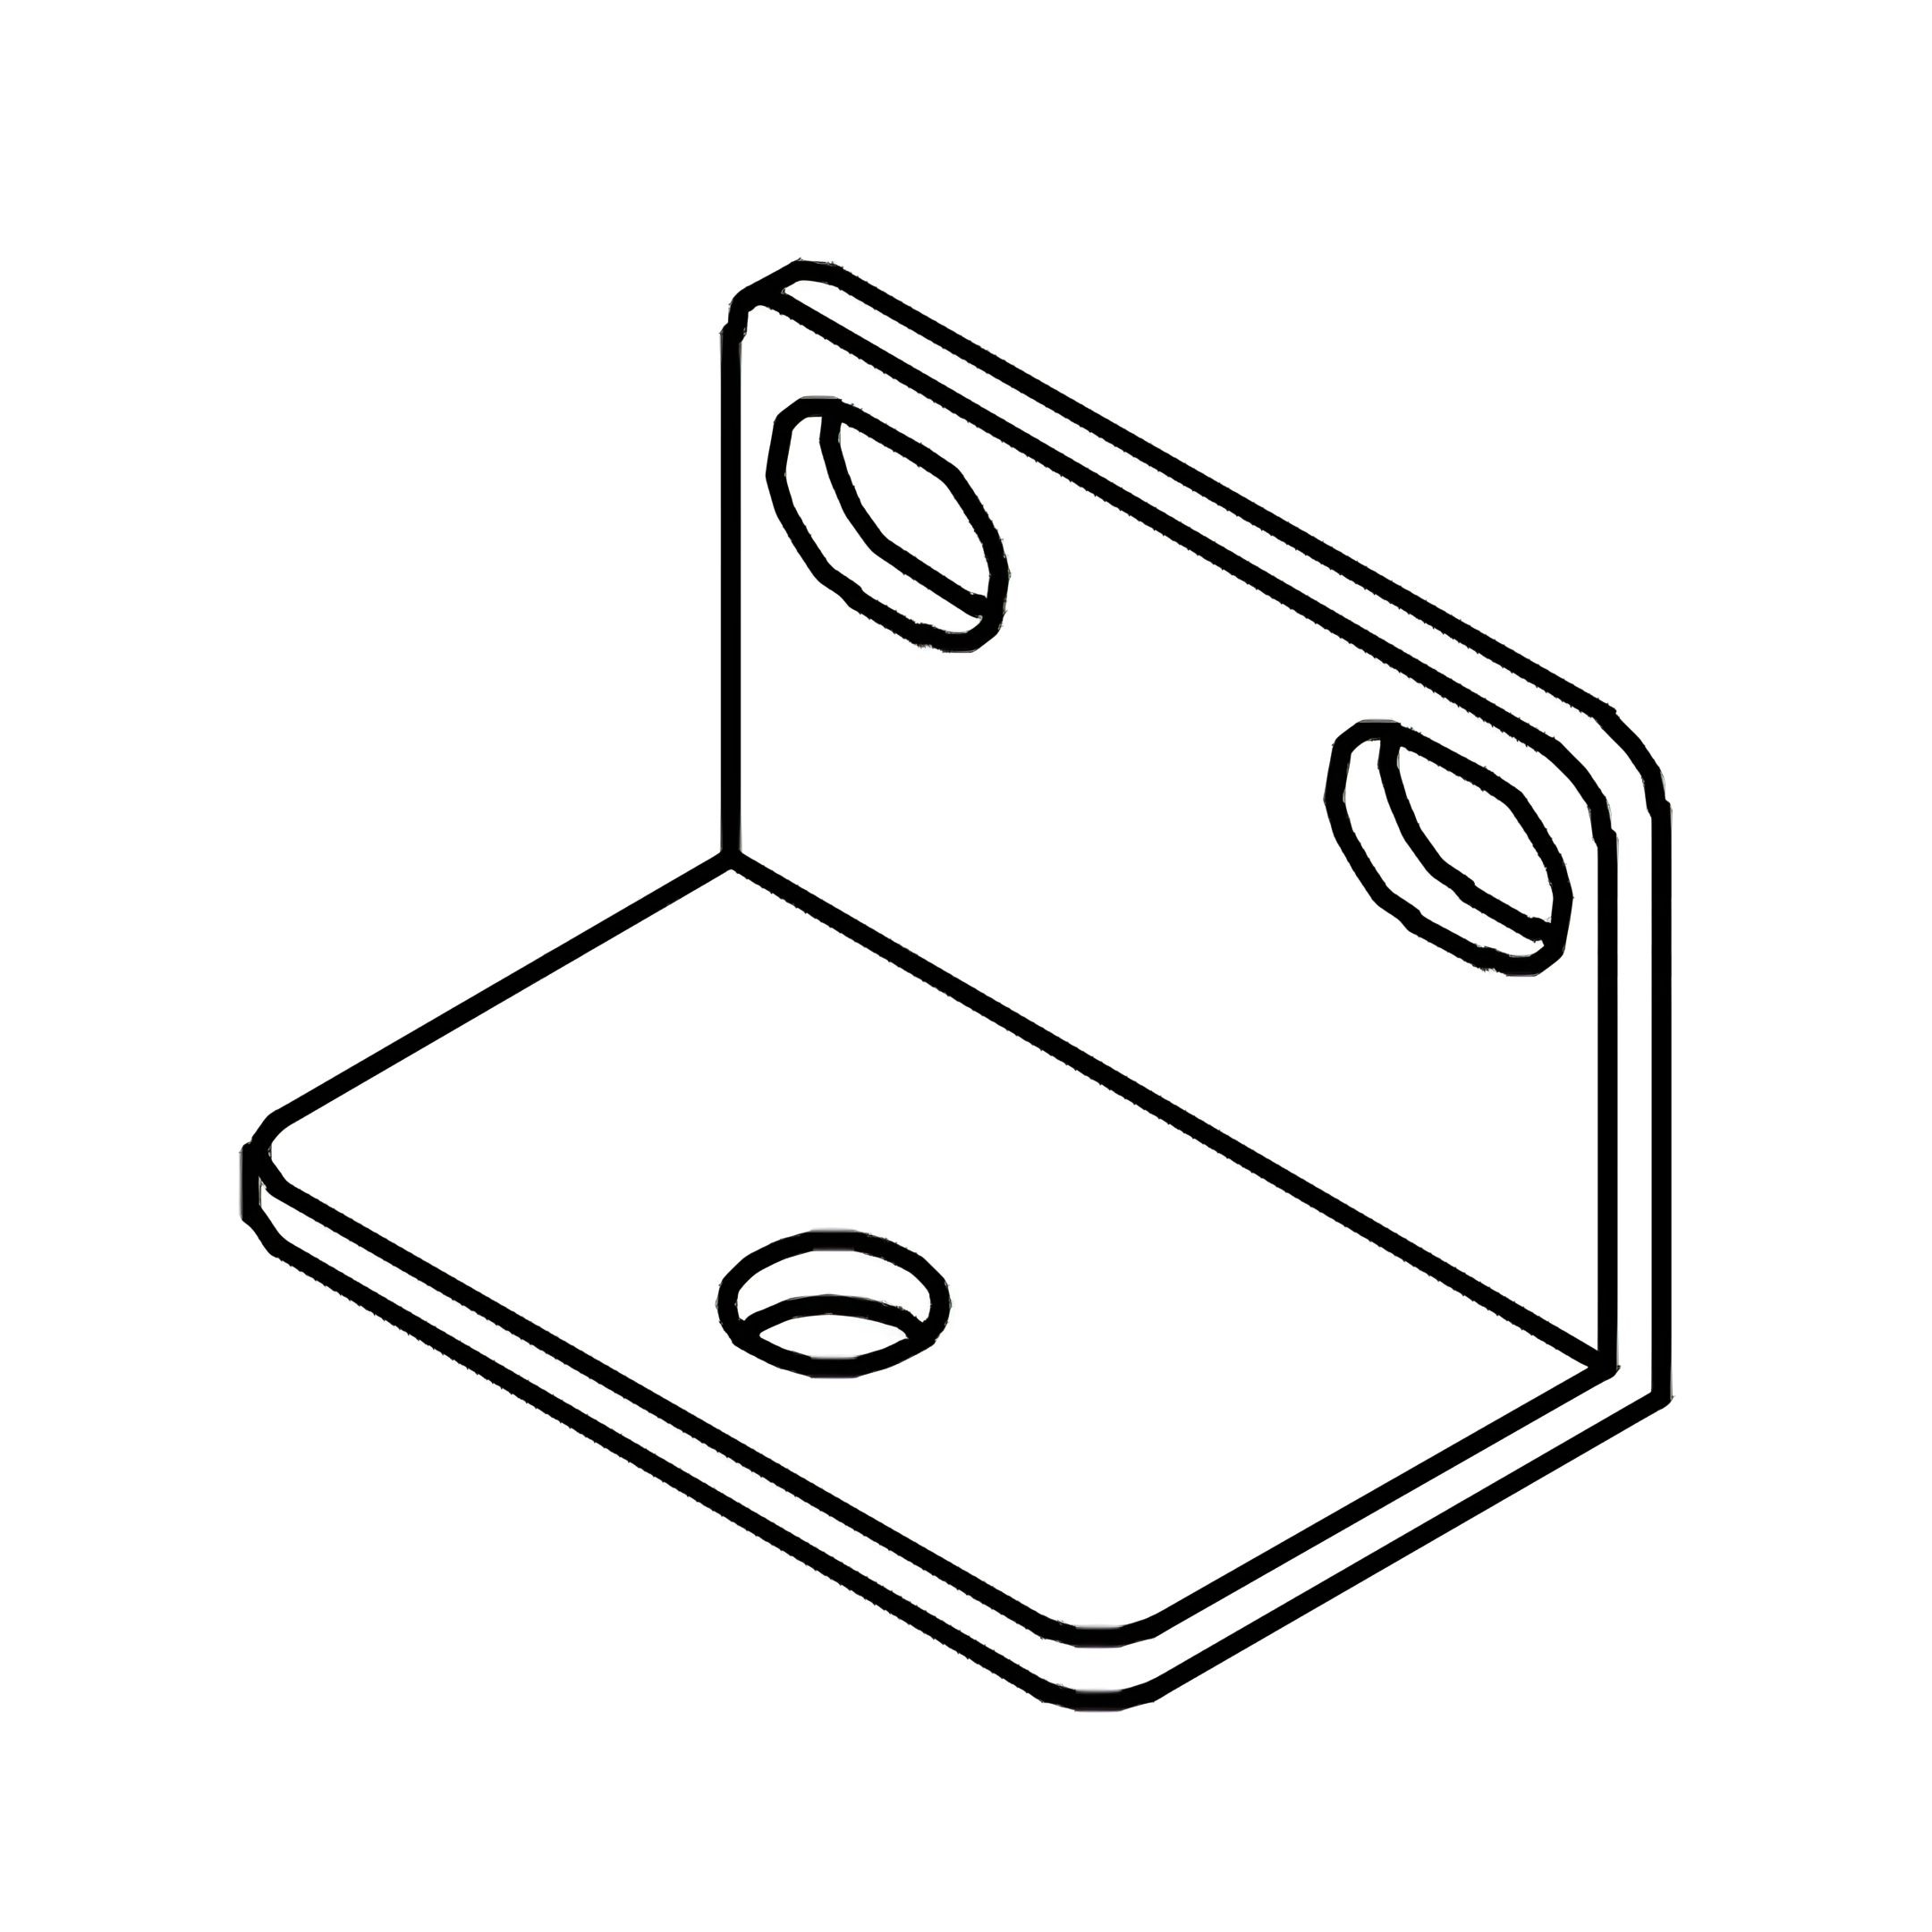
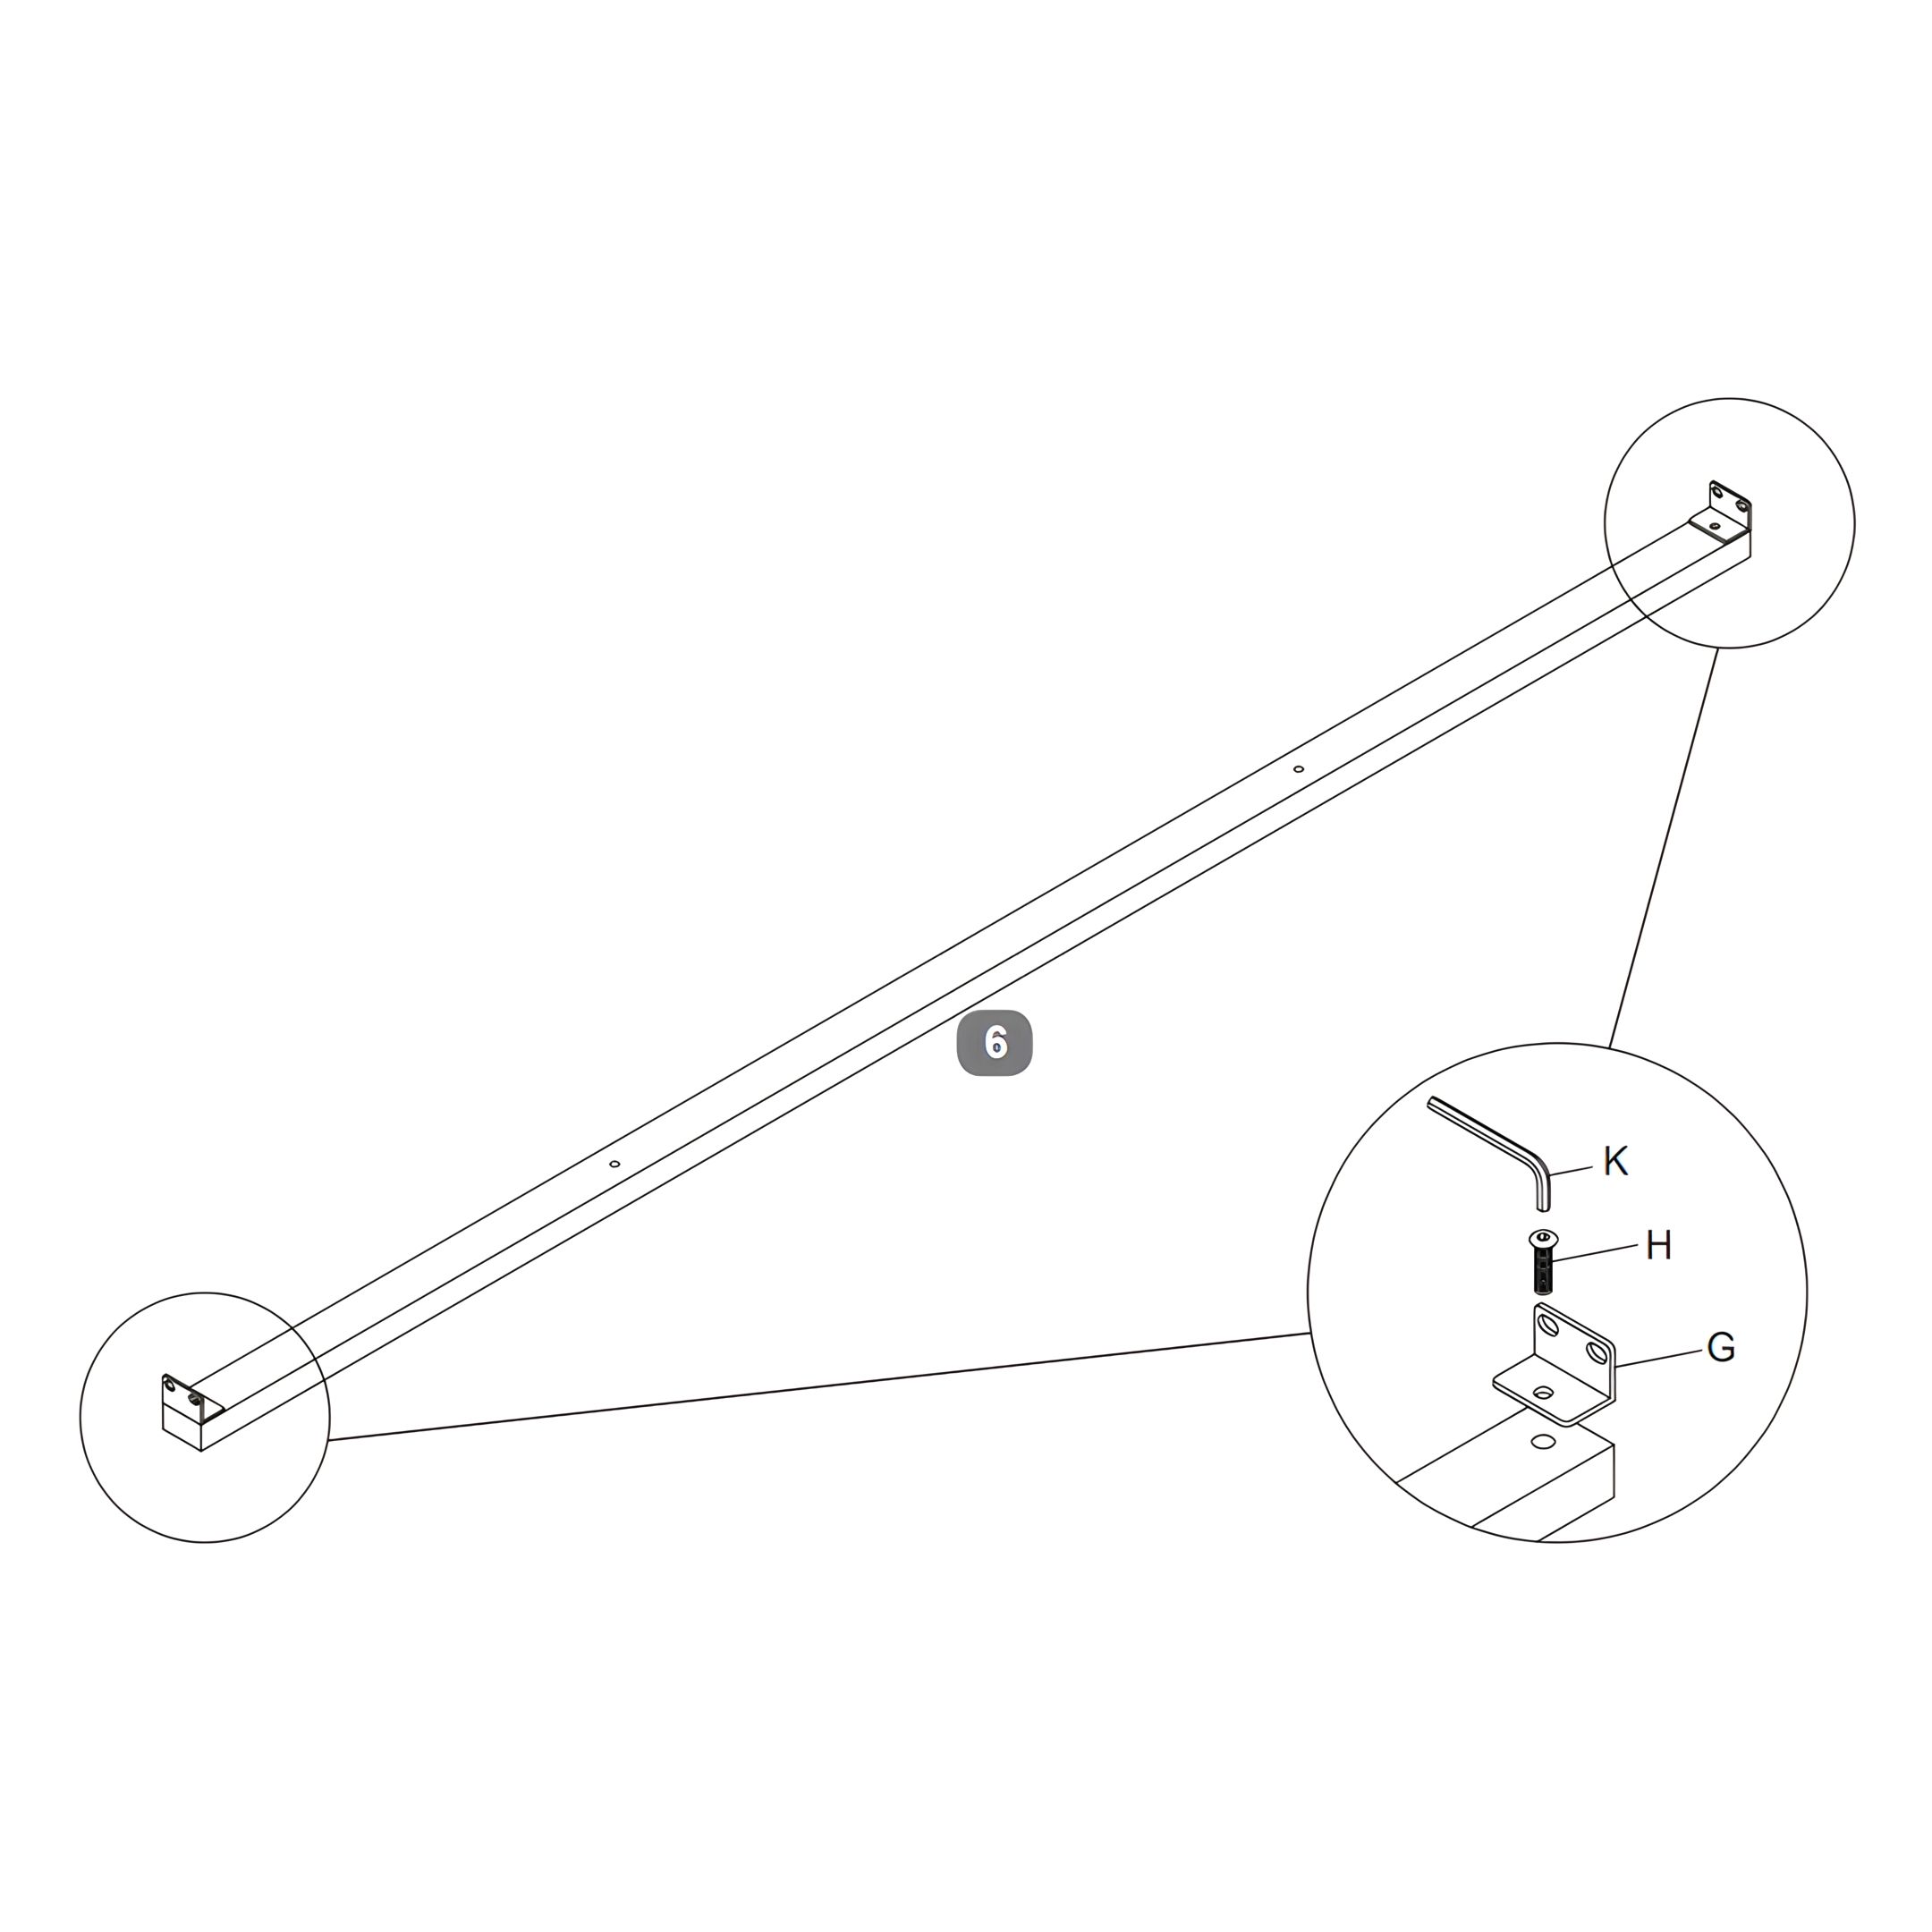
G - “L” Shape Bracket (2 for Double & King, 4 for Super King)
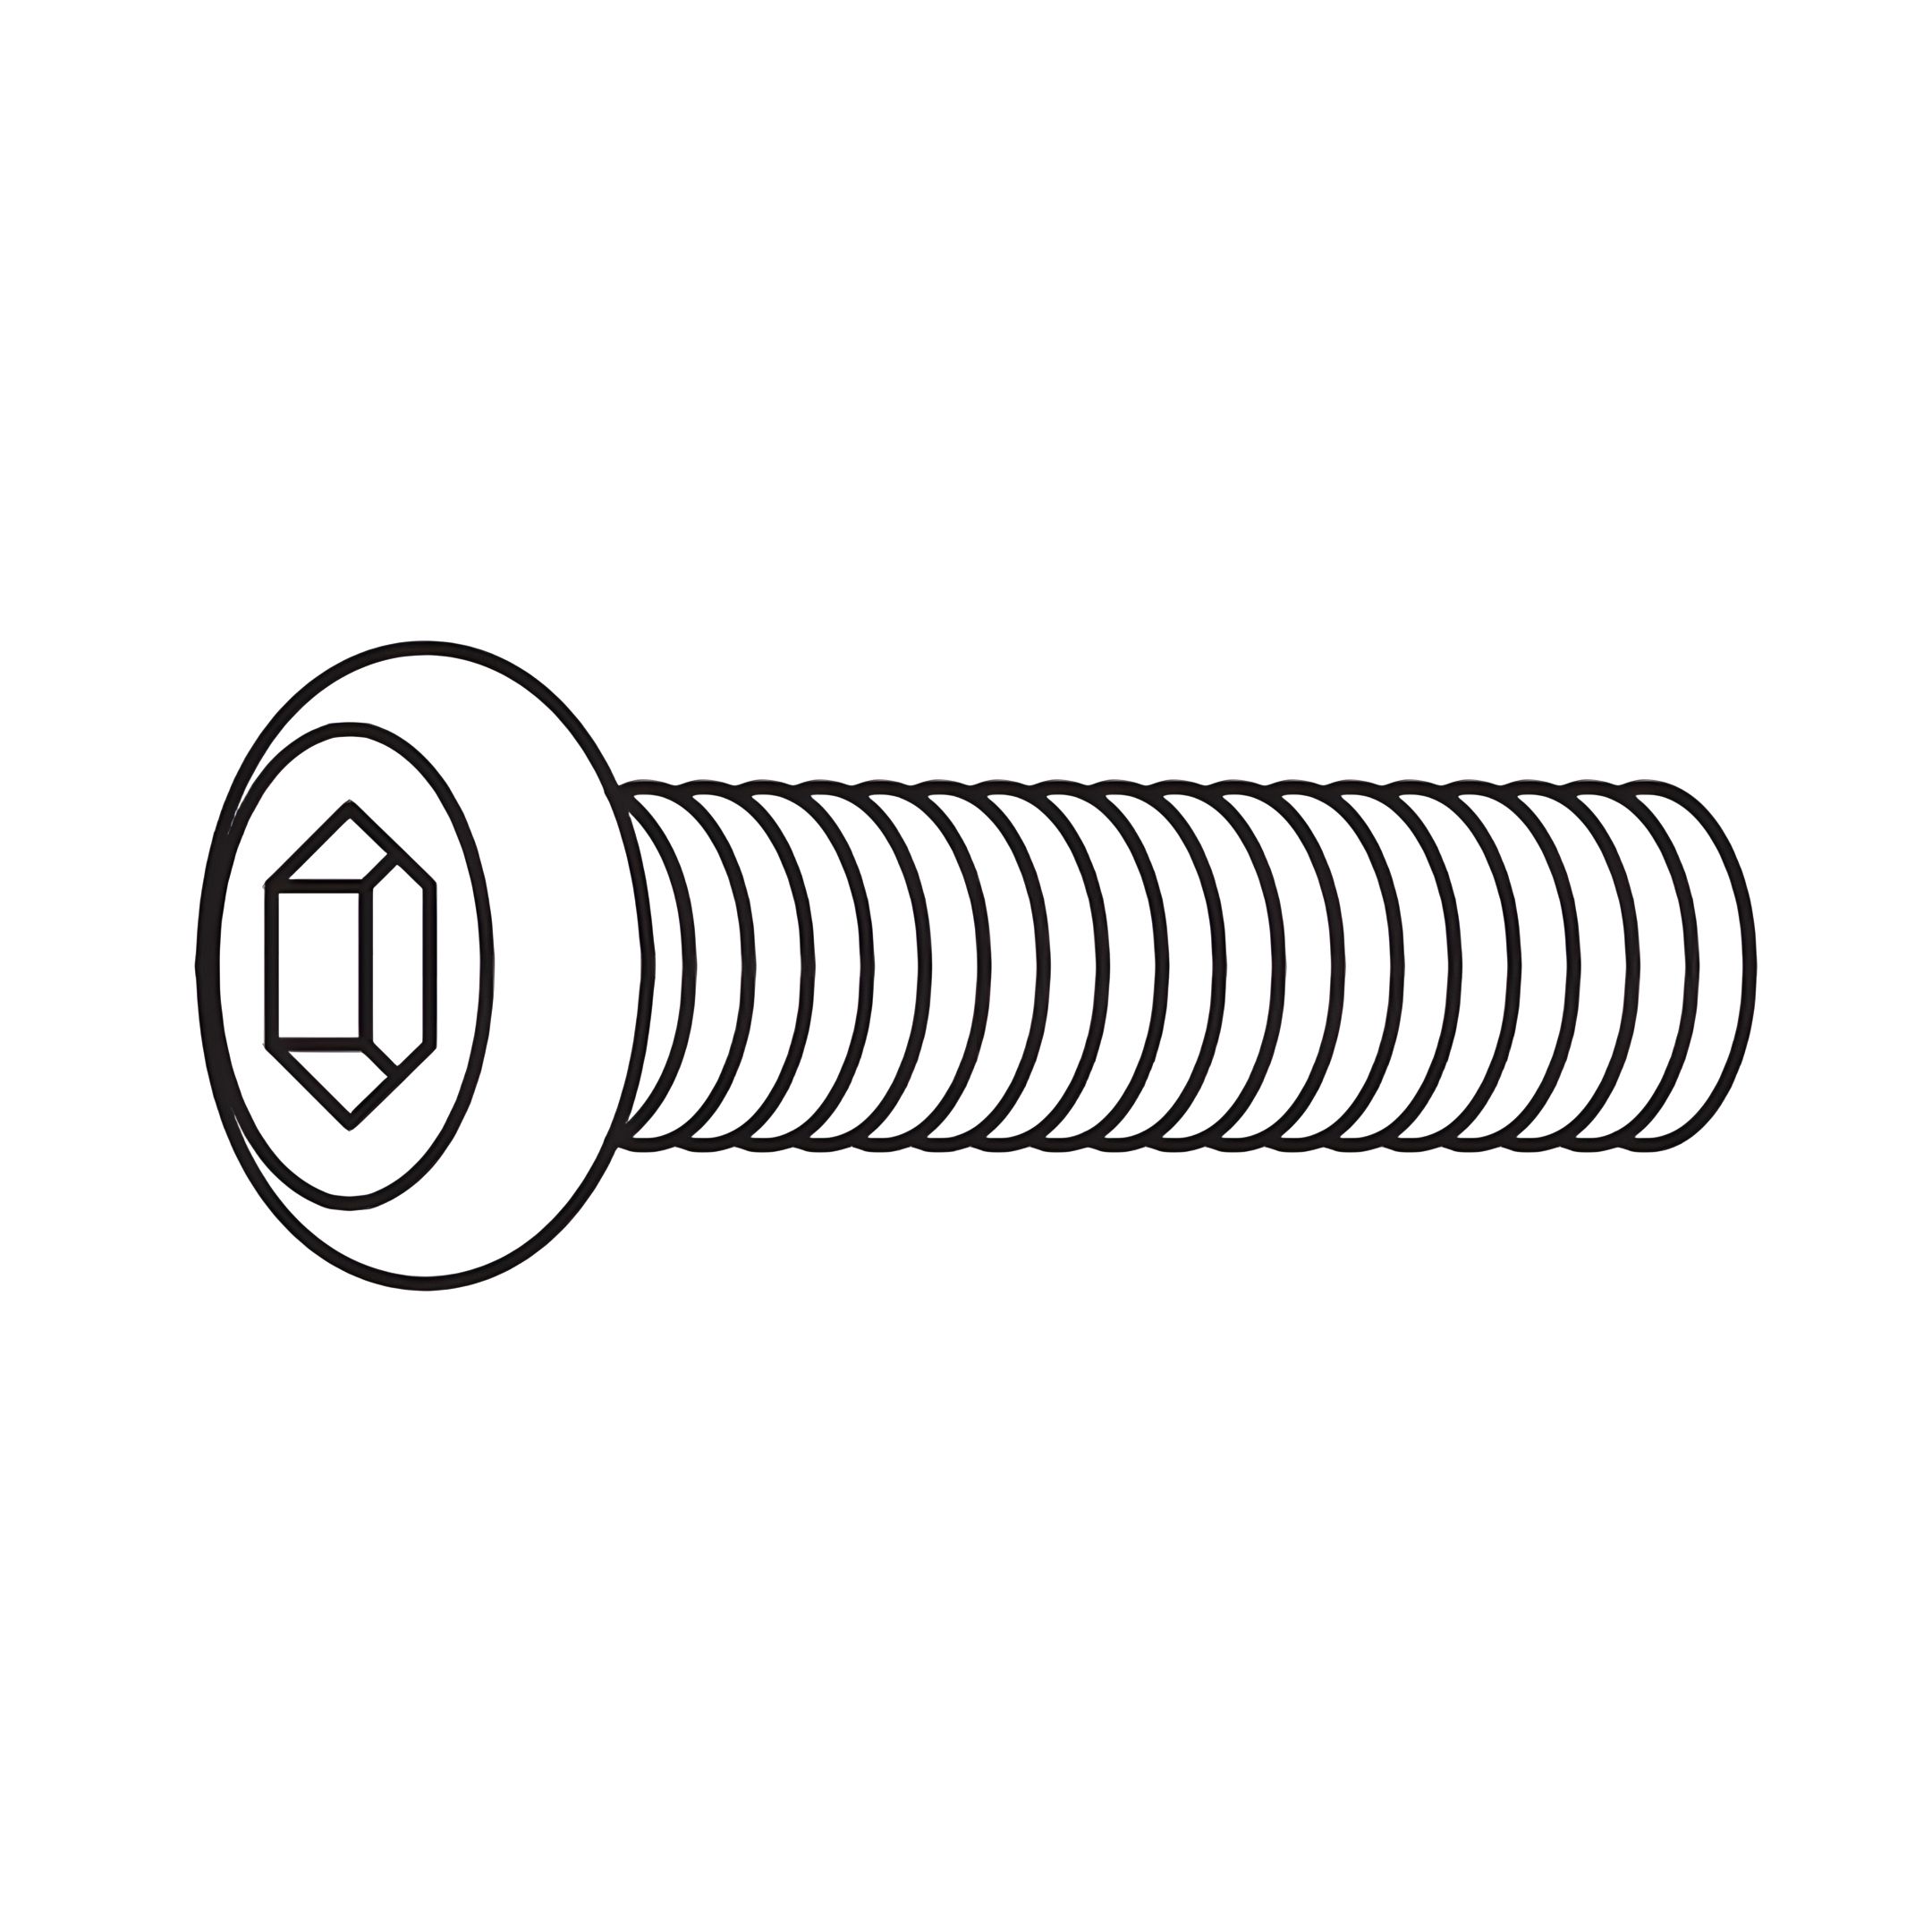
H - Bolt (M8x20mm) (6 for Double & King, 12 for Super King)
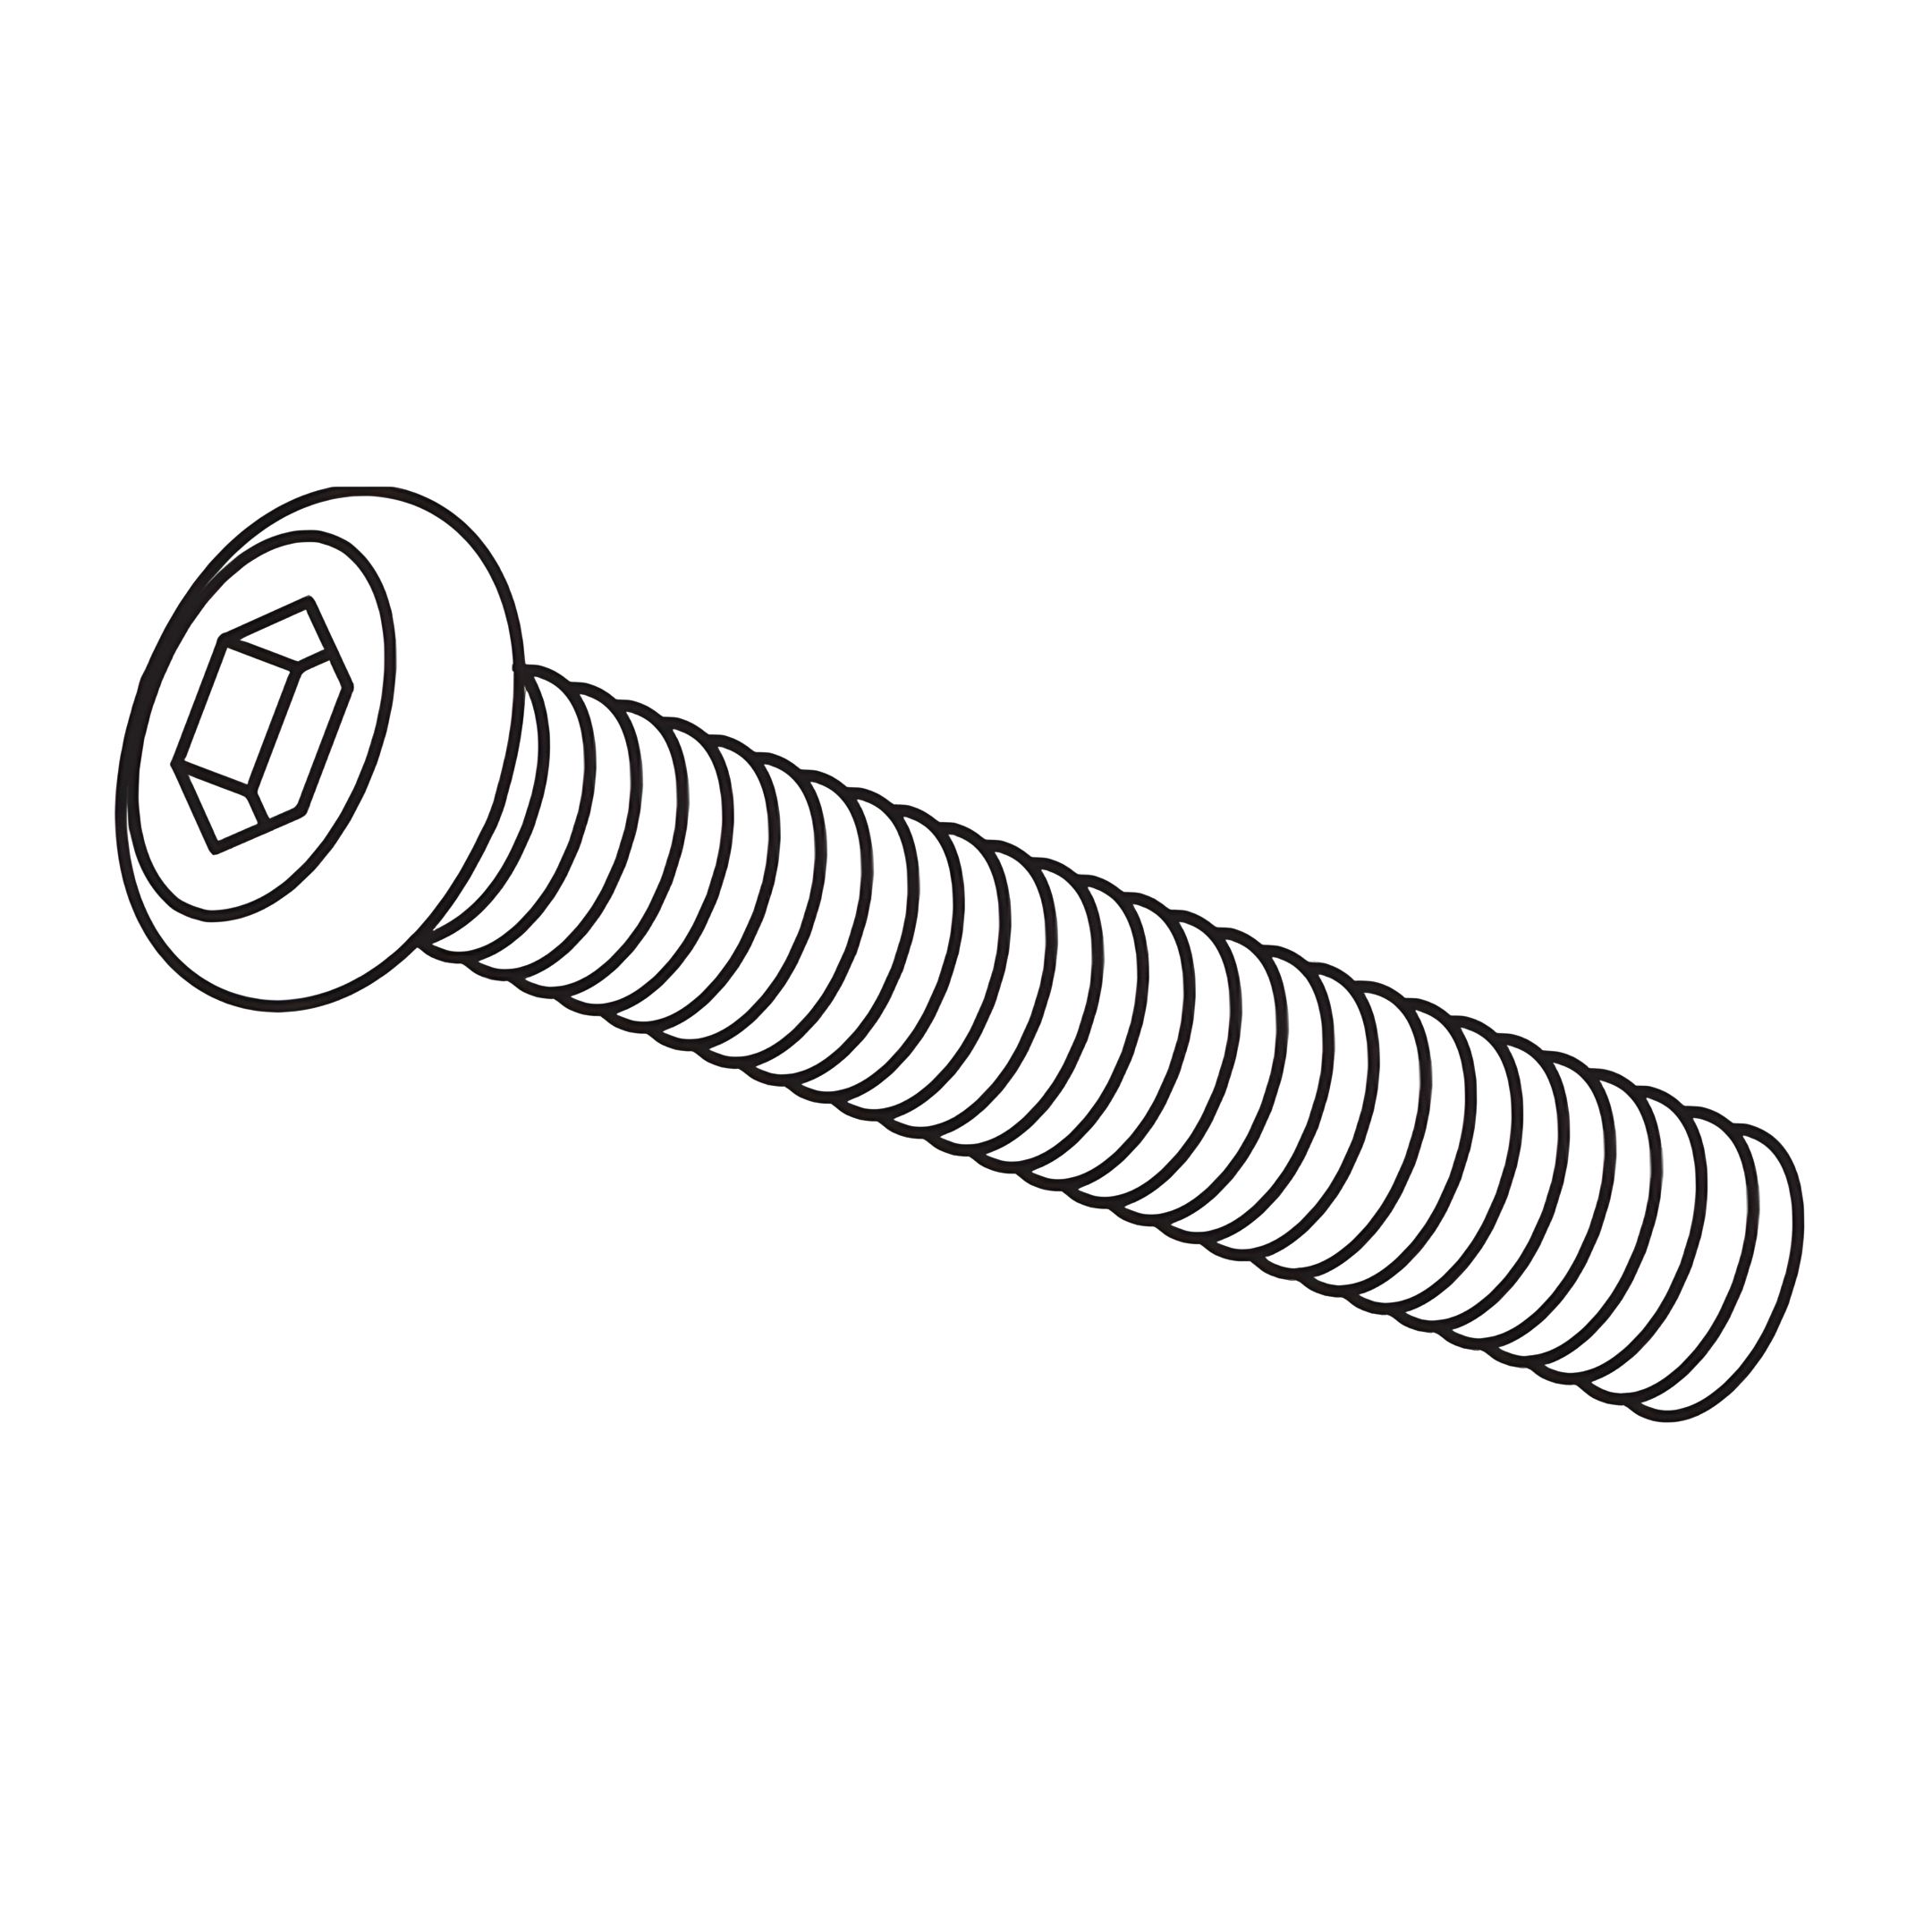
J - Bolt (M8x35mm)(2 for Double & King, 4 for Super King)
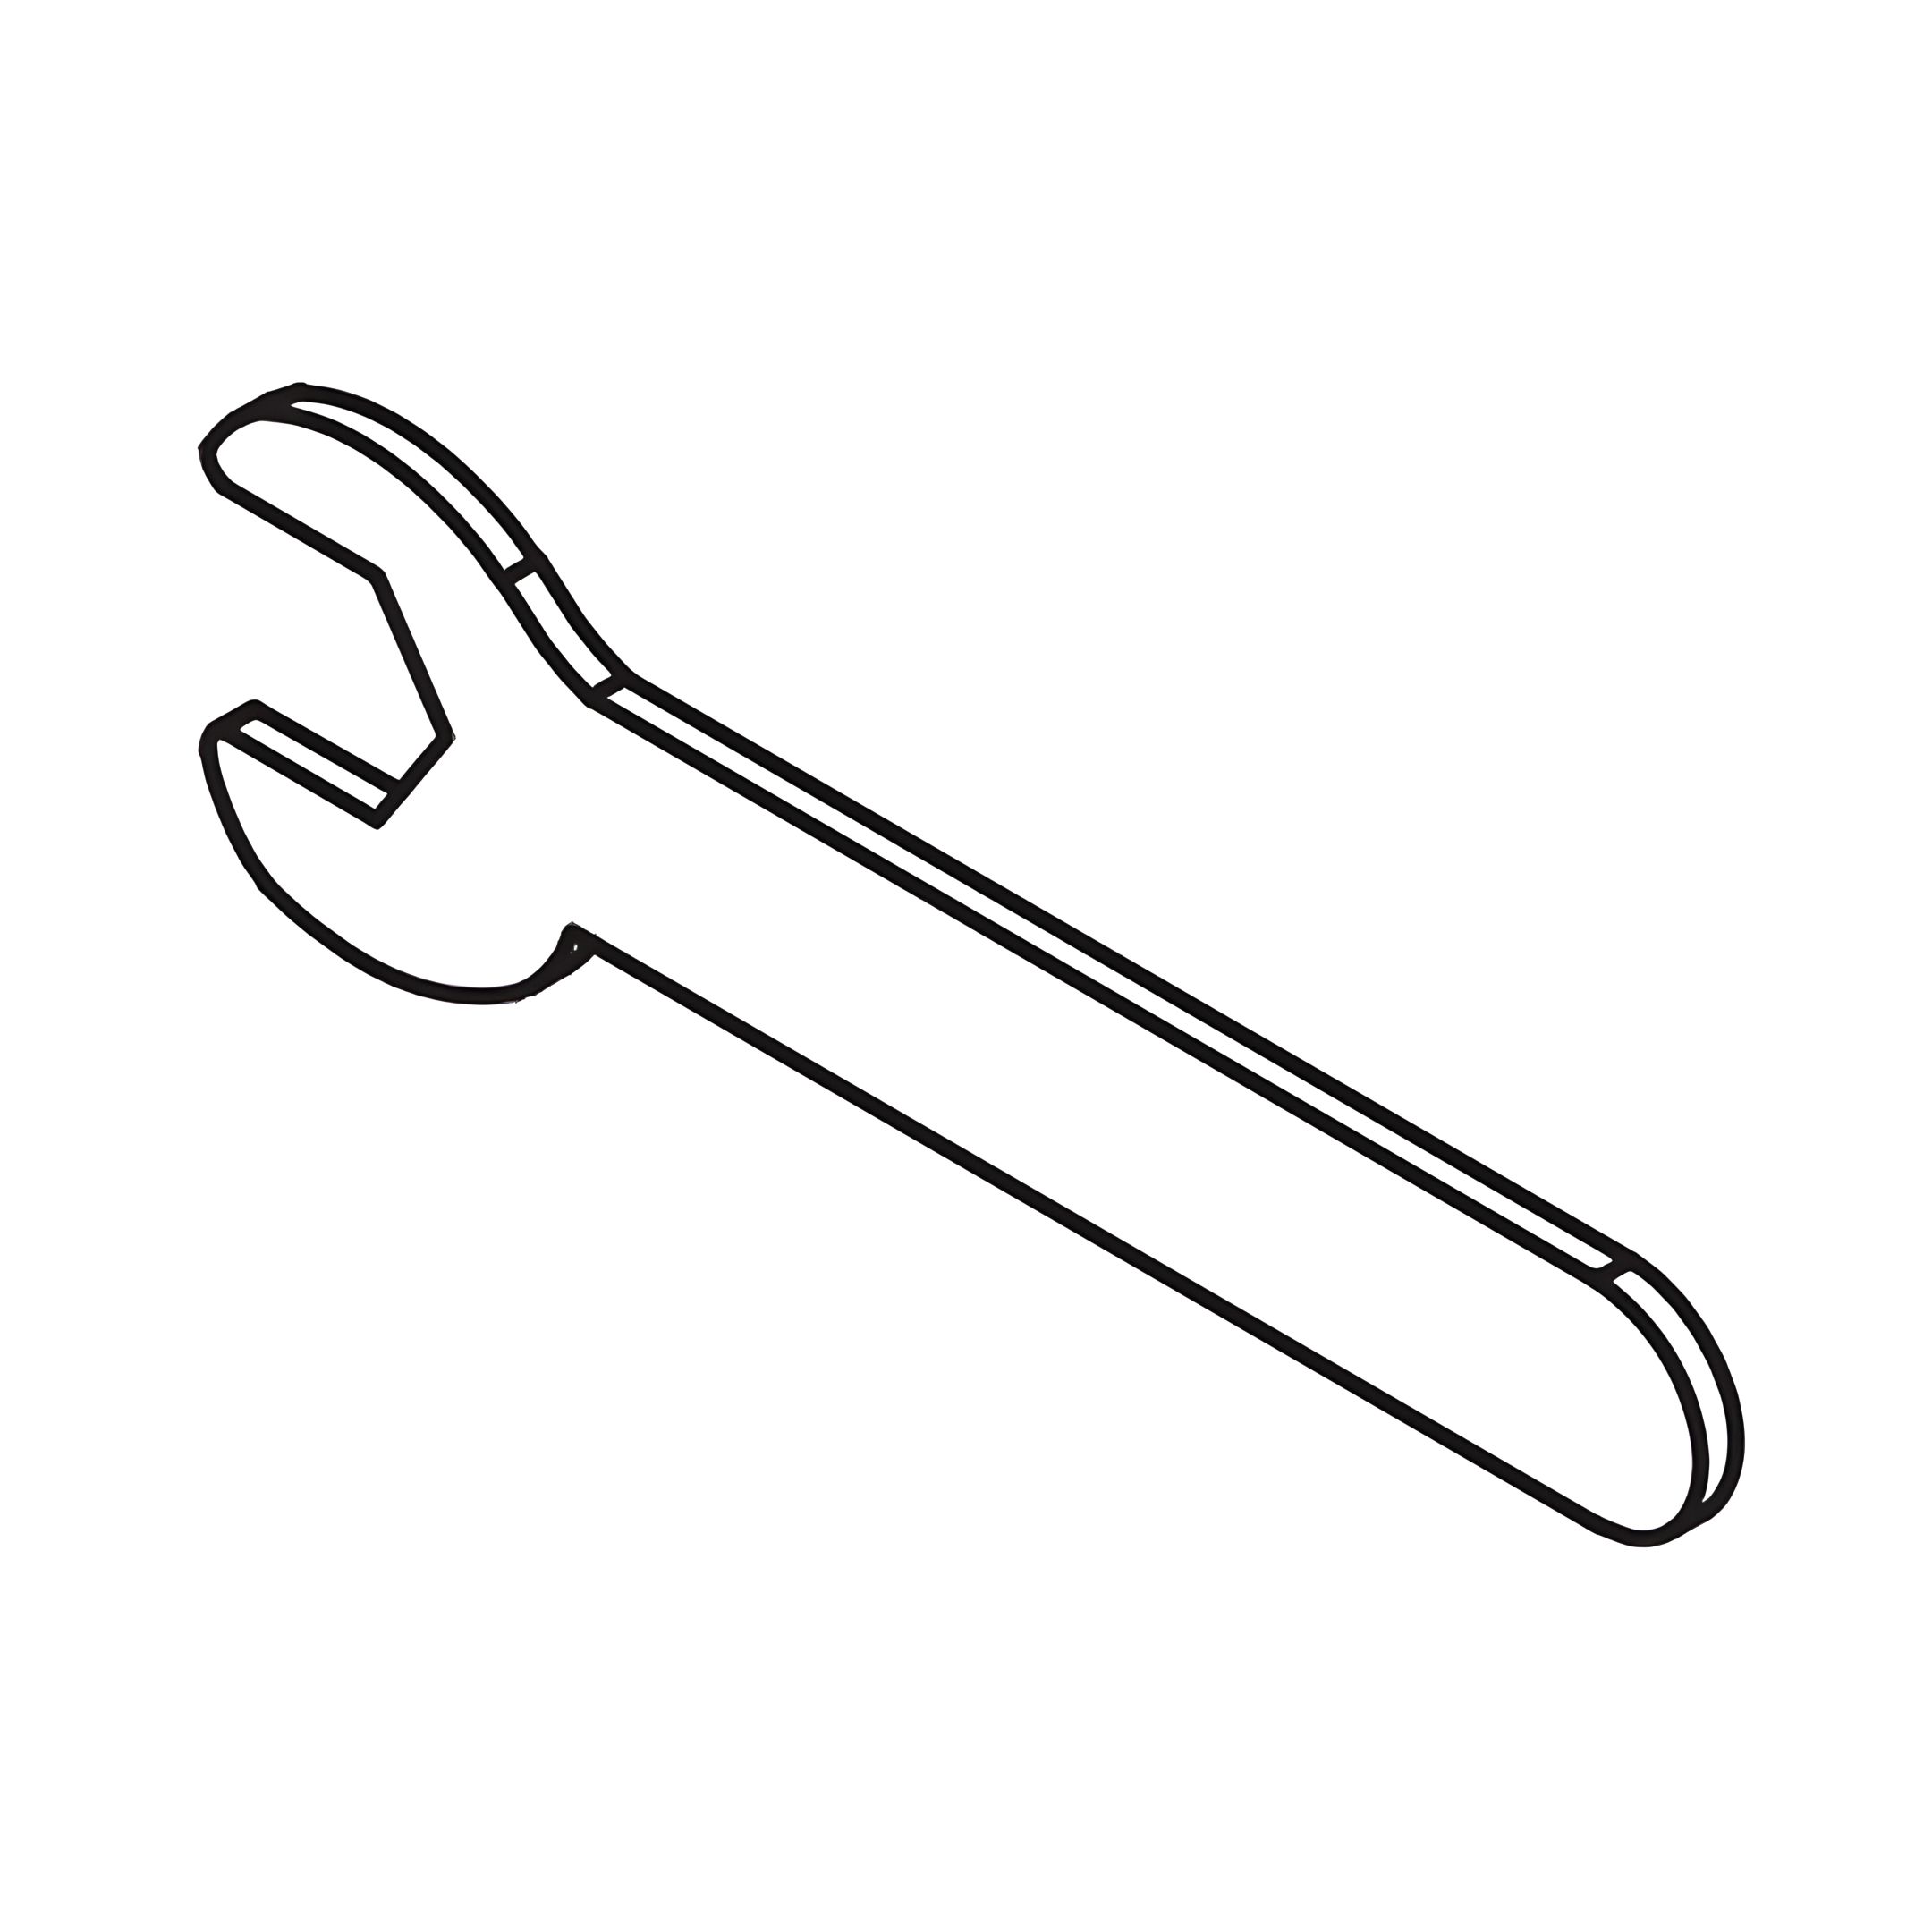
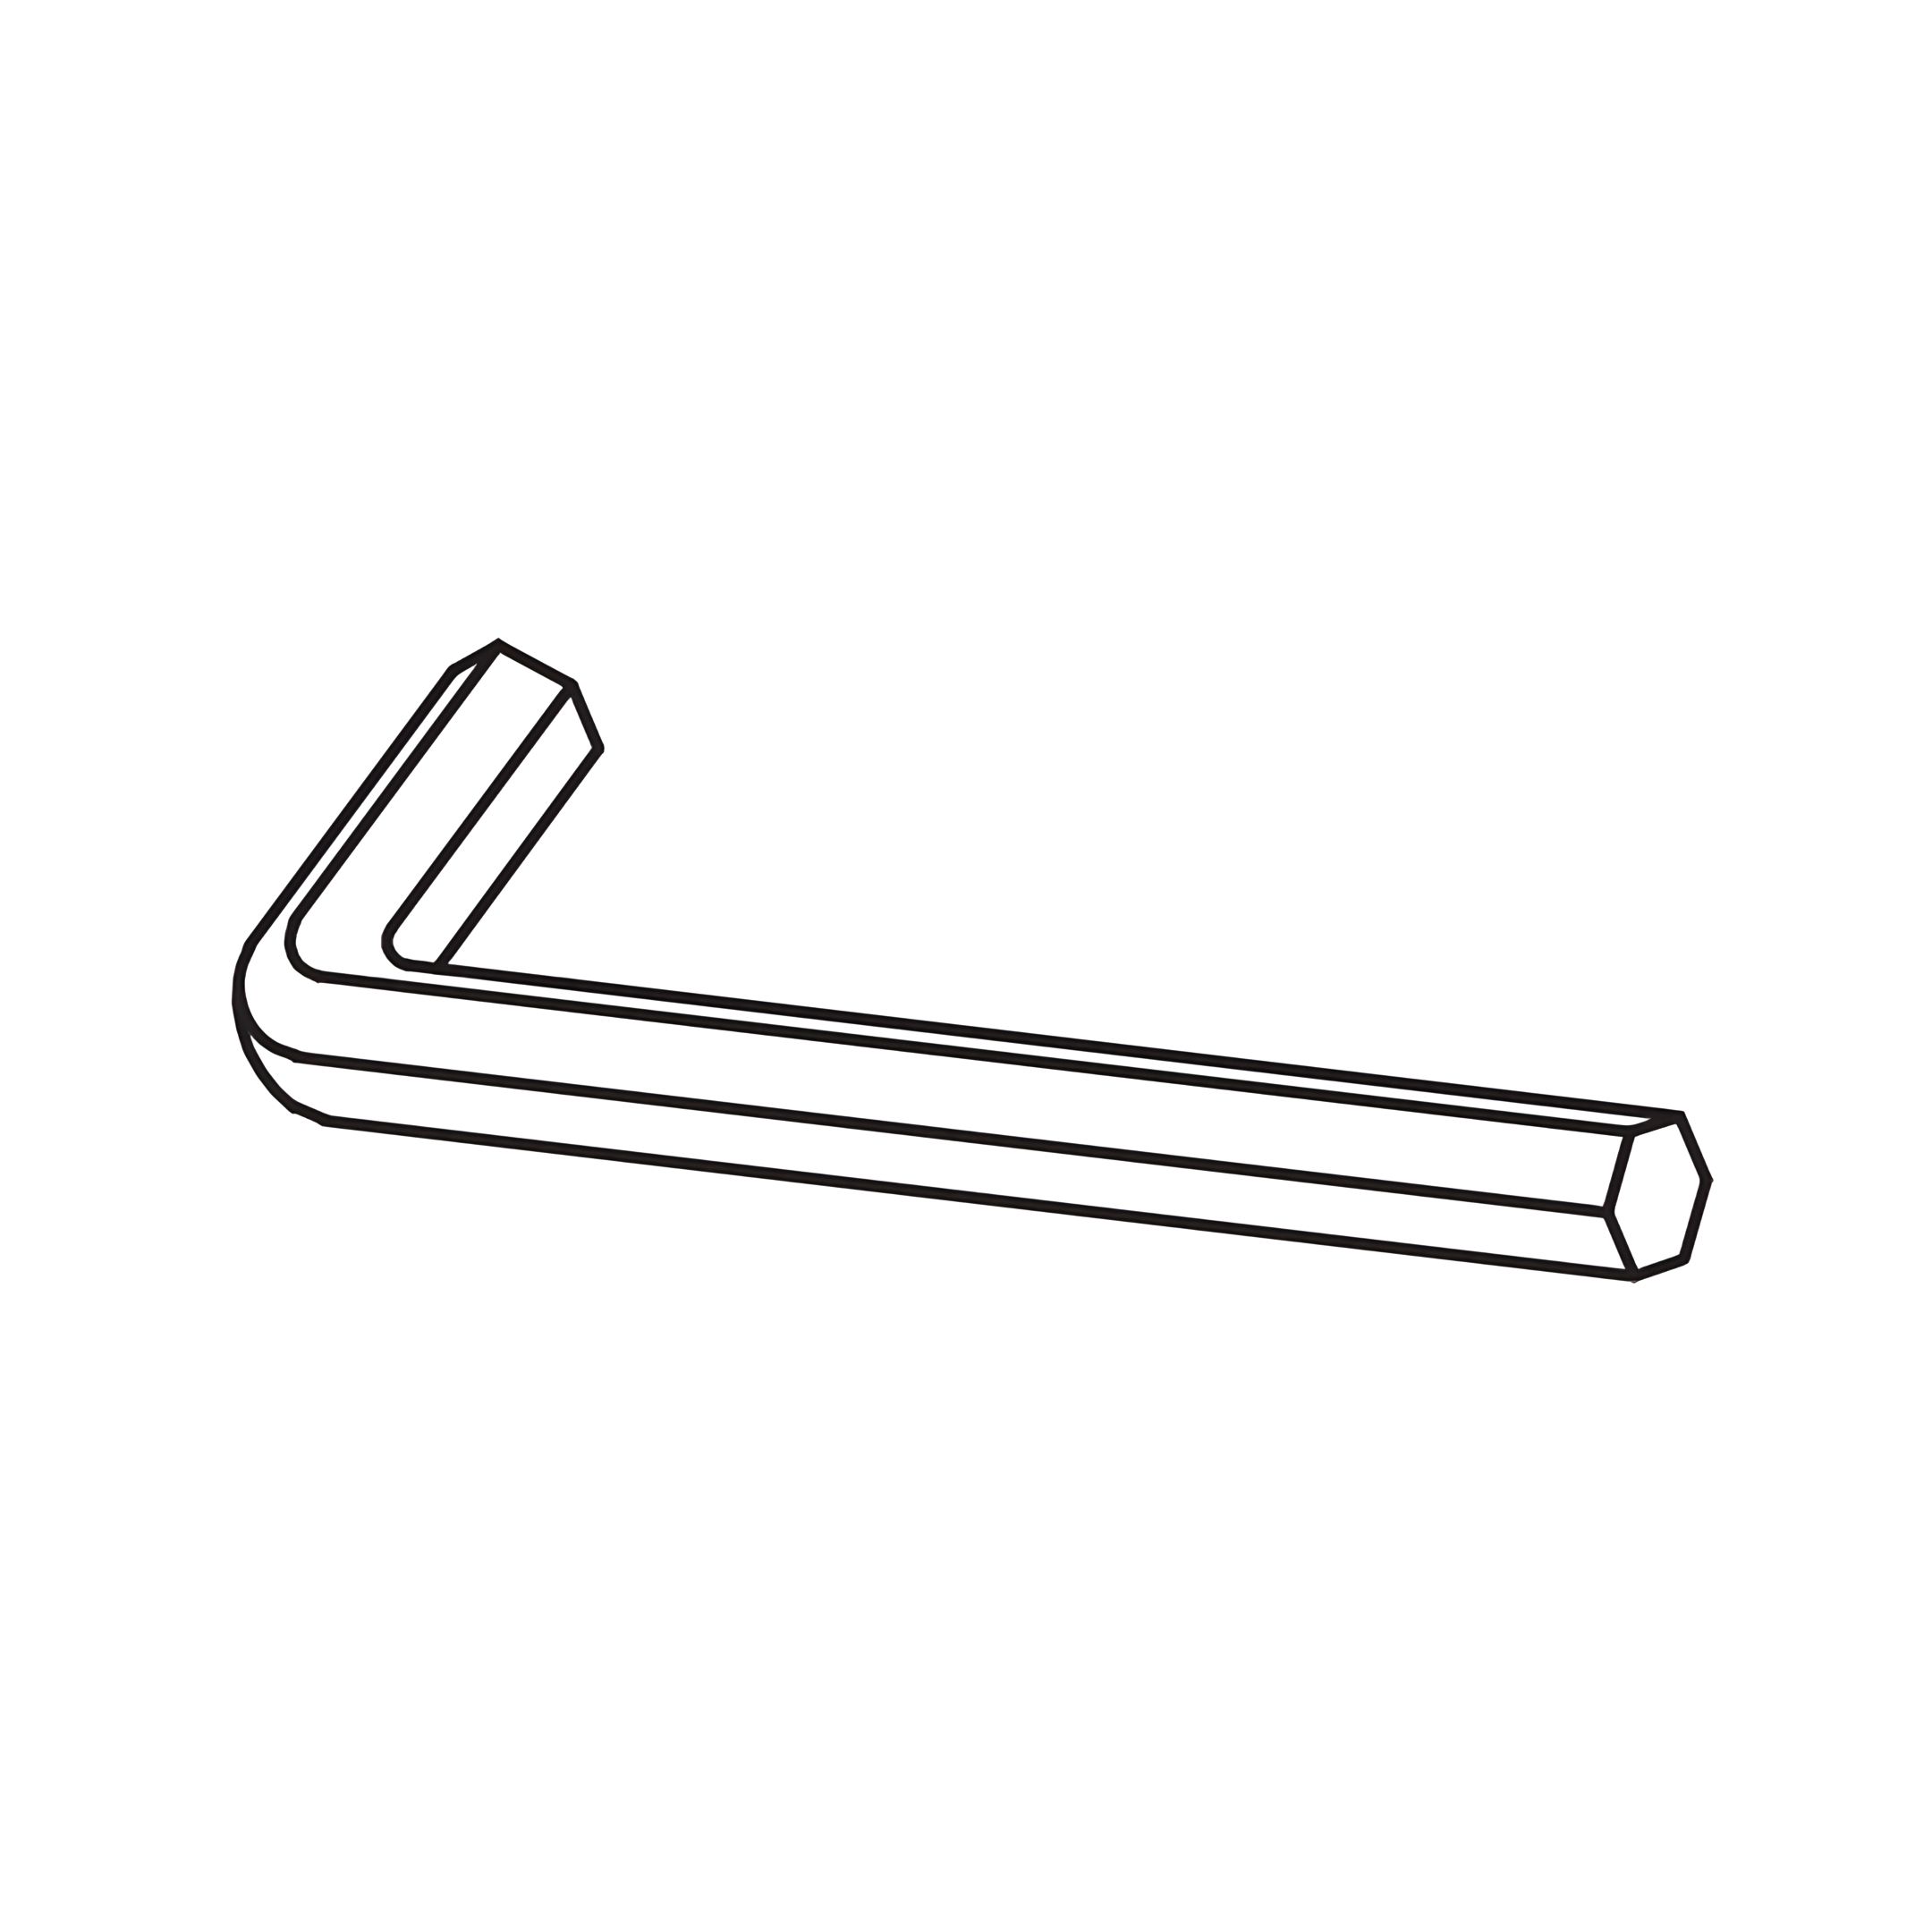
K- Allen Key
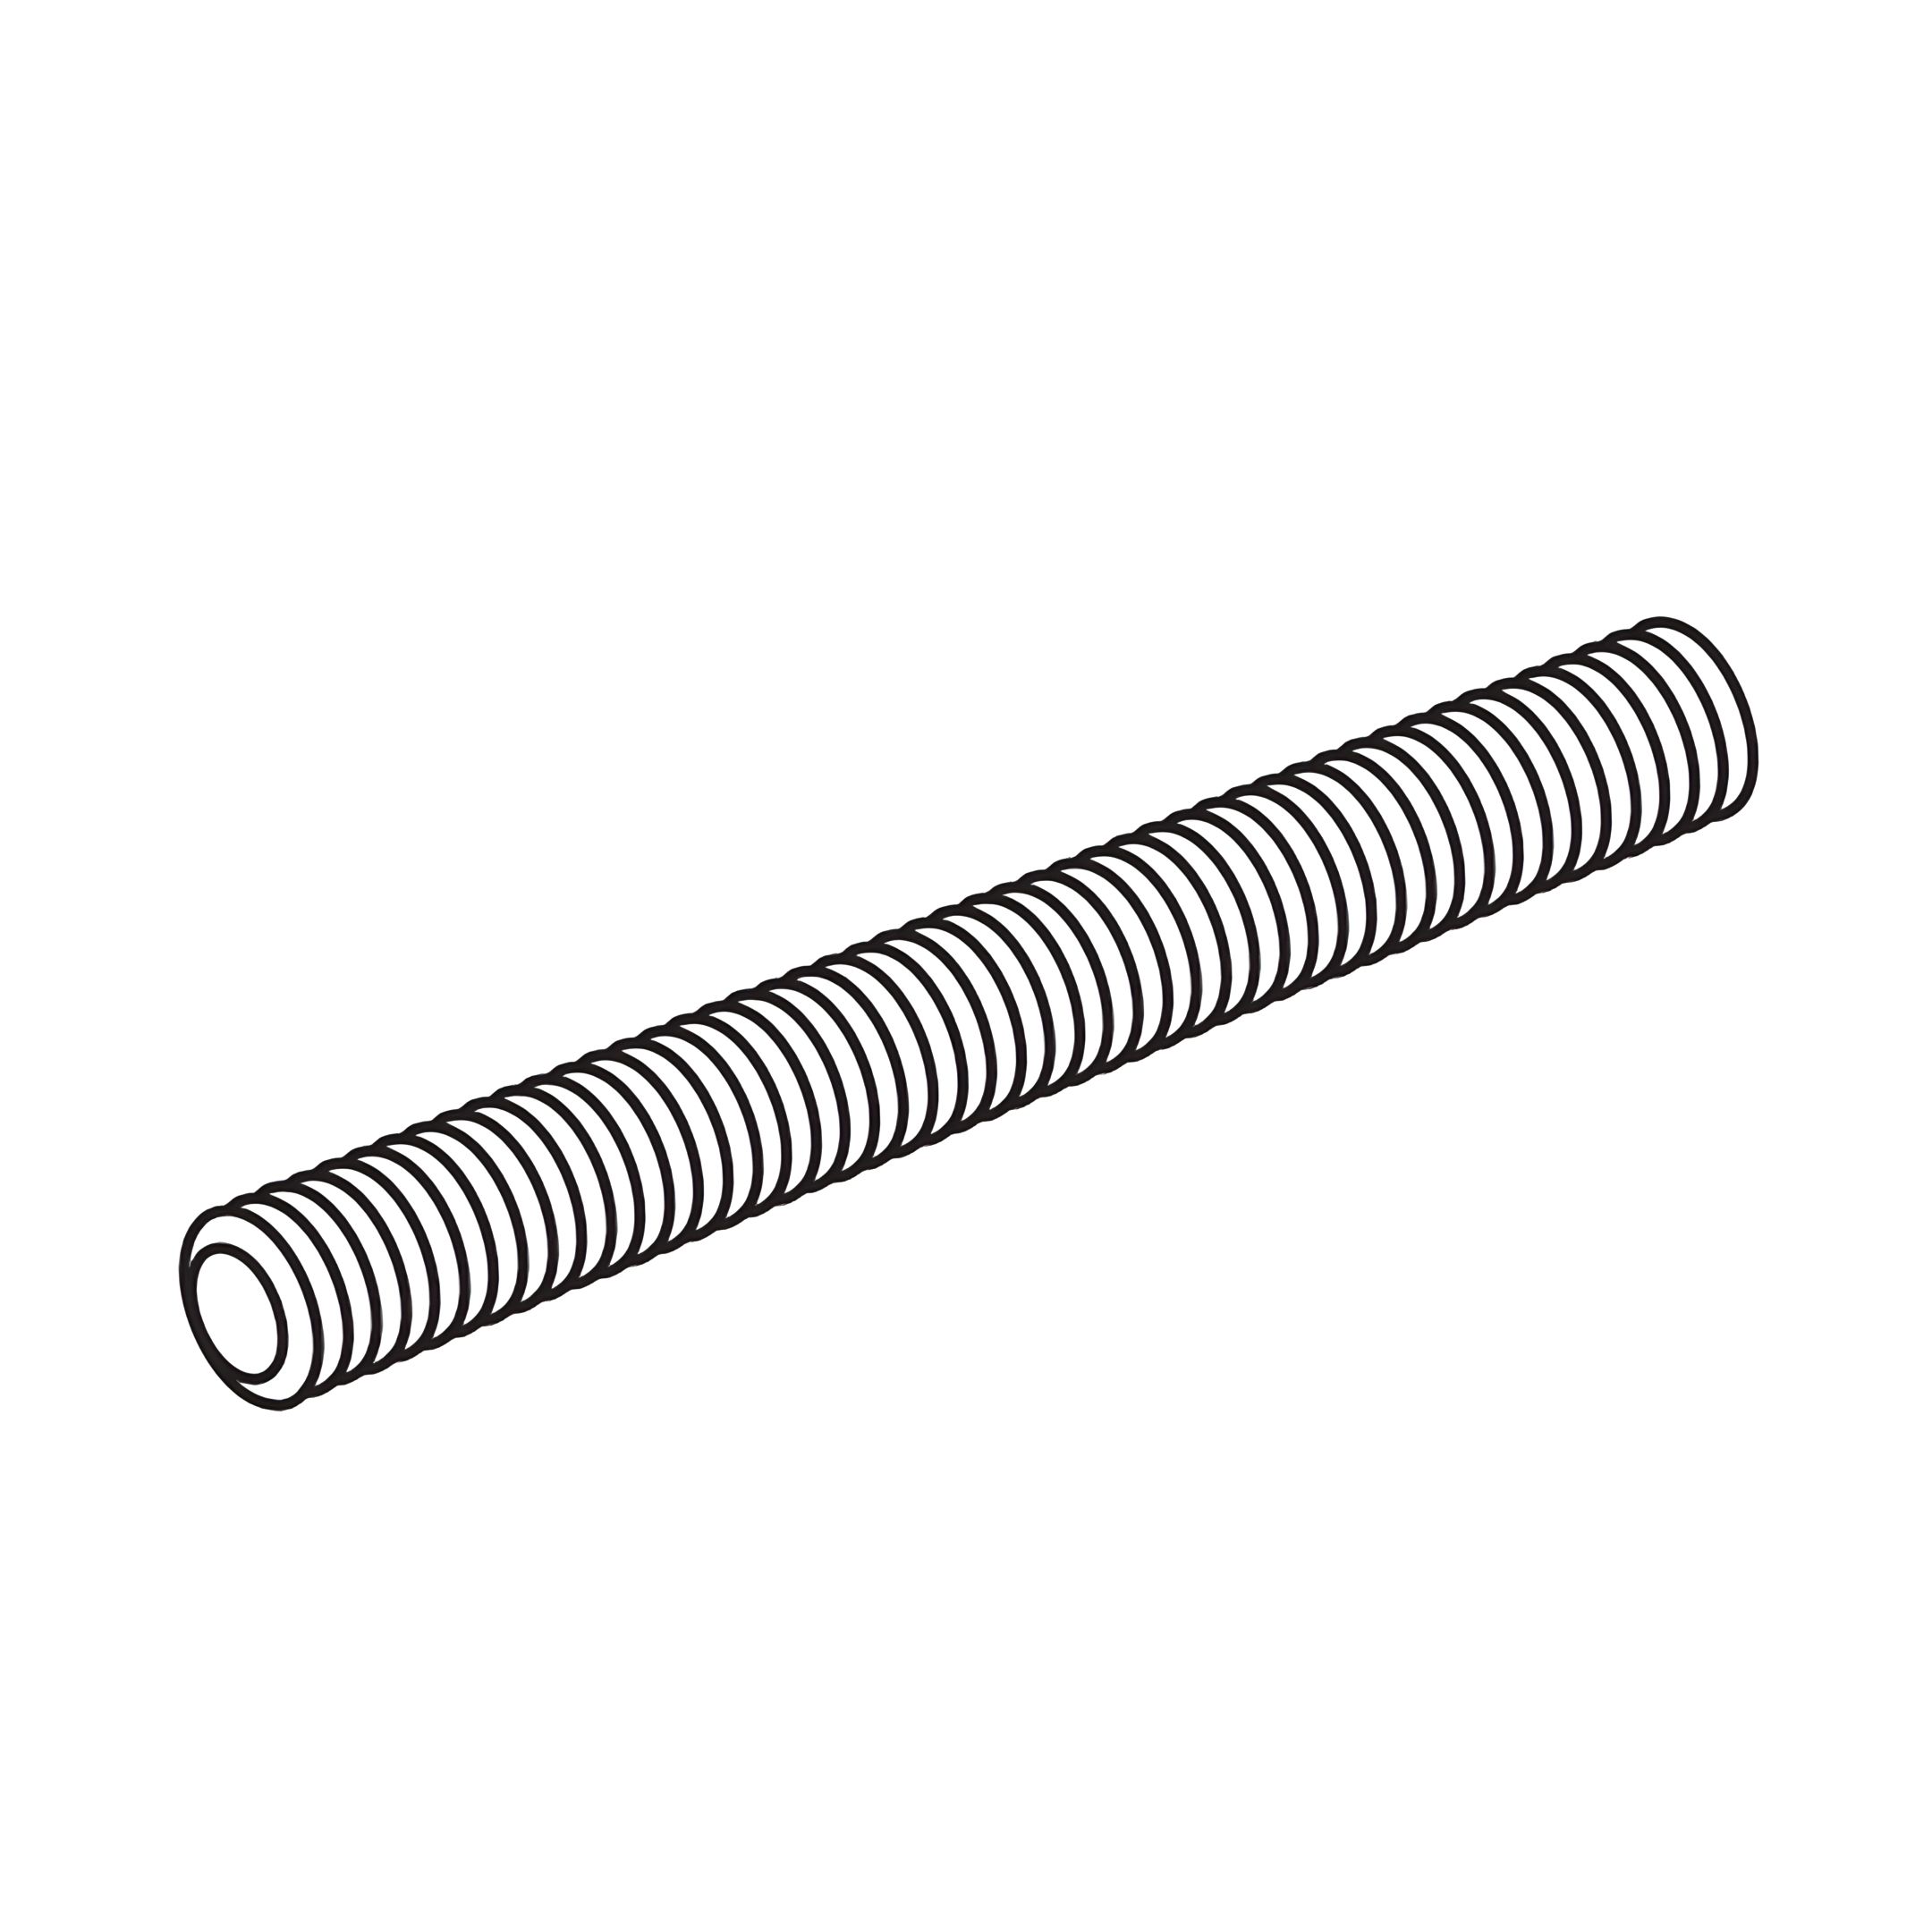
L - Dowel (Ø8x30mm)
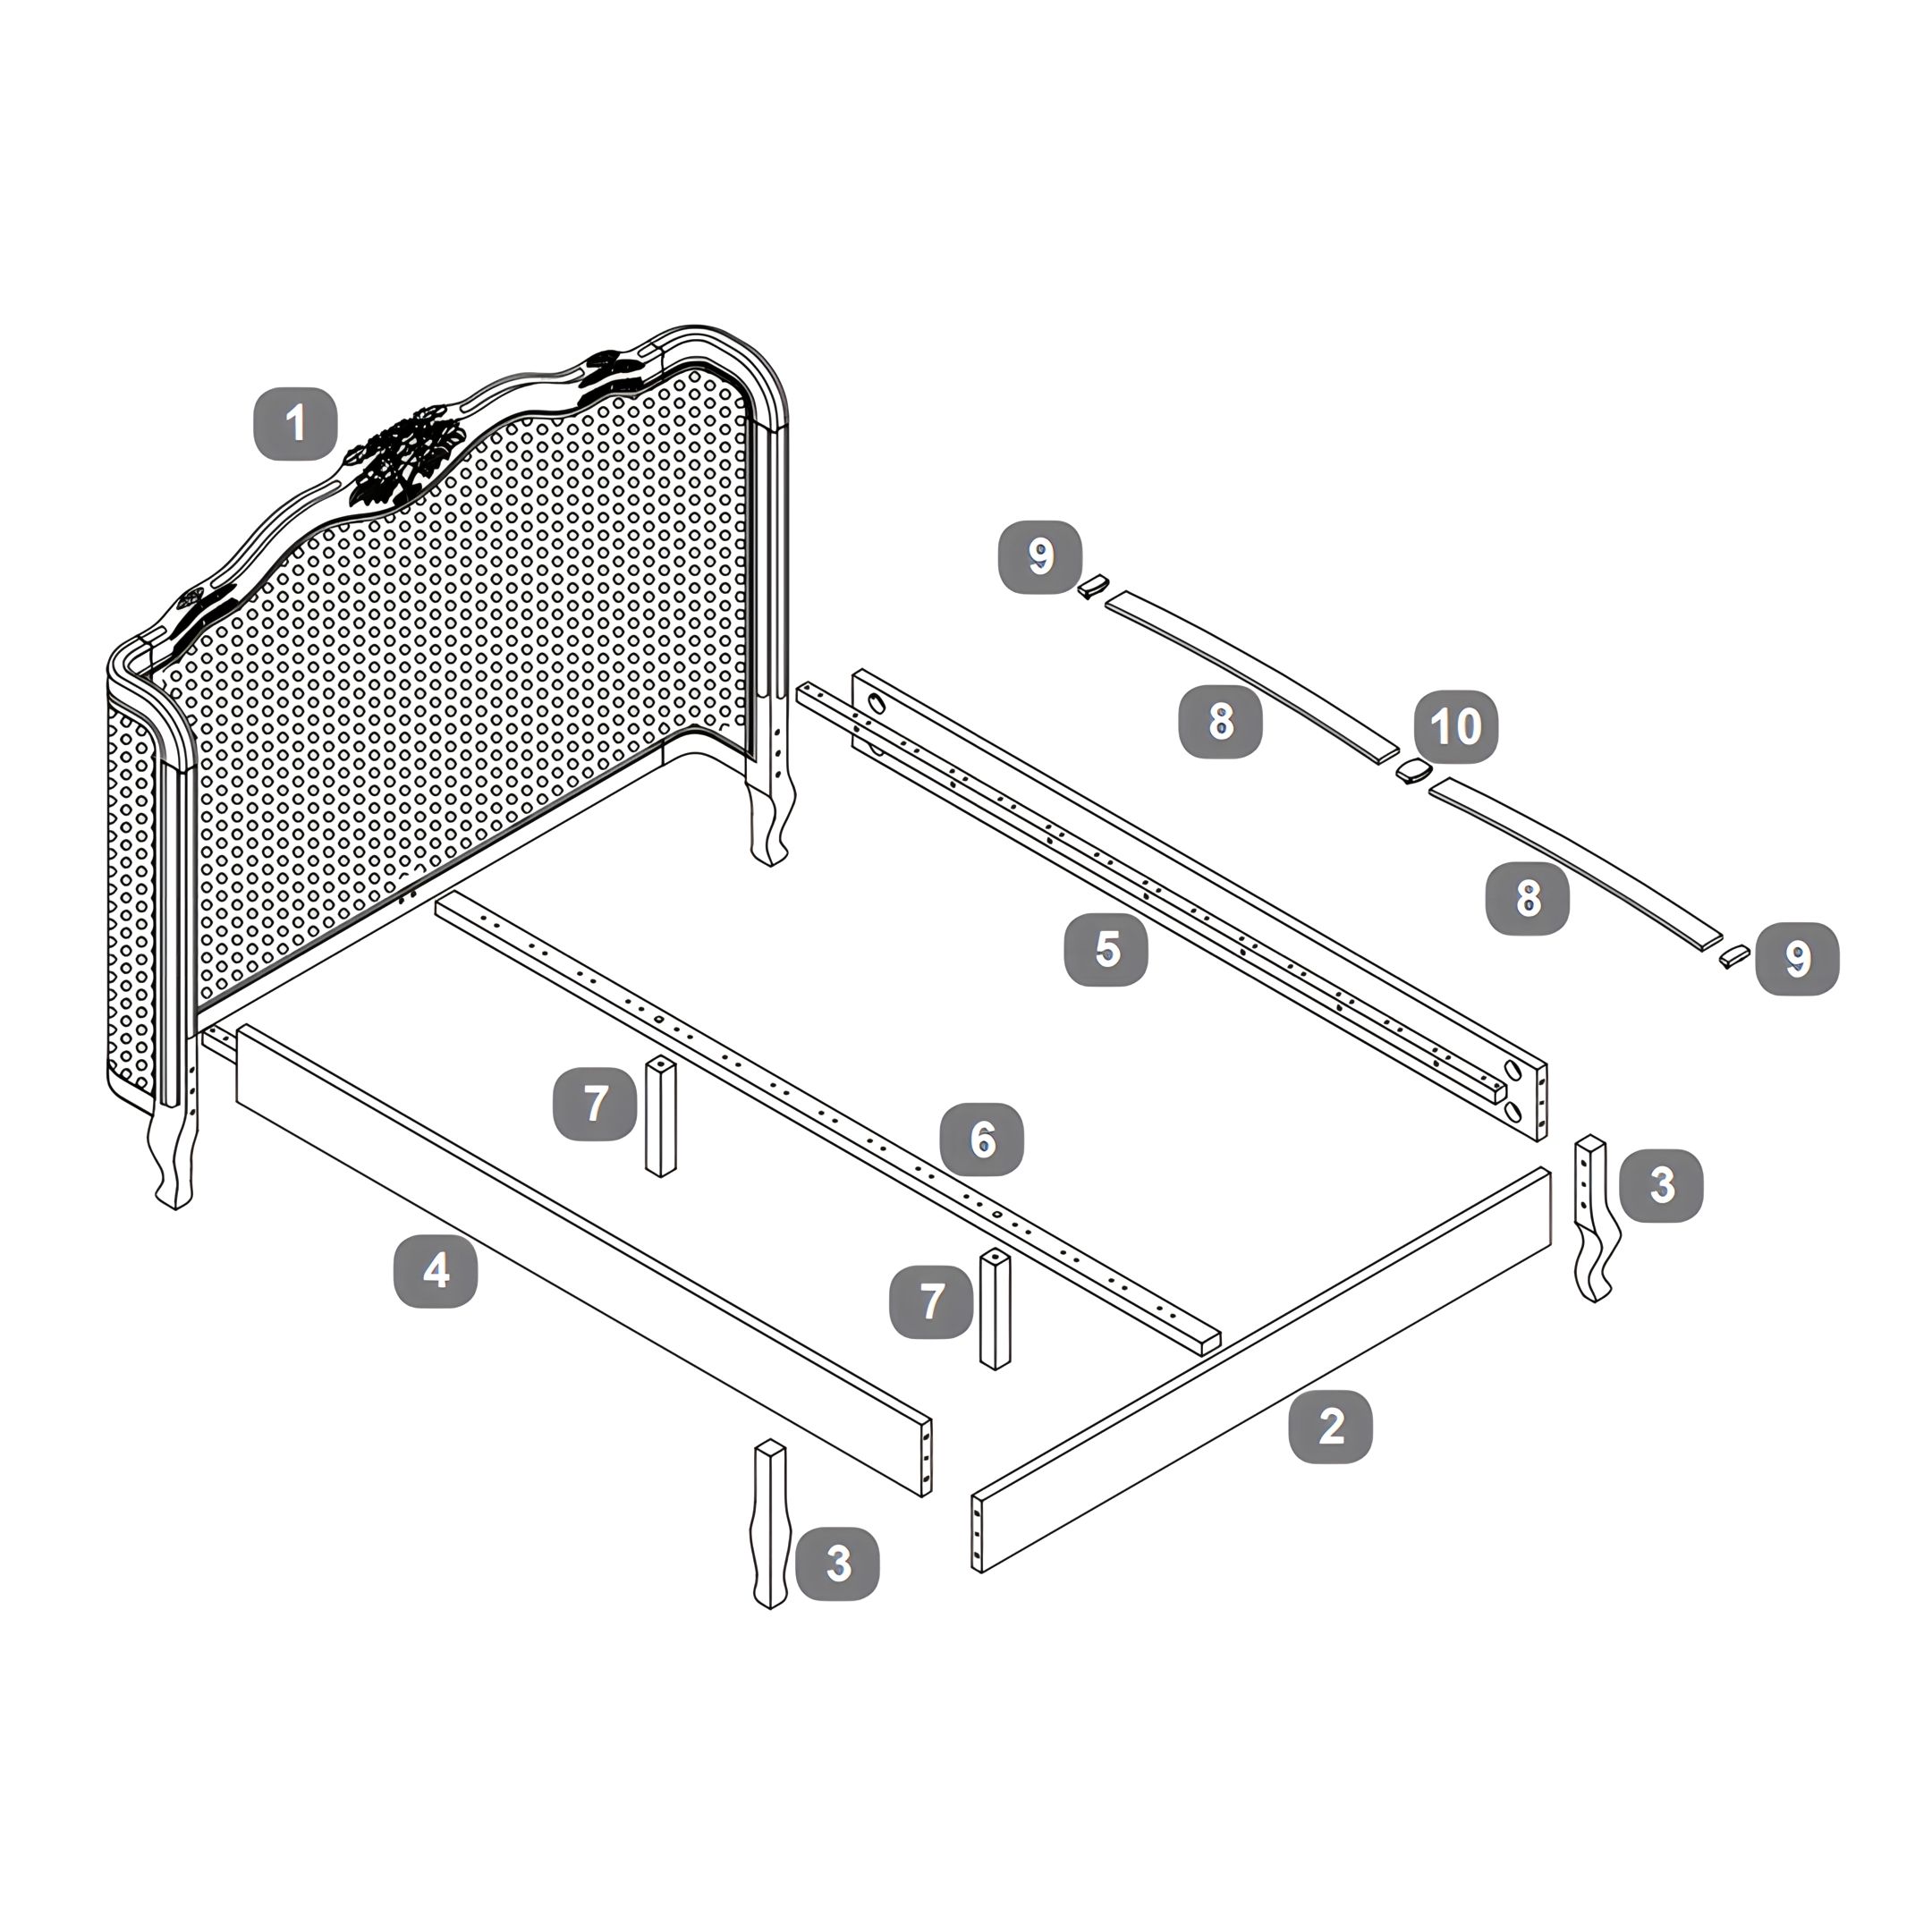
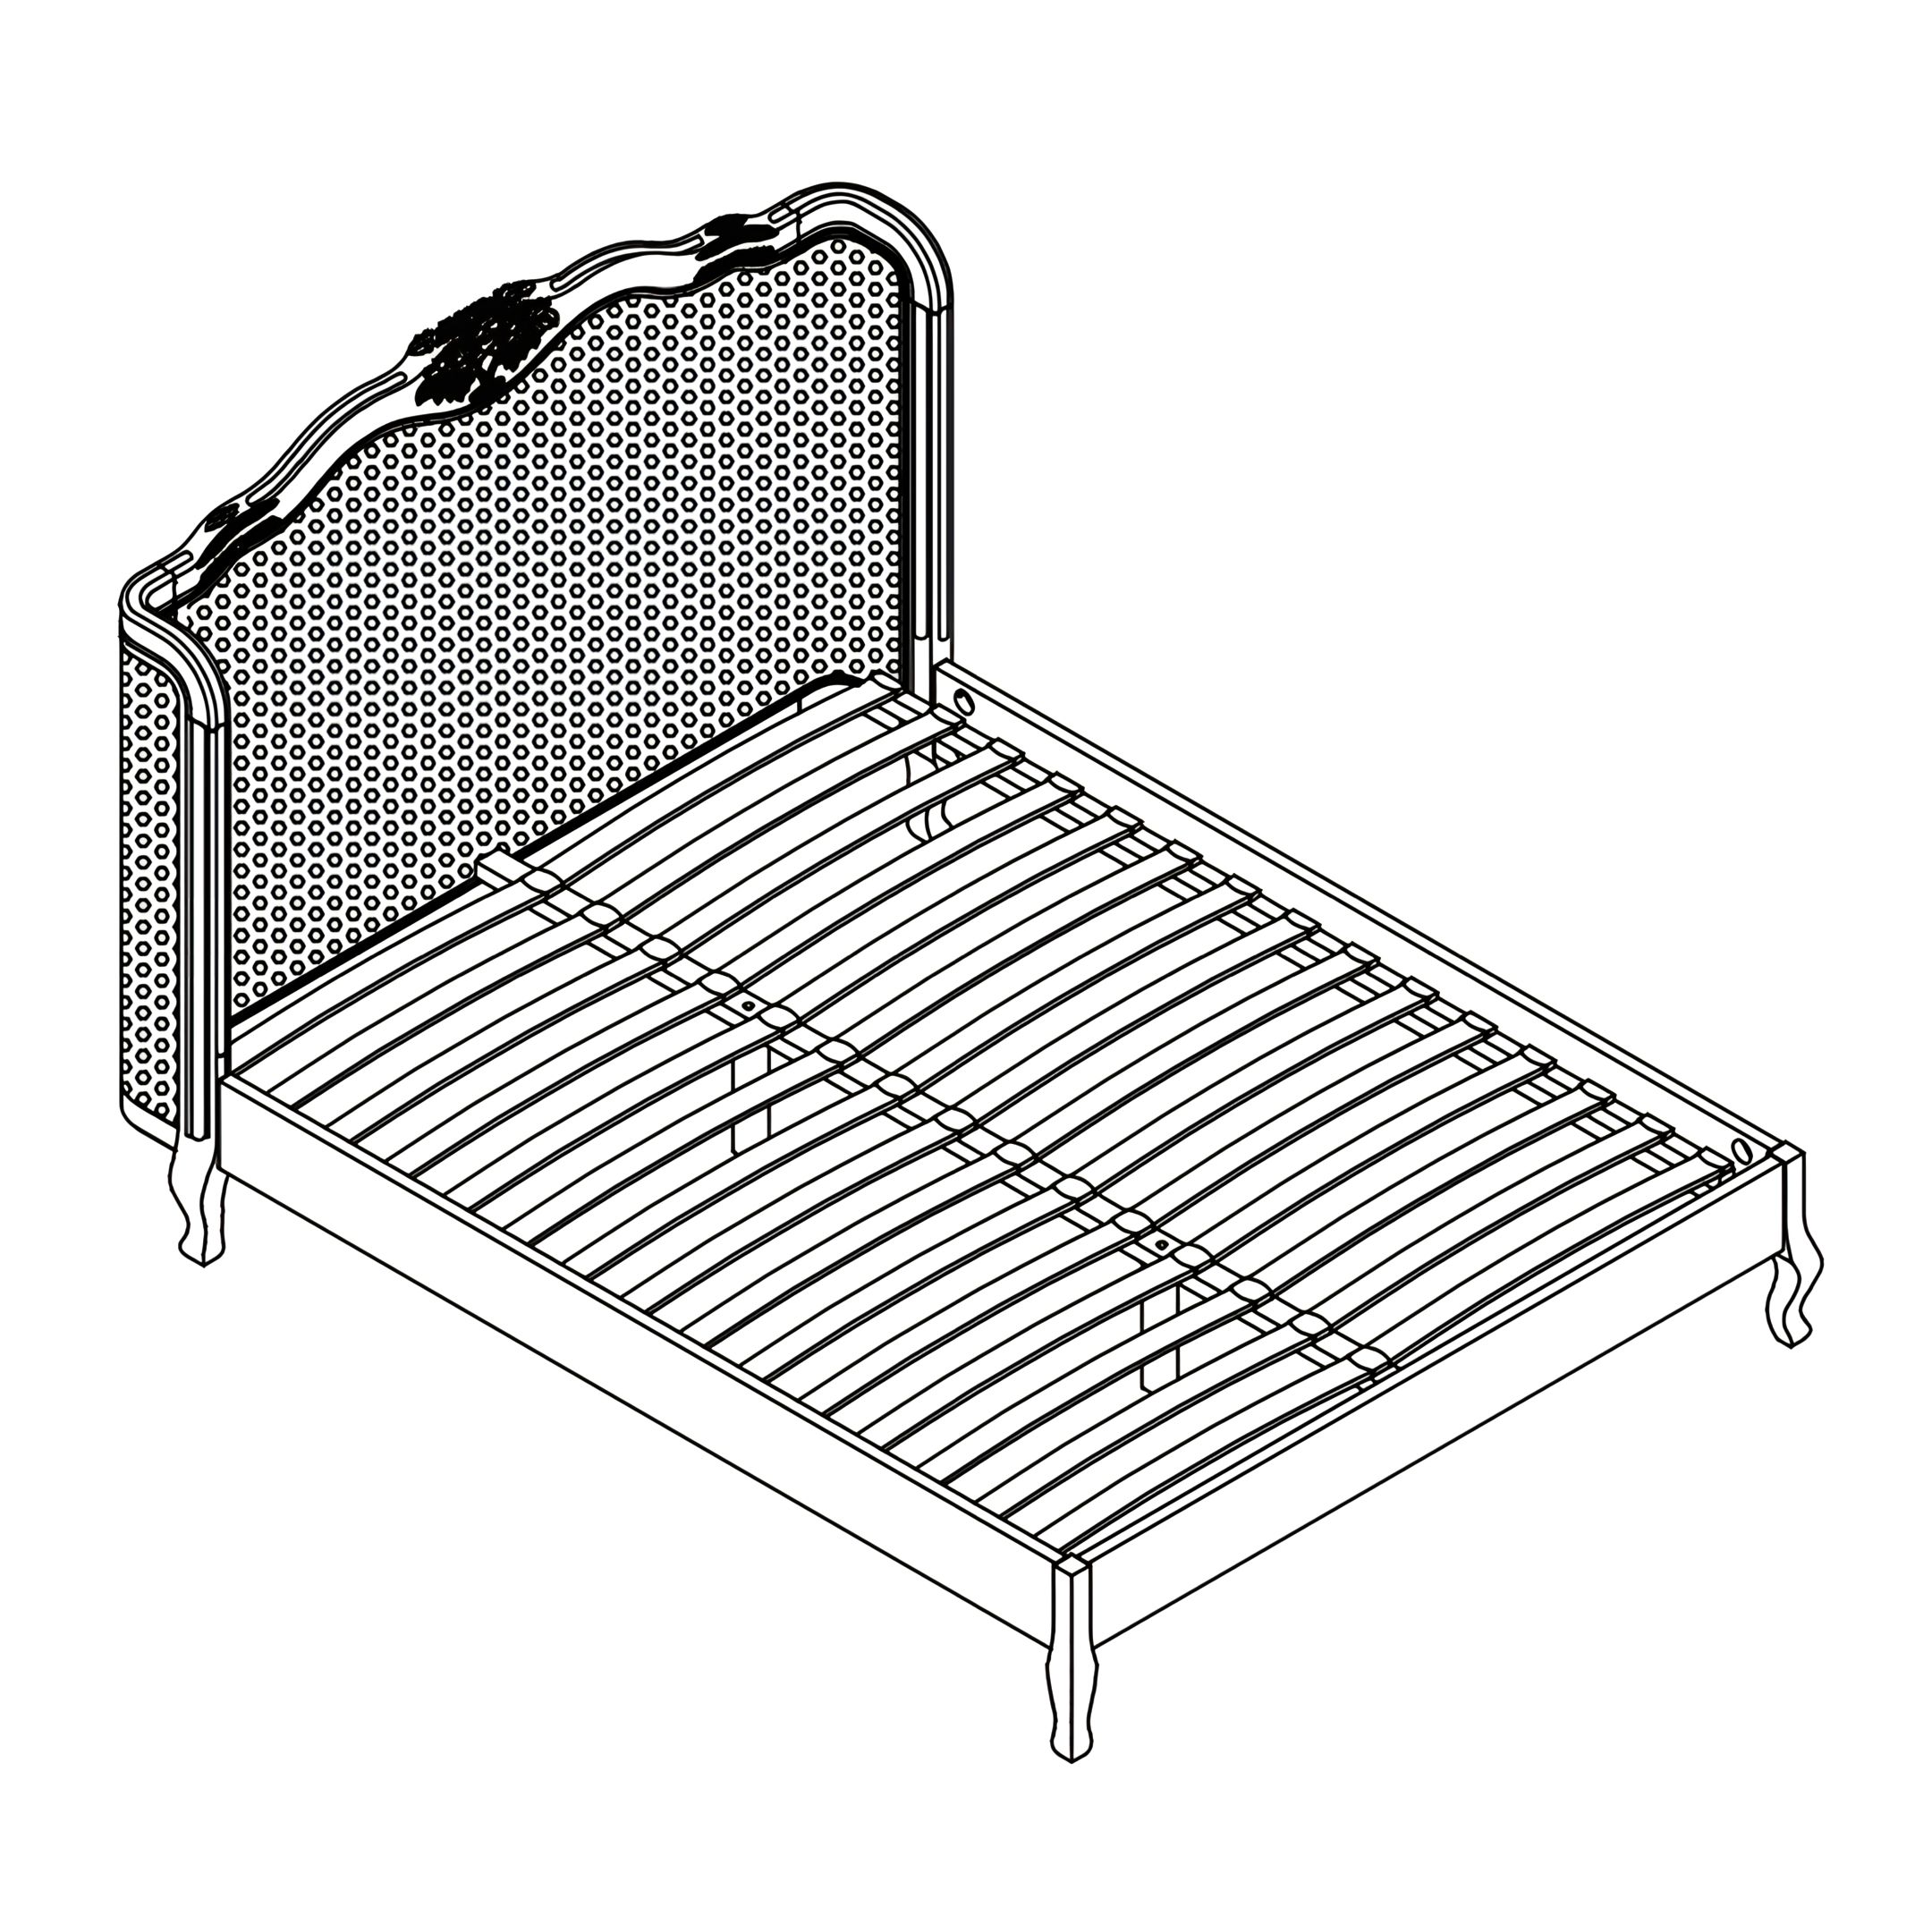
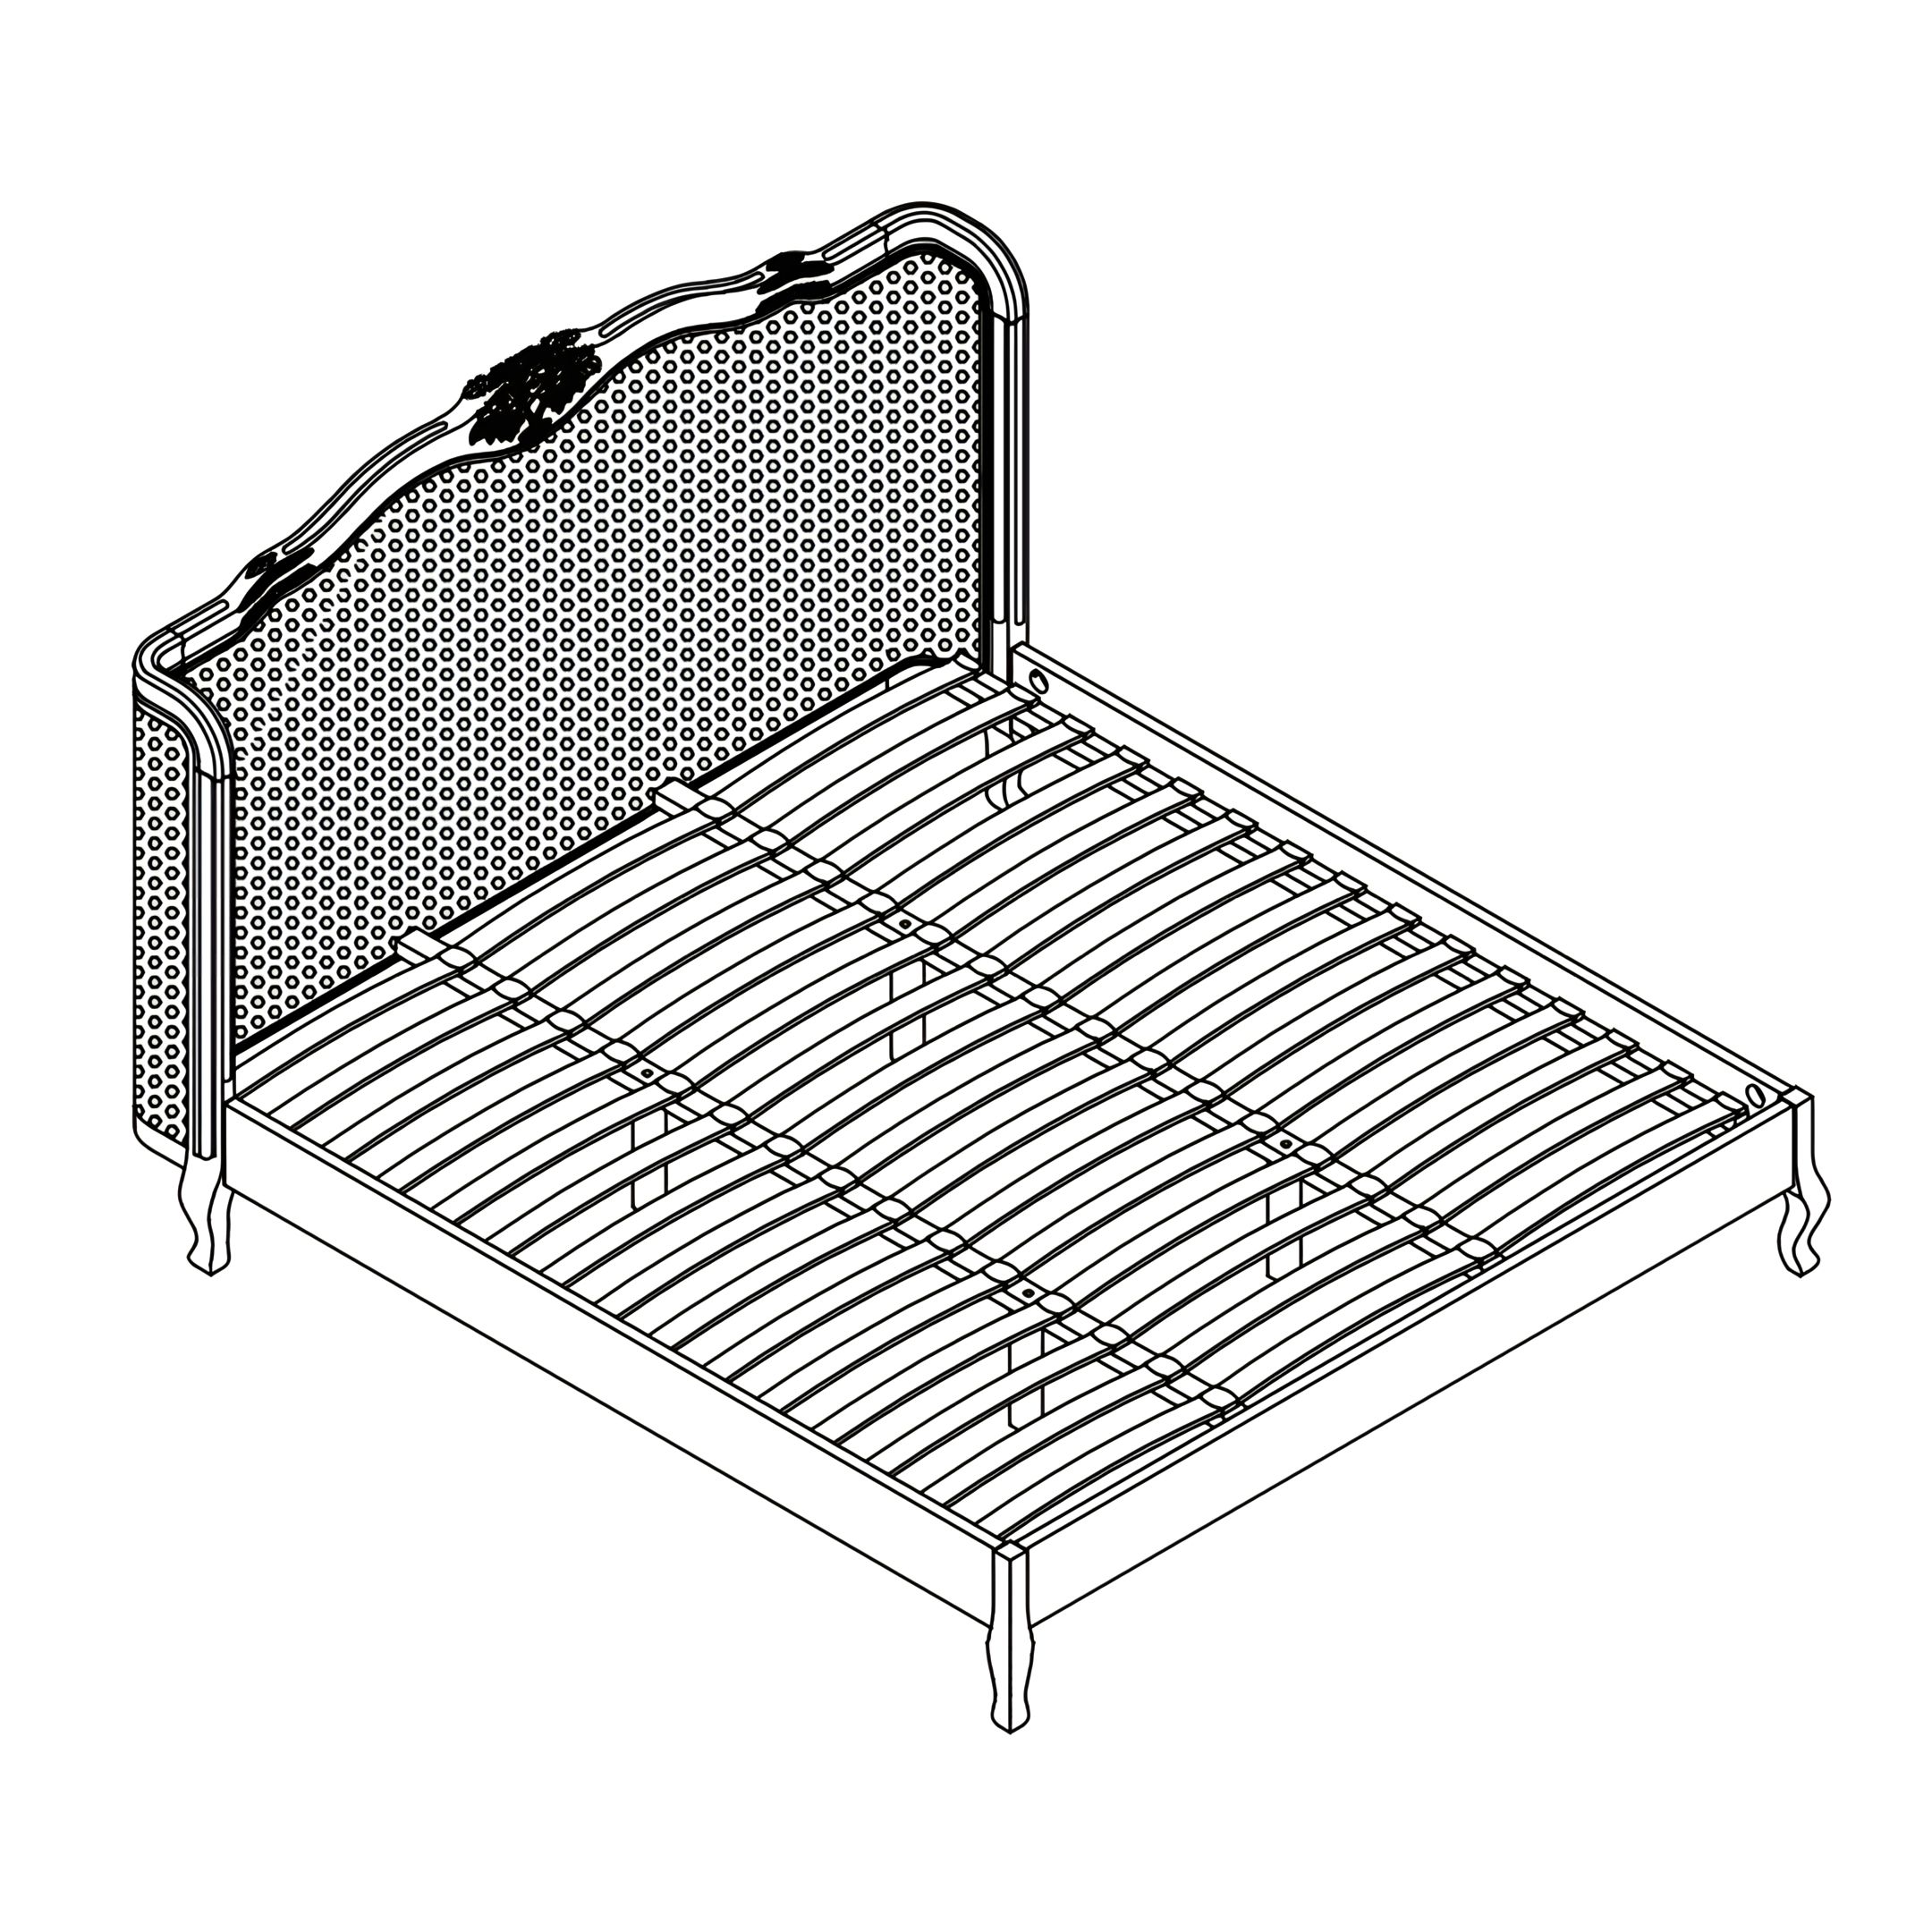
Parts
1Headboard
2Footboard
3Footbard Legs
4Side Rail - LH
5Side Rail - RH
6Centre Support Rail (1 for Double & King, 2 for Super King)
7Centre Support Rail Legs (2 for Double & King, 4 for Super King)
8Wooden Slats (28 for Double, 30 for King, 45 for Super King)
9 Single Plastic Caps (28 for Double, 30 for King, 30 for Super King)
10Double Plastic Caps (14 for Double, 15 for King, 30 for Super King)
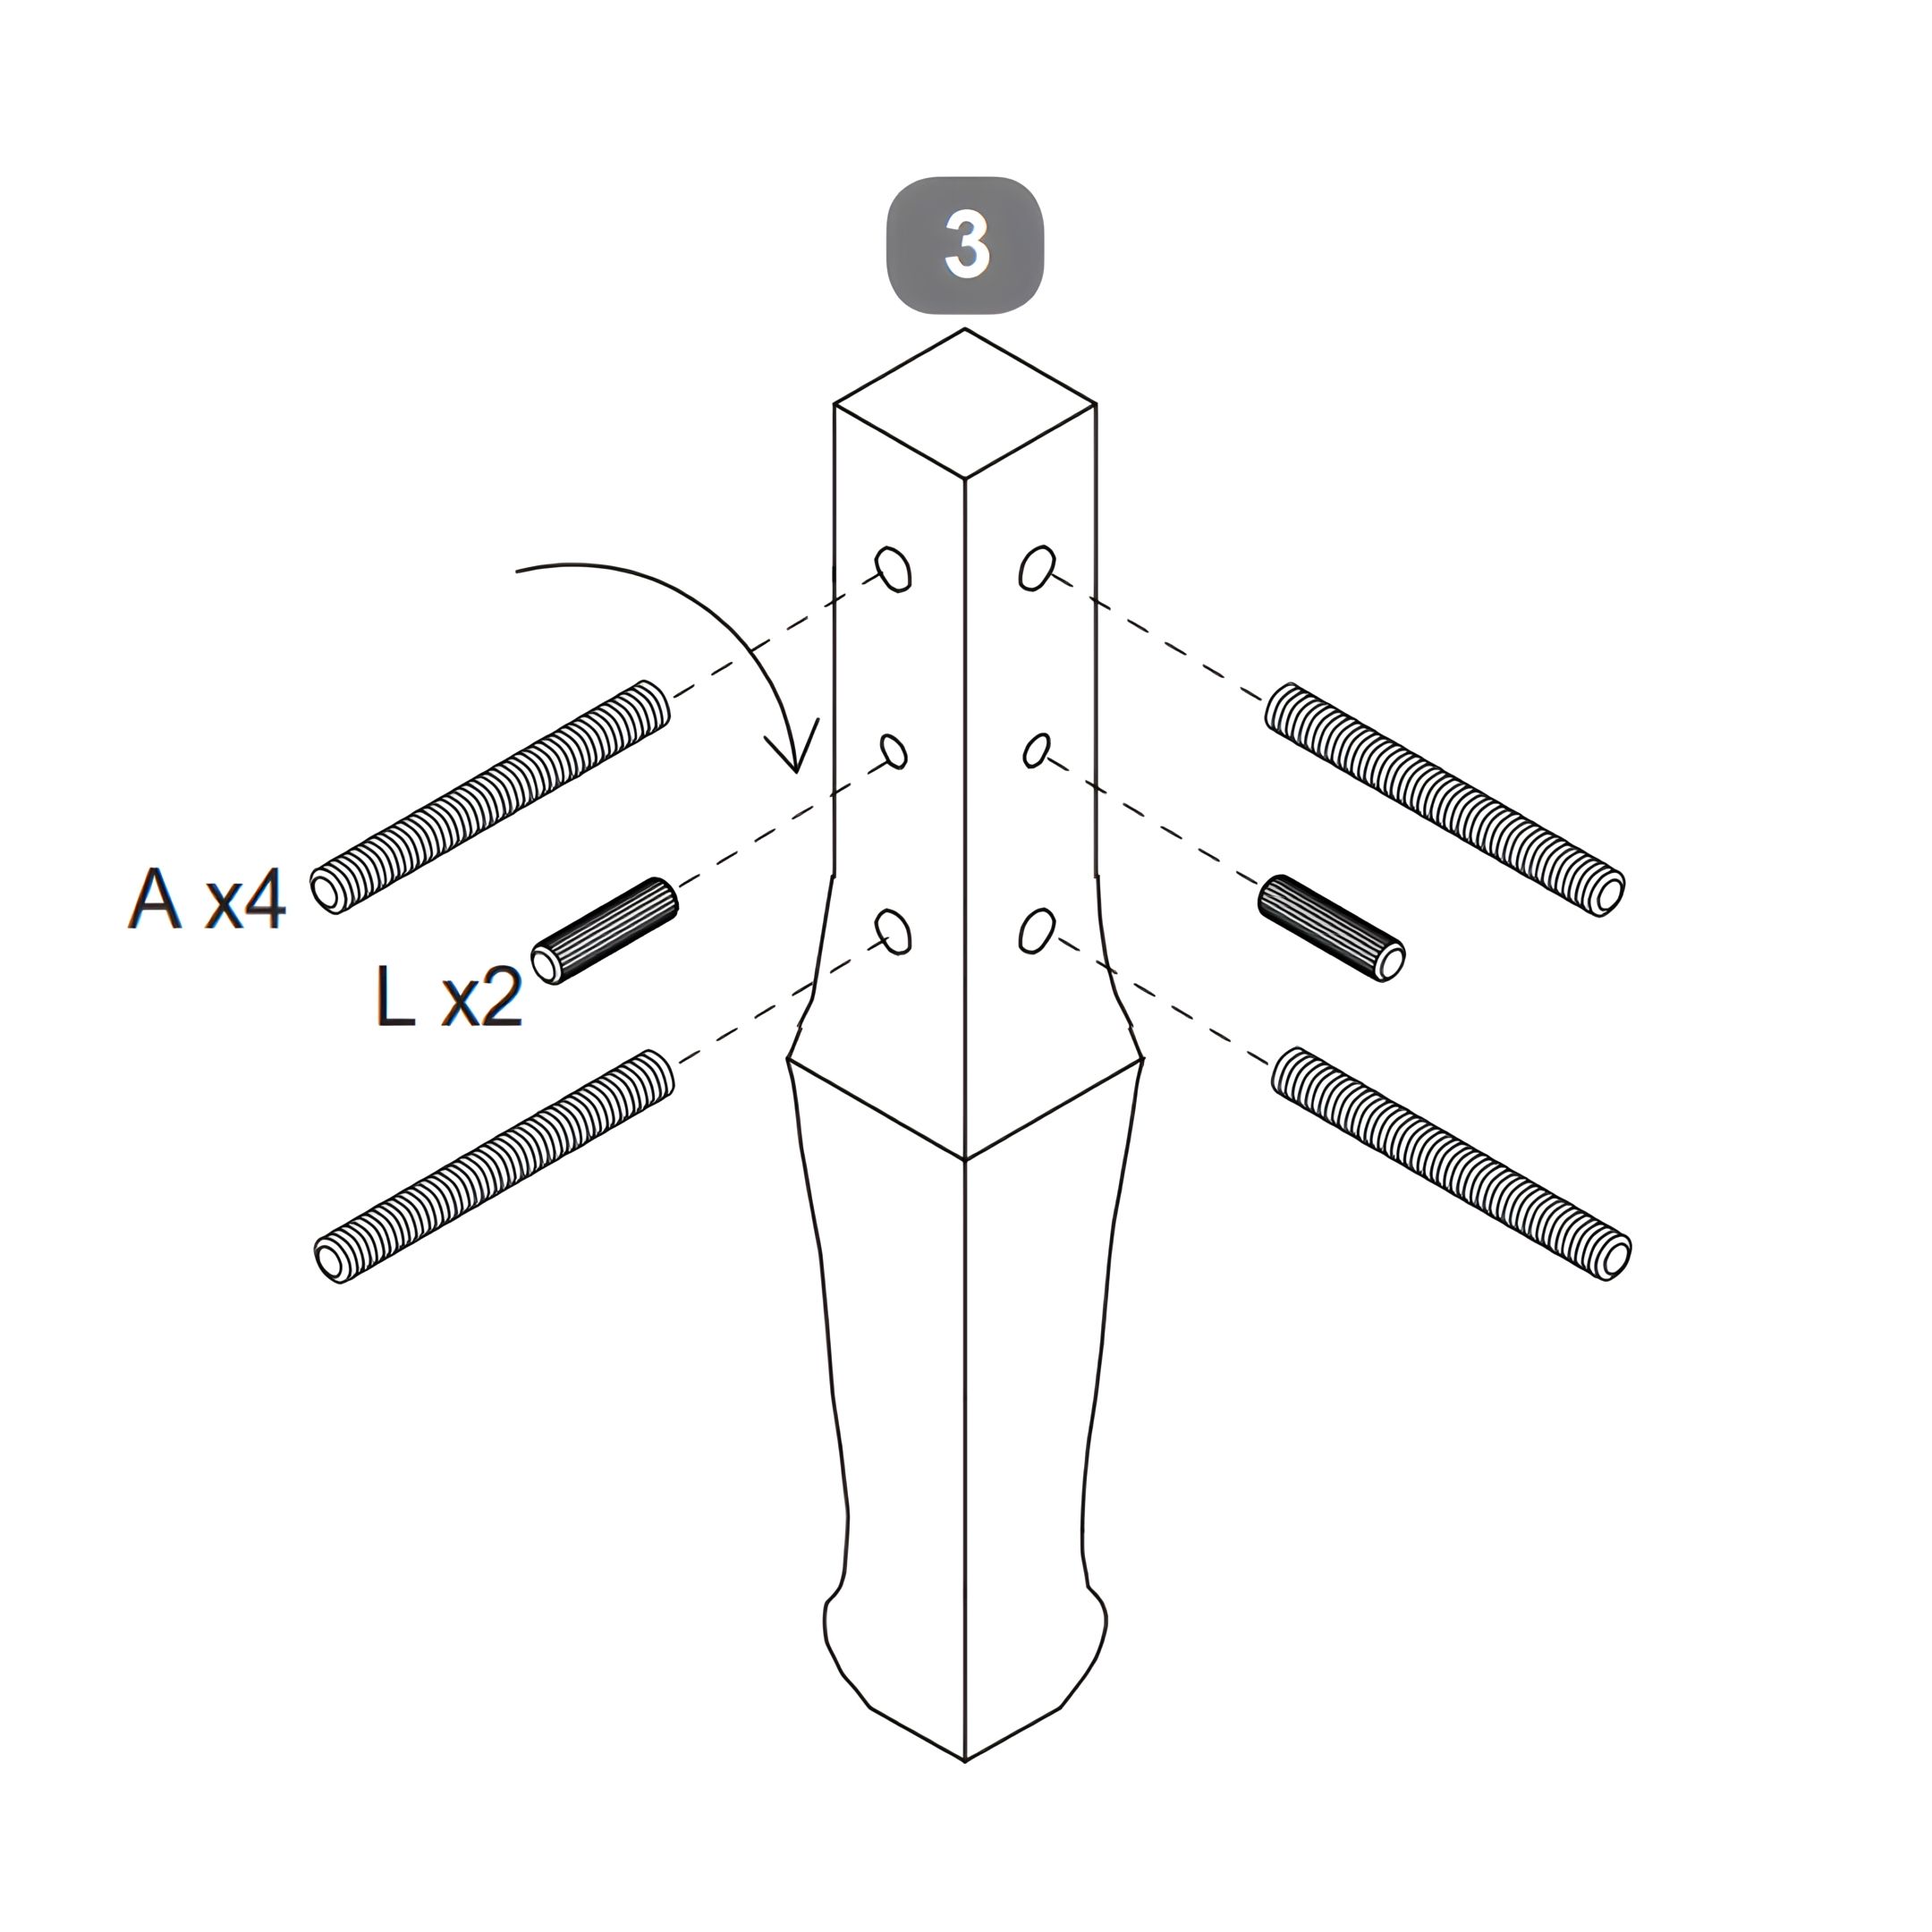
1. Prepare the Footboard Legs
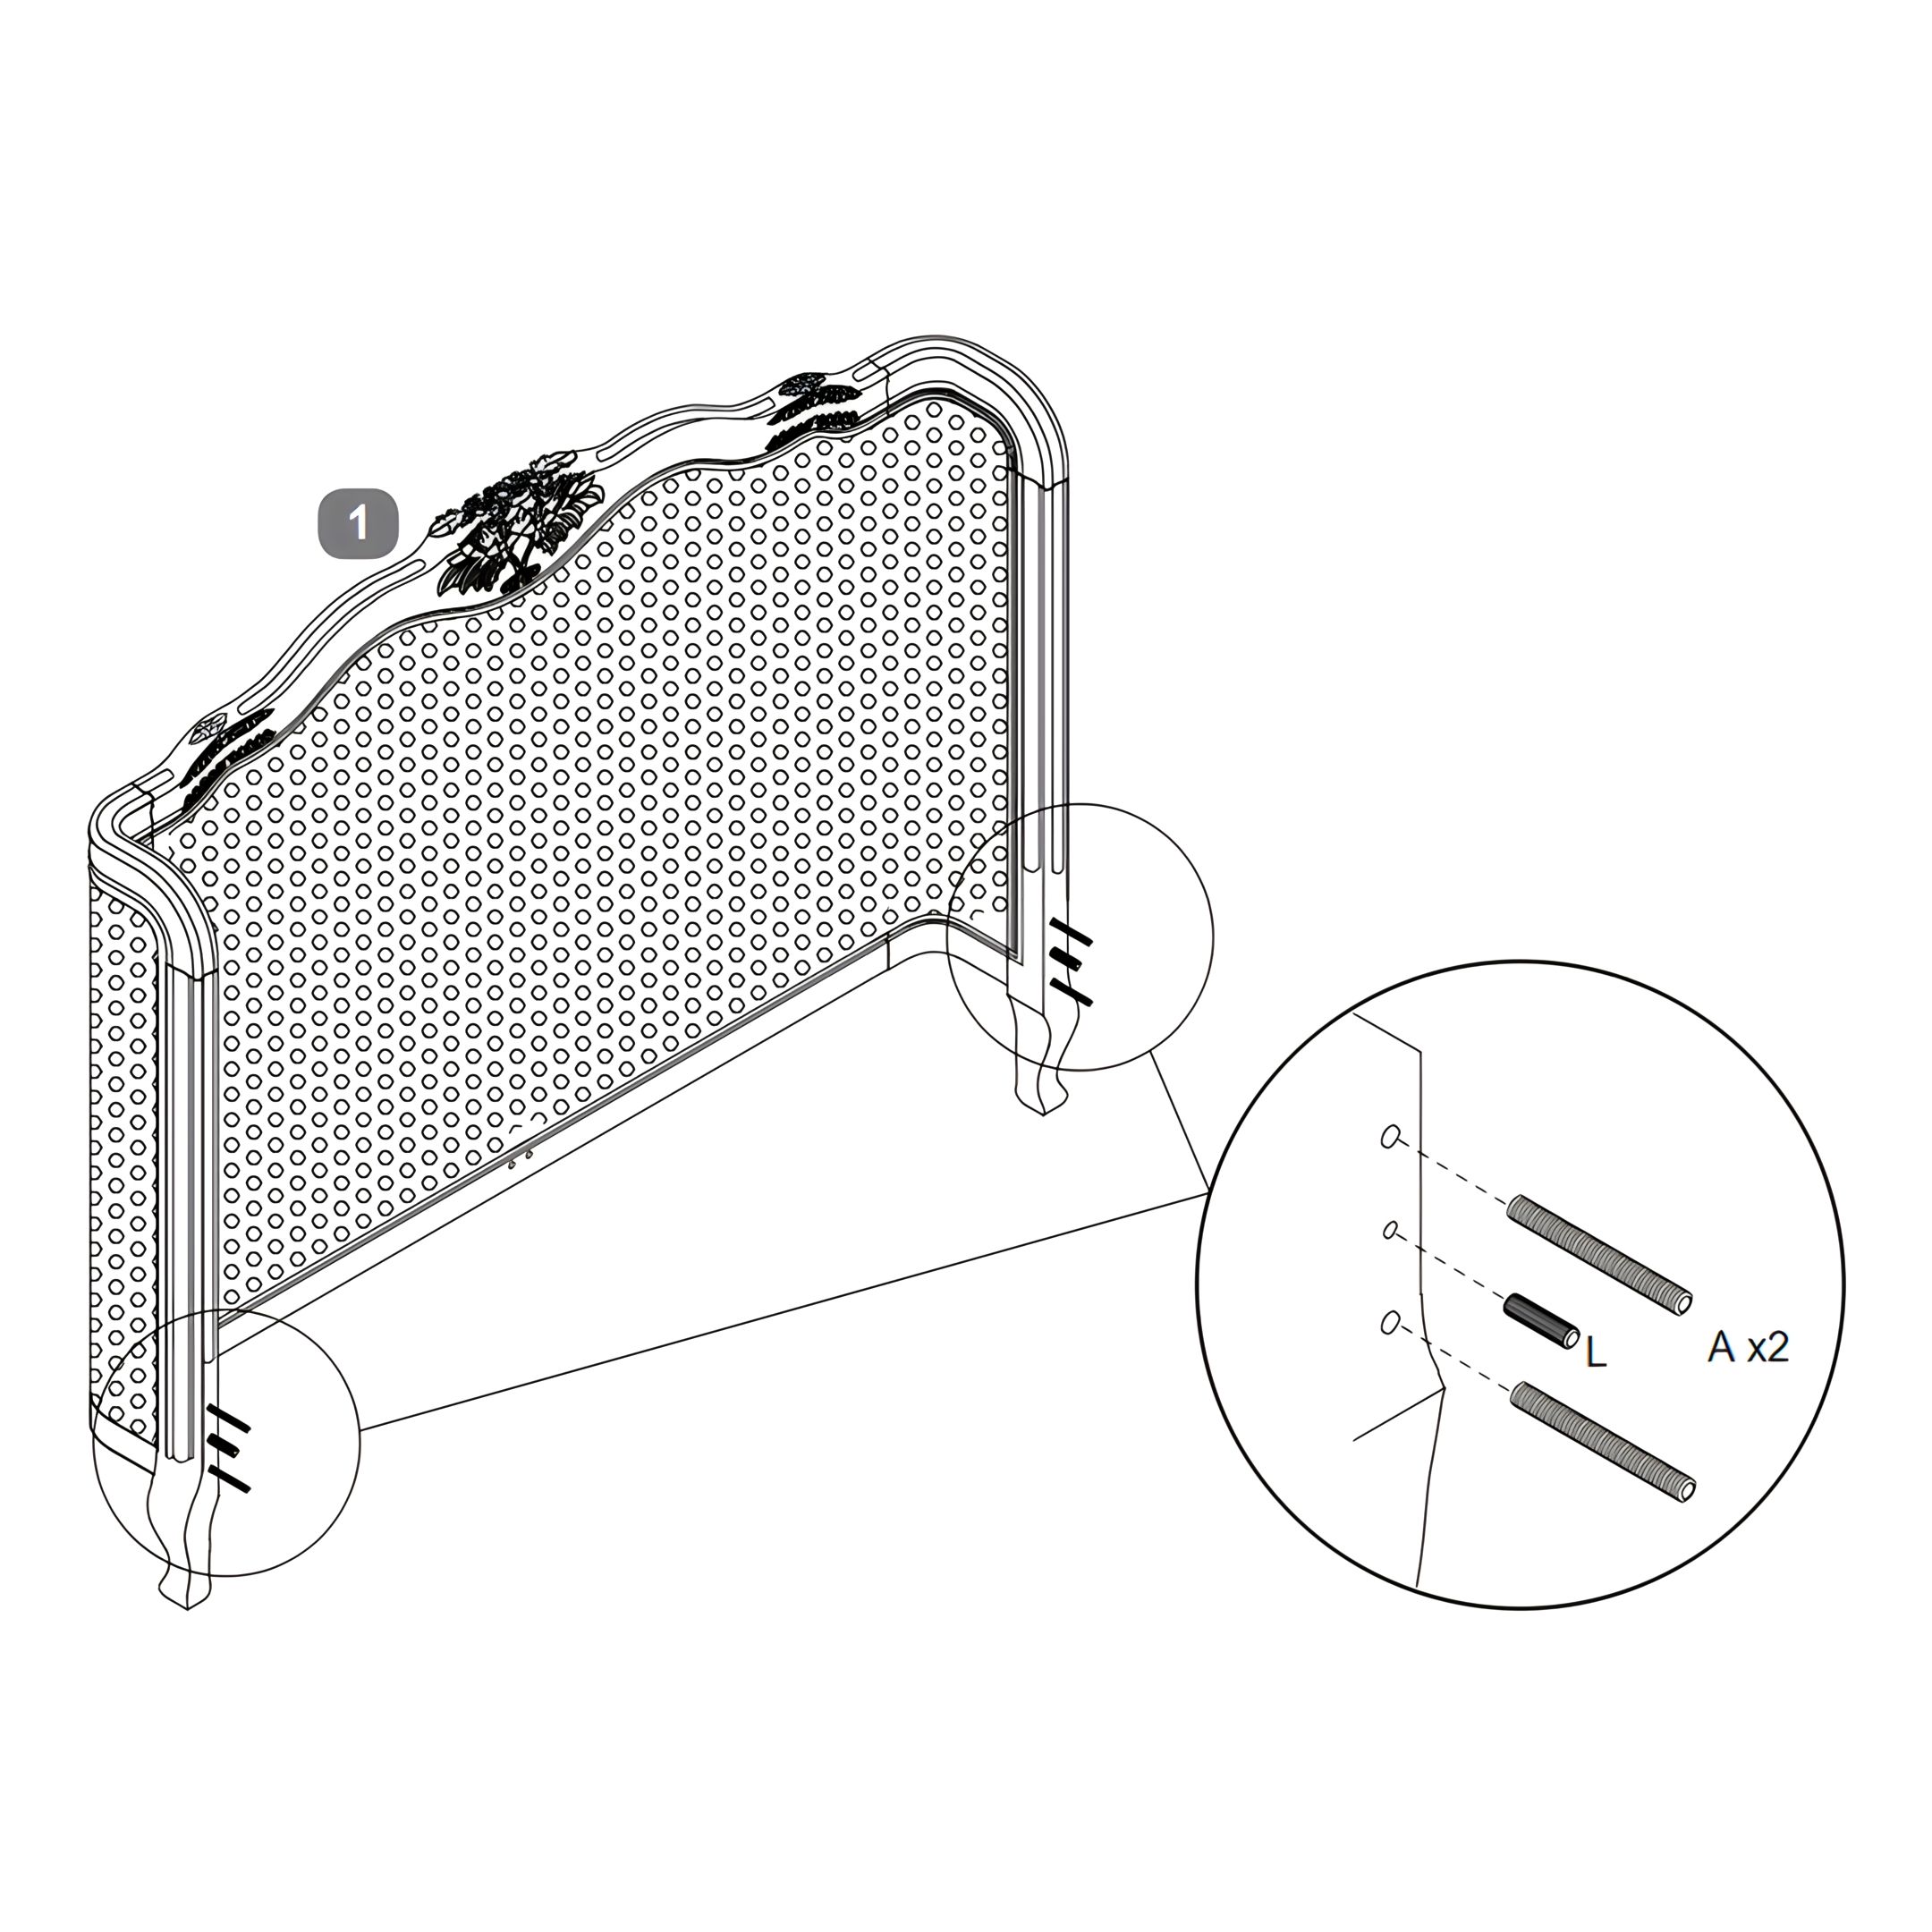
1. Insert 4 threaded studs (A) into the designated holes on one footboard leg. 2. Insert 2 dowels (L) into the remaining holes. 3. Ensure all hardware is securely in place.
Repeat the process for the other footboard leg
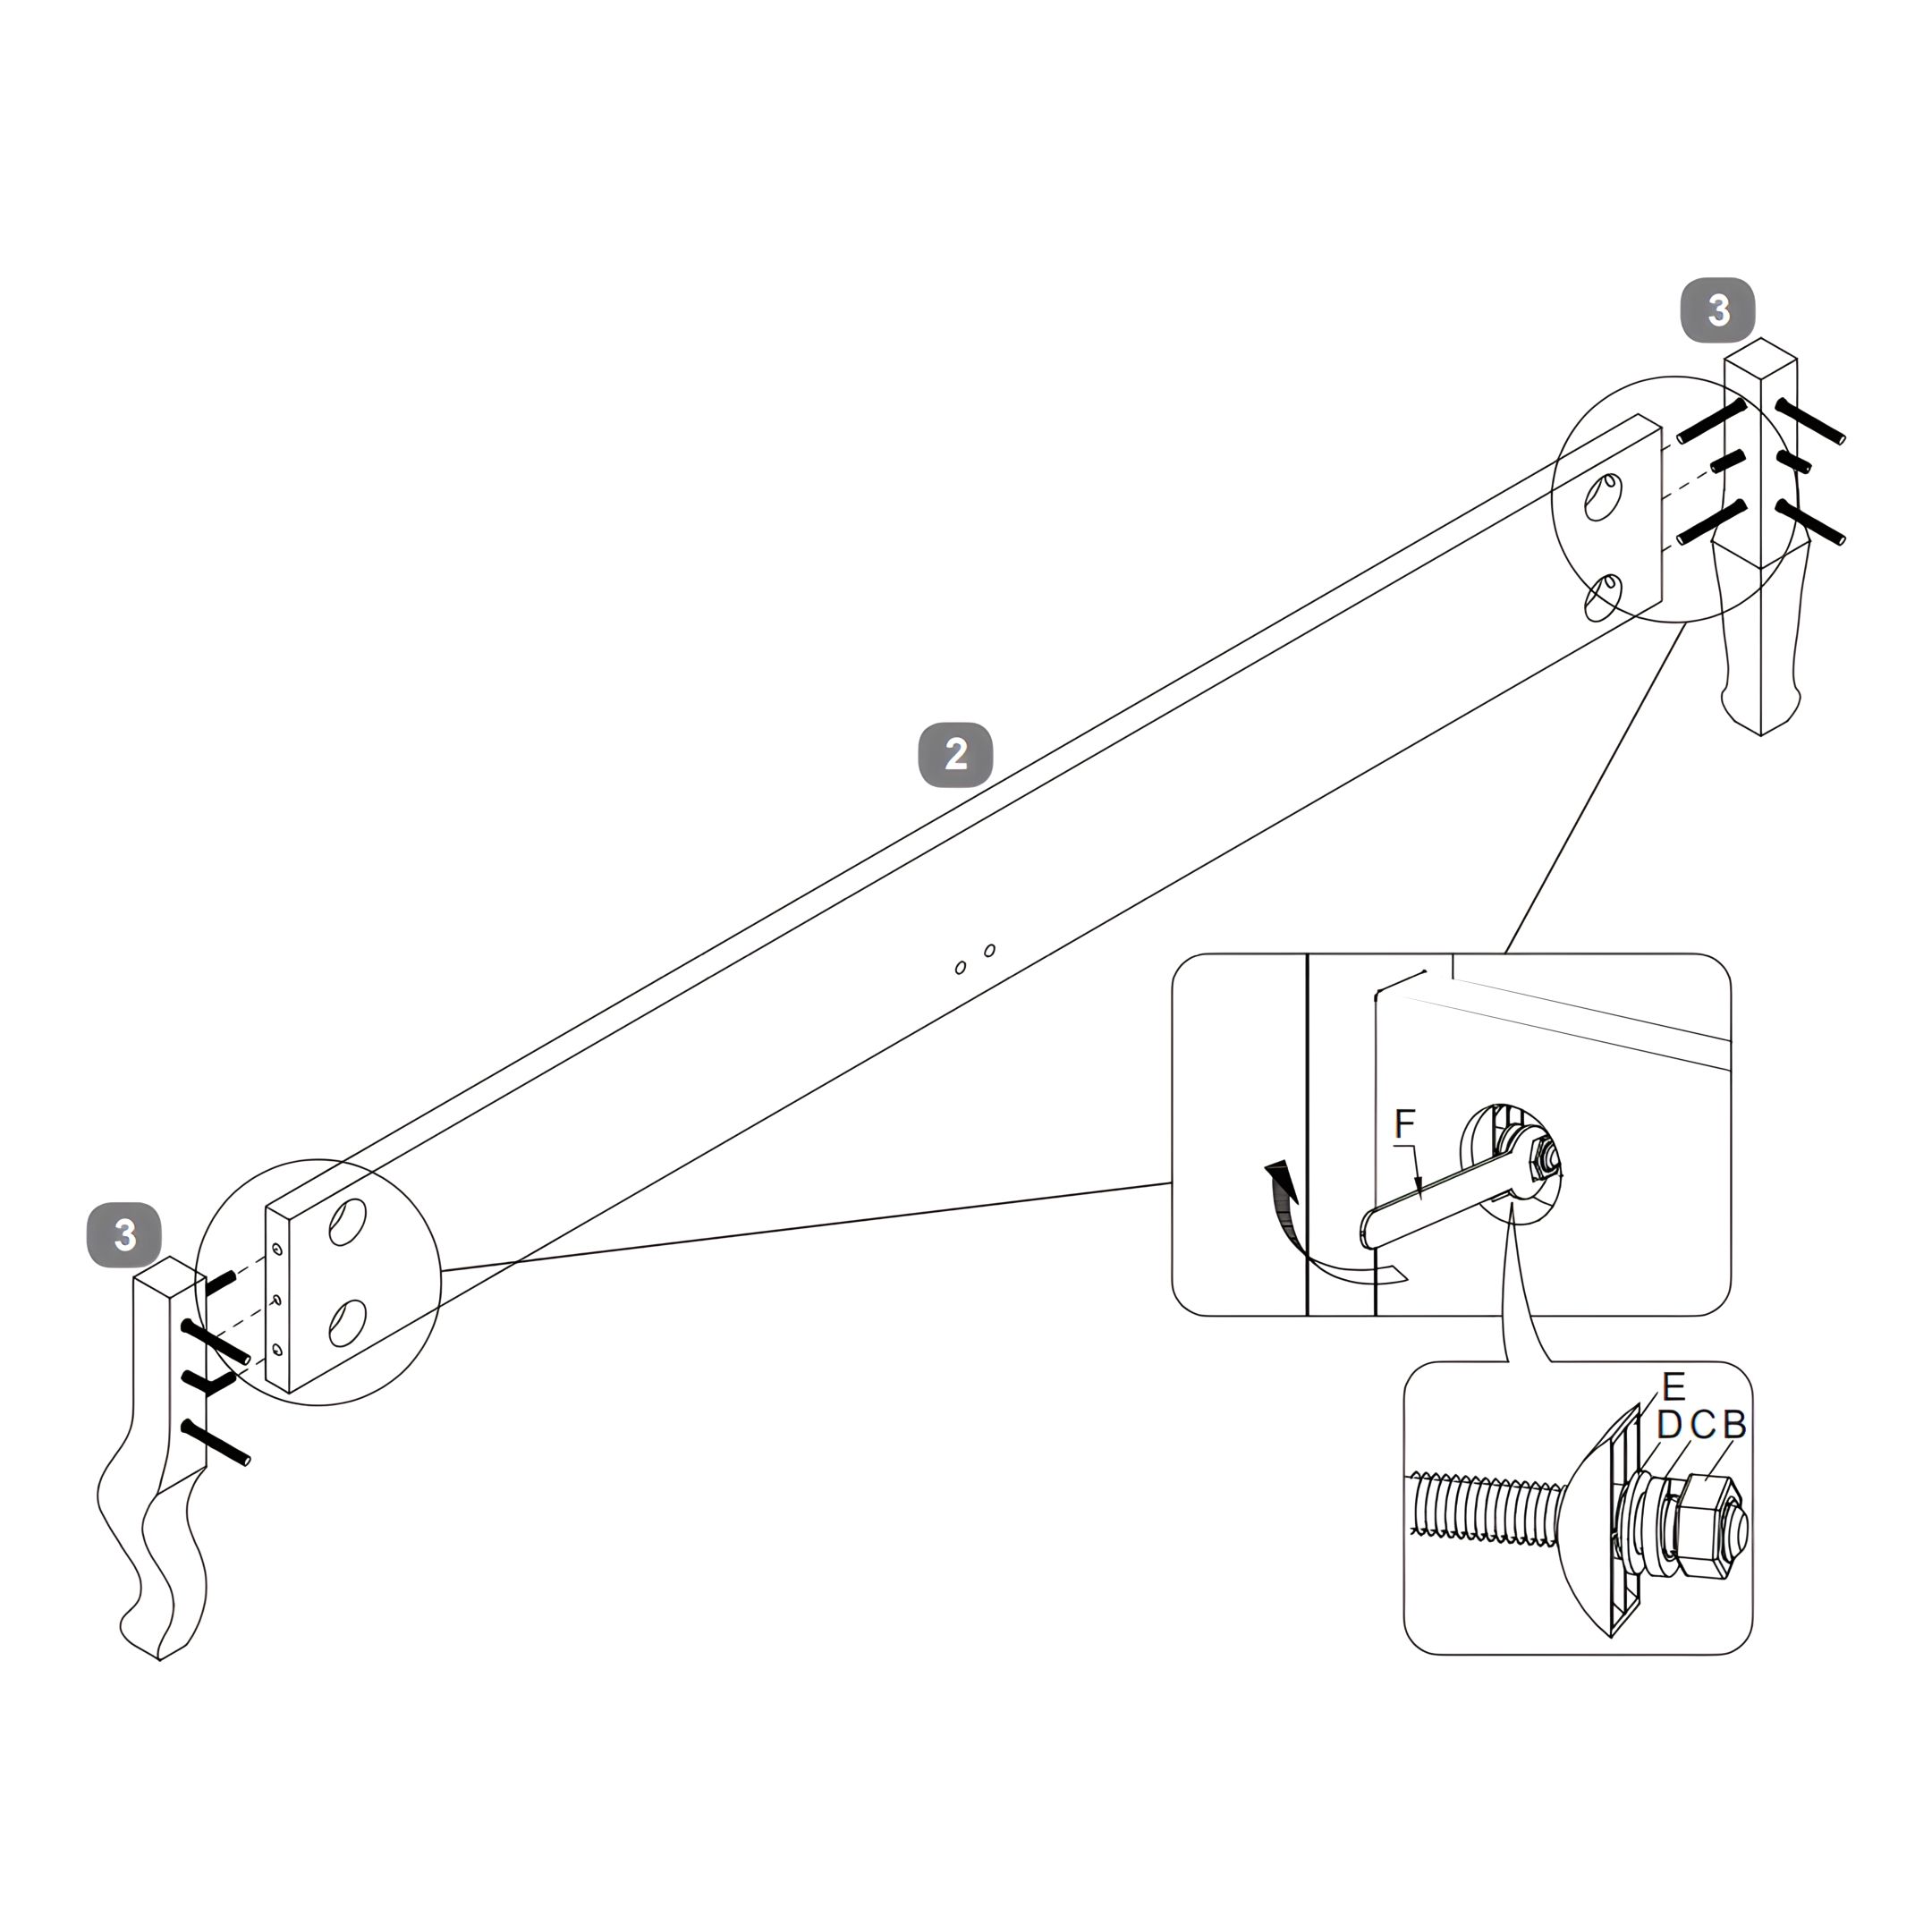
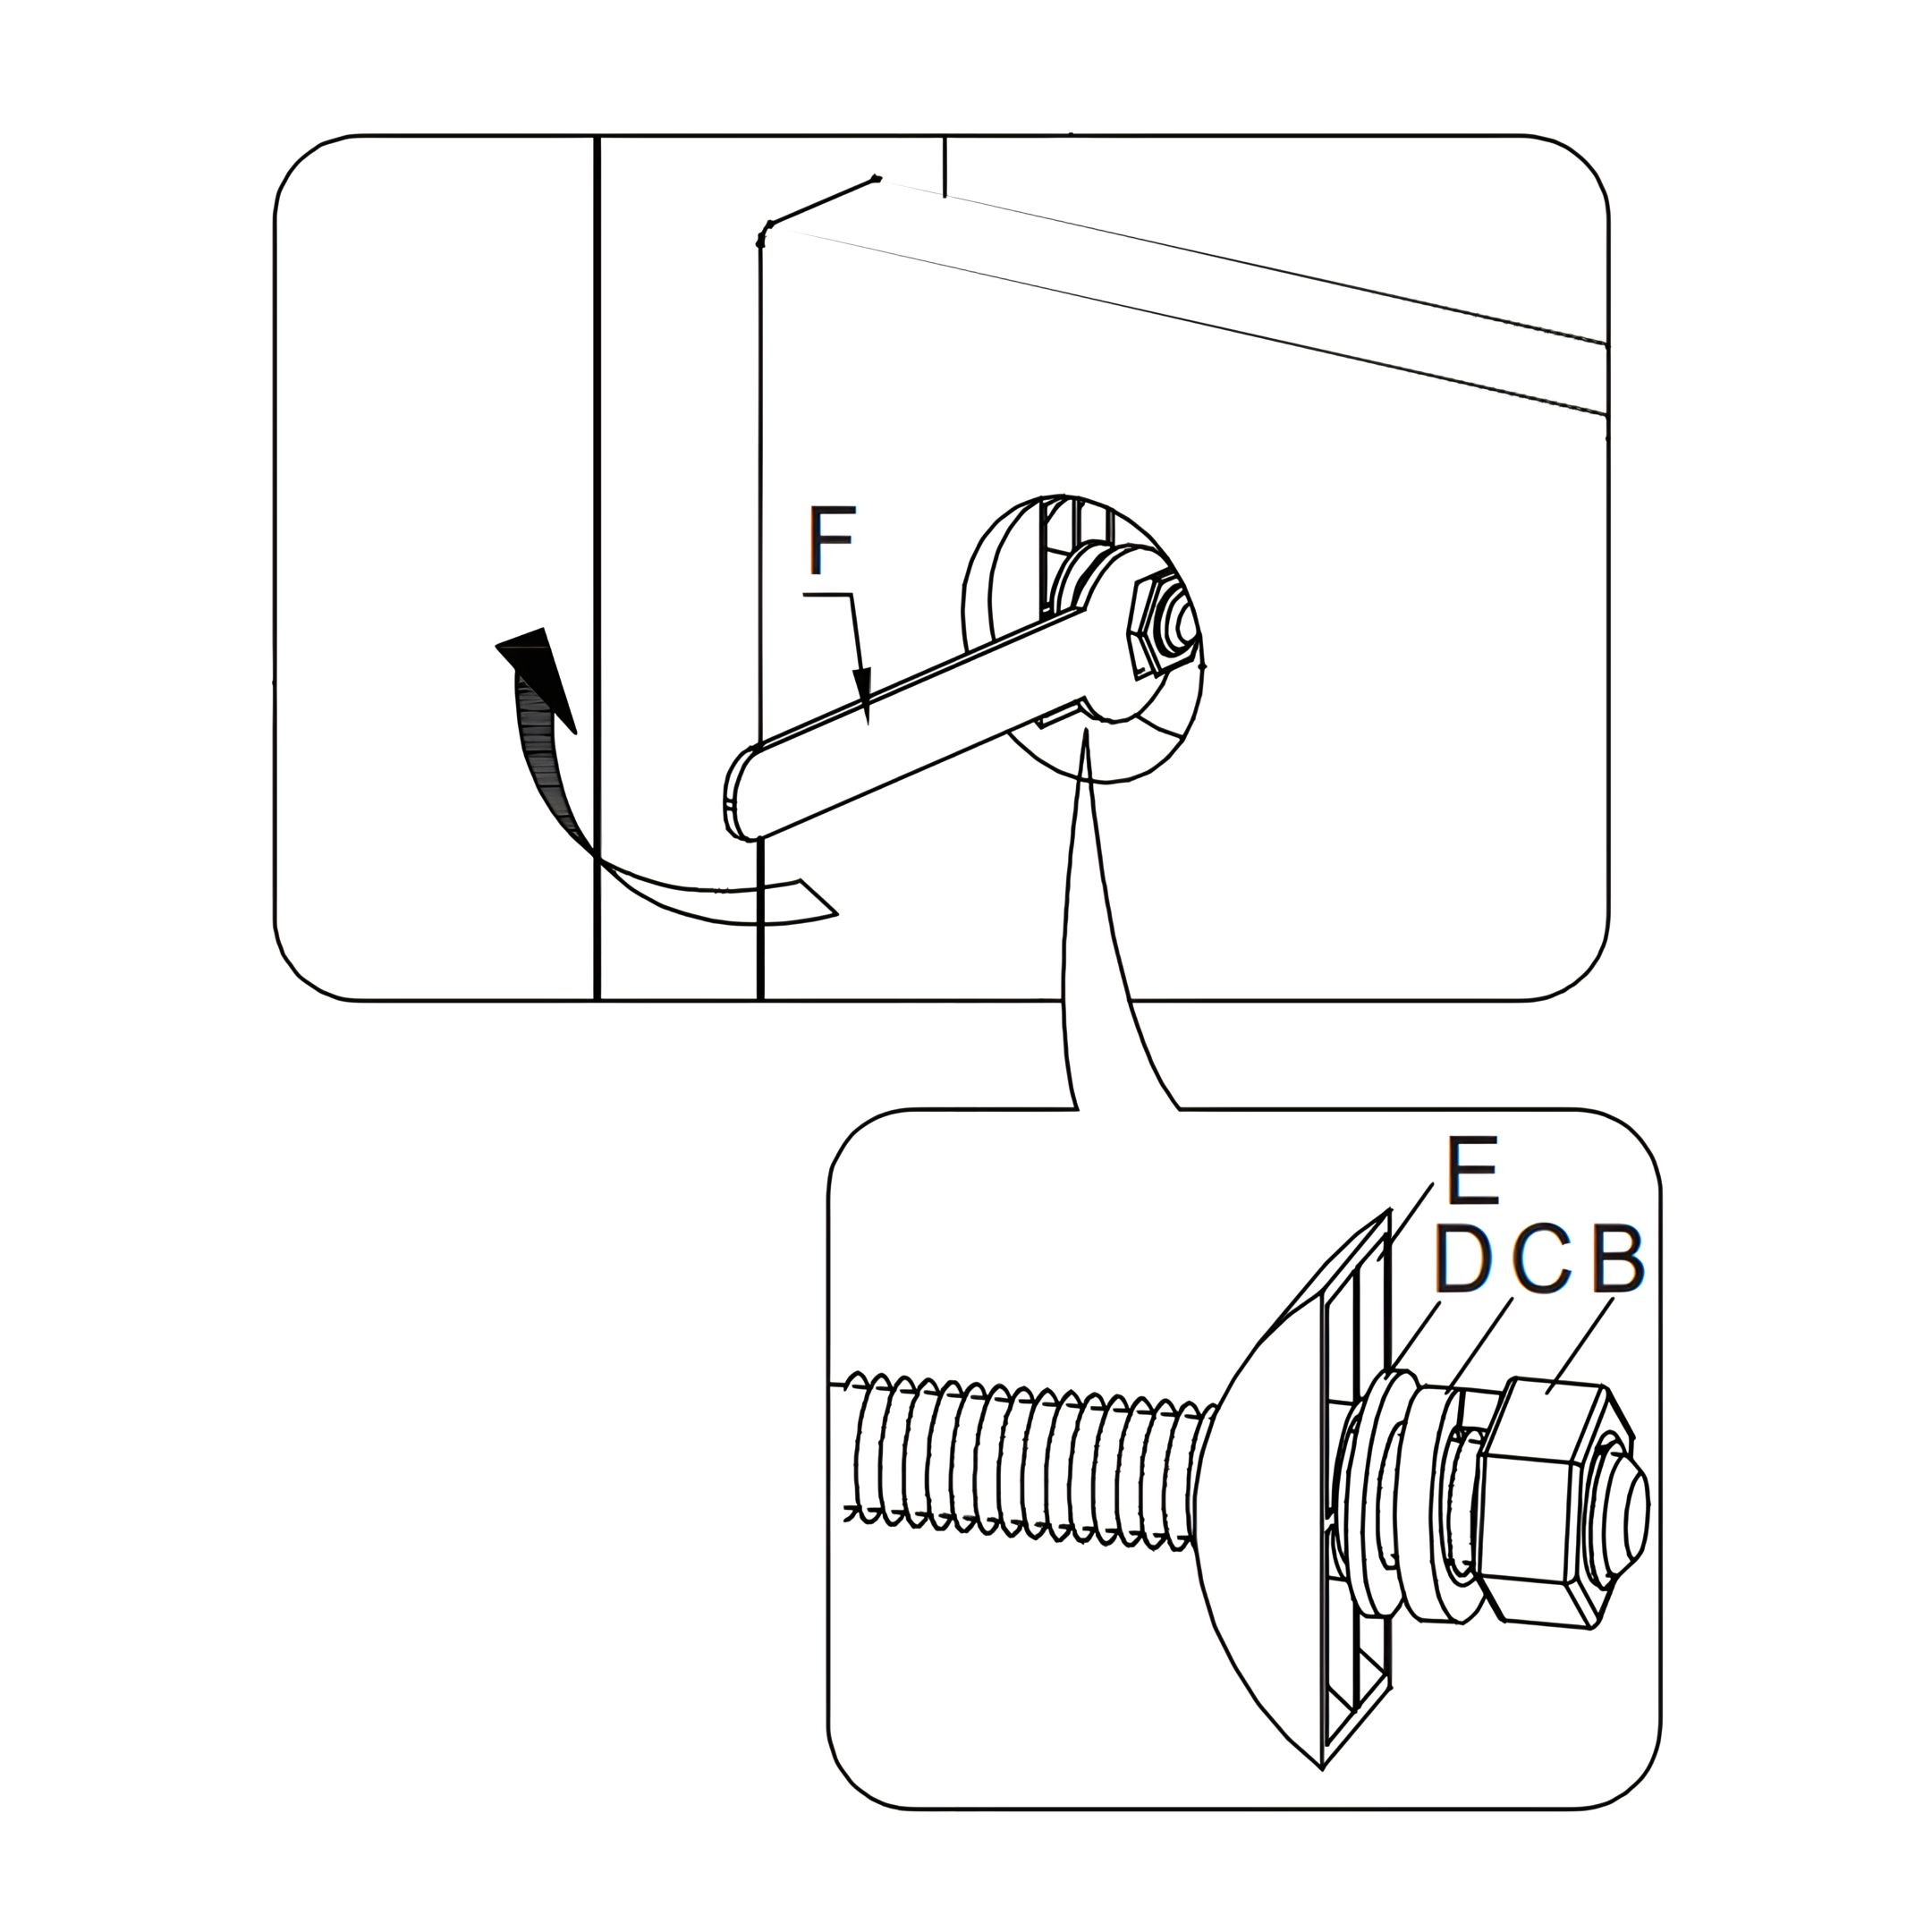
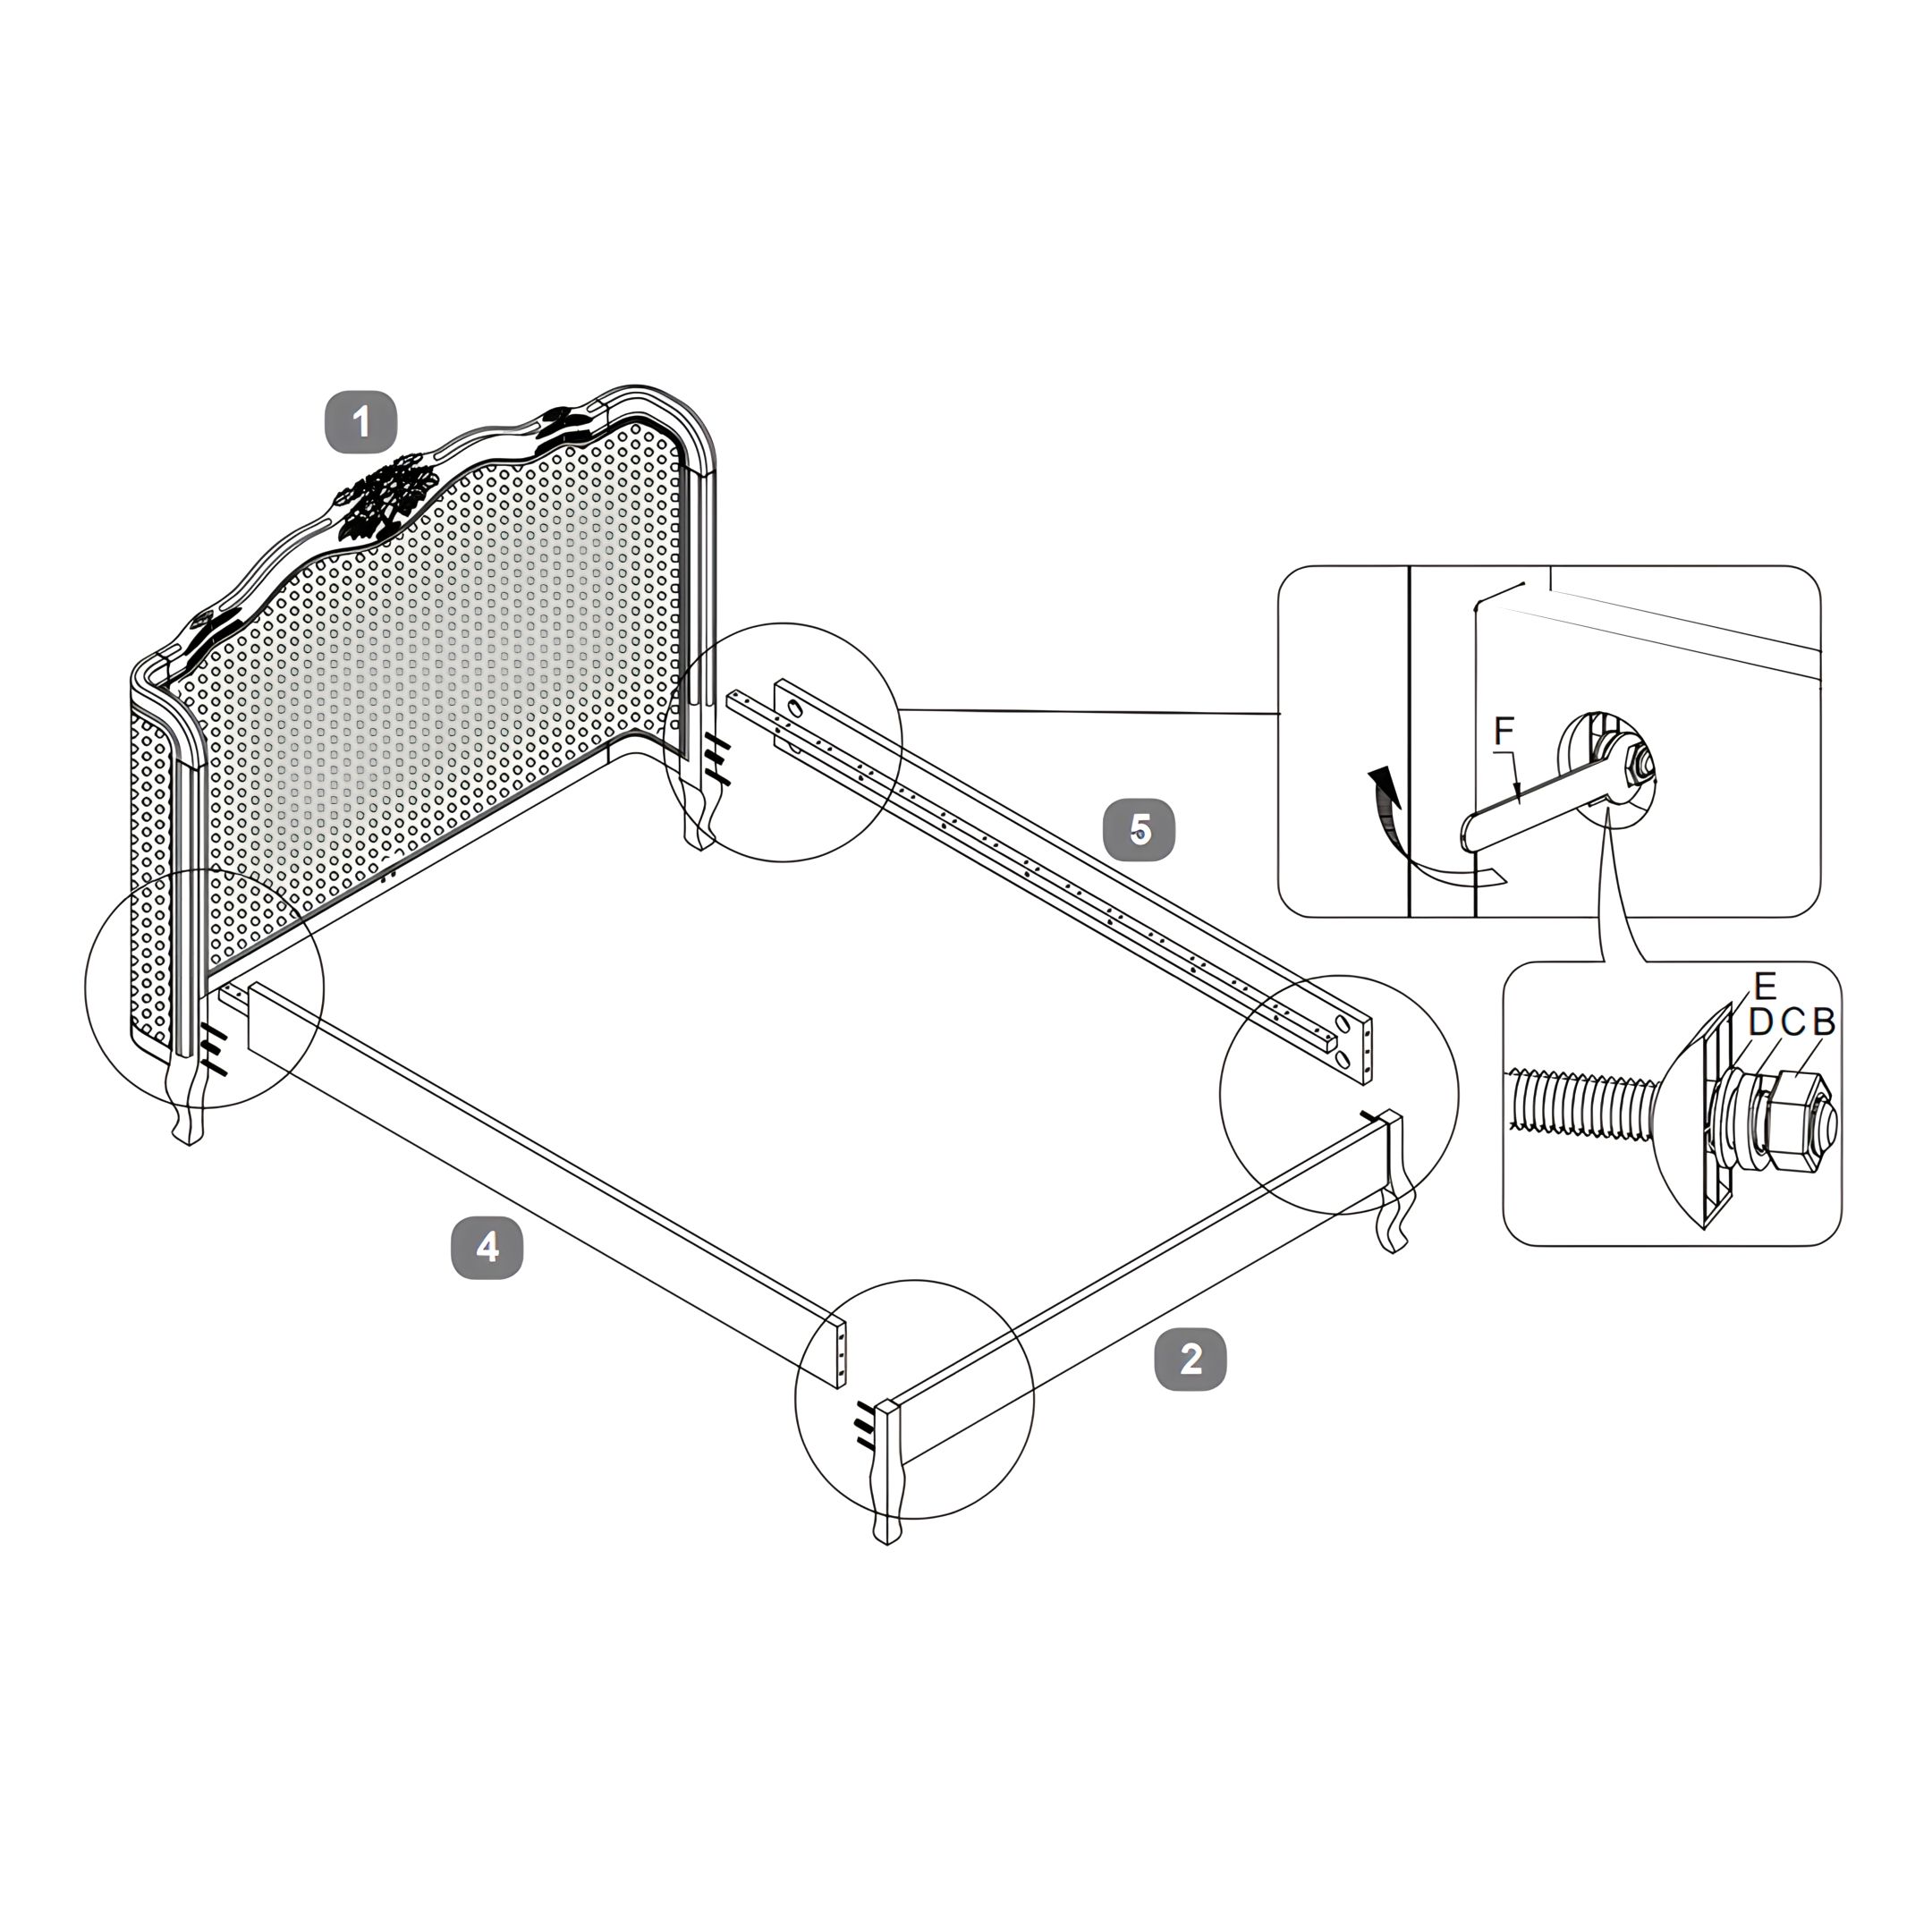
2. Attach the Legs to the Footboard
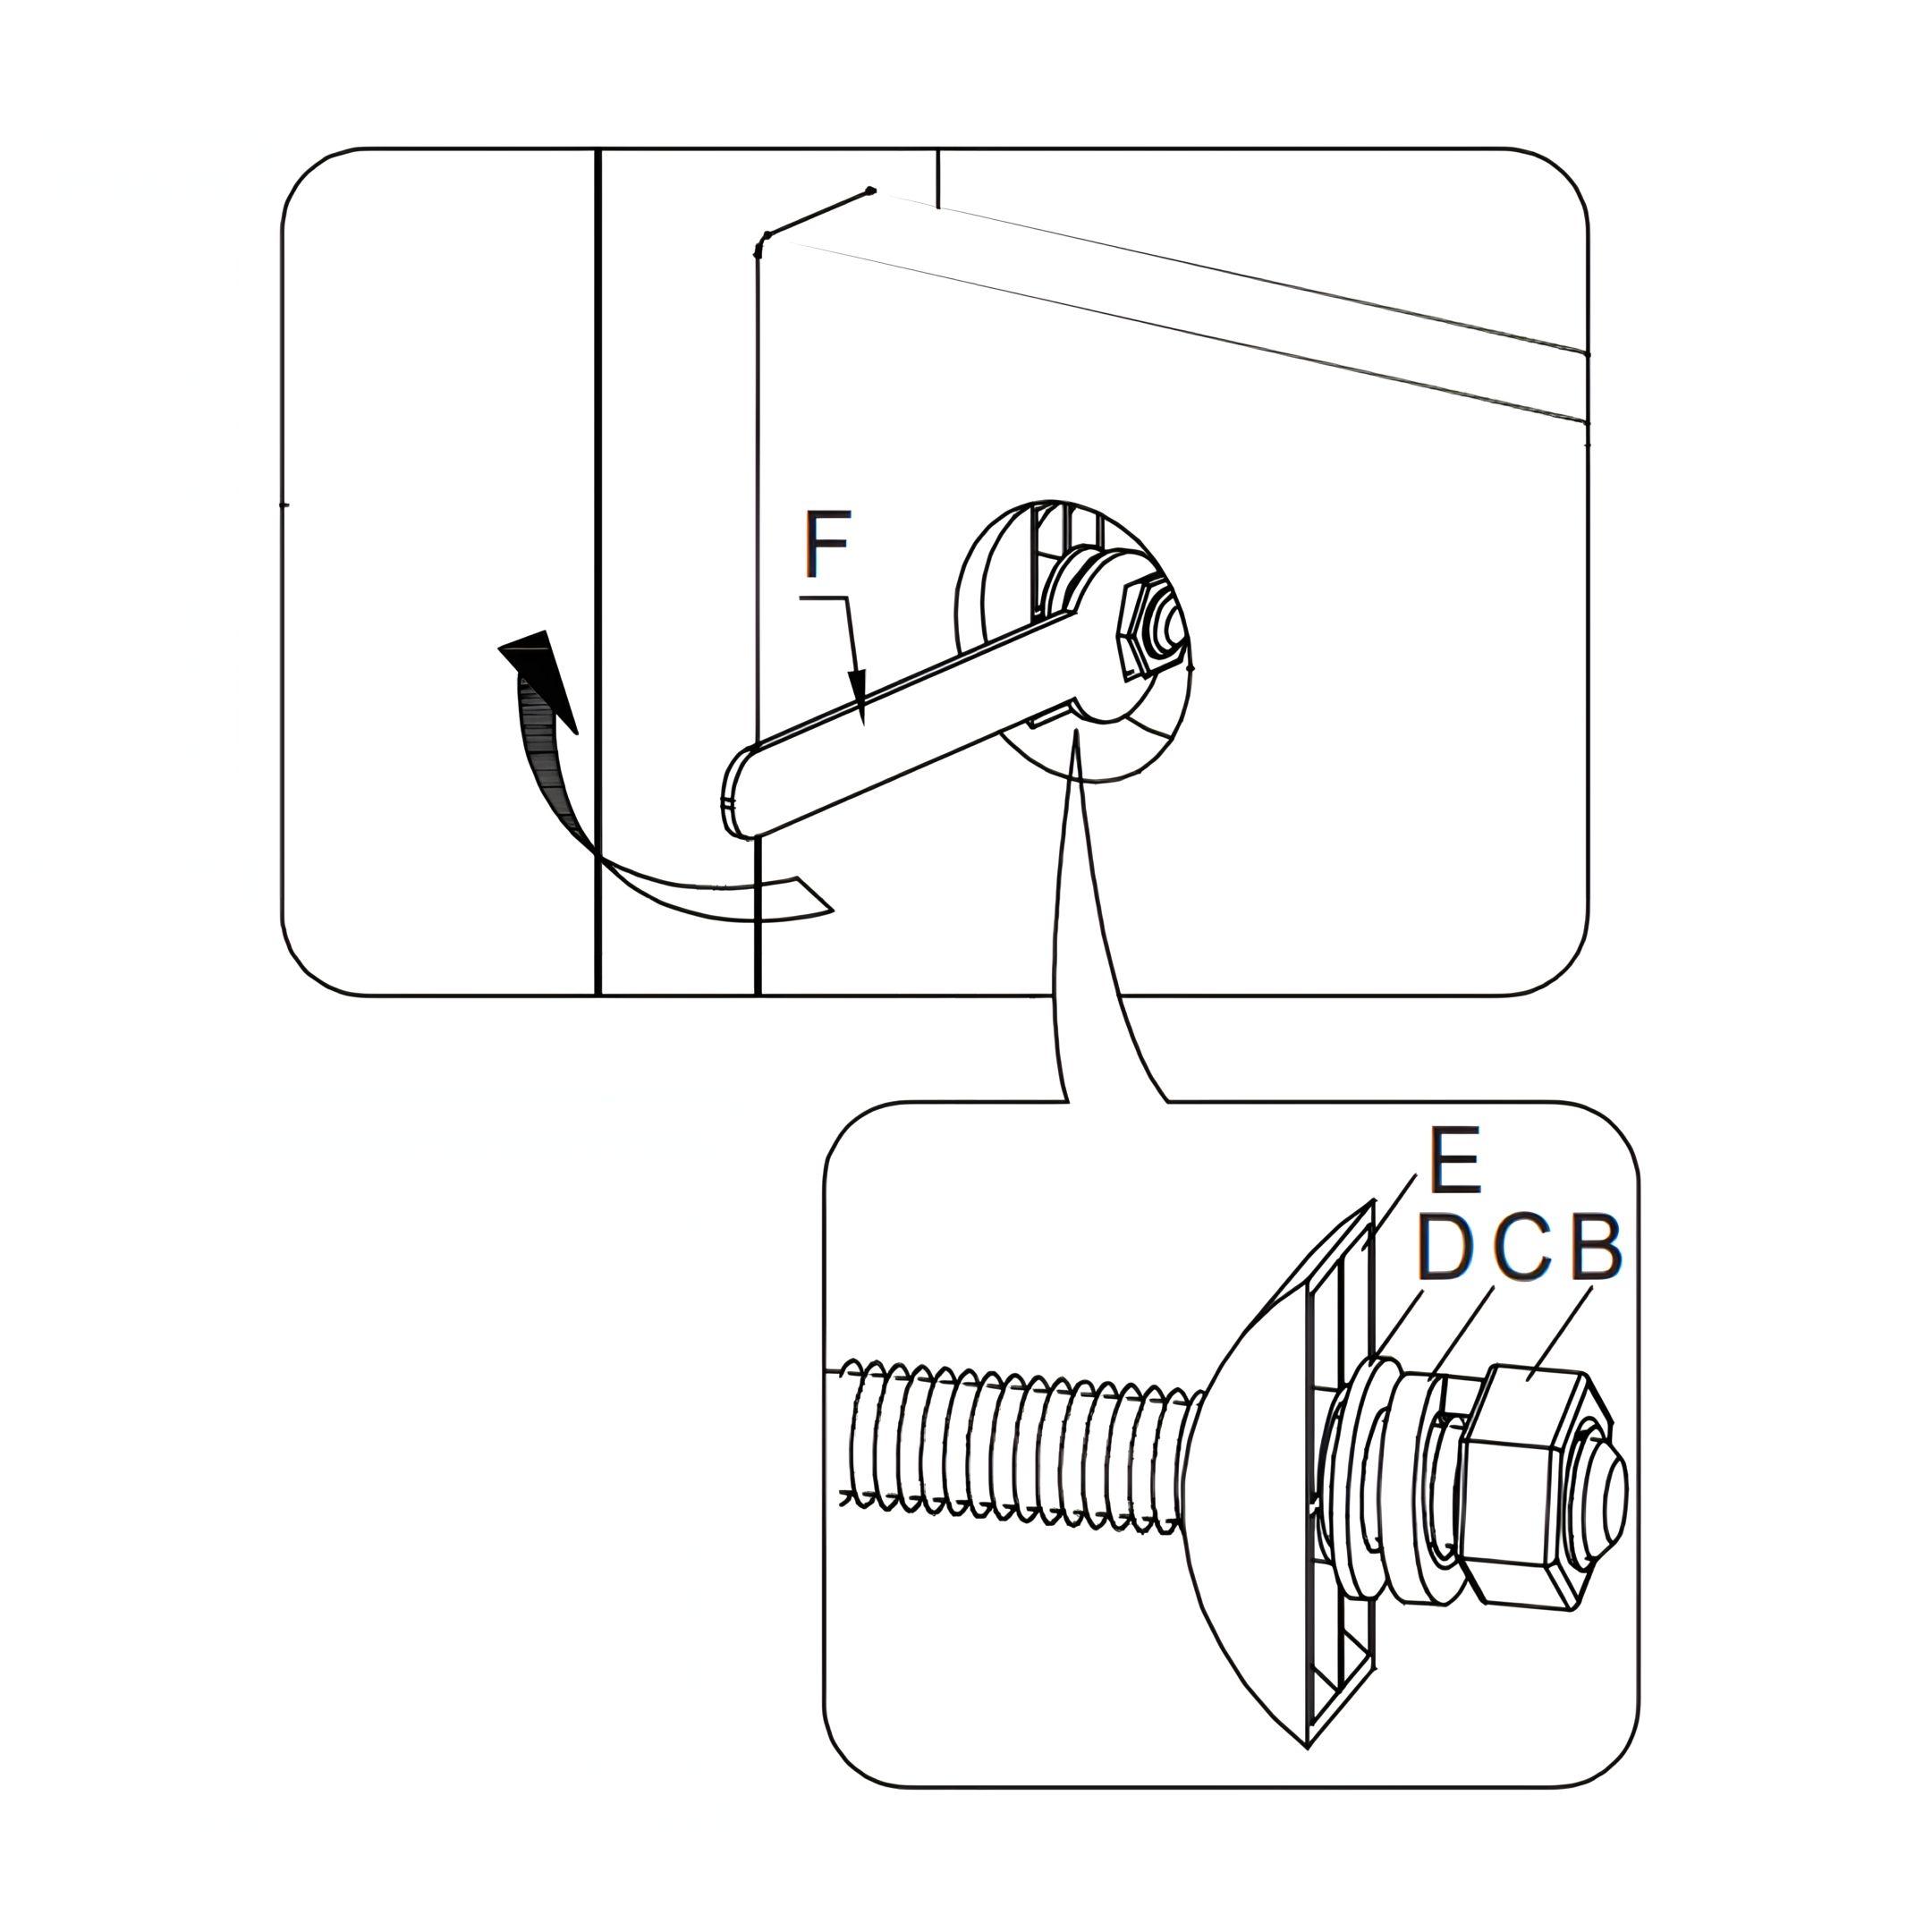
1. Align the footboard (2) with the pre-installed threaded studs on the footboard legs (3). 2. Secure each connection using a half-moon bracket (E), flat washer (D), spring washer (C), and nut (B). 3. Tighten the nuts using the spanner (F) to ensure a firm attachment.
Repeat for both sides.
3. Prepare the Headboard
1. Insert 2 threaded studs (A) into the designated holes on each side of the headboard (1). 2. Insert 1 dowel (L) into the remaining hole on each side.
4. Attach the Side Rails
1. Align the left side rail (4) and right side rail (5) with the pre-installed threaded studs on the headboard (1) and footboard (2). 2. Secure each connection using a half-moon bracket (E), flat washer (D), spring washer (C), and nut (B). 3. Tighten all nuts using the spanner (F) to ensure a firm attachment.
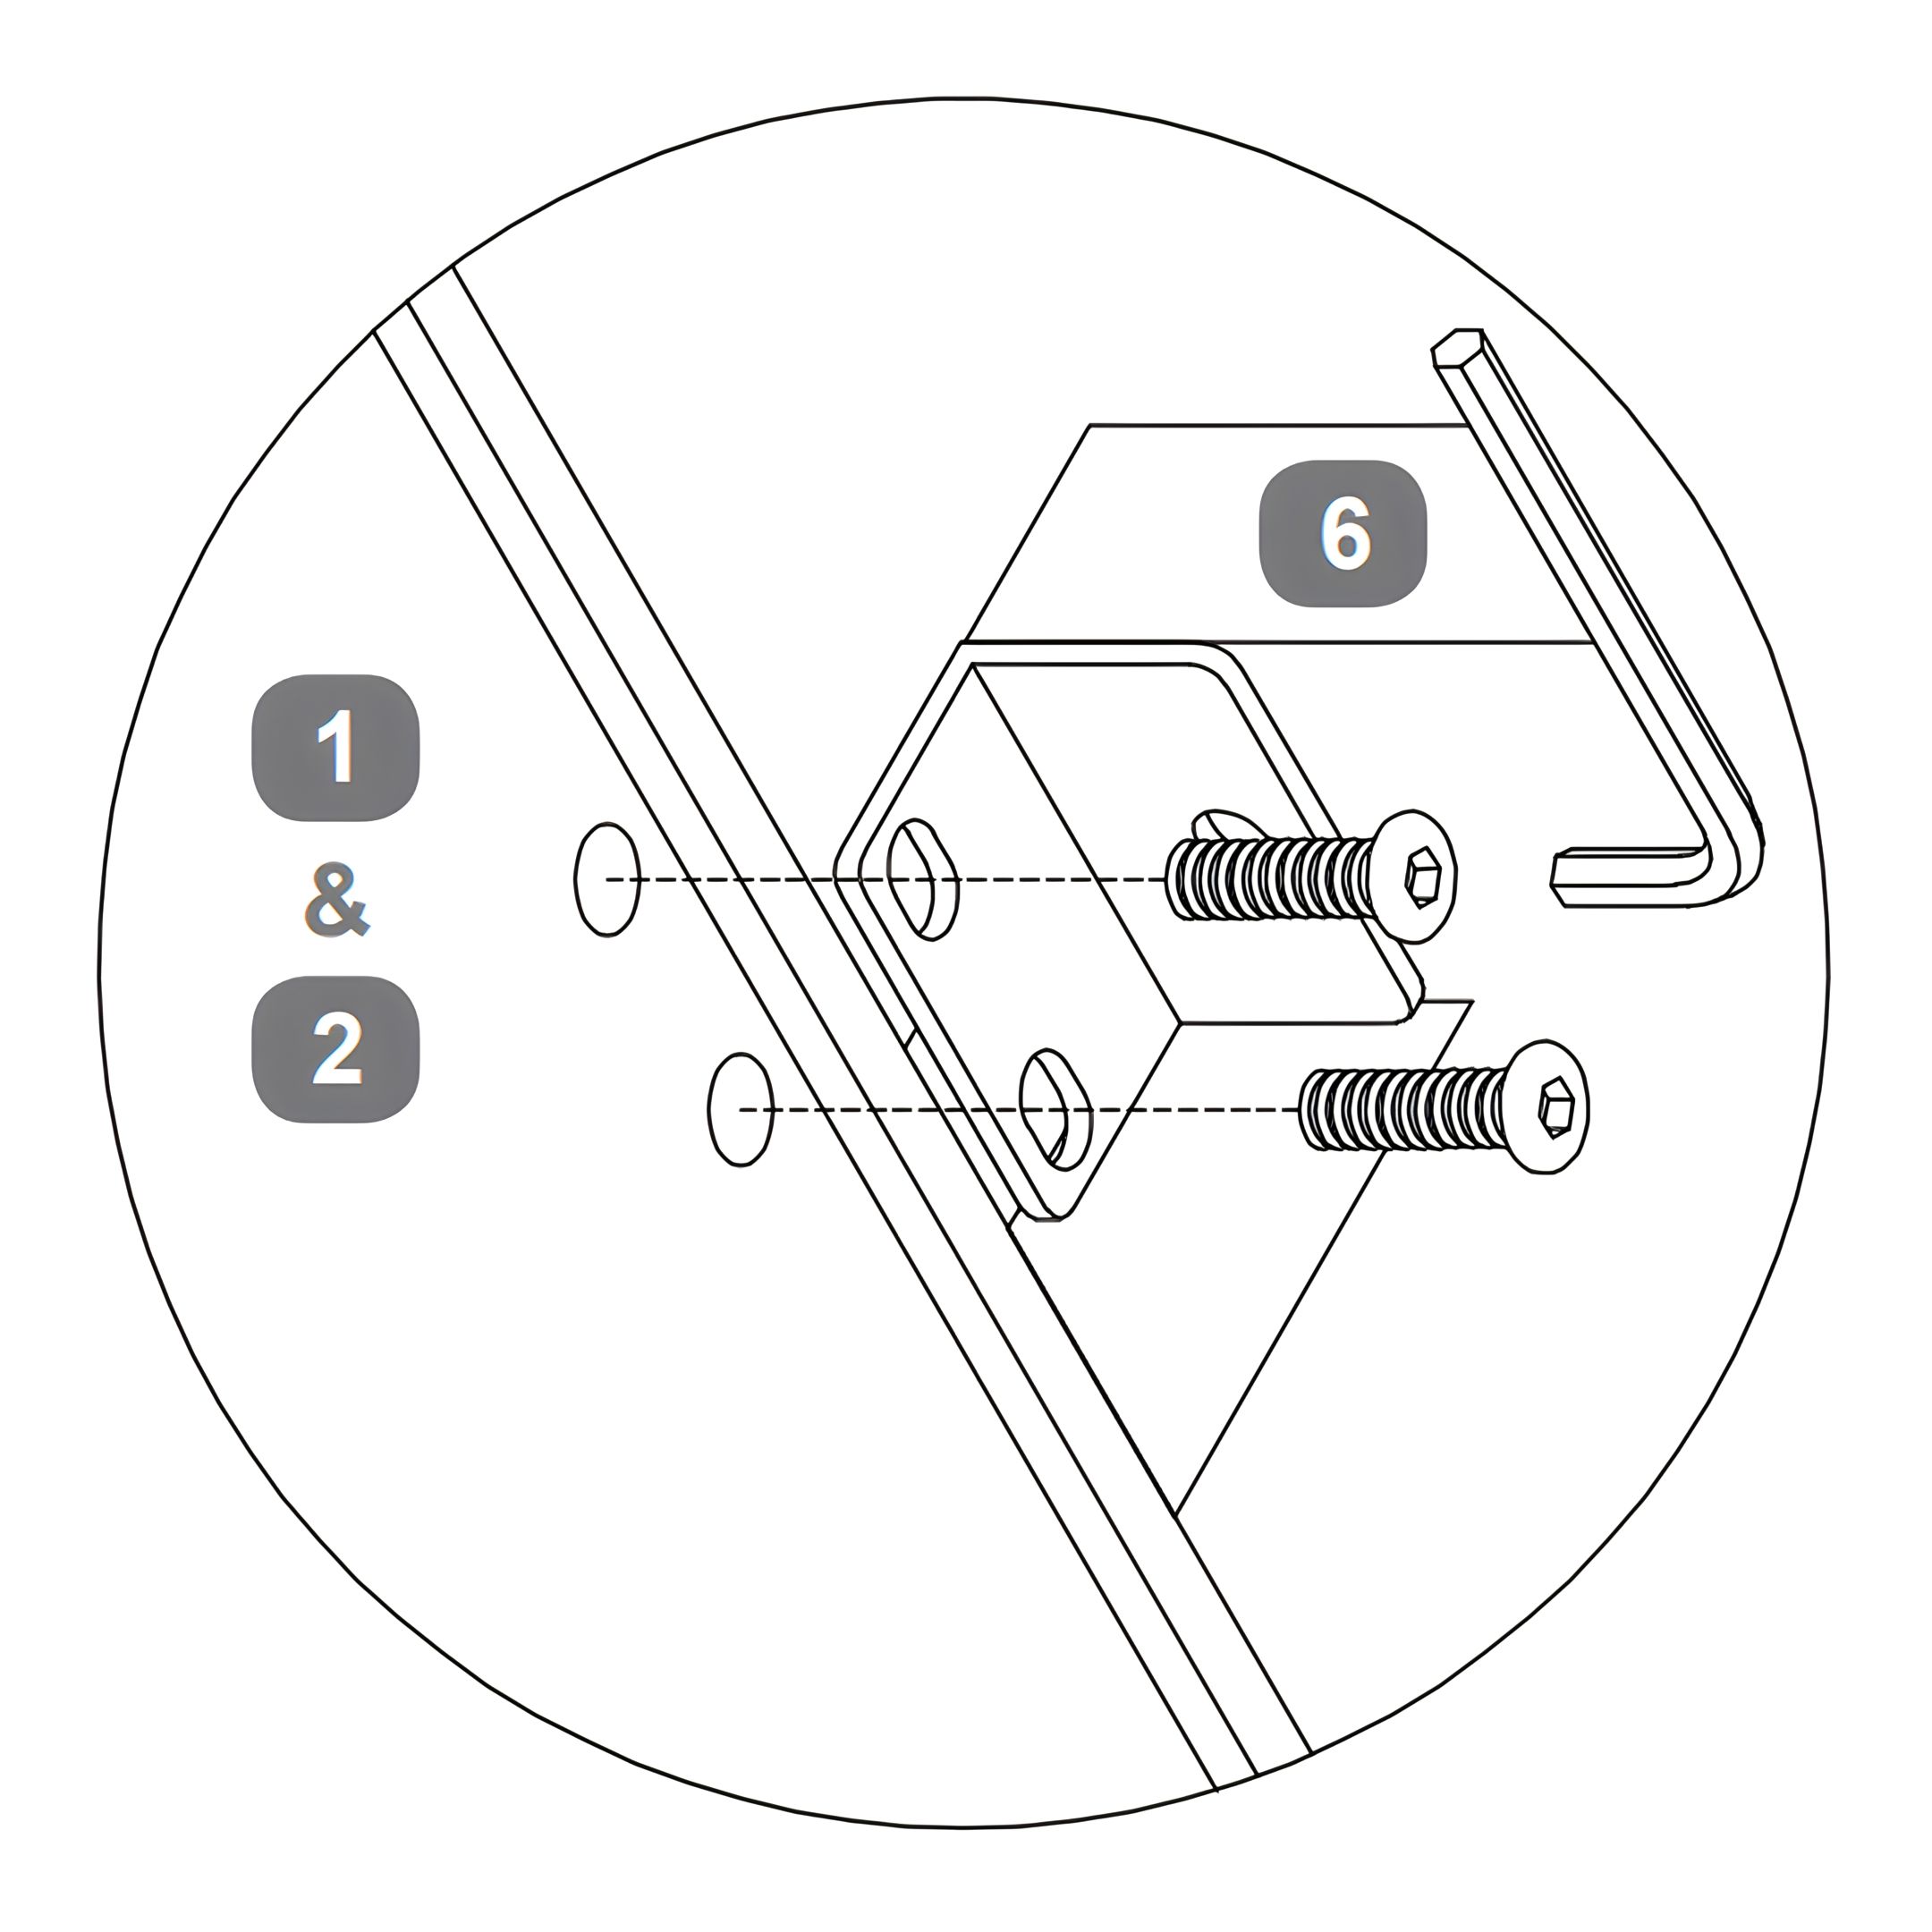
5. Attach the L-Shape Brackets to the Centre Support Rail
1. Position the "L" shape brackets (G) at both ends of the centre support rail (6). 2. Secure each bracket using bolts (H). 3. Tighten the bolts with the Allen key (K) to ensure a firm connection.
Note: If assembling the Super King size, repeat this step for both centre support rails (6).
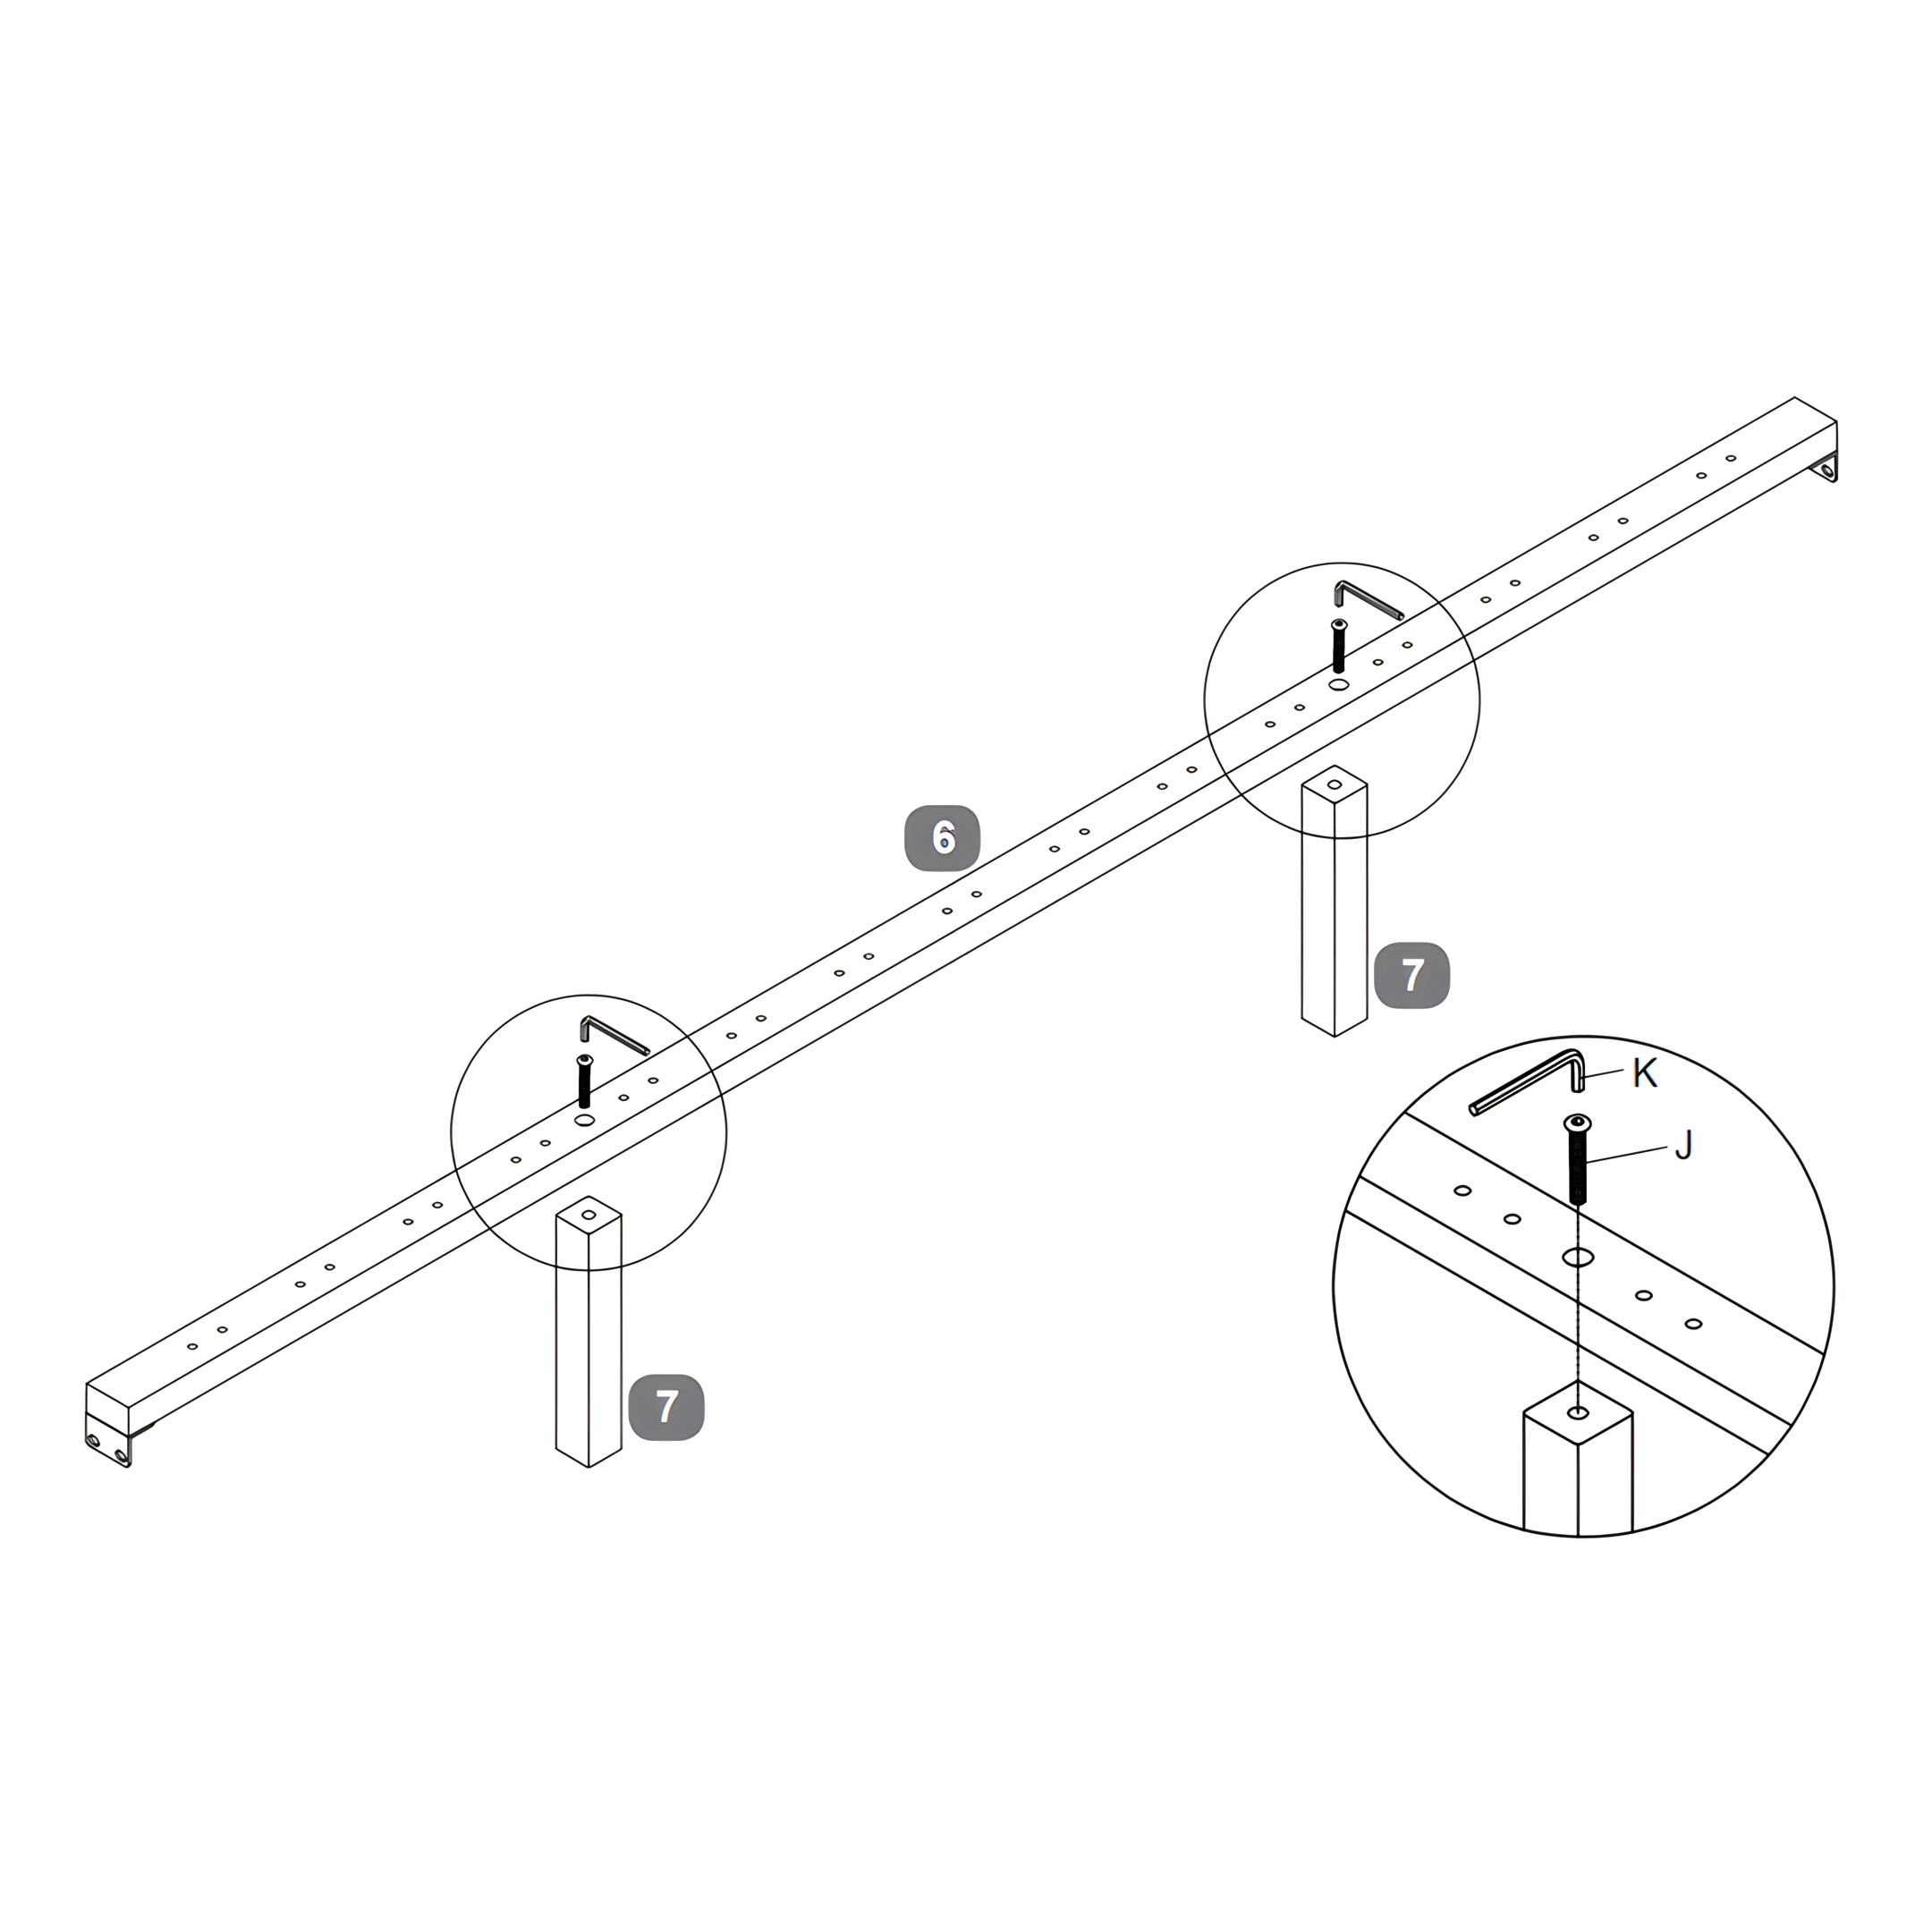
6. Attach the Centre Support Rail Legs
1. Align the centre support rail legs (7) with the designated holes on the centre support rail (6). 2. Secure each leg using bolts (J) and tighten them with the Allen key (K). 3. Ensure the legs are firmly attached to provide proper support.
Note: If assembling the Super King size, attach four centre support rail legs (7) instead of two, as there are two centre support rails (6).
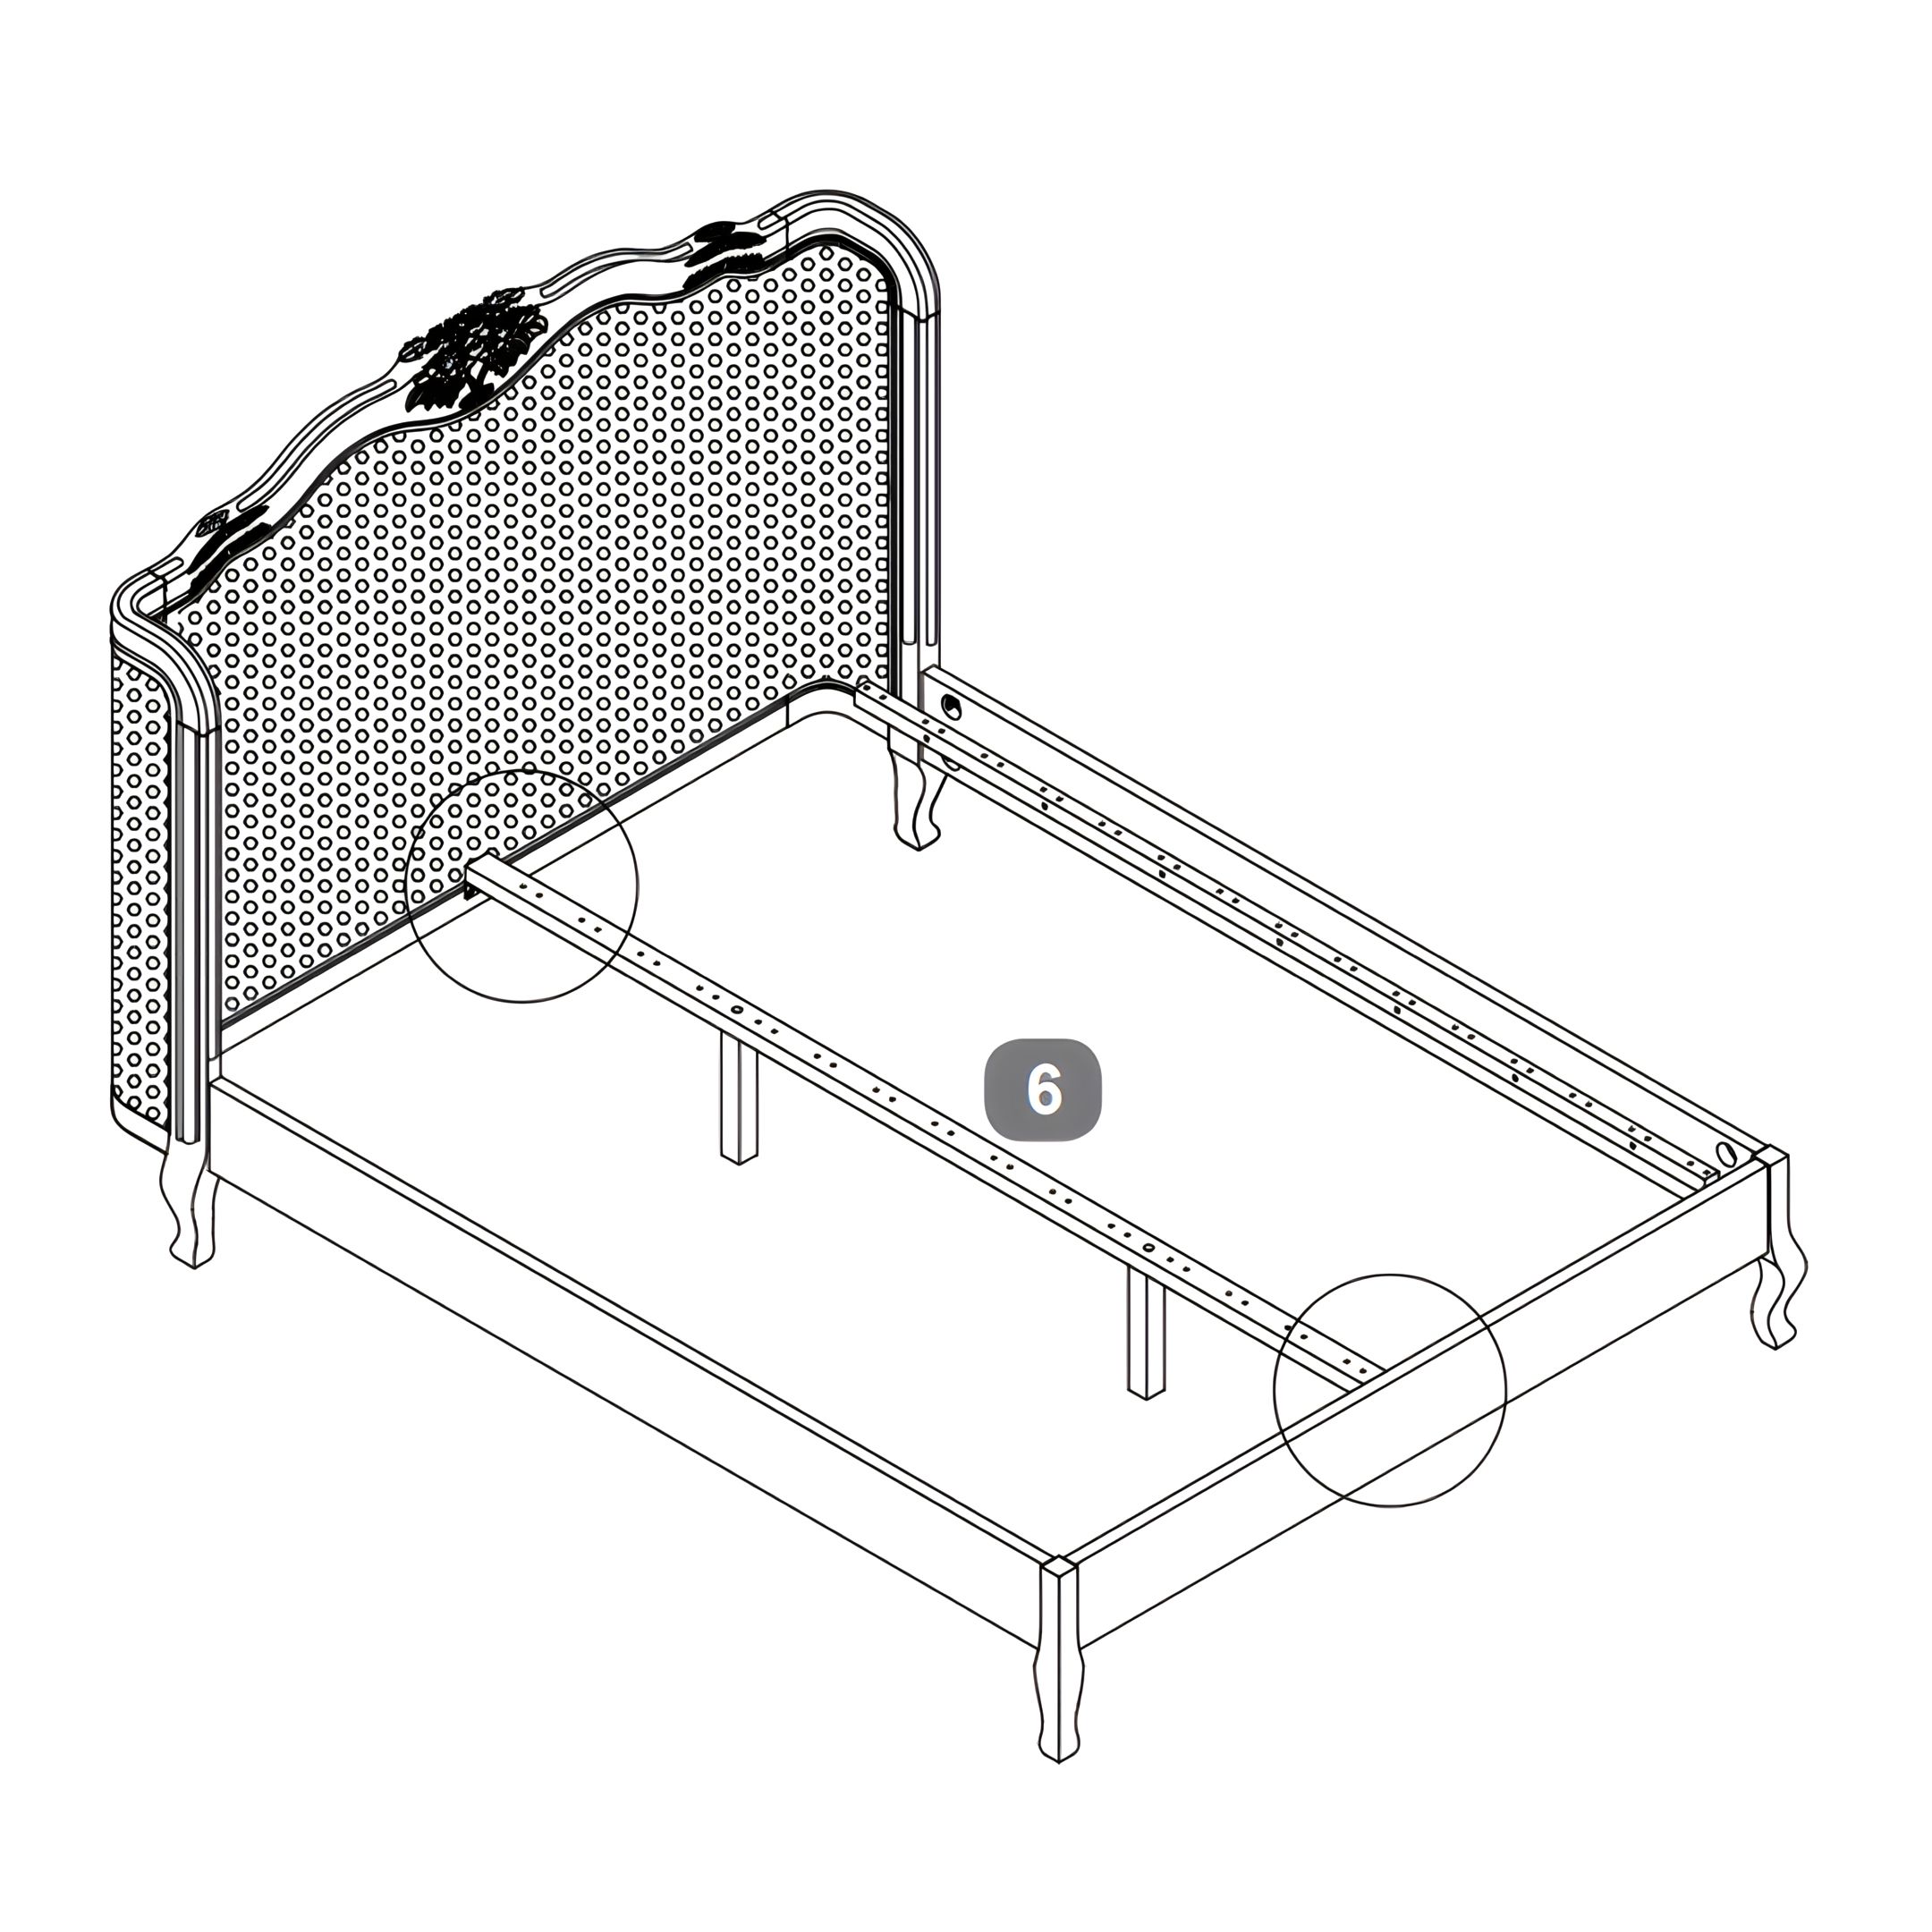
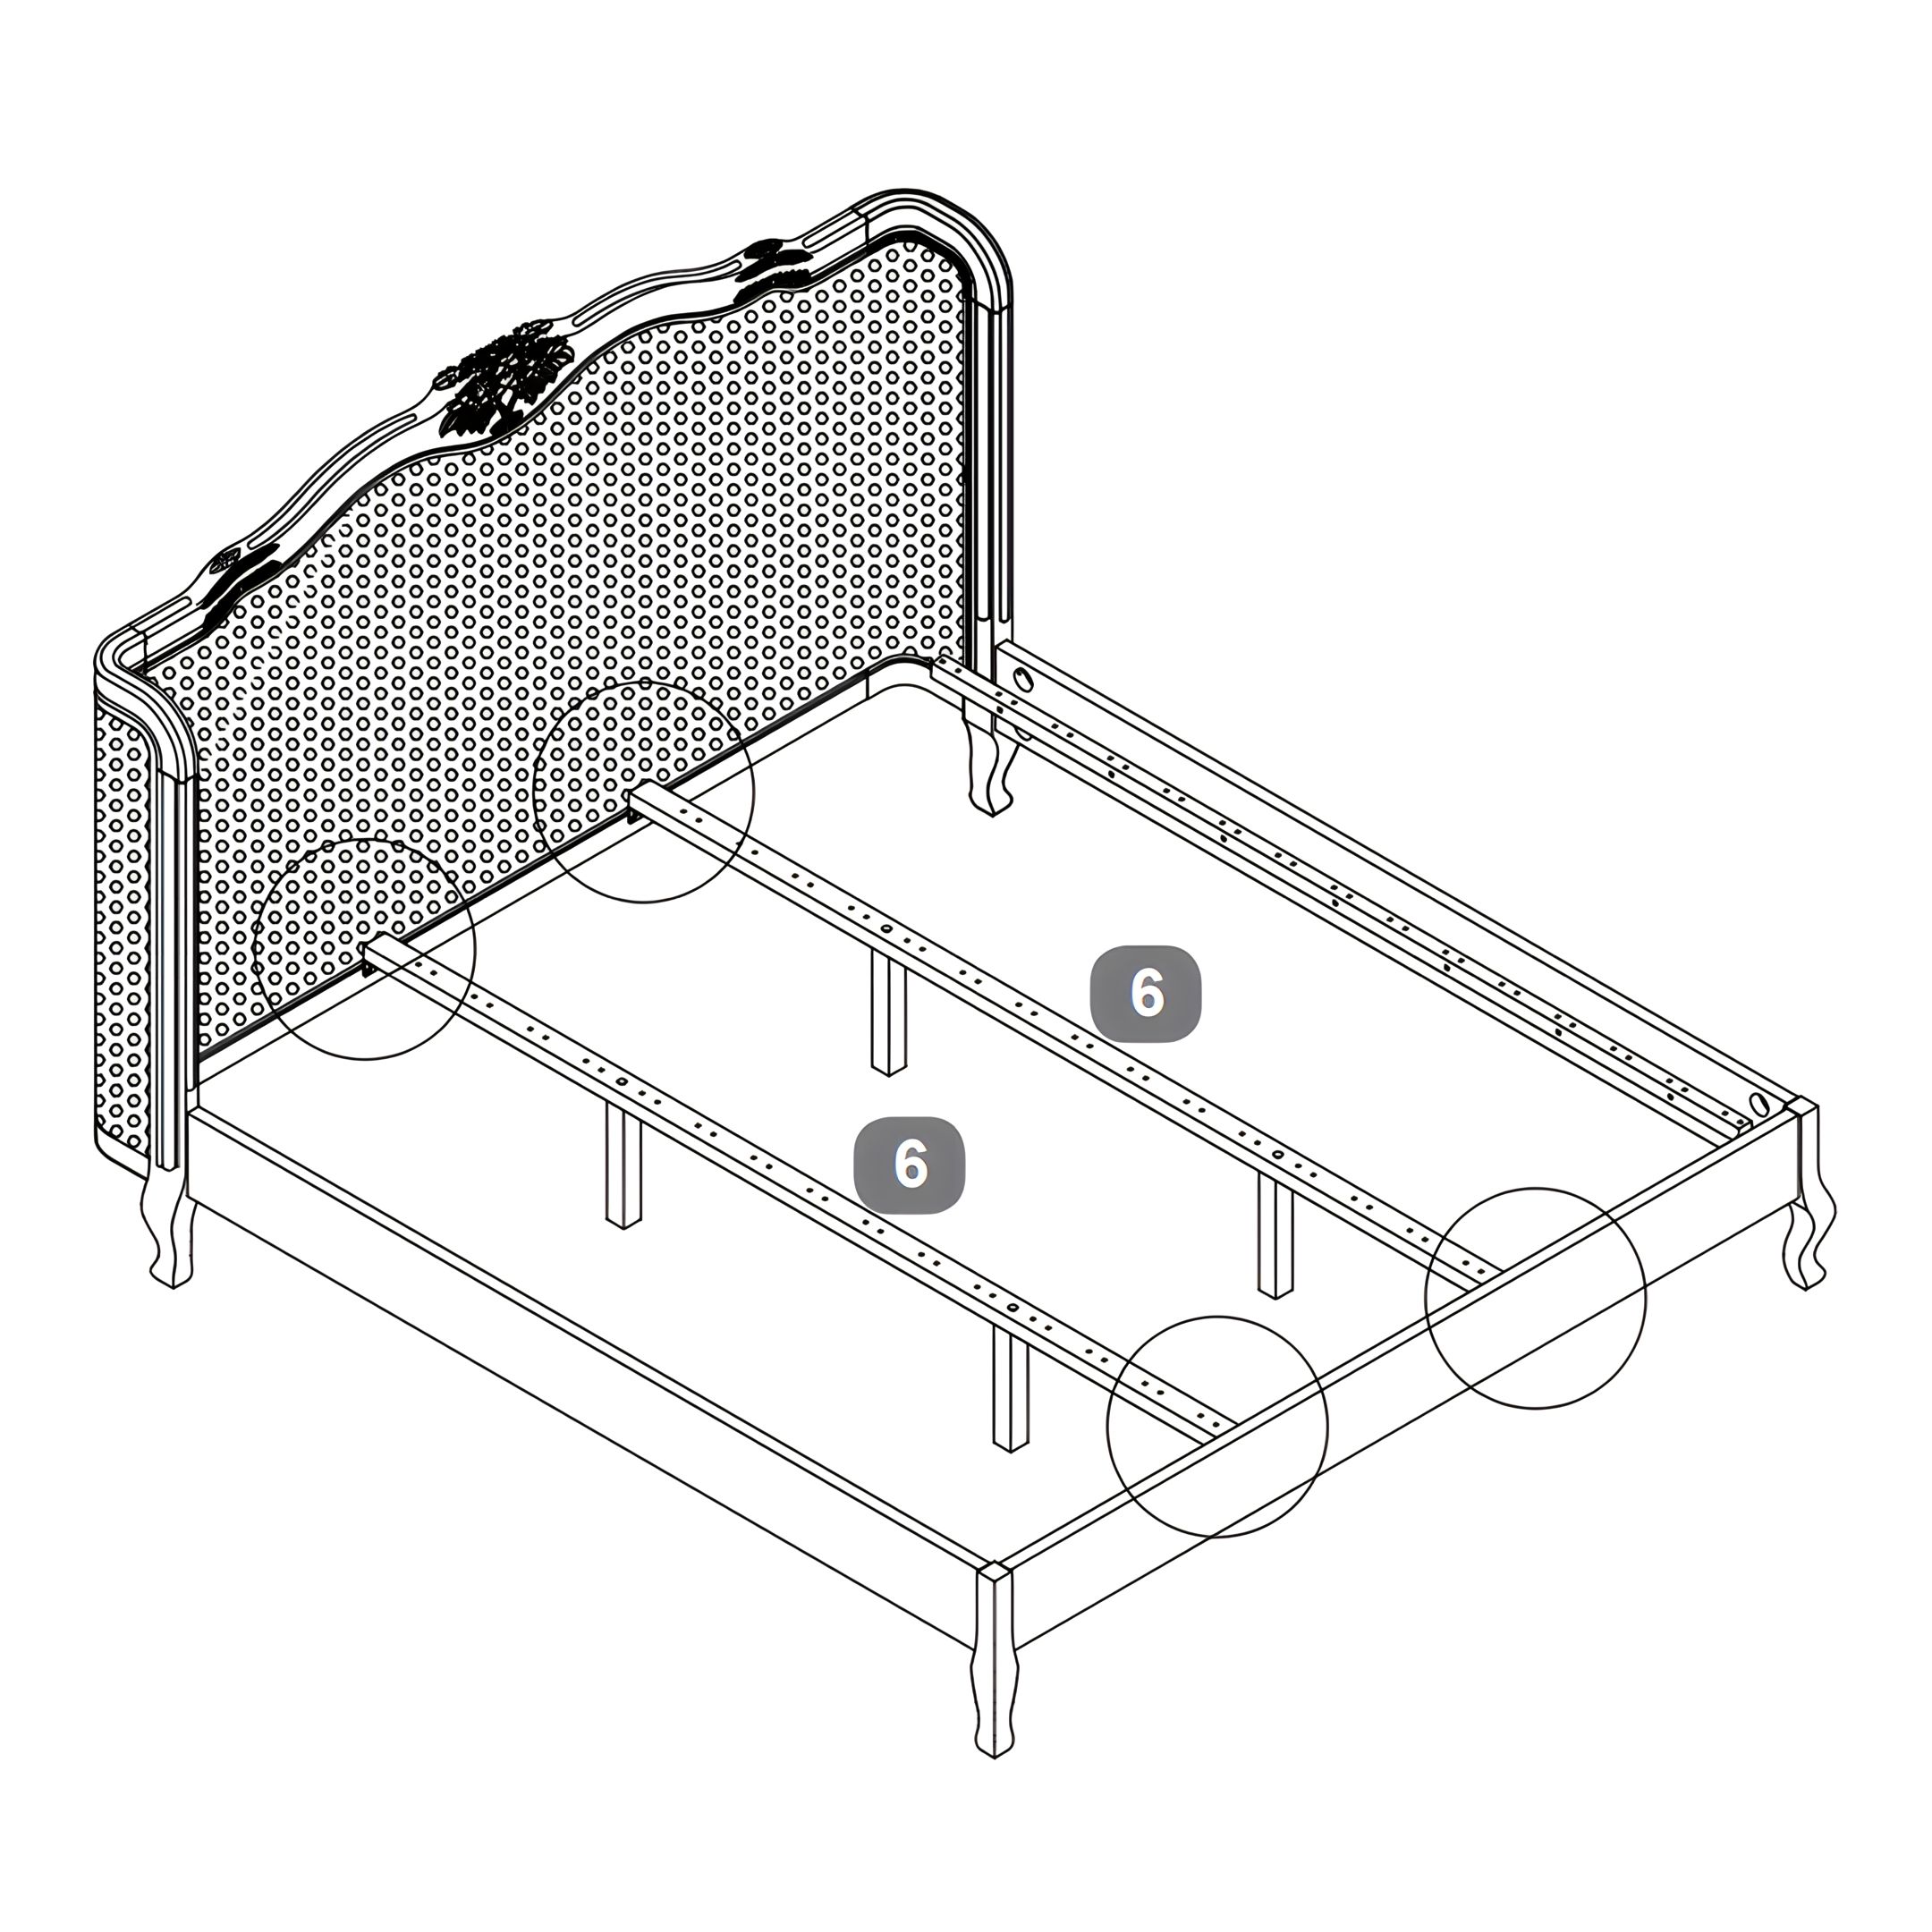
7. Install the Centre Support Rail onto the Bed Frame
1. Position the centre support rail (6) so that the L-shape brackets (G) align with the pre-drilled holes on the headboard (1) and footboard (2). 2. Secure the rail by inserting and tightening the bolts into the brackets using the Allen key (K).
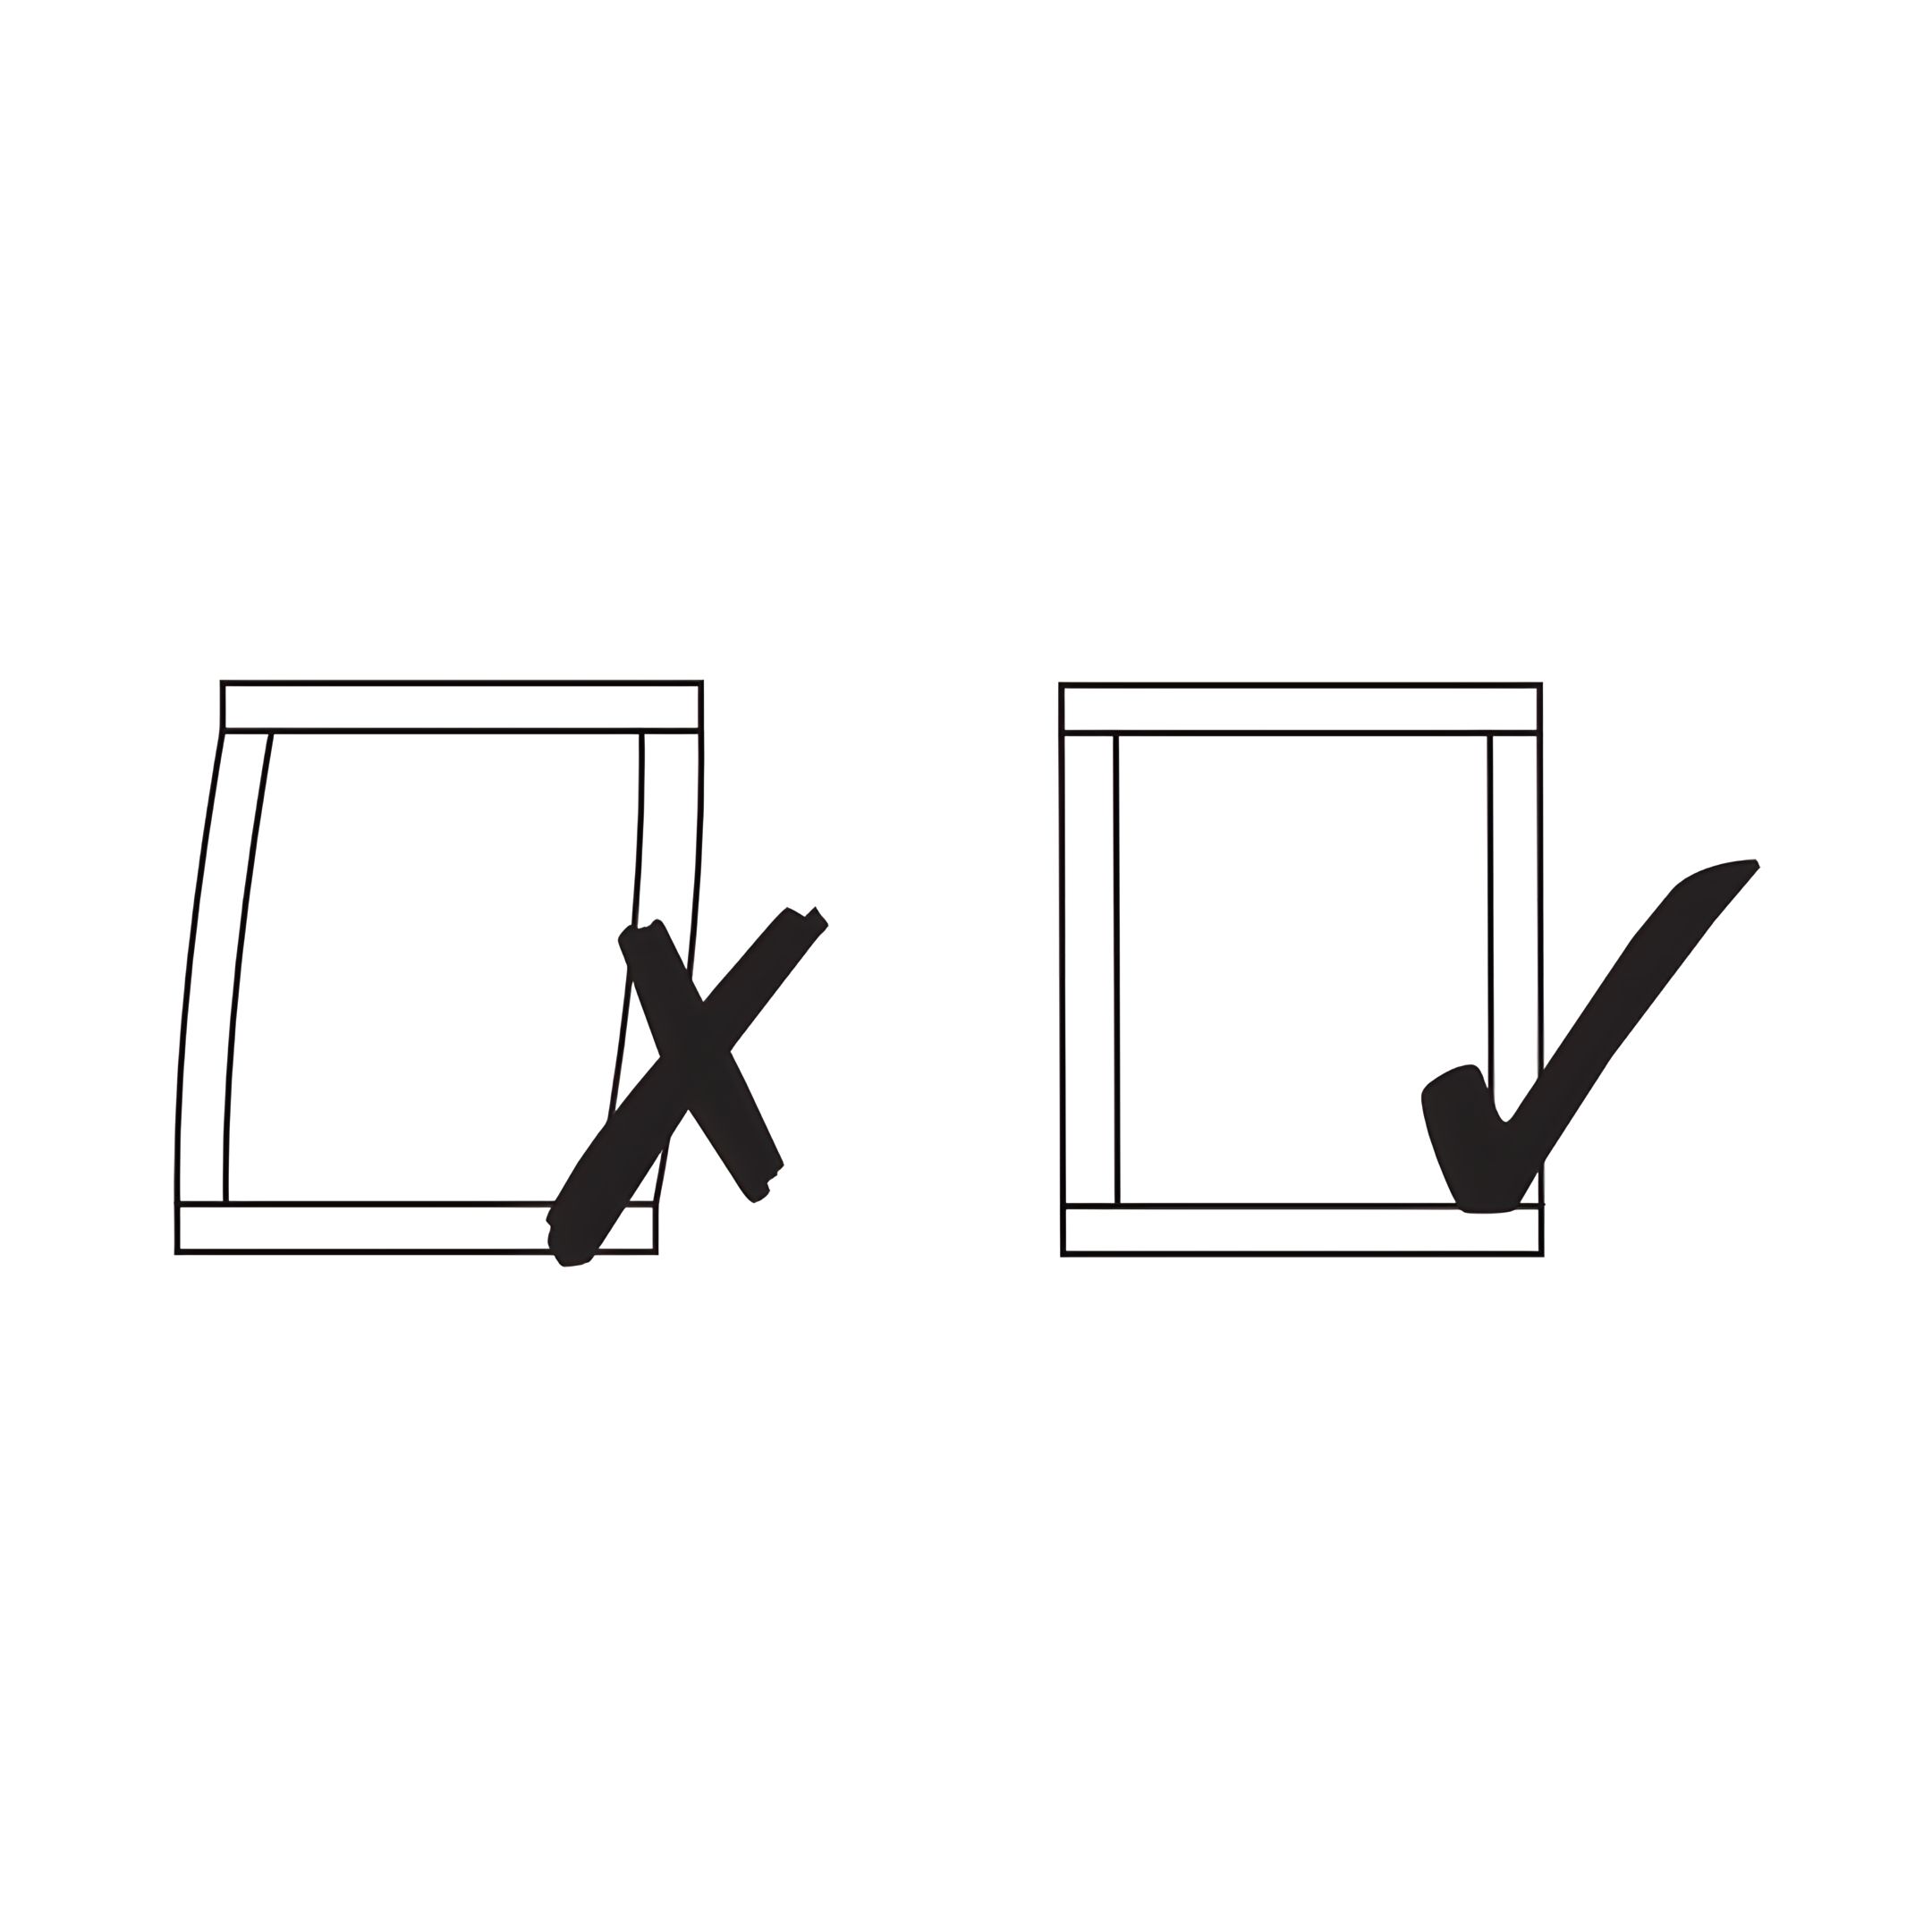
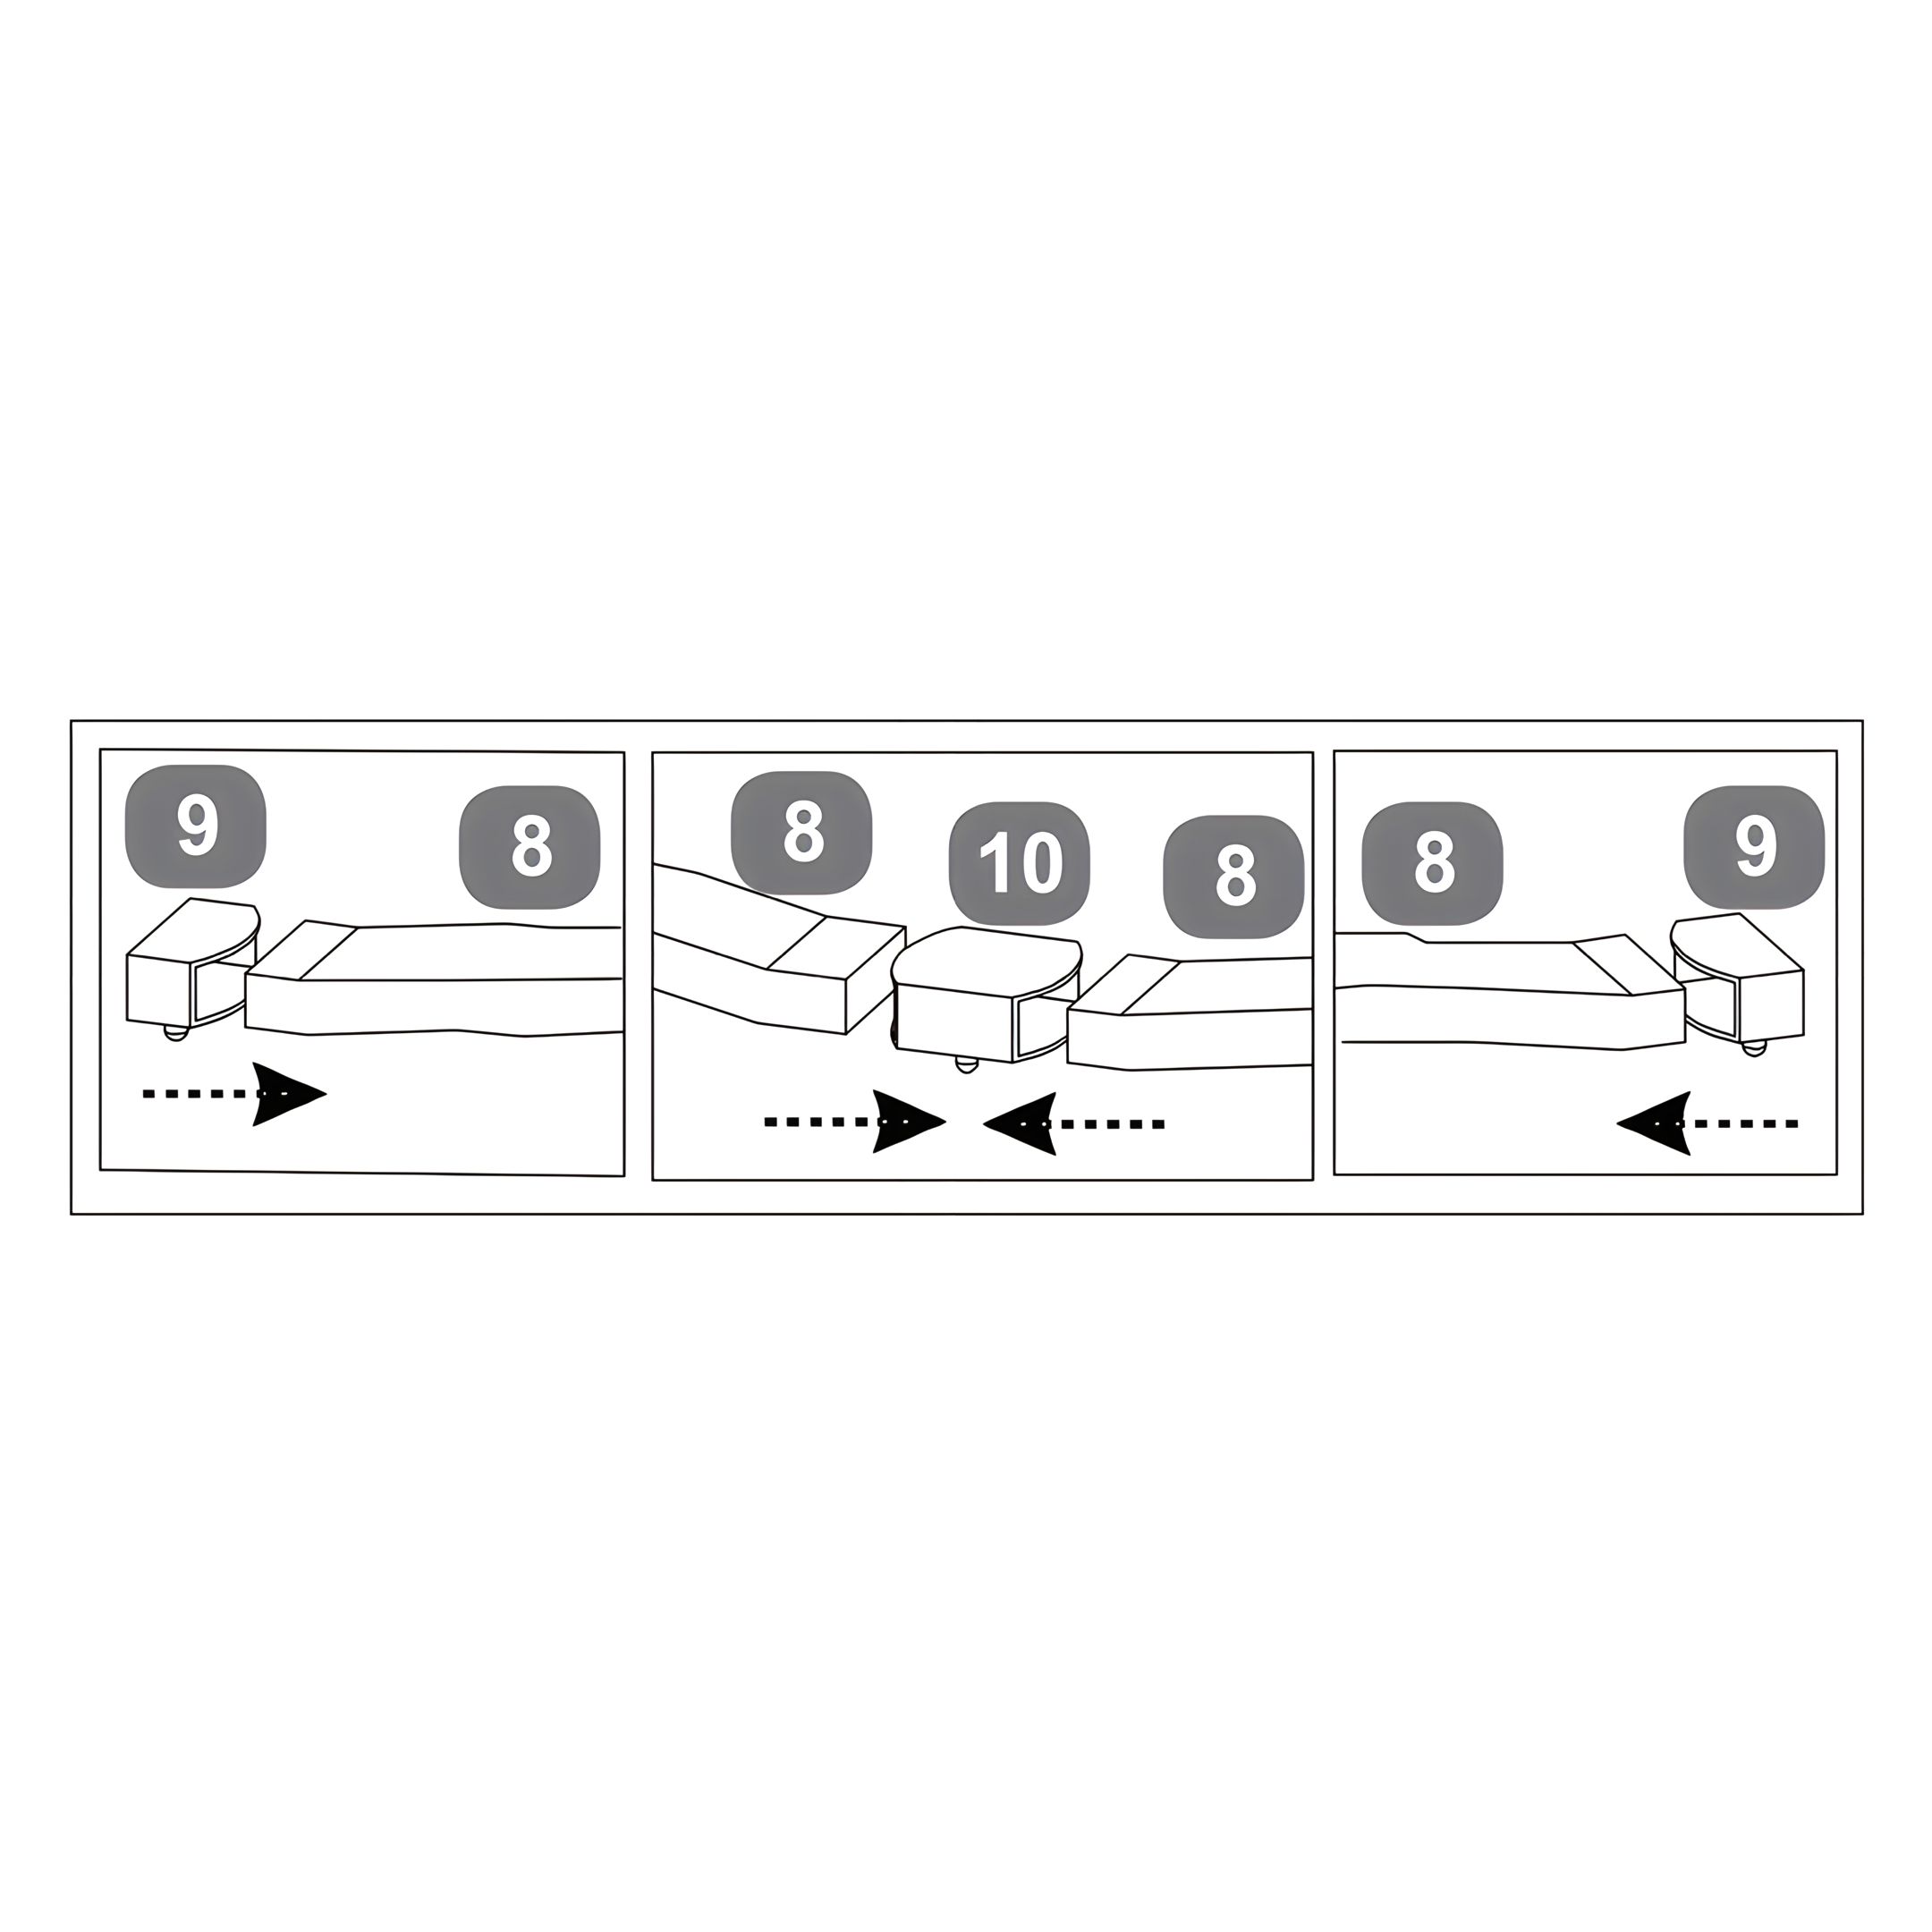
Note: Make certain the bed is squared up as shown in the diagram then tighten all bed assembly bolts 100%.
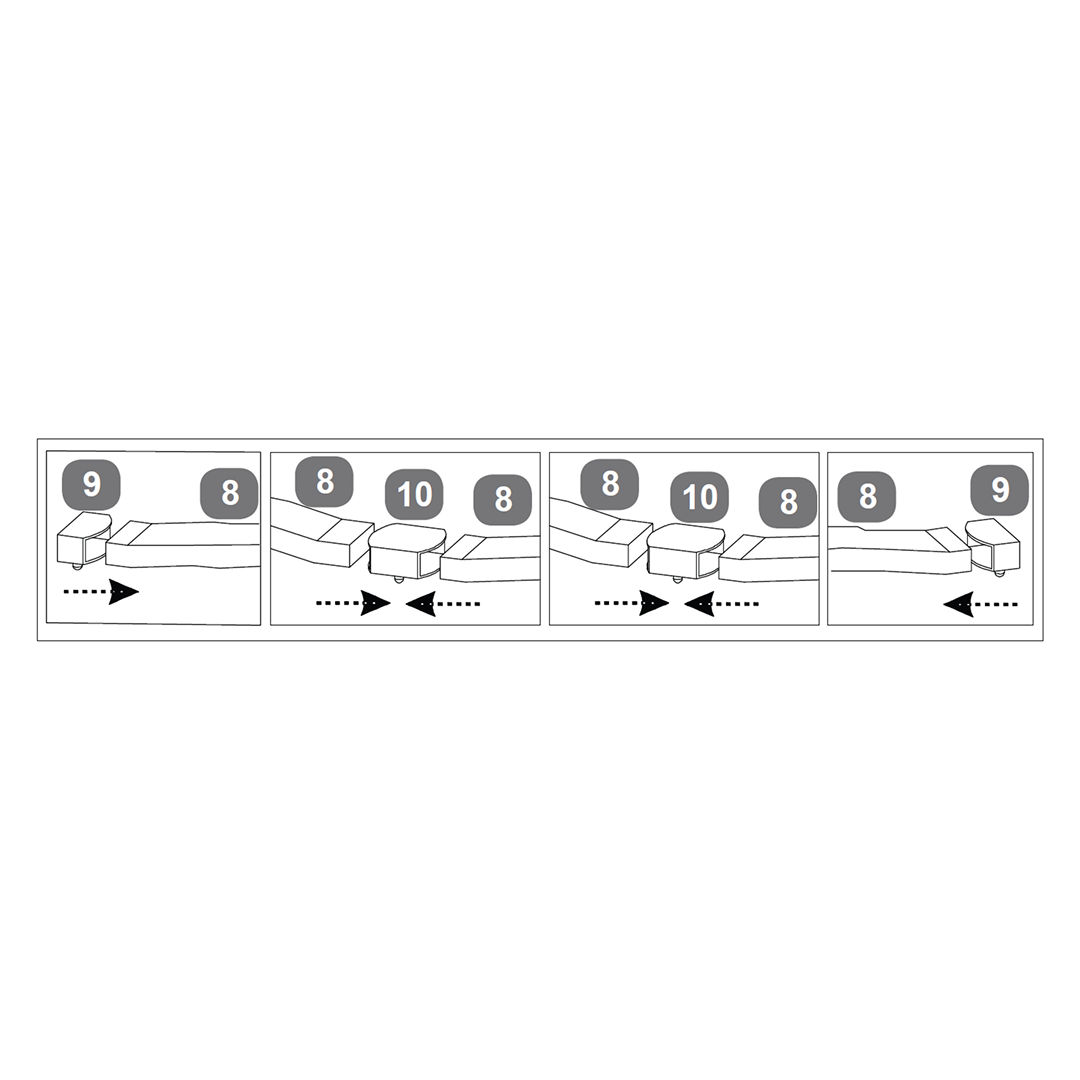
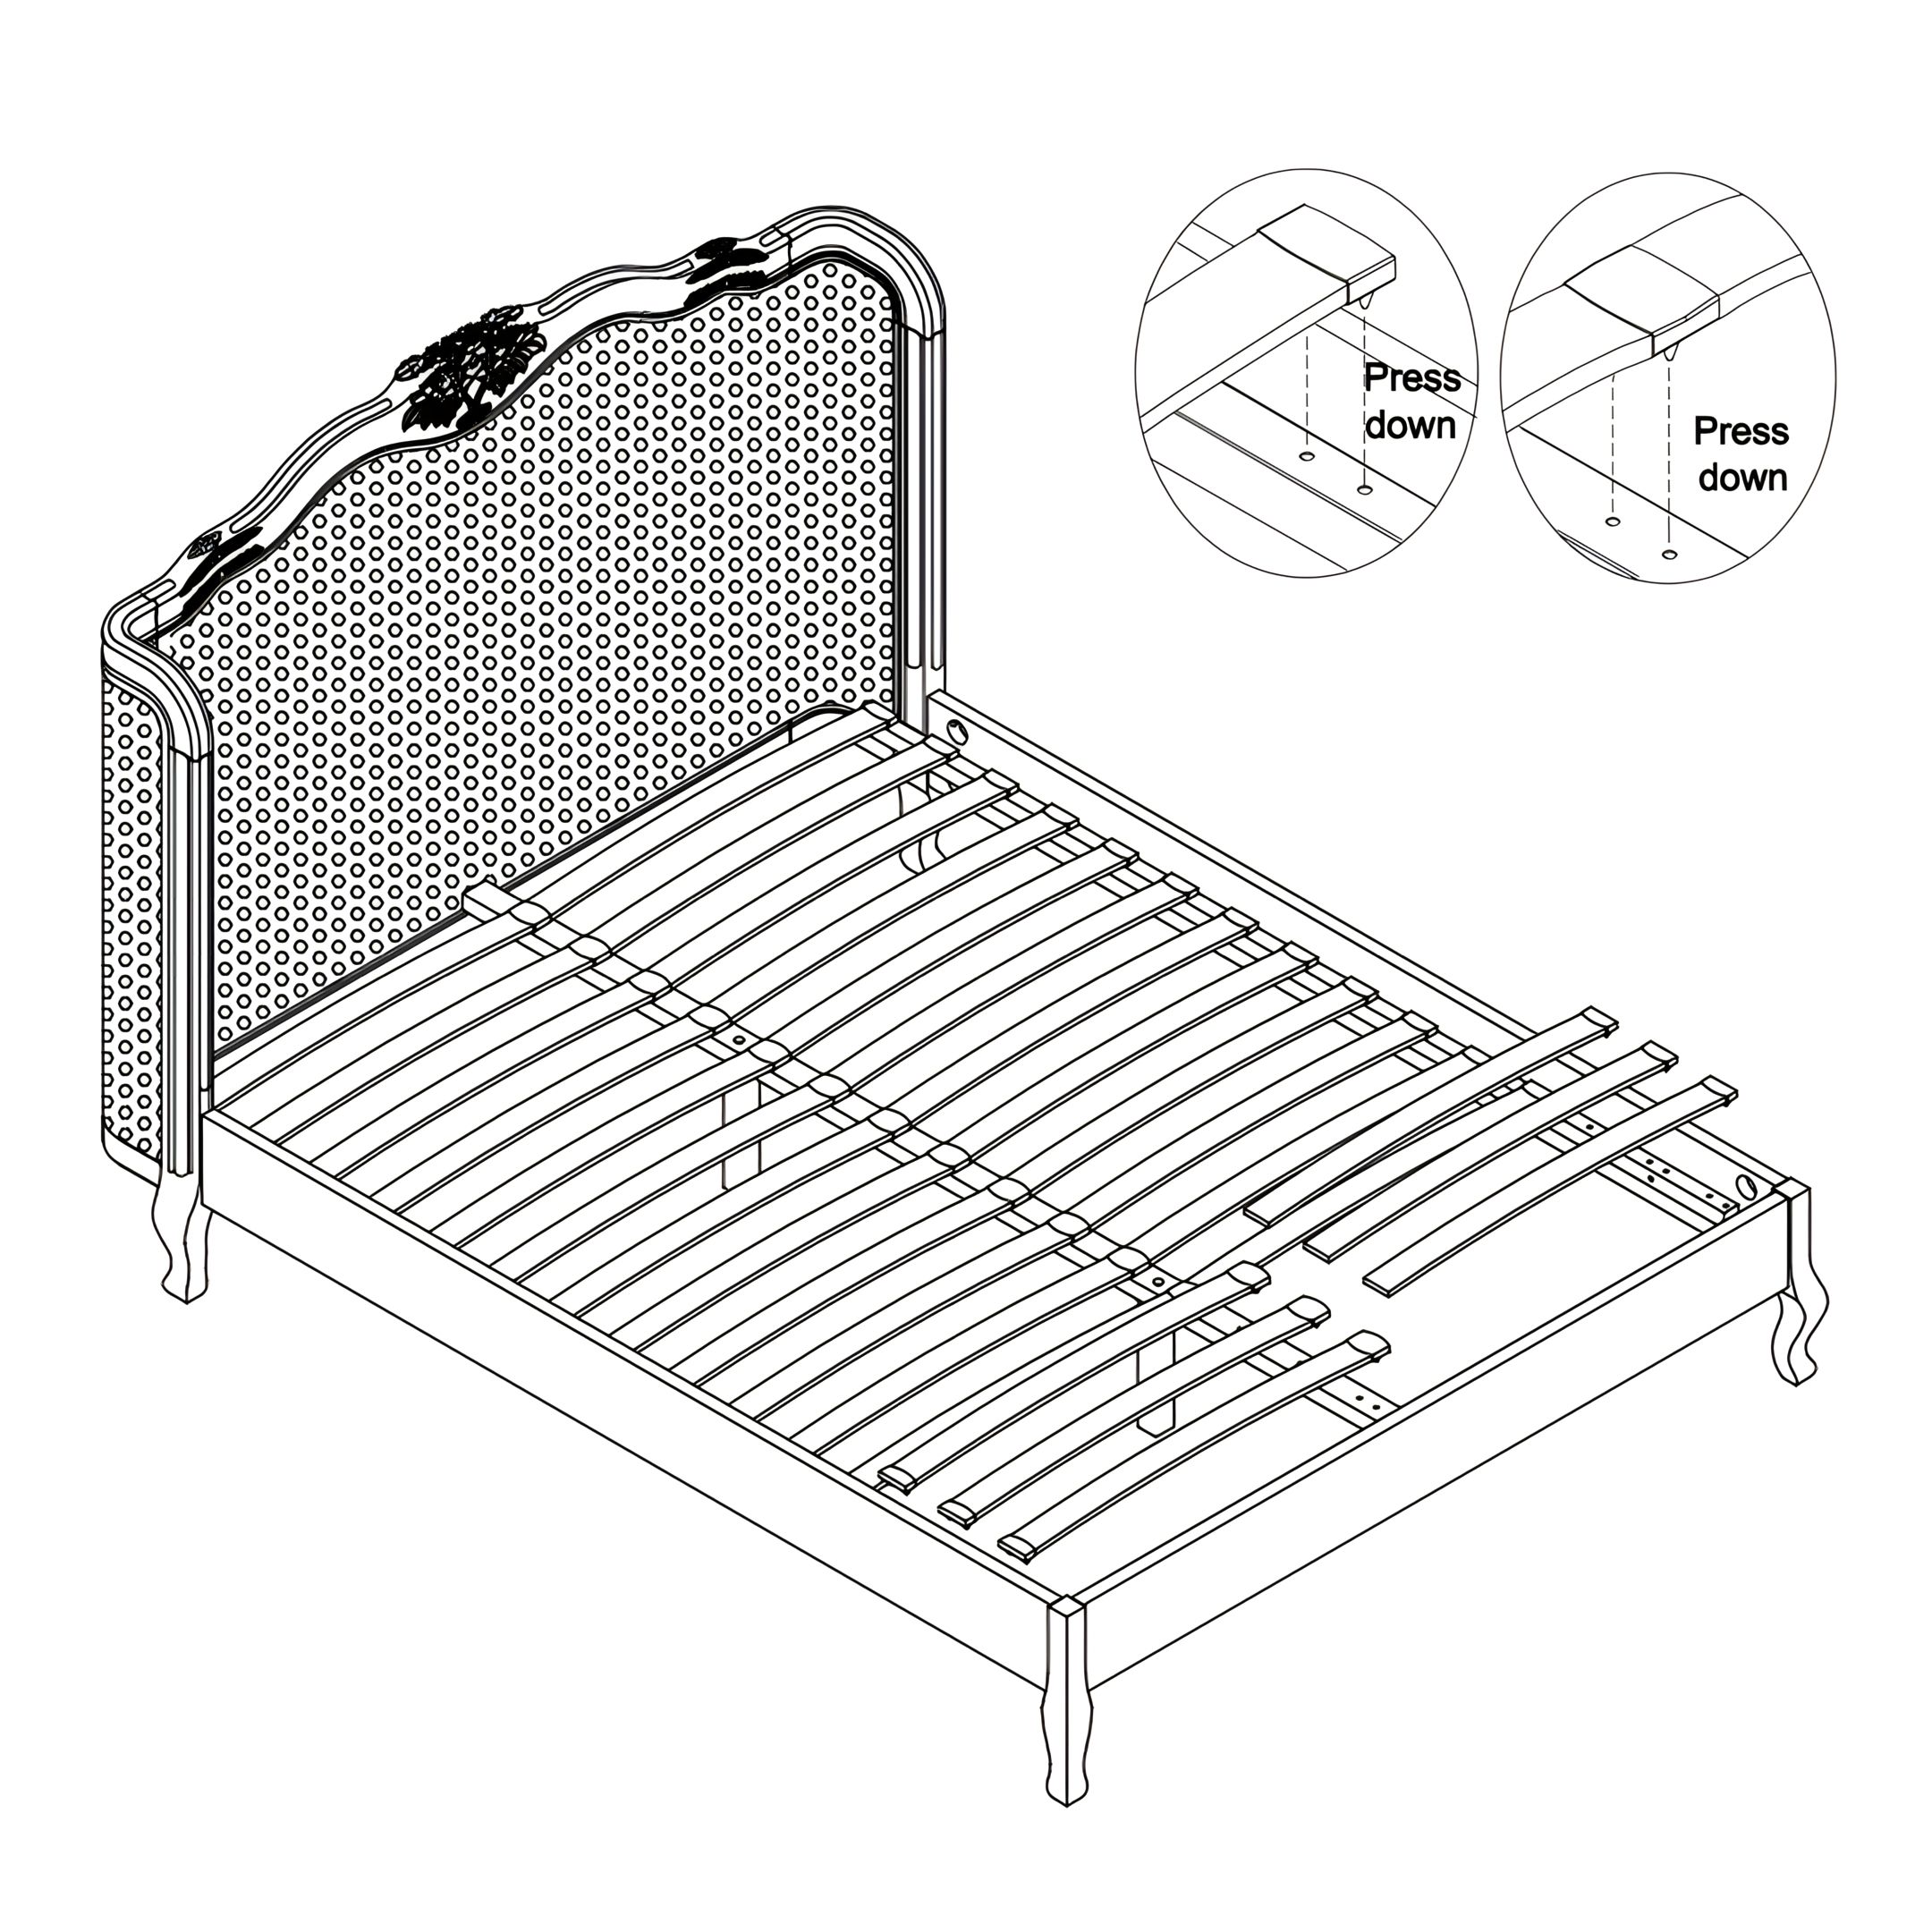
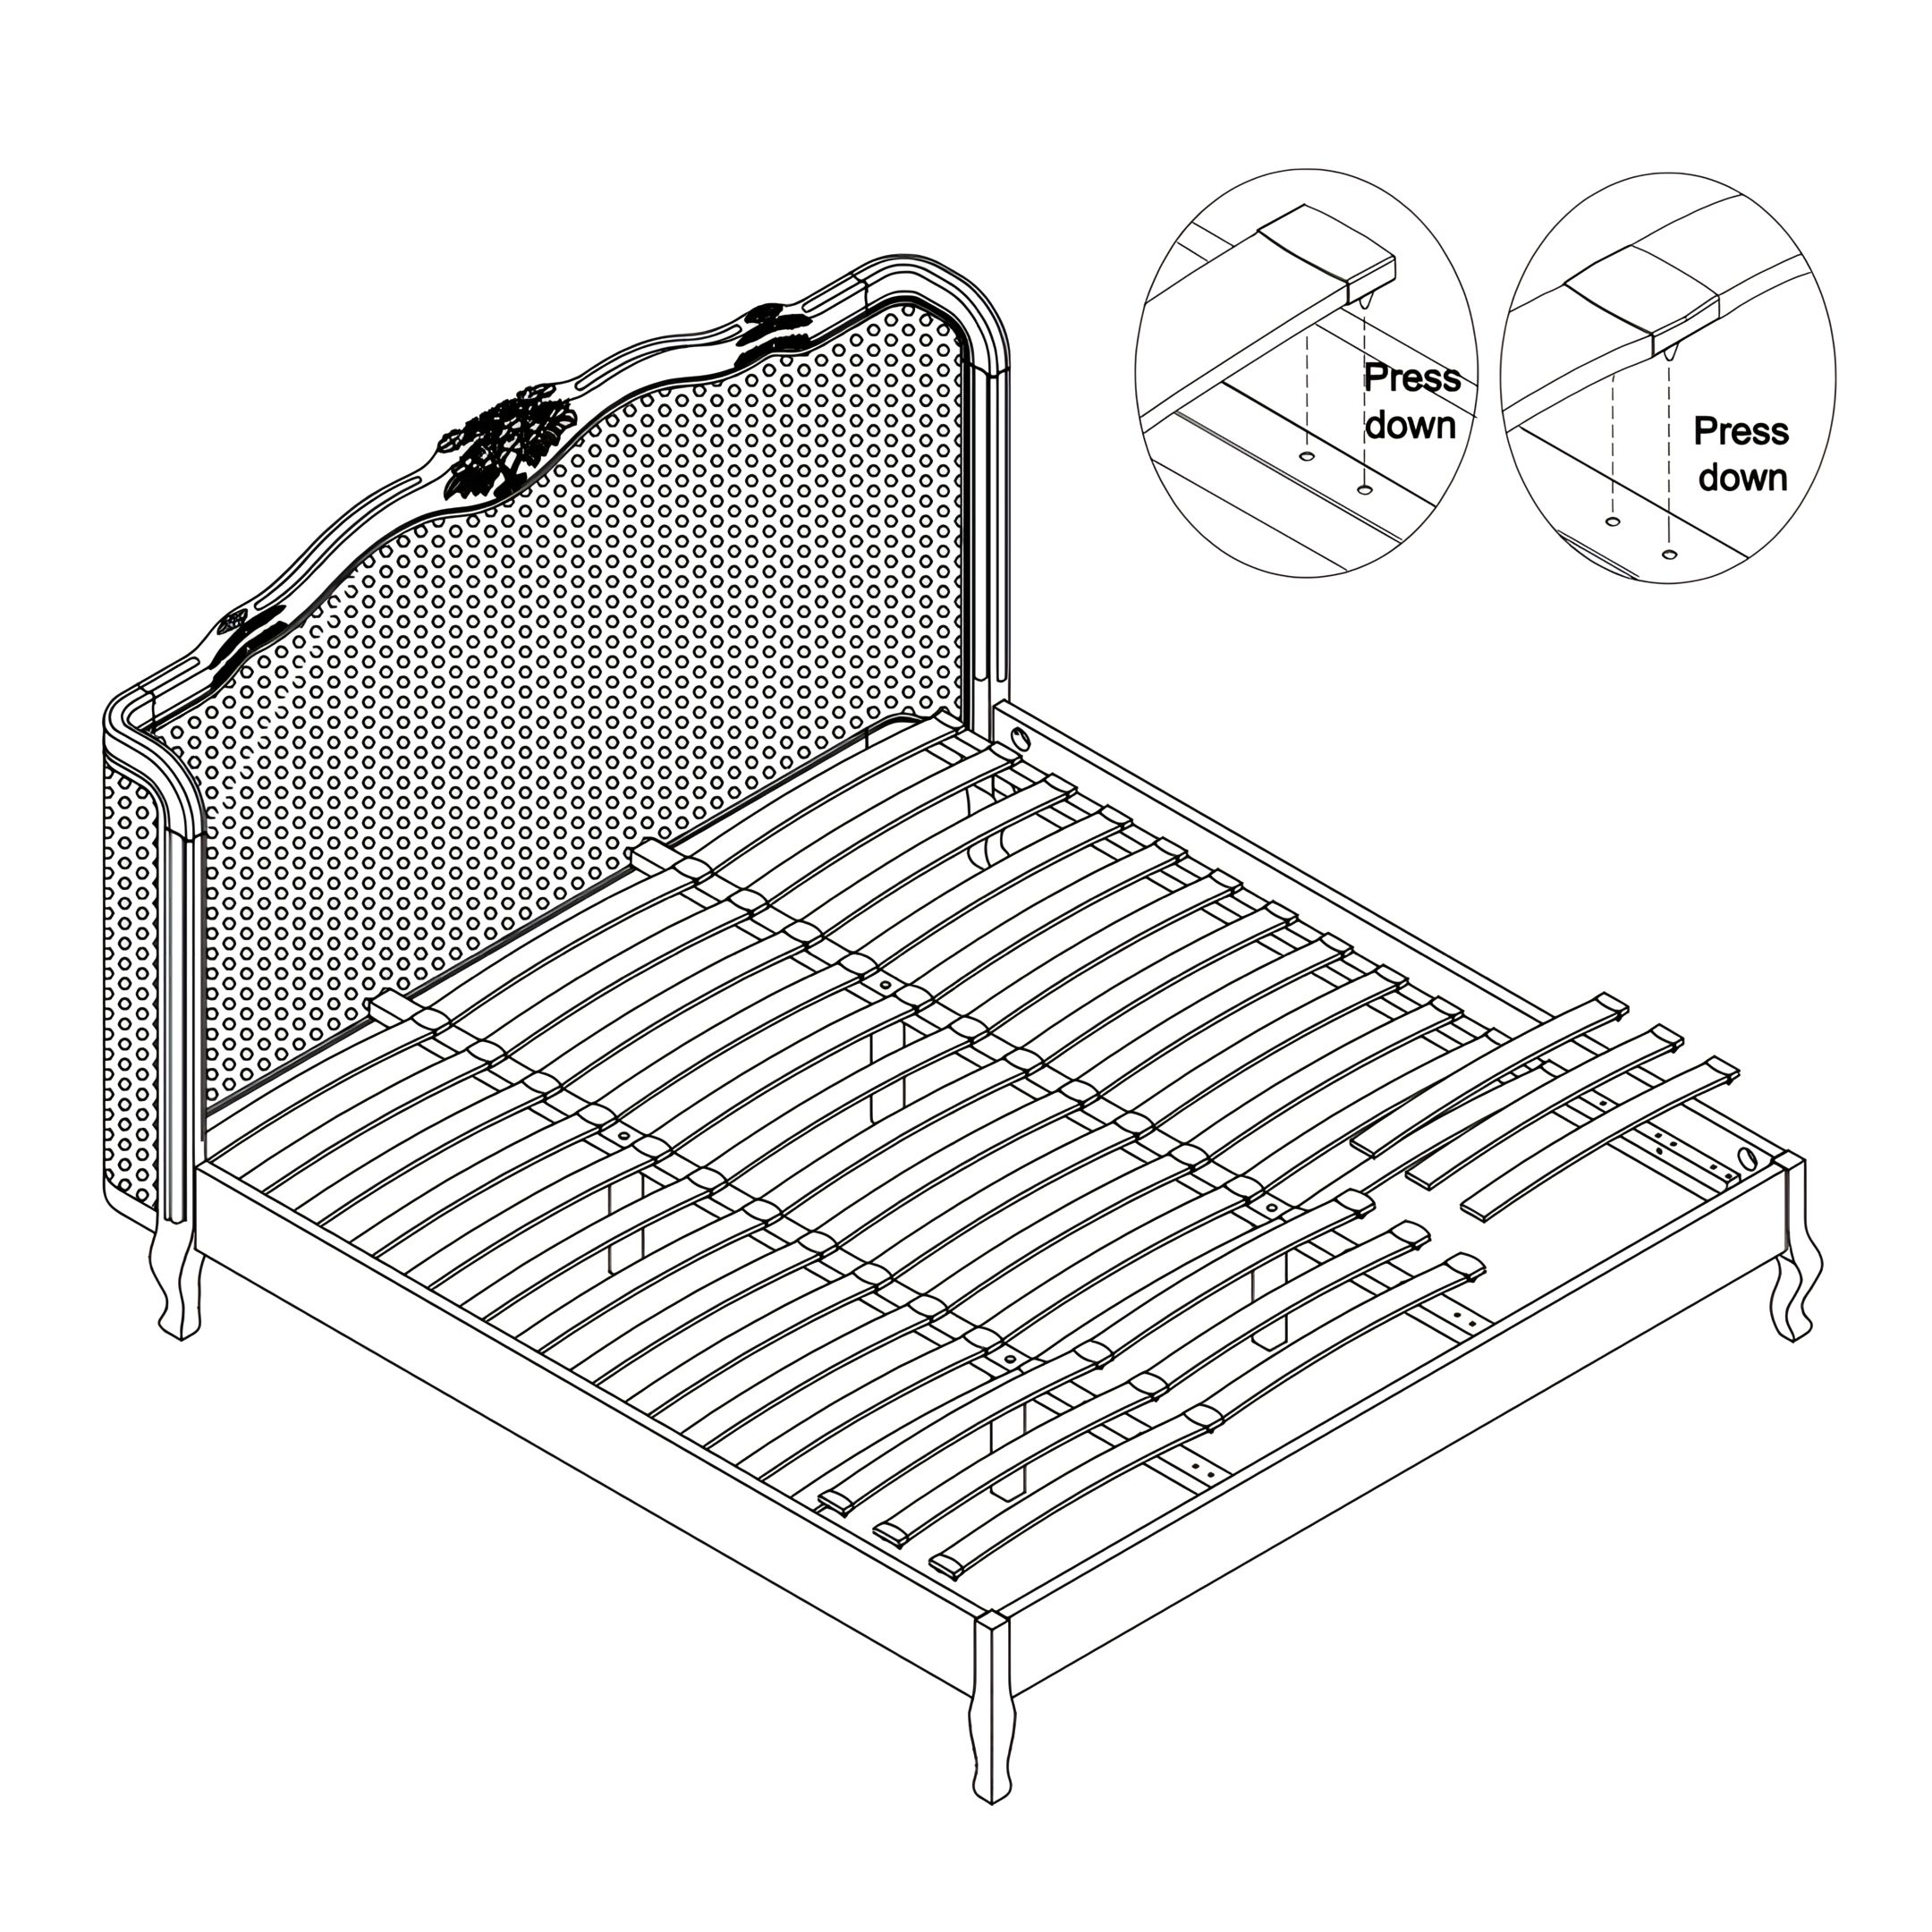
8. Install the Slats
1. Attach Single Plastic Caps (9) to the ends of the Bentwood Slats (8) that will be inserted into the Side Rails (4 & 5). 2. Attach Double Plastic Caps (10) to the ends of the slats that will be inserted into the Centre Support Rail (6). 3. Insert each end of the slats into the designated slots on the Side Rails (4 & 5) and Centre Support Rail (6). 4. Press down firmly to ensure each slat is securely in place.