1. Secure Threaded Fasteners
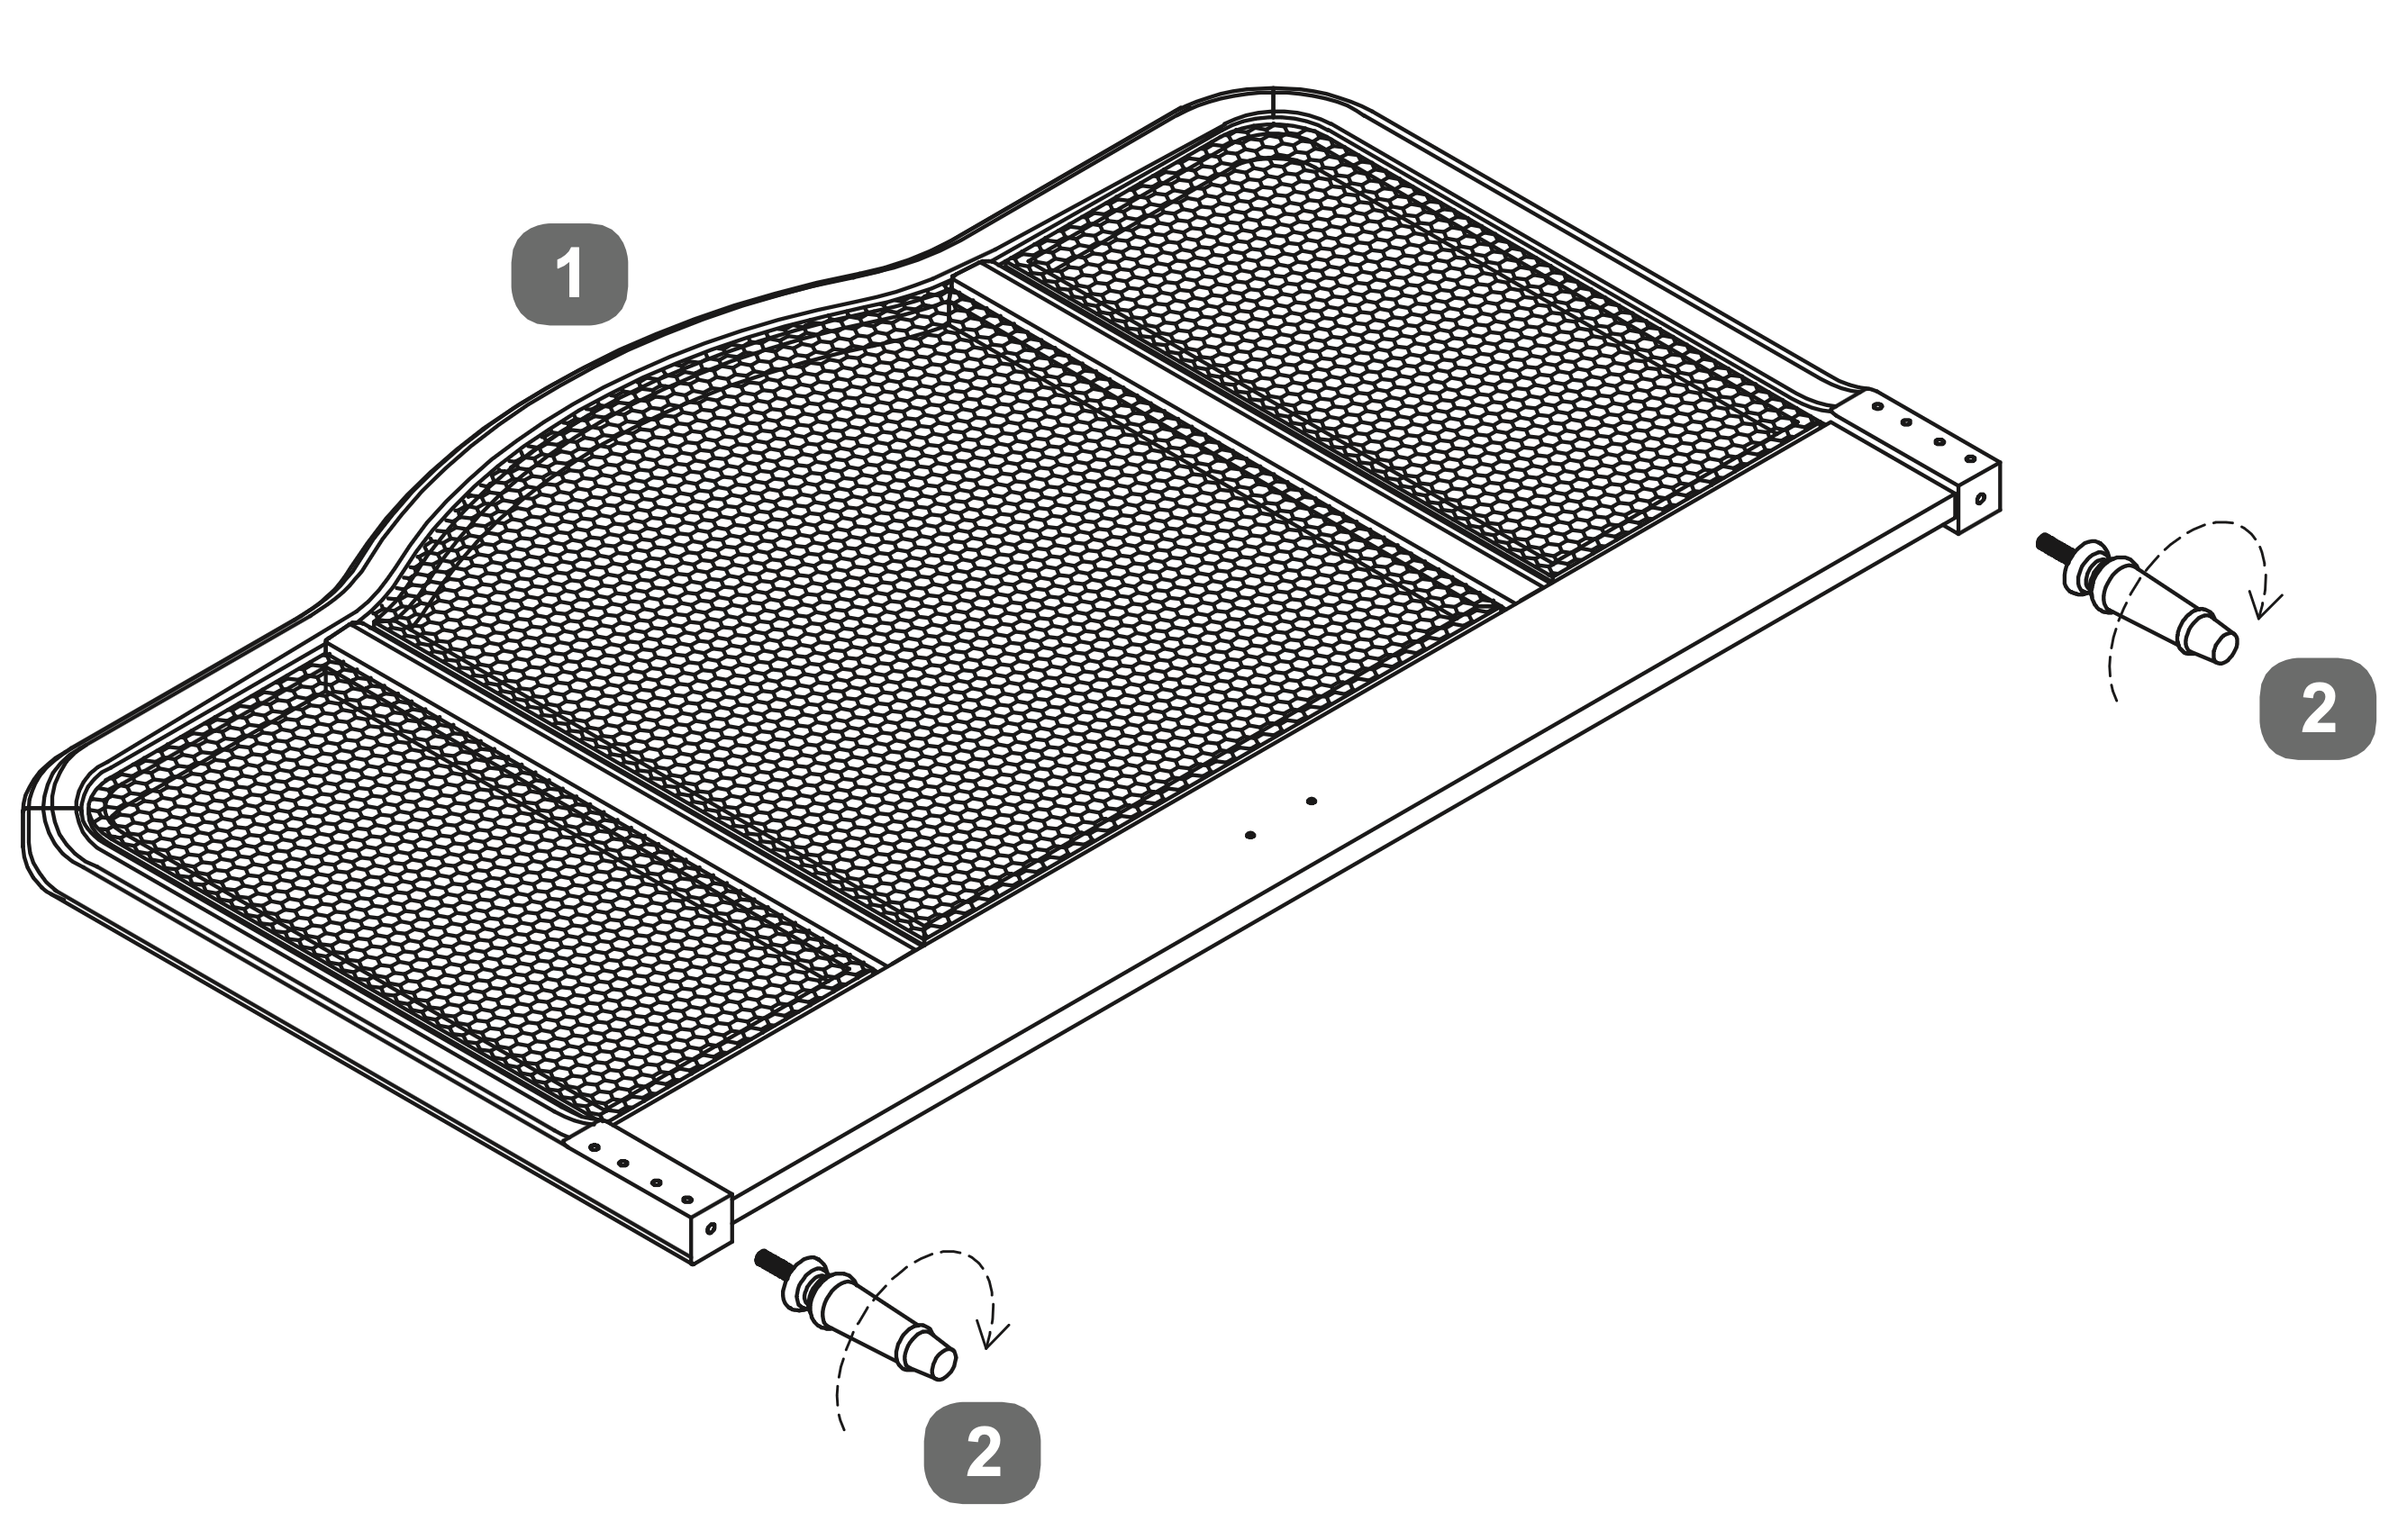
- Insert the threaded studs (A) into the designated holes on each side of the headboard.
- Ensure they are securely fastened by twisting them clockwise.
 Instructions by time4sleep Signature Rattan Bed FrameAssembly instructions for the Signature Rattan Bed Frame Product Information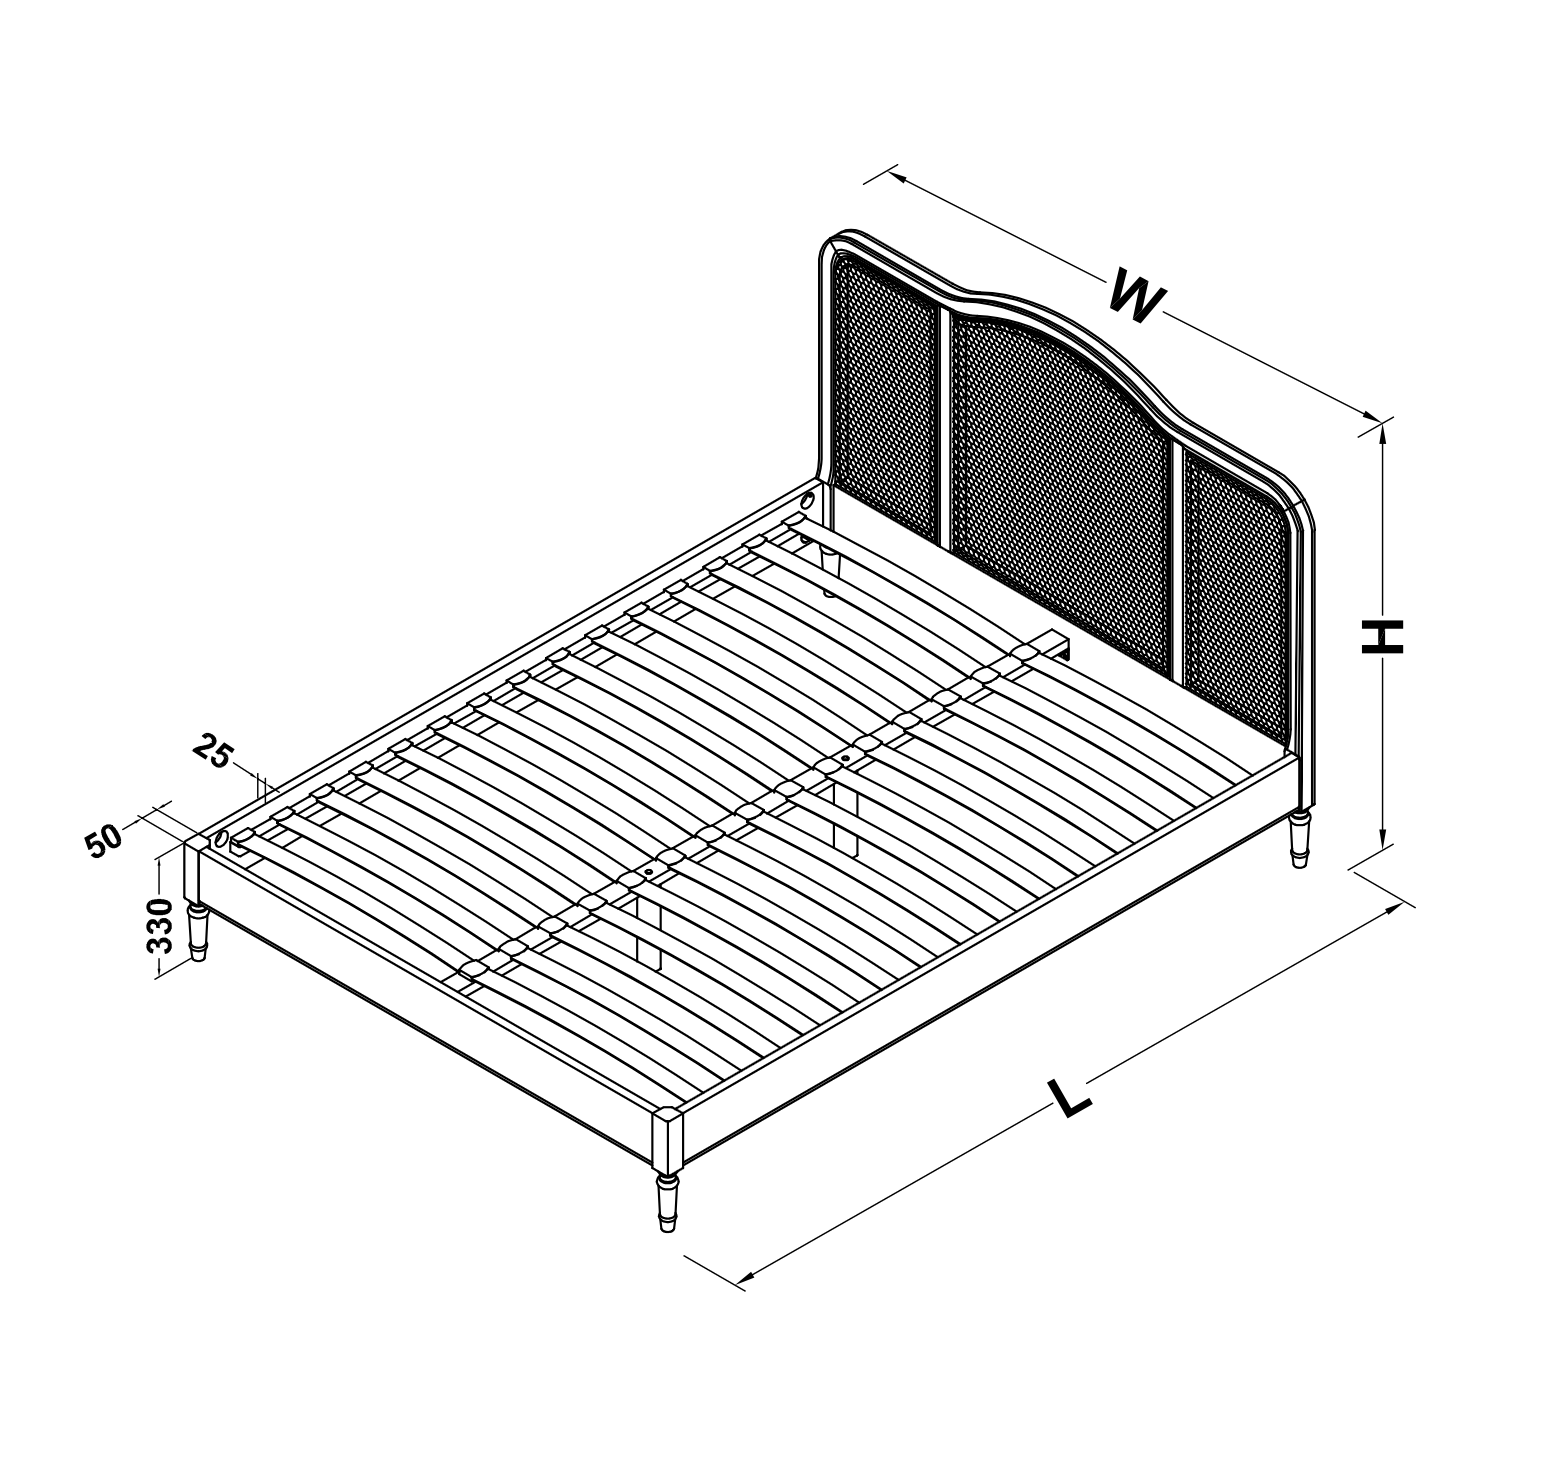 Signature French Rattan Bed FrameDiscover the perfect fusion of classic French elegance and modern sophistication with this stunning rattan oak bed. This beautifully crafted piece seamlessly blends traditional French design elements with a sleek contemporary oak finish, creating a versatile centerpiece that elevates any bedroom setting.
The rich contemporary oak finish enhances the natural wood grain, whilst the warmth and character of natural wood combine with the textural interest of the woven rattan finish.
The thoughtful design bridges the gap between old-world charm and modern living, making it an ideal choice for those who appreciate classic French style but prefer a slightly more modern look.. Whether paired with vintage accessories or contemporary bedding, this versatile piece adapts beautifully to your personal style.
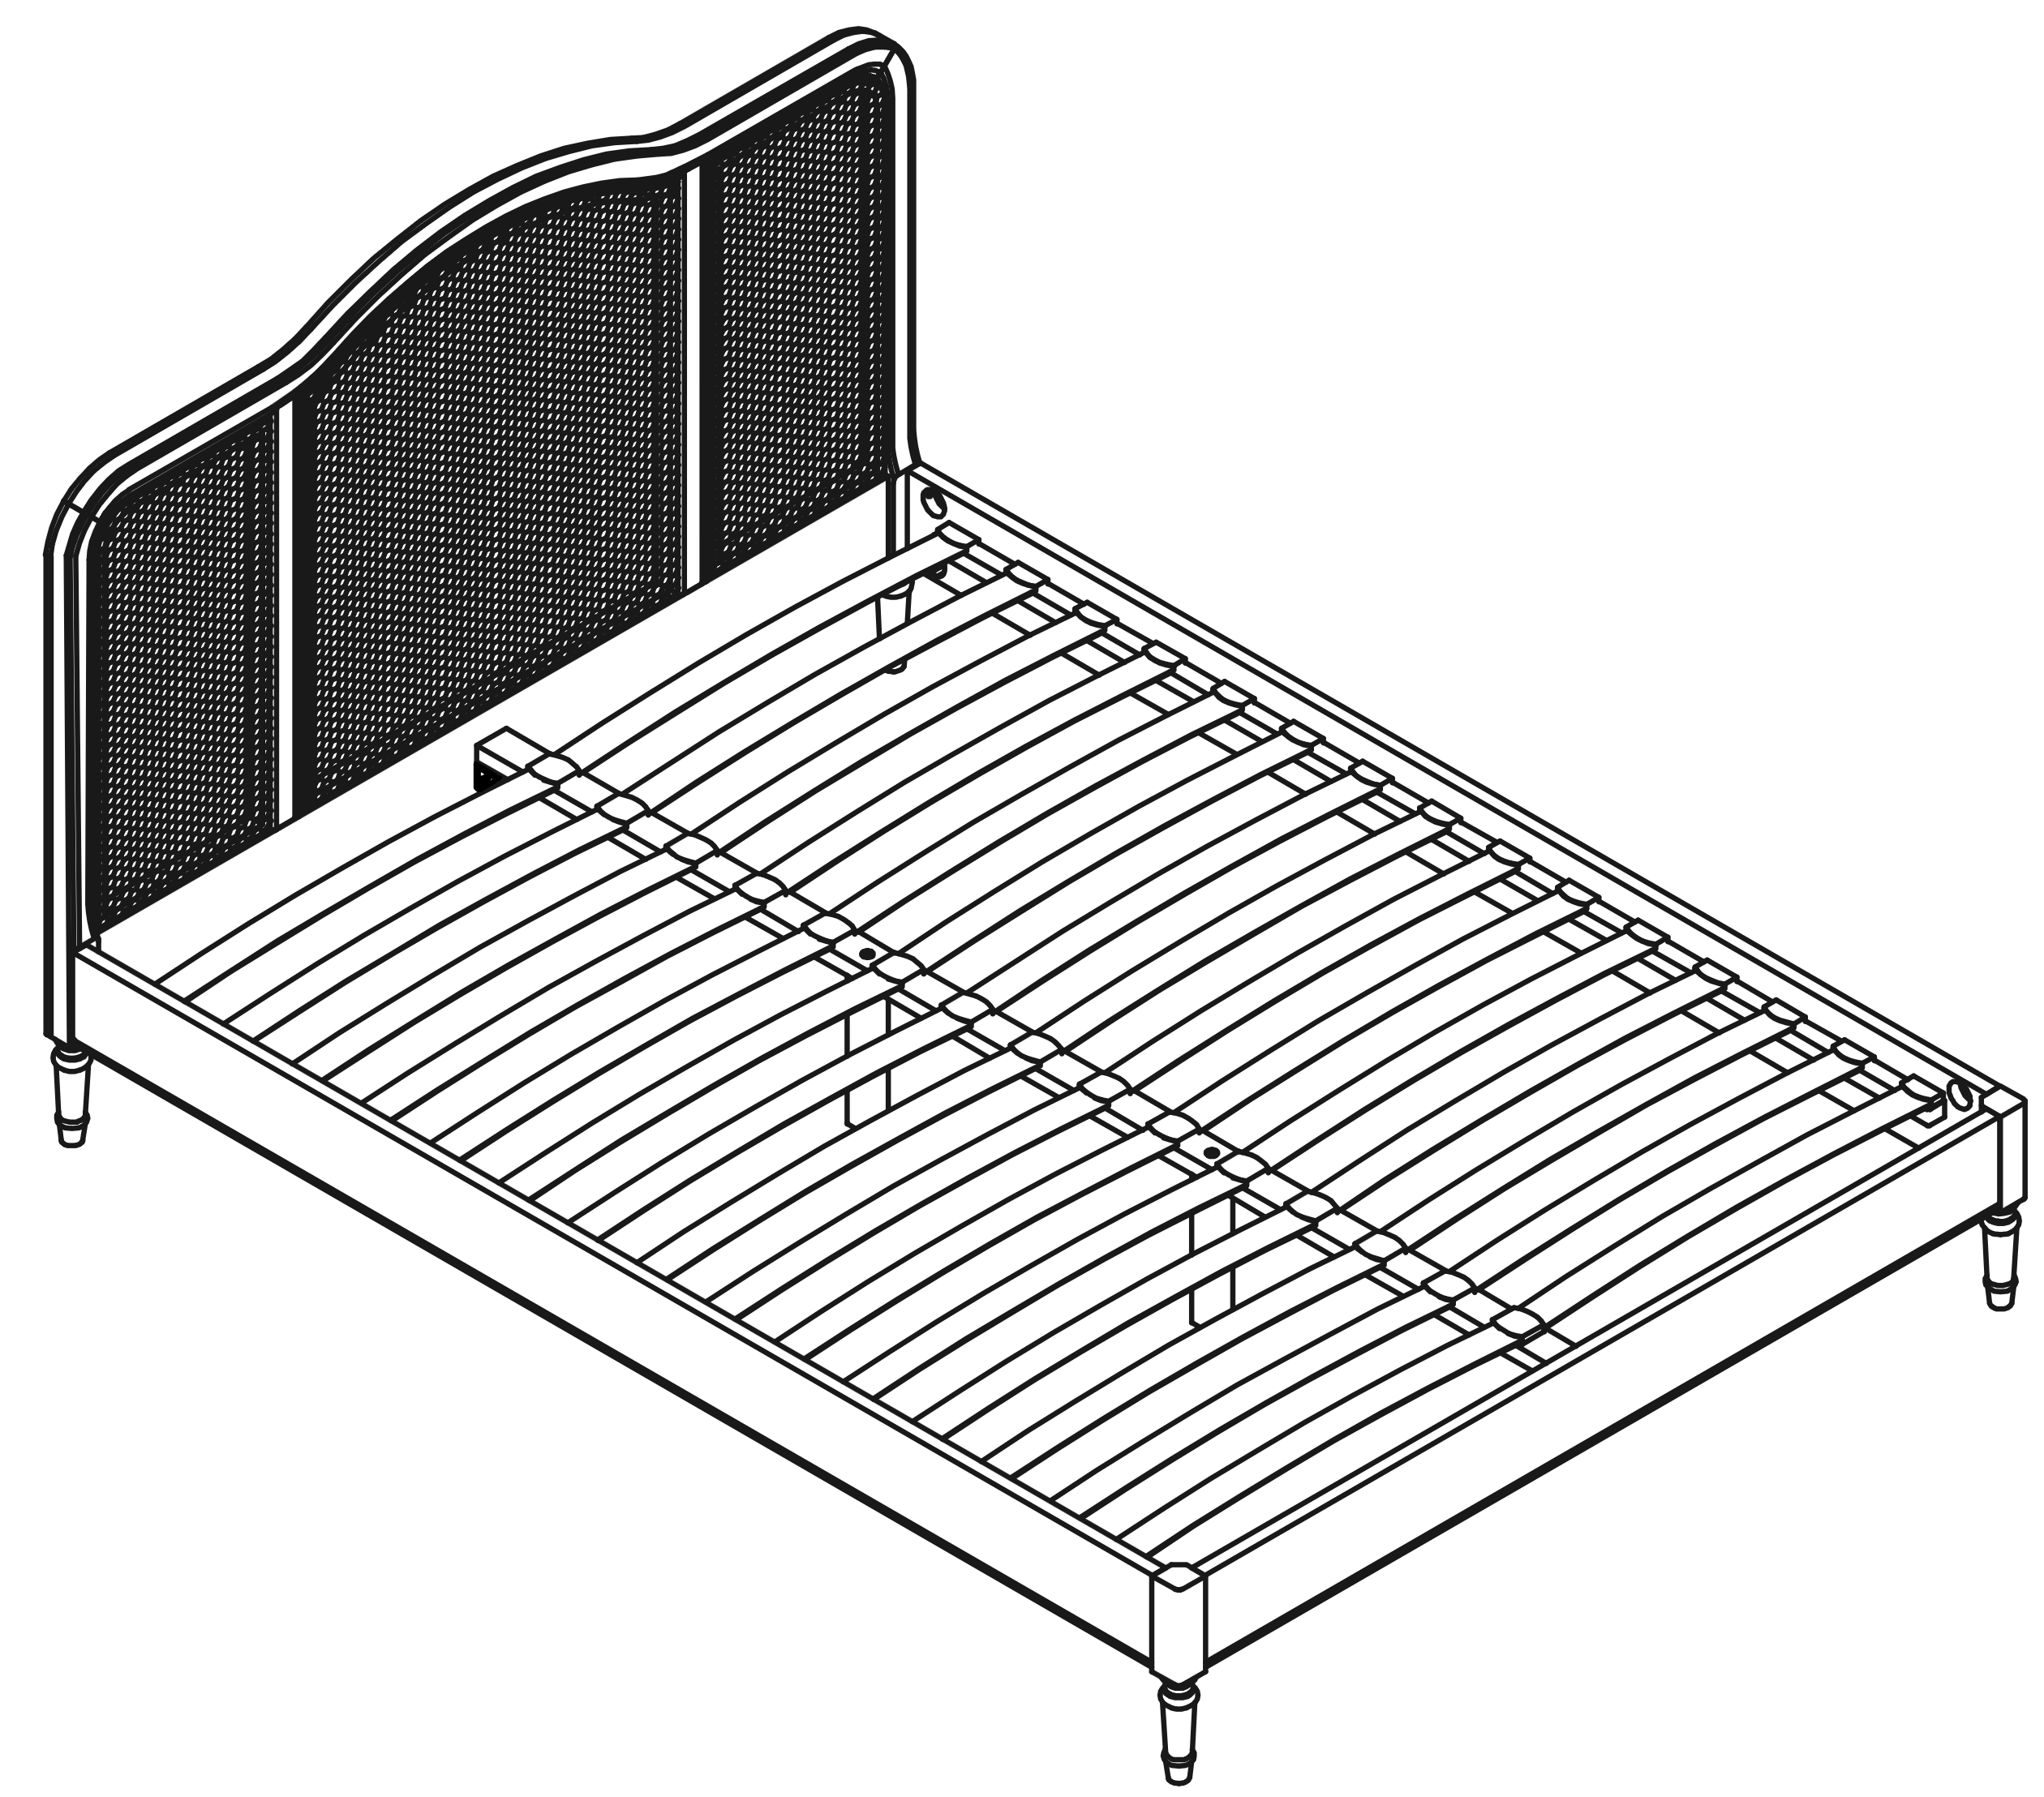
Perfect for creating a sophisticated bedroom sanctuary, this French style rattan oak bed brings together the best of both worlds – the romantic appeal of traditional French design and the clean, refined look of contemporary craftsmanship. The bed comes with a sprung slatted base for extra comfort and support.
Tools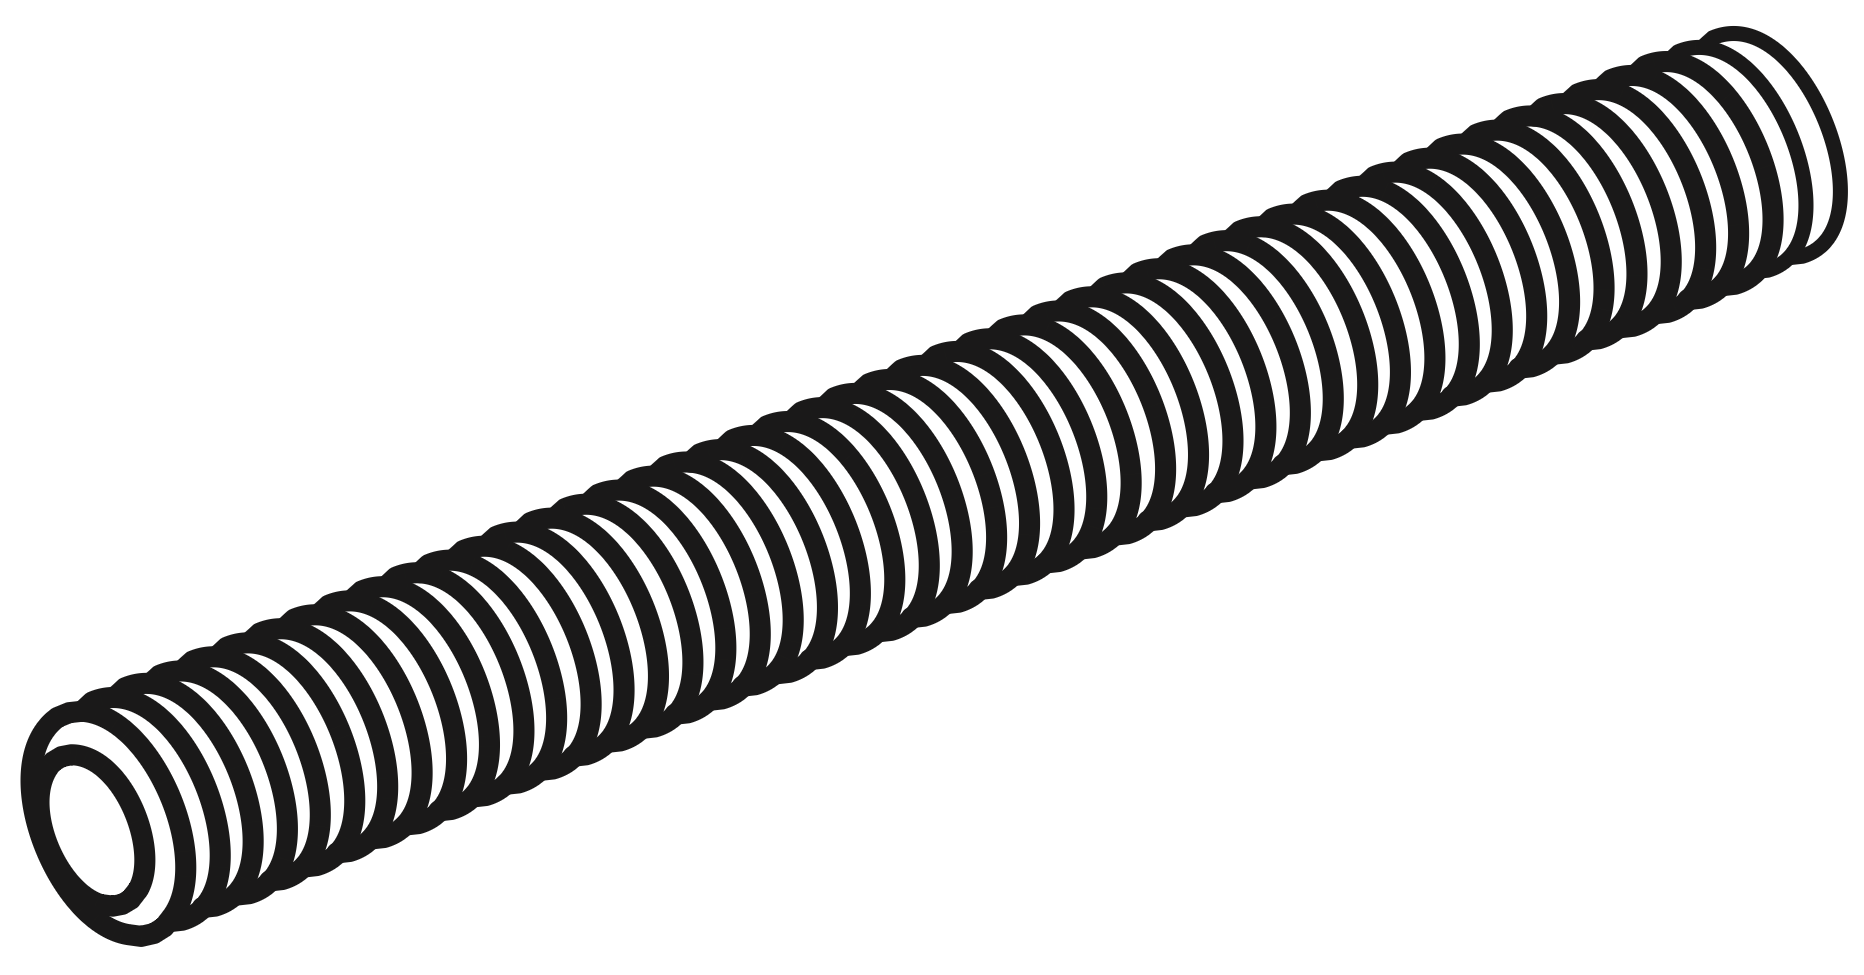 A - Threaded stud (M8x80mm) 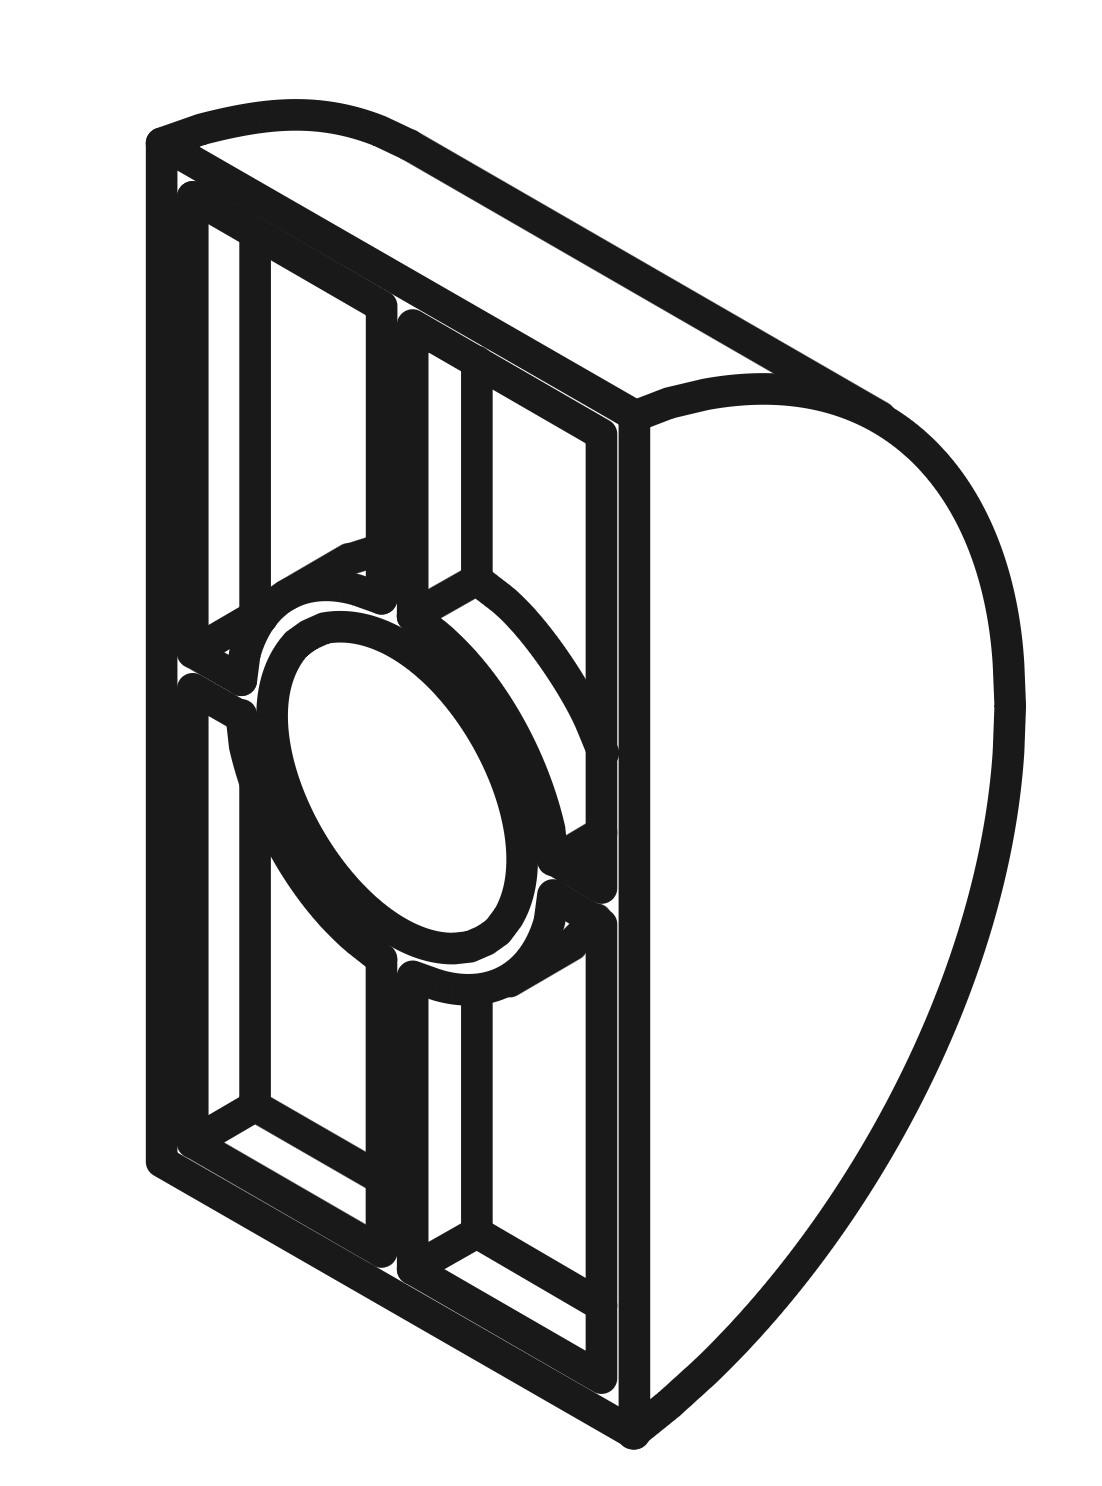 B - Half-moon bracket  C - Flat washer for M8 stud  D -Spring washer for M8 stud  E - Nut for M8 stud  F - Spanner for M8 nuts 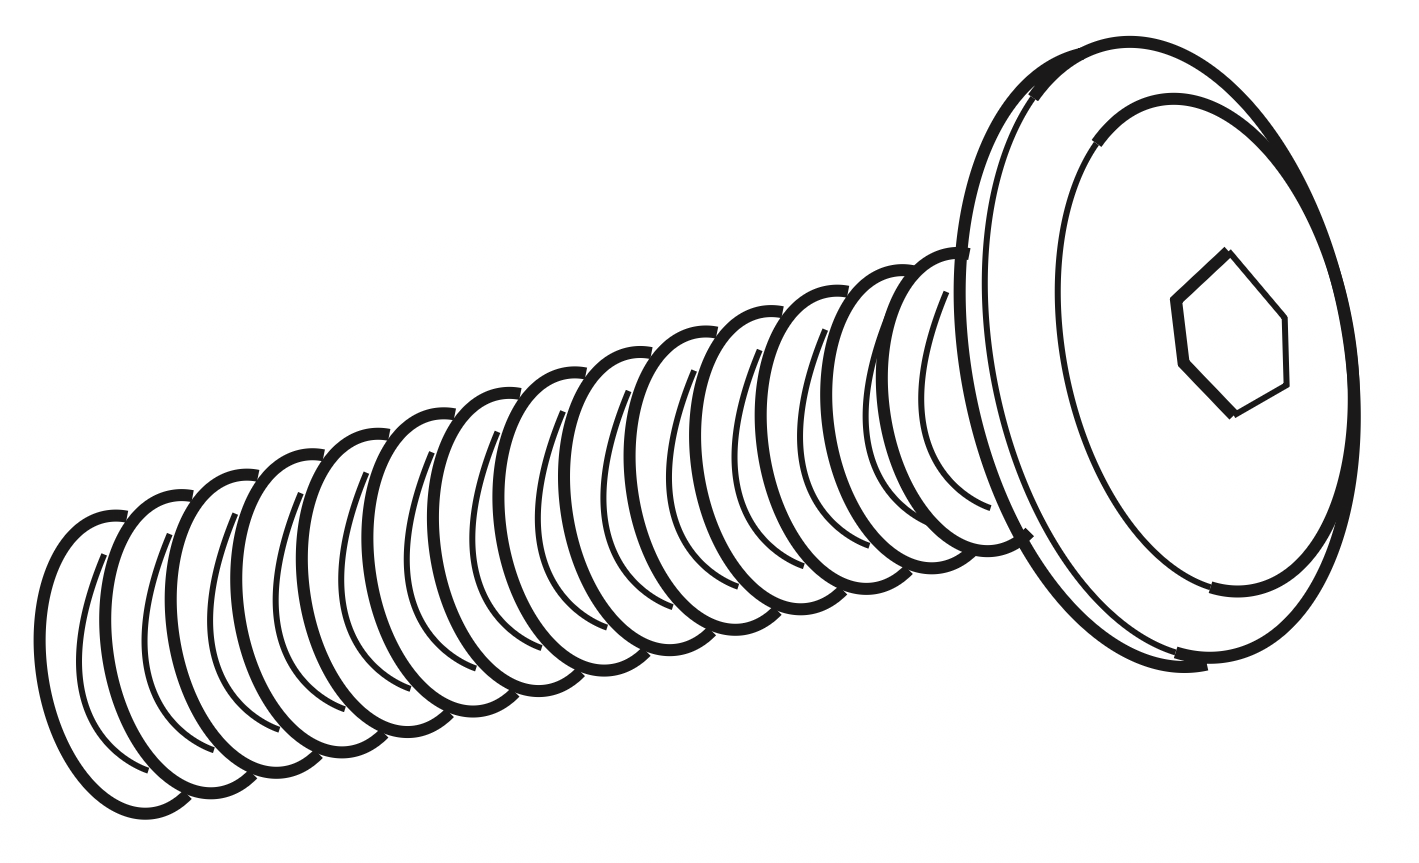 G - Bolt (M8x35mm) 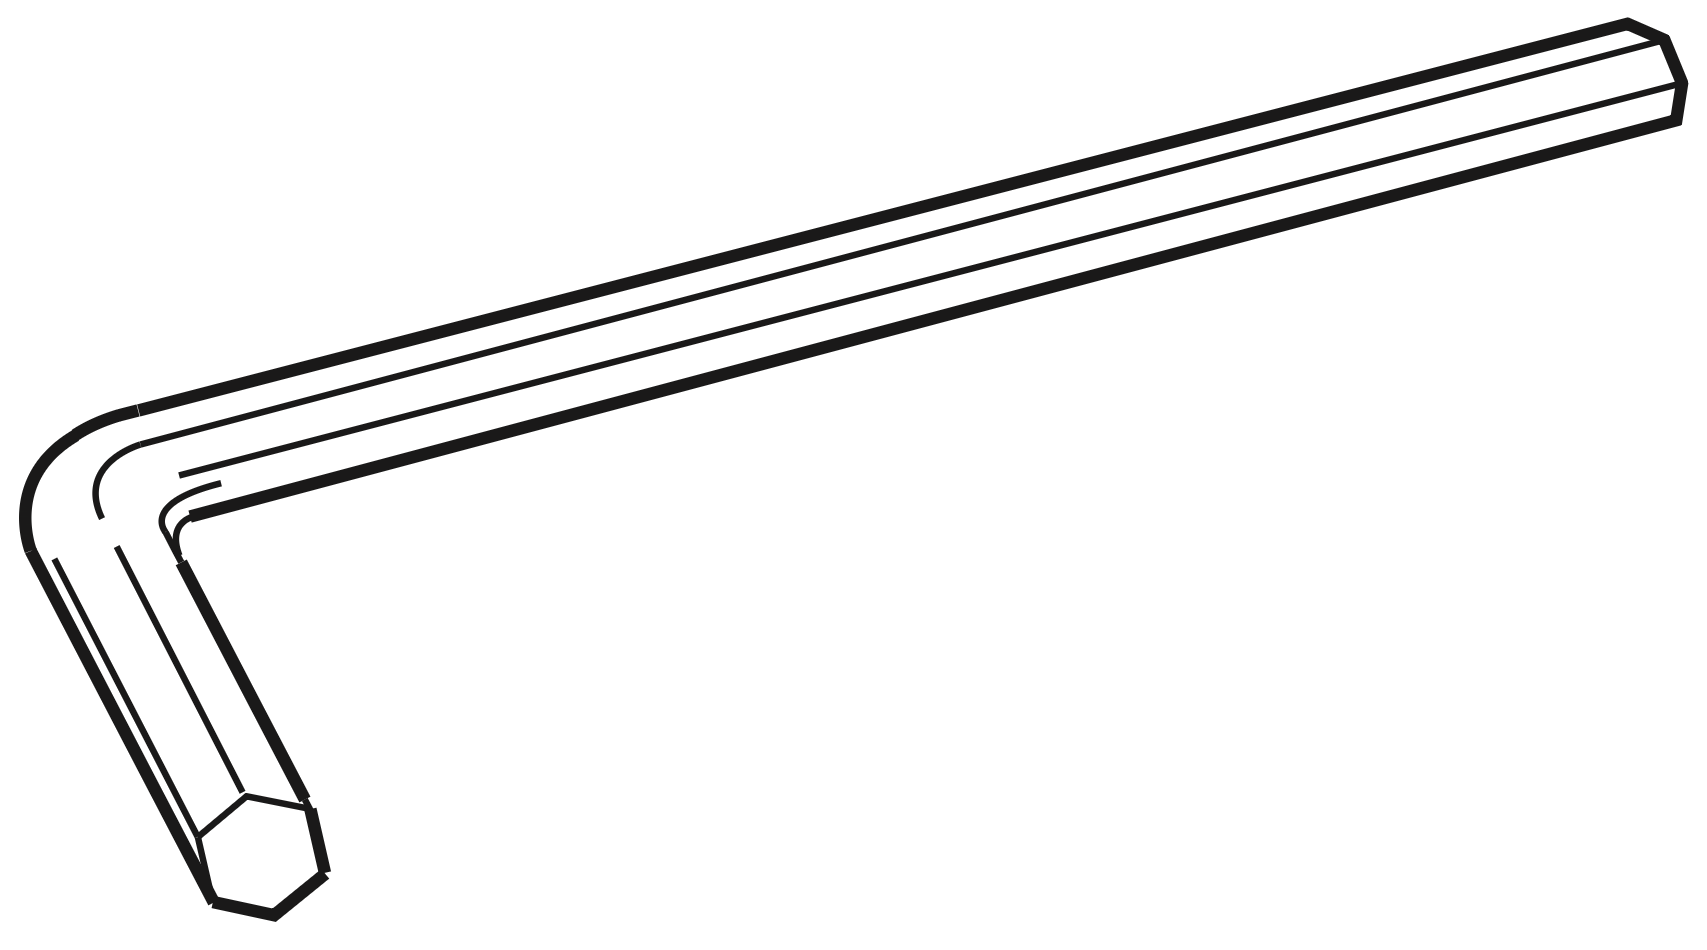 H - Allen key for M8 bolts 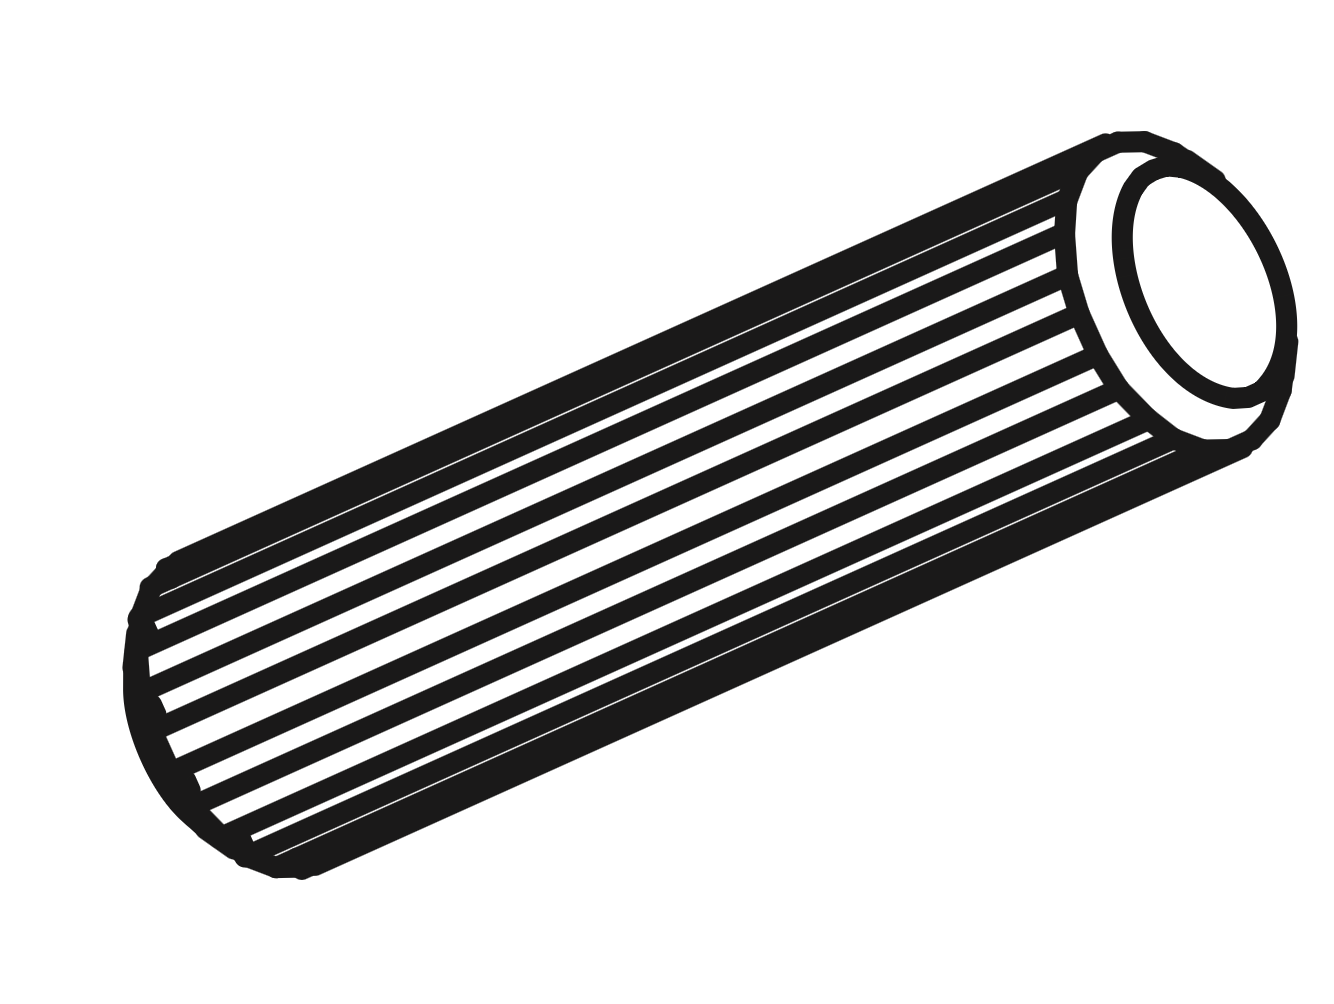 I - Dowel (M10x40mm)  J - Bolt (M8x20mm) 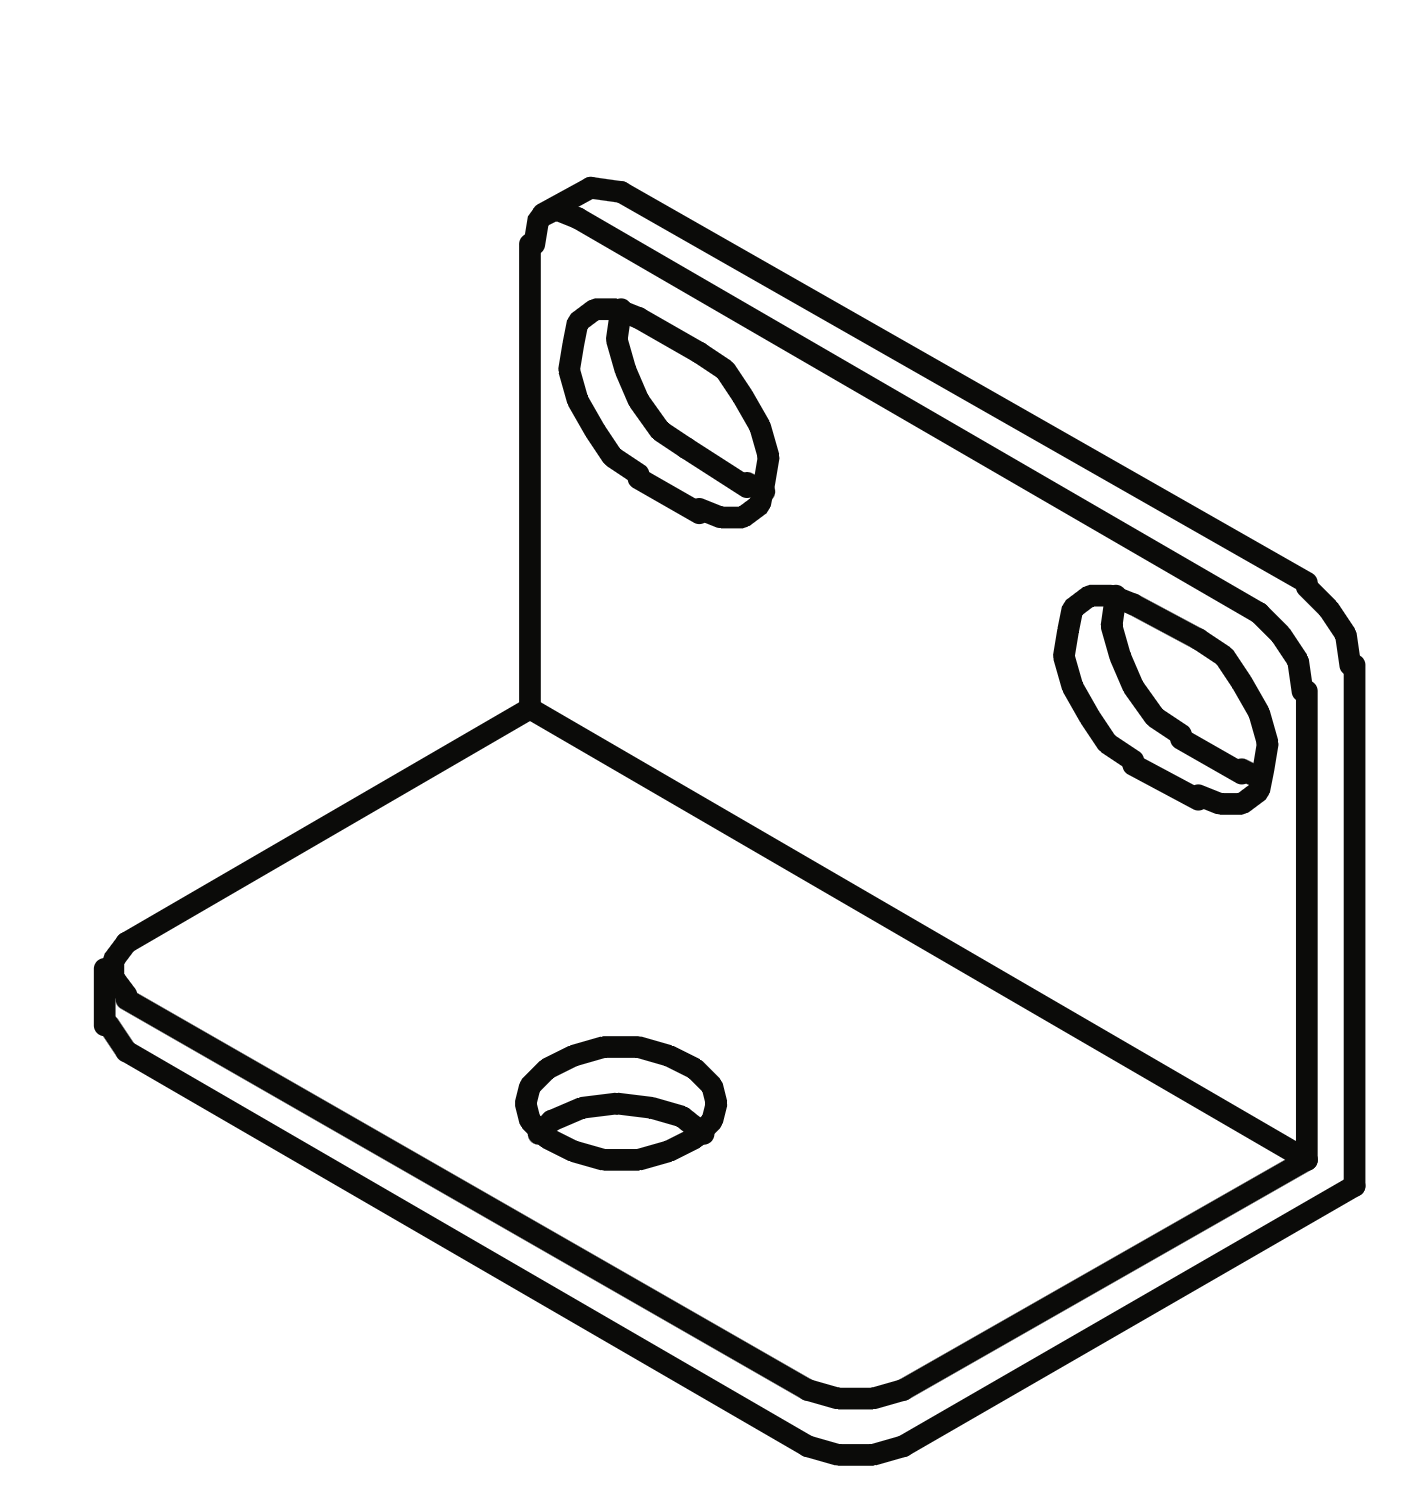 K - L Shape Bracket Parts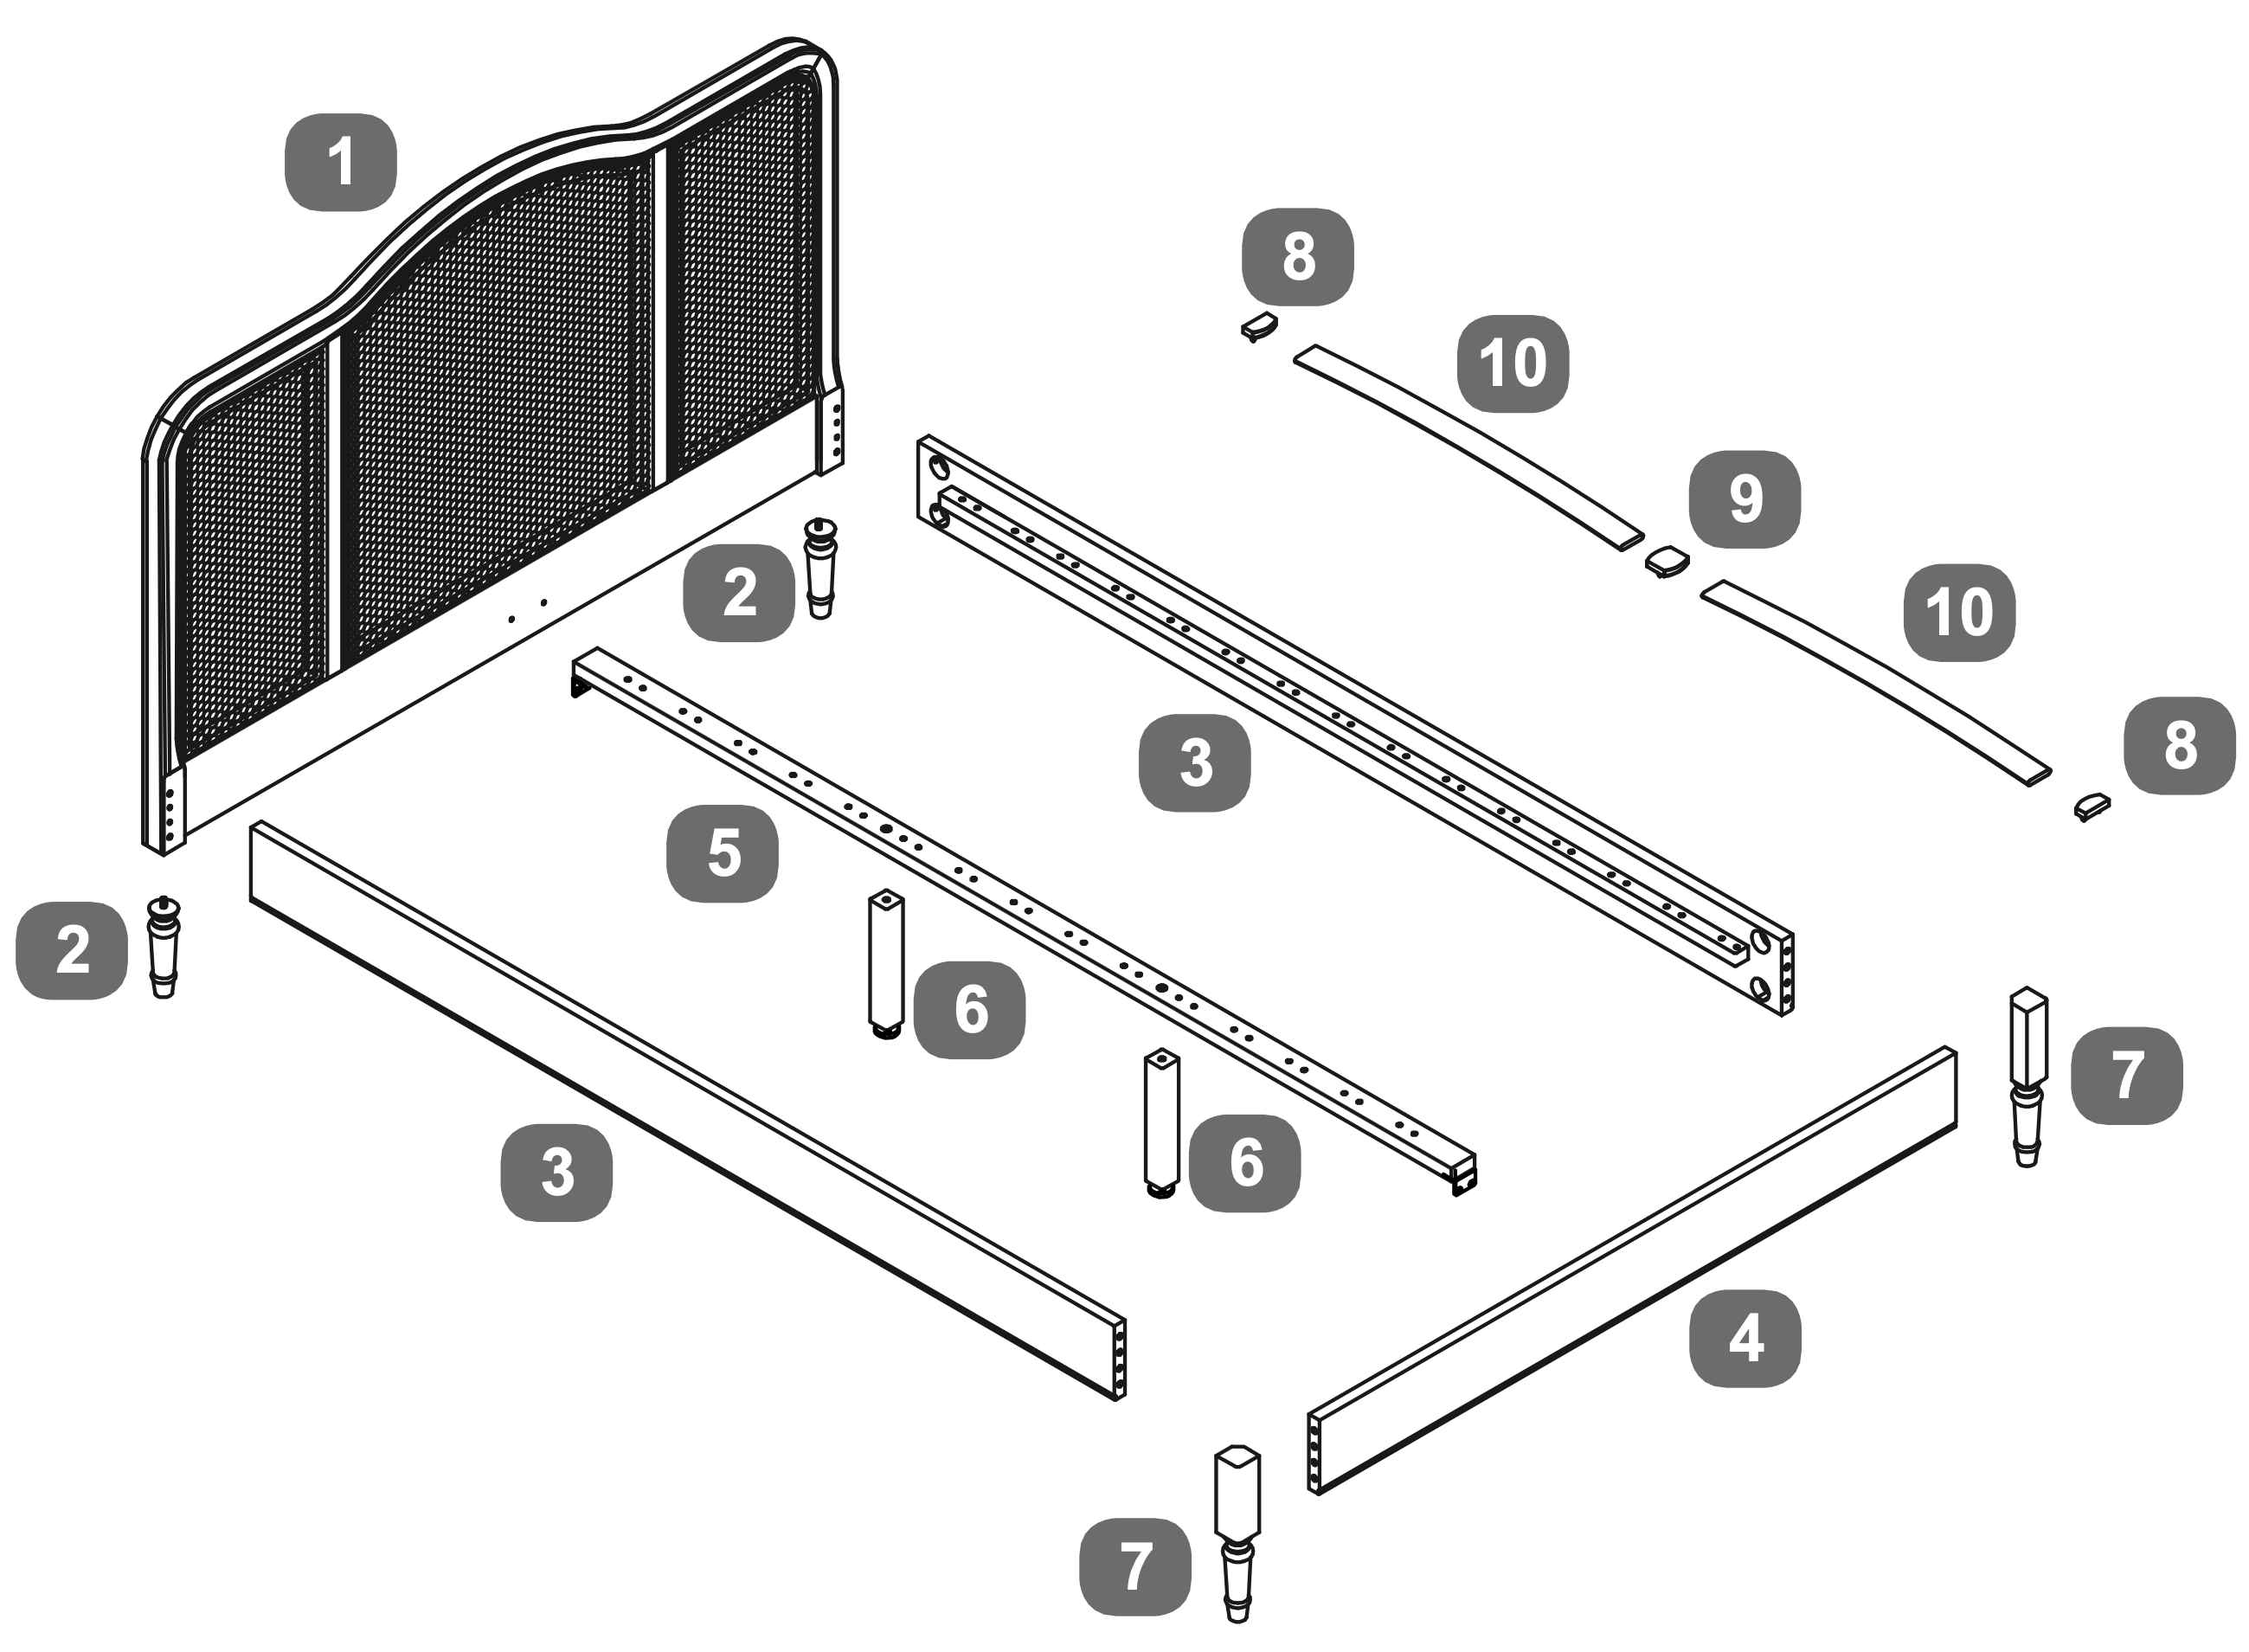 1Headboard - Box 1 2Headboard Legs - Box 2 3Side Rail - Box 2 4Footboard - Box 2 5Wood Centre Support - Box 2 6Centre Support Legs - Box 2 7Footboard Legs - box 2 8Single Plastic Caps - Box 2 (28 Double / 30 King) 9Double Plastic Caps - Box 2 (14 Double / 15 King) 10Bentwood Slats - Box 2 (28 Double / 30 King) 1. Secure Threaded Fasteners
2. Fasten Headboard Components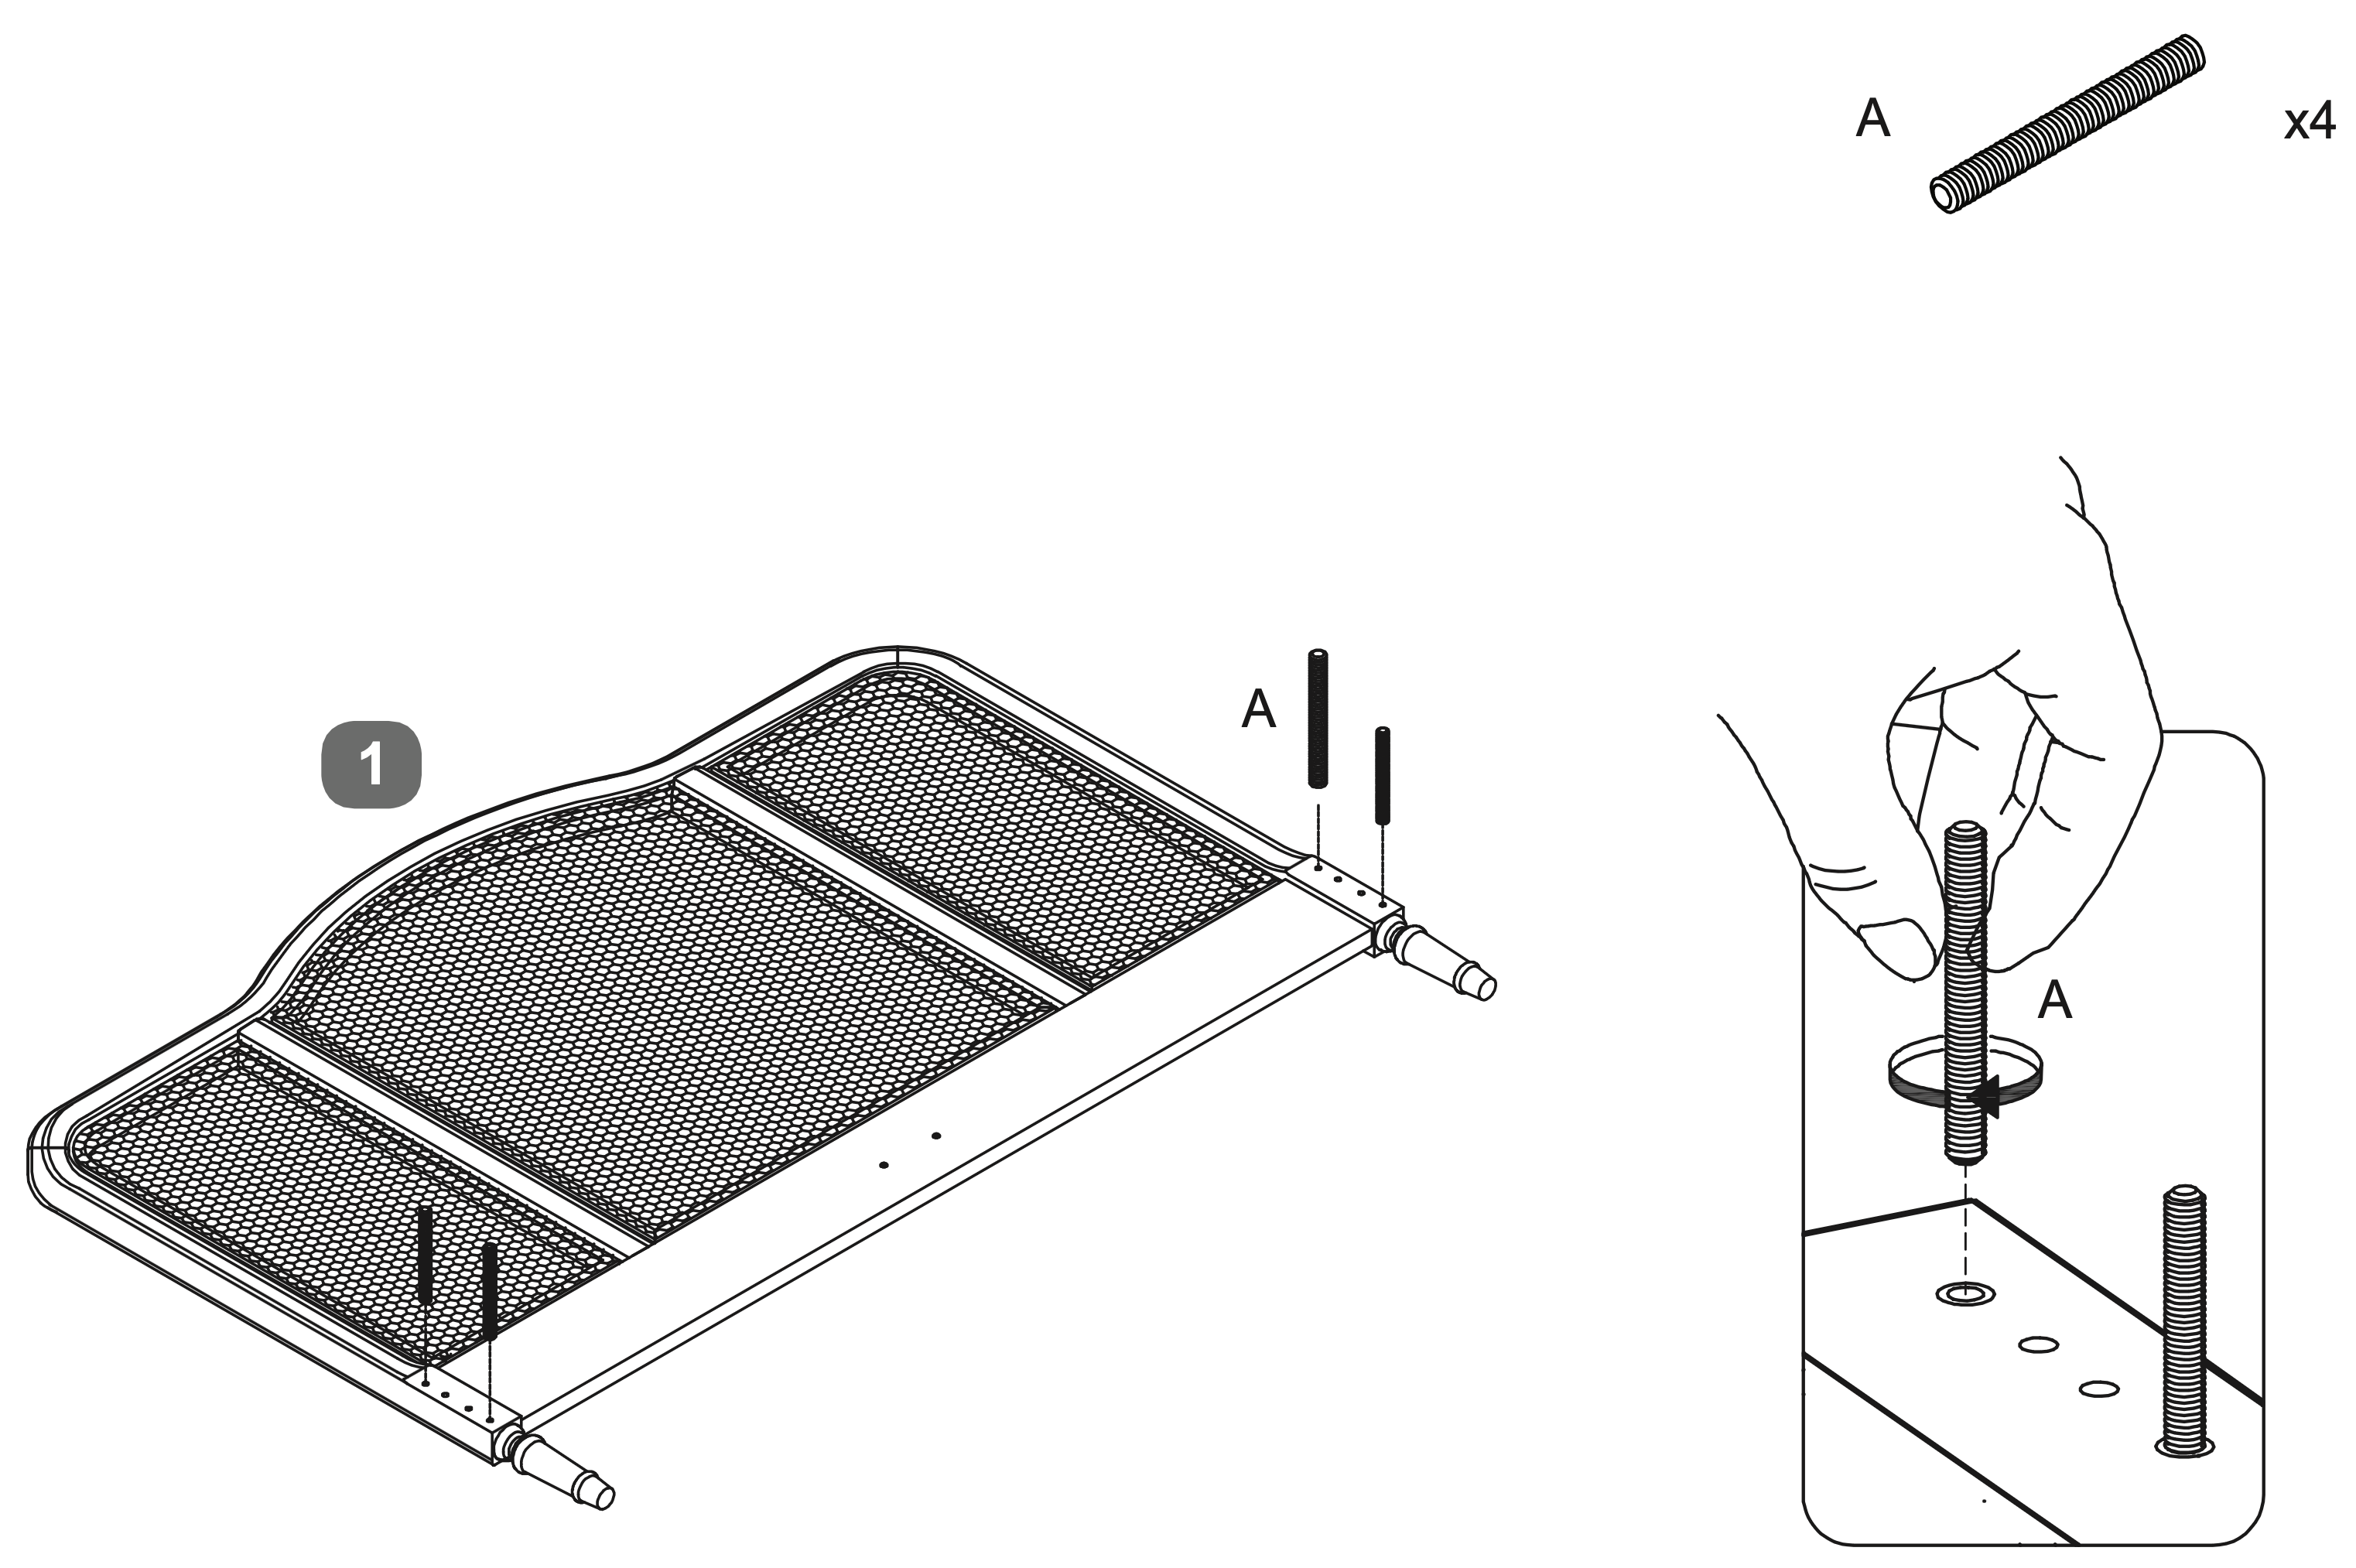 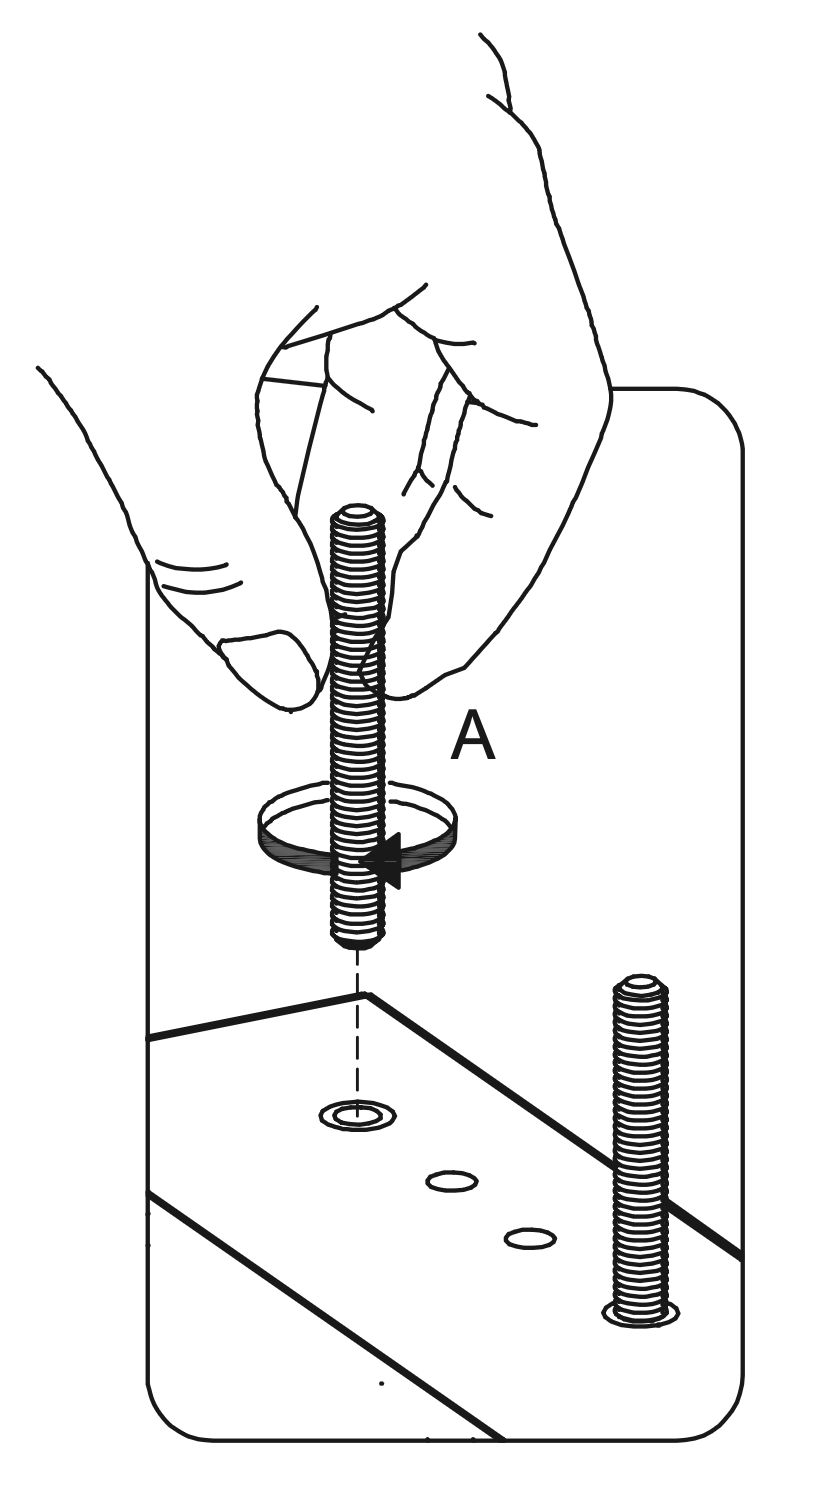
3. Attach Fasteners to Footboard Legs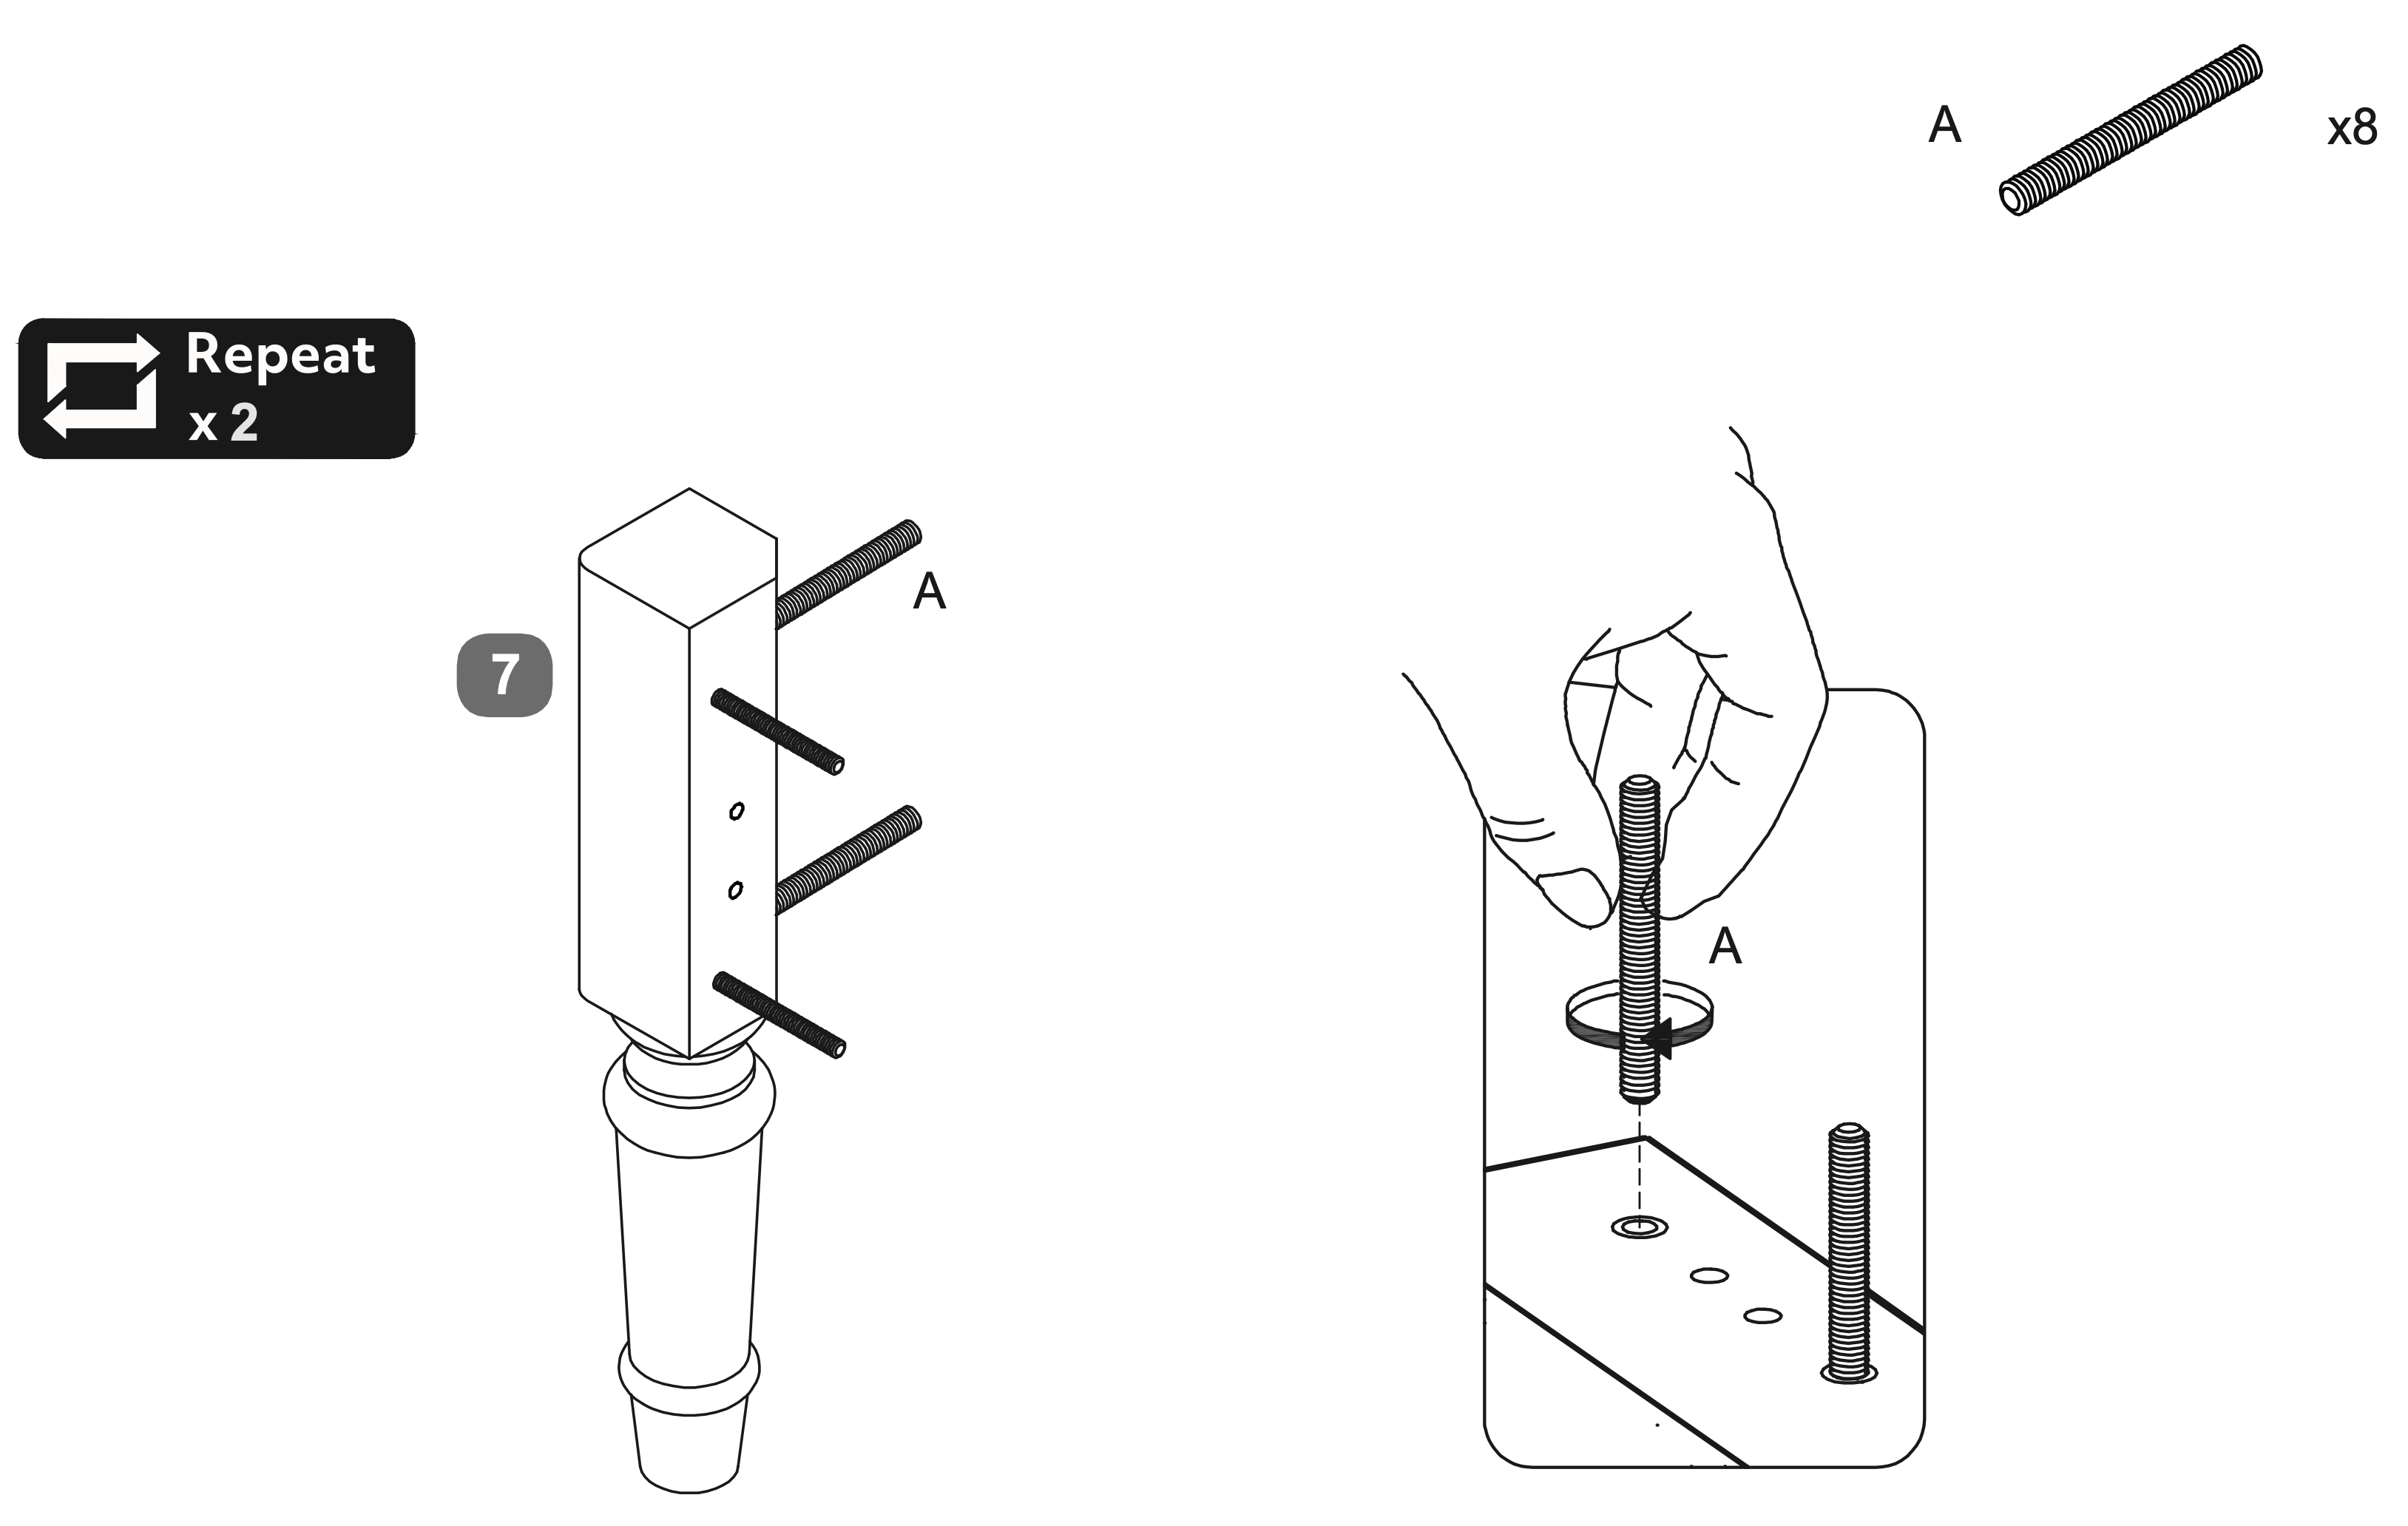 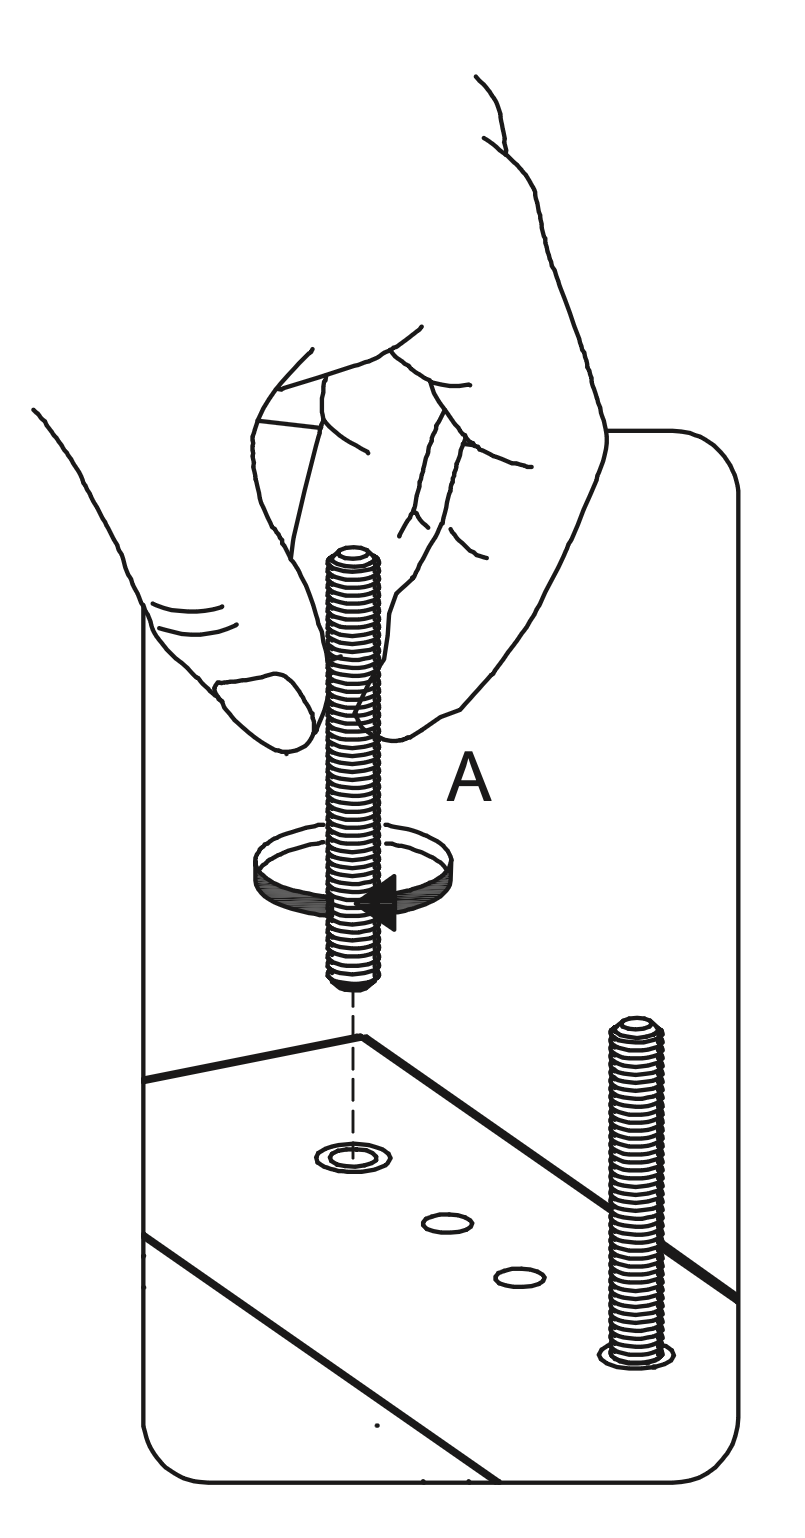
4. Assemble Footboard Structure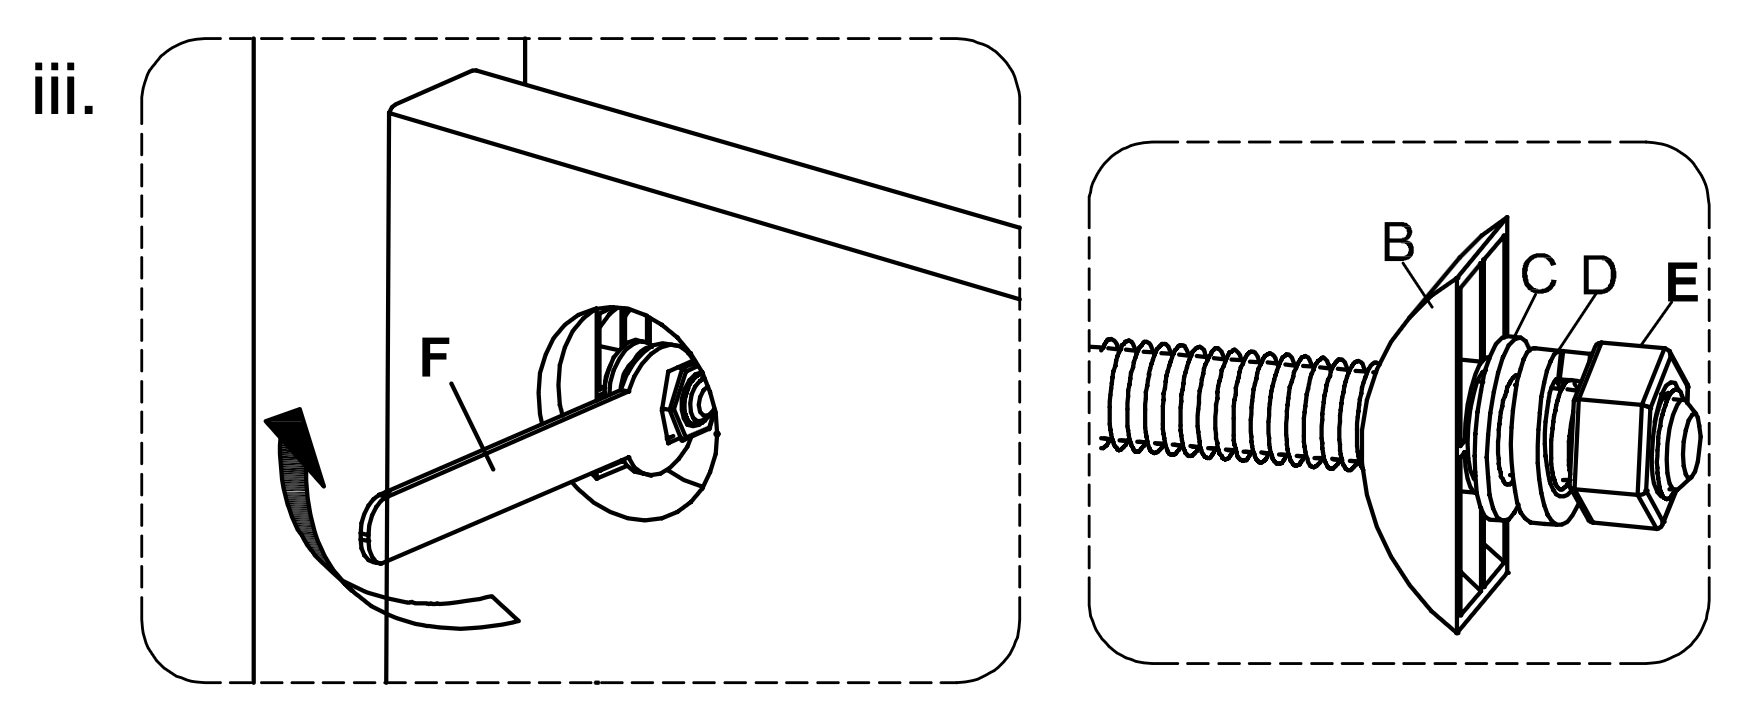 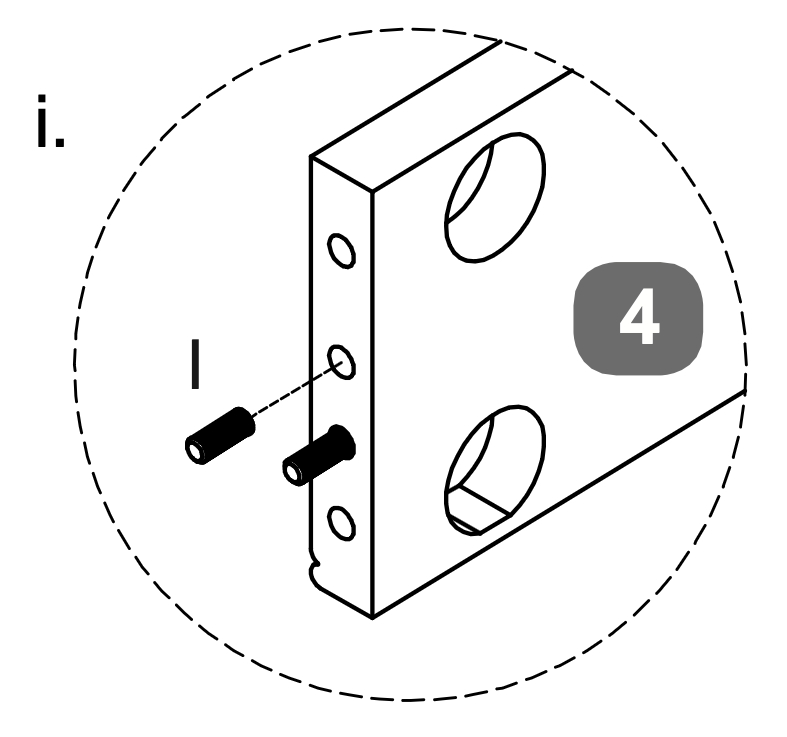 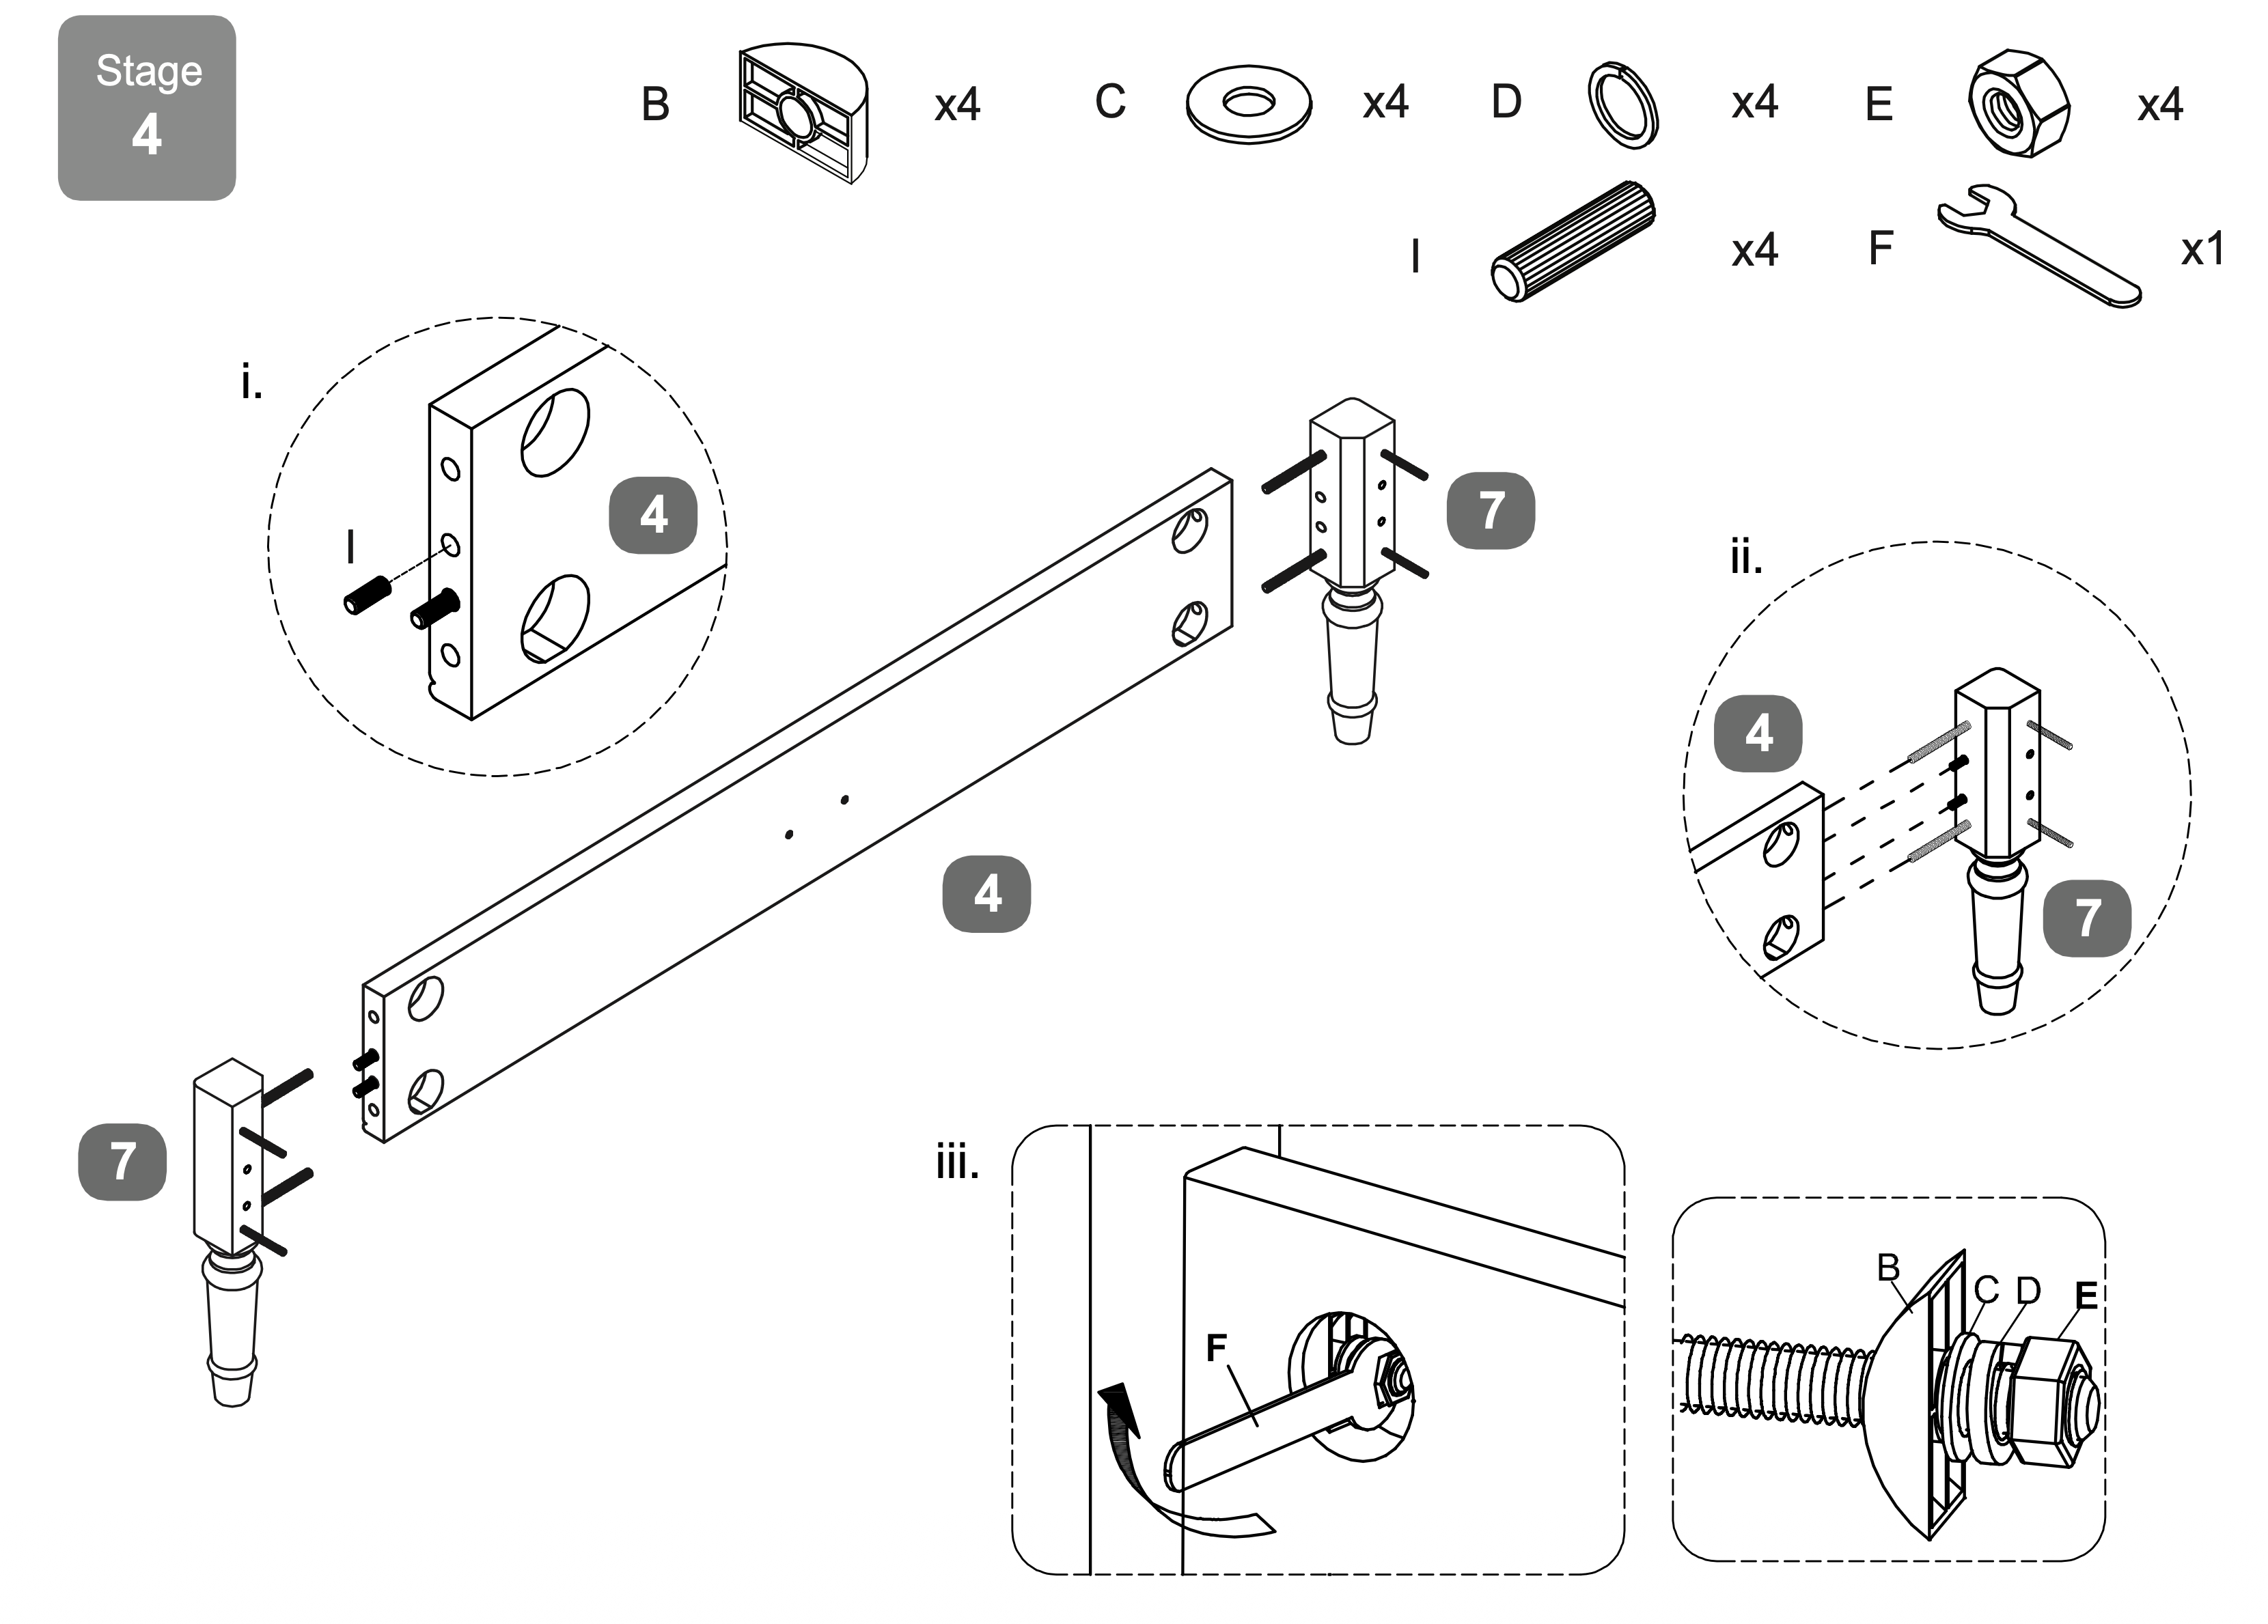 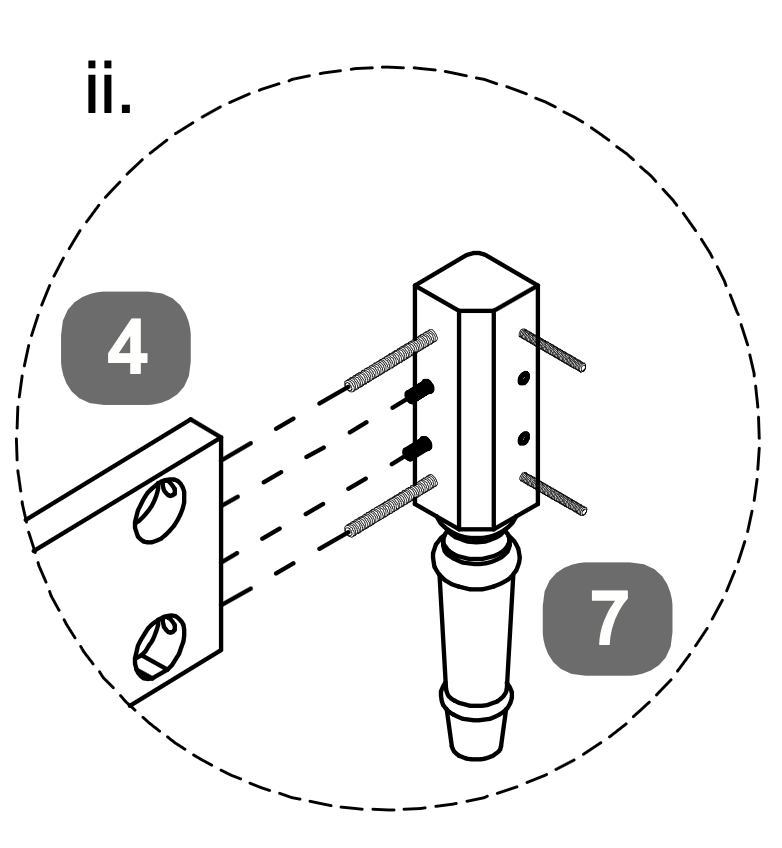
5. Align and Secure Side Rails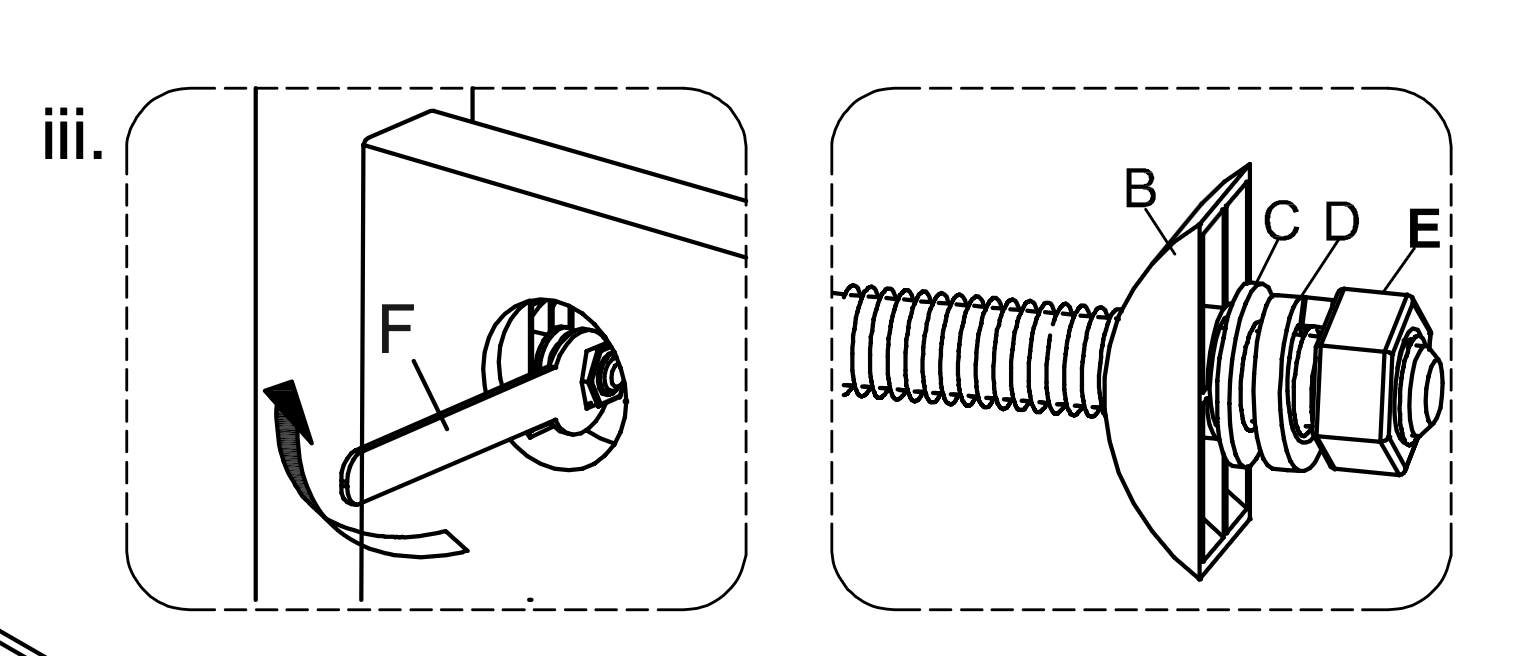  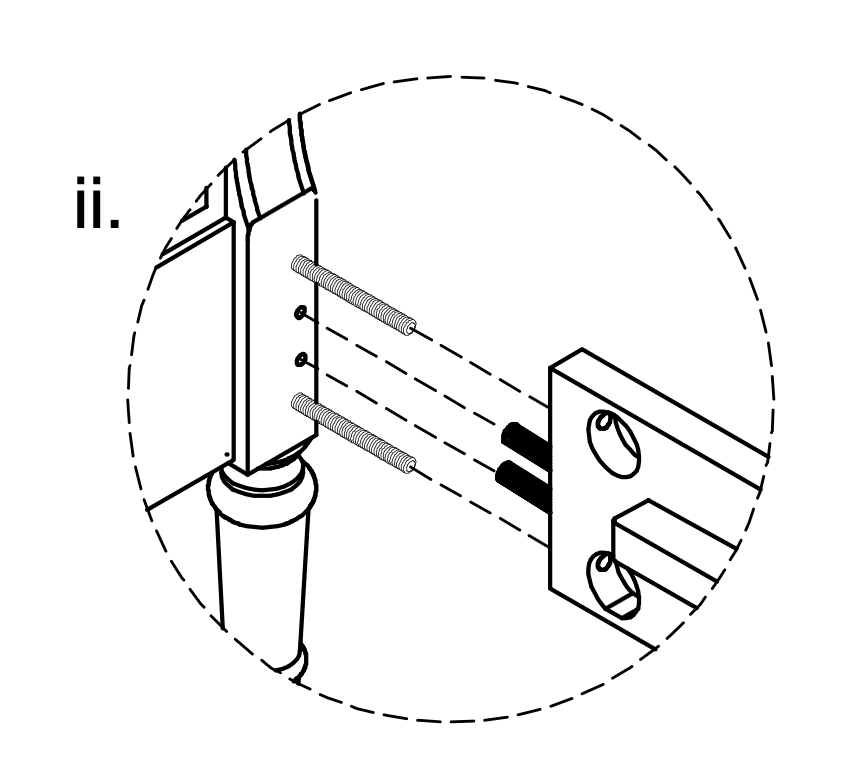 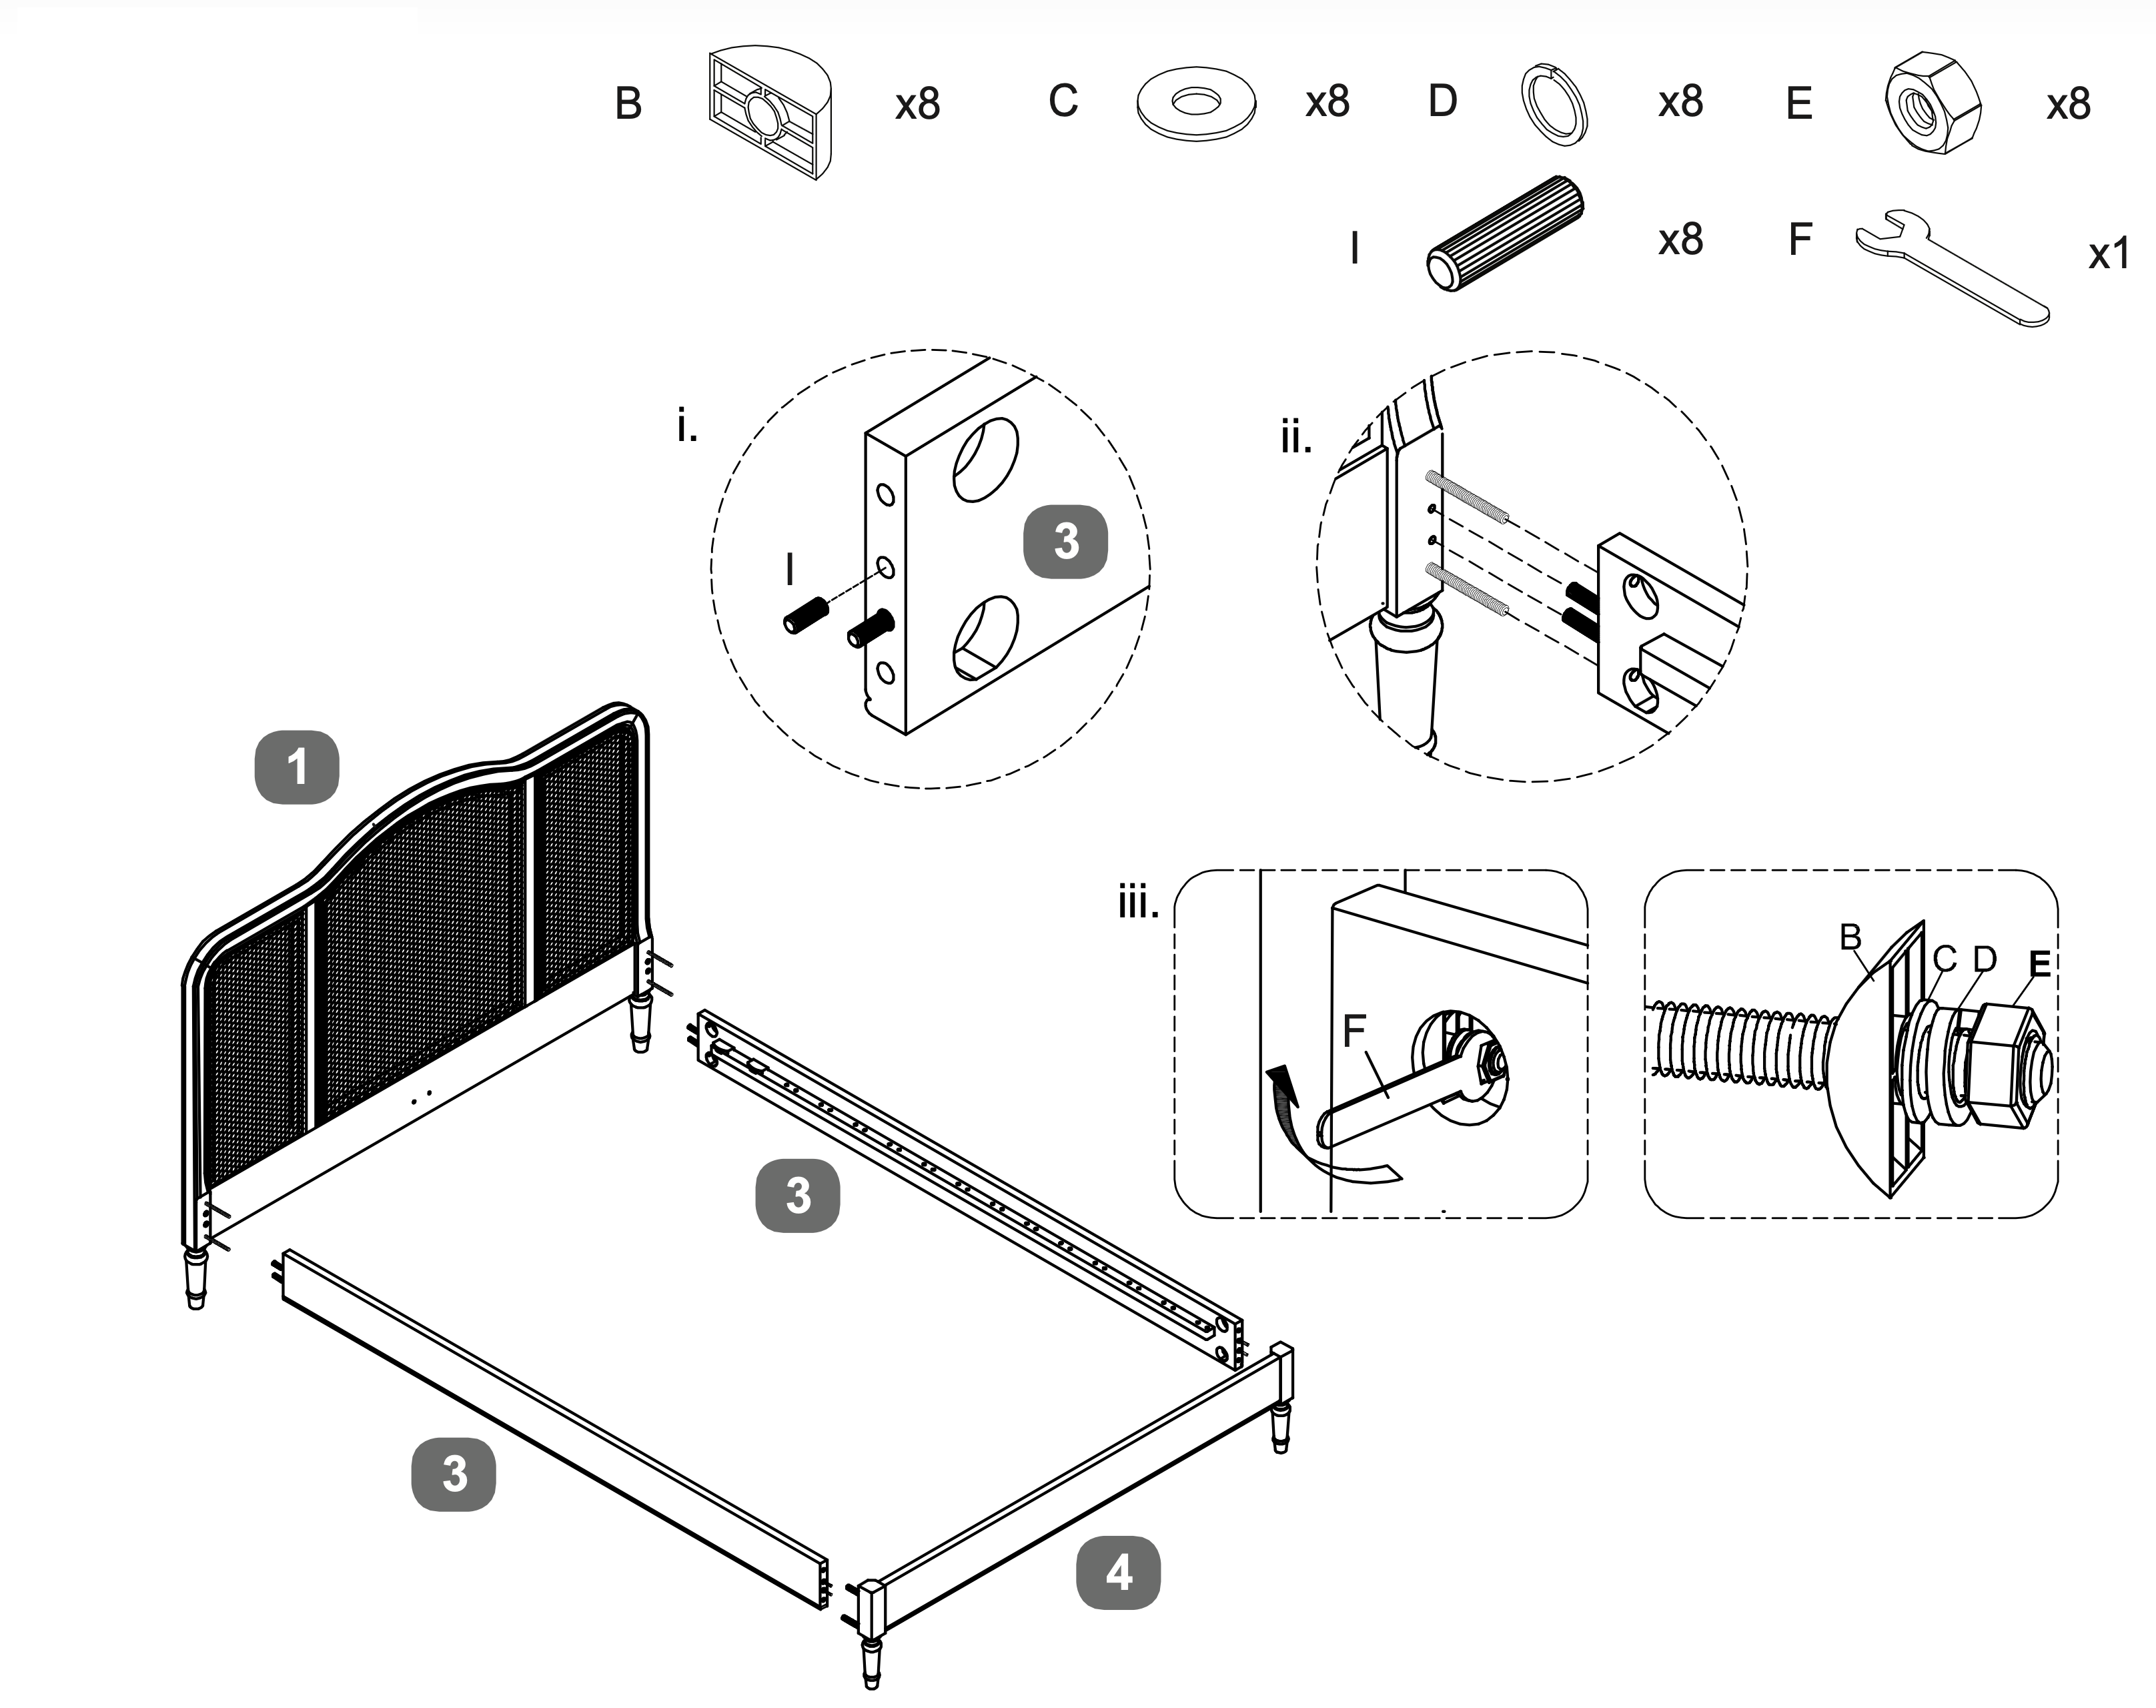
6. Attach Support Brackets Securely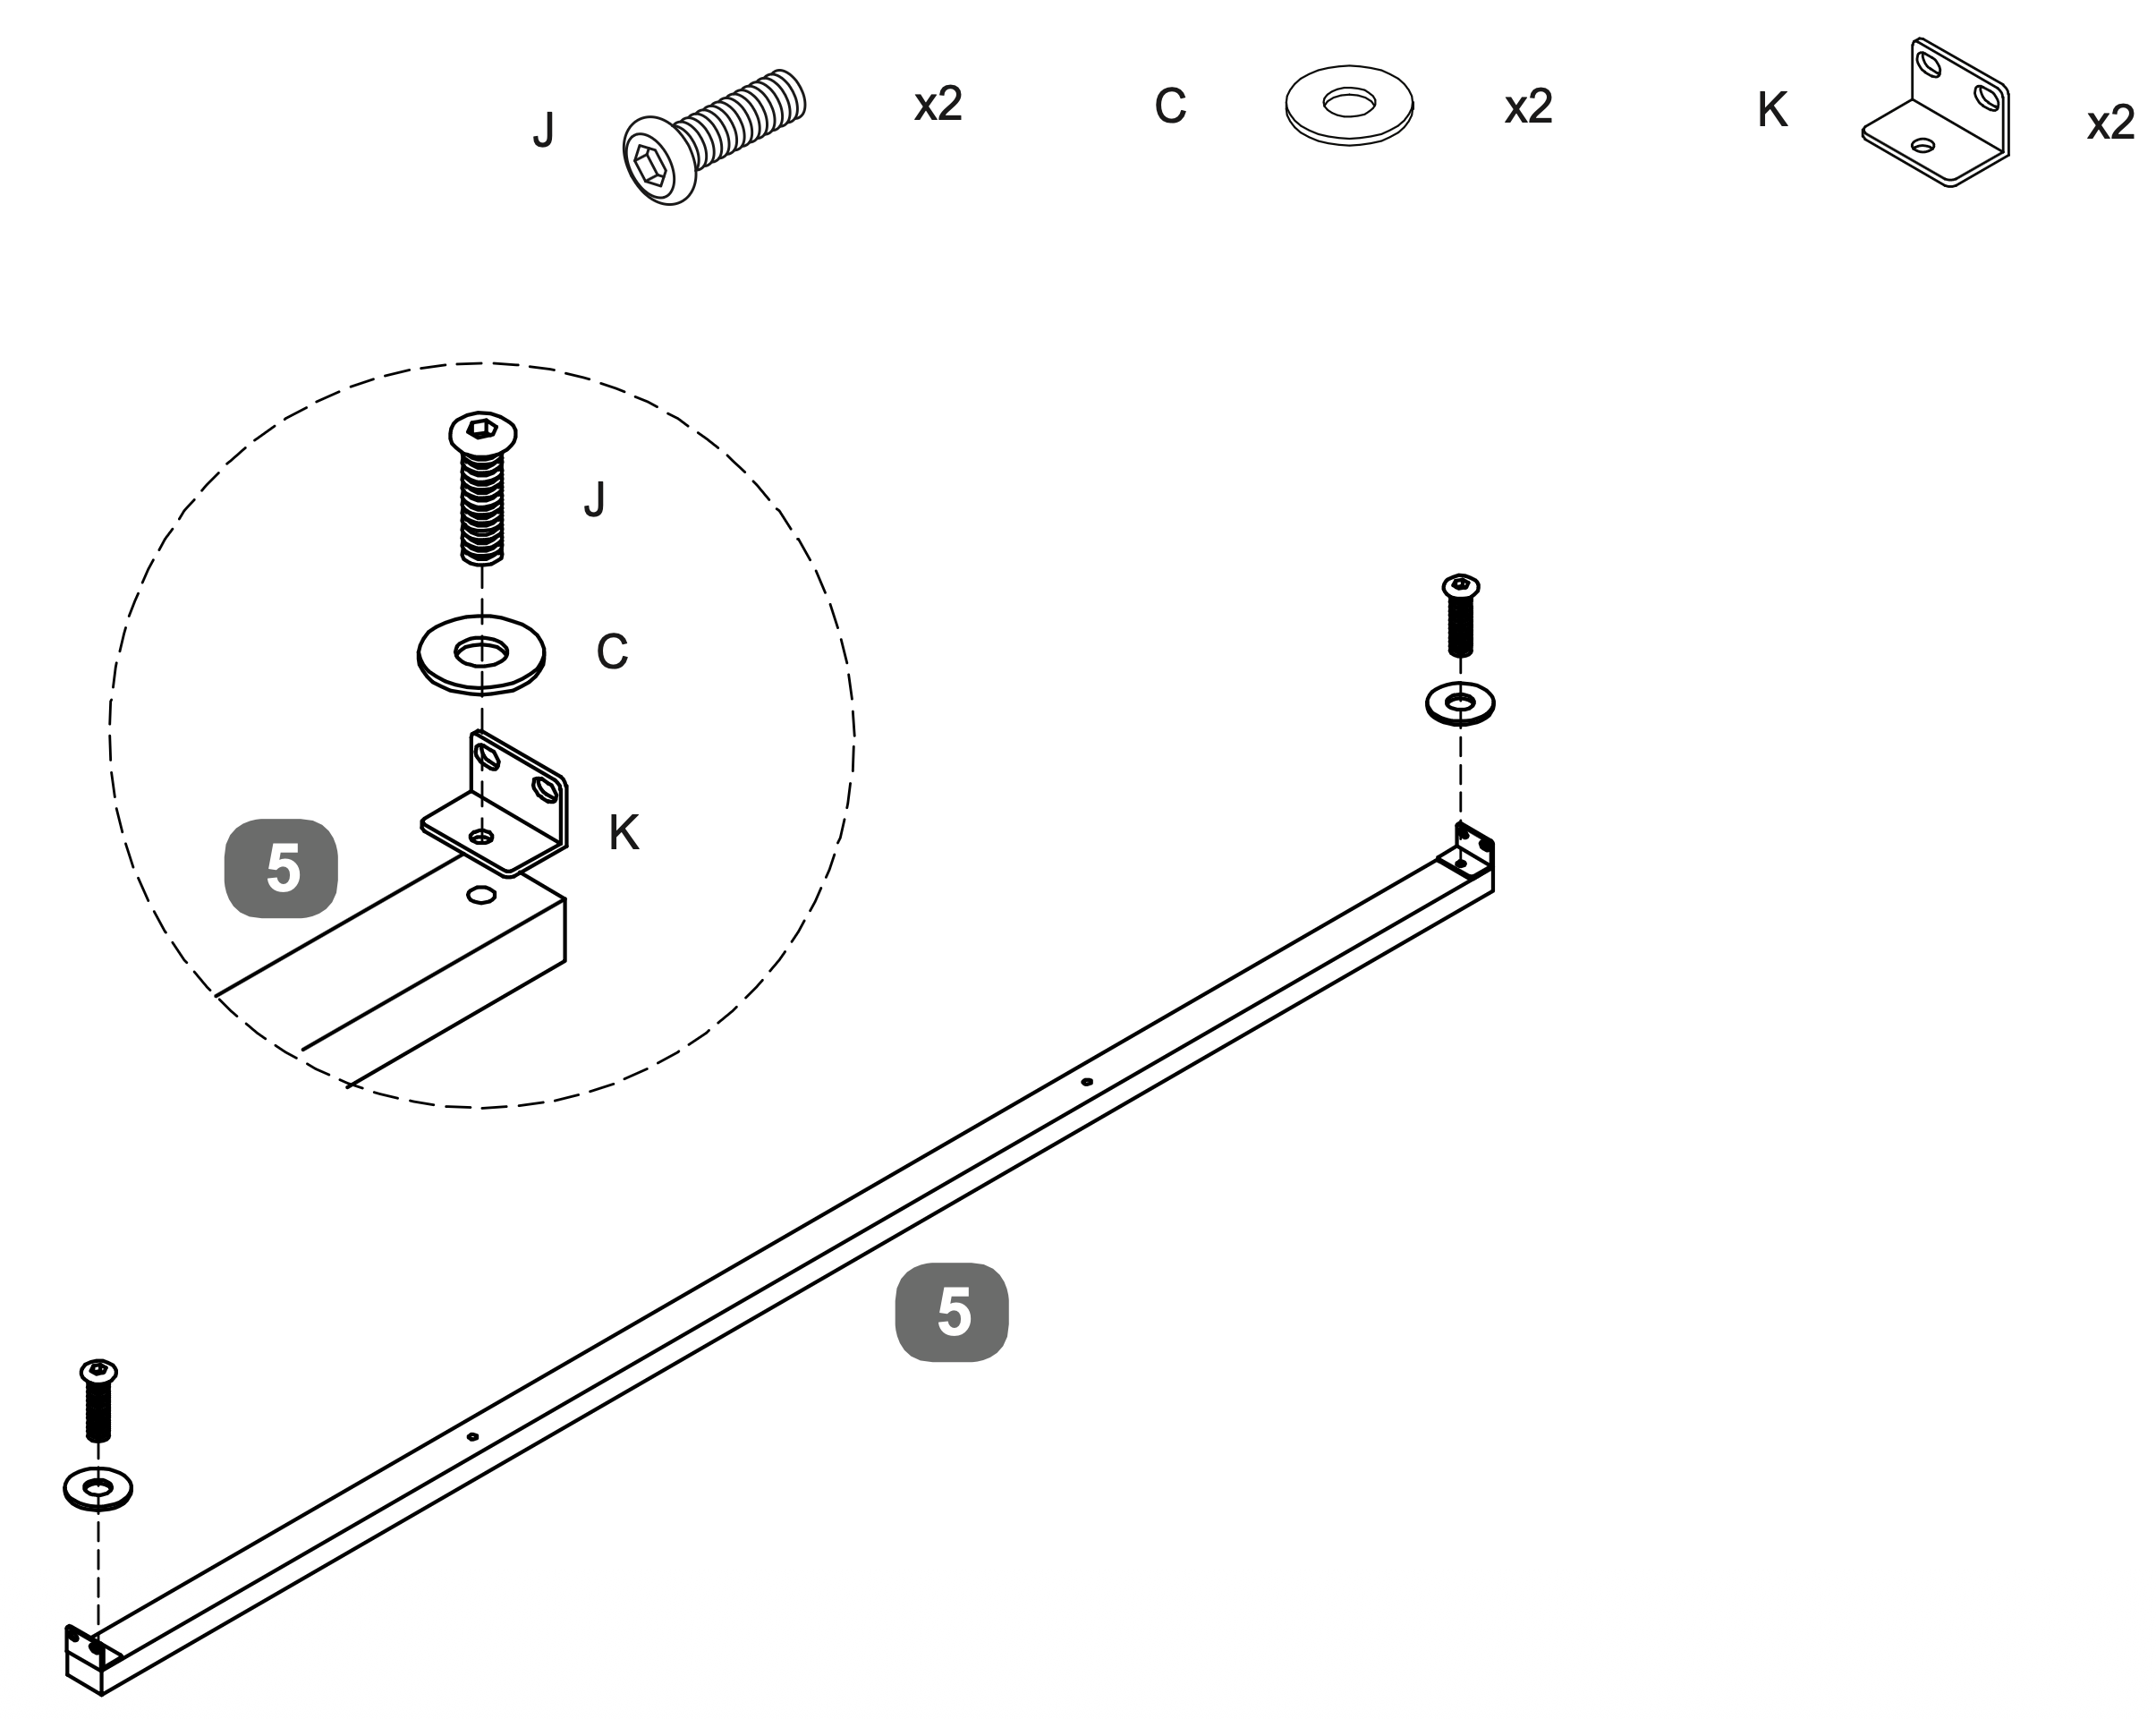 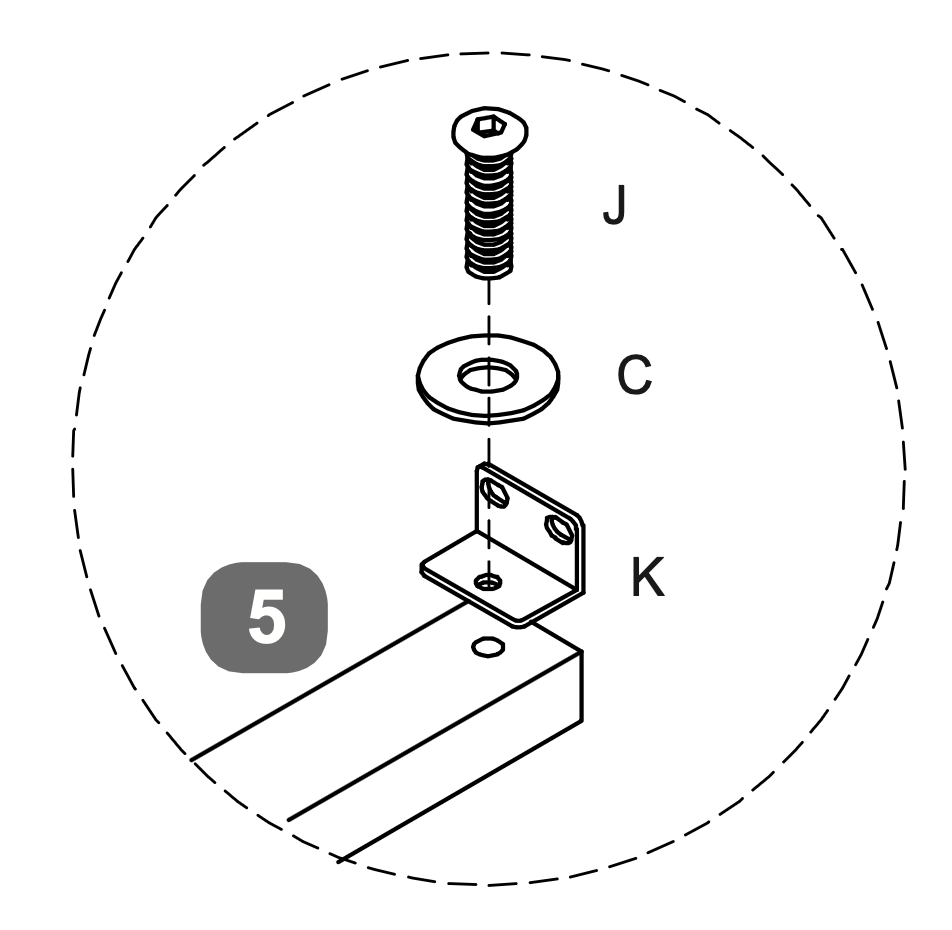
7. Stabilize Center Support Structure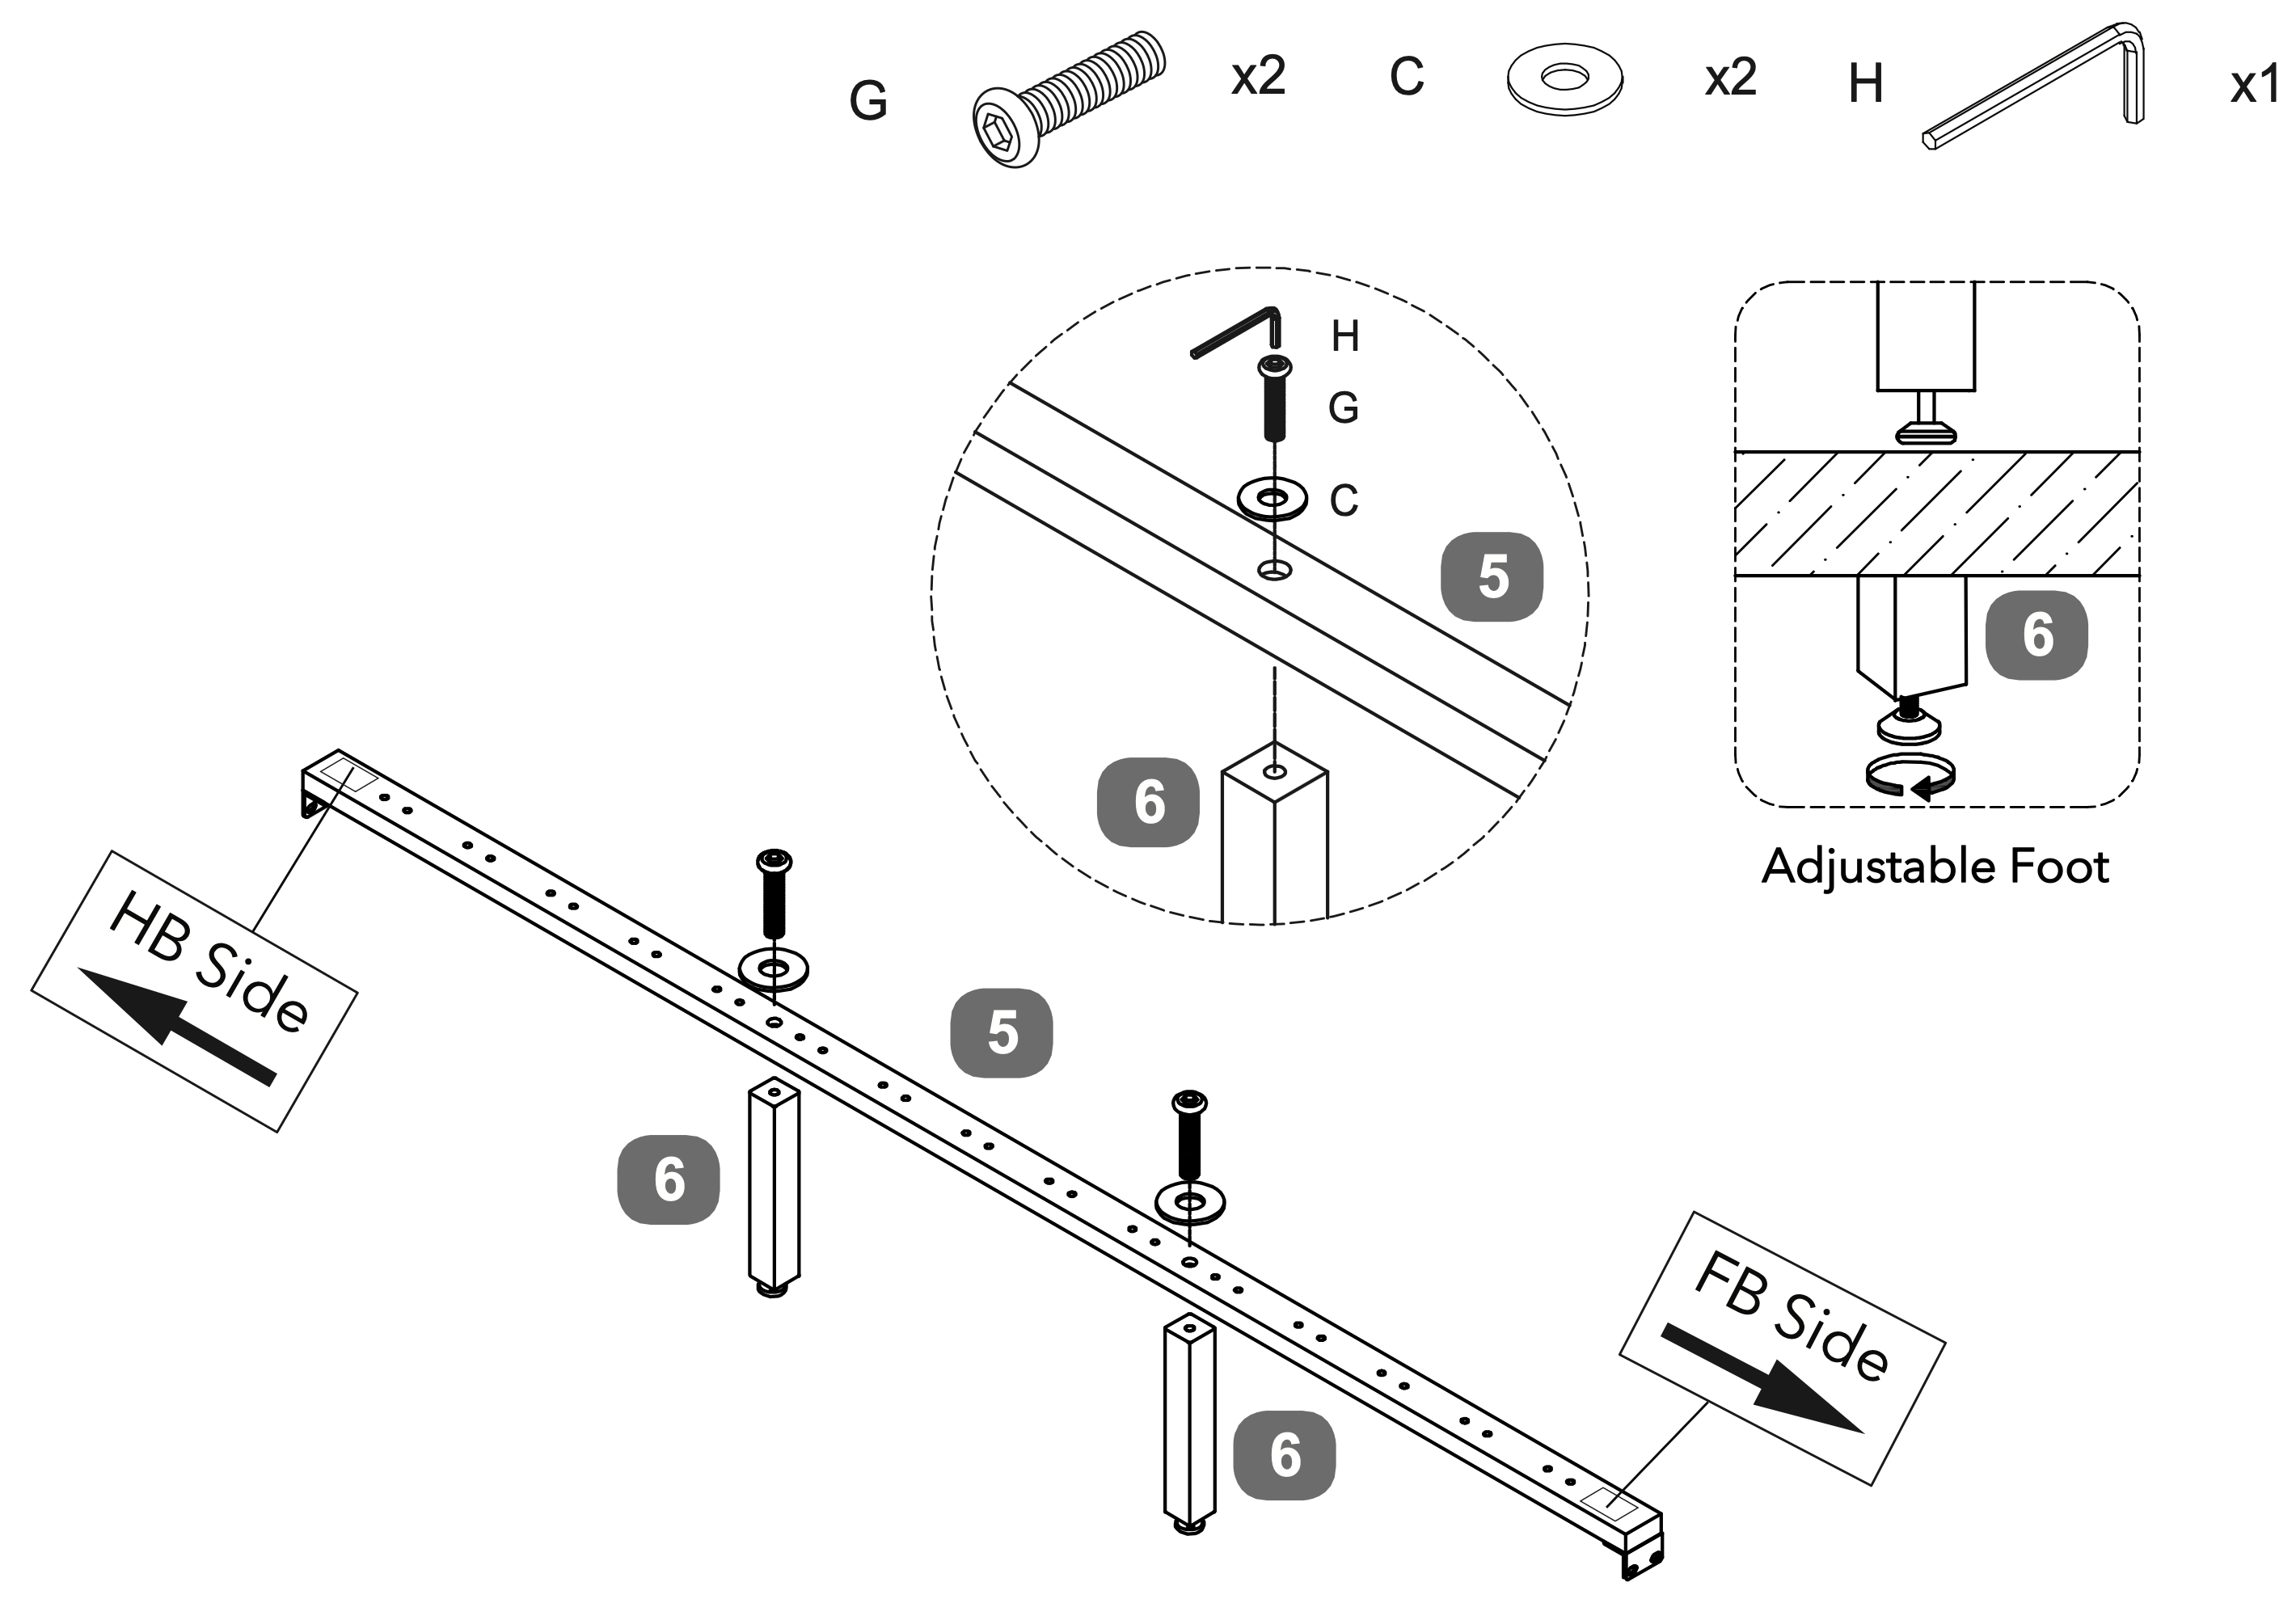 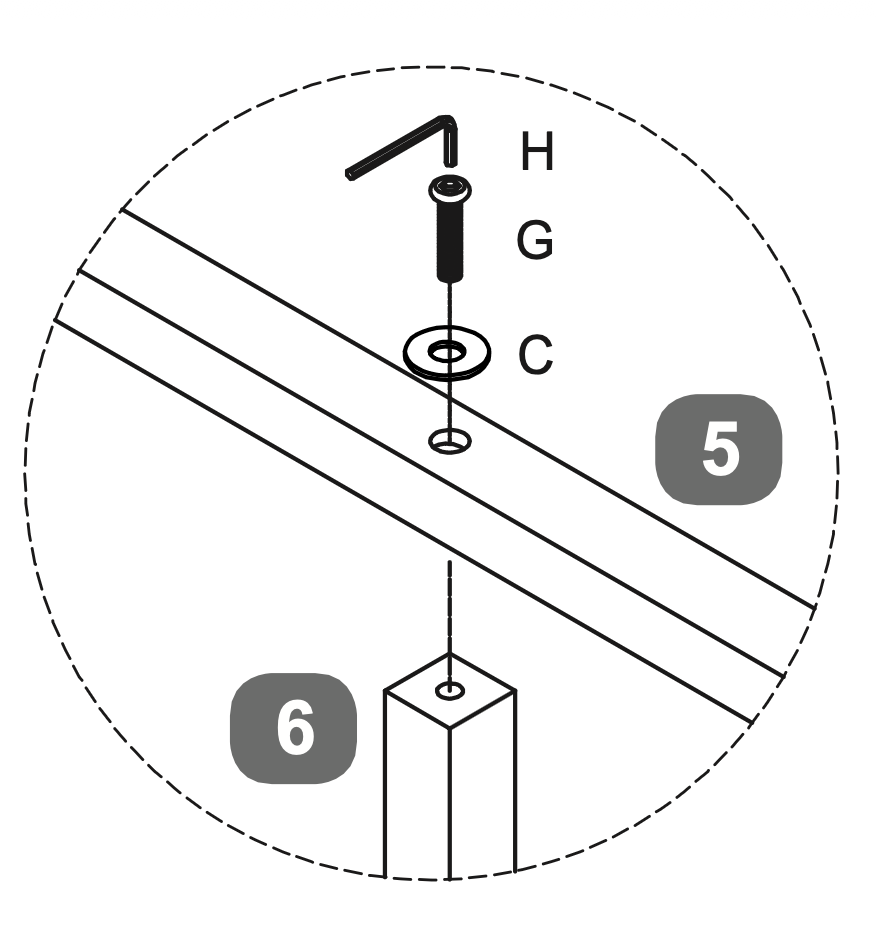 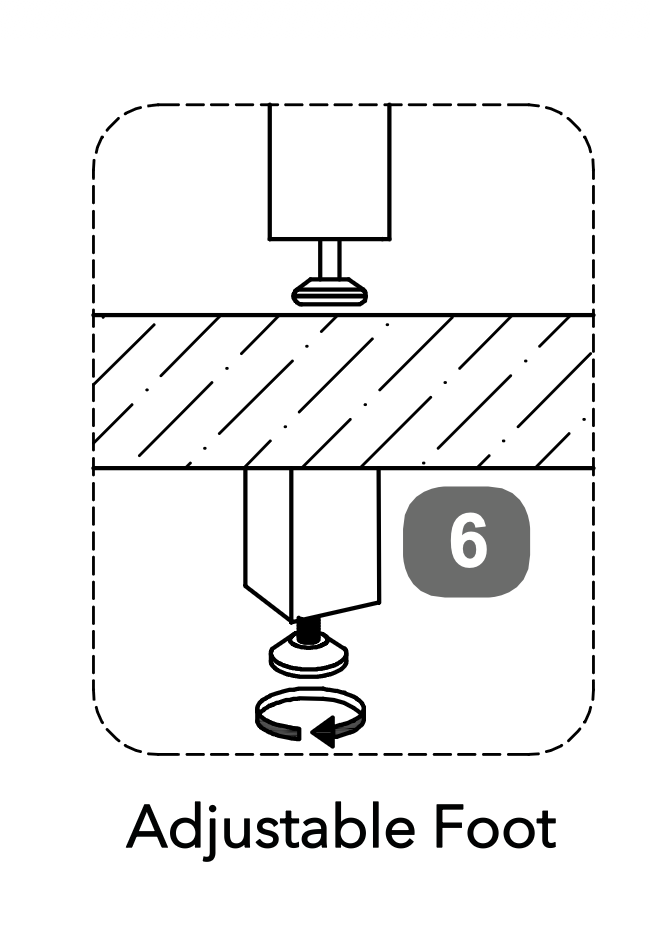
8. Square and Secure Frame Assembly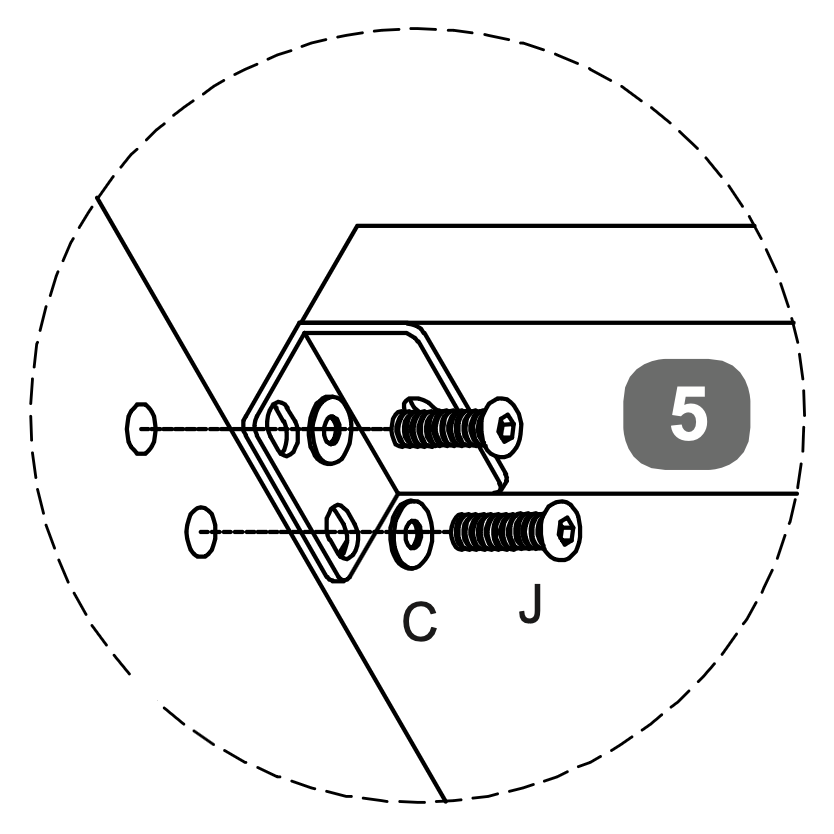 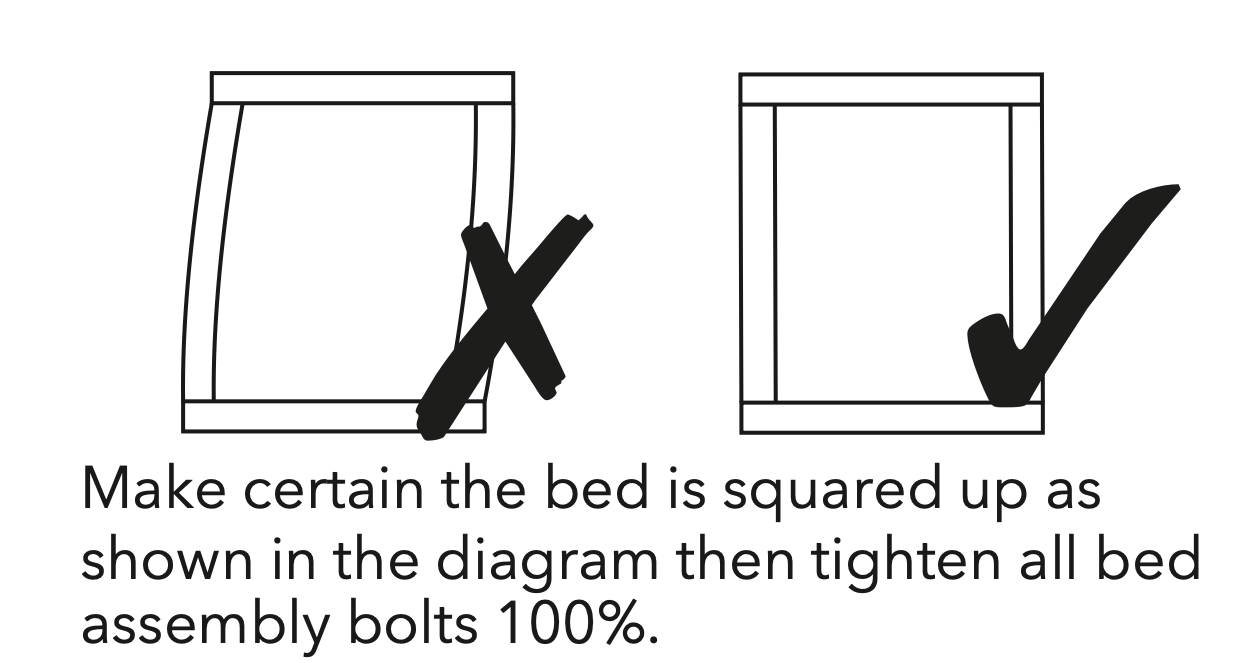 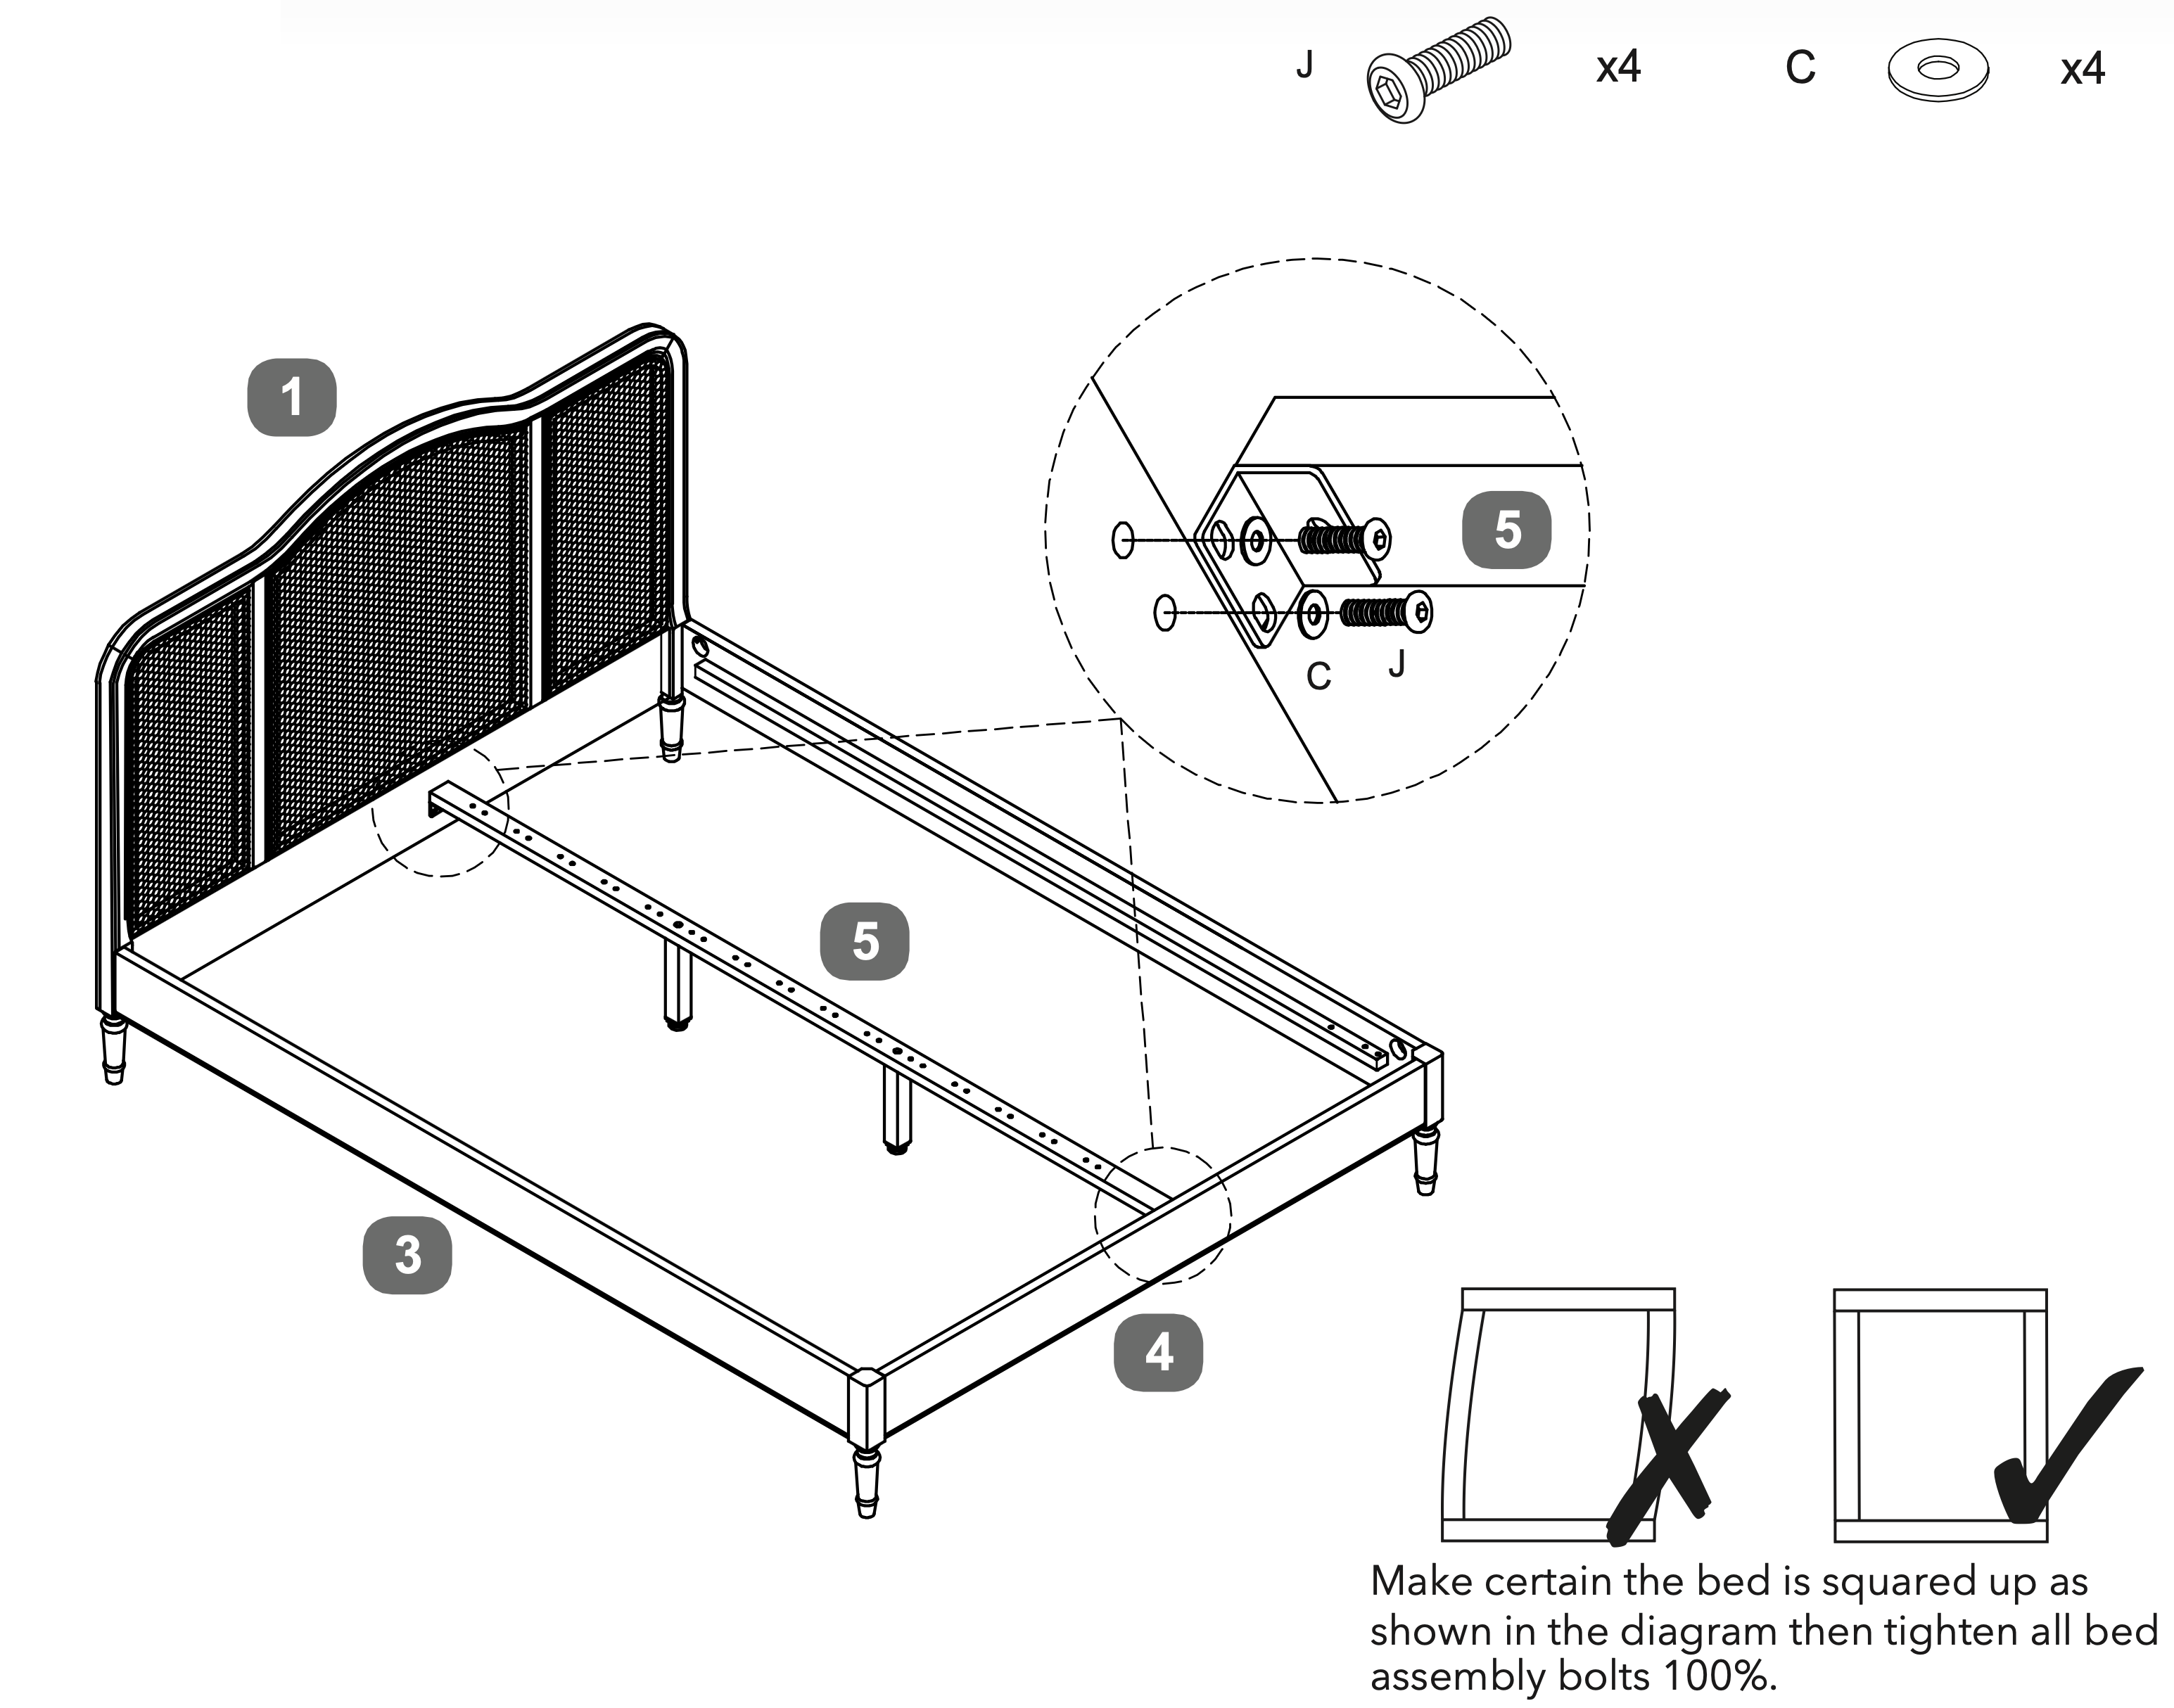
9. Align and Secure Slats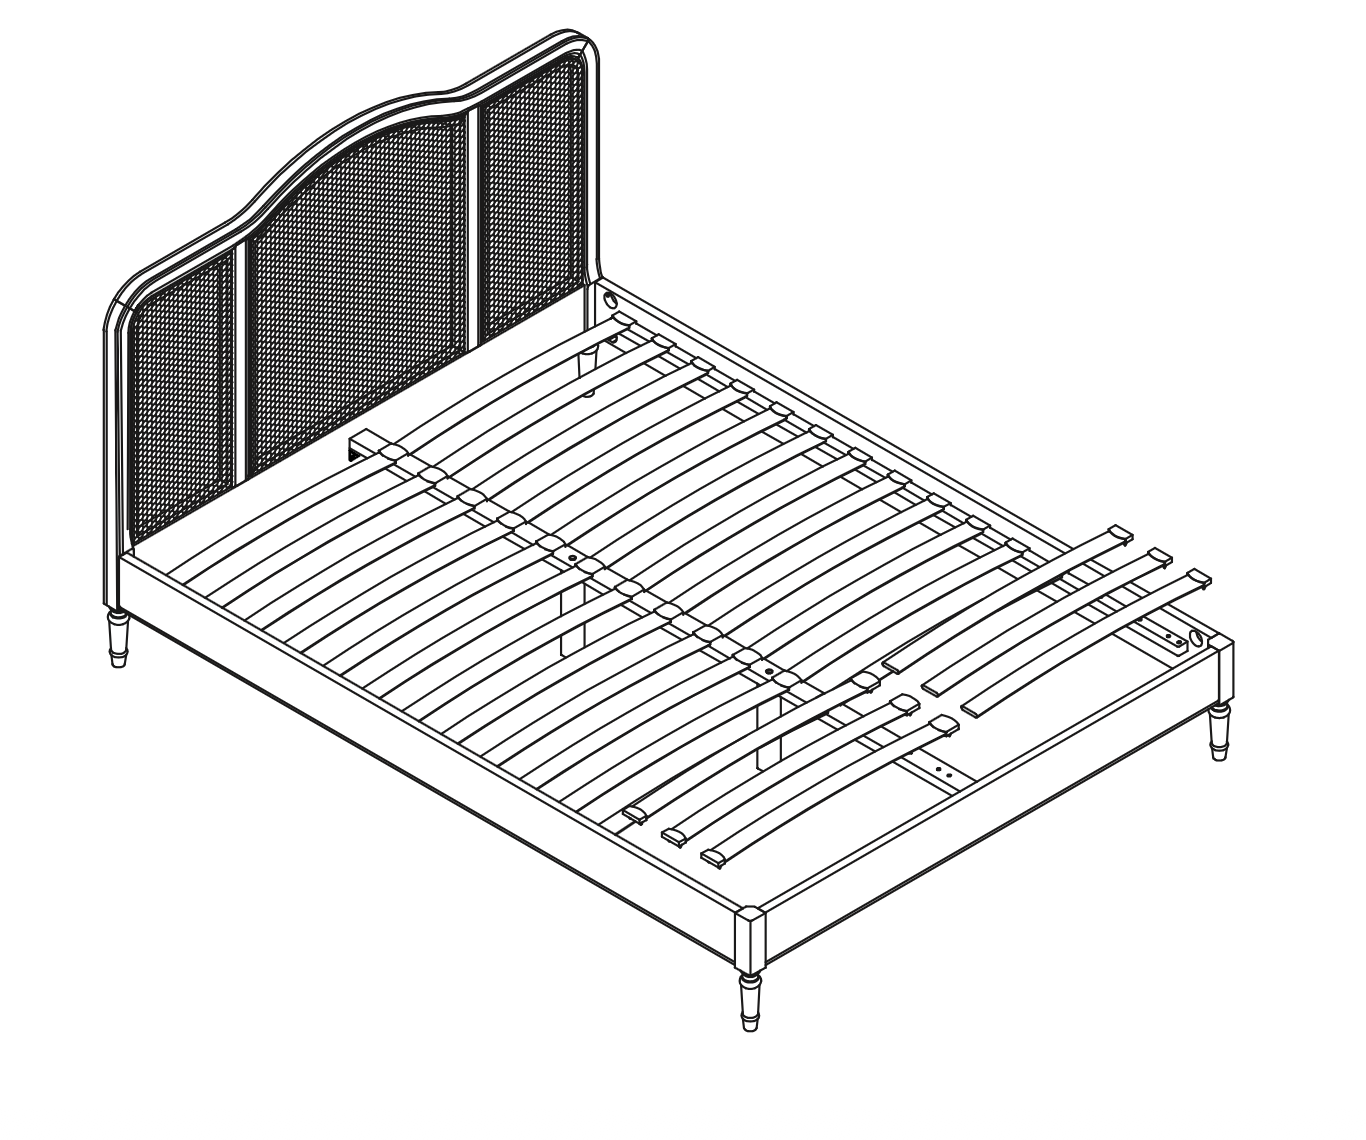 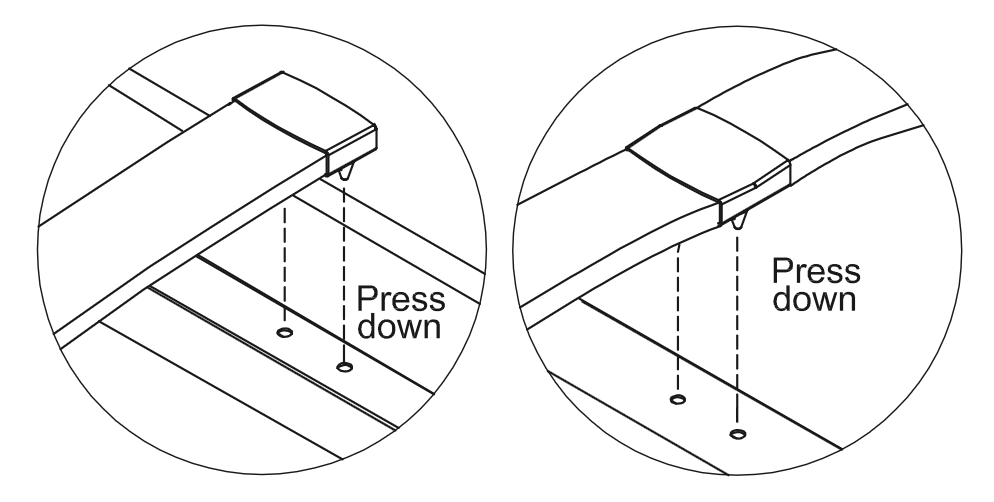 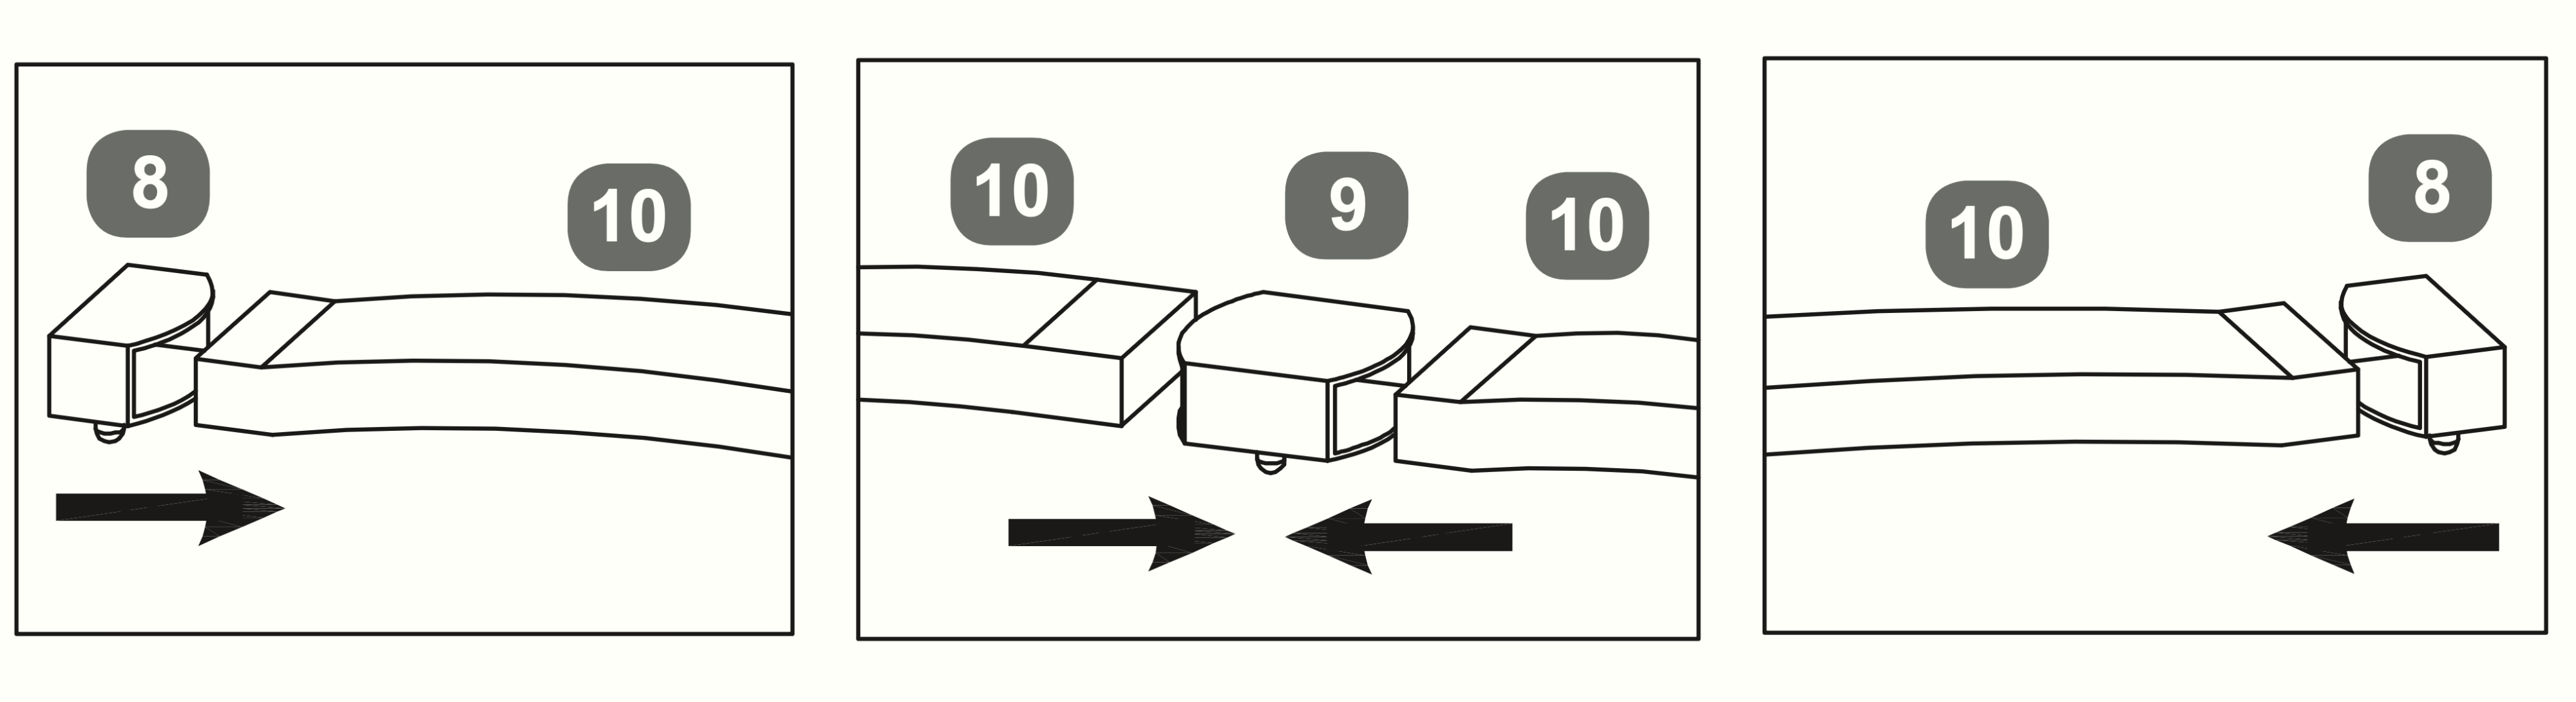
|