Assembly instructions for Upholstered Ottoman Bed Frame by Time4Sleep
Product Information
Upholstered Ottoman Bed Frame
If you're looking for elegance and simplicity combined with functionality, then the Amalfi Ottoman may be the perfect bed for you. With extra deep side rails this bed provides class leading levels of storage.
The slatted Ottoman base can be easily raised with the assistance of the gas lift struts to reveal a high-capacity storage area.
With a generously proportioned headboard and clean contemporary lines the Amalfi will make a stylish focal point in your bedroom. Upholstered in a wide range of fabric options there is sure to be a colour which will work well in any design scheme.
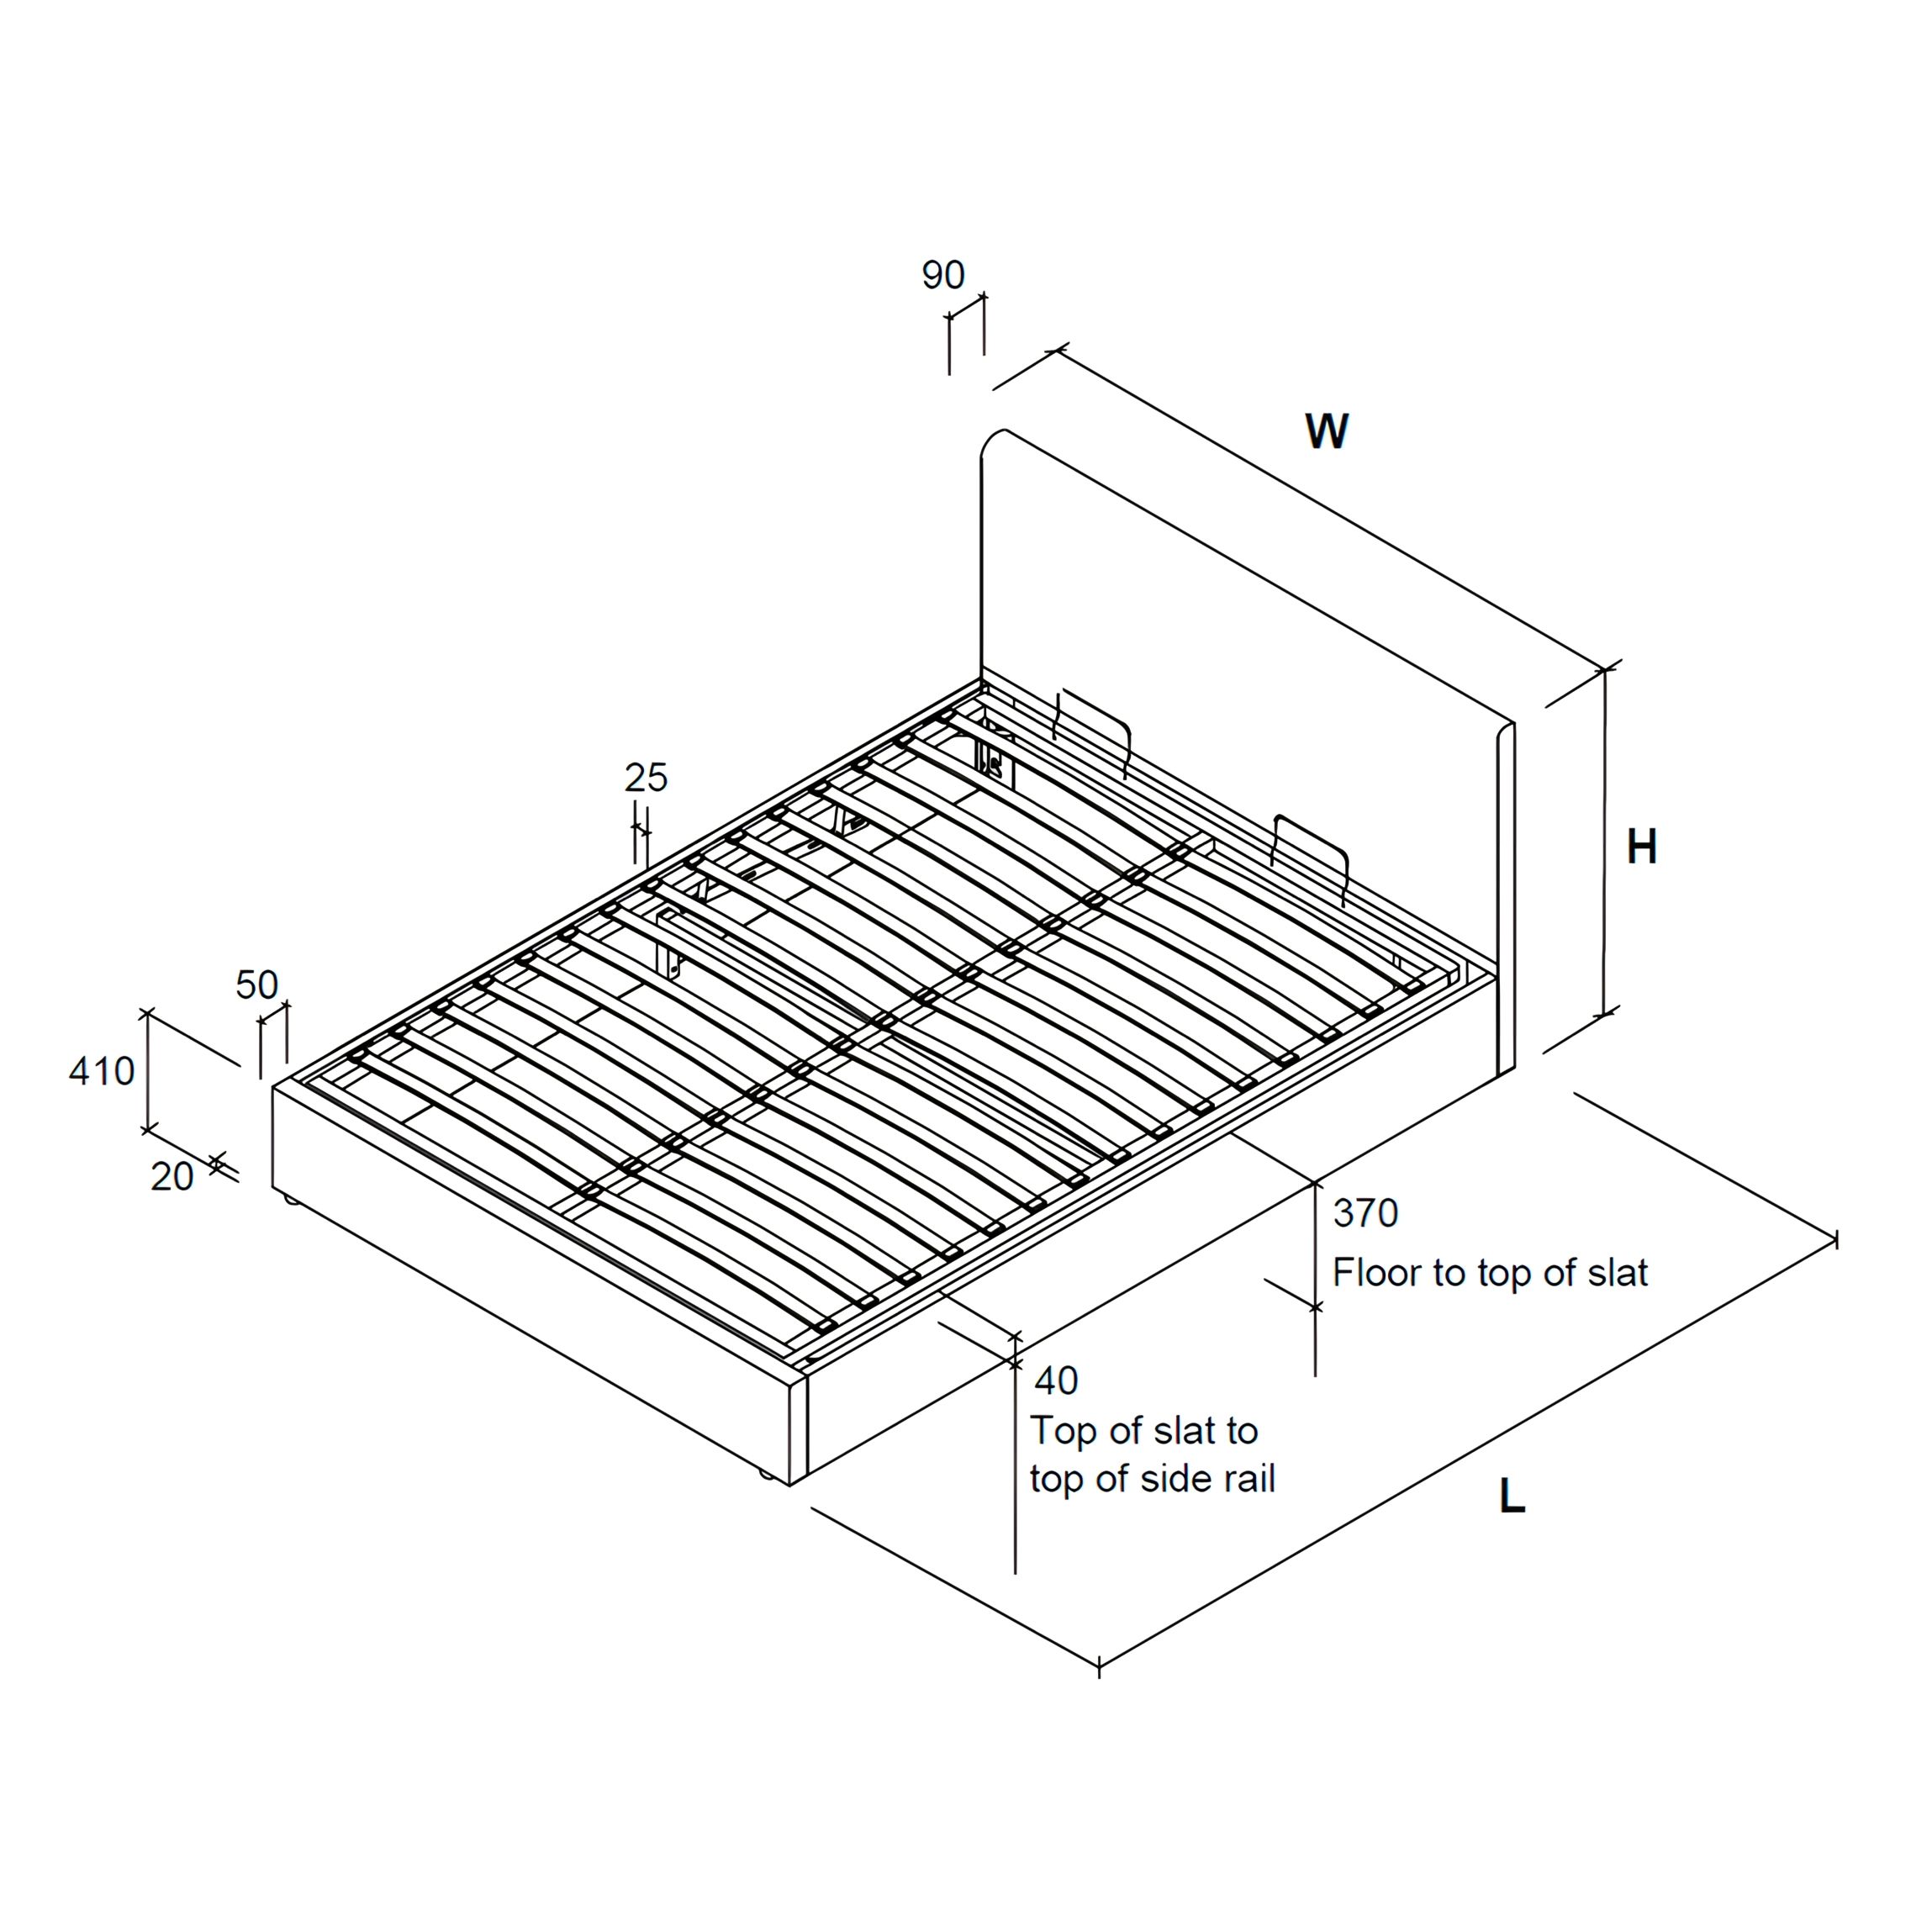
The underbed ottoman storage height on this bed frame is approximately 30cm.
C - Bolt sets (M8x50mm) - 10 for Single, 12 for Small Double/Double/King, 14 for Super King
E - Bolt sets (M6x45mm)
F - Bolt sets (M6x20mm) - 12 for Single/Small Double/Double/King, 16 for Super King
G - Flat washer for M8 nuts - 10 for Single, 12 for Small Double/Double/King, 14 for Super King
H - Spring washer for M8 nuts - 10 for Single, 12 for Small Double/Double/King, 14 for Super King
J - Nut for M8 bolts - 14 for Single, 16 for Small Double/Double/King, 18 for Super King
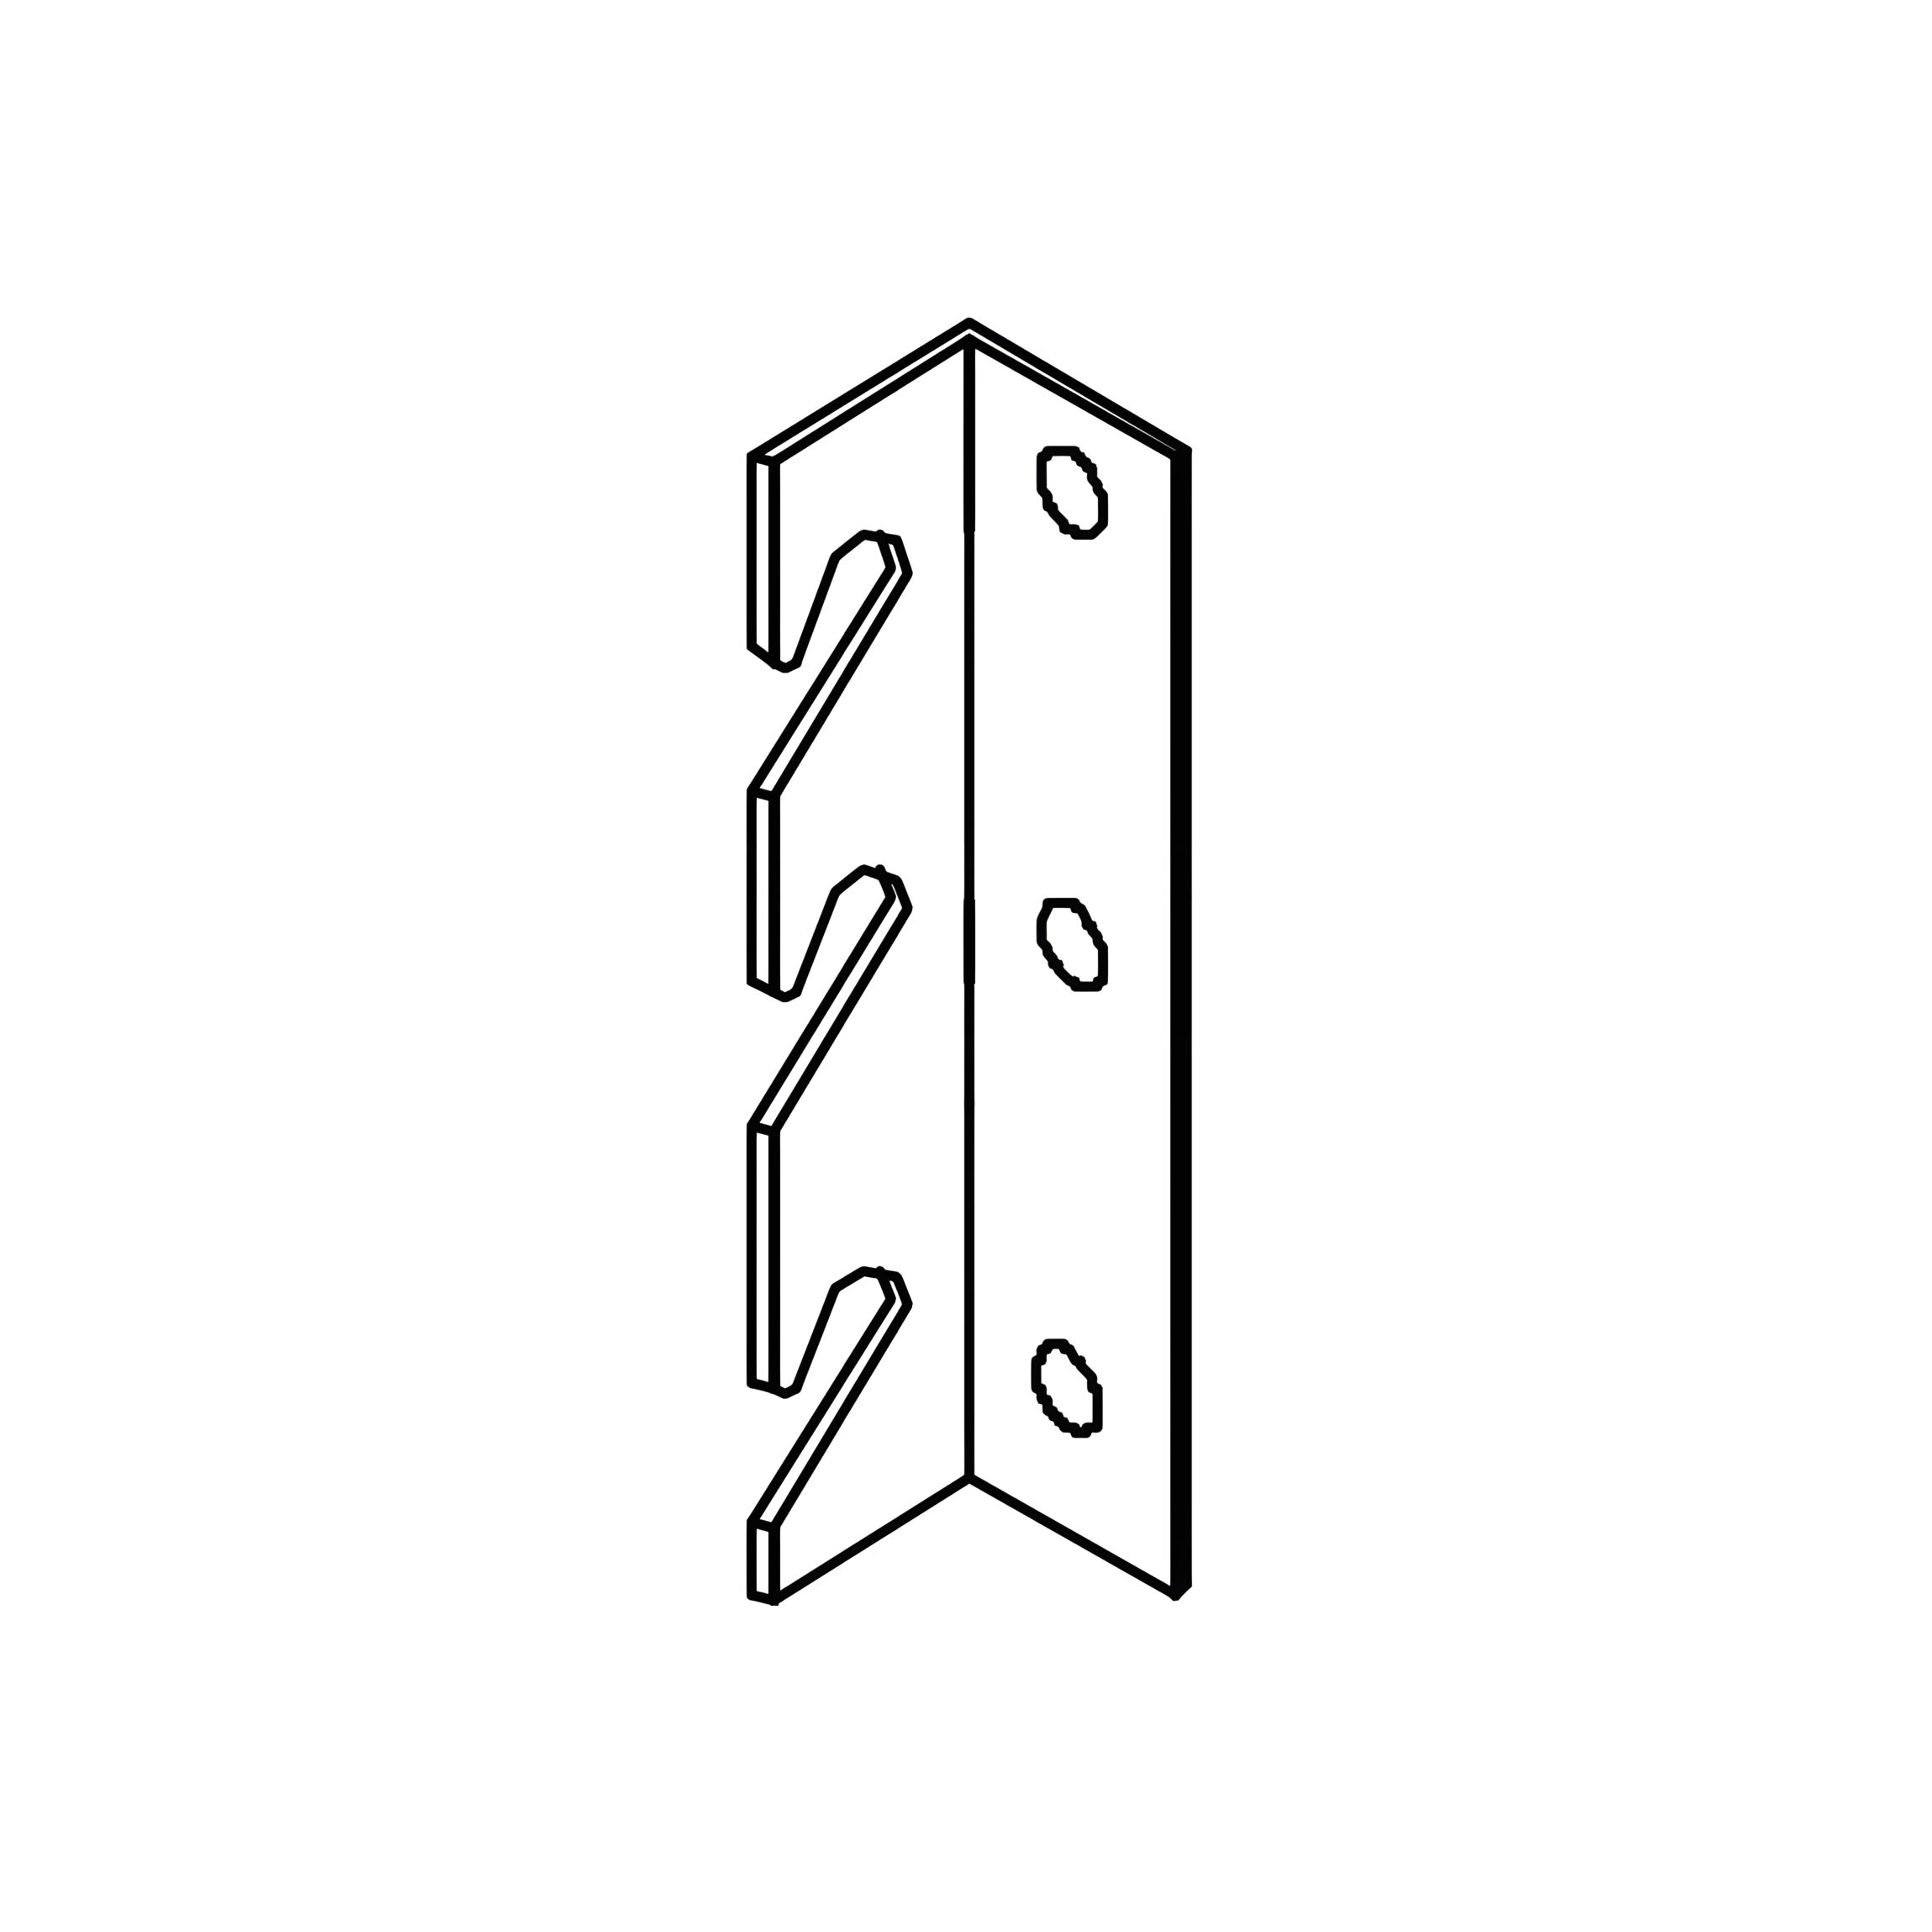
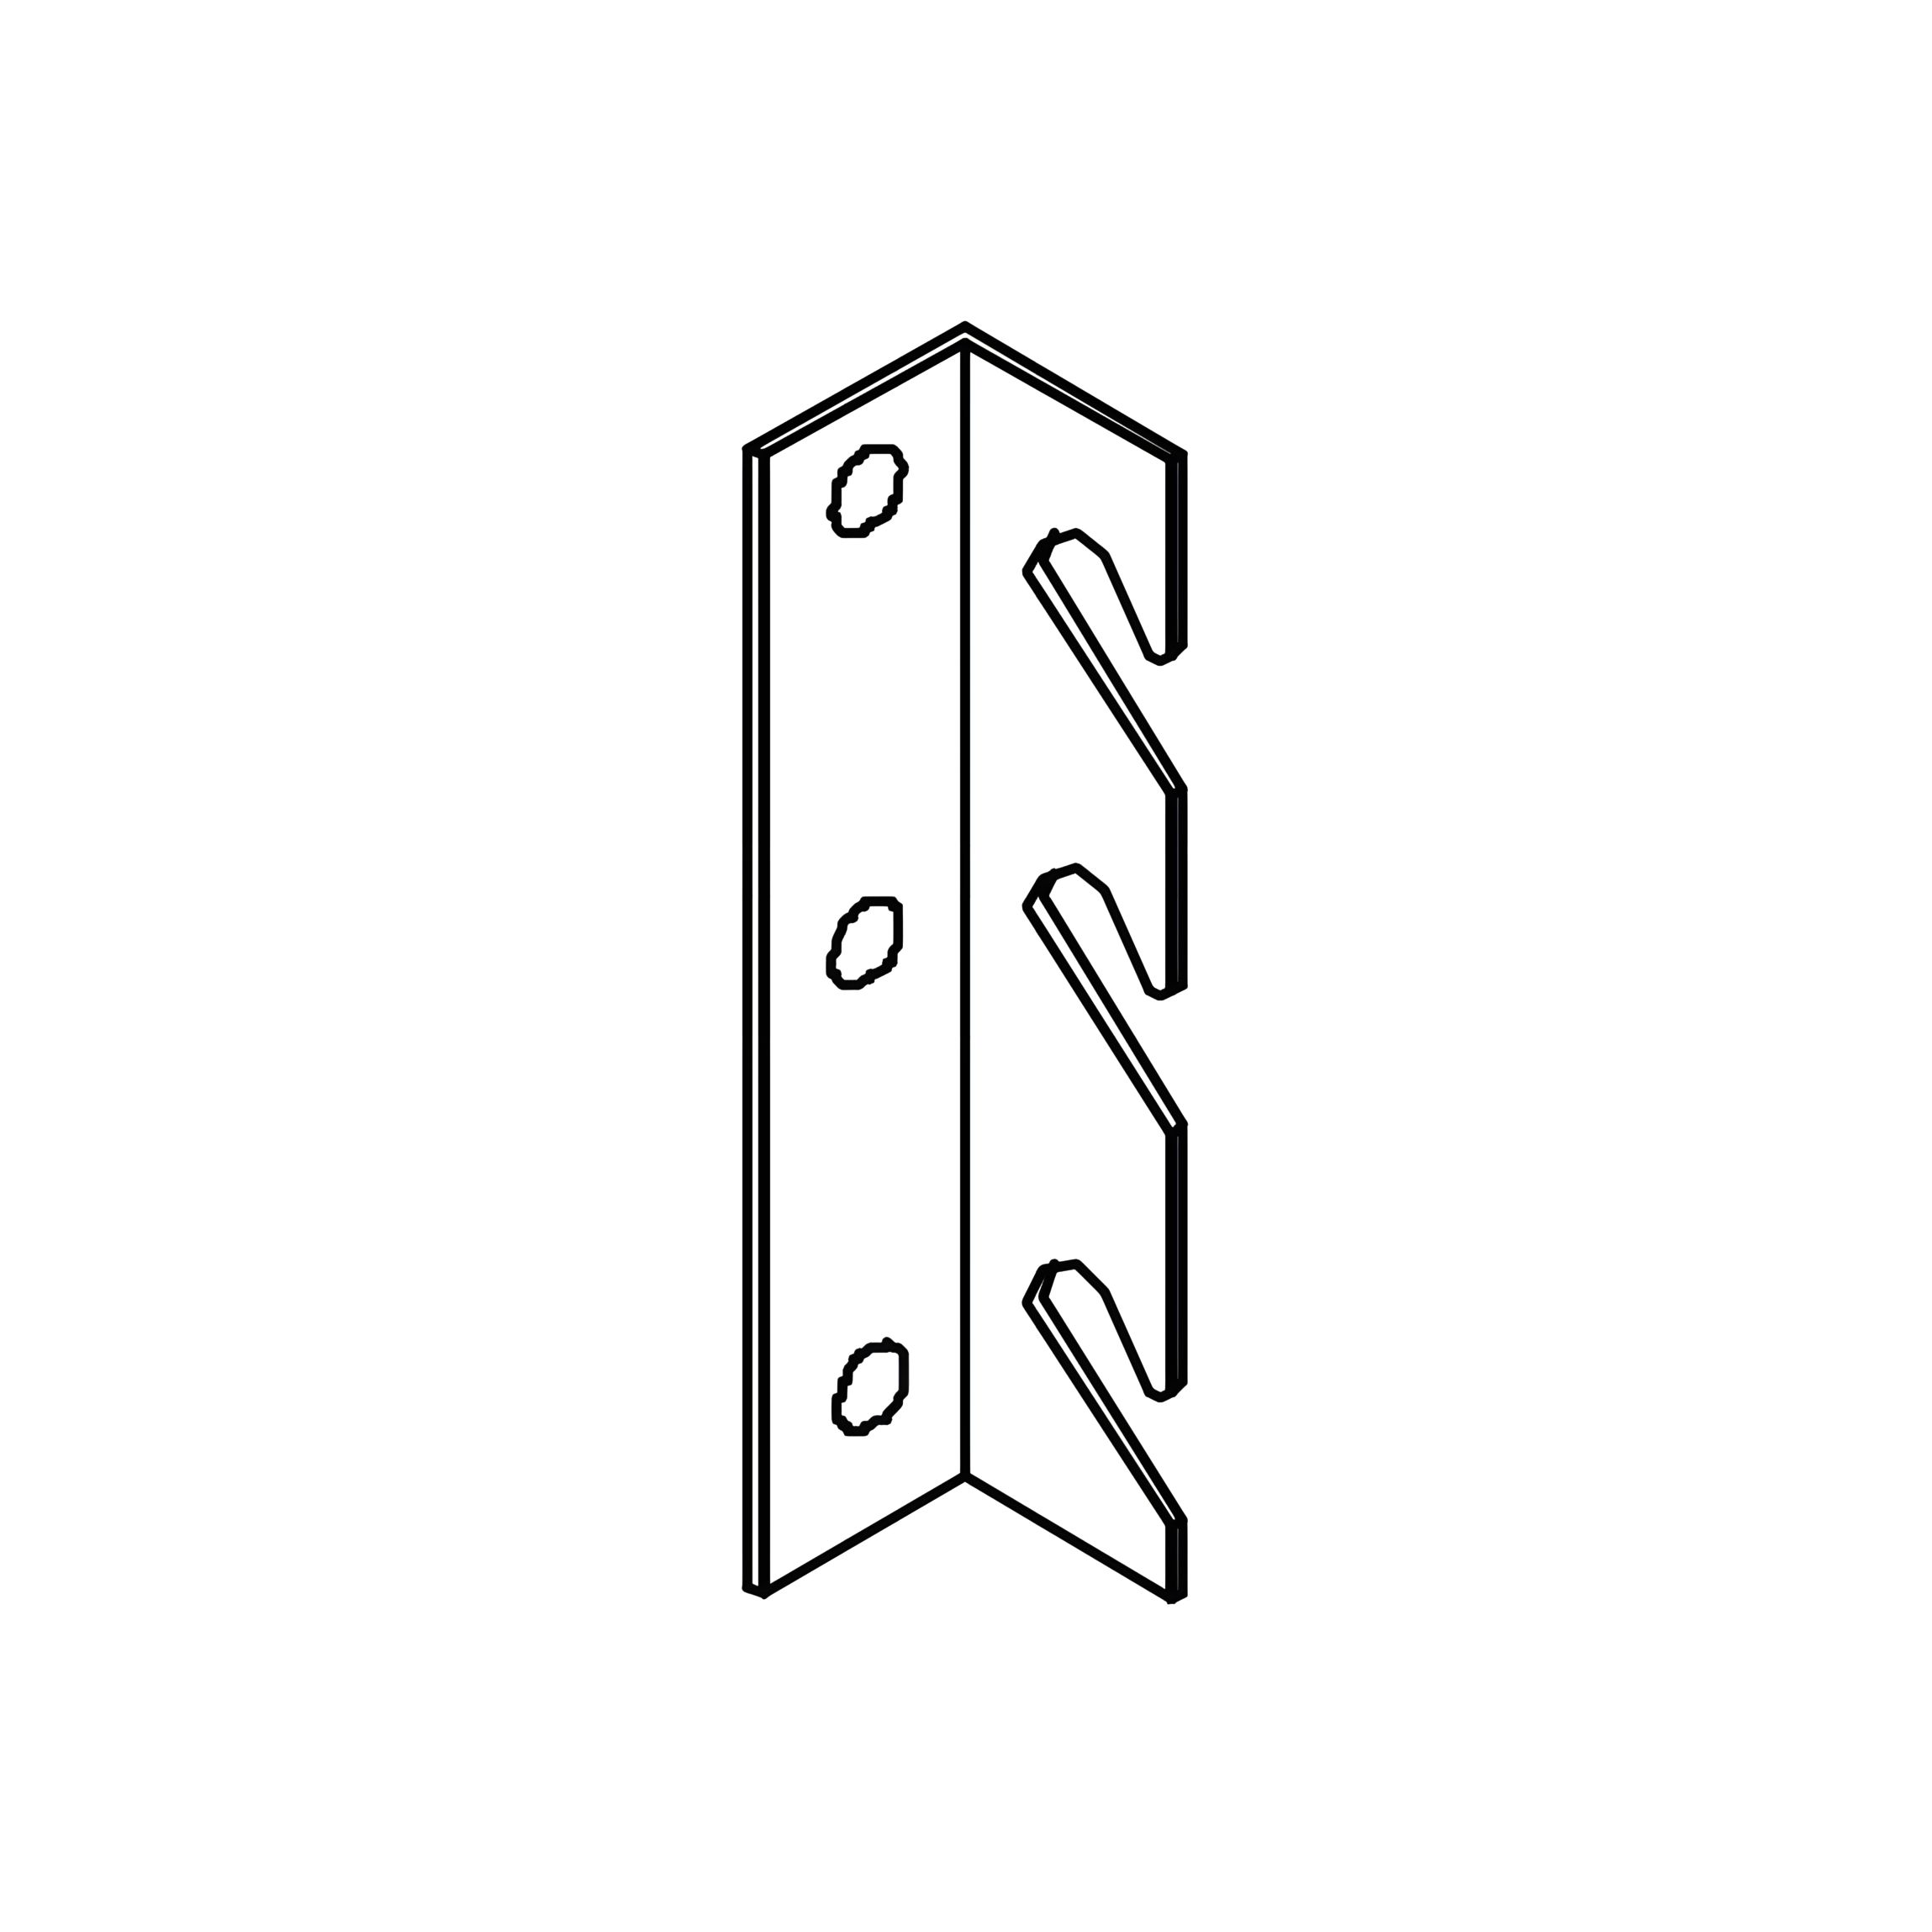
K - Angle Brackets - LH
L - Angle Brackets - RH
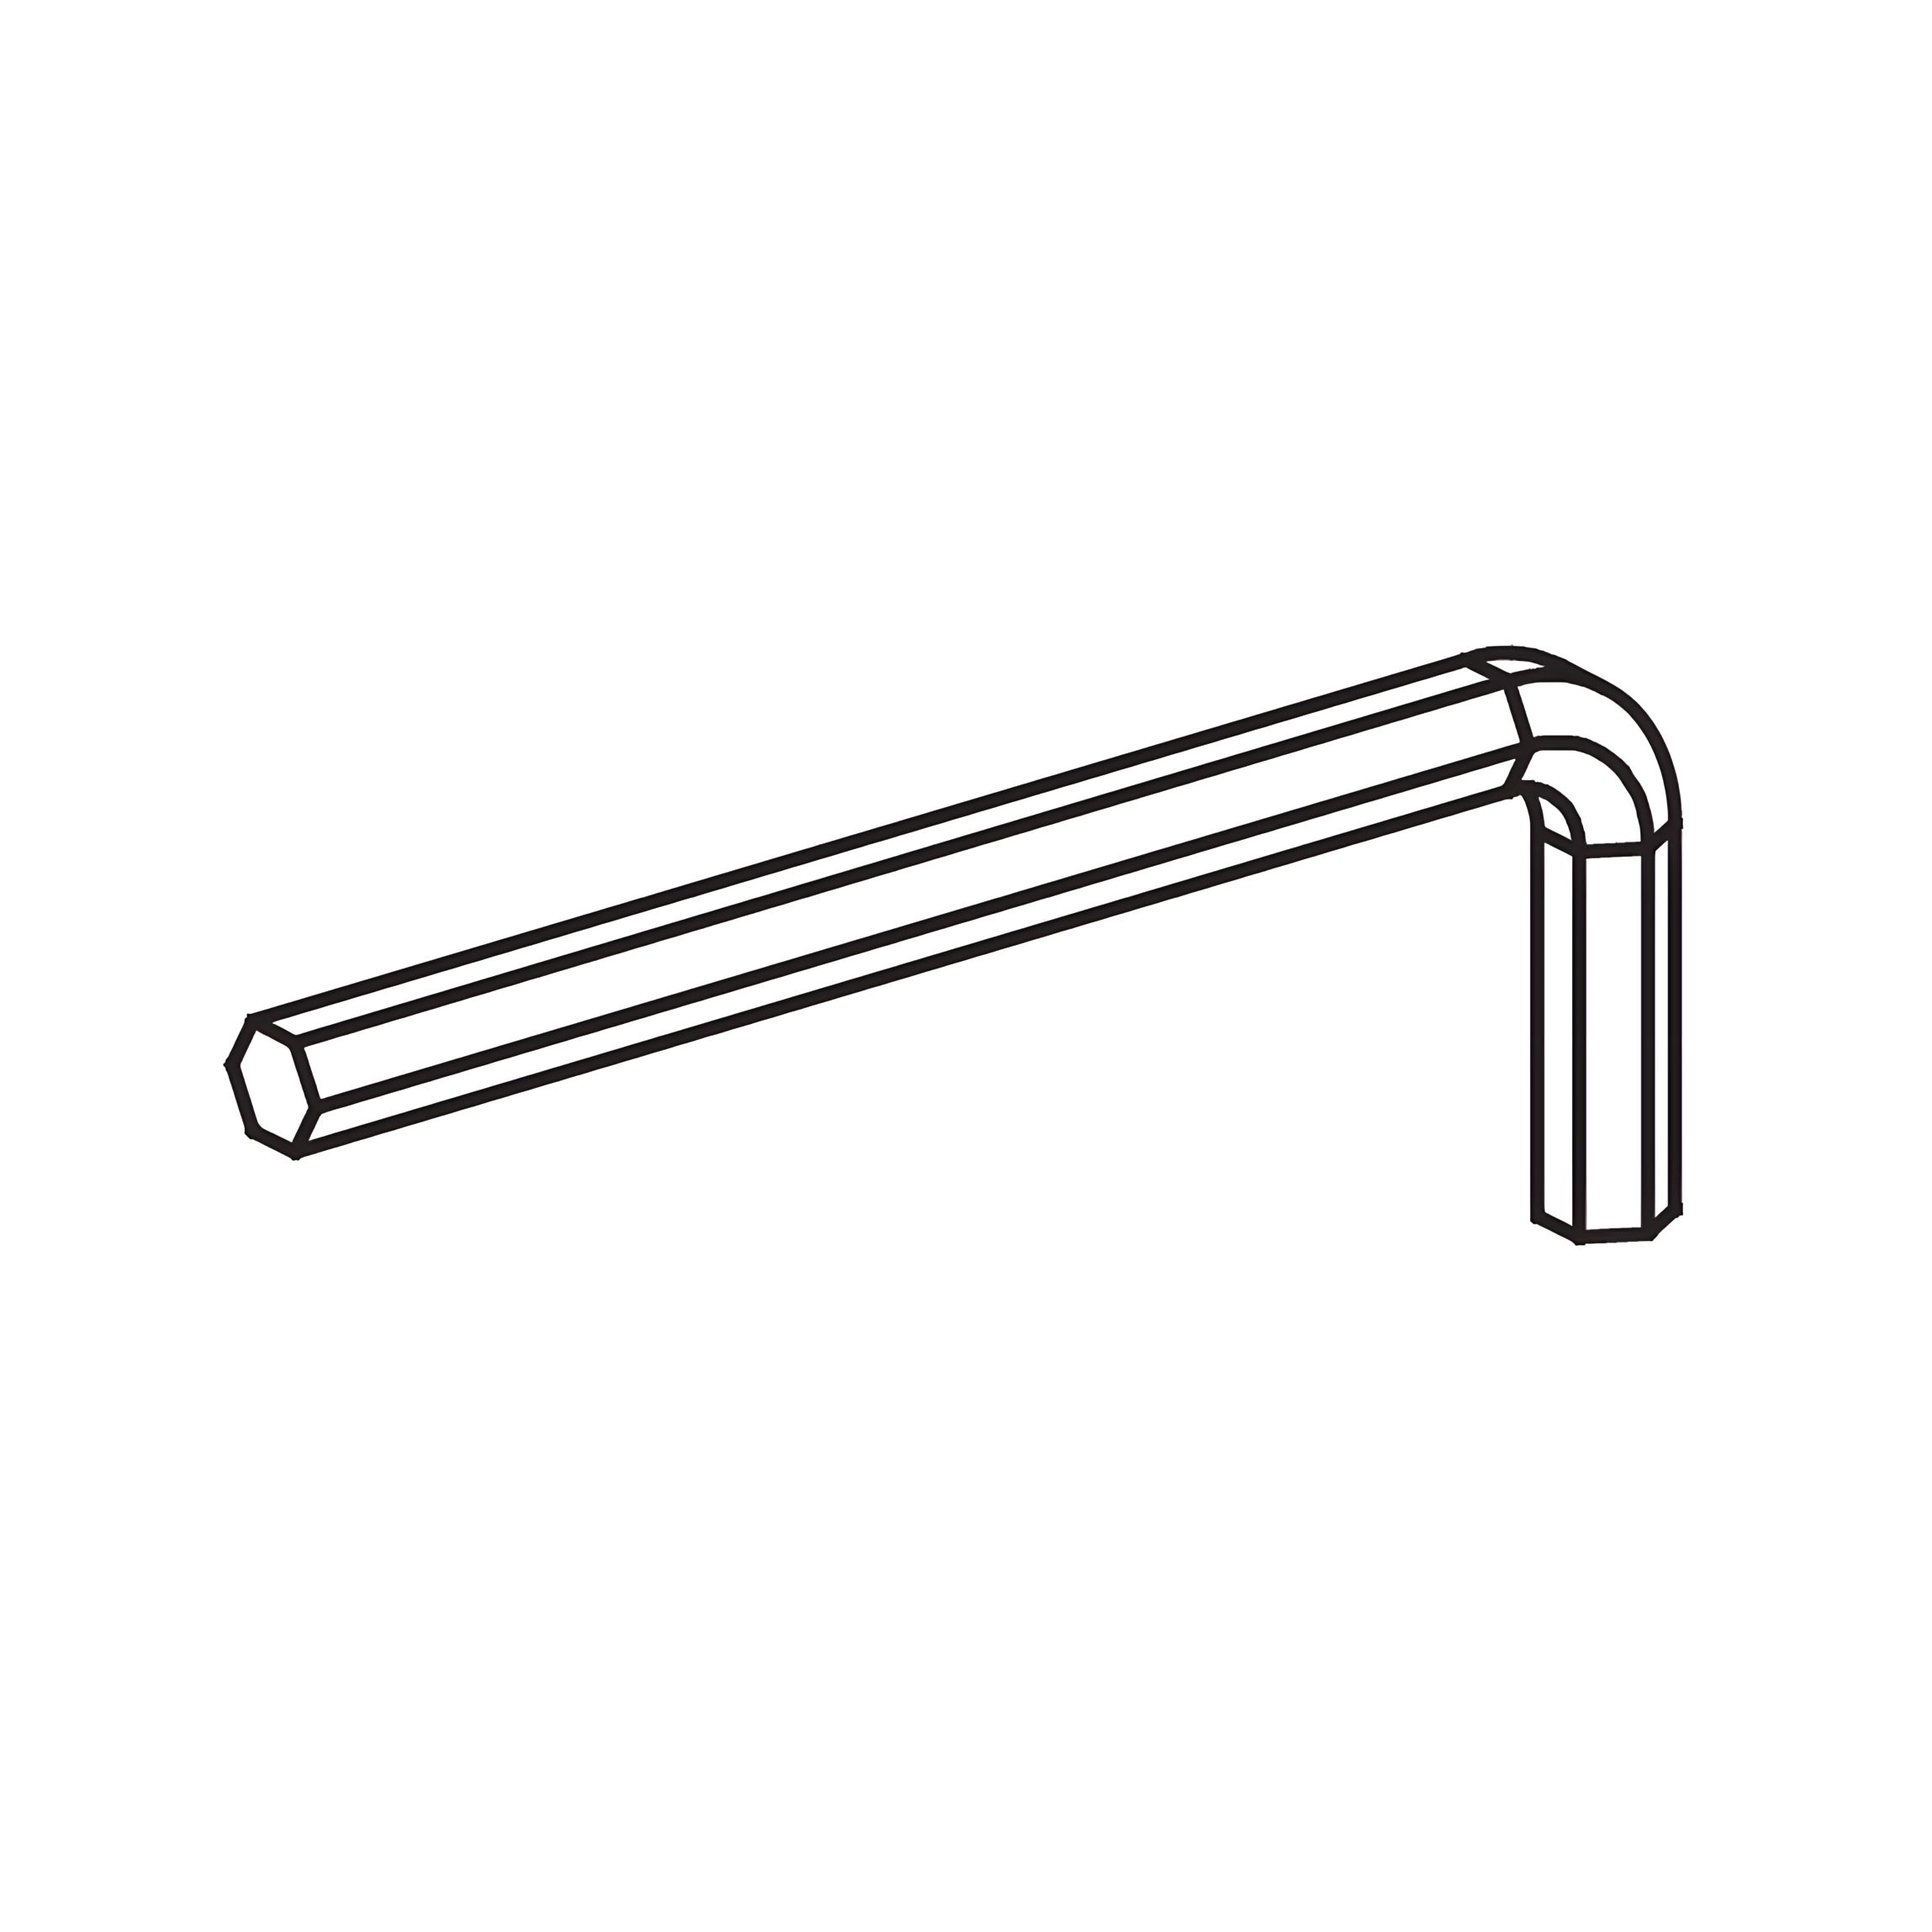
M - Allen Key for M8 bolts
N - Allen Key for M6 bolts
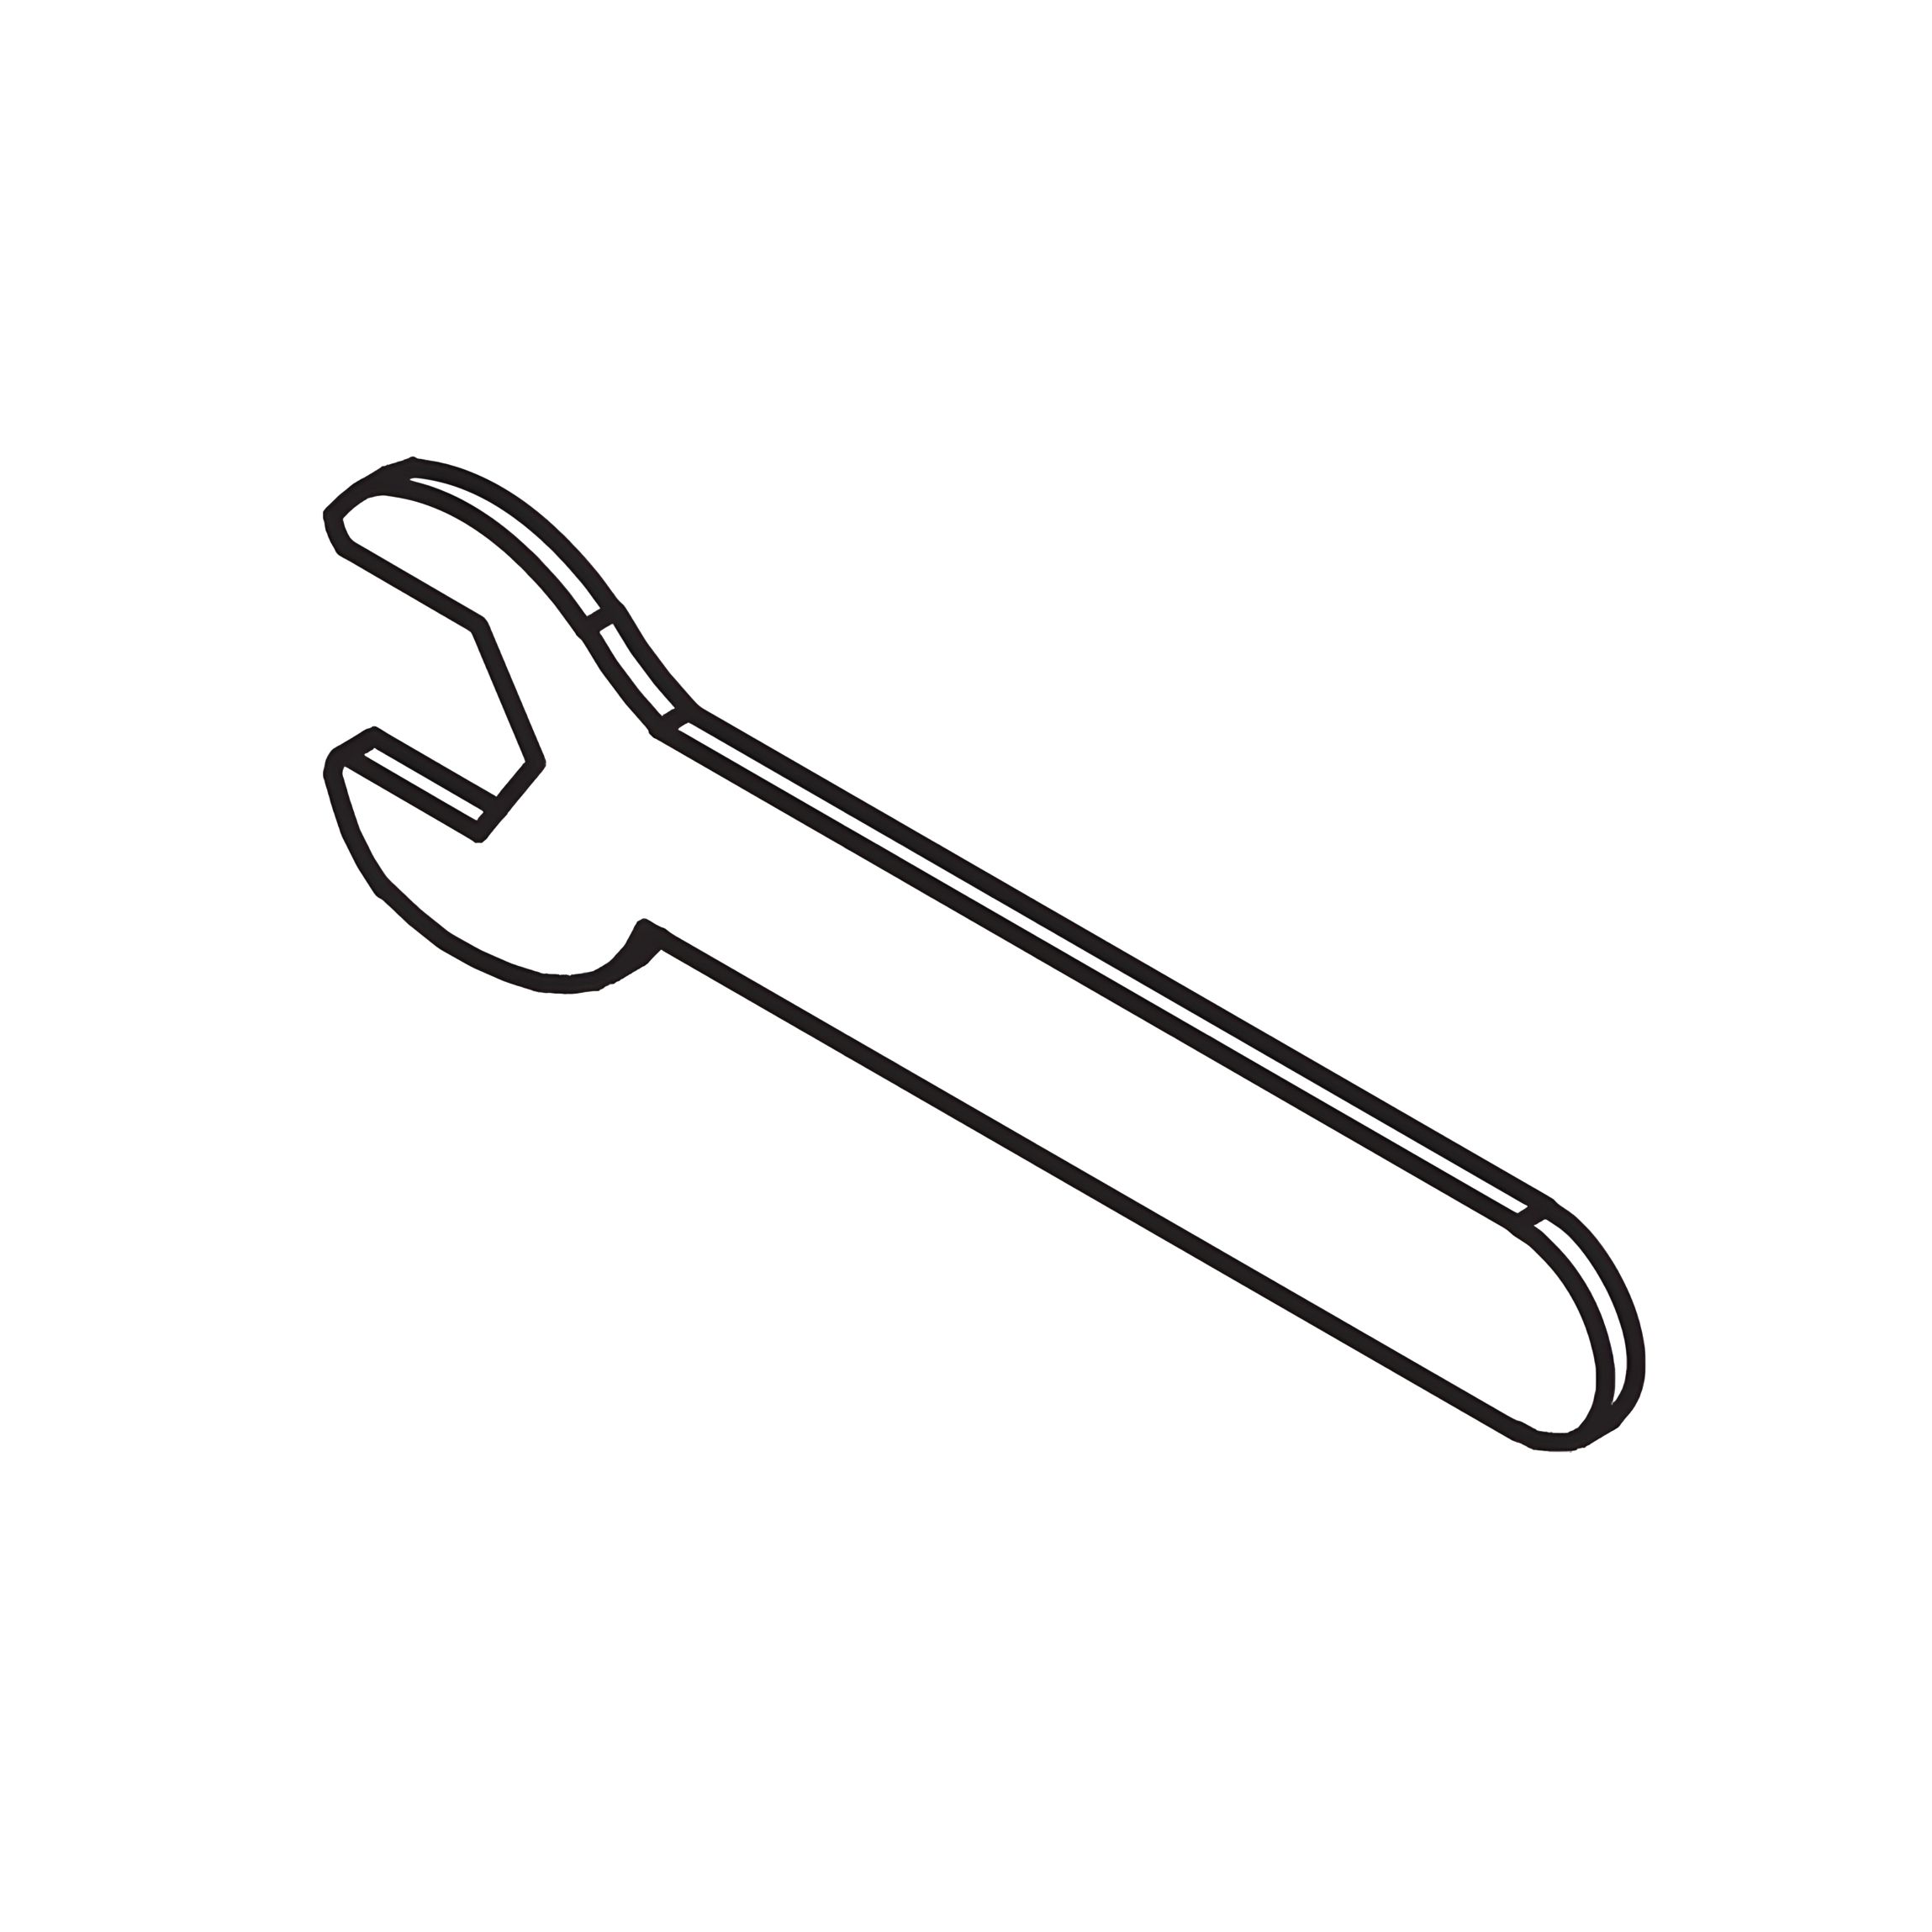
P - Spanner for M8 nuts
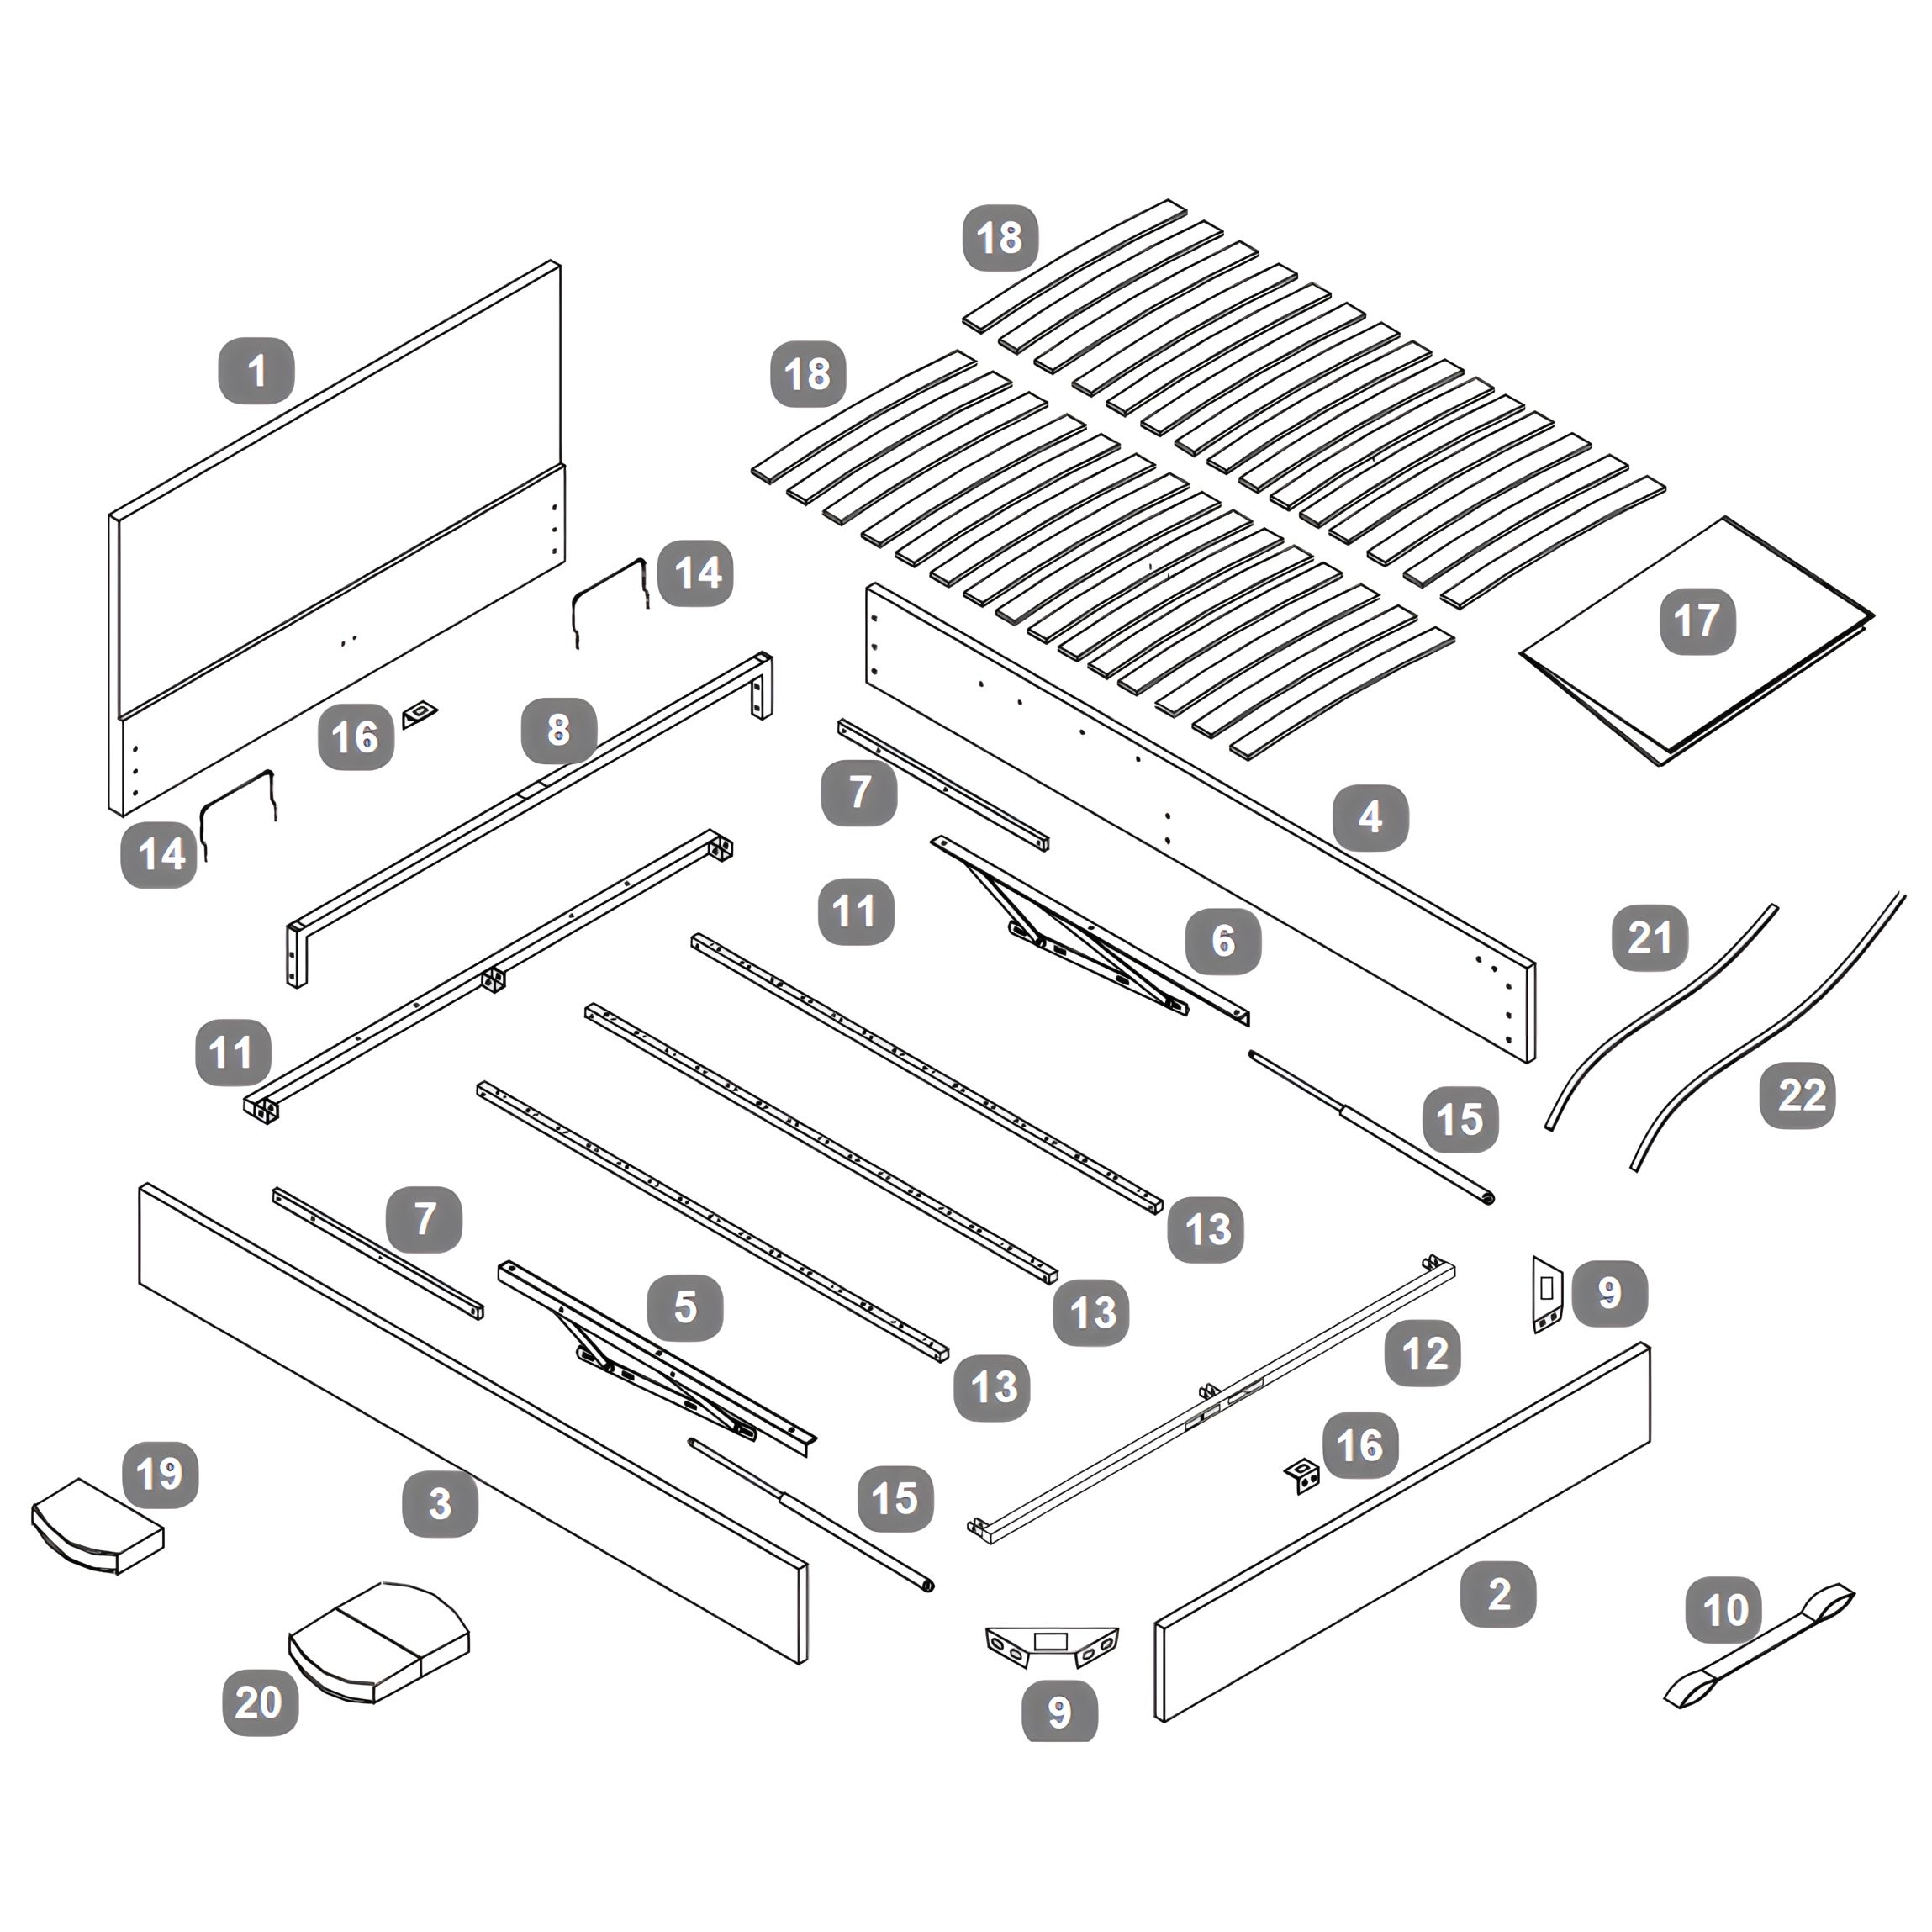
Parts
1Headboard
2Footboard
3Side Rail - LH
4Side Rail - RH
5Lift Mechanism - LH
6Lift Mechanism - RH
7Spacer Rails for Lift Mechanism
8‘U’ Shape Cross Bar
9Angled Corner Brackets
10Fabric Hand Strap
11Cross Rail for Metal Slat Frame - HB
12Cross Rail for Metal Slat Frame - FB
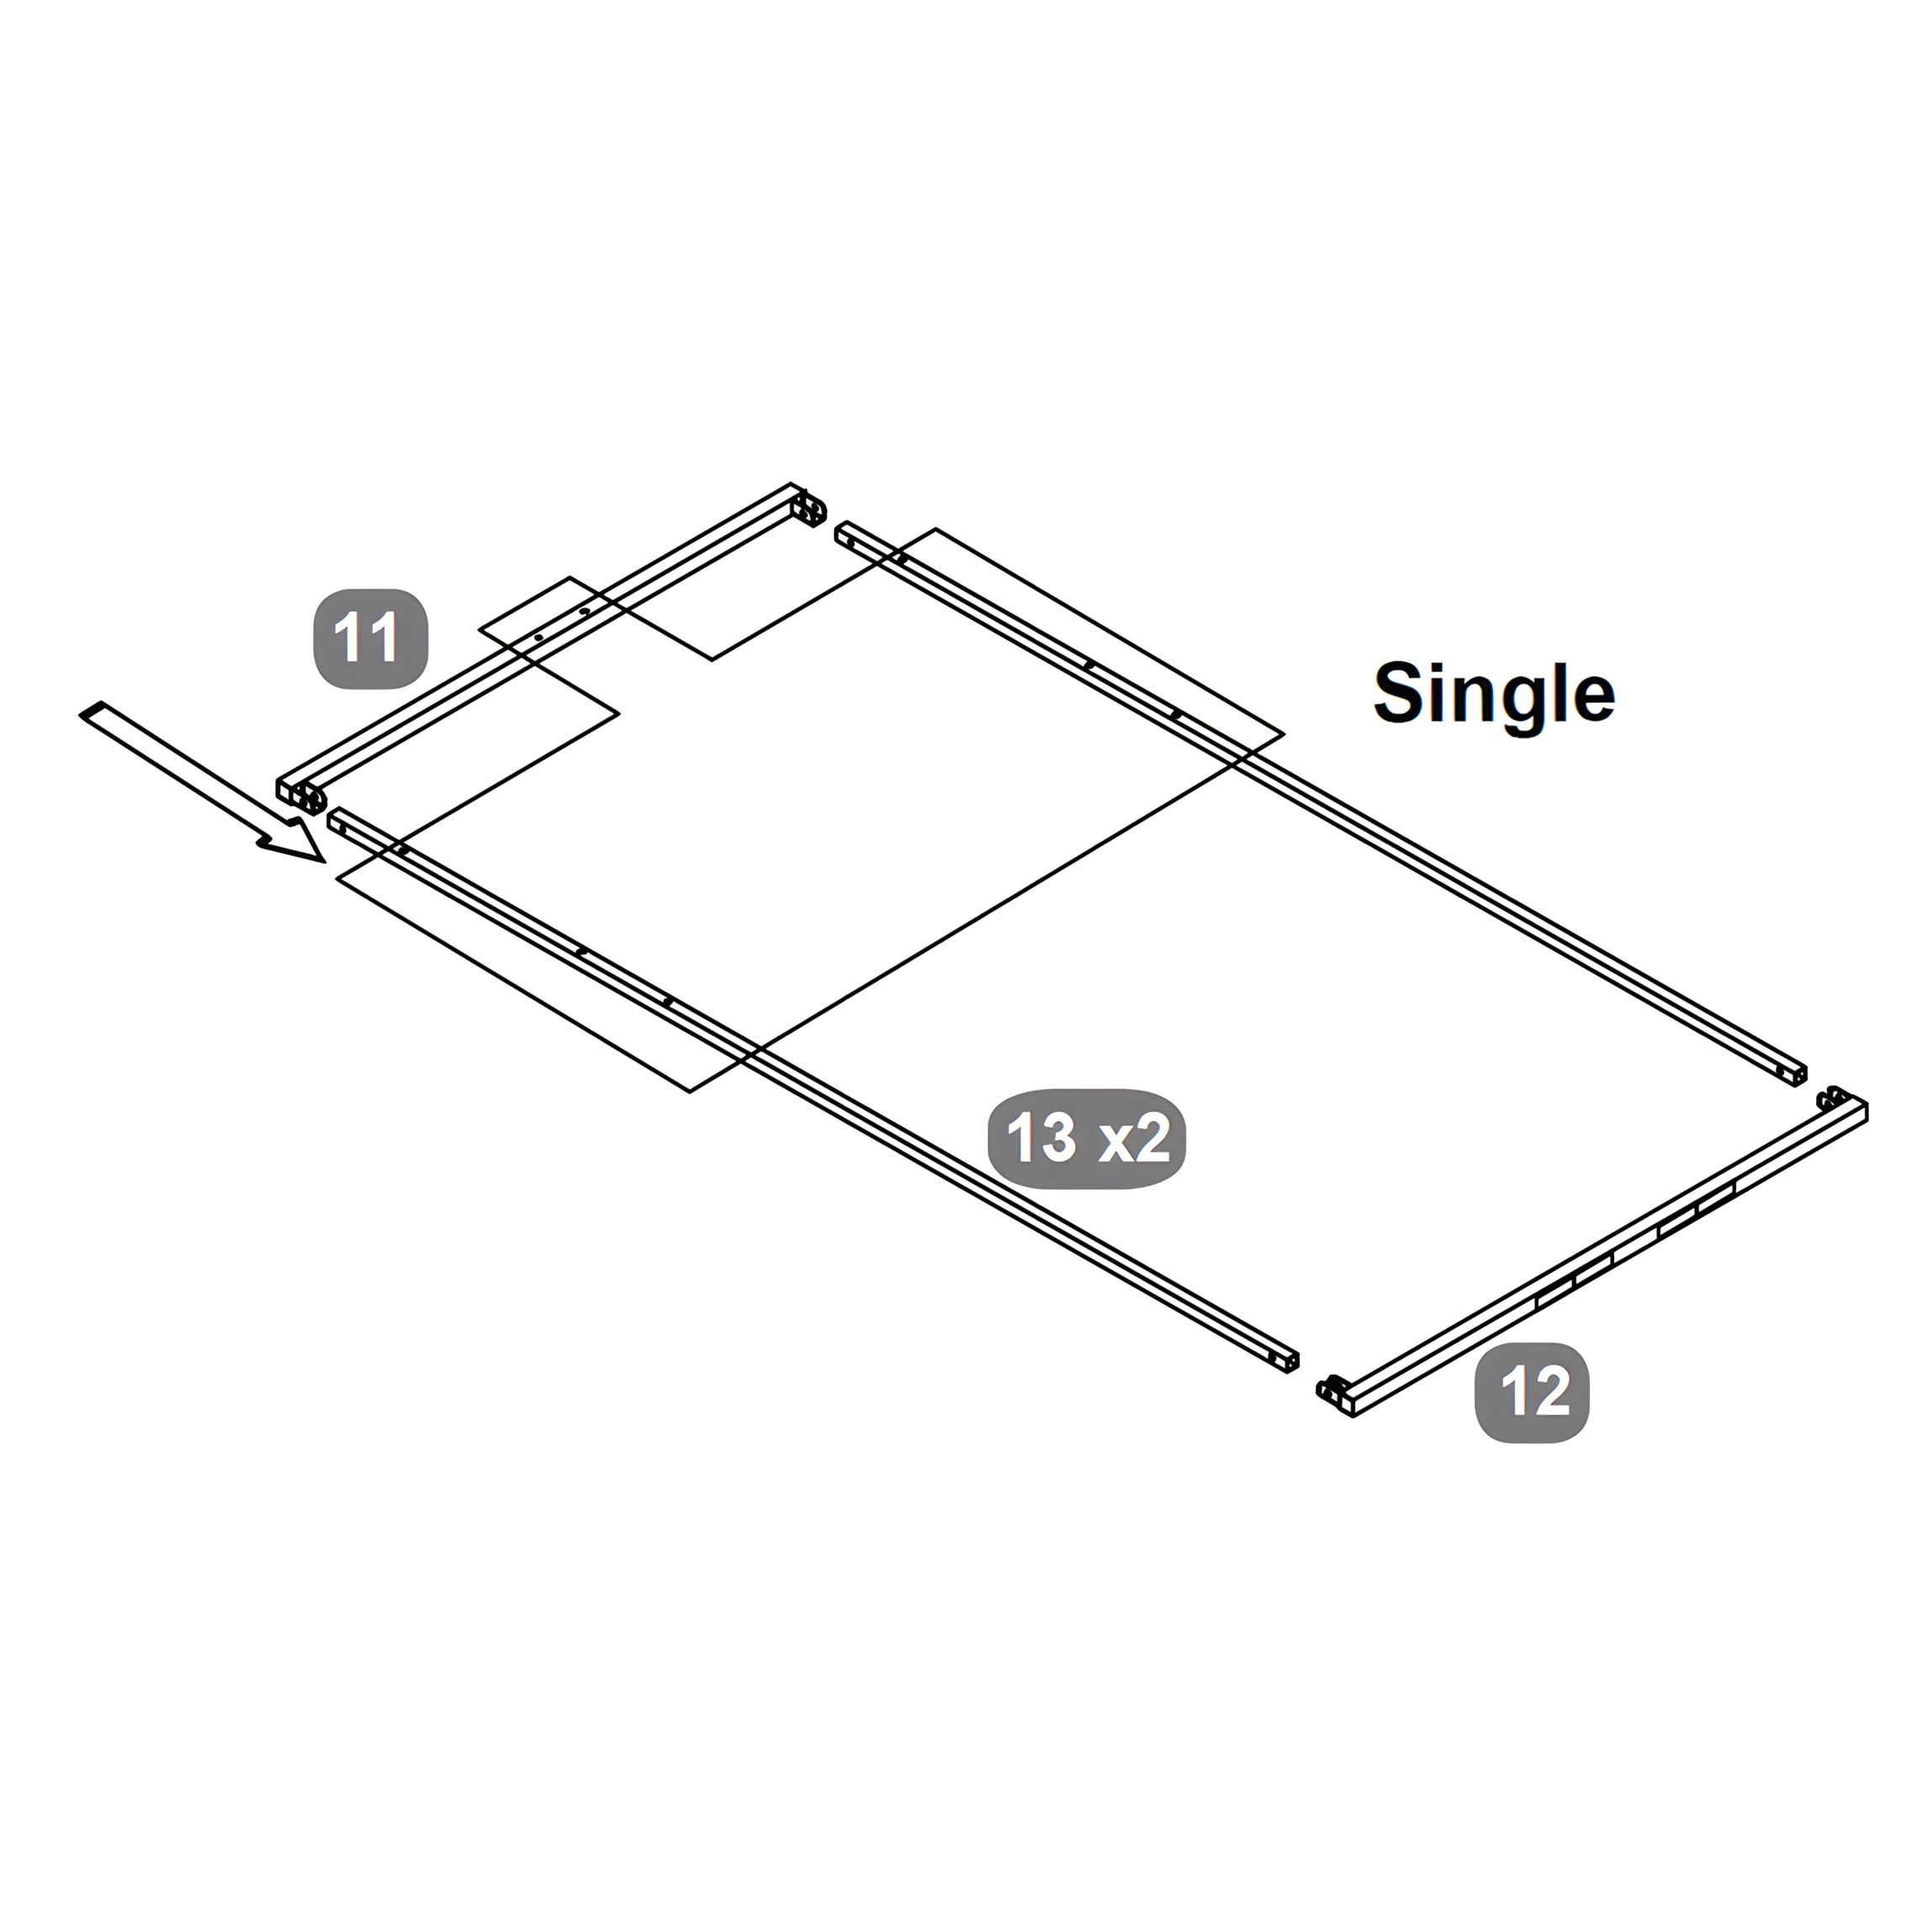
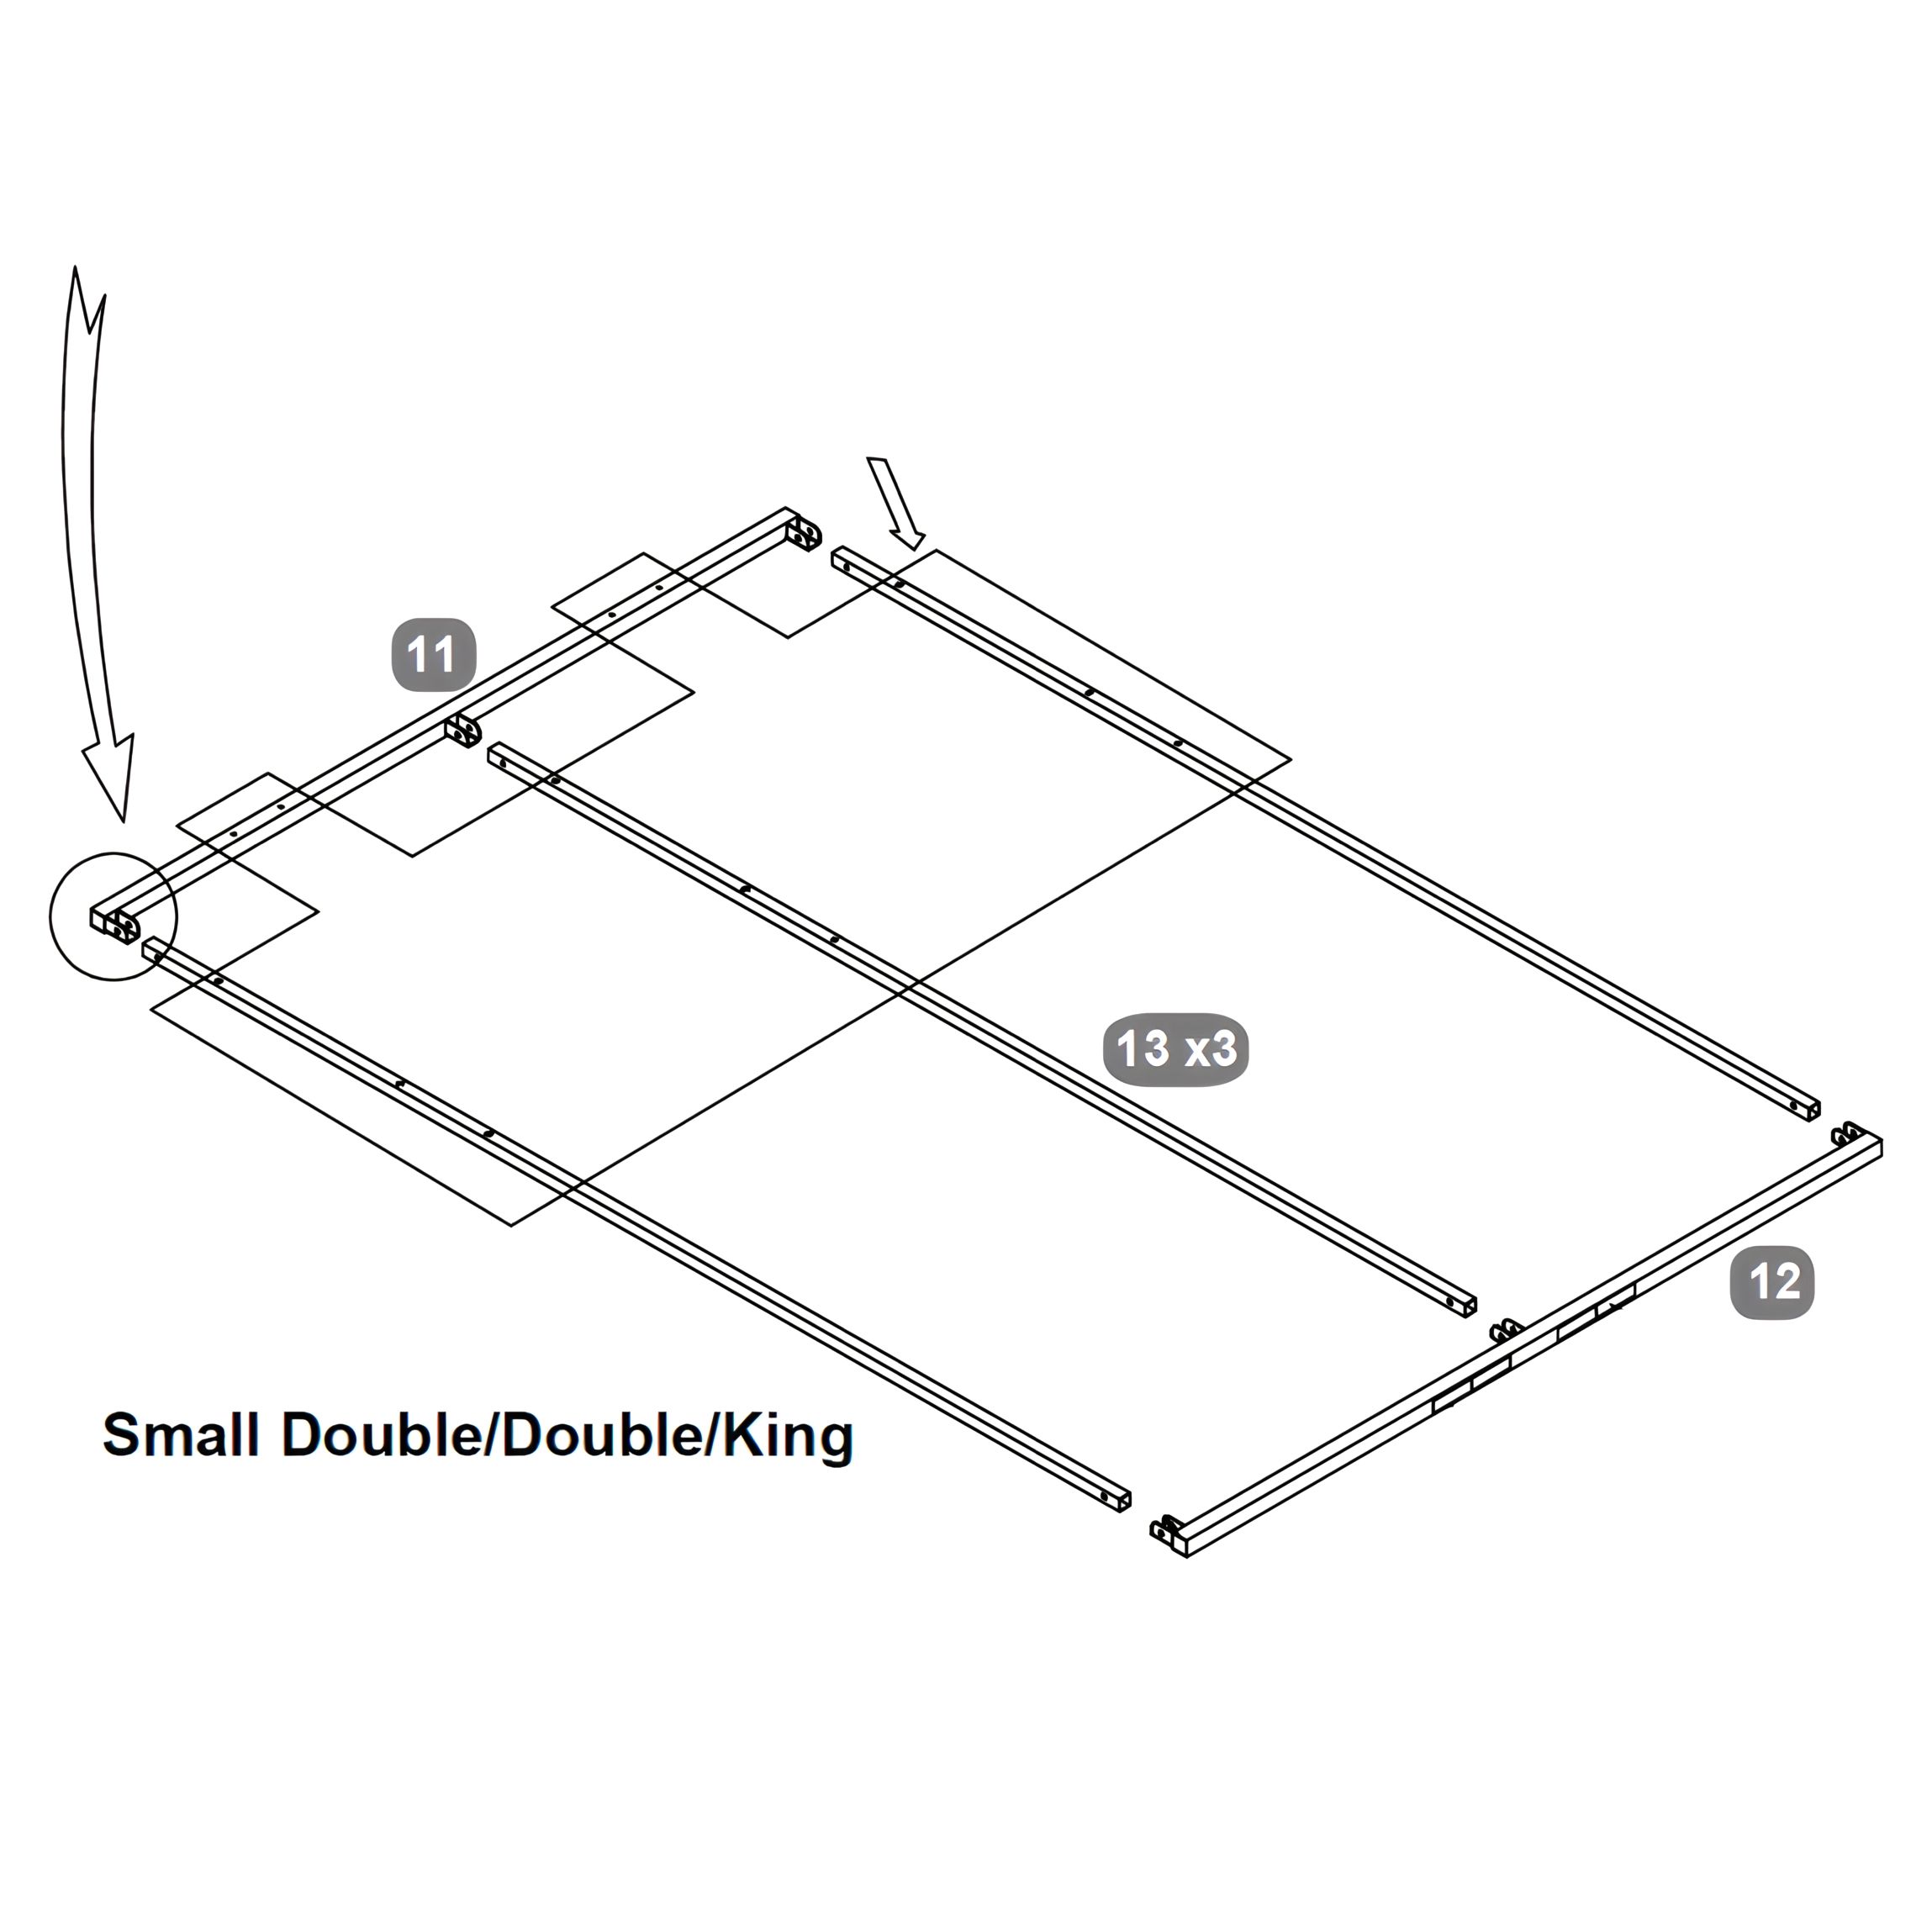
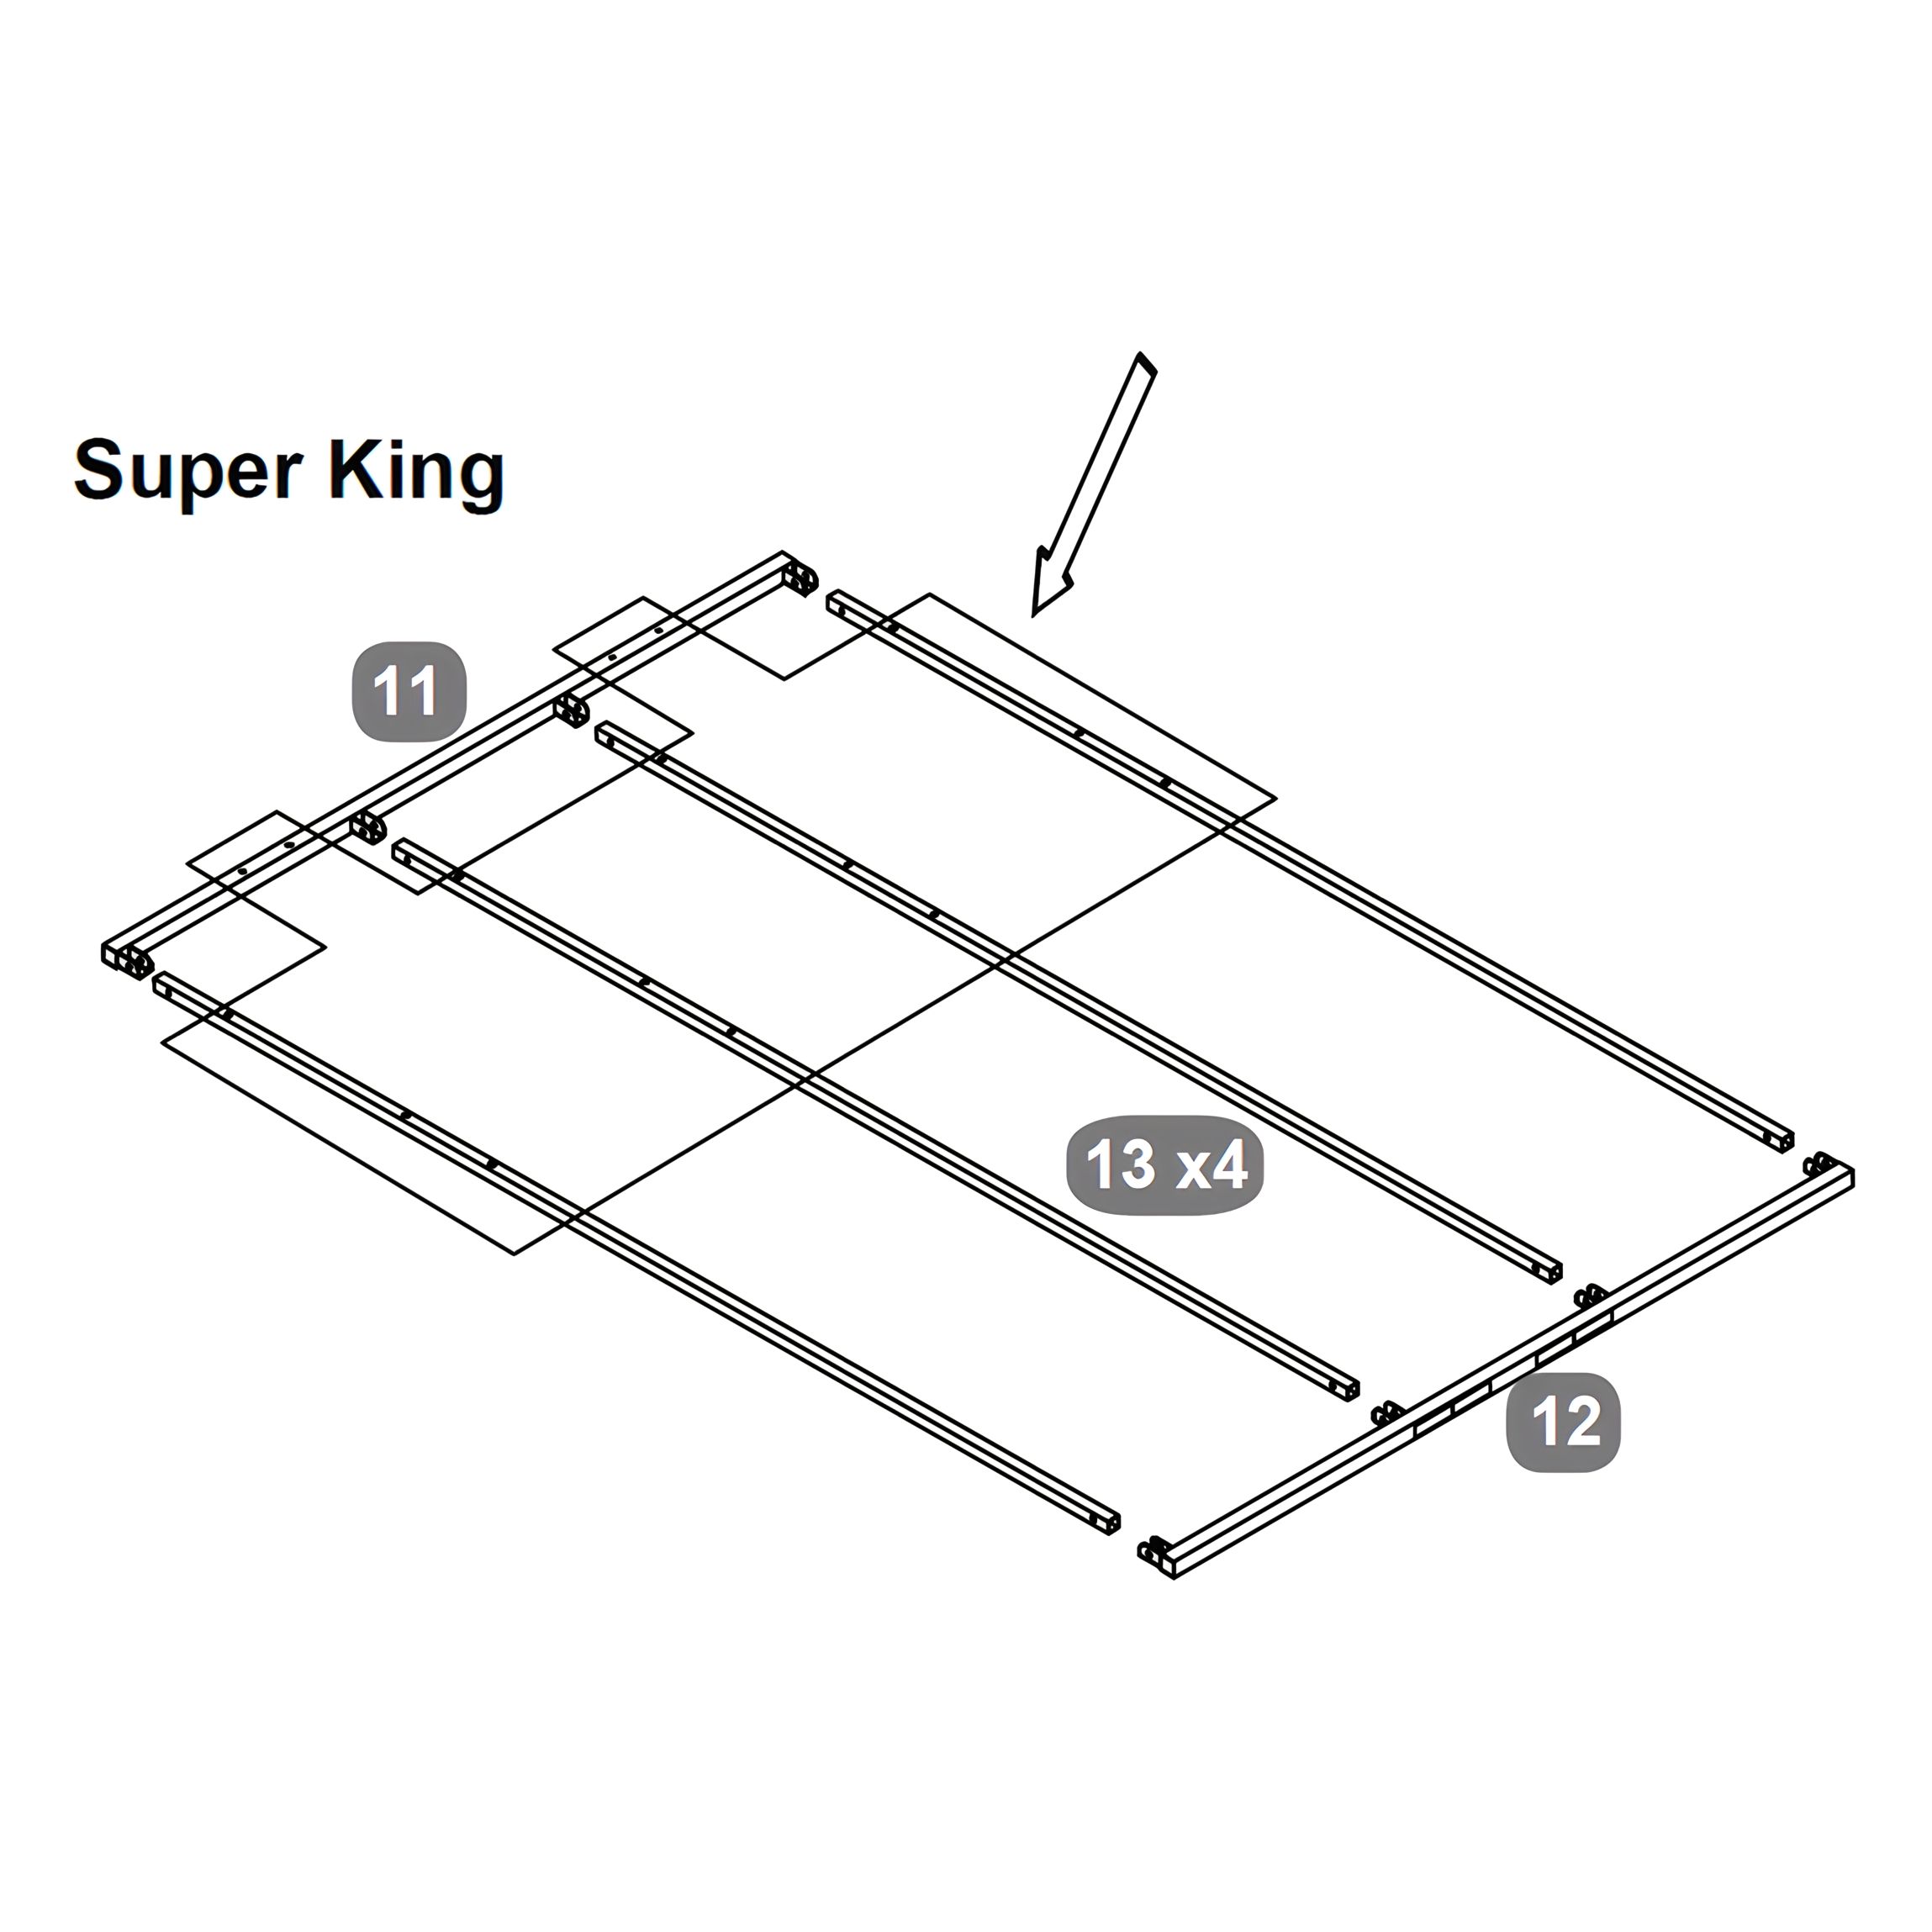
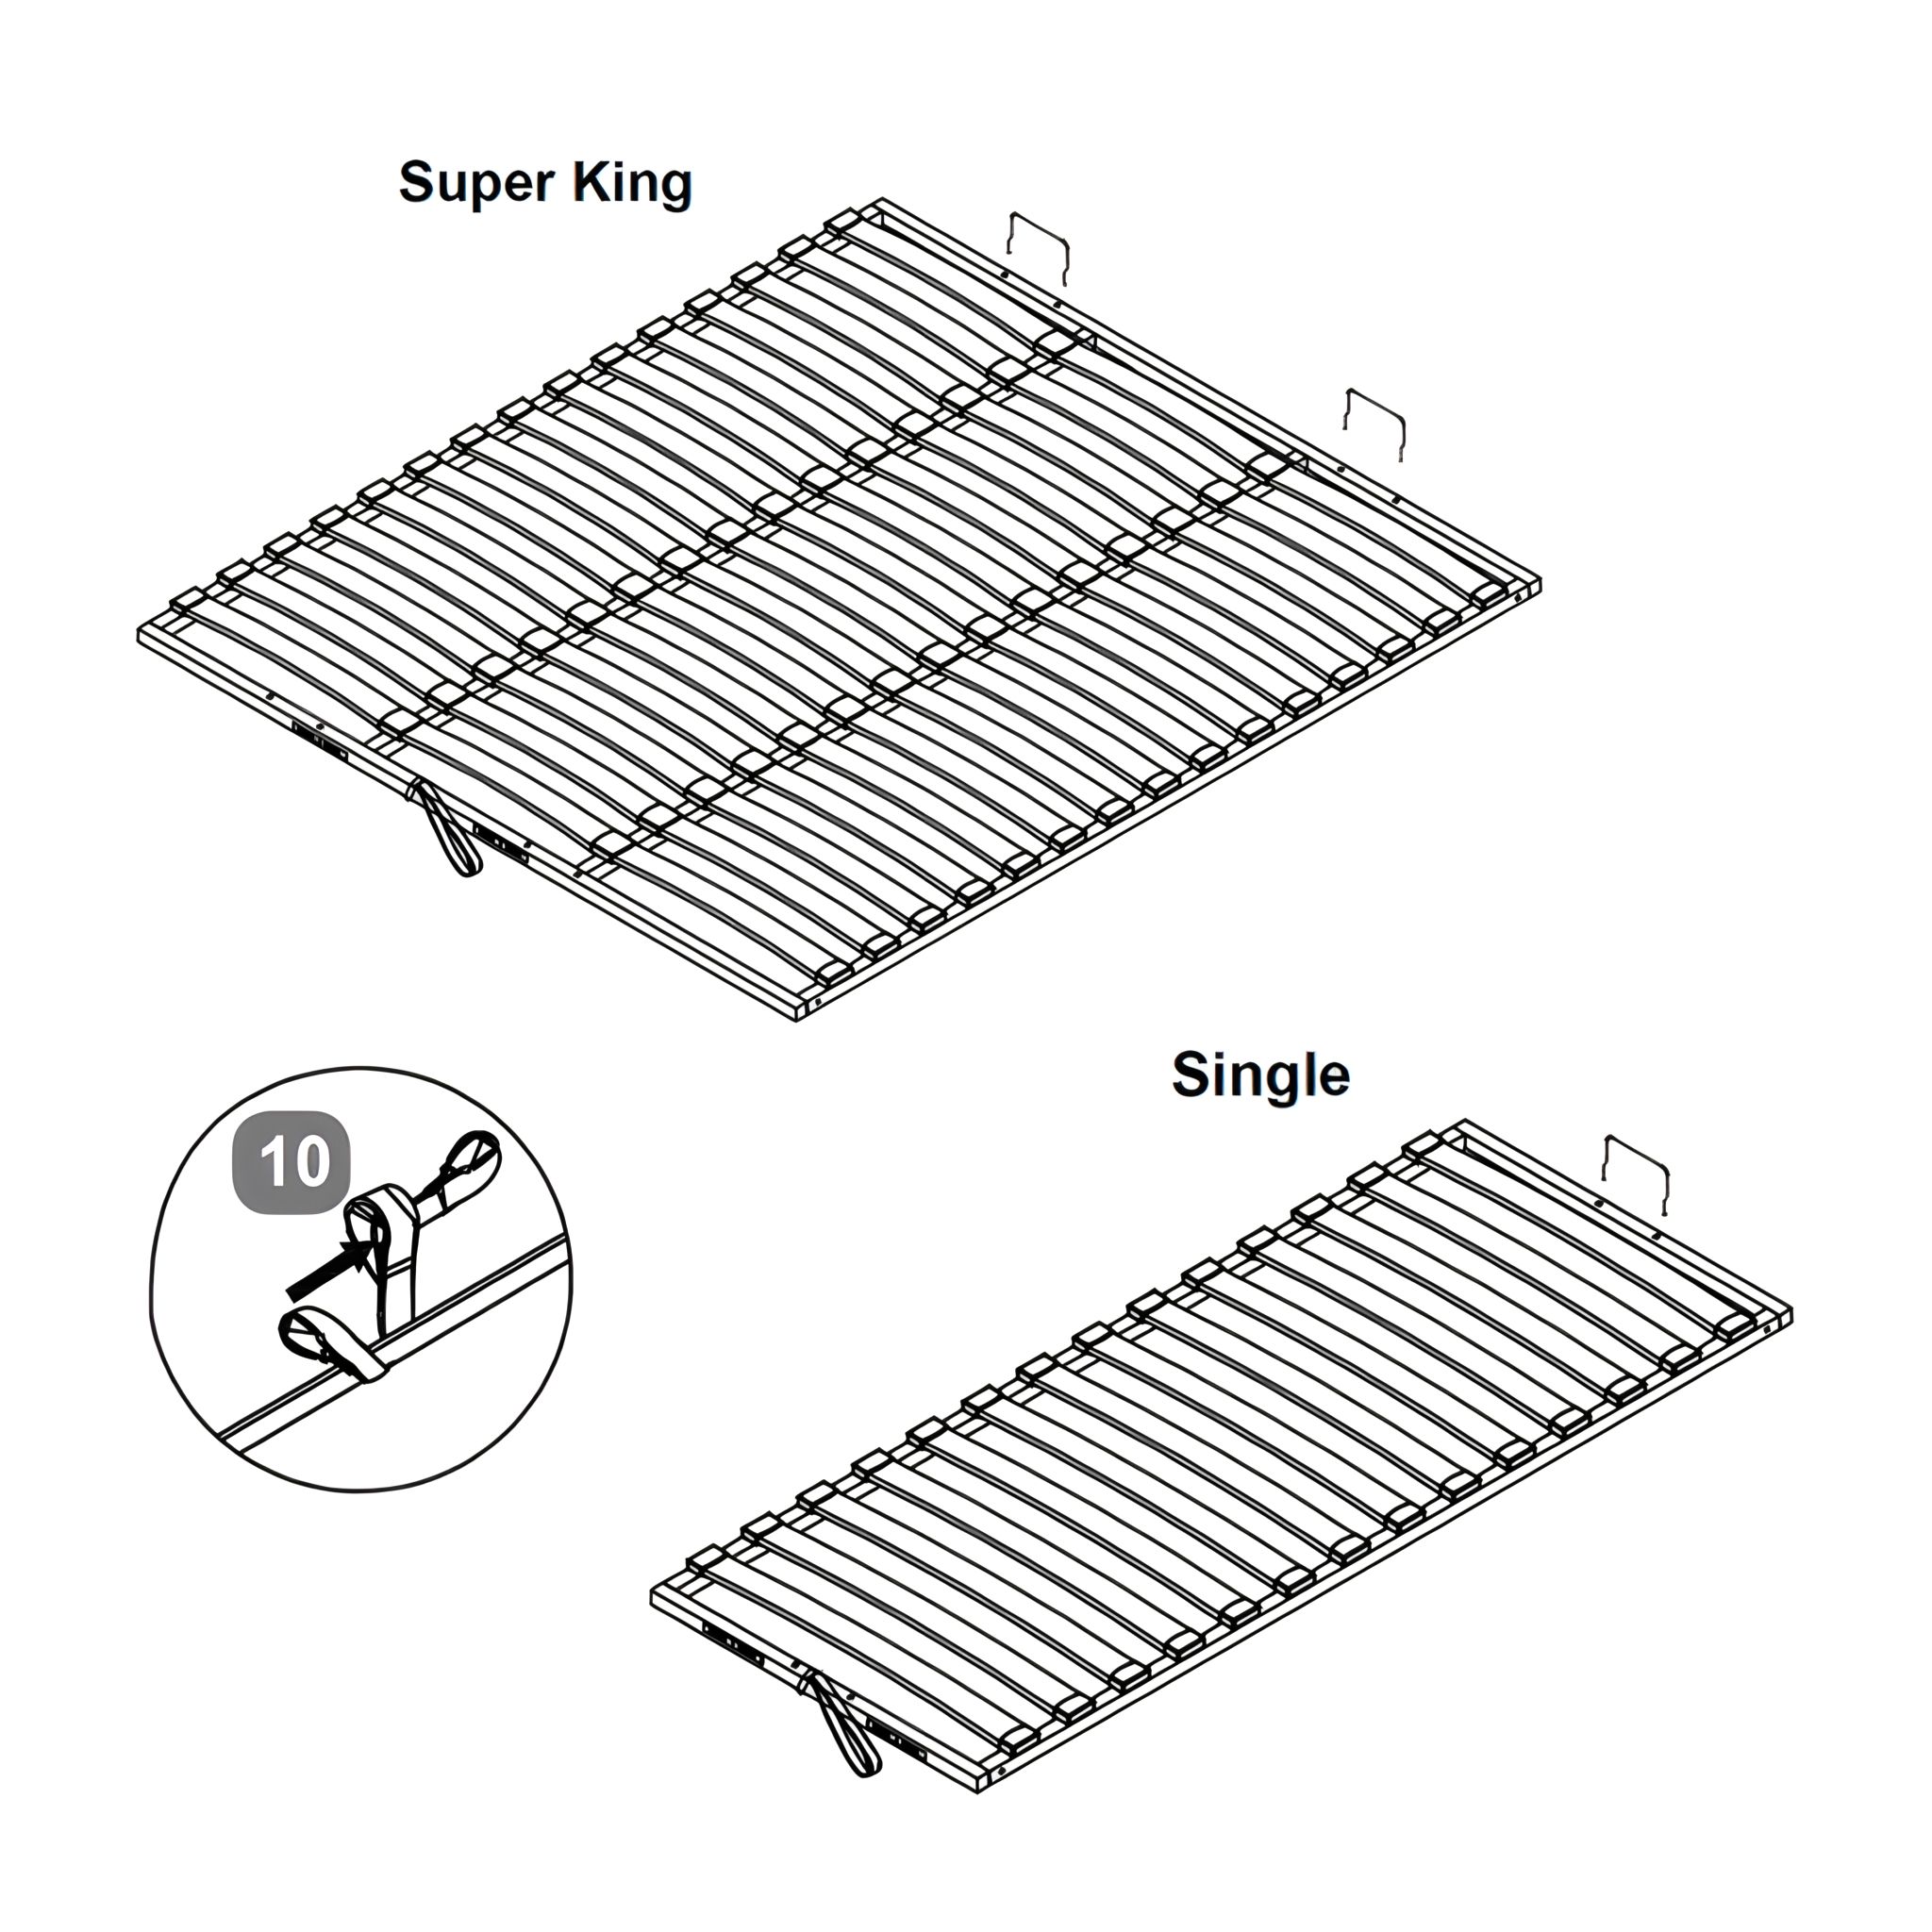
13Side Rail for Metal Slat Frame – 2 for Single, 3 for Small Double, 3 for Double, 3 for King, 4 for Super King
14Mattress Stopper – 1 for Single, 2 for Small Double, 2 for Double, 2 for King, 2 for Super King
15Gas Lift Pistons – 2 for Single, 2 for Small Double, 2 for Double, 2 for King, 2 for Super King
16Frame Support Bracket – 2 for Single, 2 for Small Double, 2 for Double, 2 for King, 4 for Super King
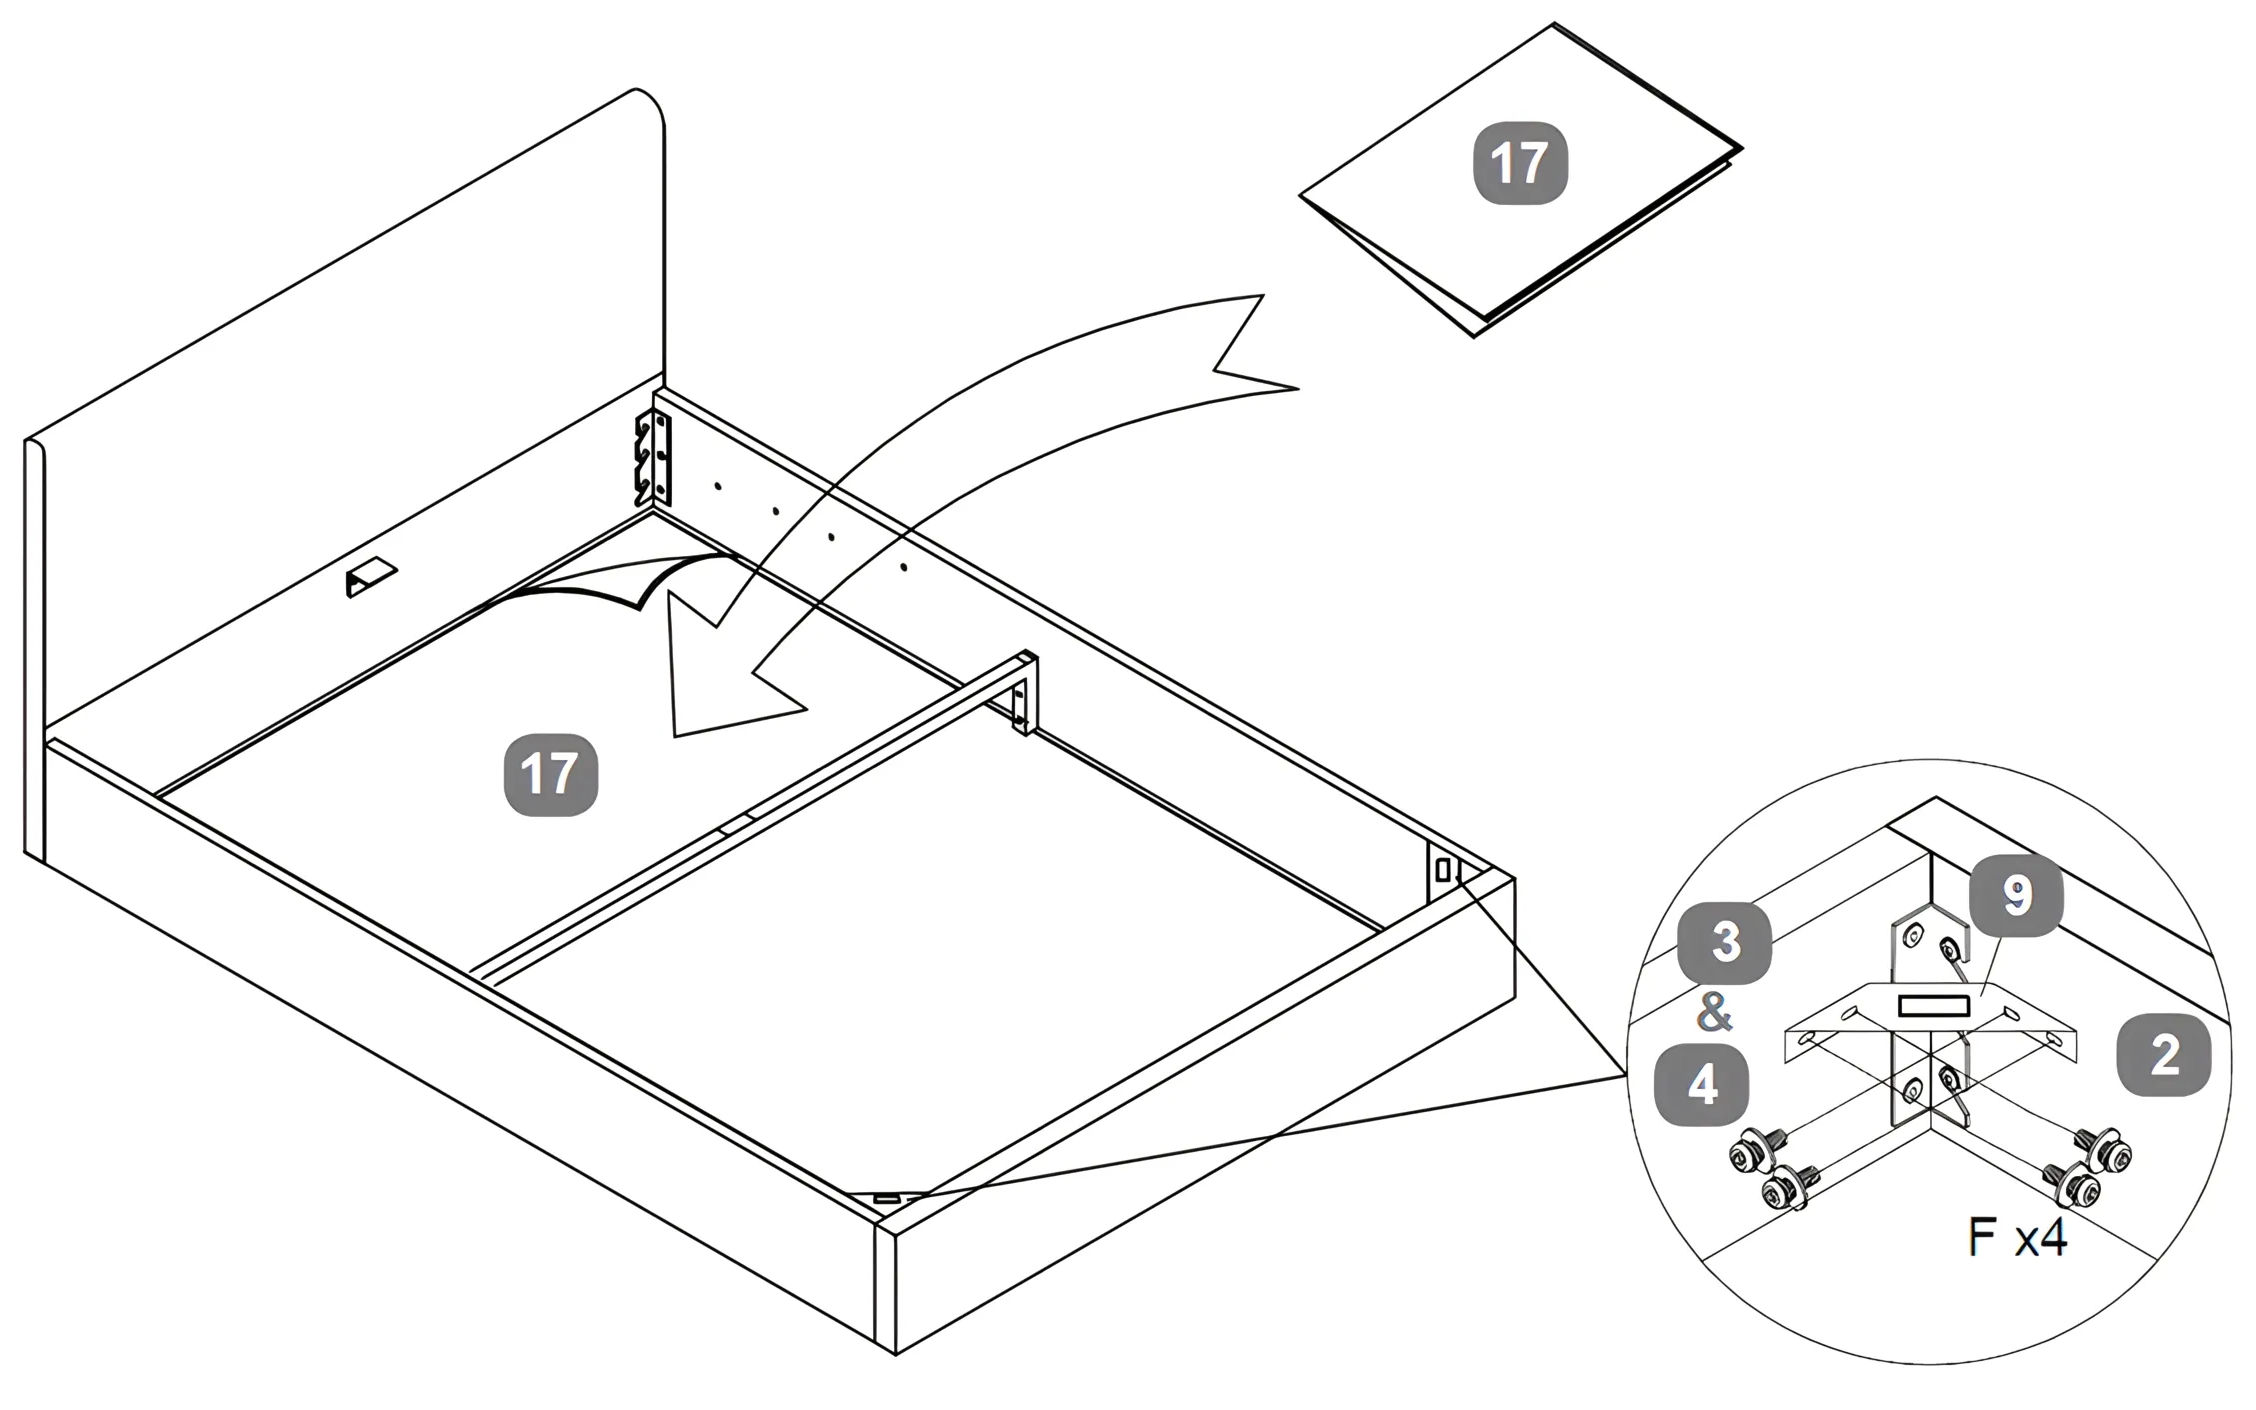
17Fabric Base Cover – 1 for Single, 1 for Small Double, 1 for Double, 1 for King, 1 for Super King
18Bentwood Slats – 14 for Single, 28 for Small Double, 28 for Double, 30 for King, 45 for Super King
19Single Plastic Caps – 28 for Single, 28 for Small Double, 28 for Double, 30 for King, 30 for Super King
20Double Plastic Caps – 14 for Small Double, 14 for Double, 15 for King, 30 for Super King
21Shorter Vecro With Glue – 2 for Single, 2 for Small Double, 2 for Double, 2 for King, 2 for Super King
22Longer Vecro With Glue – 2 for Single, 2 for Small Double, 2 for Double, 2 for King, 2 for Super King
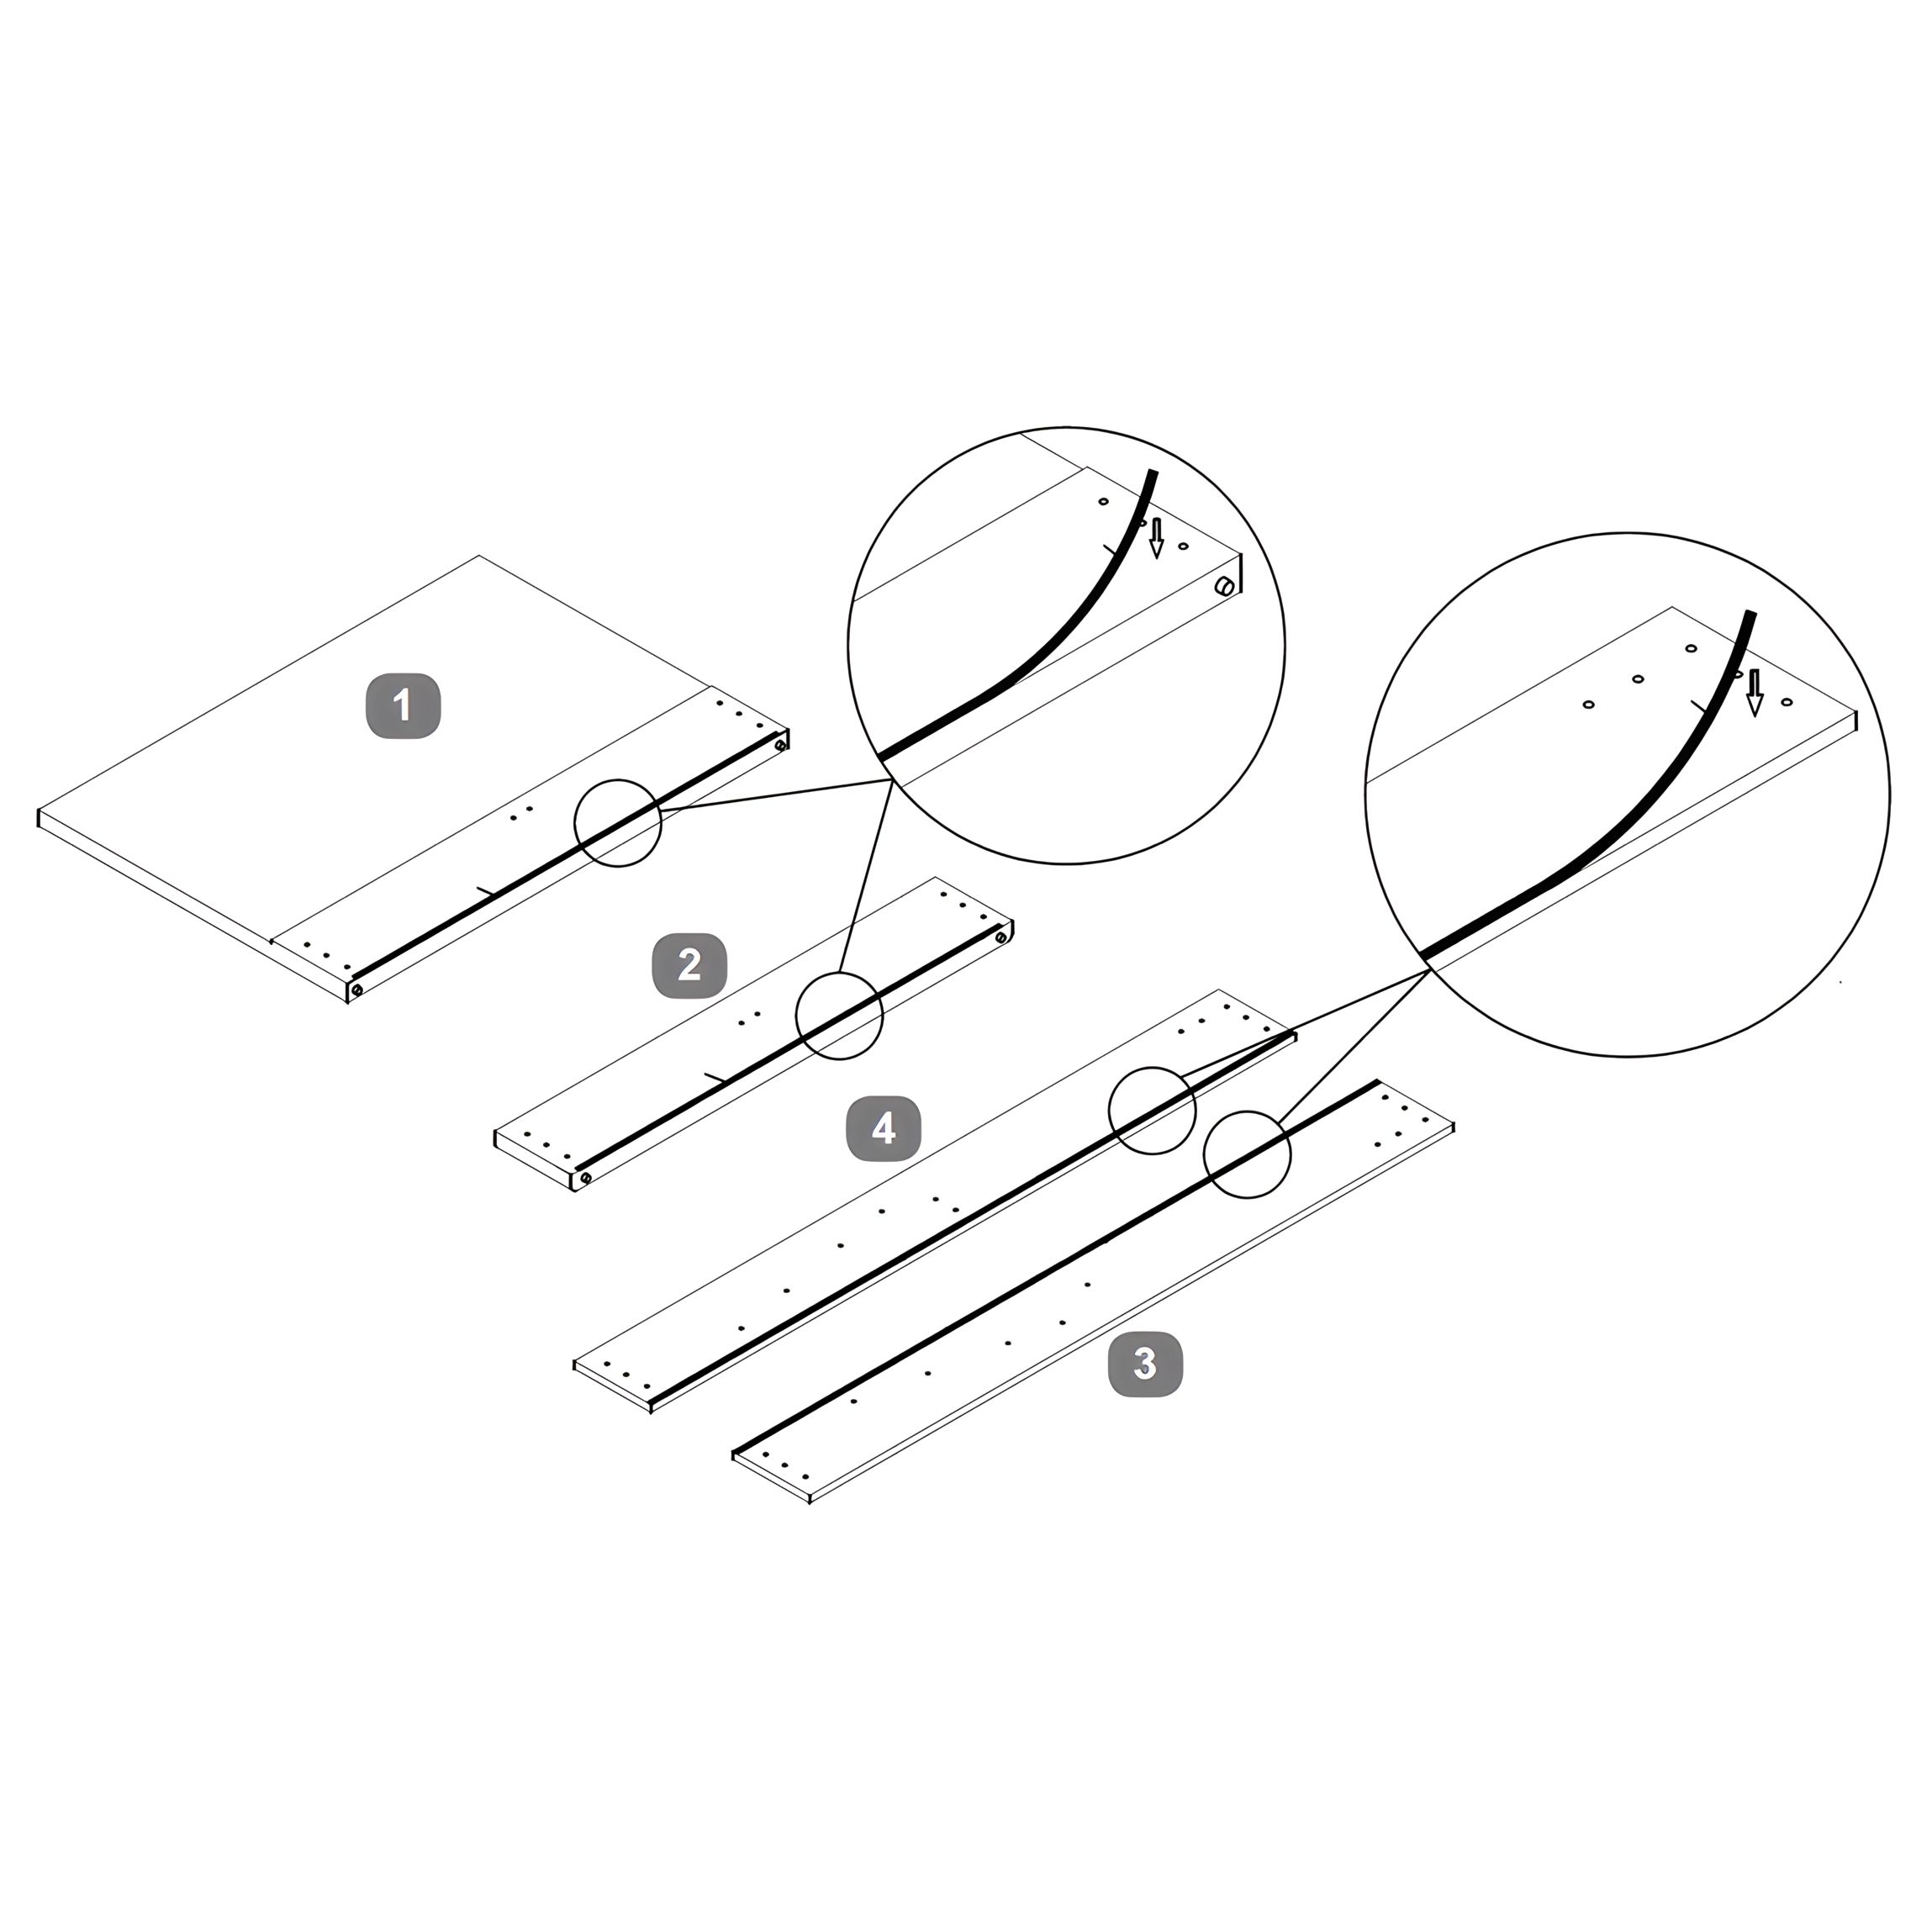
1. Attach Velcro Strips
1. Identify the Headboard (1), Footboard (2), Side Rail – LH (3), and Side Rail – RH (4). 2. Fit the Shorter Velcro with Glue (21) to the inner faces of the Headboard (1) and Footboard (2). 3. Fit the Longer Velcro with Glue (22) to the inner faces of the Side Rail – LH (3) and Side Rail – RH (4). 4. Press each strip down firmly to ensure the glued backing adheres securely to the surface.
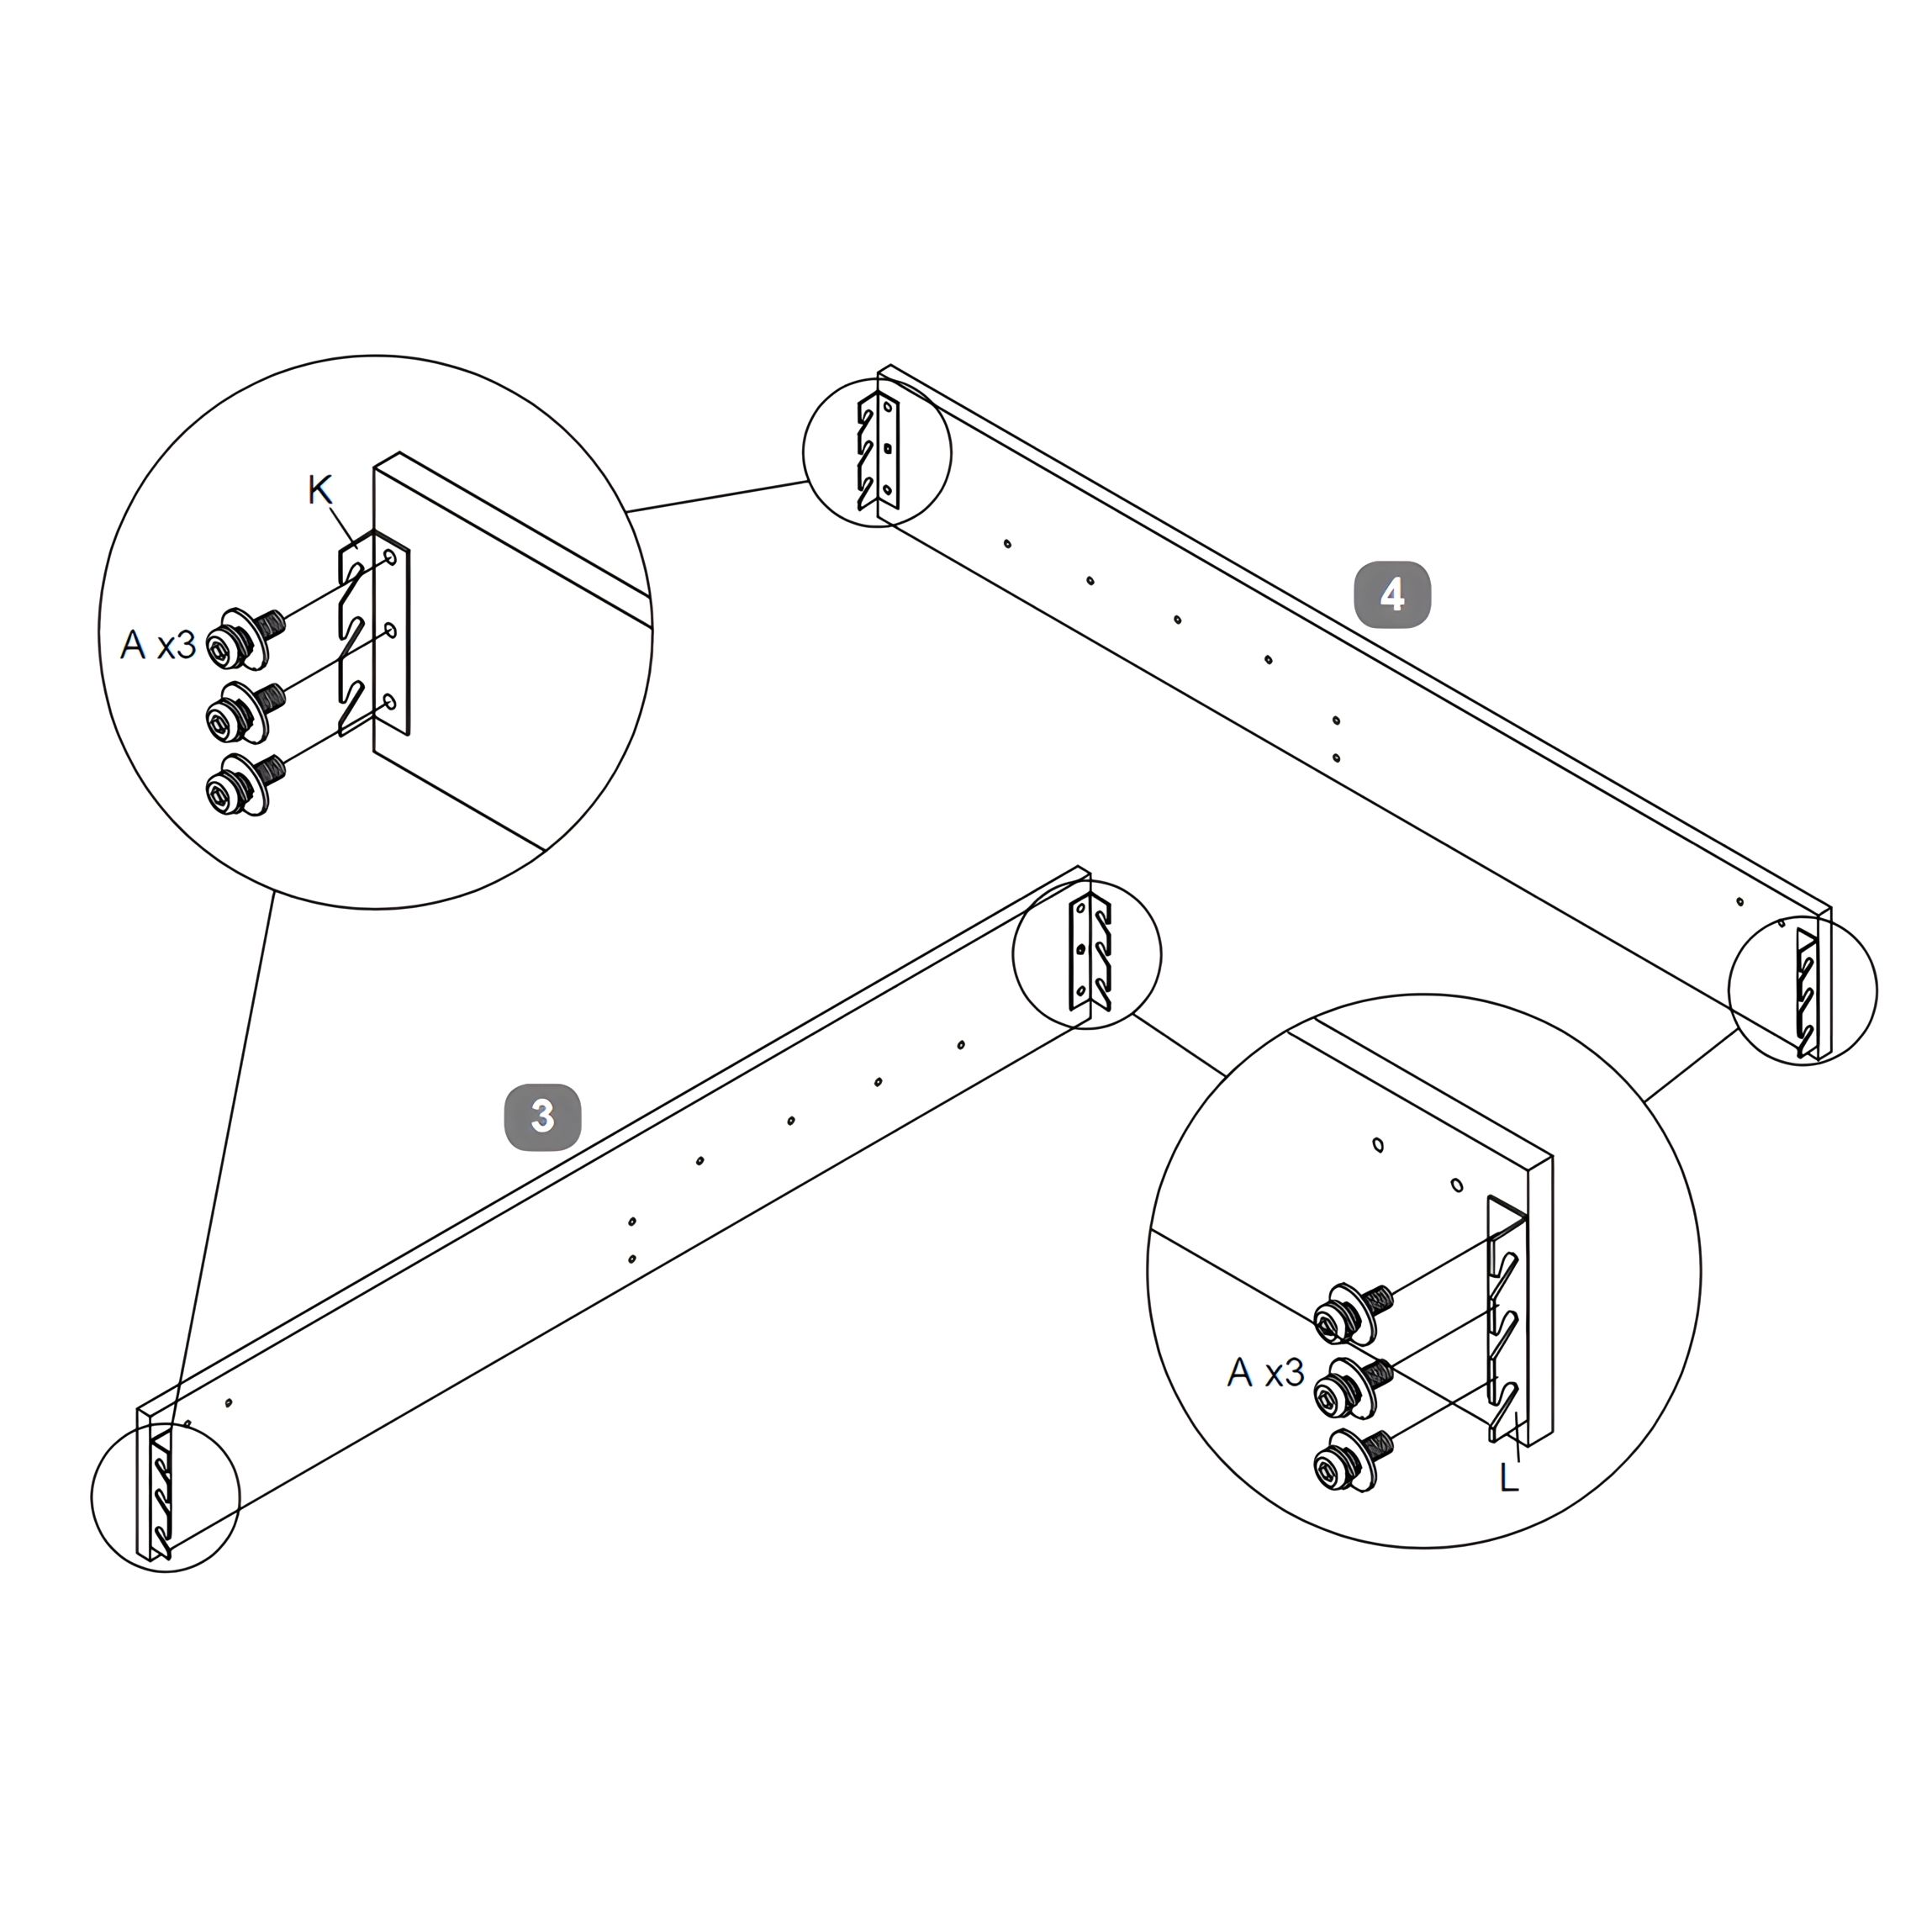
2. Attach Angle Brackets to Side Rails
1. Position the Side Rail – LH (3) and Side Rail – RH (4) with the bracket mounting holes facing outward. 2. Attach one Angle Bracket – LH (K) to each end of Side Rail – LH (3) using 3 × Bolt (A), each with a Flat Washer (G) and a Spring Washer (H). 3. Repeat the process for Side Rail – RH (4), using 3 × Bolt (A) per bracket and securing each Angle Bracket – RH (L). 4. Tighten all bolts using the Allen Key (M) until the brackets are firmly secured.
3. Assemble Bed Frame Structure
1. Align the Side Rails – LH (3) and RH (4) with the Headboard (1) and Footboard (2). 2. Secure each corner using 3 × Bolt (B) through the mounted Angle Brackets (K & L) into the Headboard and Footboard. 3. Before tightening, ensure the frame is properly squared by checking alignment from a top-down view, as shown in the diagram. 4. Once aligned, fully tighten all bolts to 100% using the Allen Key (M).
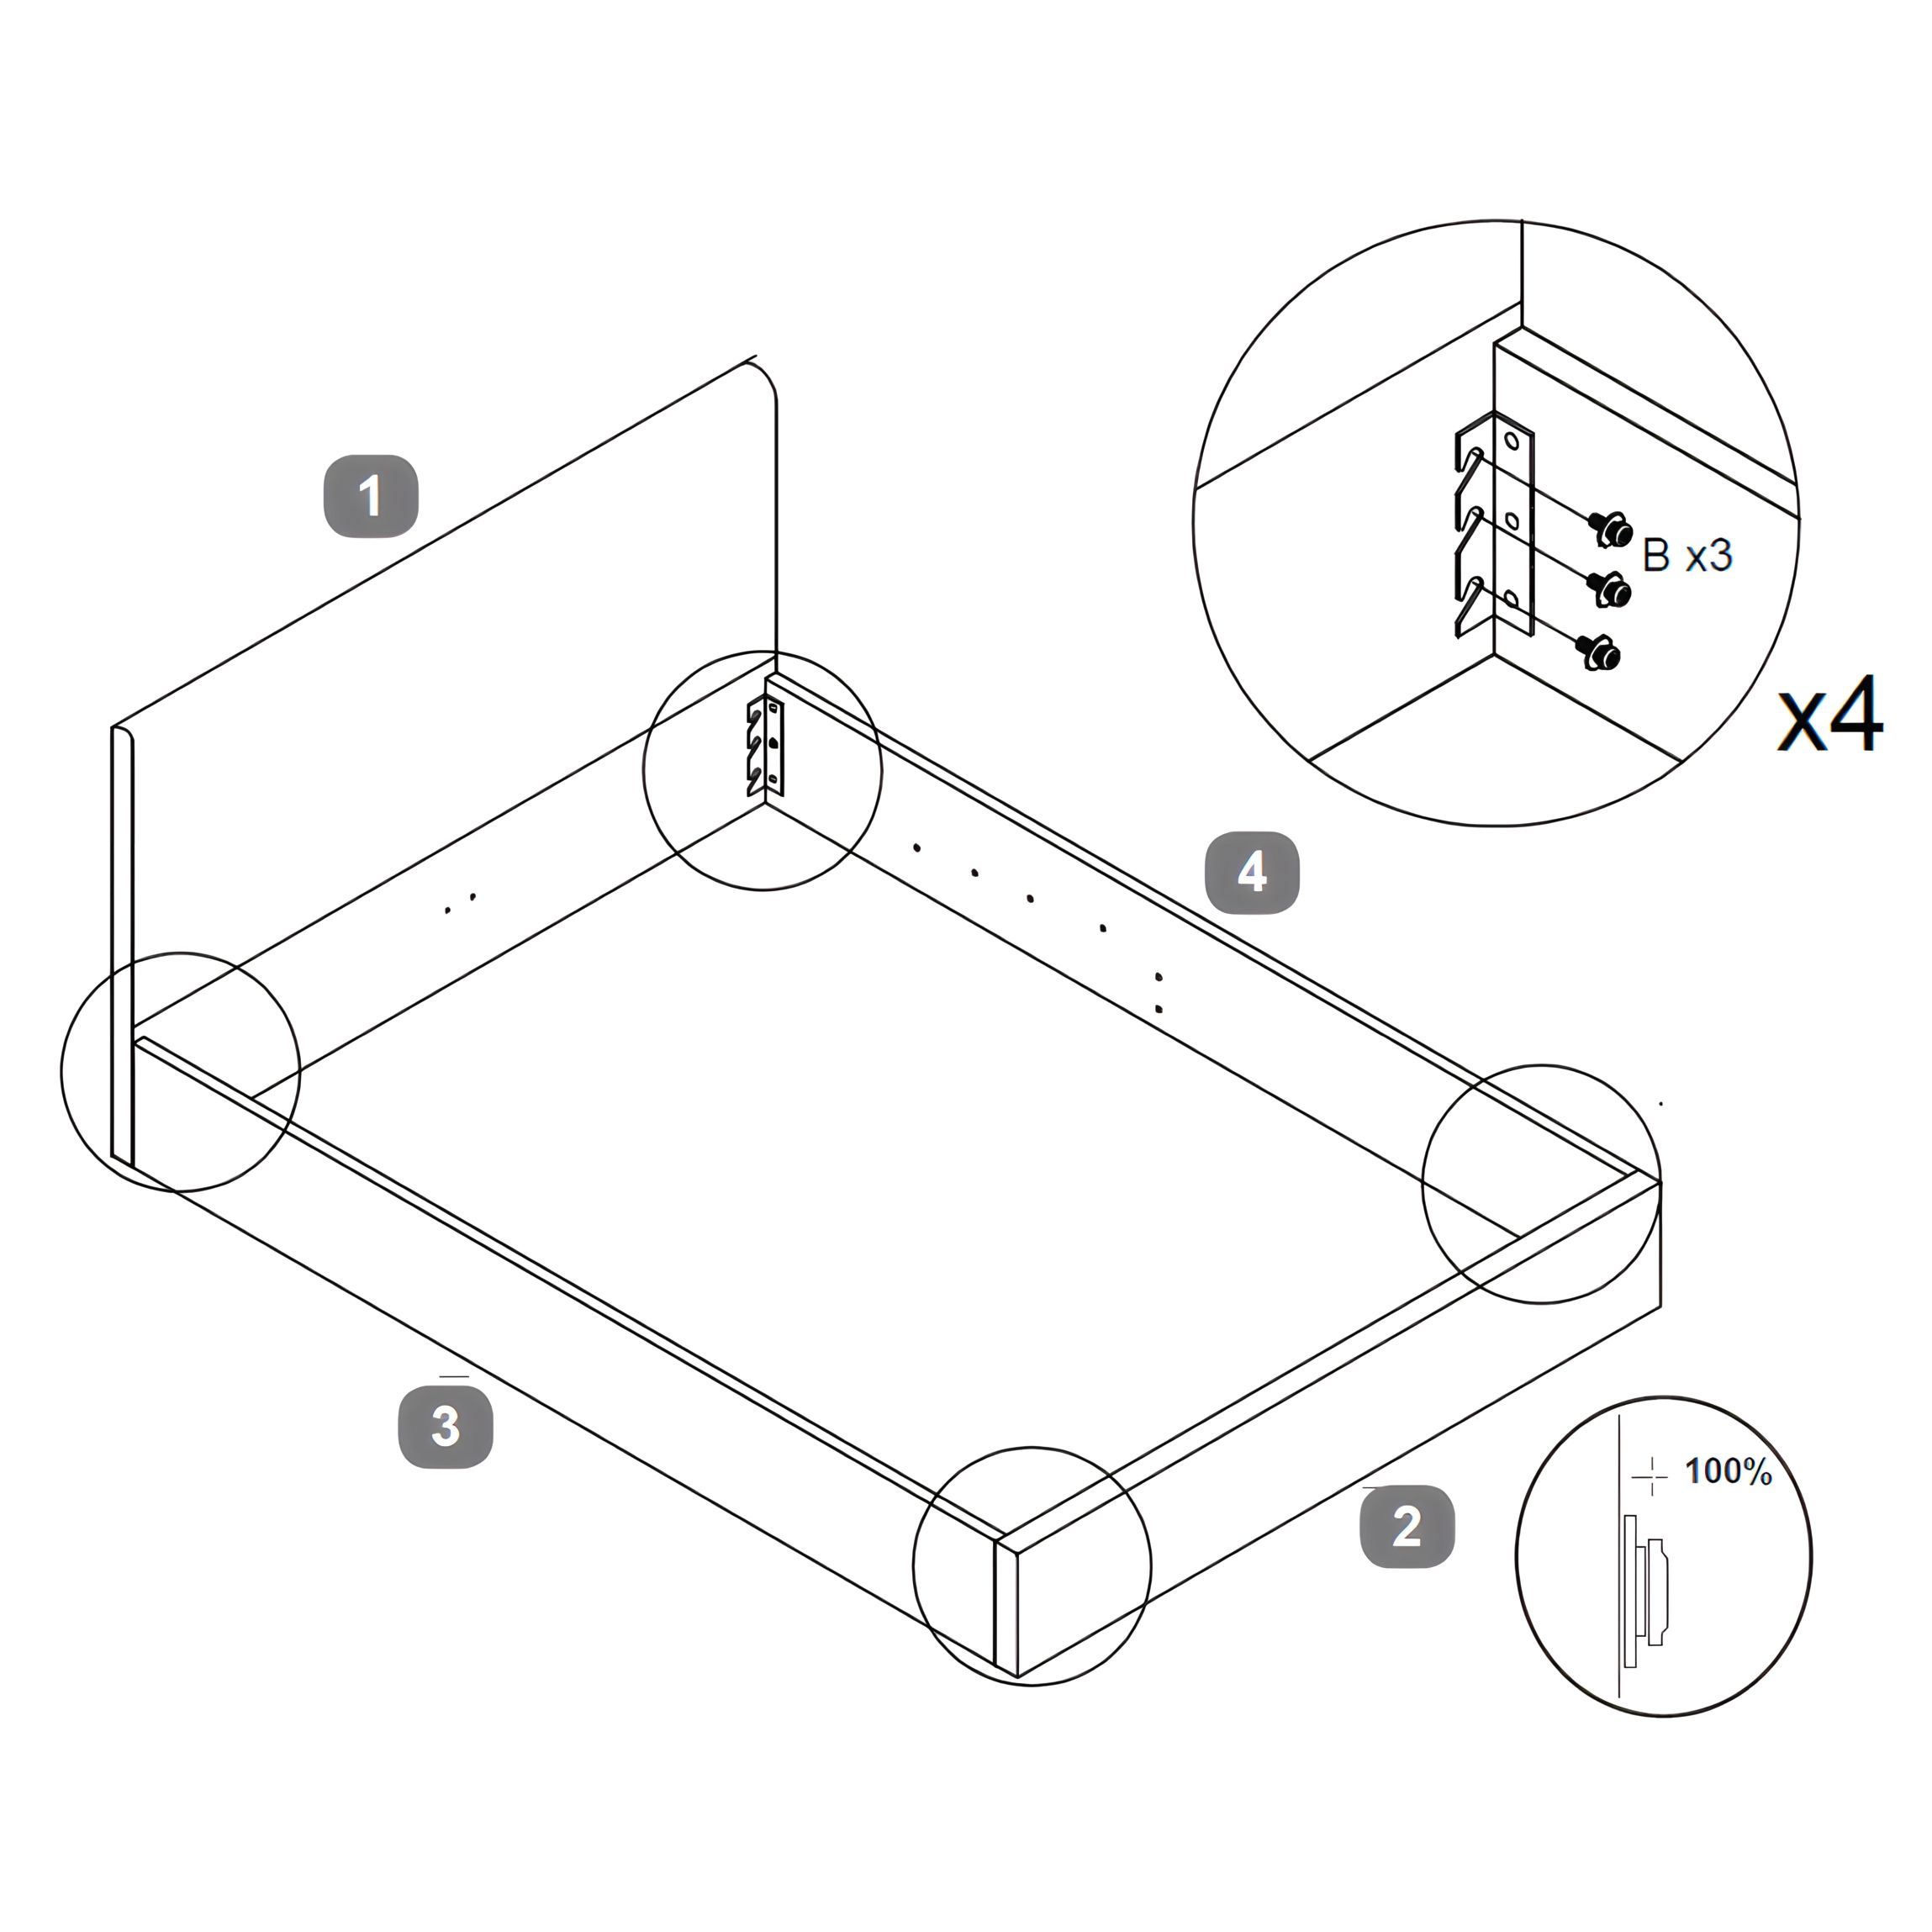
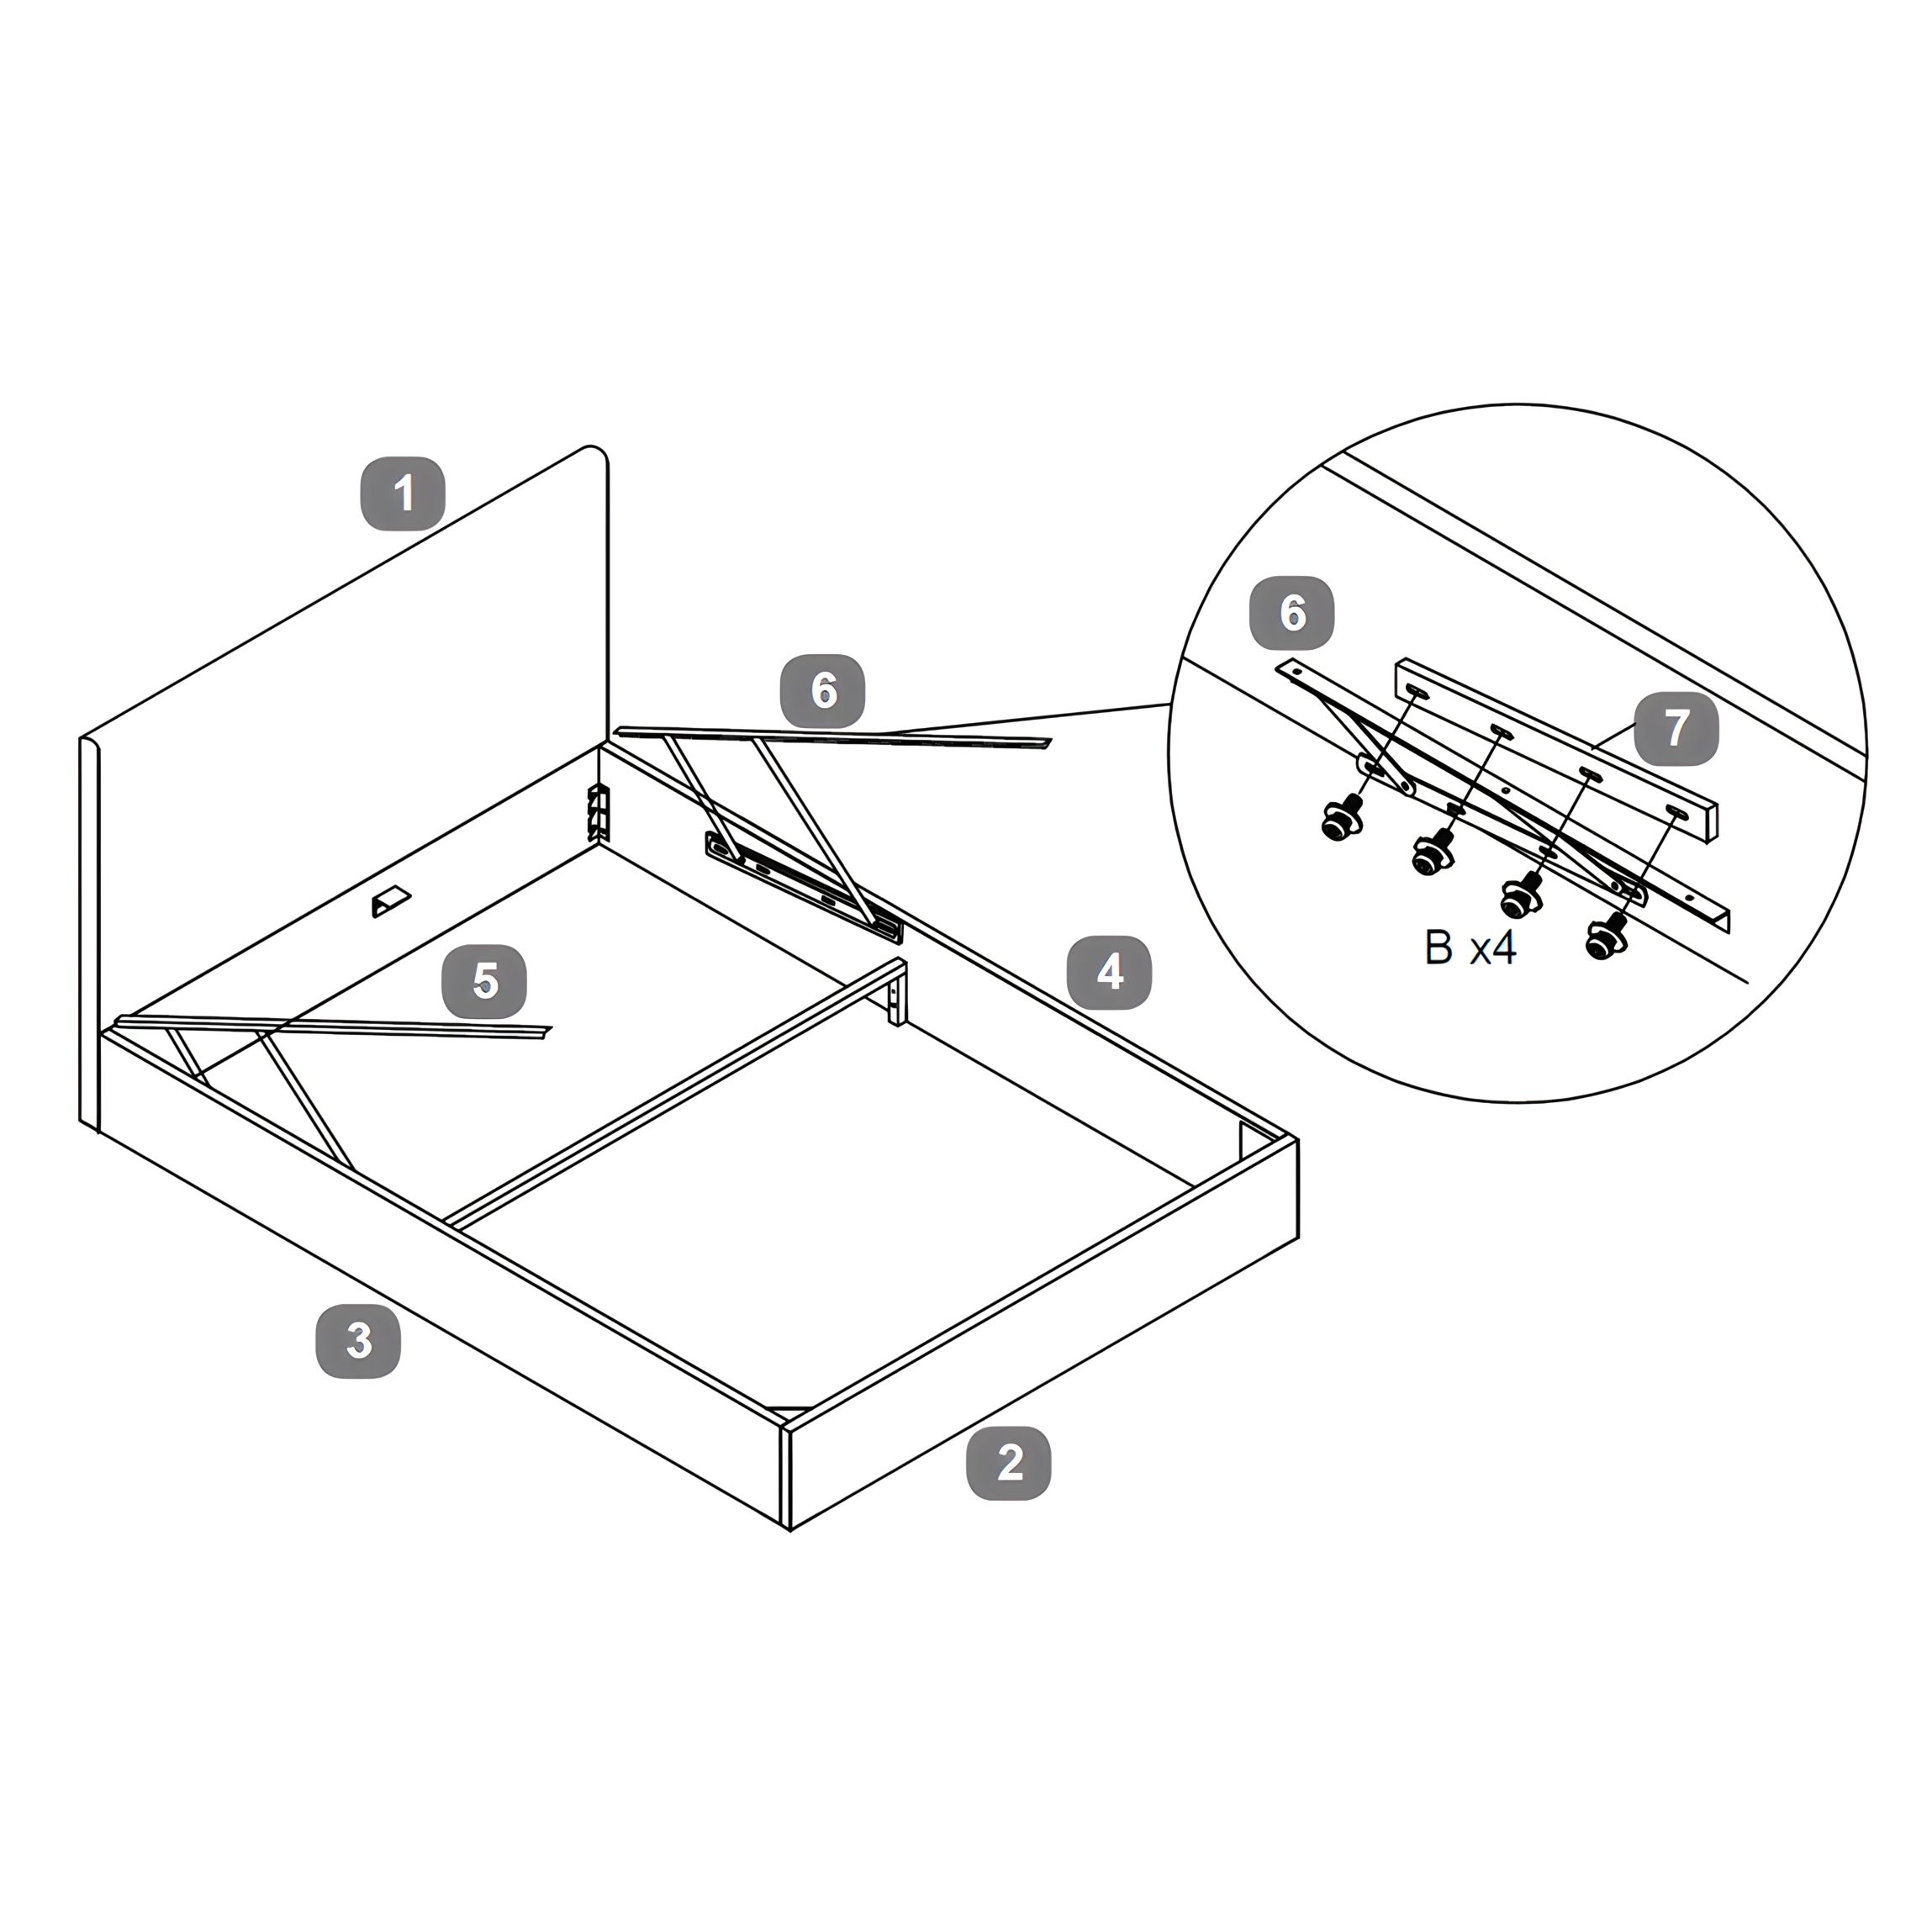
4. Install Frame Support Brackets and Cross Rails
1. Insert the Cross Rail for Metal Slat Frame – HB (11) and FB (12) into the notches on the Side Rails – LH (3) and RH (4). 2. Secure each end of the cross rails using 2 × Bolt (E) per rail. Tighten with the Allen Key (N). 3. Attach the Frame Support Brackets (16) to the center underside of the Headboard (1) and Footboard (2) using Bolt (F). 4. Ensure brackets are aligned vertically for proper load support.
Number of Bolt (F) per size:
Single / Small Double / Double / King: 4
Super King: 8
Frame Support Brackets (16) per size:
Single / Small Double / Double / King: 2
Super King: 4
5. Attach Corner Brackets and Base Cover
1. Secure one Angled Corner Bracket (9) to each interior corner where the Side Rails – LH (3) and RH (4) meet the Footboard (2), using 2 × Bolt (F) per bracket. 2. Tighten all bolts using the Allen Key (N) to ensure the brackets are firmly fixed. 3. Fit the Fabric Base Cover (17) evenly around the inside of the bed frame, tucking it neatly against the inner edges of the sides.
6. Assemble Slat Frame Structure
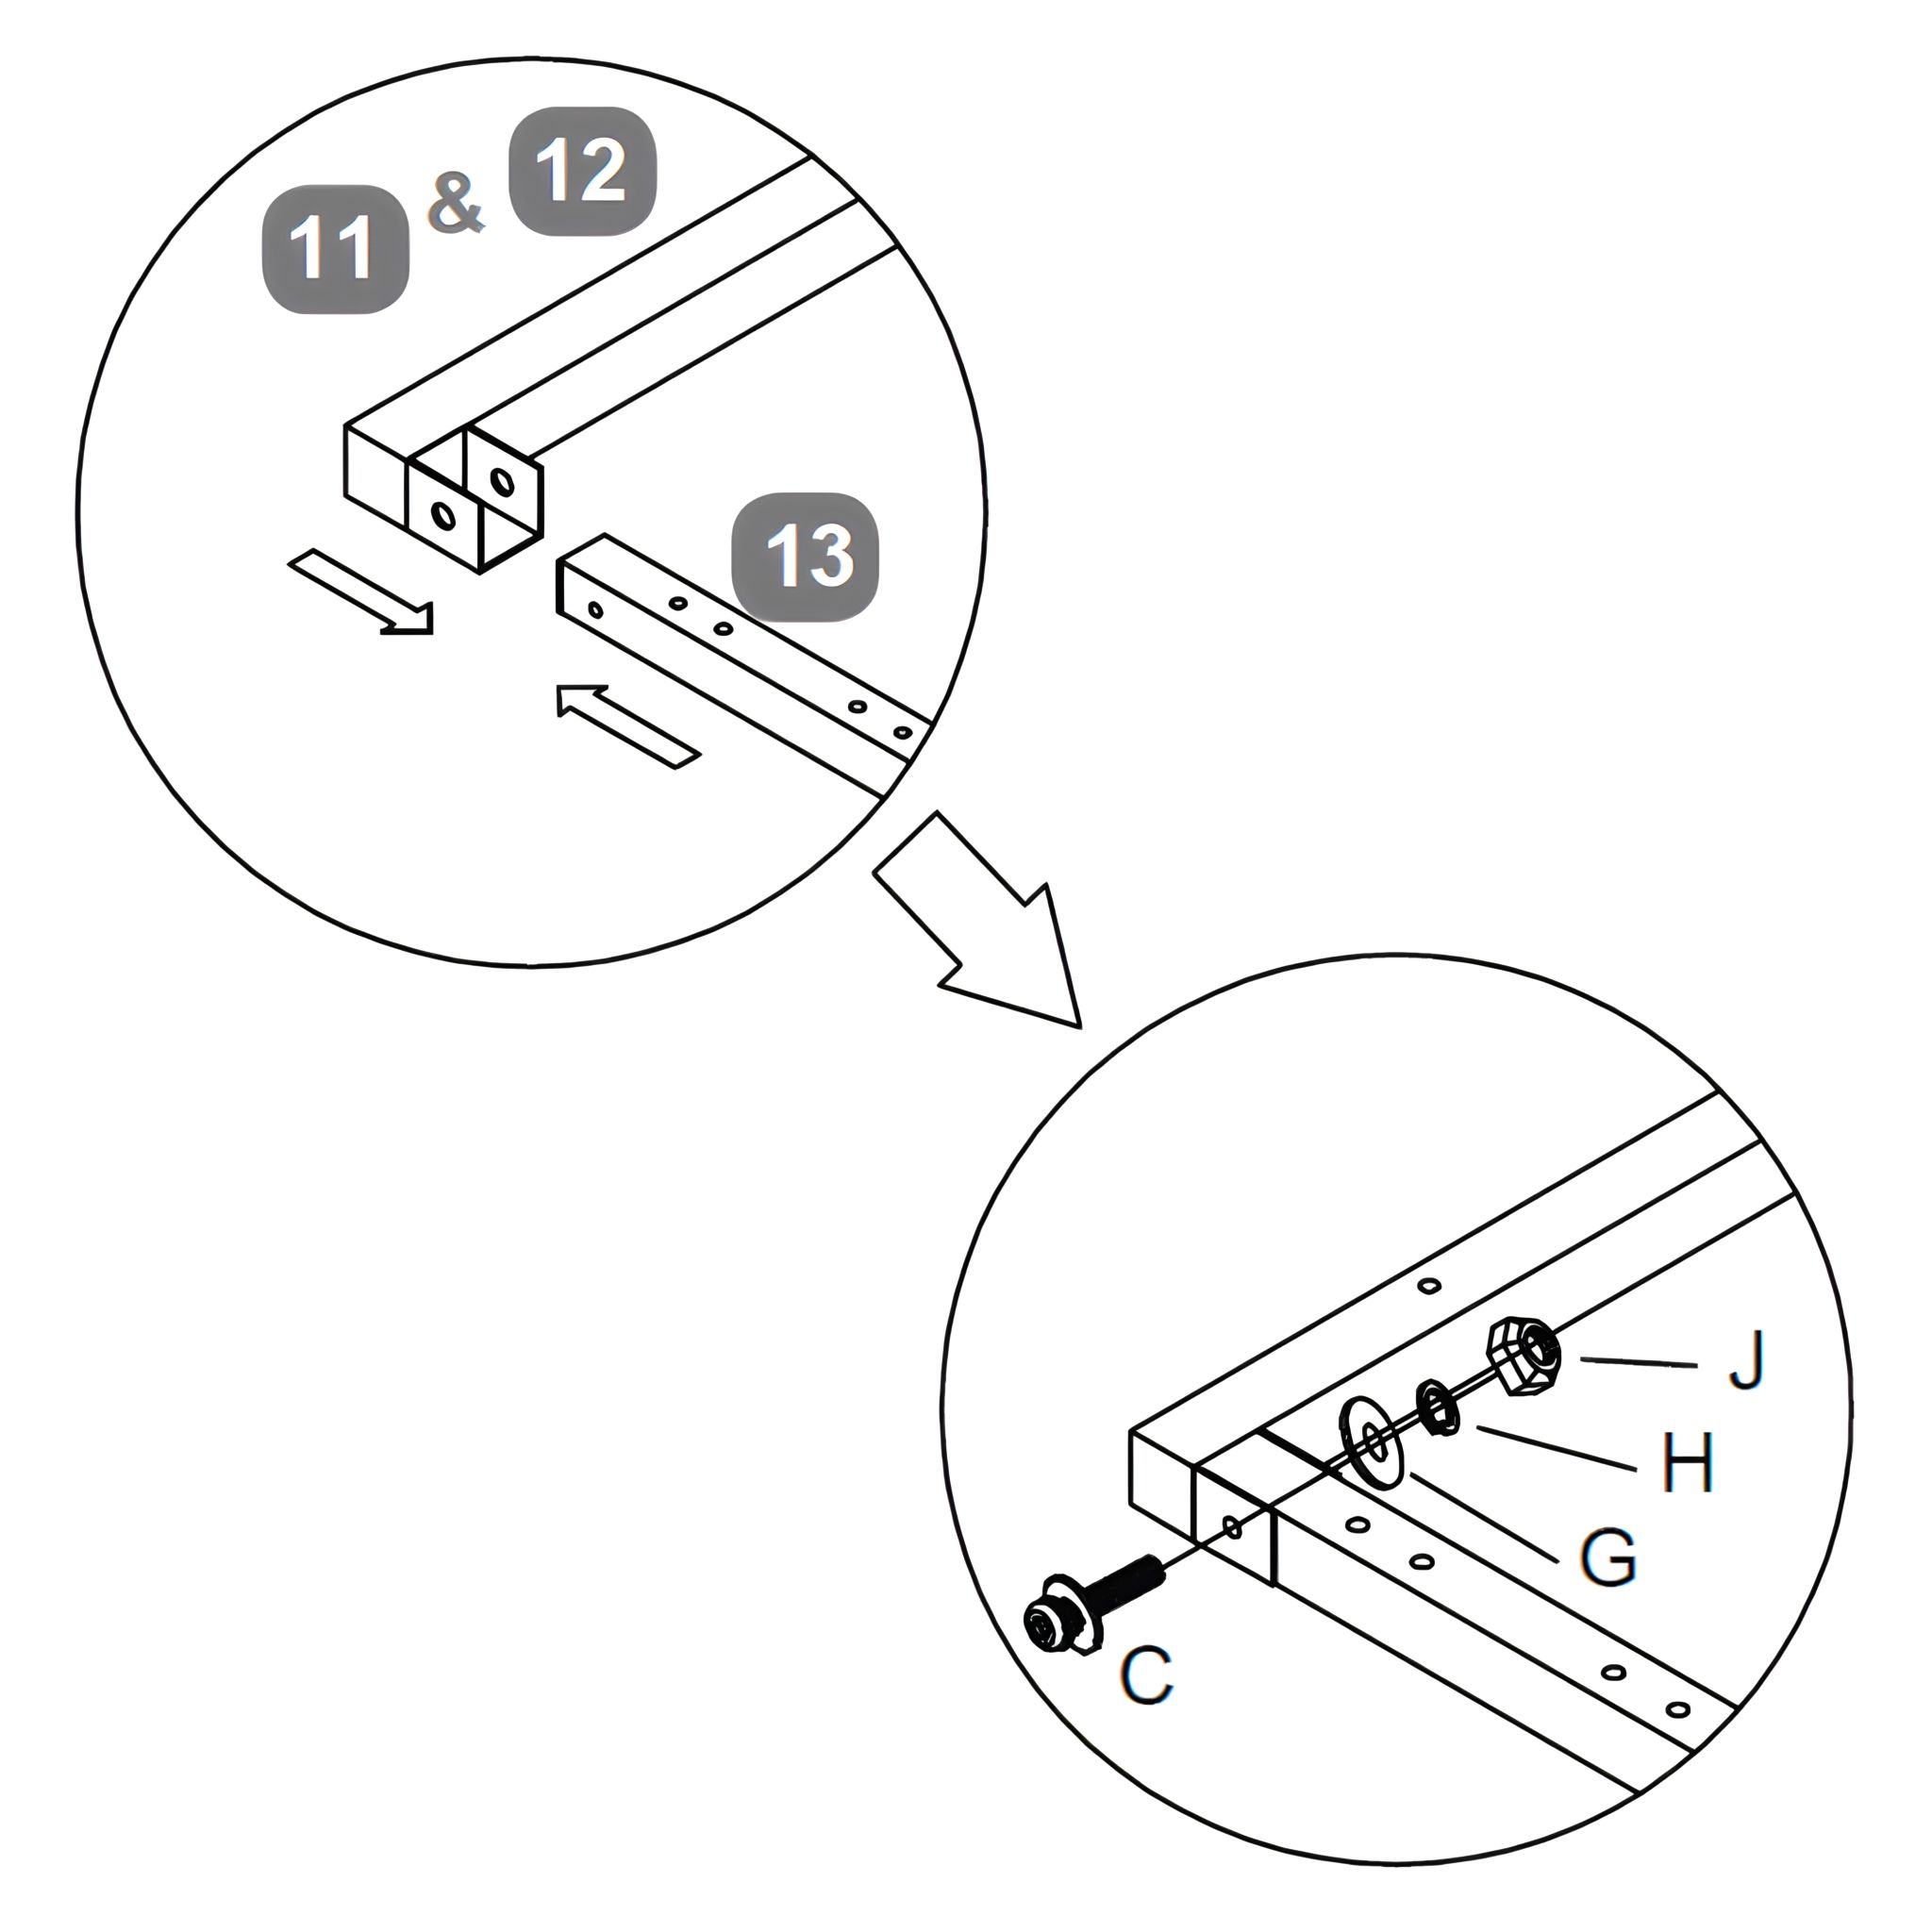
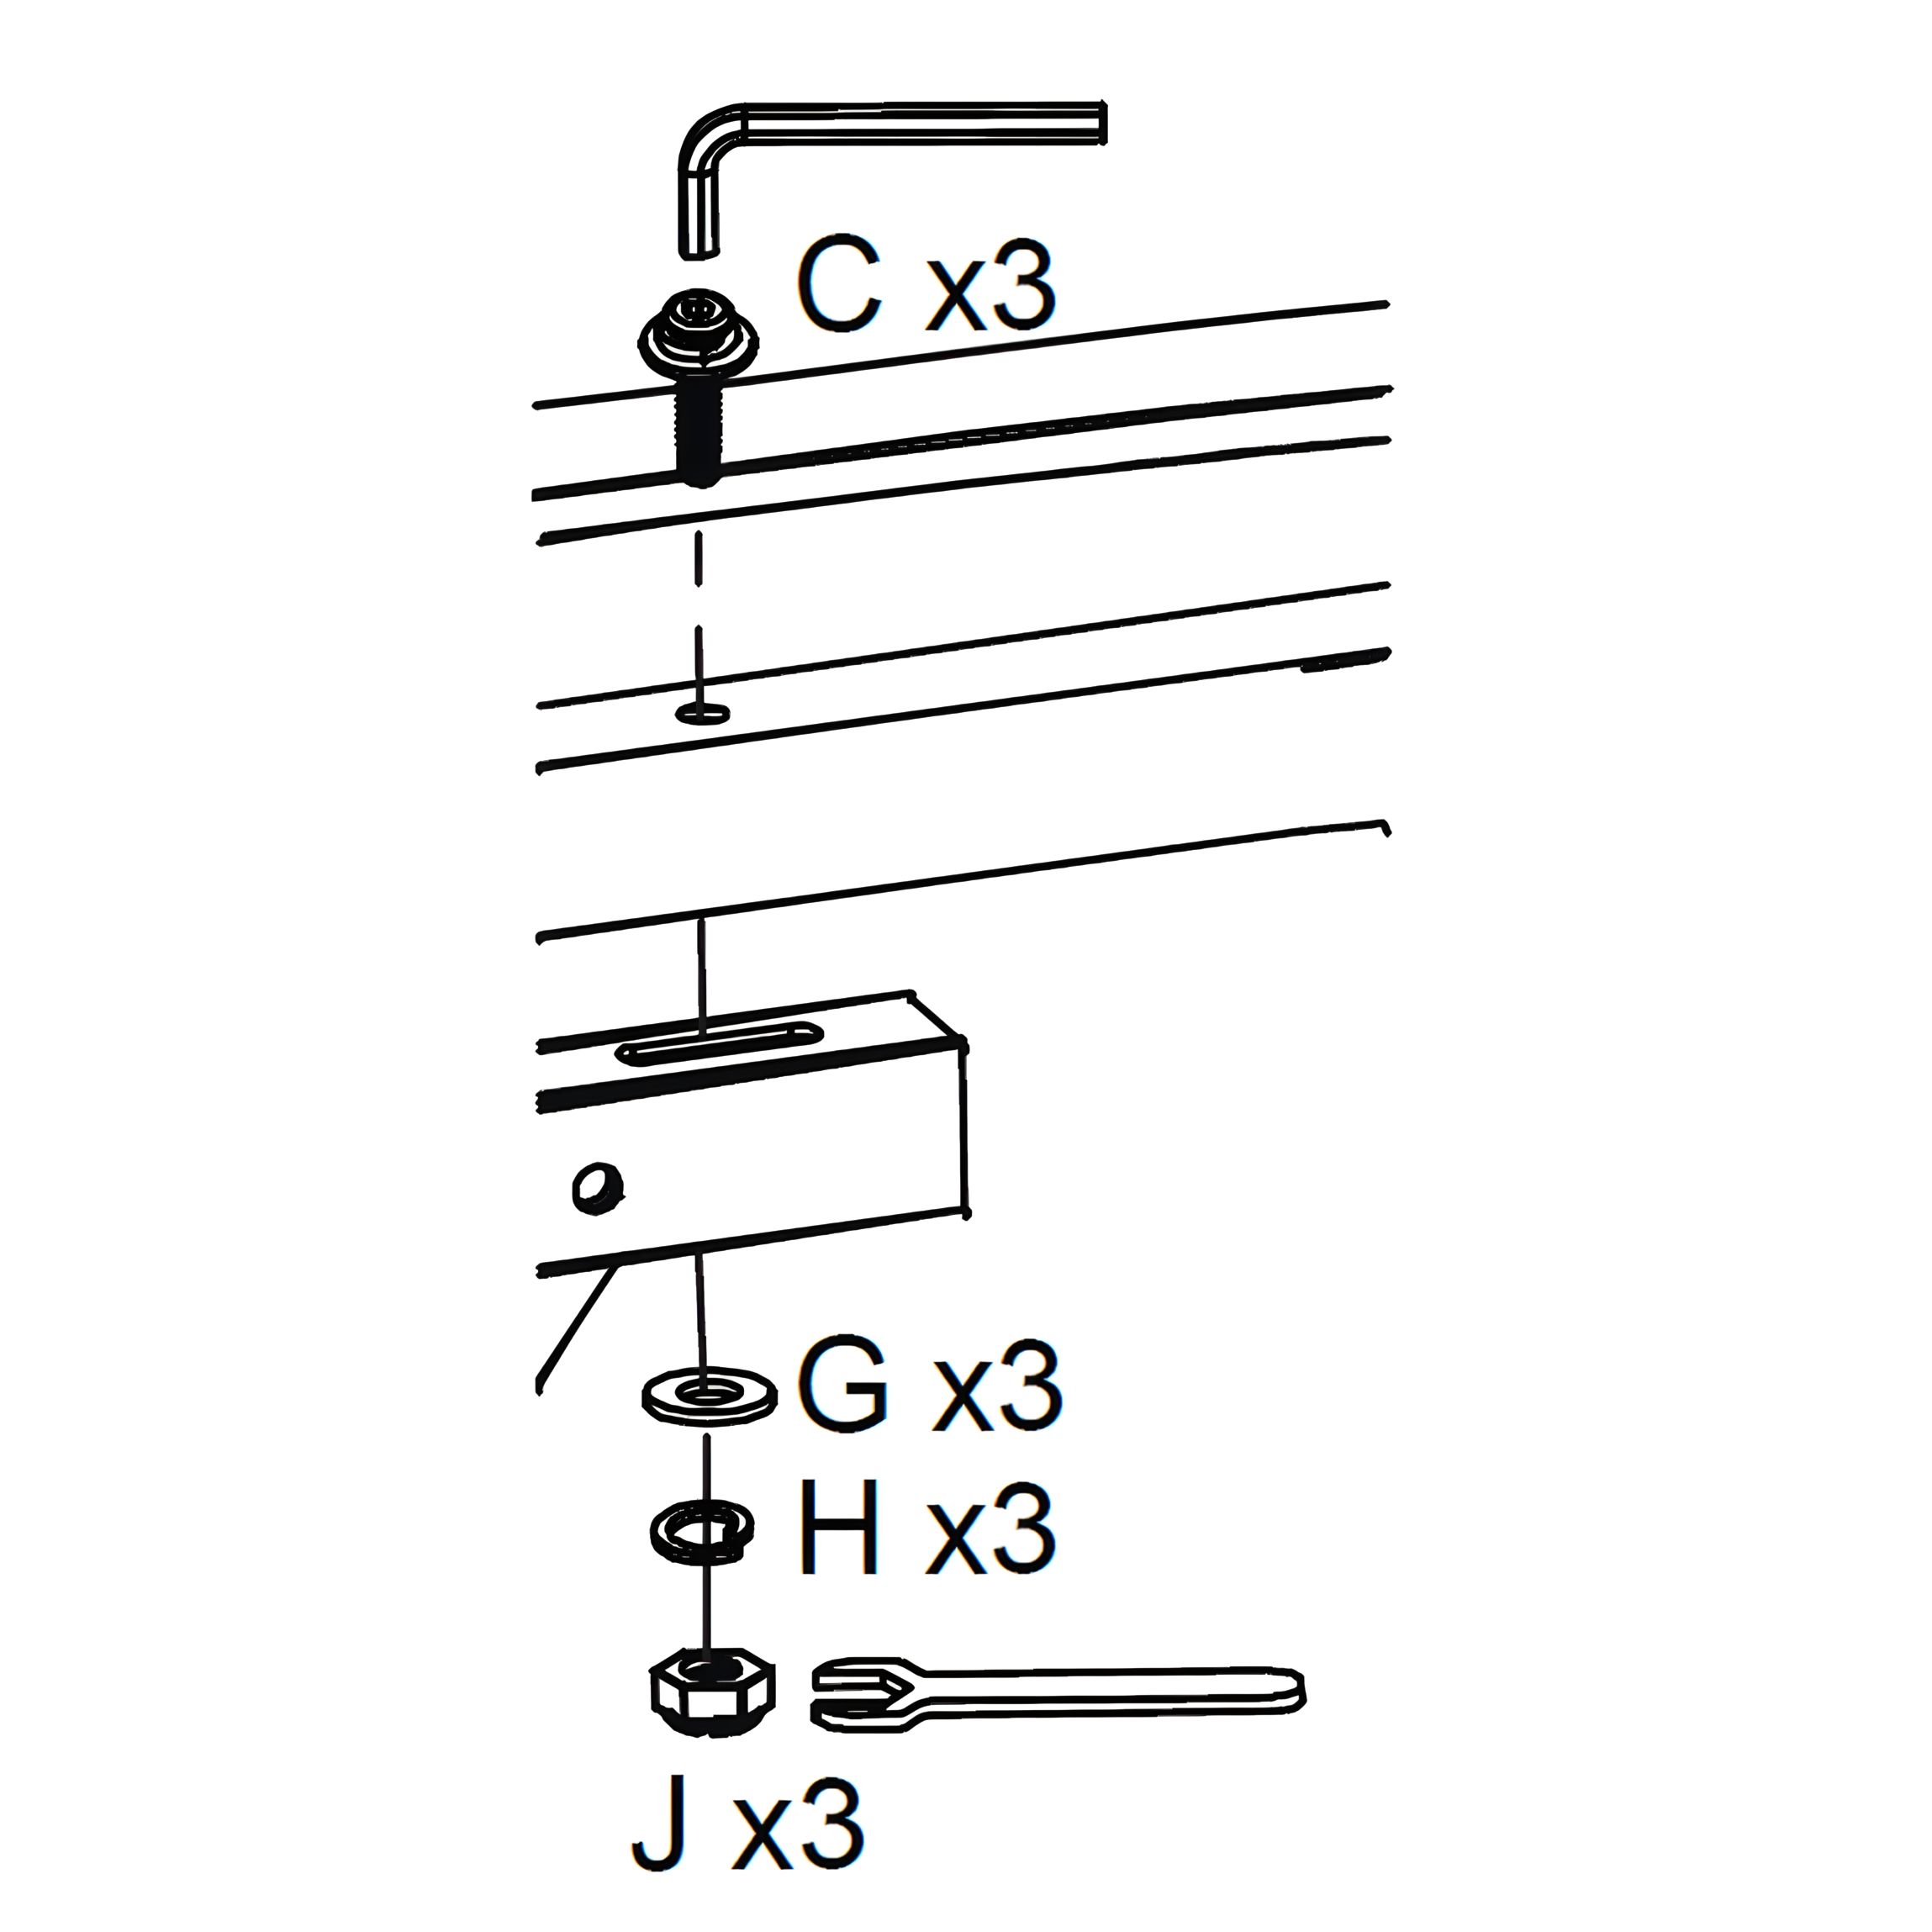
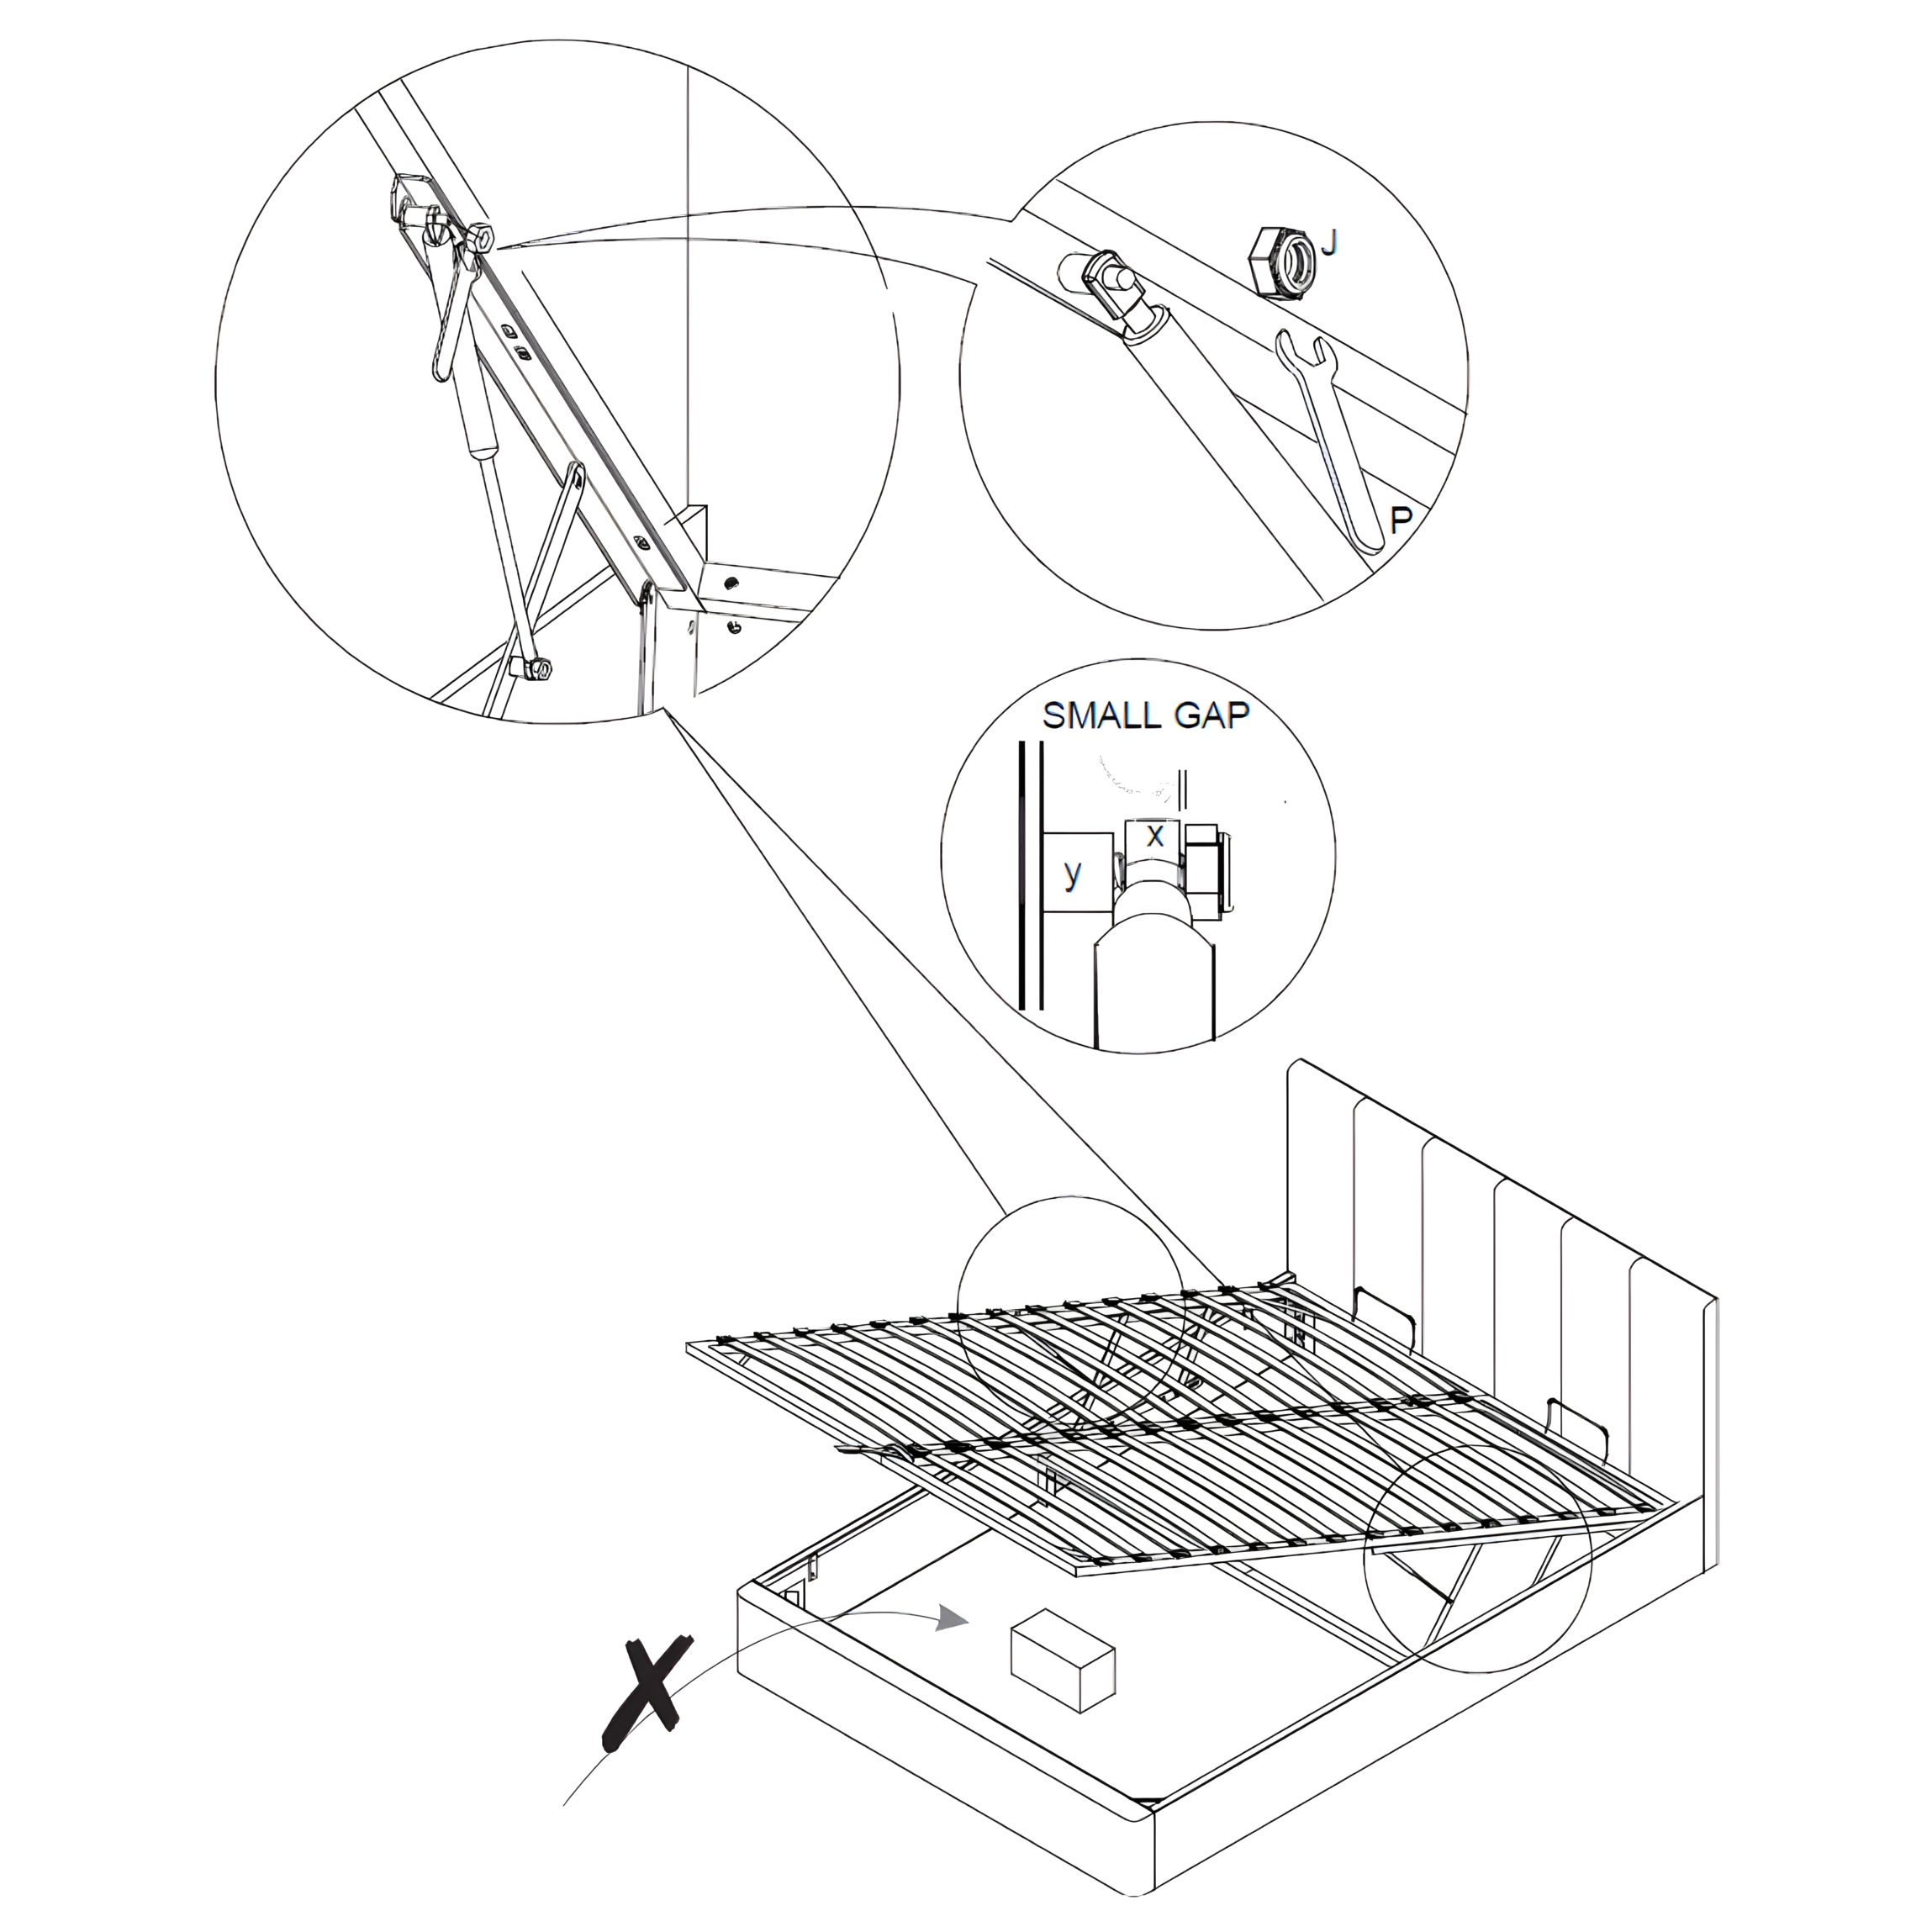
1. Position the Cross Rail for Metal Slat Frame – HB (11) and FB (12) on a flat surface. This view is from underneath the slat frame. 2. Slide the required number of Side Rails for Metal Slat Frame (13) between the cross rails, aligning the holes. 3. In the three or more long tubes (13), the many slat cap holes should face downward, touching the floor. From underneath, you should only see the alignment holes — 13 for Small Double/Double/King, 13 for Single, or 16 for Super King — that are marked within the boxed lines. 4. Ensure that the split joints in the short end tubes (11 & 12) are pointing upward. 5. Secure each connection using Bolt (C) along with a Flat Washer (G), Spring Washer (H), and Nut (J). 6. Tighten all connections using the Allen Key (M) and Spanner (P) to complete the frame structure
7. Fit Slats and Caps to Slat Frame
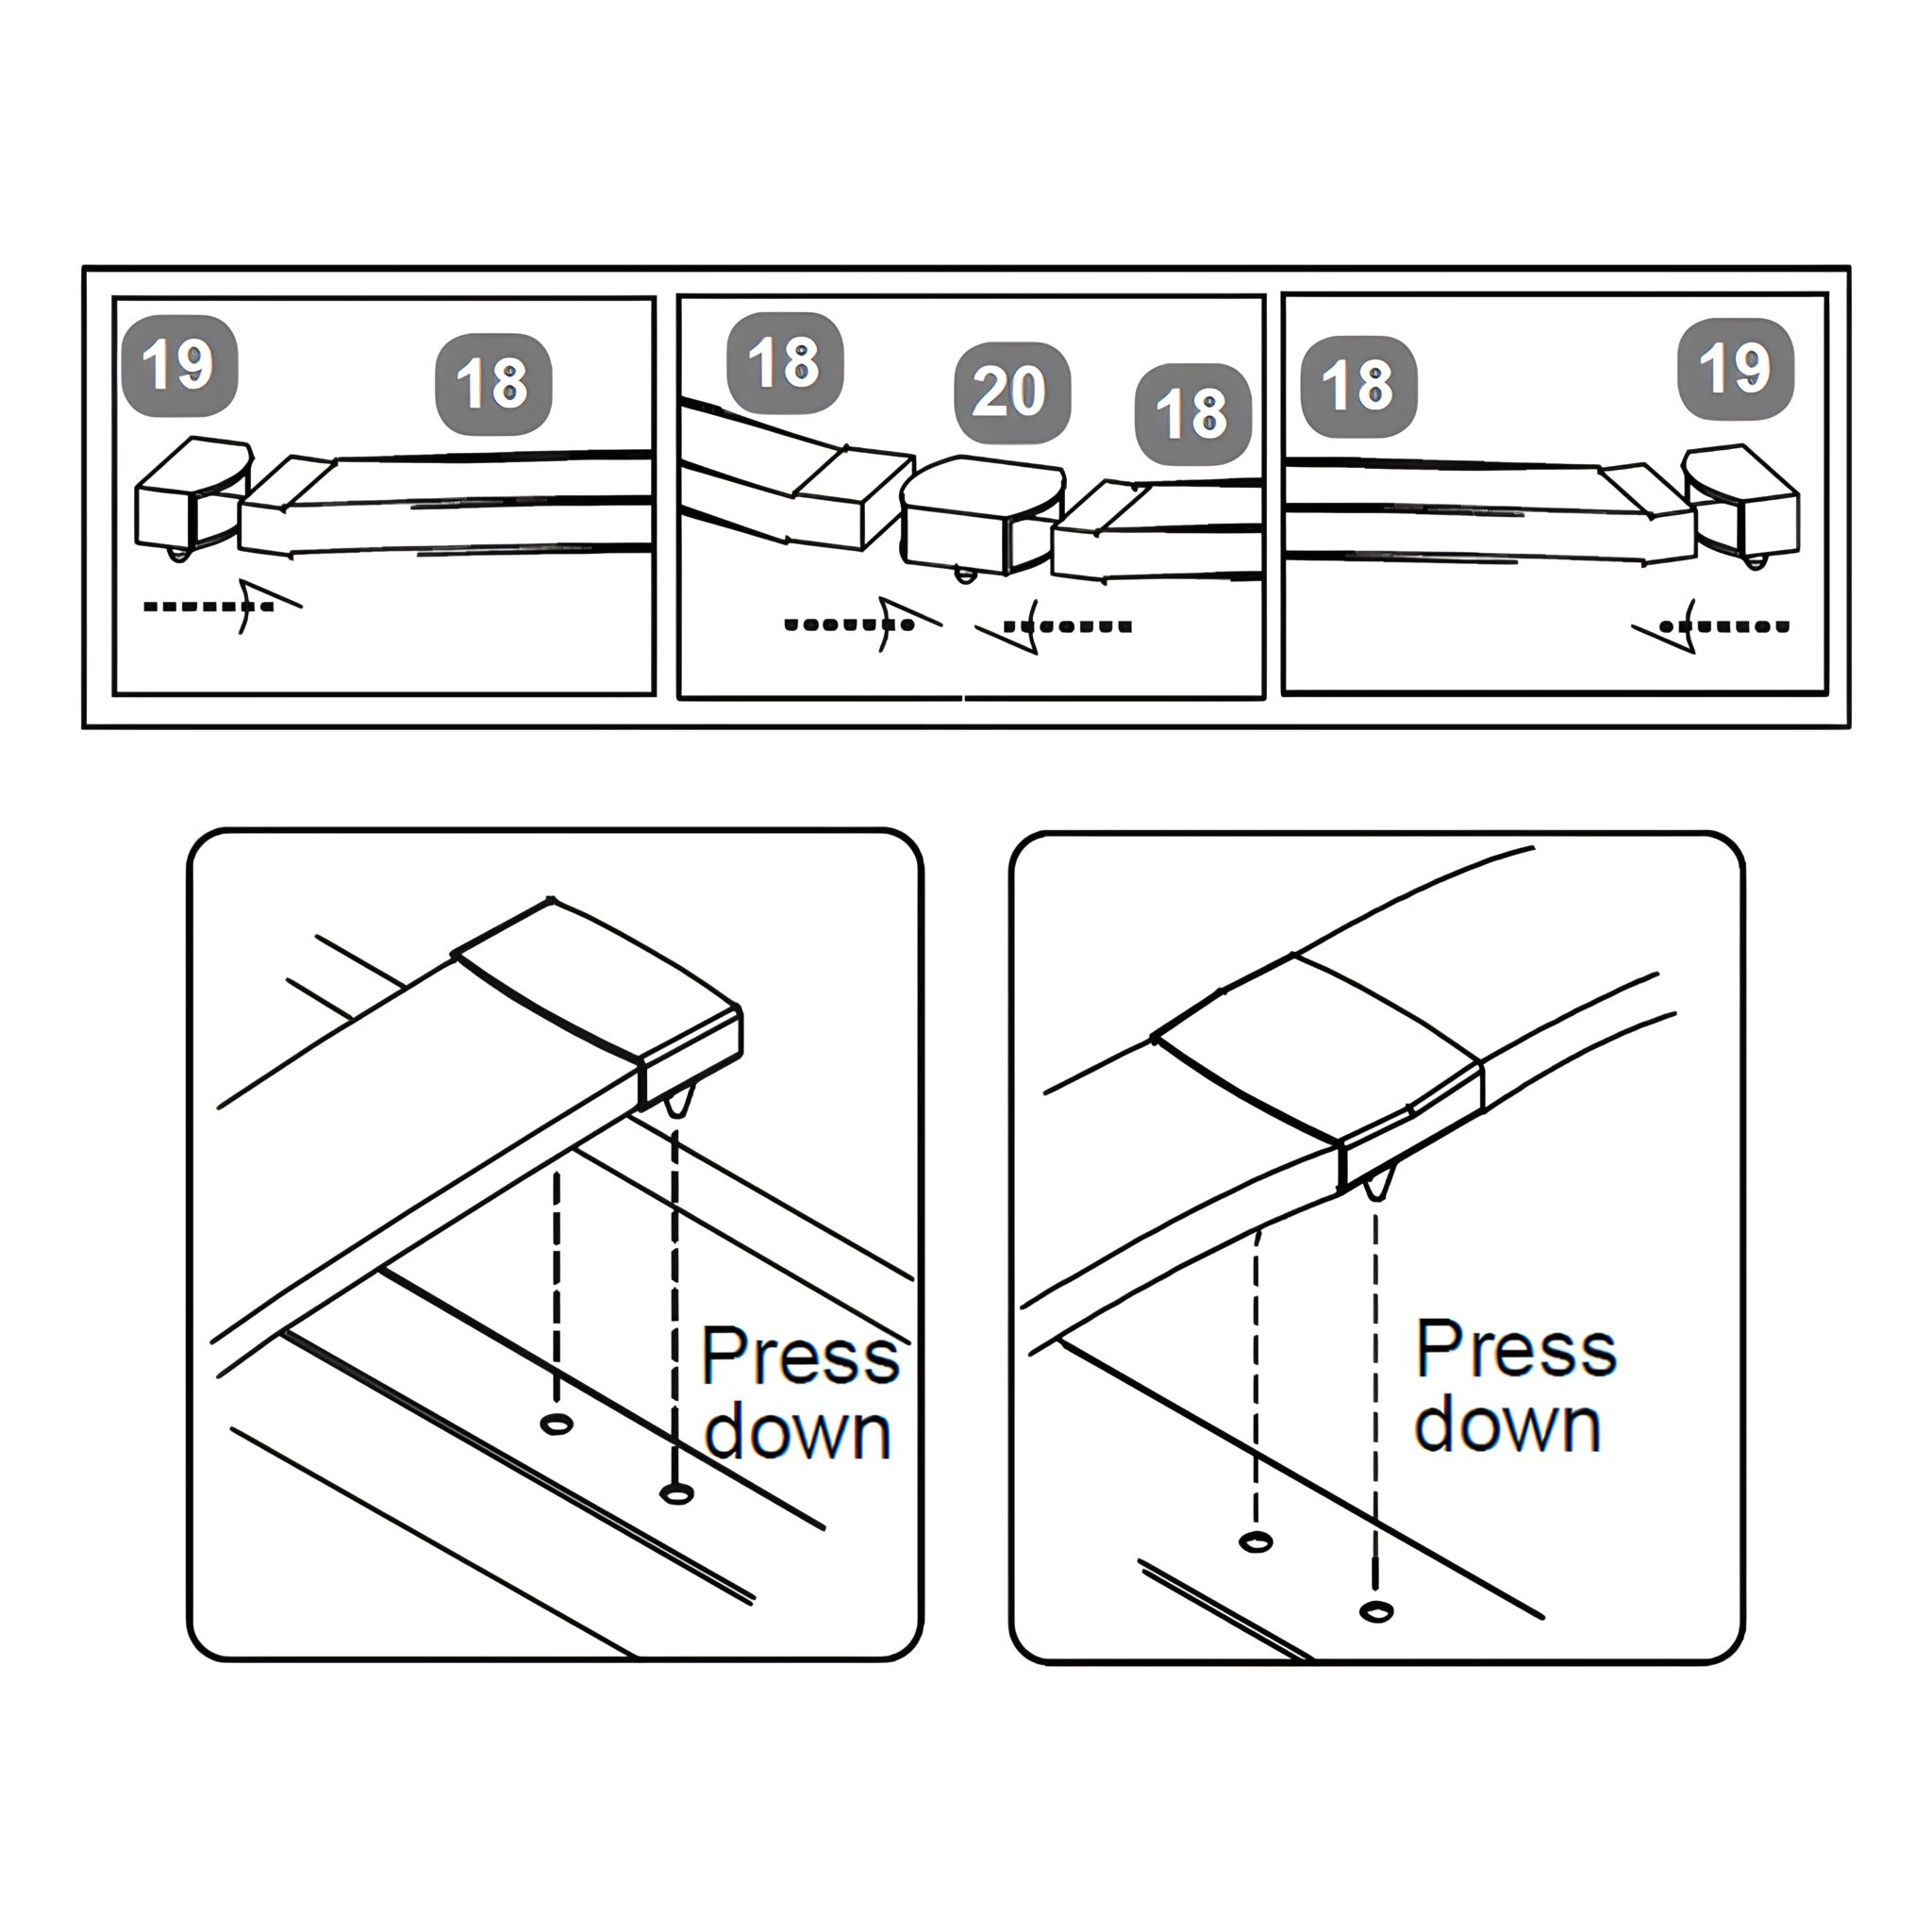
1. After assembling the frame, please turn it over. 2. Fit one Single Plastic Cap (19) to each end of the Bentwood Slats (18) by angling the cap and pressing firmly onto the slat. 3. For middle slats (where applicable), use Double Plastic Caps (20) to connect adjacent slats before pressing them into place. 4. Insert each capped slat into the pre-drilled holes on the metal side rails (13), then press down until securely fixed. 5. Repeat for all slats across the full width of the frame. 6. Attach the Fabric Hand Strap (10) to the central slat using the designated loop and fixing point.
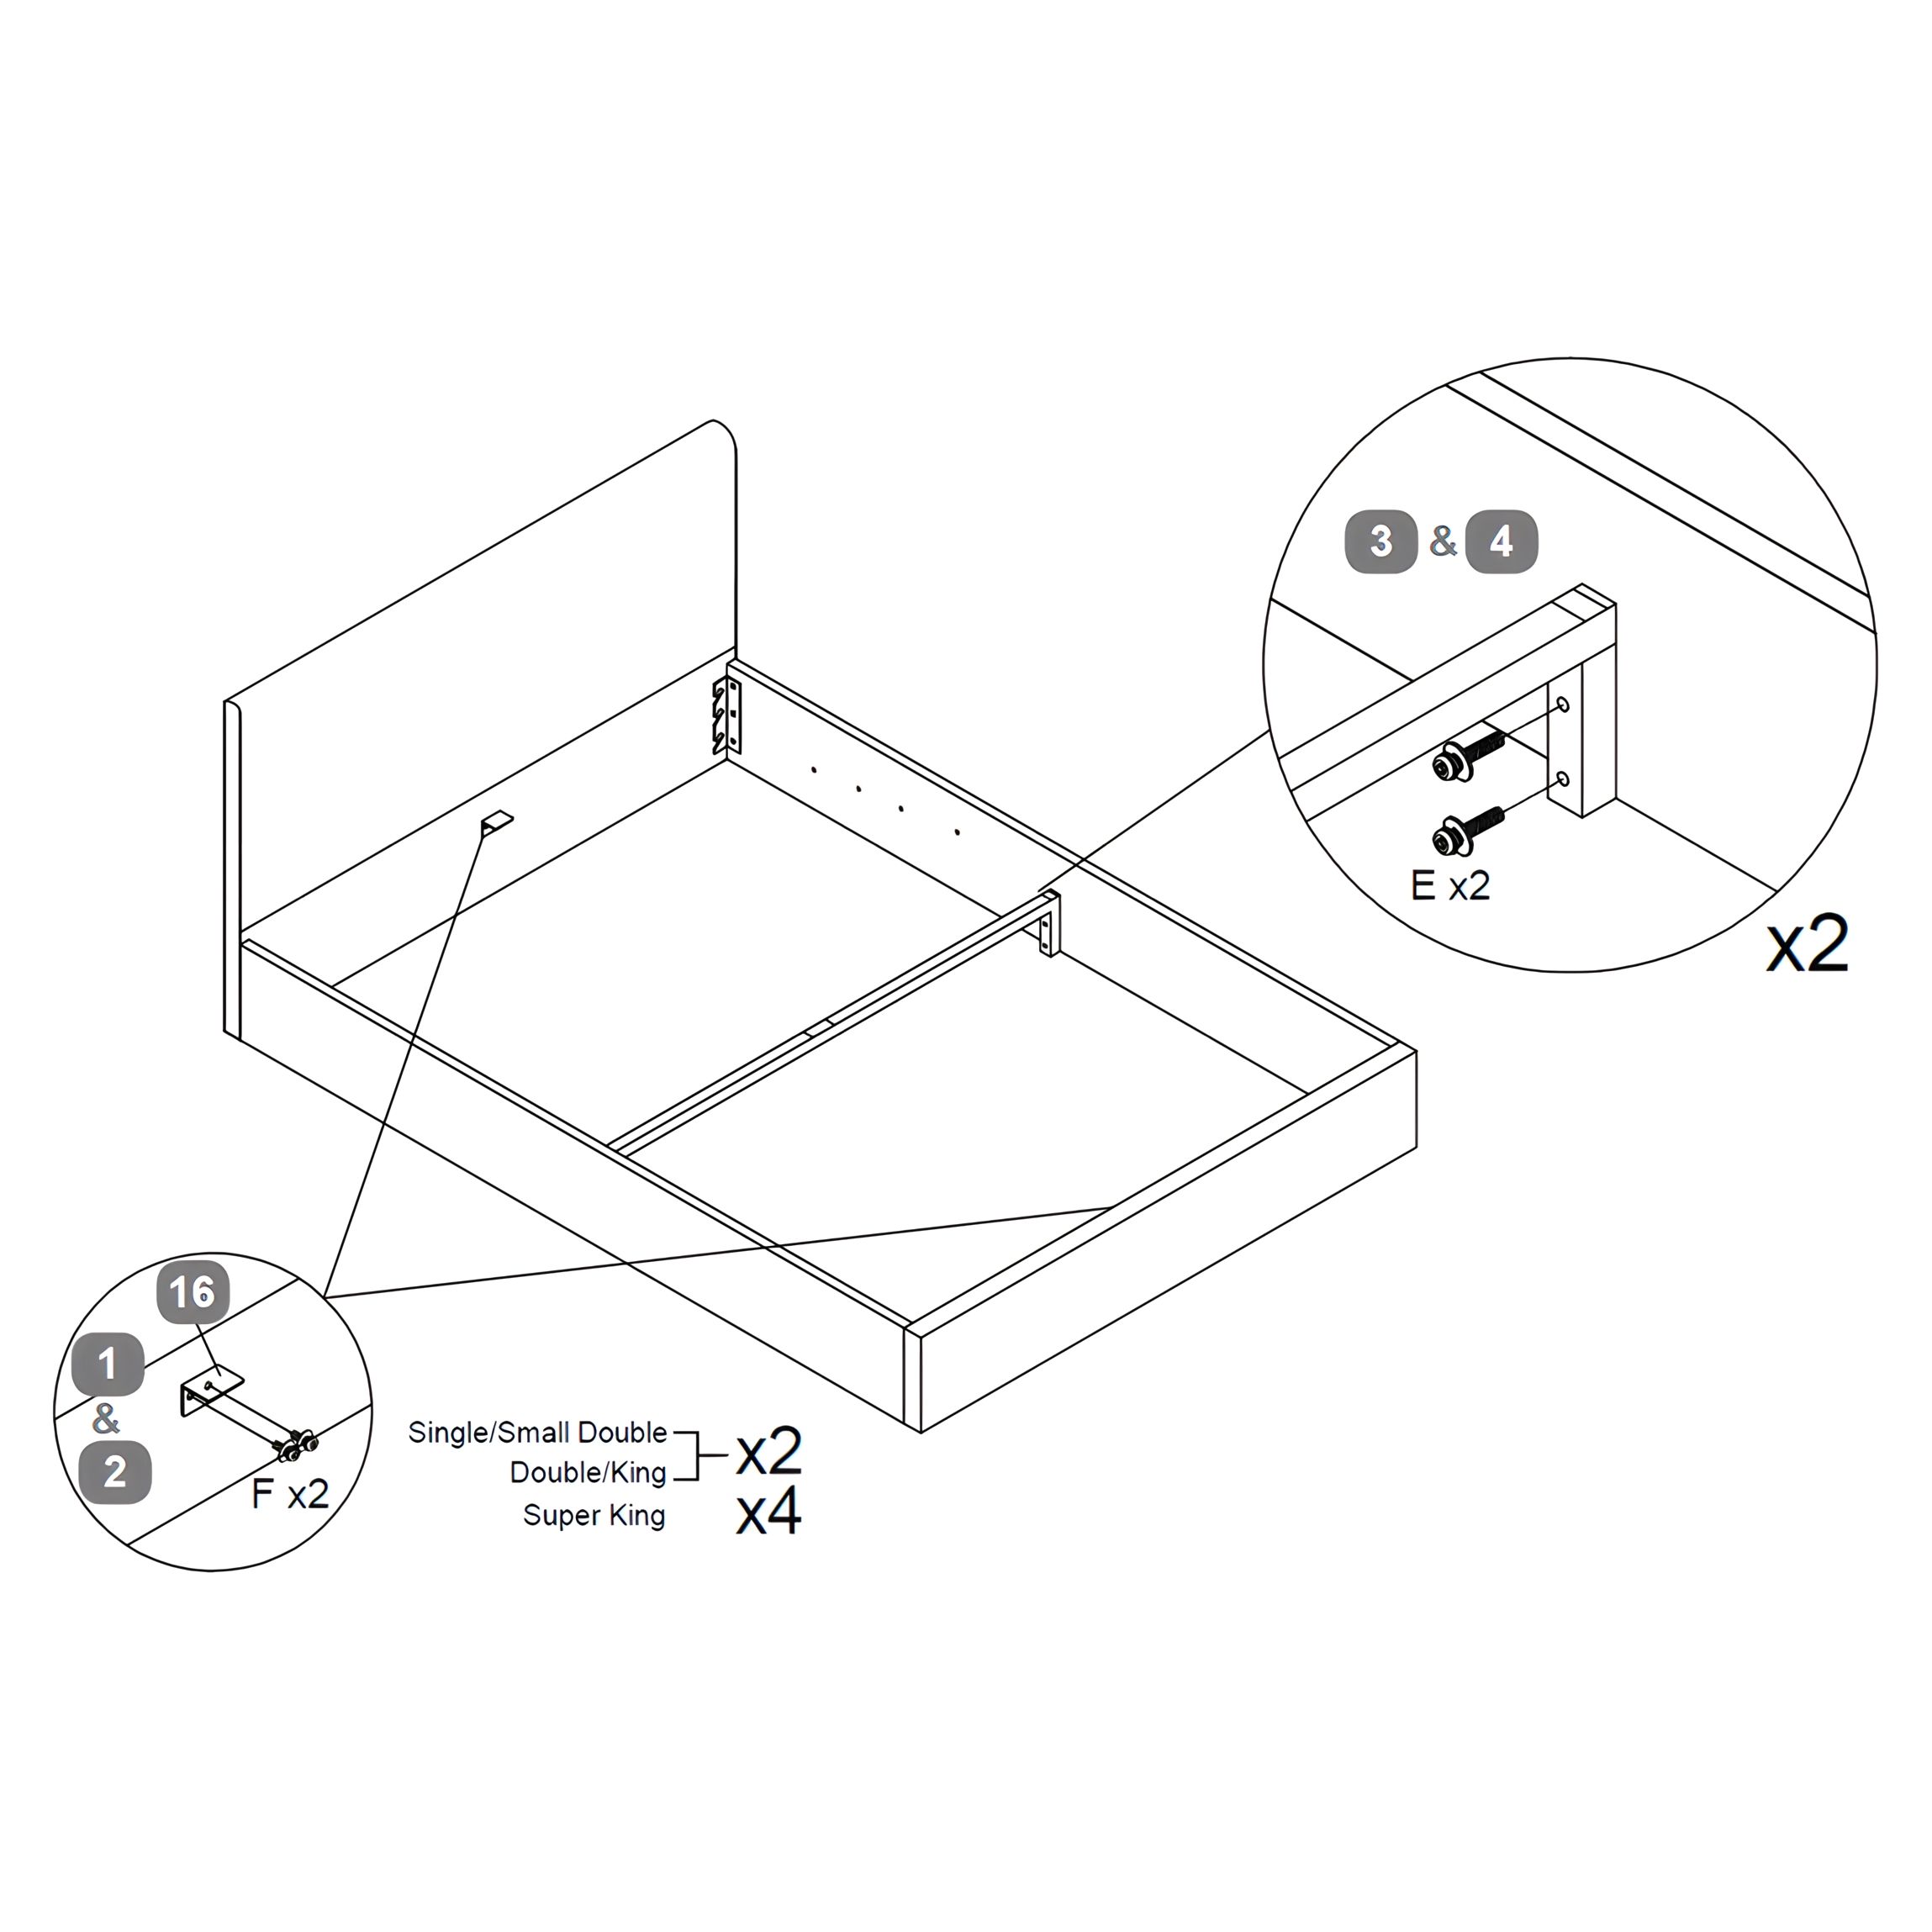
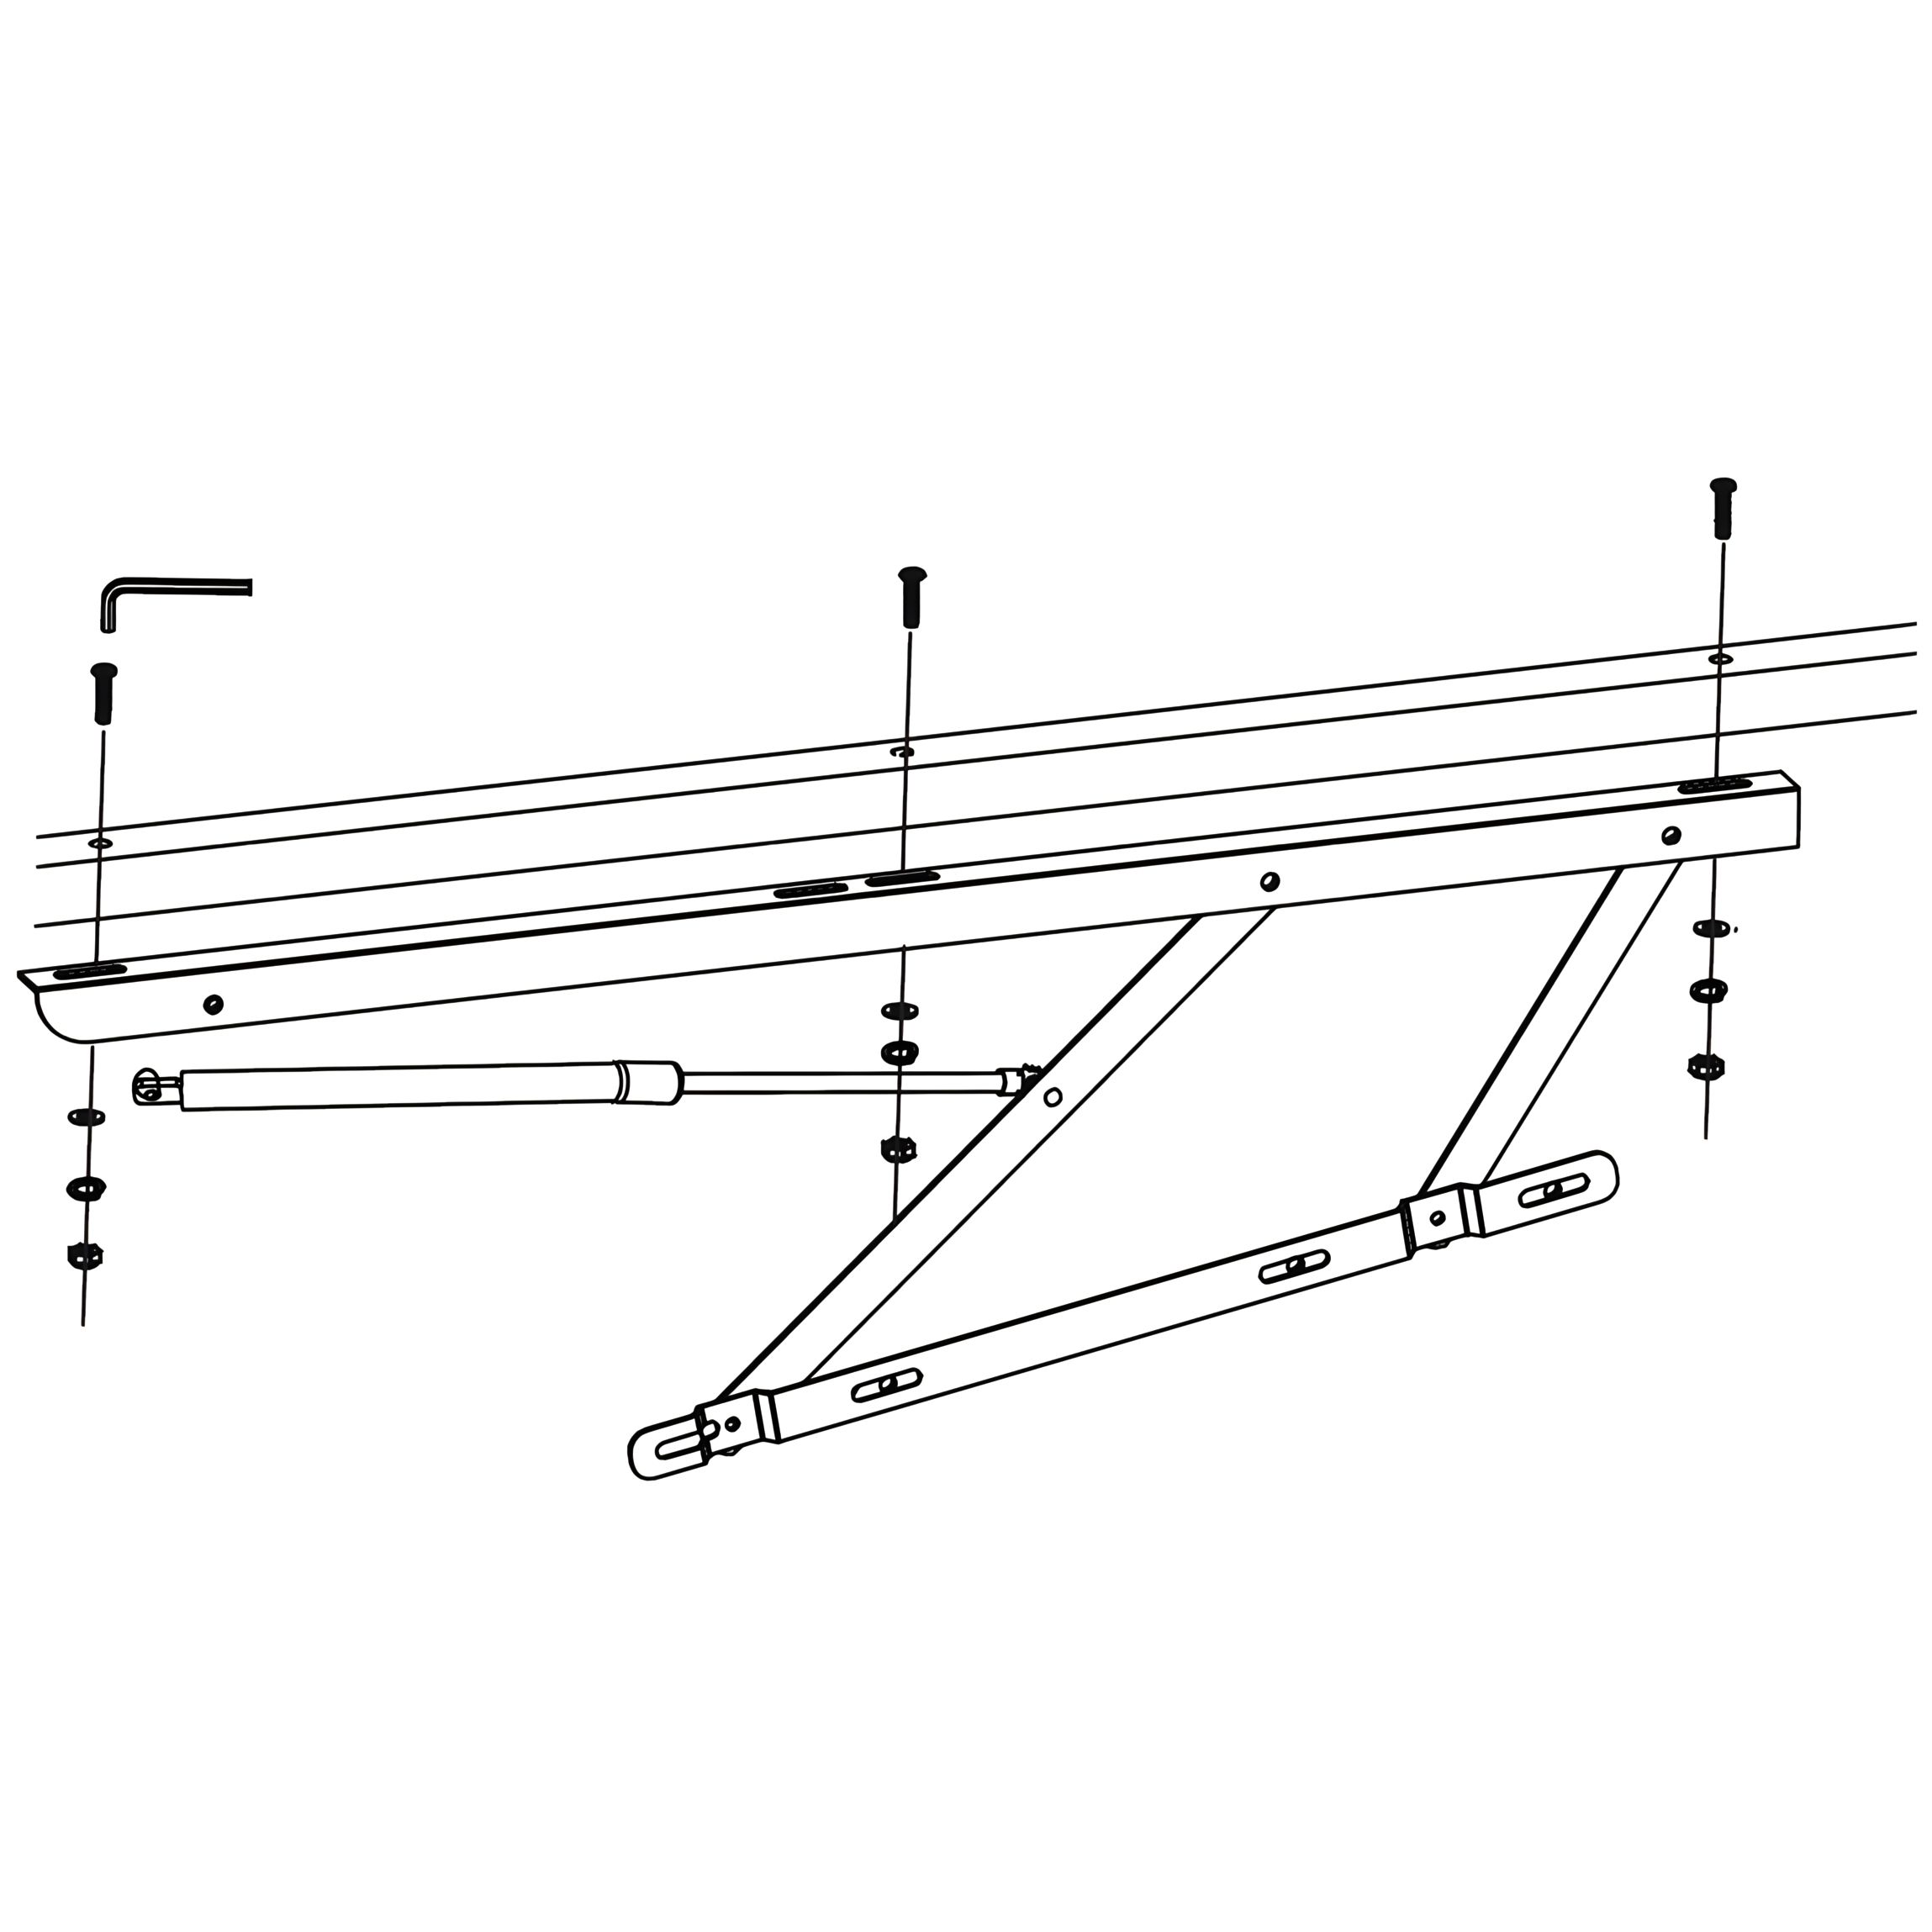
8. Install Lift Mechanism and Spacer Rails
1. Position the Lift Mechanism – LH (5) and RH (6) inside the bed frame along the inner side rails. 2. Align the lower section of each lift arm with the pre-drilled holes on the Side Rail – LH (3) and RH (4). 3. Place the Spacer Rails (7) between the bed frame and lift mechanism brackets. 4. Secure each bracket using 4 × Bolt (B) per side. 5. Tighten all bolts using the Allen Key (M) to ensure the lift arms and spacer rails are securely attached.
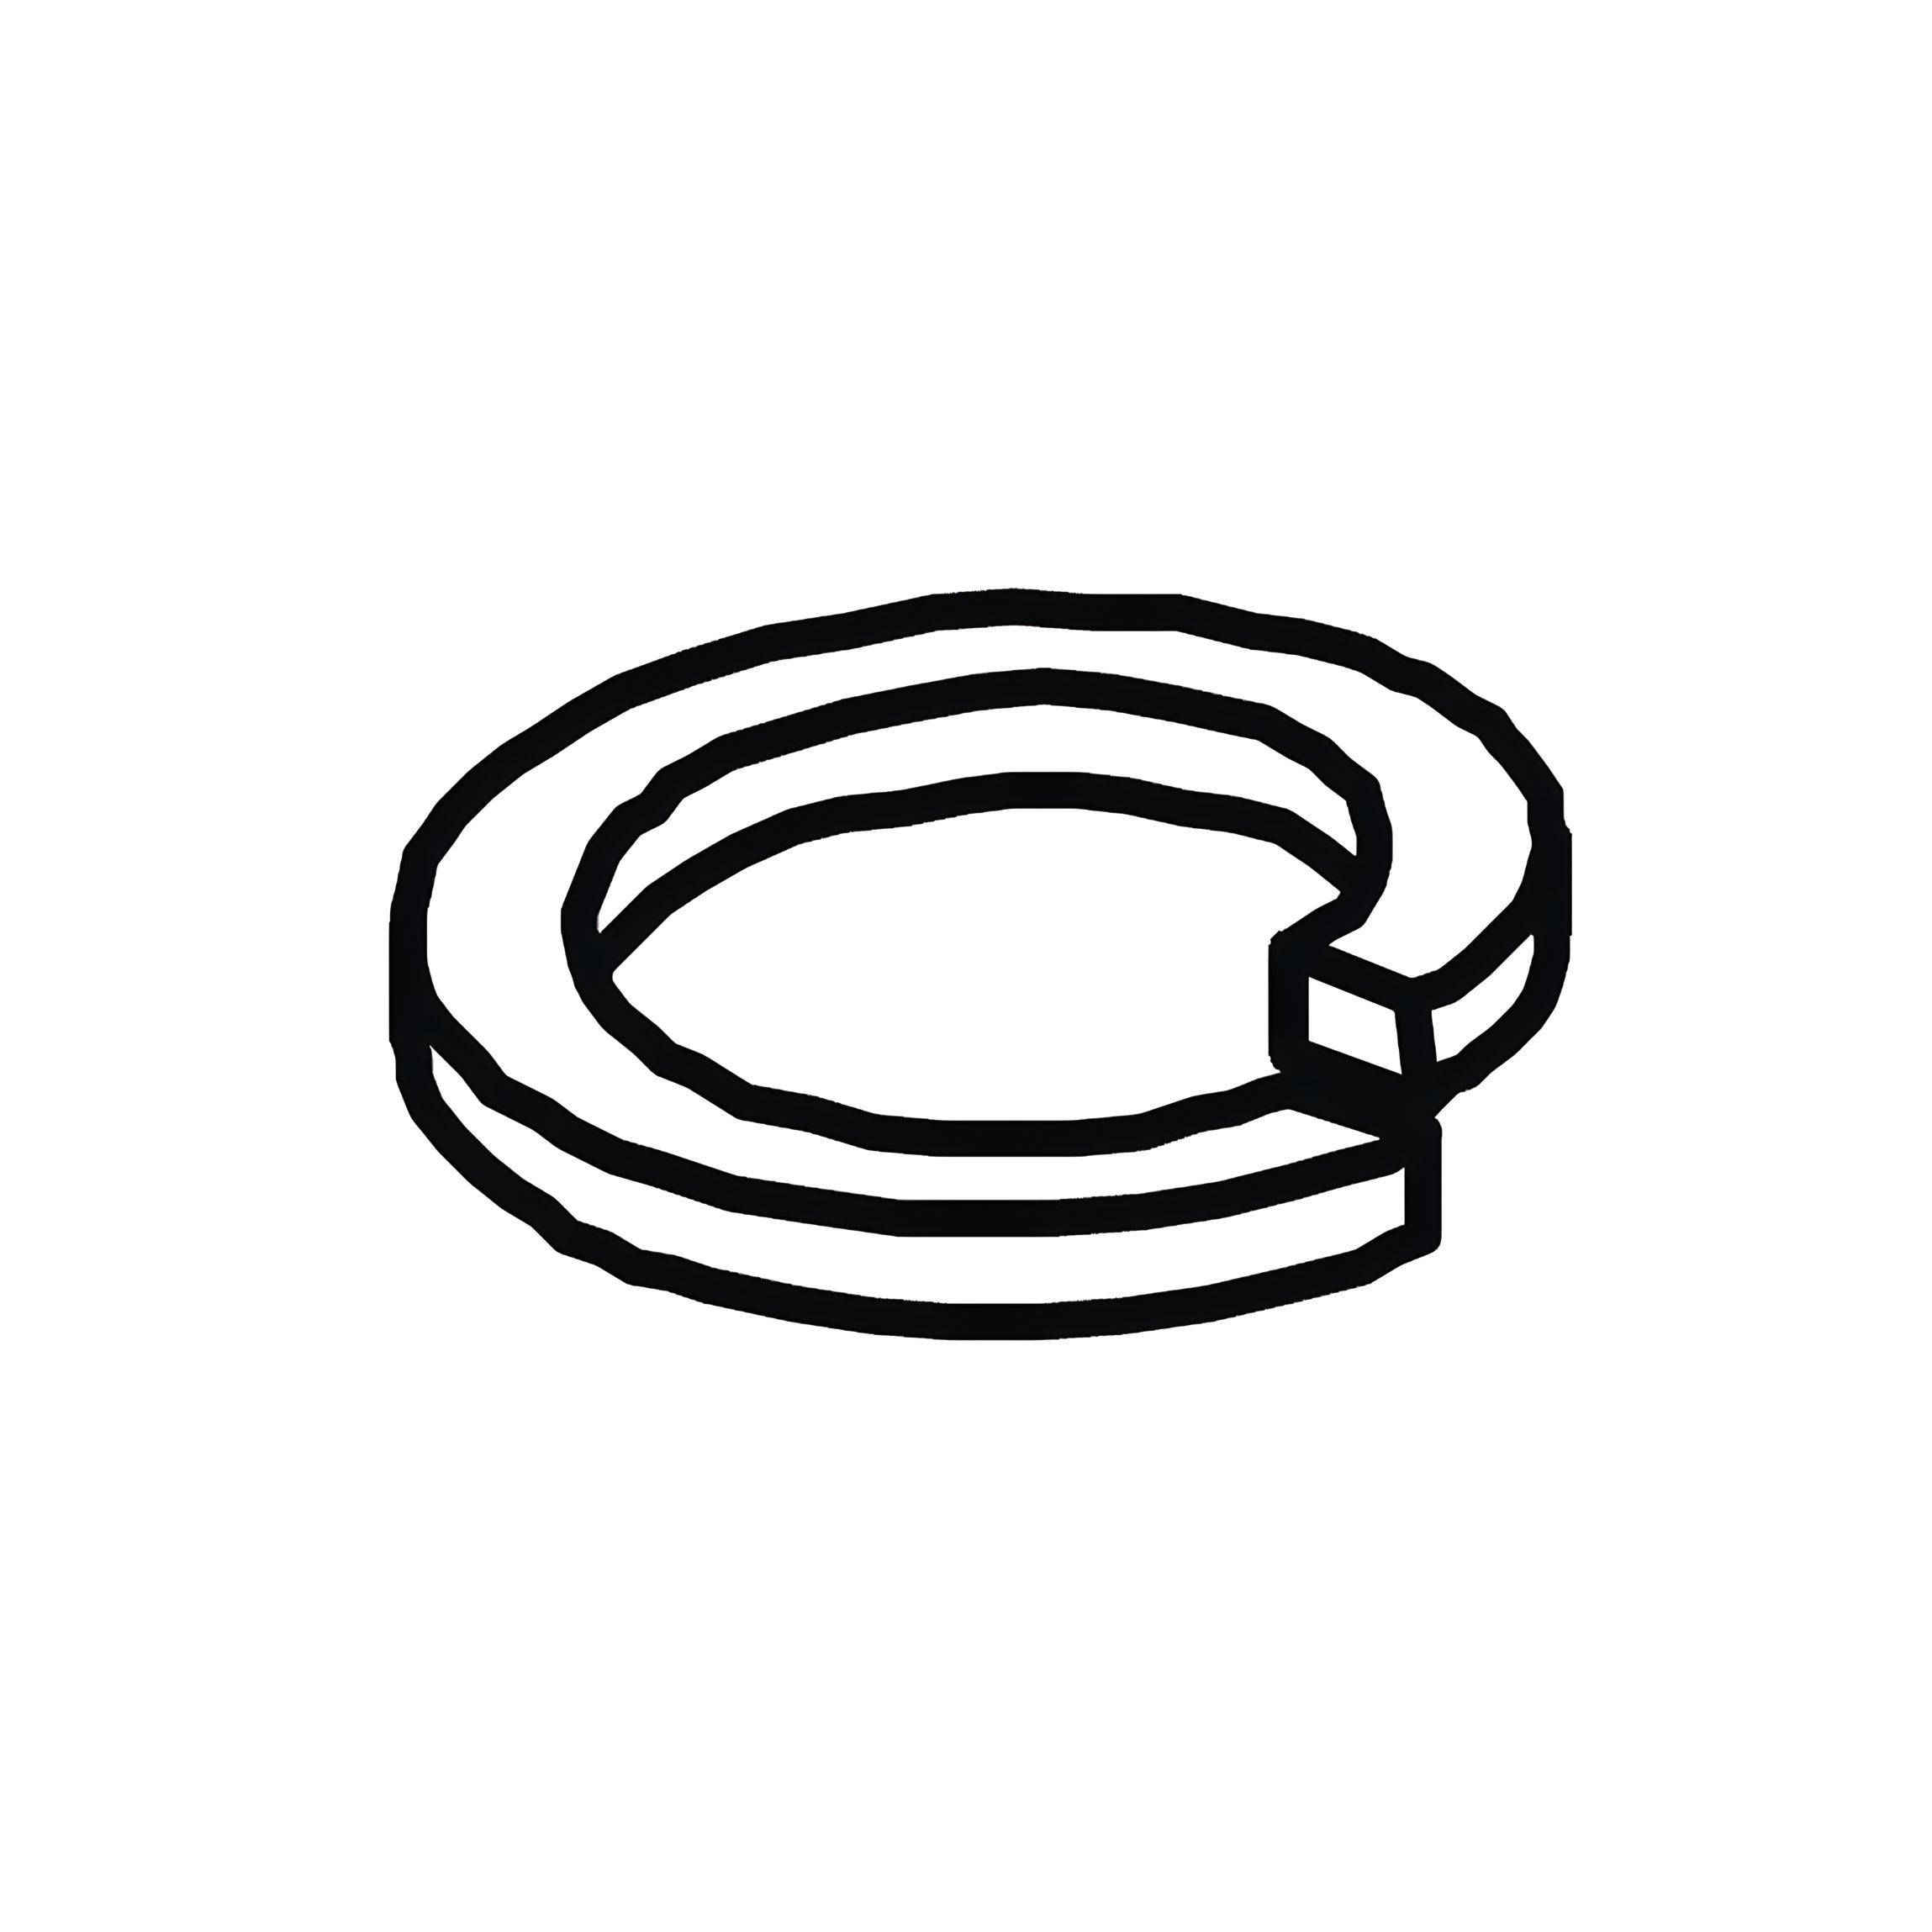
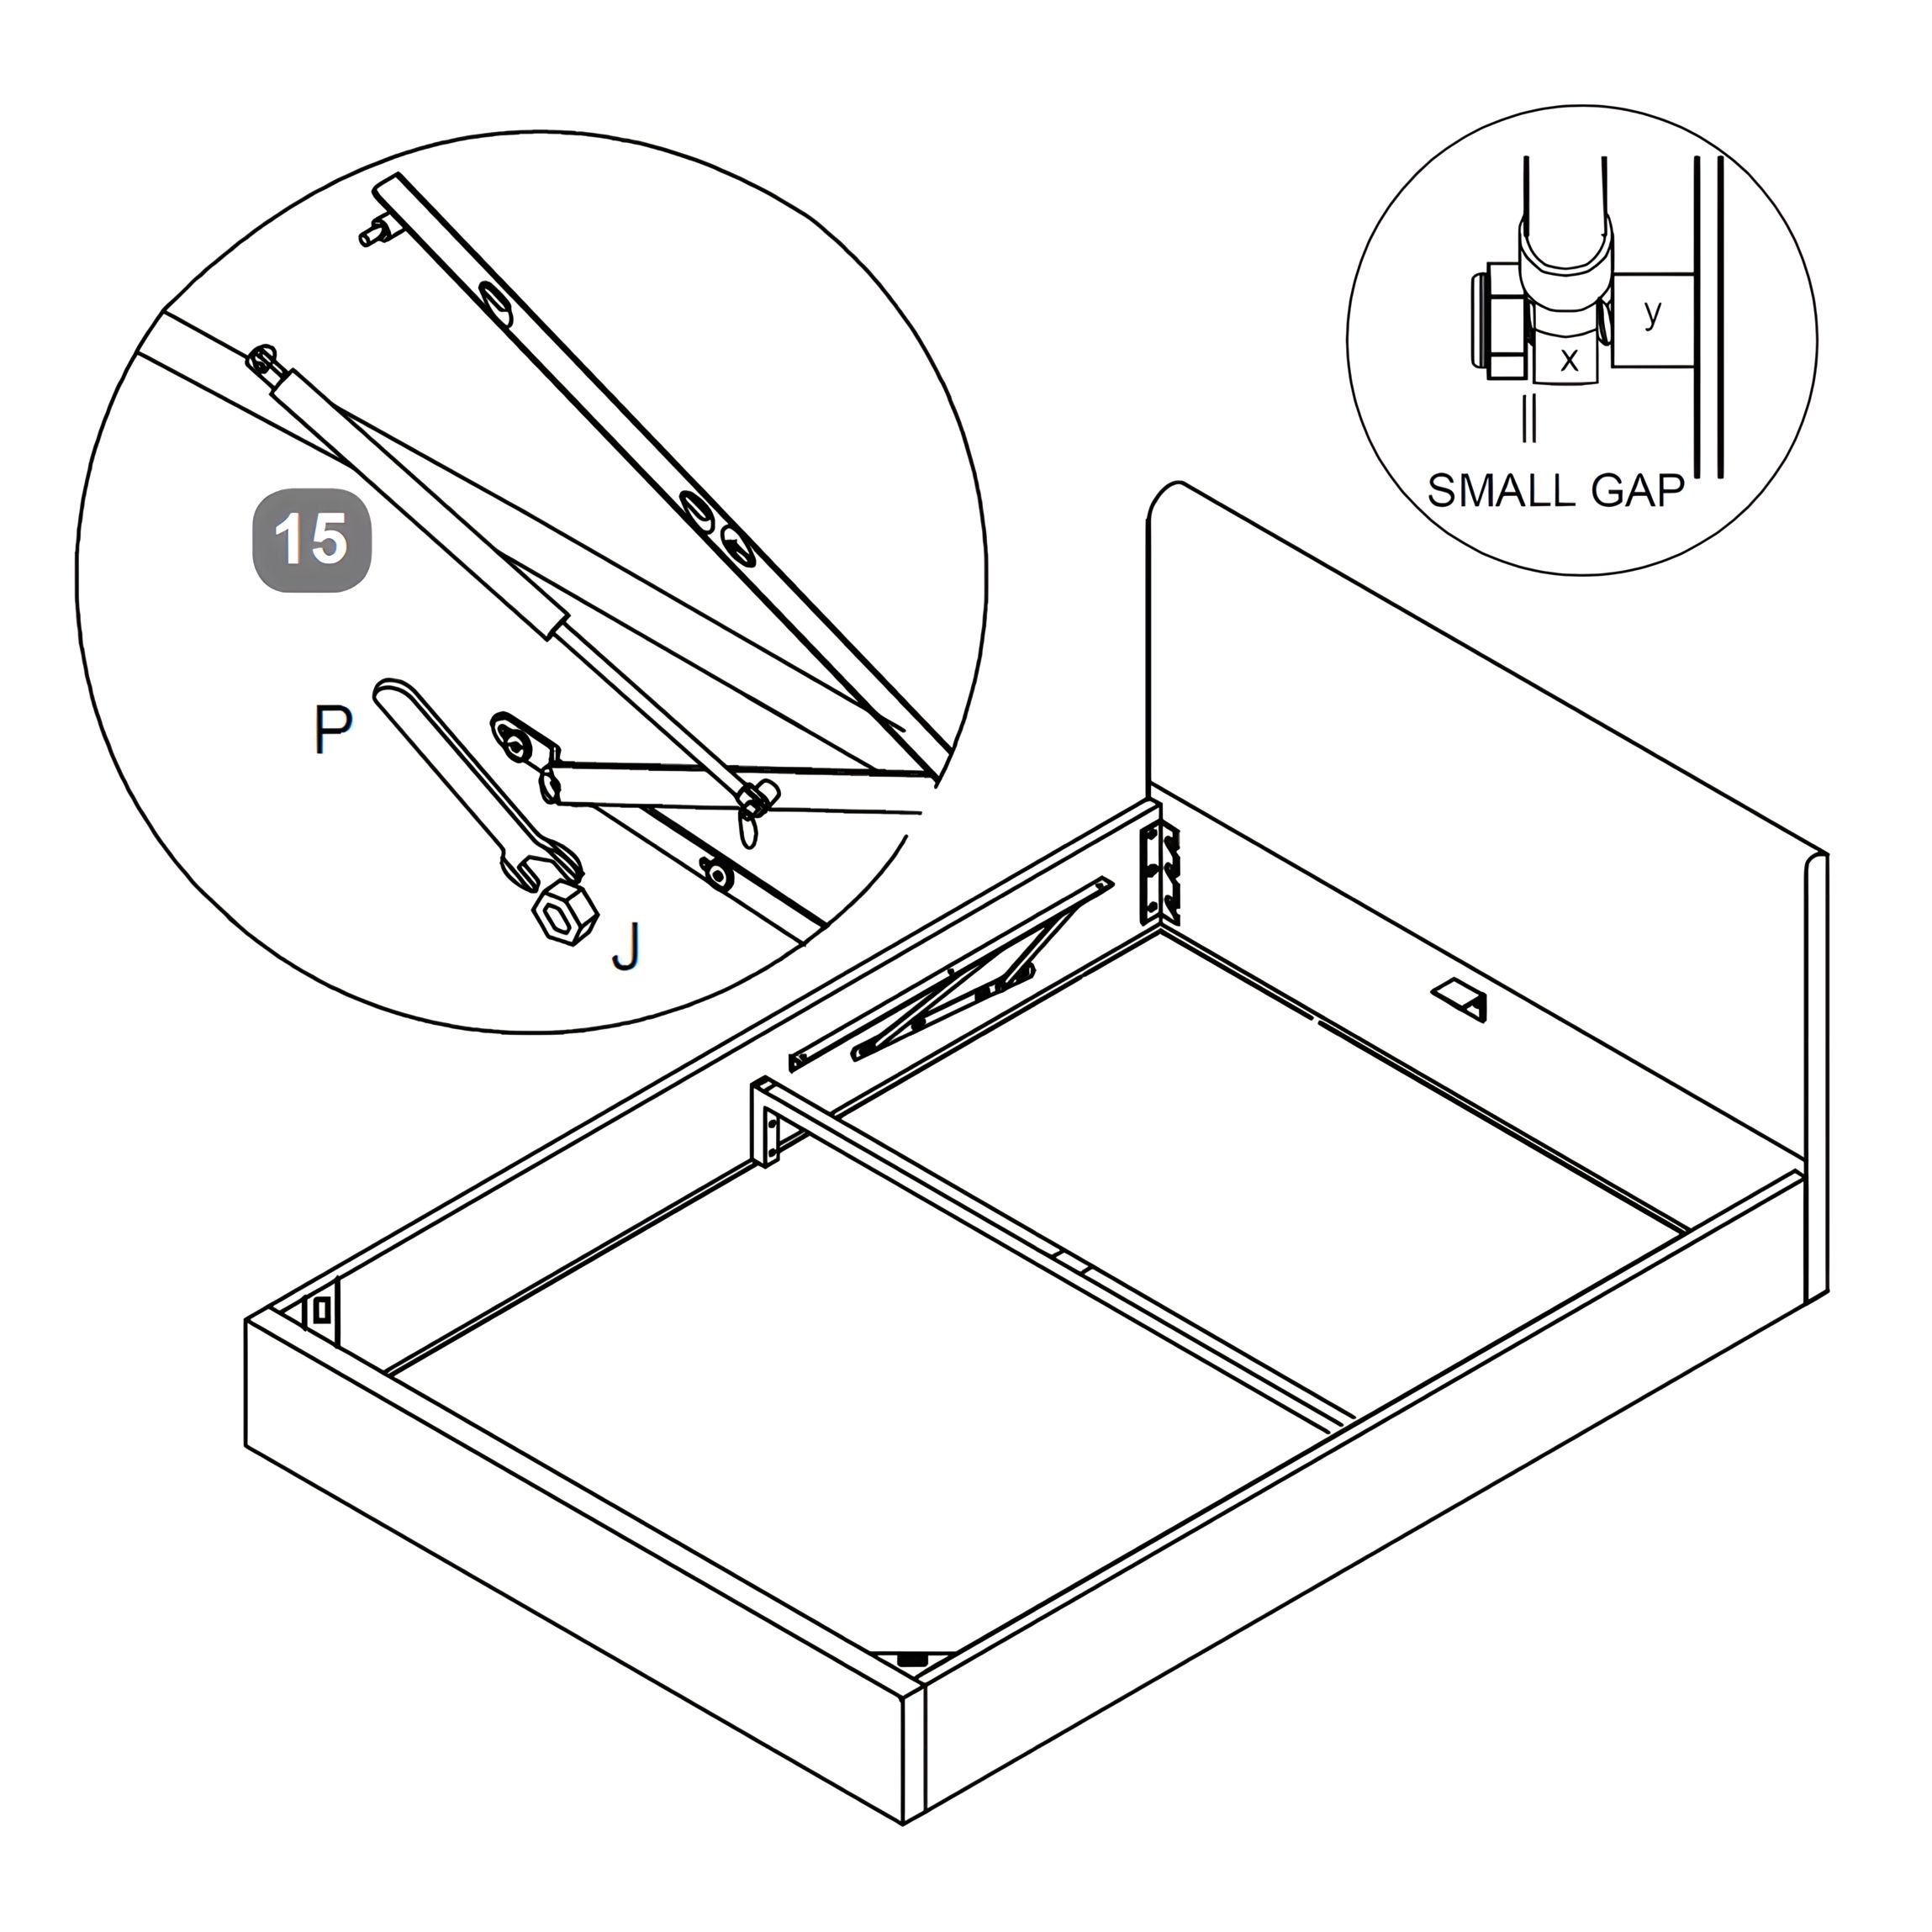
9. Attach Gas Lift Pistons to Mechanism Arms
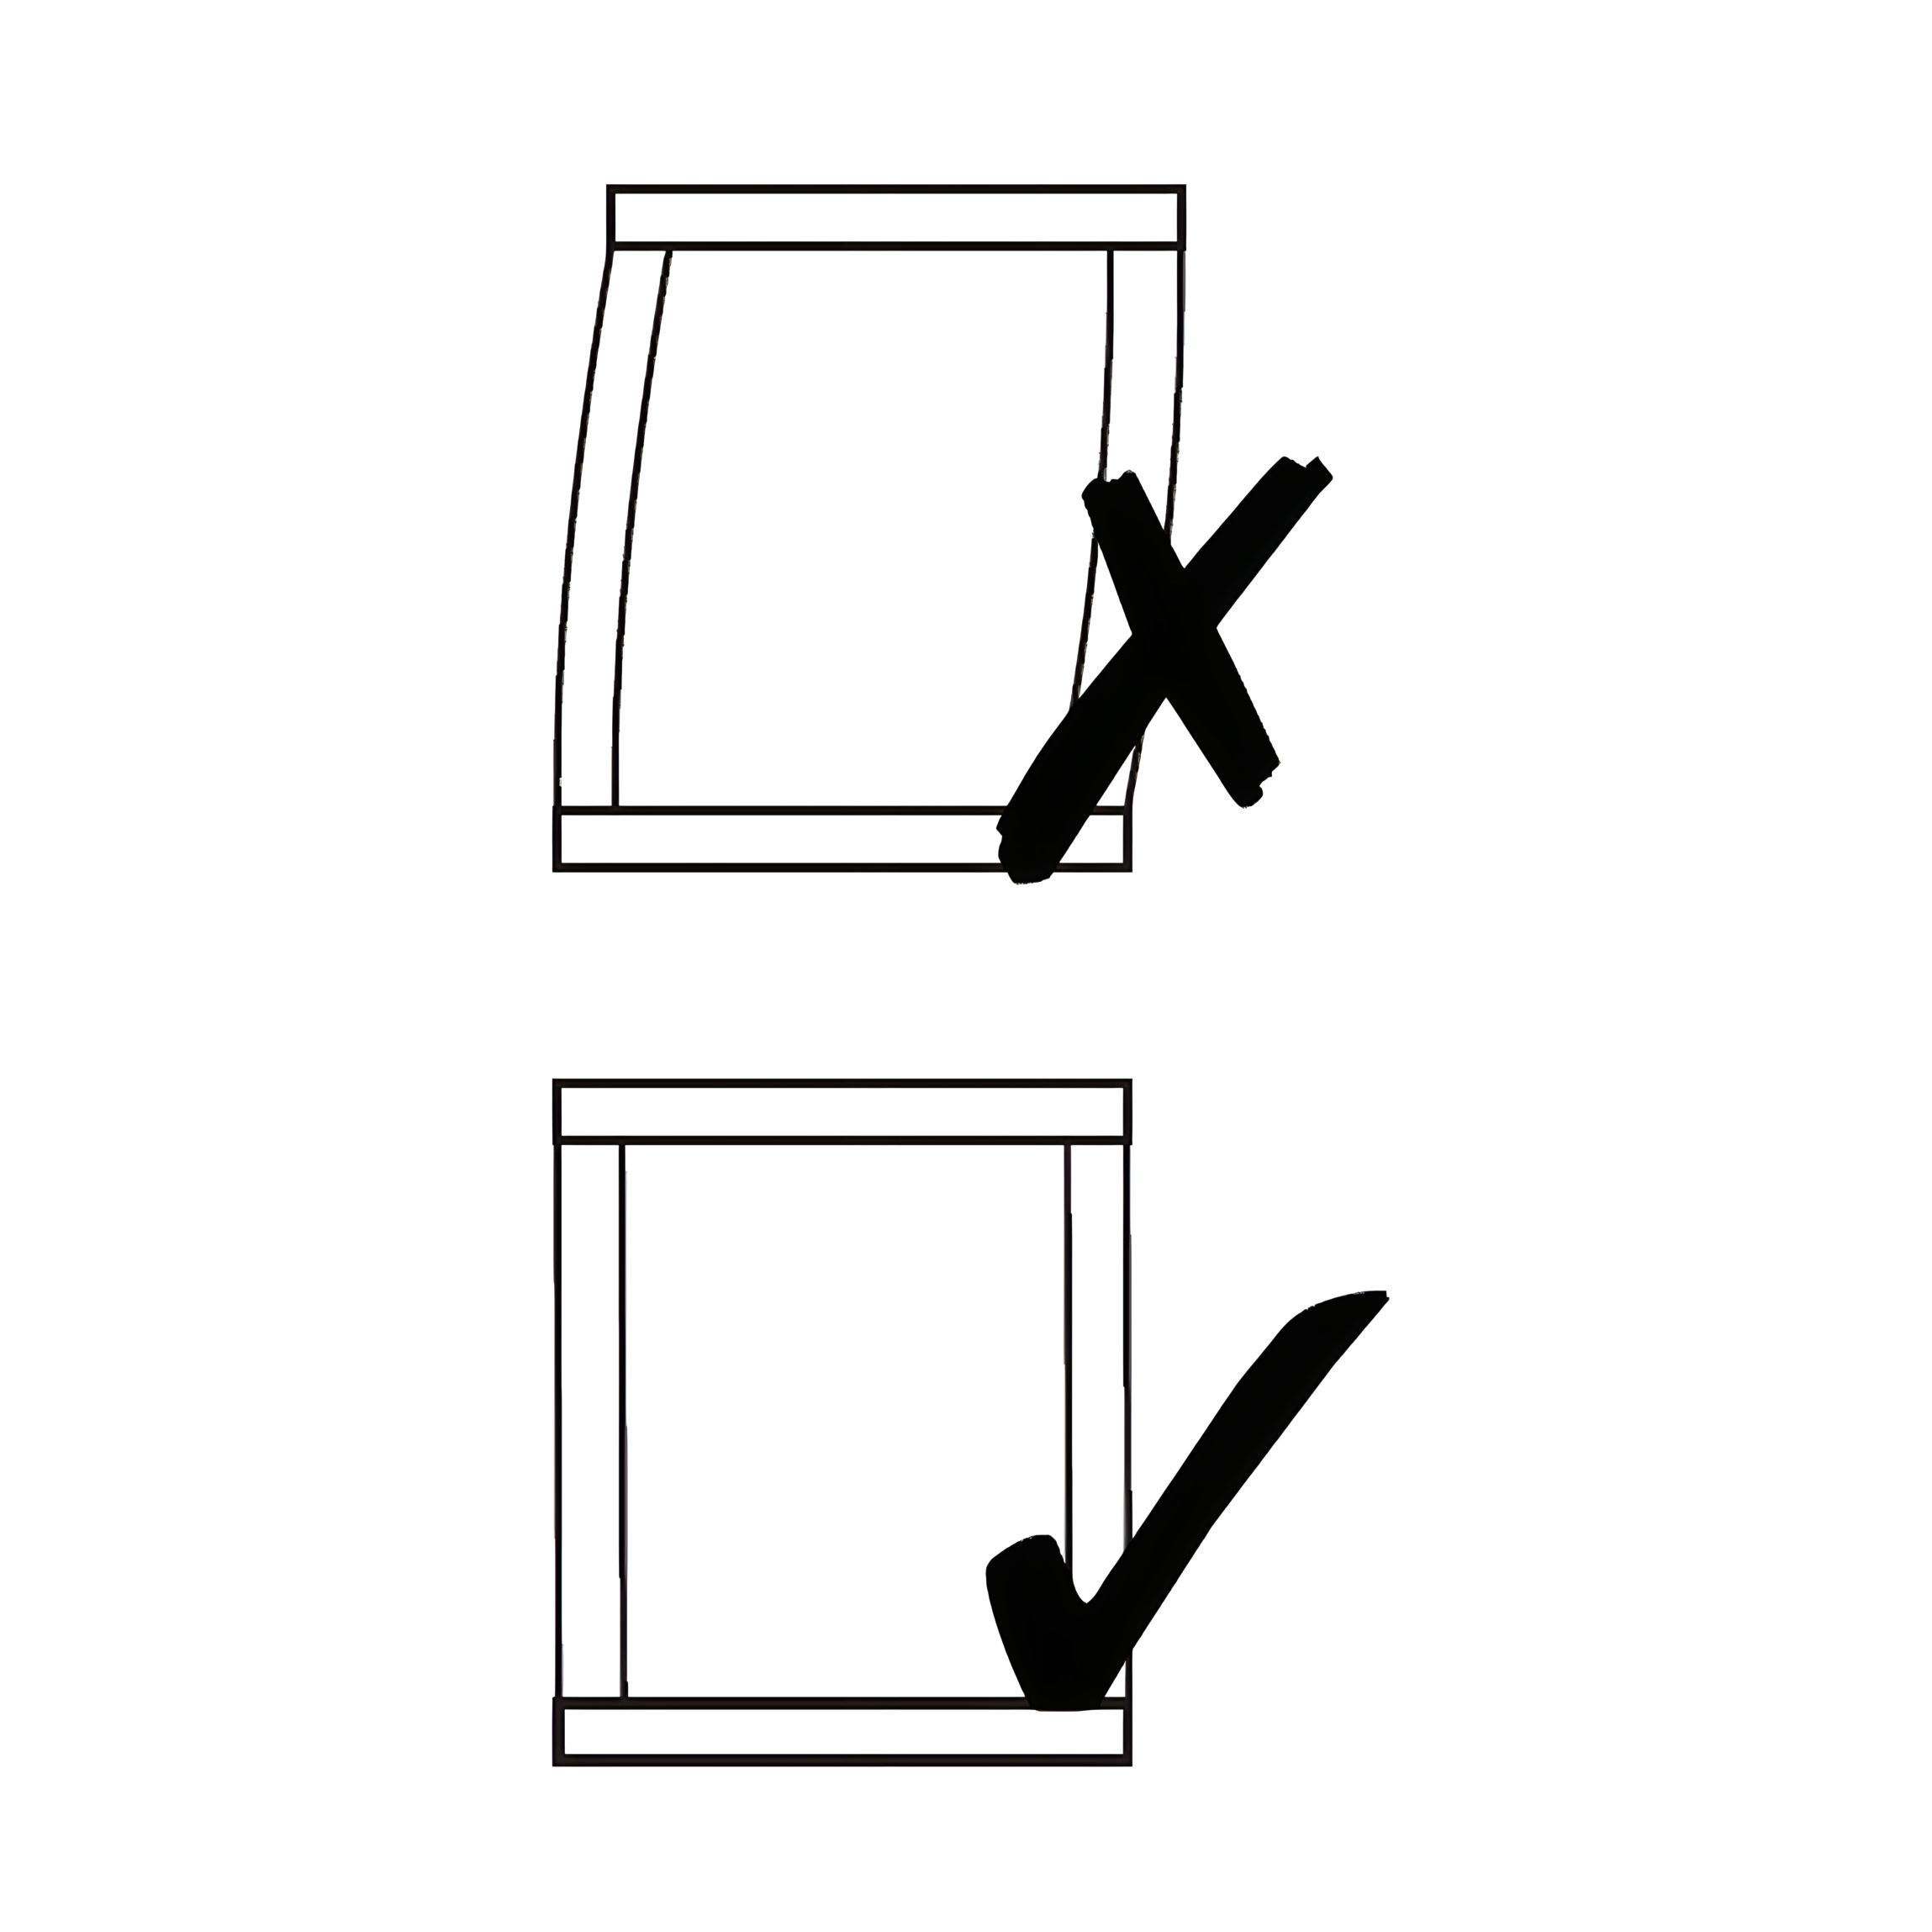
1. Slide the stem of the Gas Lift Piston (15) (marked as x) onto the axle (marked as y) located on the lower section of each lift mechanism arm. 2. Fit a Flange Lock Nut (J) to secure the piston in place. 3. Use the Spanner (P) to tighten the nut — do not over-tighten. 4. Ensure a small gap remains between the nut and the piston stem so the stem can move freely during operation.
This is important for proper functionality. Refer to the image provided to check correct clearance.
10. Secure Slat Frame to Lift Mechanism
1. Position the assembled slat frame over the lift mechanism arms. 2. Loosely fit 3 sets of Bolt (C), Flat Washer (G), Spring Washer (H), and Nut (J) on each side of the frame using the pre-drilled holes. 3. Carefully hold the slat frame down and align it so there are even gaps on both sides between the frame and bed rails. 4. Once aligned, fully tighten all bolts using the Allen Key (M) and Spanner (P) to ensure the frame is securely attached to the lift arms.
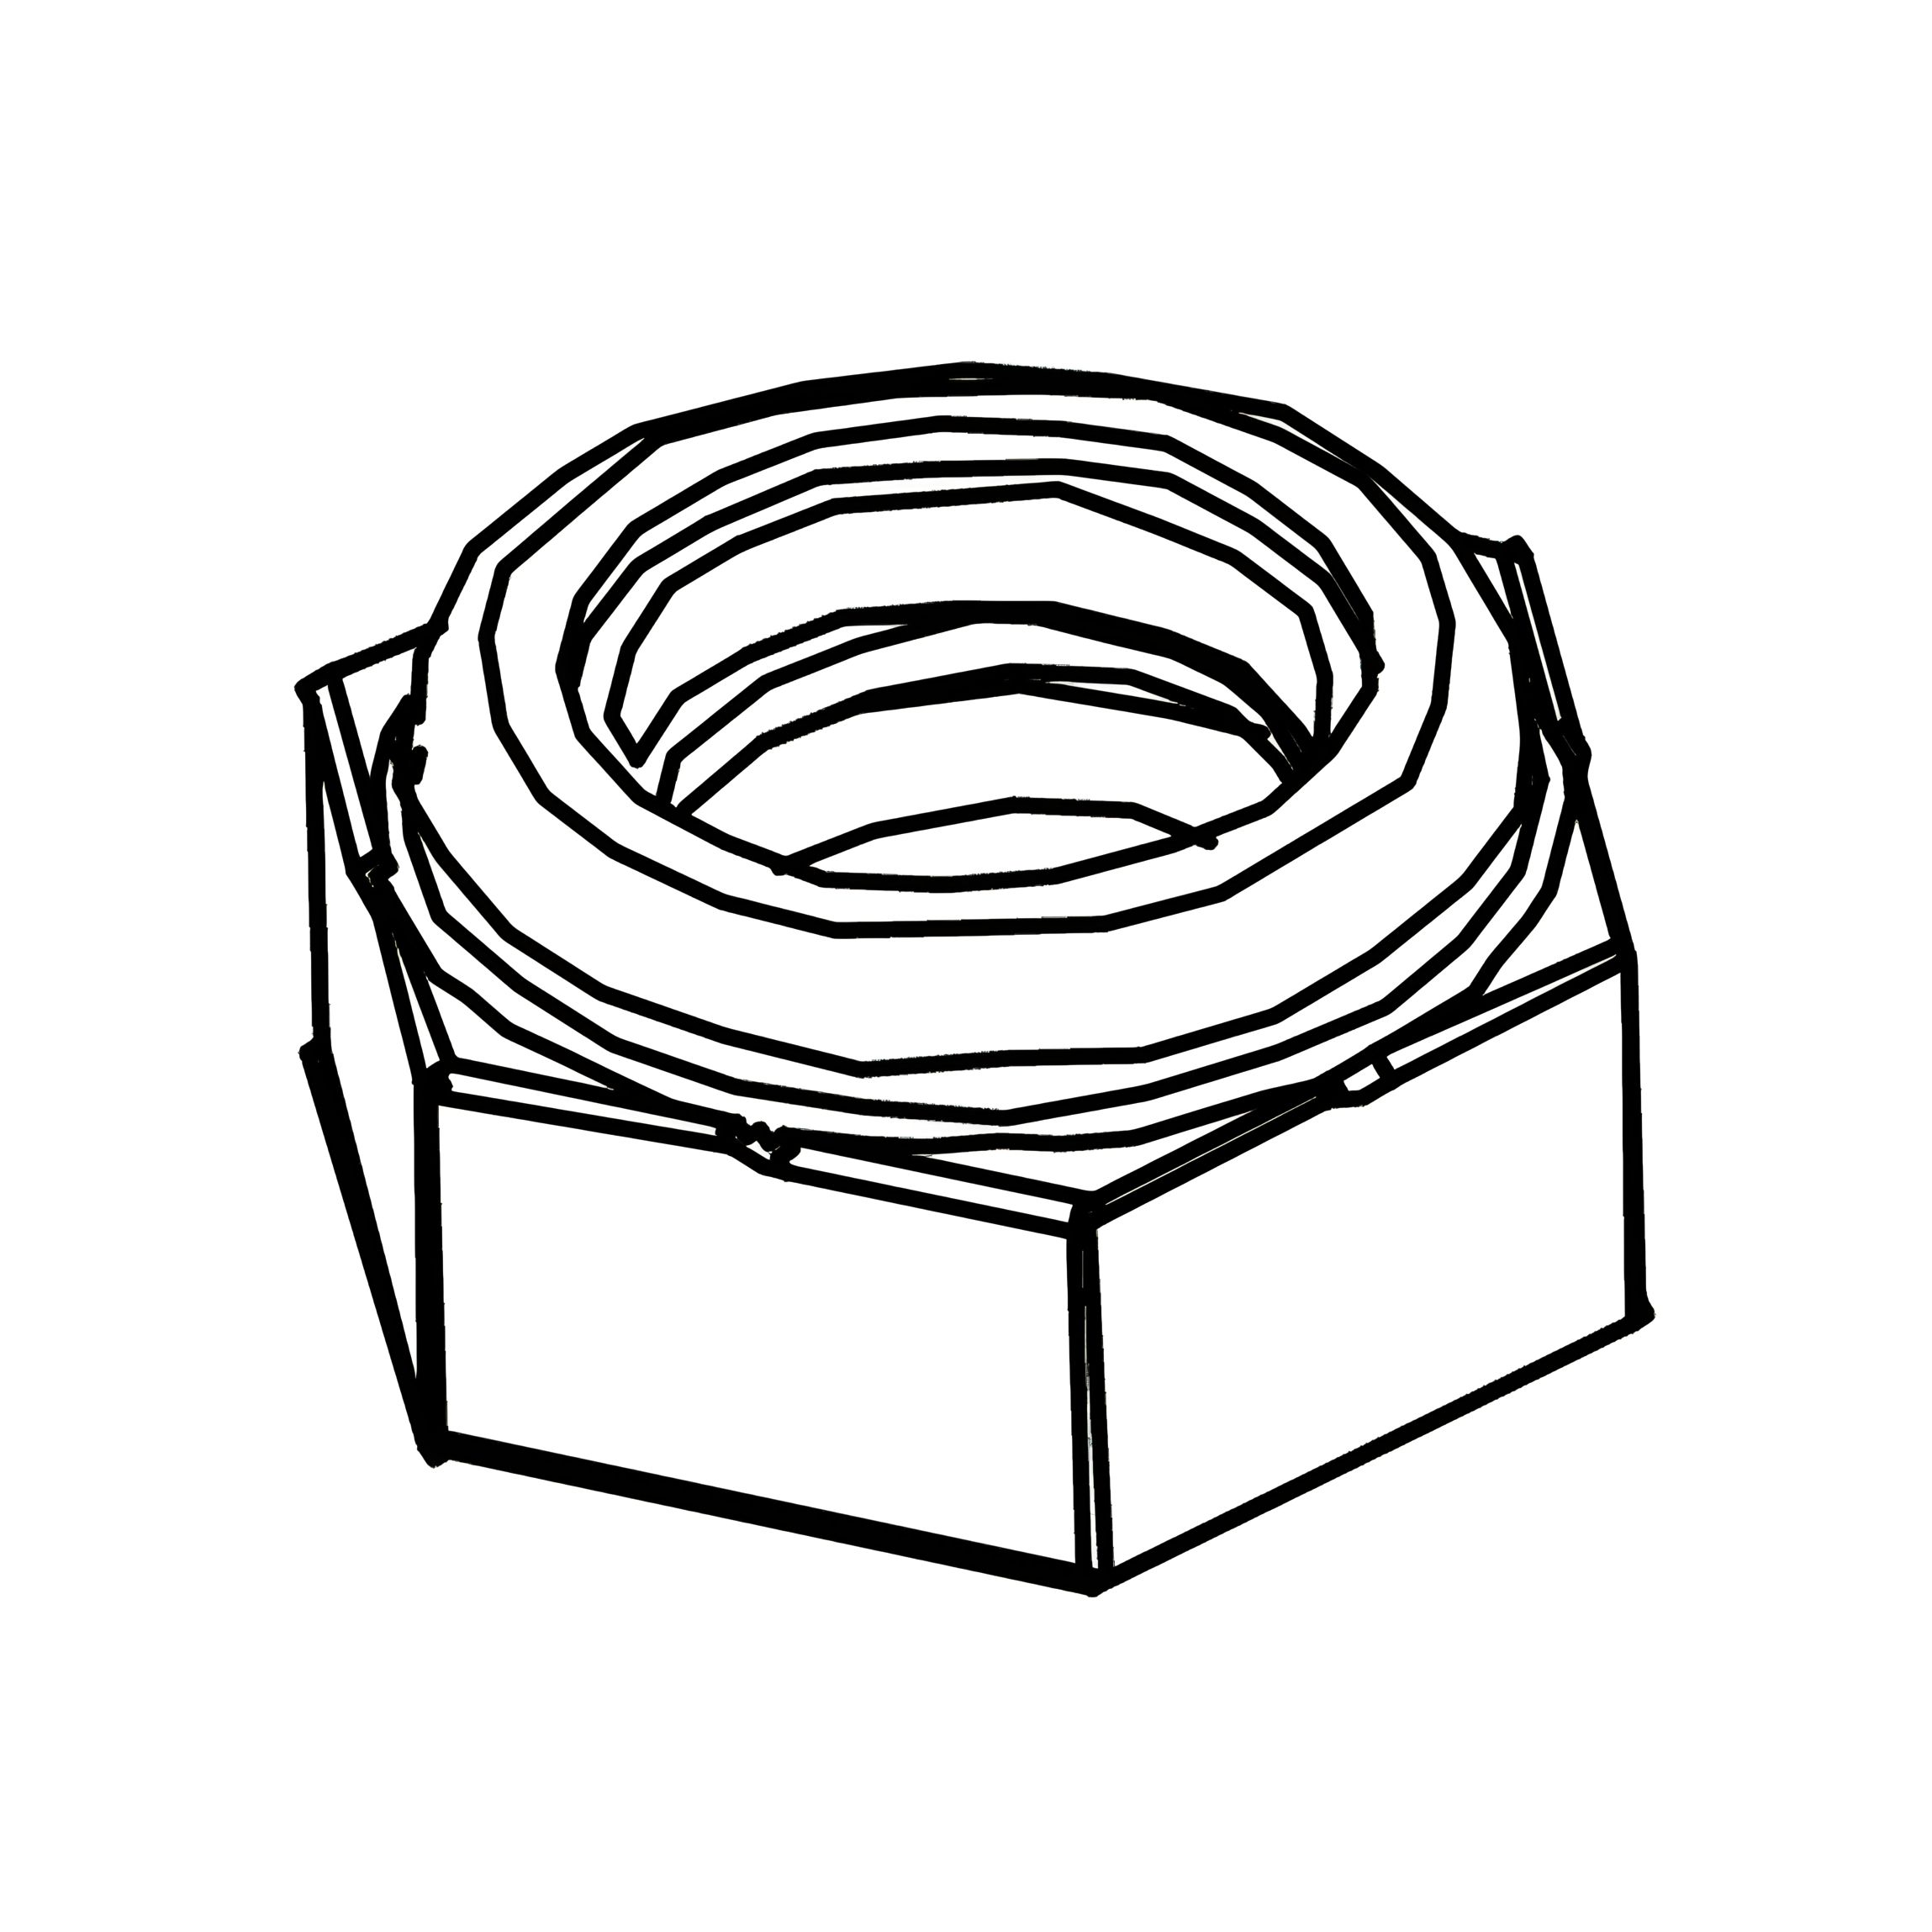
11. Connect Cylinder Stem and Review Storage Clearance
1. Slide the gas-lift cylinder stem (x) onto the axle (y) located on the upper arm of the lift mechanism. 2. Fit a Flange Lock Nut (J) to secure the stem, and tighten it using the Spanner (P) — do not over-tighten. 3. Leave a small gap between the nut and the stem to allow for free movement. This is critical for proper operation — refer to the detailed sketch for correct spacing. 4. Gently test the lifting motion to confirm smooth articulation of the mechanism.
Note:
Be very careful what you store under the bed. The top of stored items (such as a suitcase or box) must not touch the slats, or they may be damaged.
Maximum storage height: 300 mm
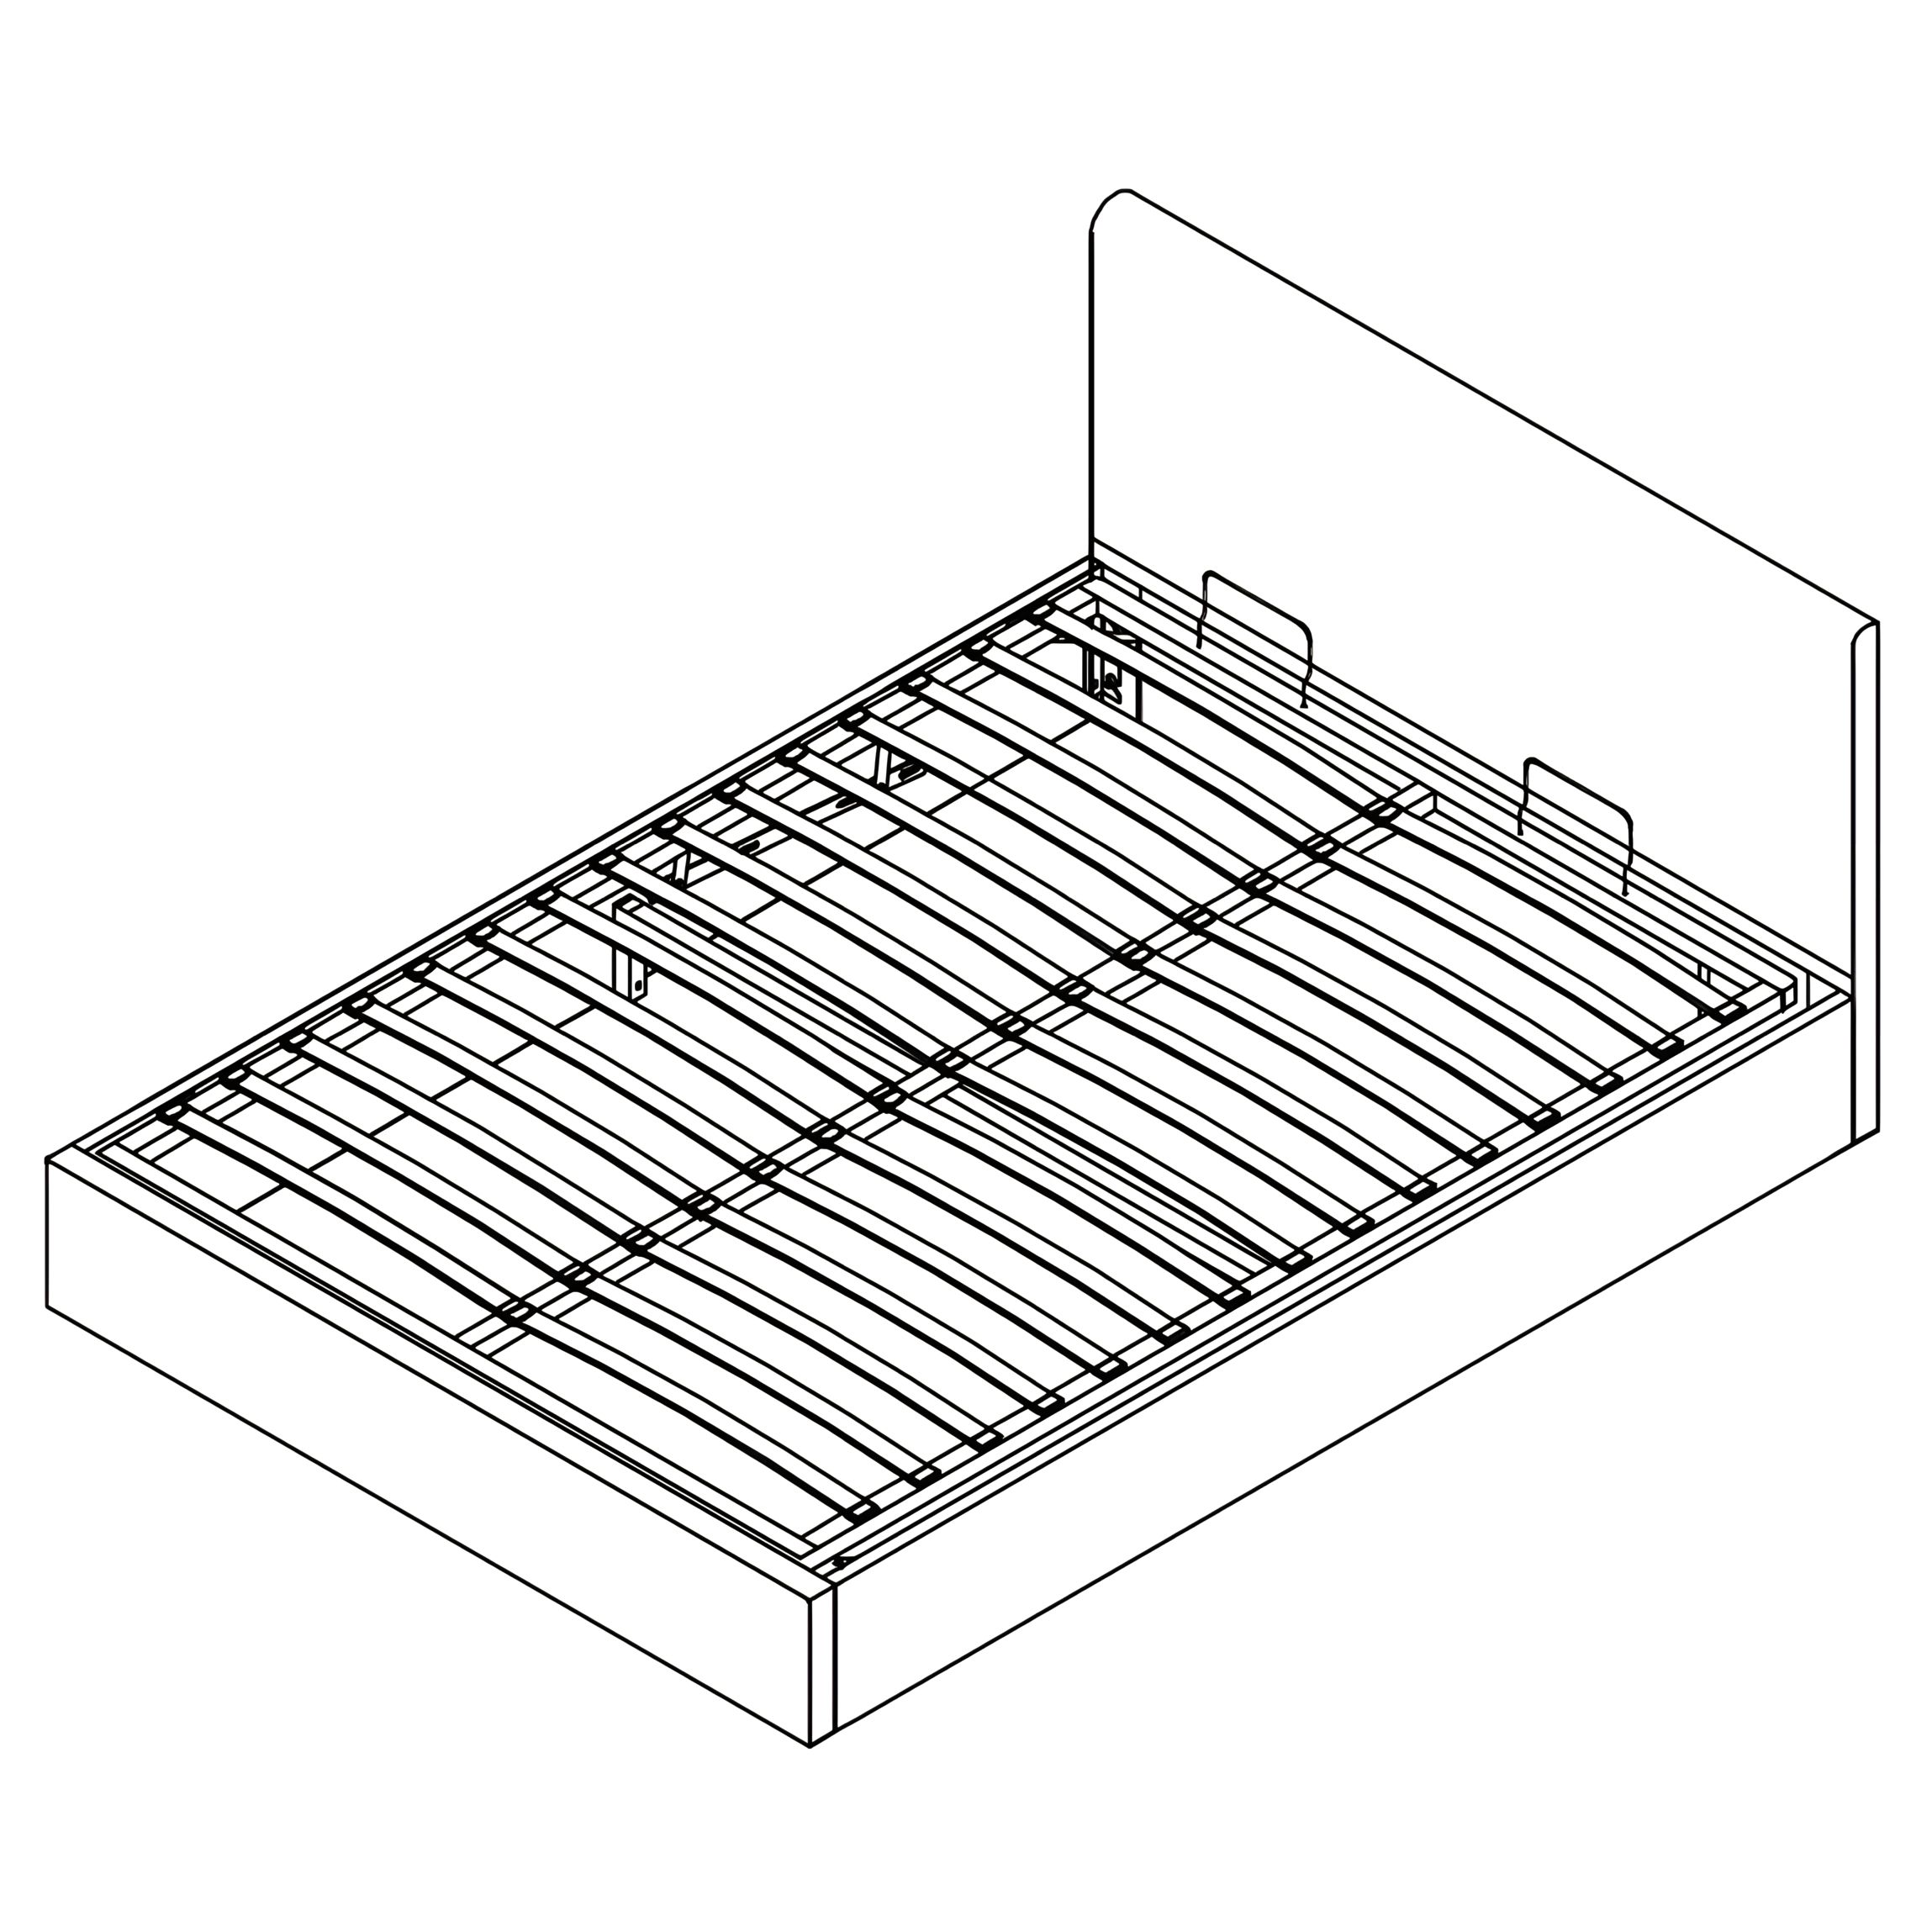
12. Final Check
Verify that all slats are securely placed and evenly spaced.
Check for any loose connections and tighten the screws if necessary