1. Side Rail Attachment and Securing
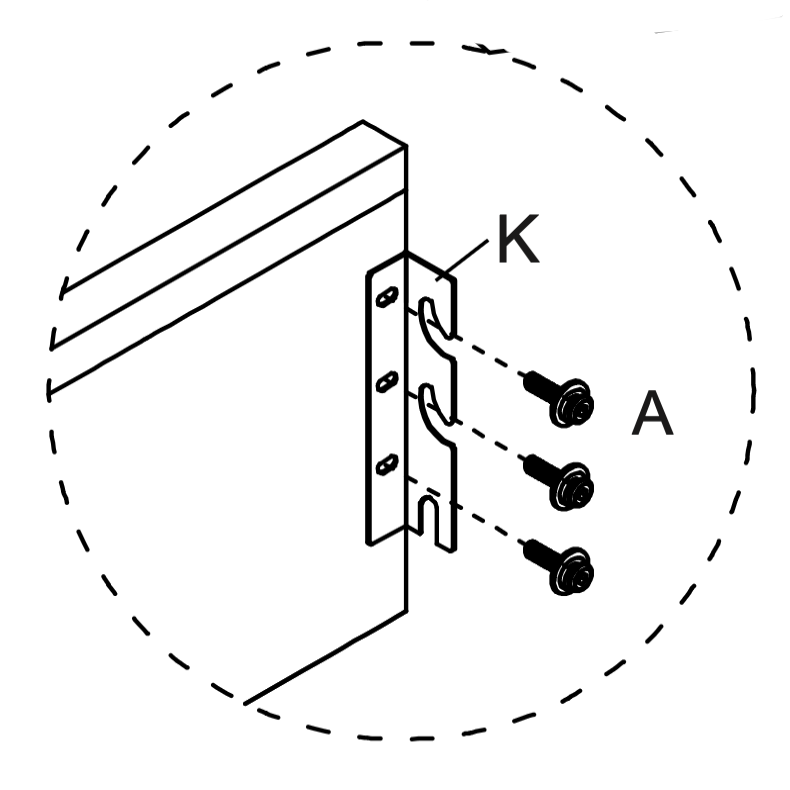
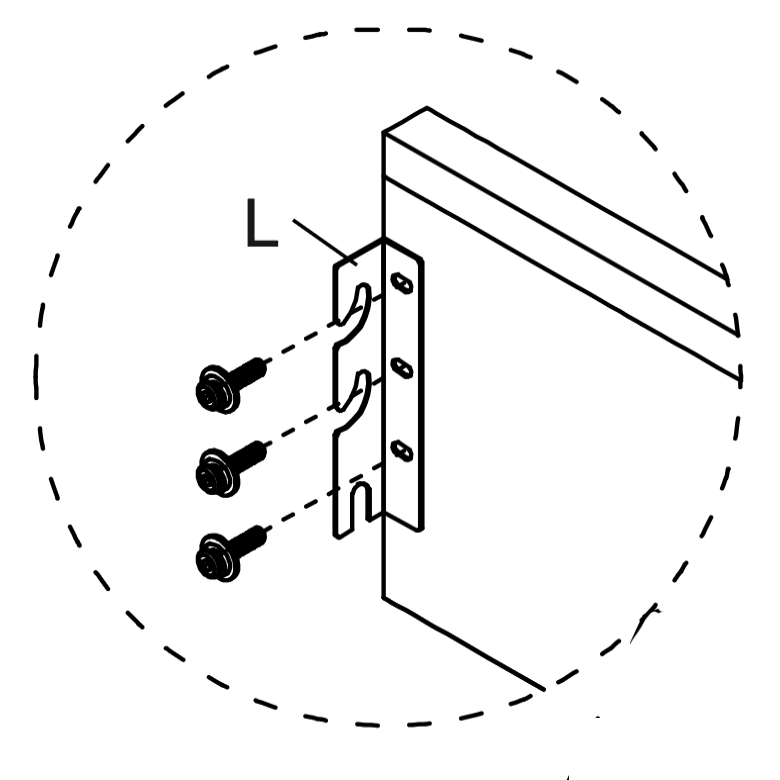
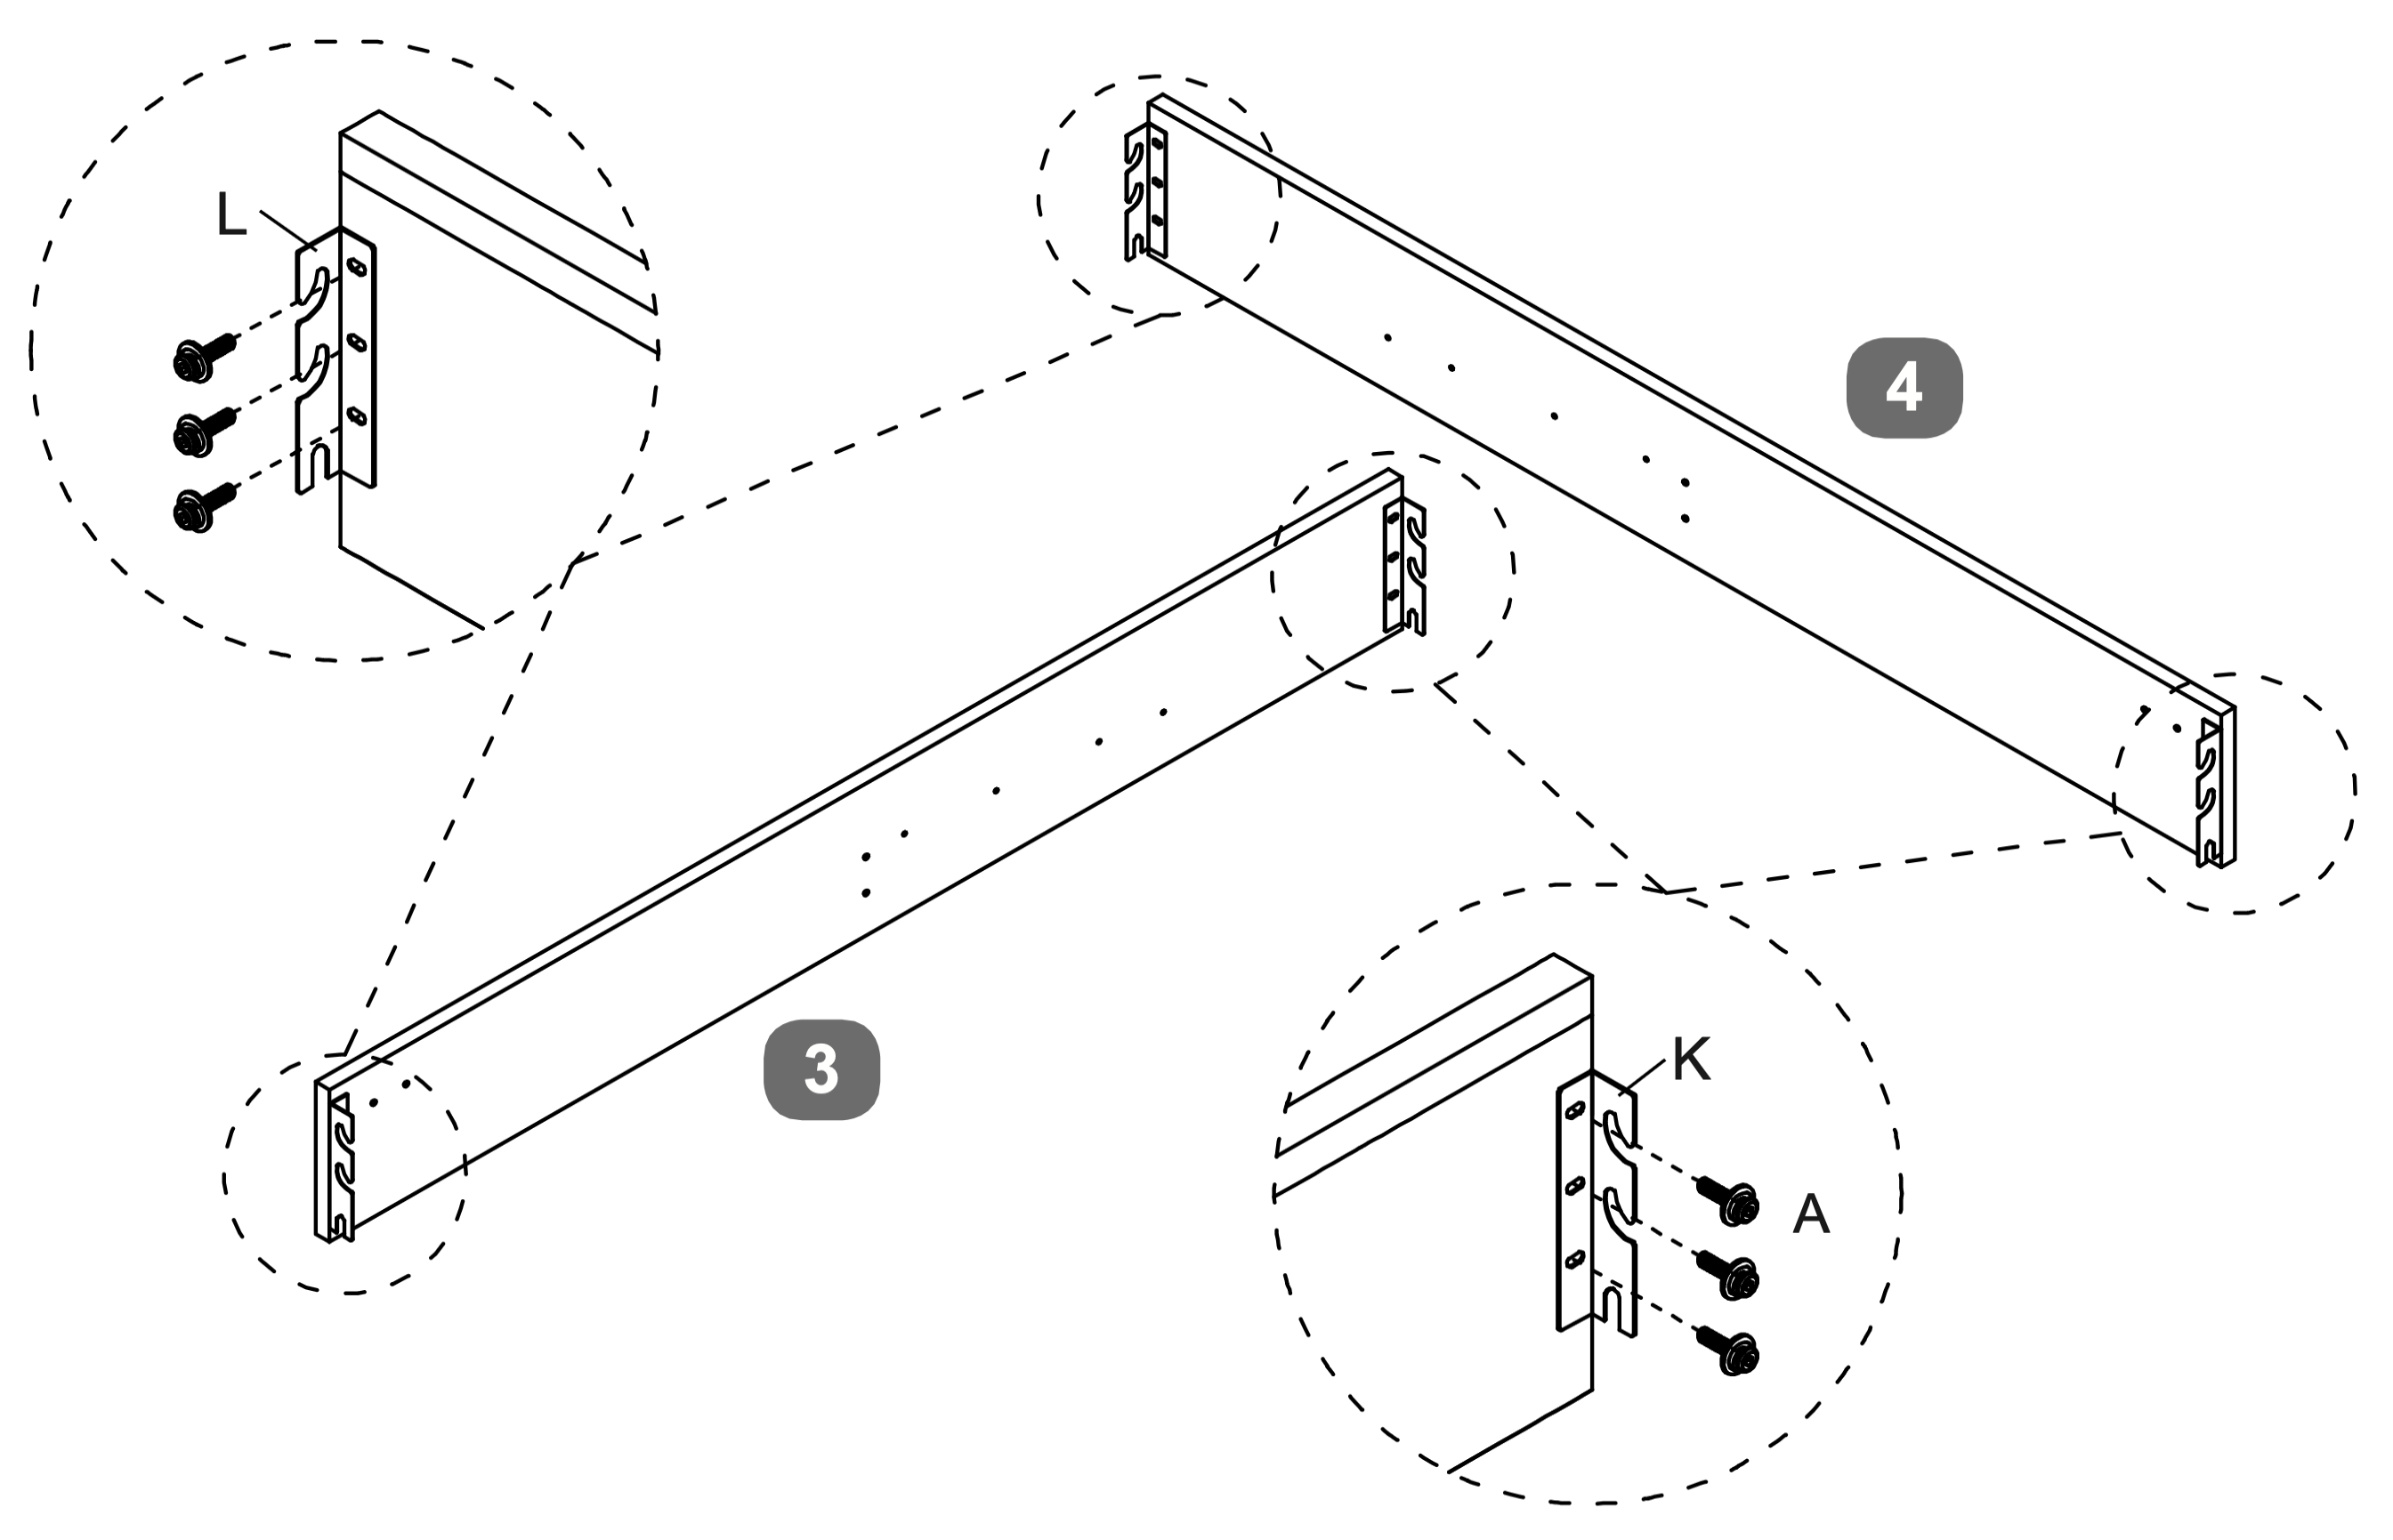
- Attach the left and right Corner Brackets (L and K) to each end of the siderail. Use three bolt (M8x25mm) (A) on each bracket using Allen Key (M).
 Instructions by time4sleep Upholstered Ottoman Winged Bed FrameAssembly instructions for the Upholstered Ottoman Winged Bed Frame Product Information Upholstered Ottoman Winged Bed FrameTransform your bedroom into a sophisticated sanctuary with the Opulence Winged Ottoman Bed, where contemporary design meets practical storage solutions.
View product (opens in new tab)
Tools Bed Assembly: A - Bolt (M8x25mm) 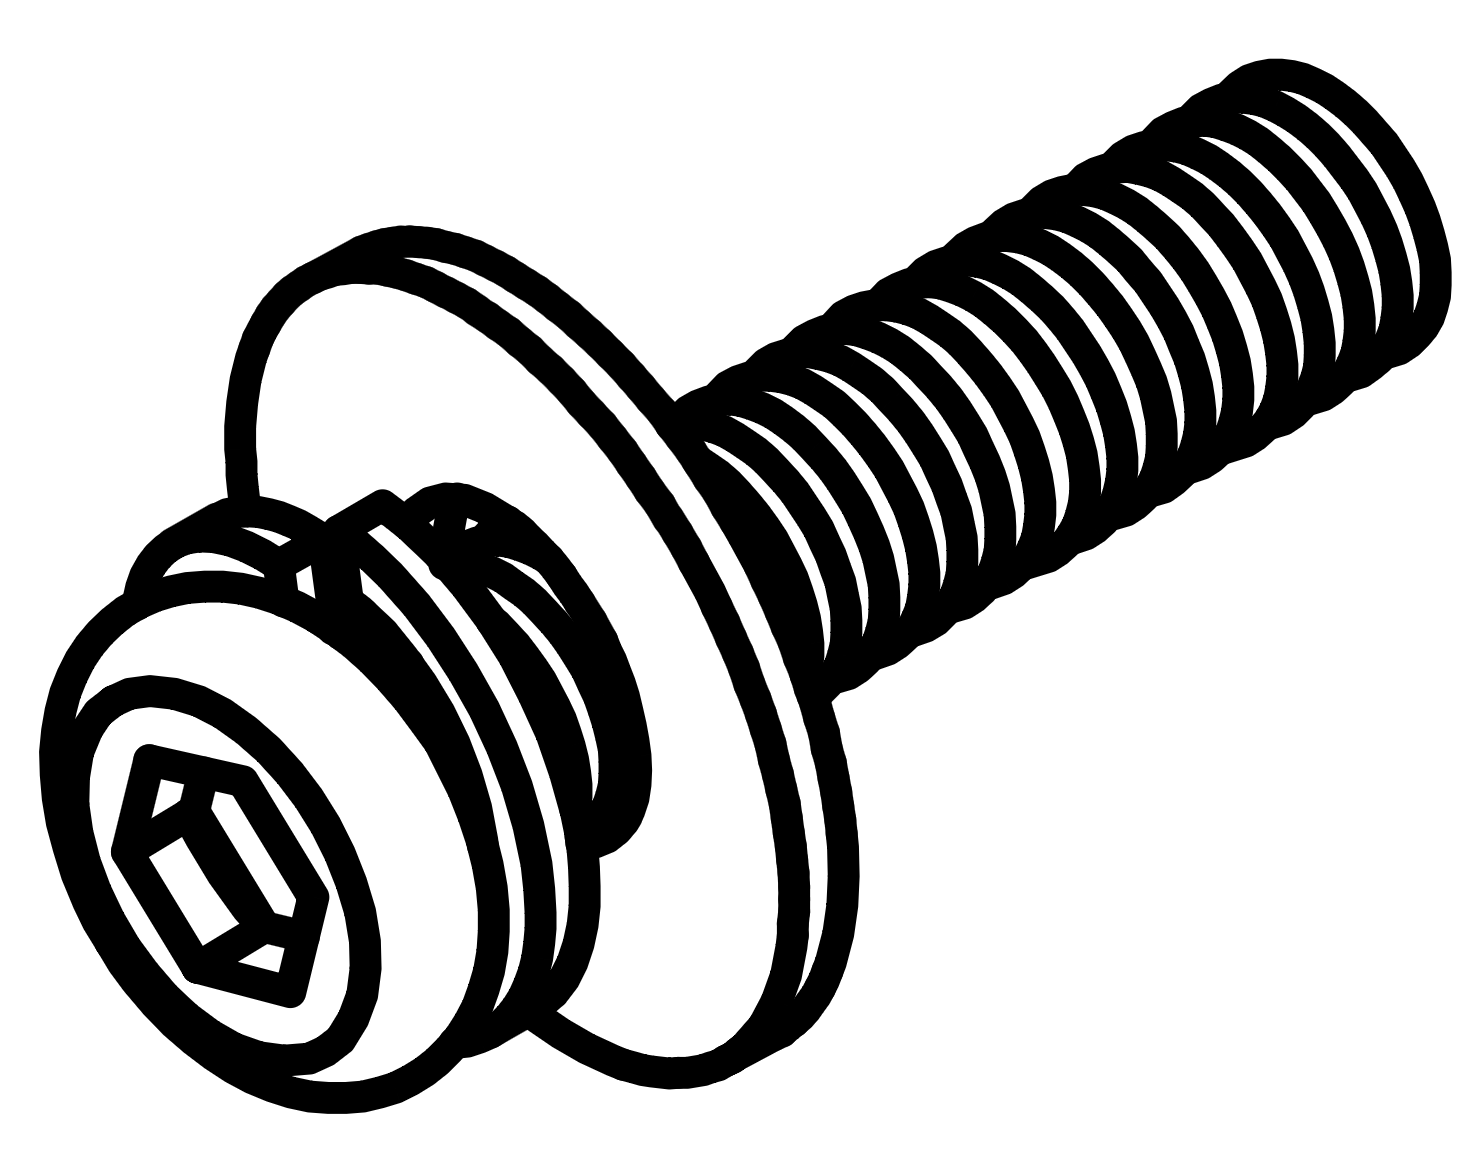 Bed Assembly: C - Bolt (M8x50mm) 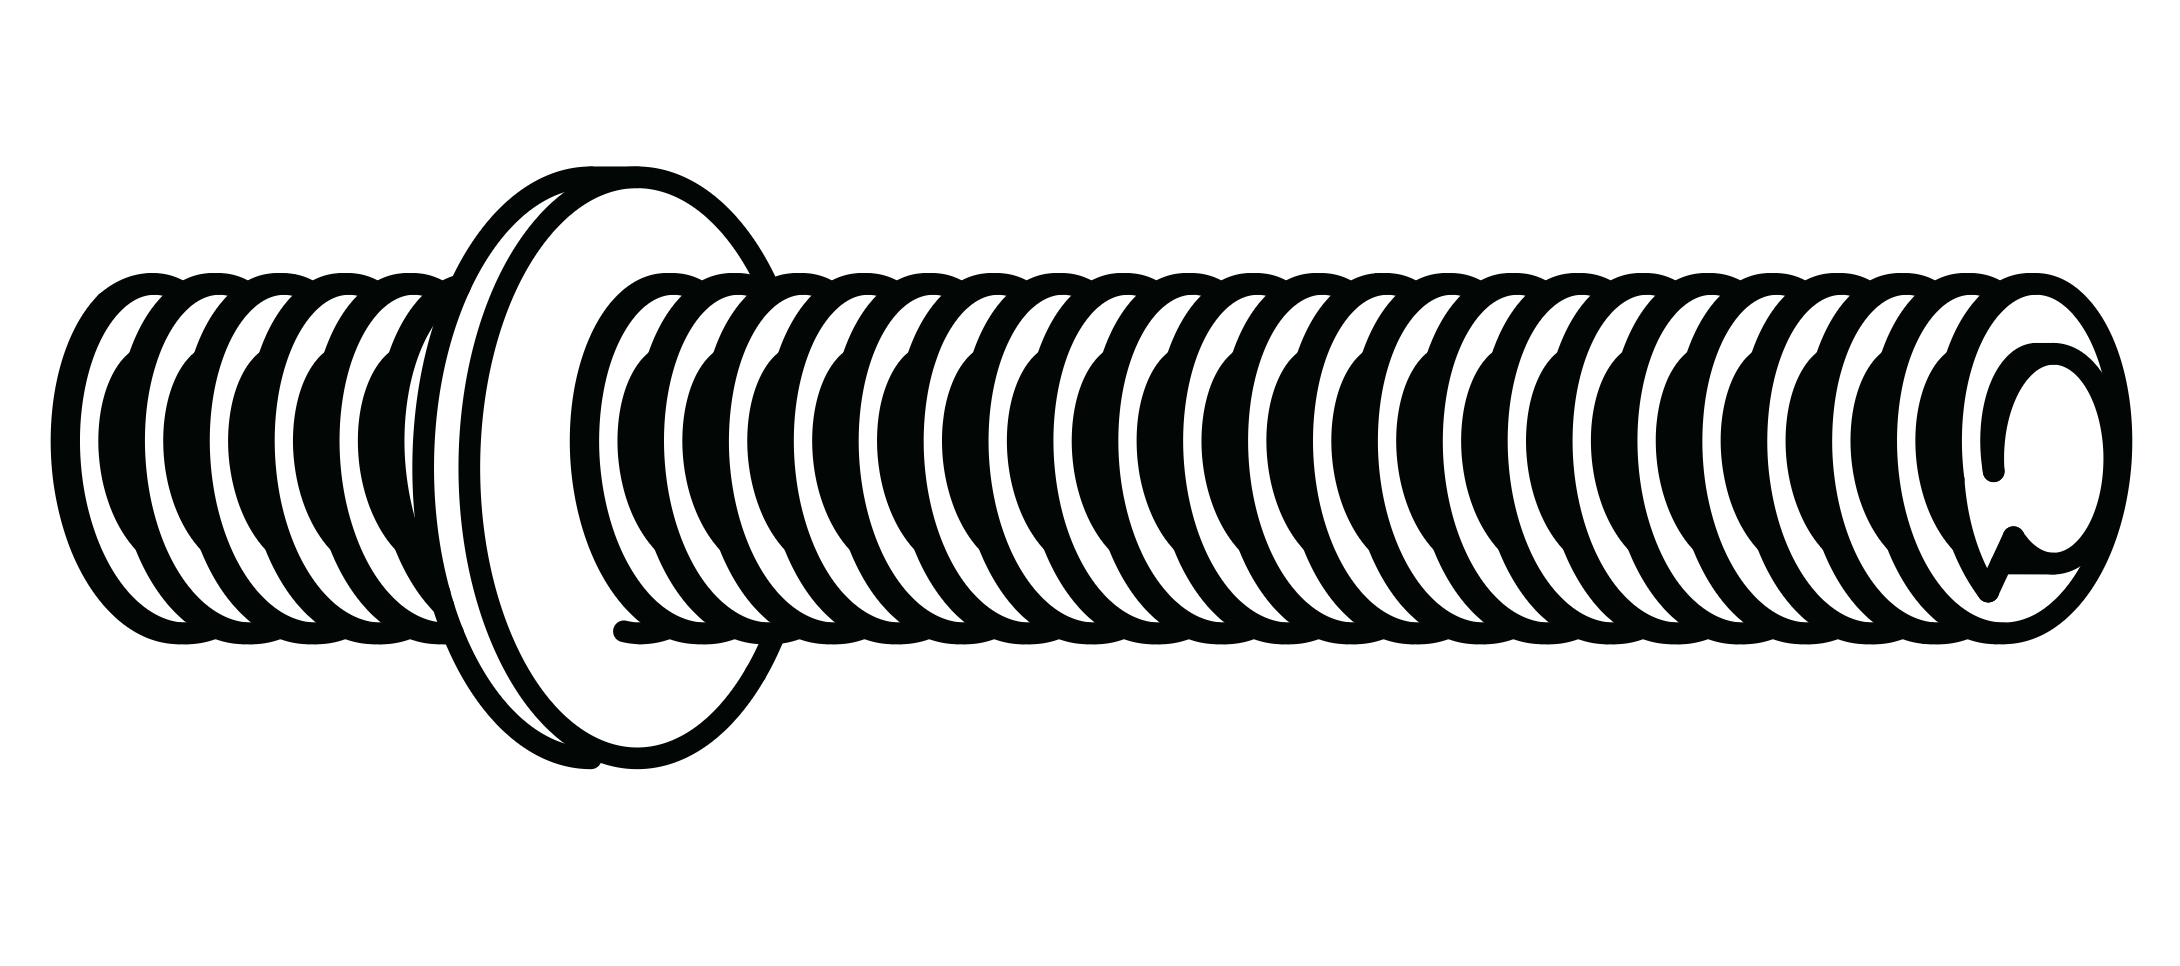 Bed Assembly: D - Threaded Stud(M8x60)  Bed Assembly: E - Flat Washer M8 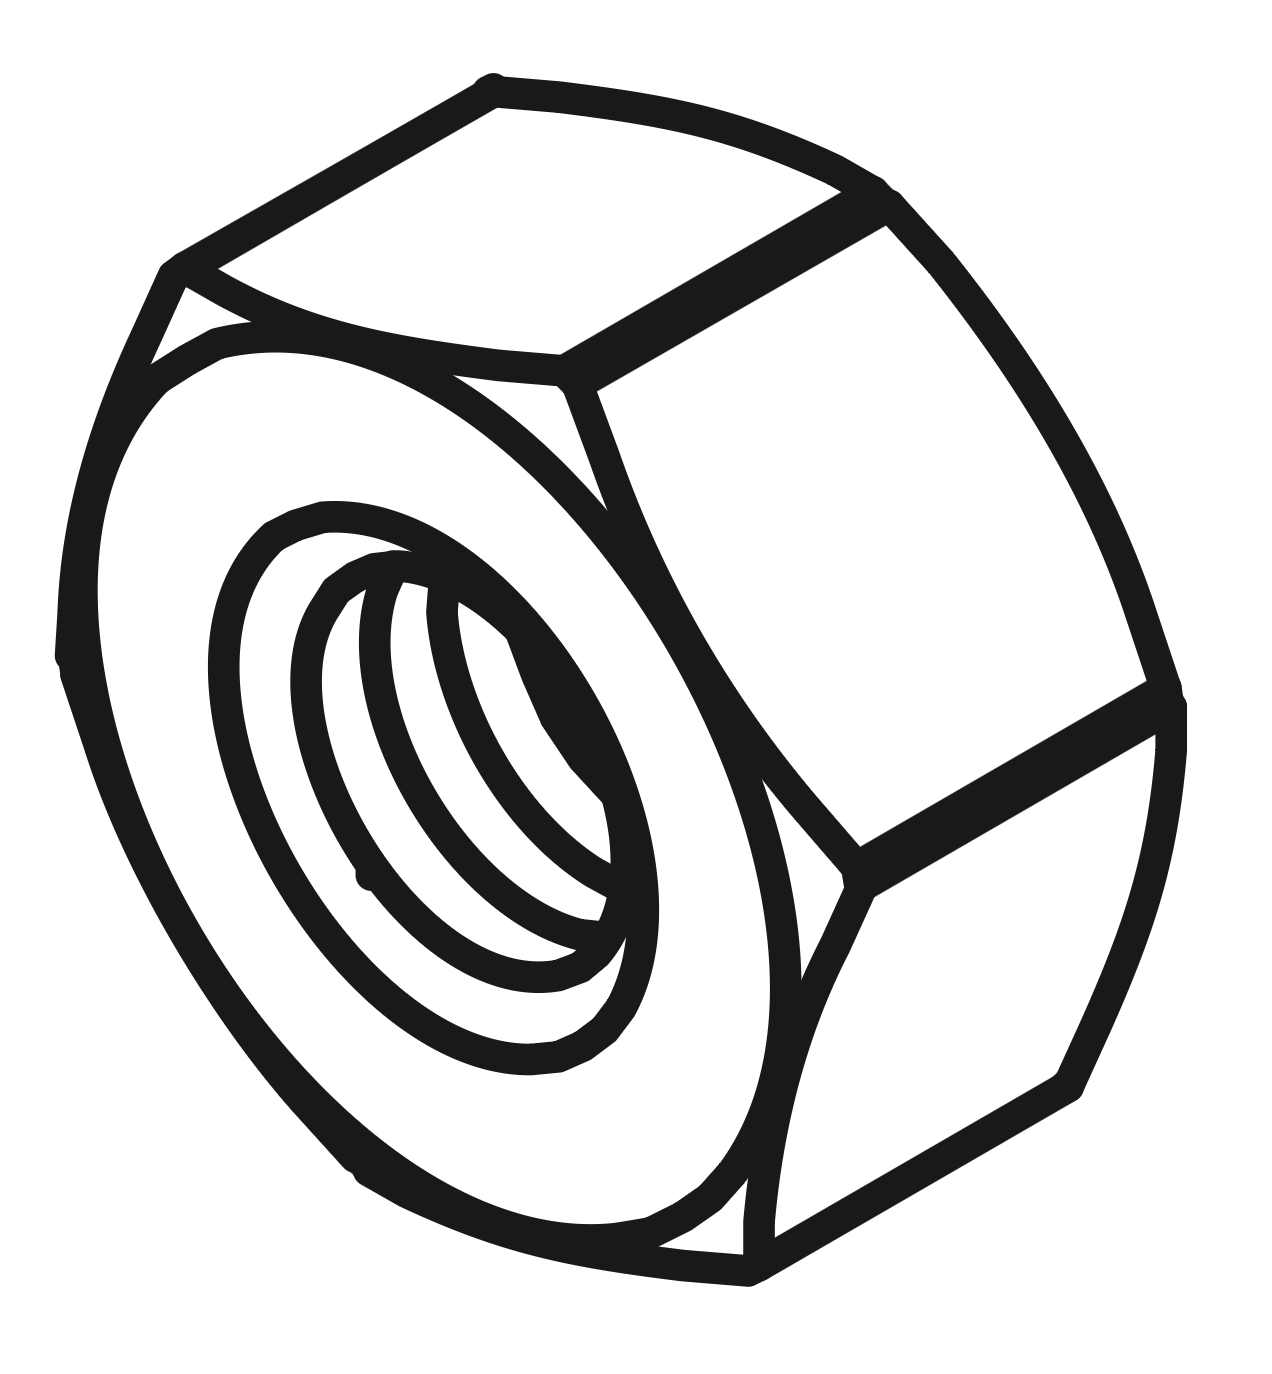 Bed Assembly: F - Nut For M8 Bolt  Bed Assembly: H - Spring Washer M8  Bed Assembly: K - Corner Bracket - Left  Bed Assembly: L - Corner Bracket - Right 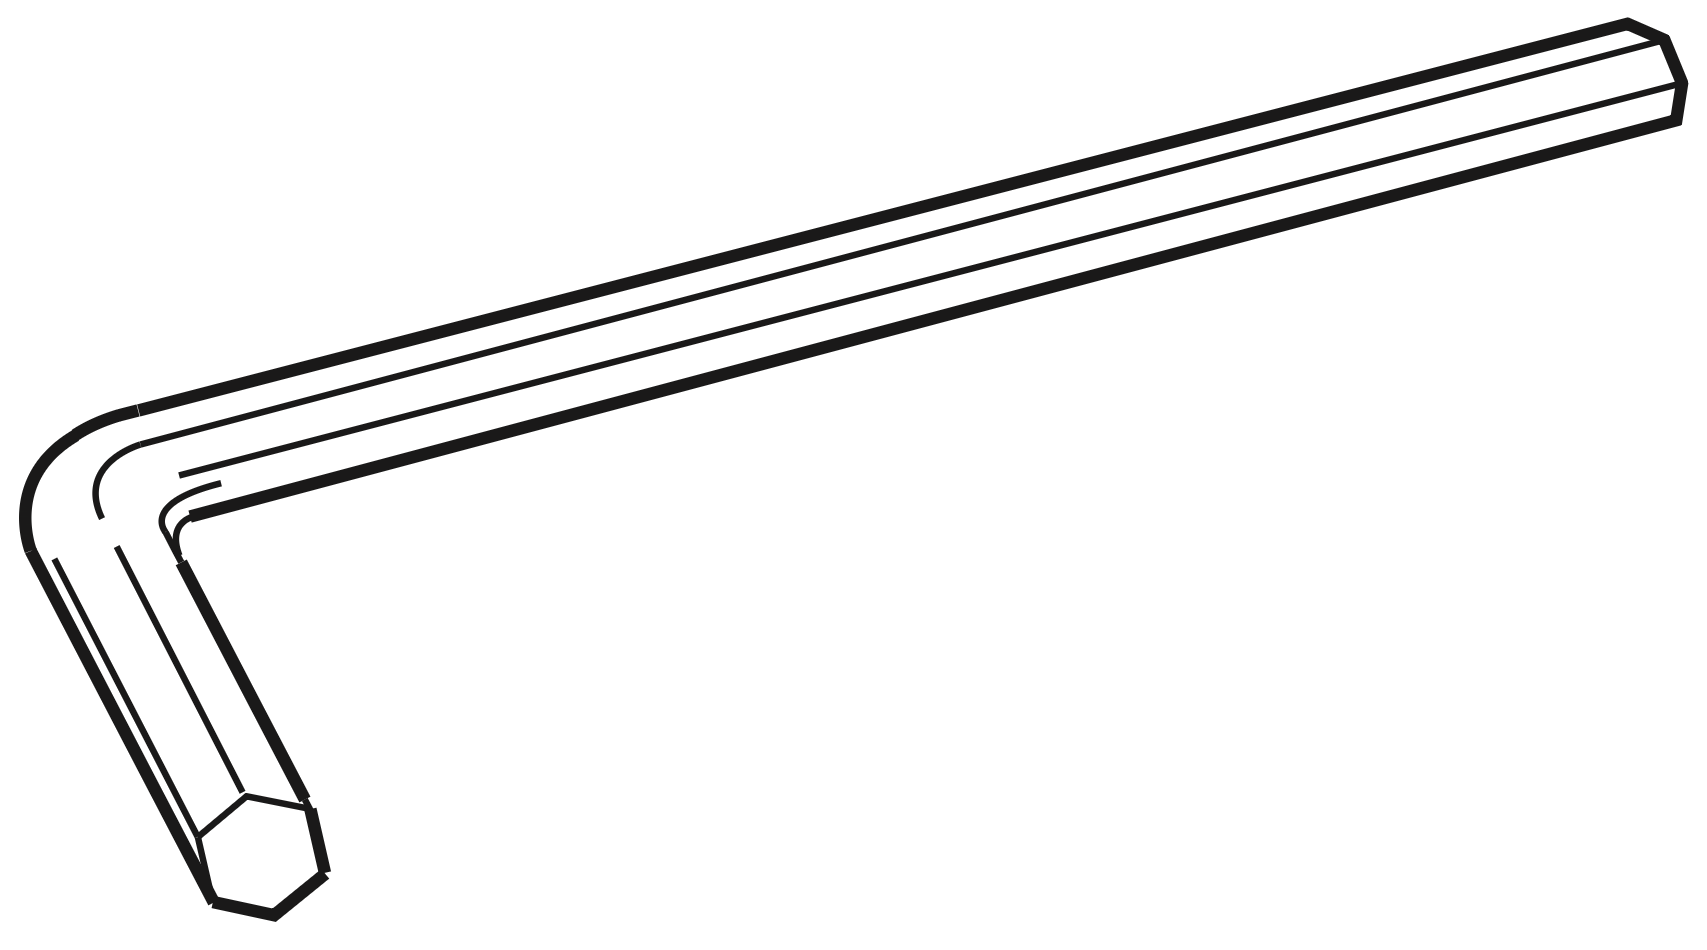 Bed Assembly: M - Allen Key for M8  Bed Assembly: P - Spanner for M8  Metal Slat Frame Assembly: A - Bolt (M8x25mm) Double /King only  Metal Slat Frame Assembly: B - Bolt (M8x35mm) Metal Slat Frame Assembly: C - Bolt (M8x50mm) Metal Slat Frame Assembly: E - Flat Washer M8  Metal Slat Frame Assembly: G - Flanged Lock-Nut M8 Metal Slat Frame Assembly: H - Spring Washer M8  Metal Slat Frame Assembly: J - Metal Plate M8 Double/King only Parts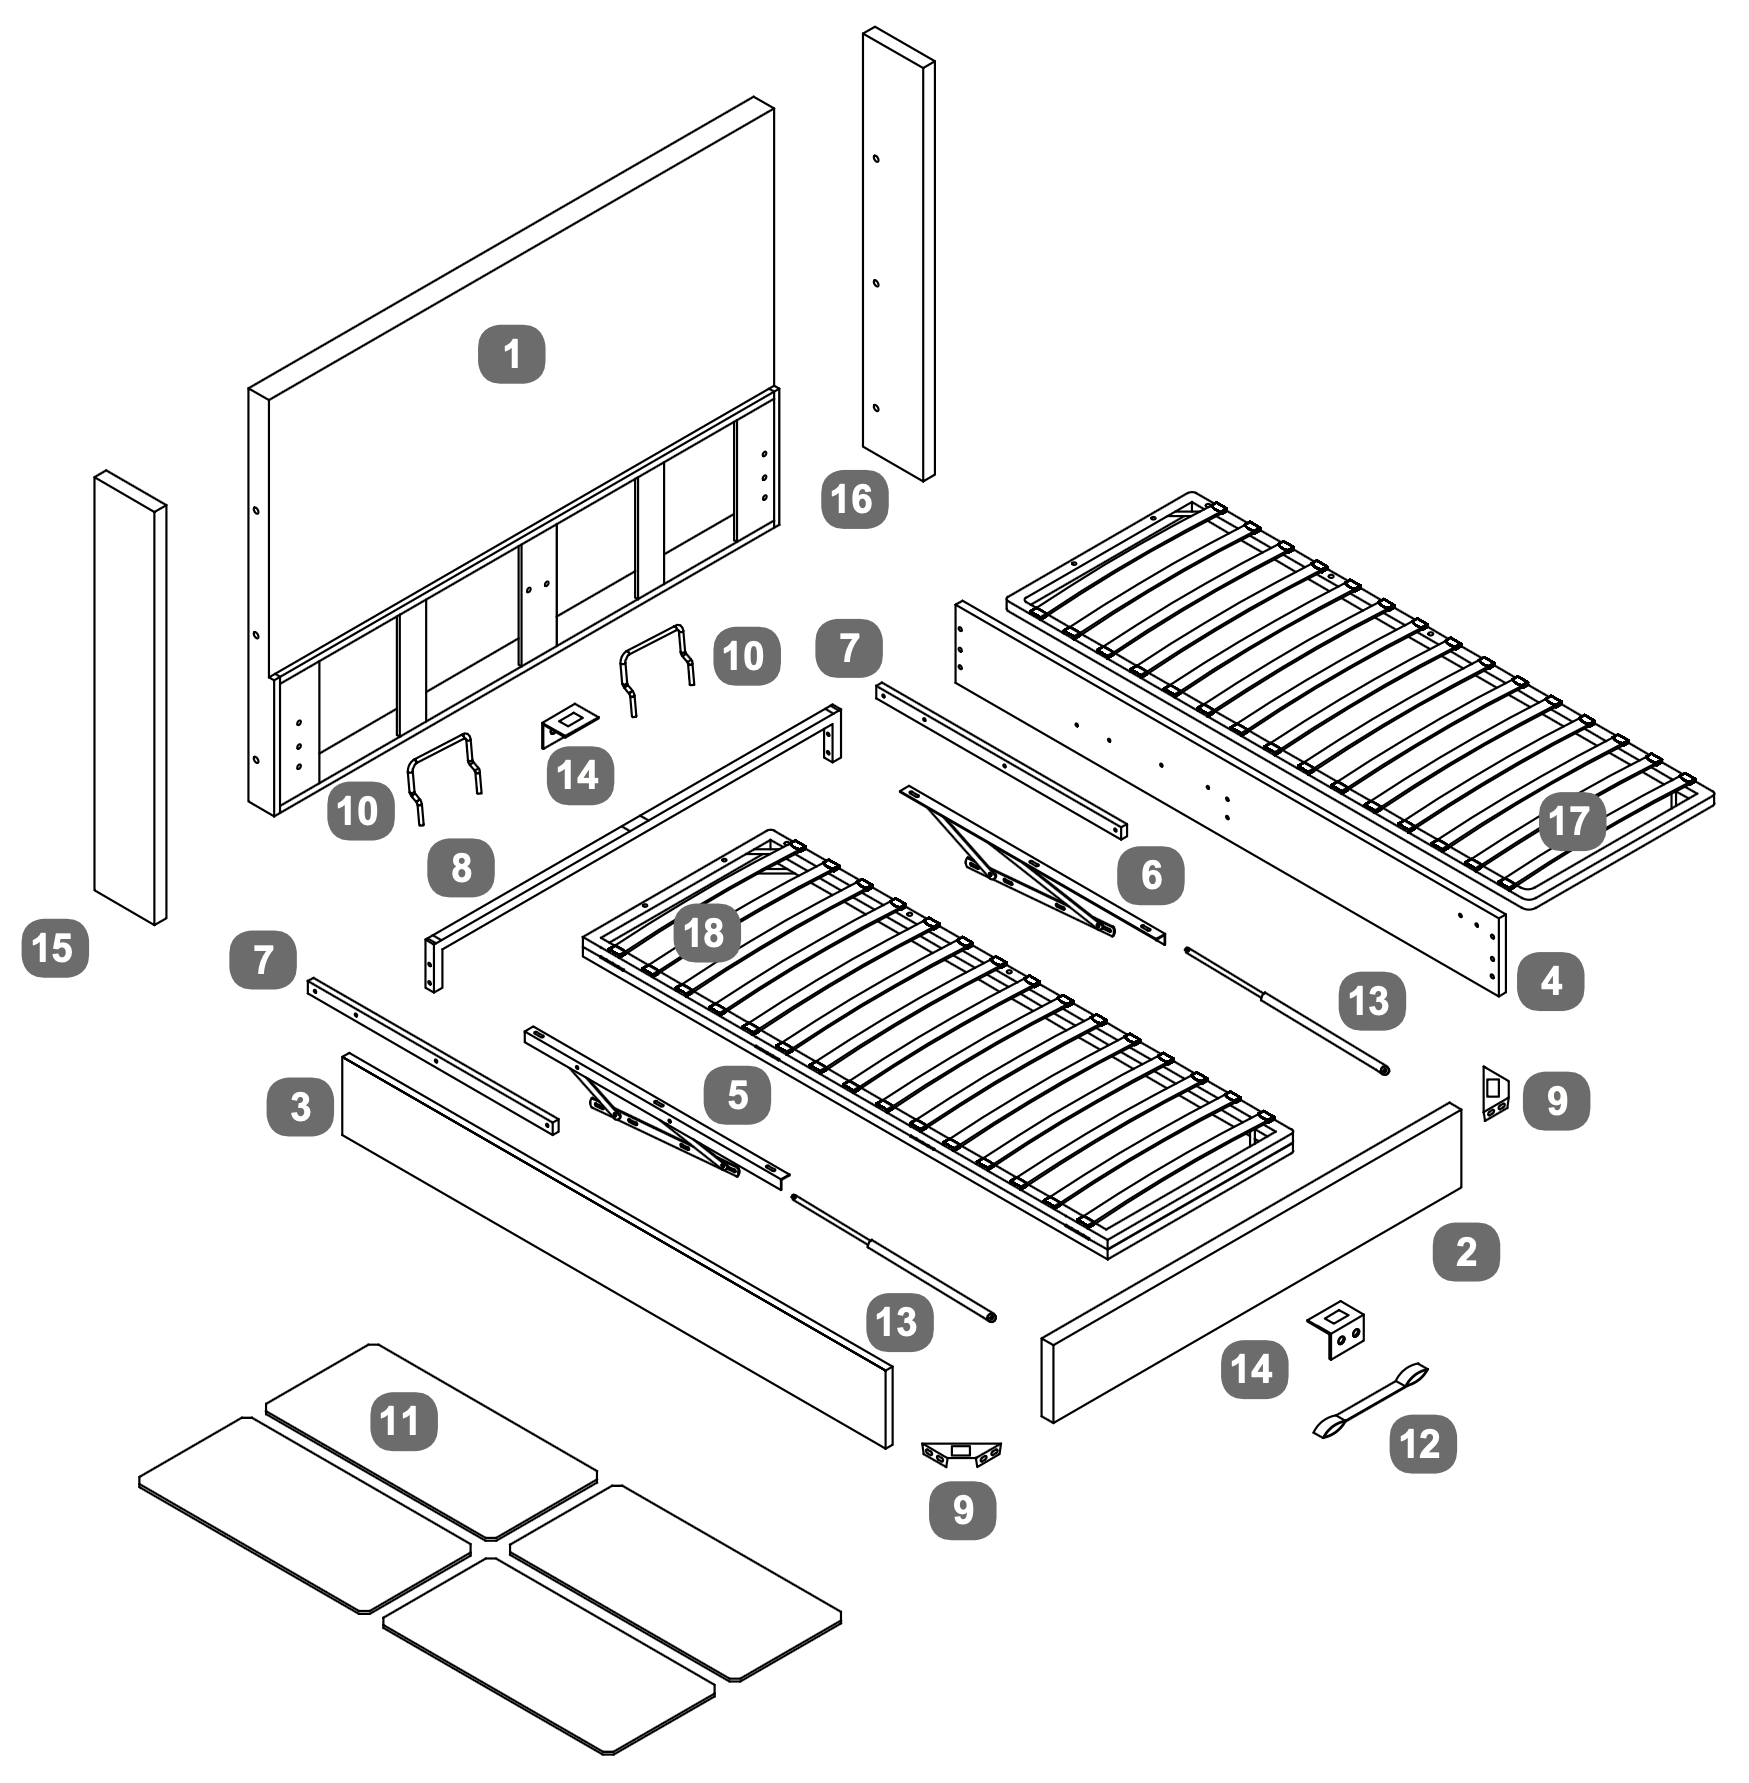 1Headboard - Box 1 2Footboard - Box 2 3Side Rail - LH - Box 2 4Side Rail - RH - Box 2 5Gas-lift Mechanism x1 - Right - Box 3 6Gas-lift Mechanism x1 - Left - Box 3 7Spacer Rail For Gas Lift Mechanism -Box 3 8`U' Shape Cross Bar - Box 3 9Angled Corner Brackets - Box 3 10Mattress Stoppers Box 3 (1 Single, 2 Double / King) 11Storage Base Board - Box 4 12Fabric Handle - Box 3 13Gas Lift Piston - Box 3 14'L' Shape Bracket - Box 3 15Wing - Left - Box 5 16Wing - Right - Box 5 17Metal Slat Frame For Single - Box 3 18Metal Slat Frame For Double/King - Box 3 1. Side Rail Attachment and Securing
2. Rail and Bracket Assembly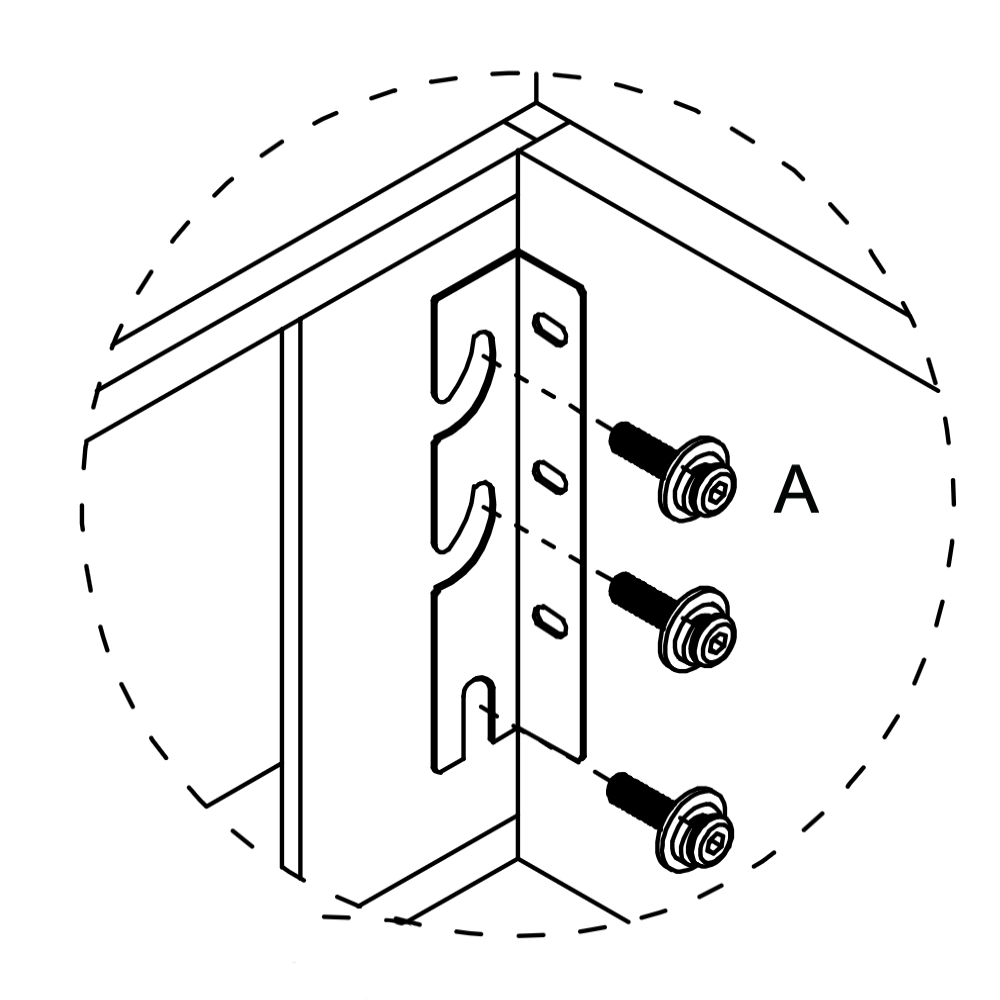 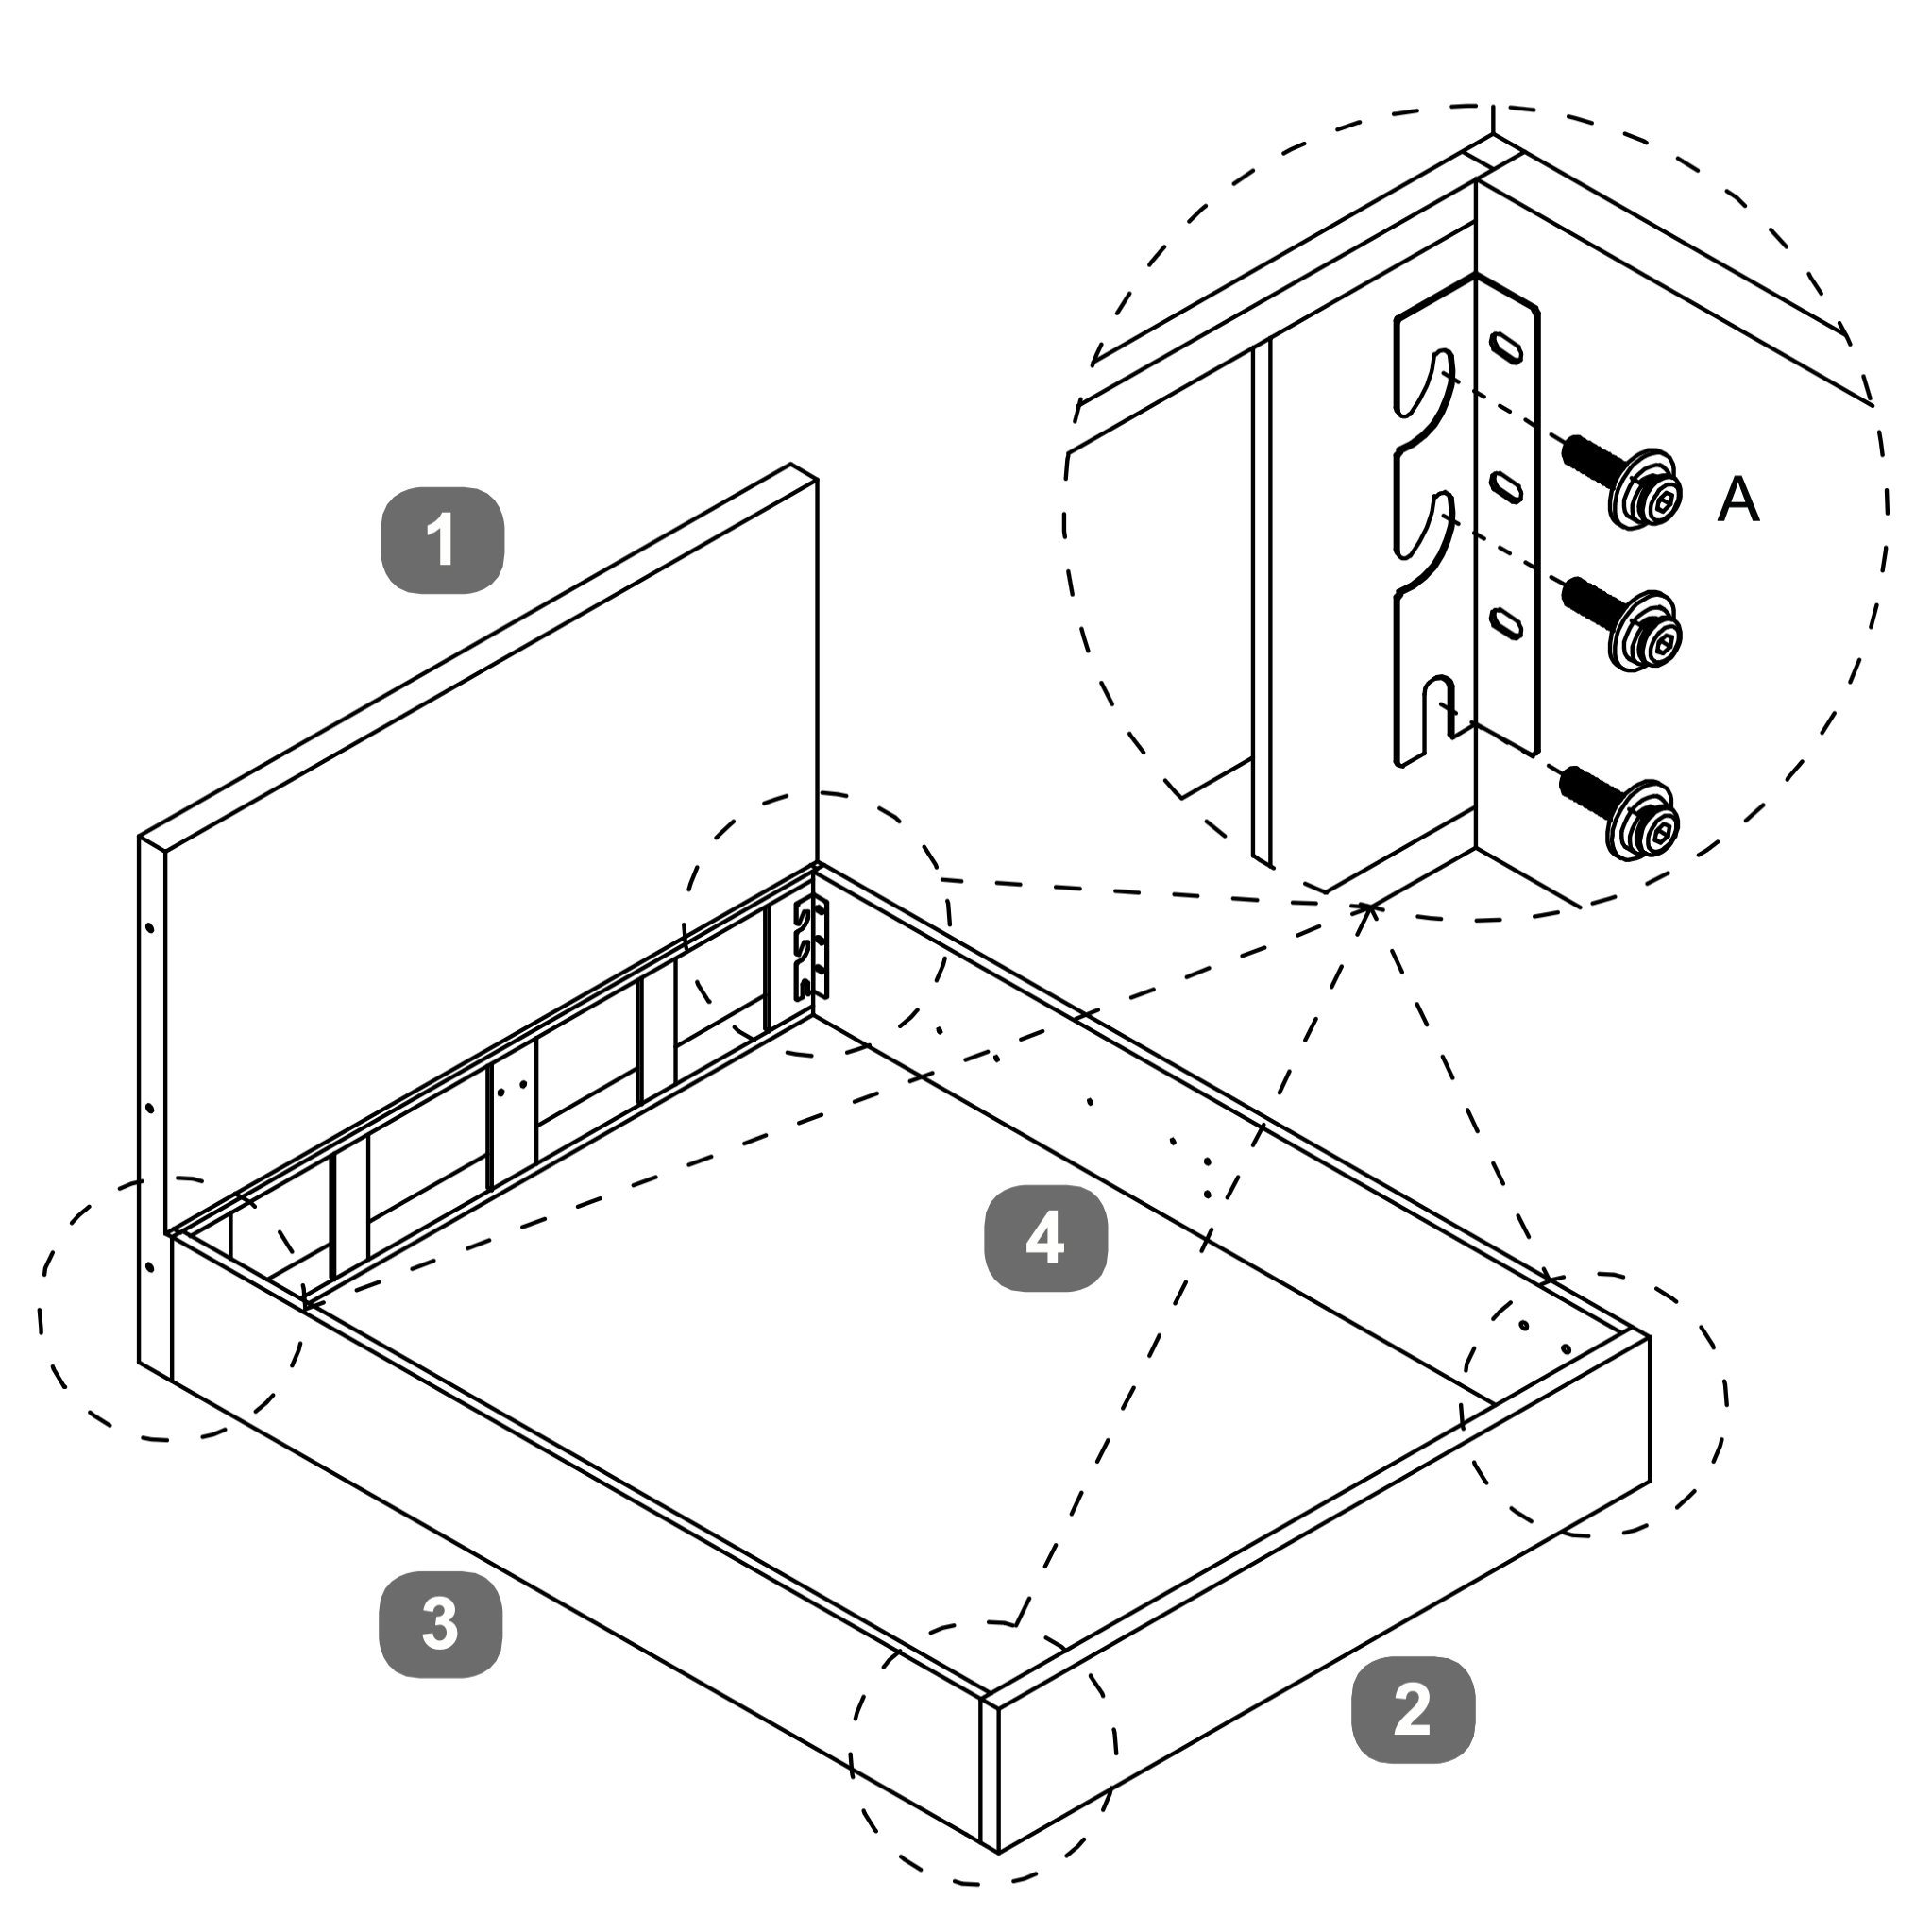
3. Wing Fastening Procedure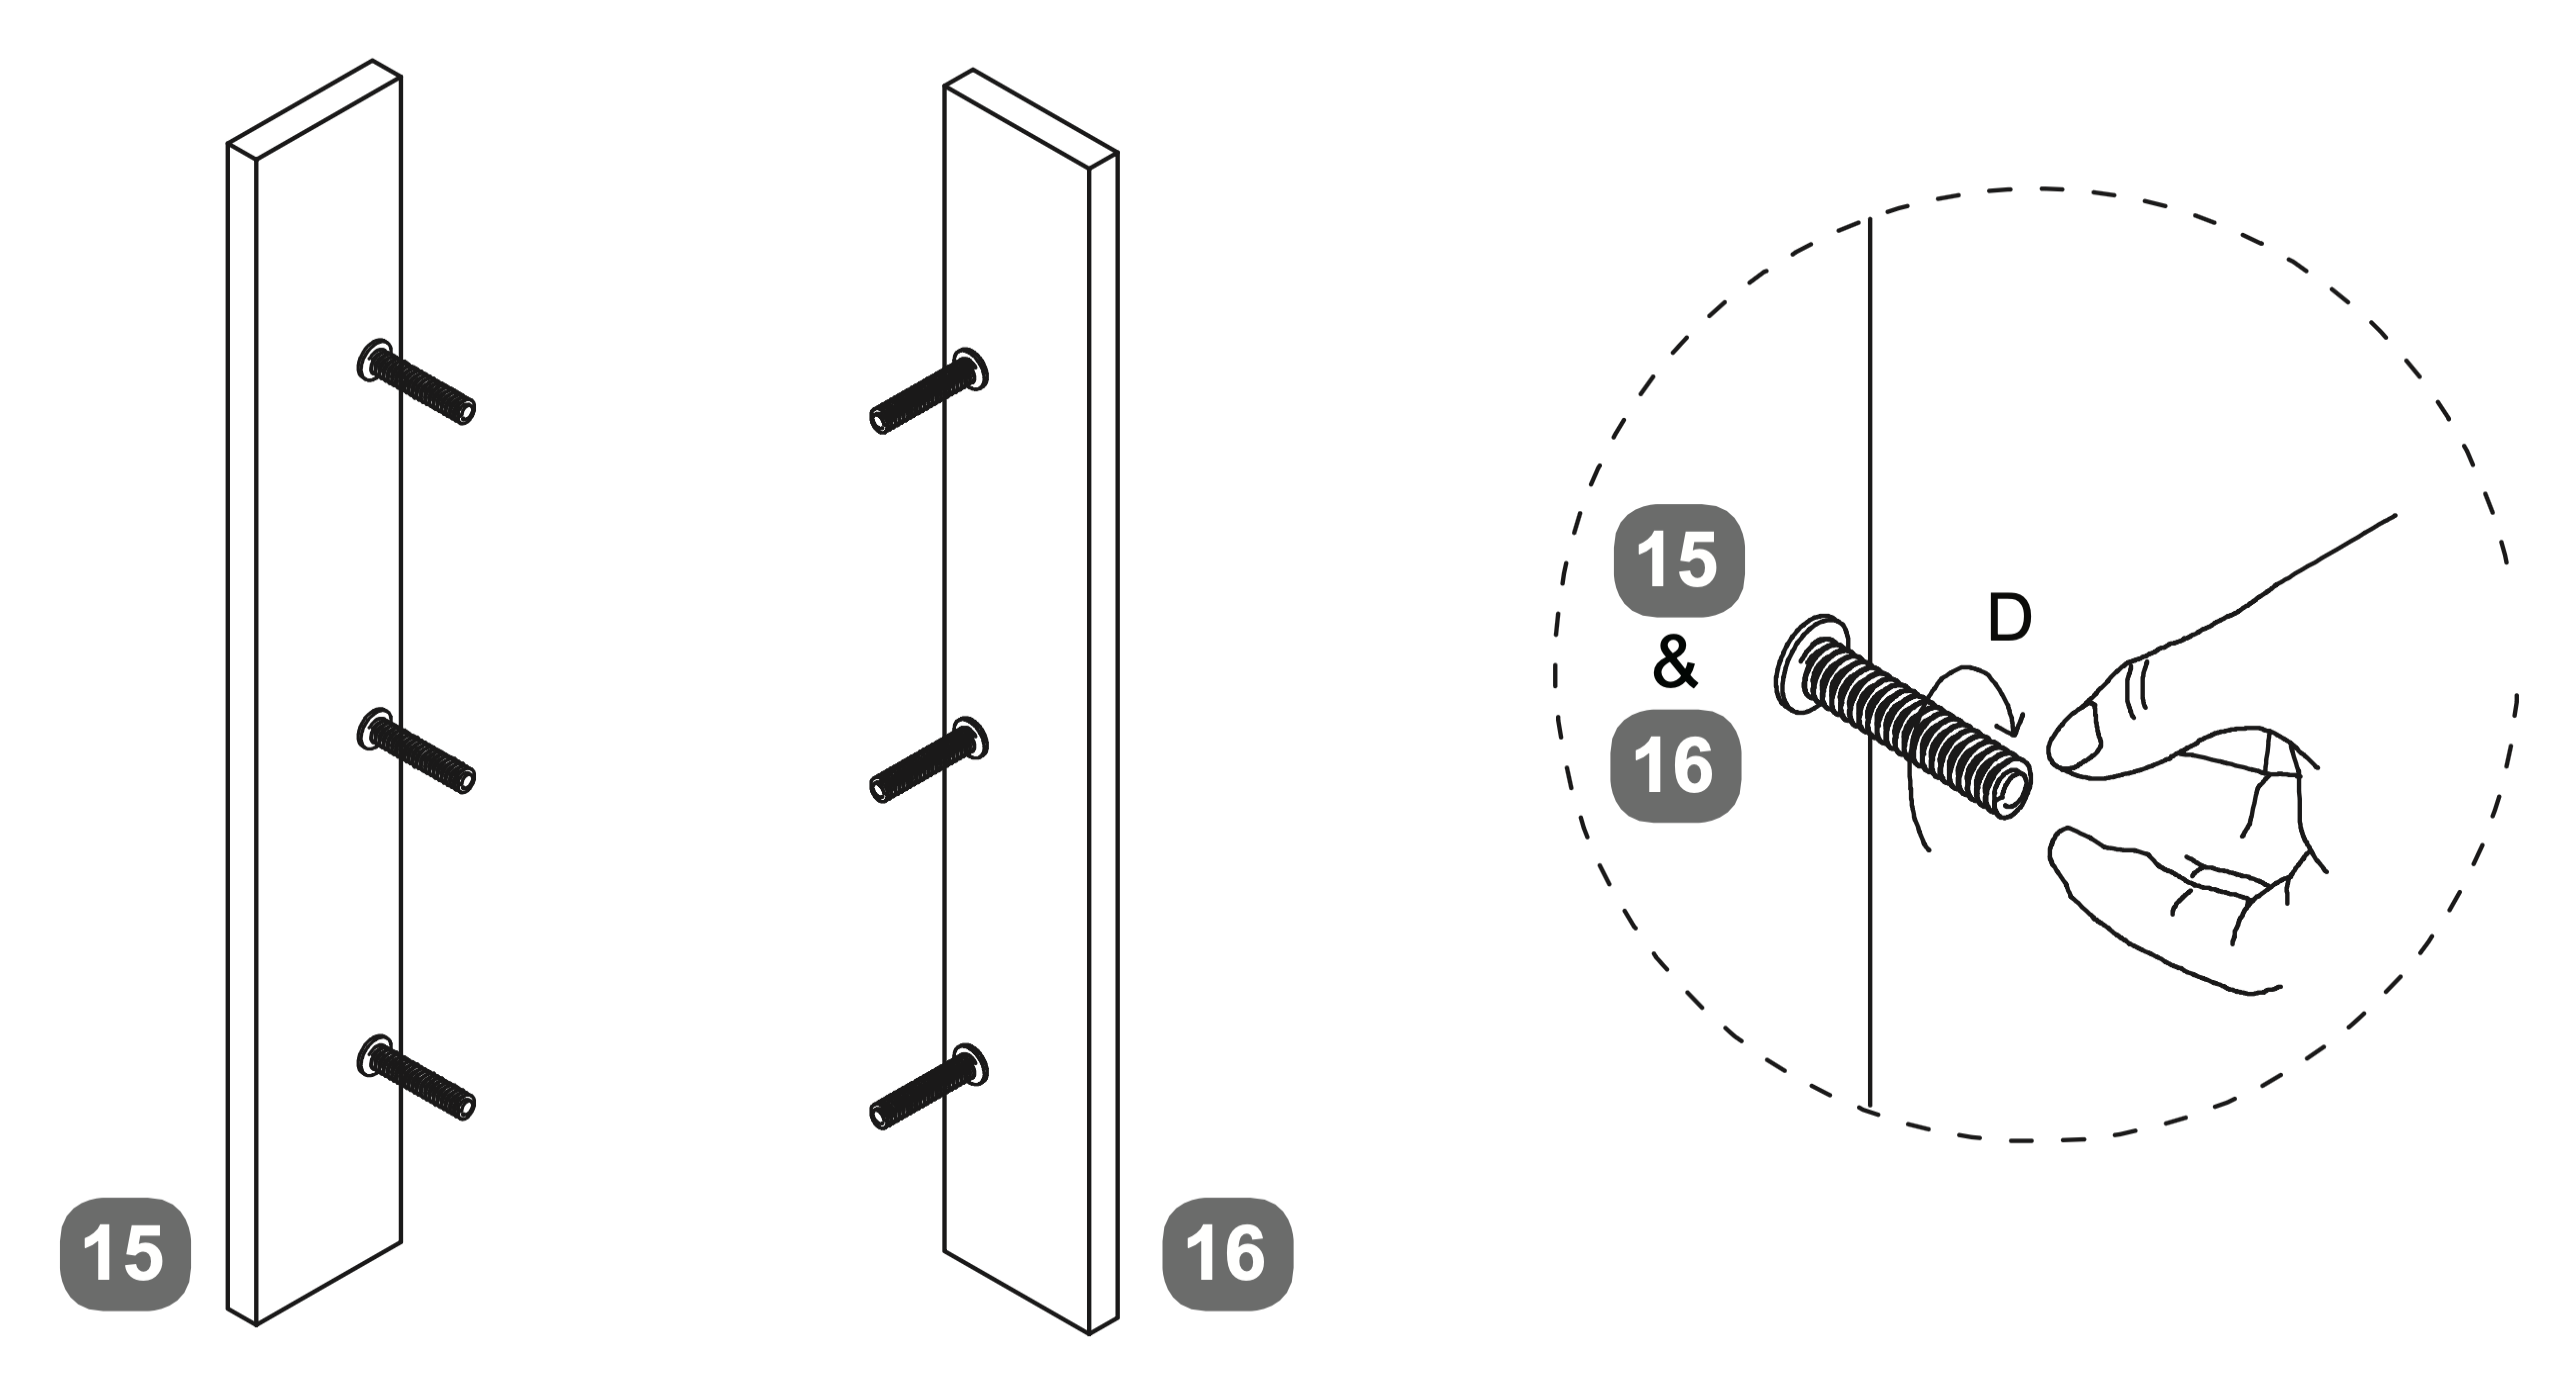 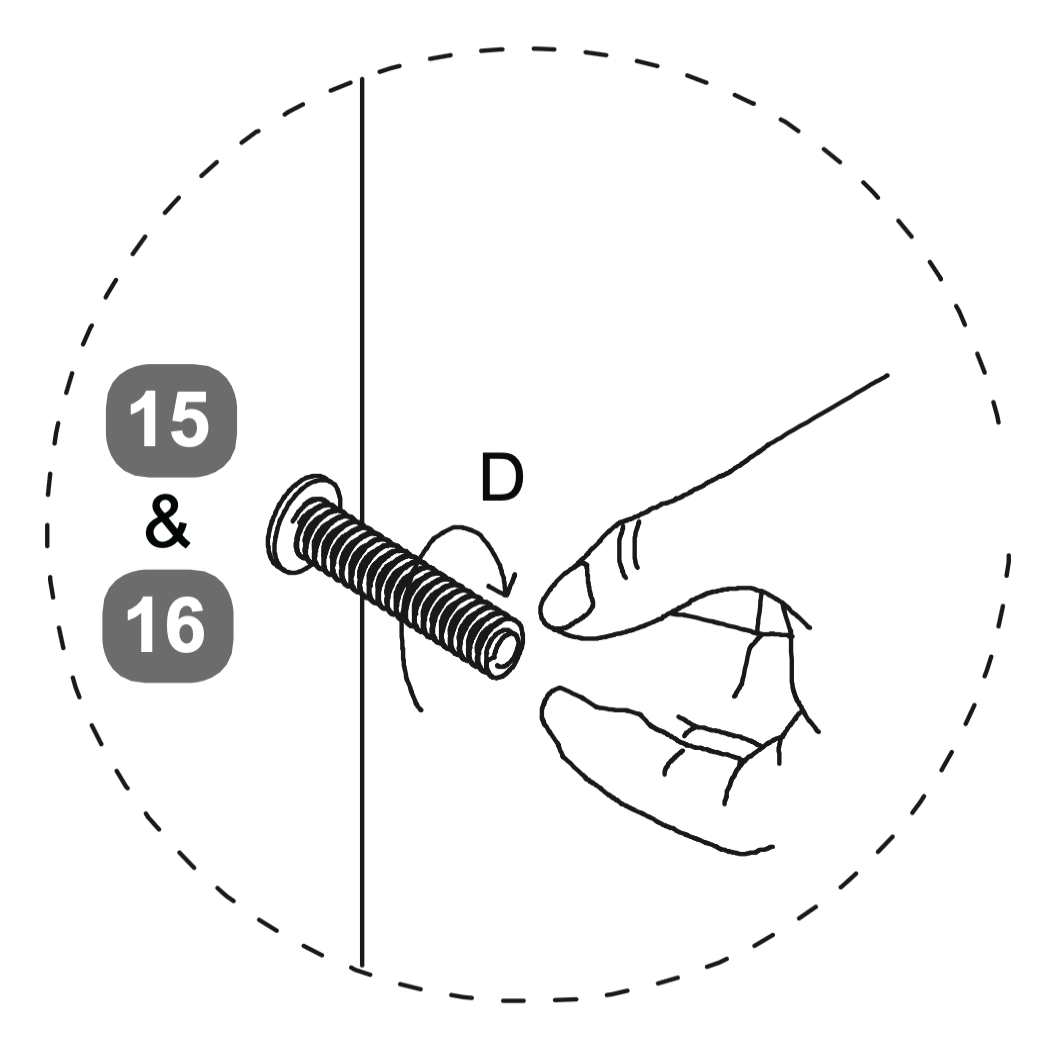
4. Wing Installation and Securing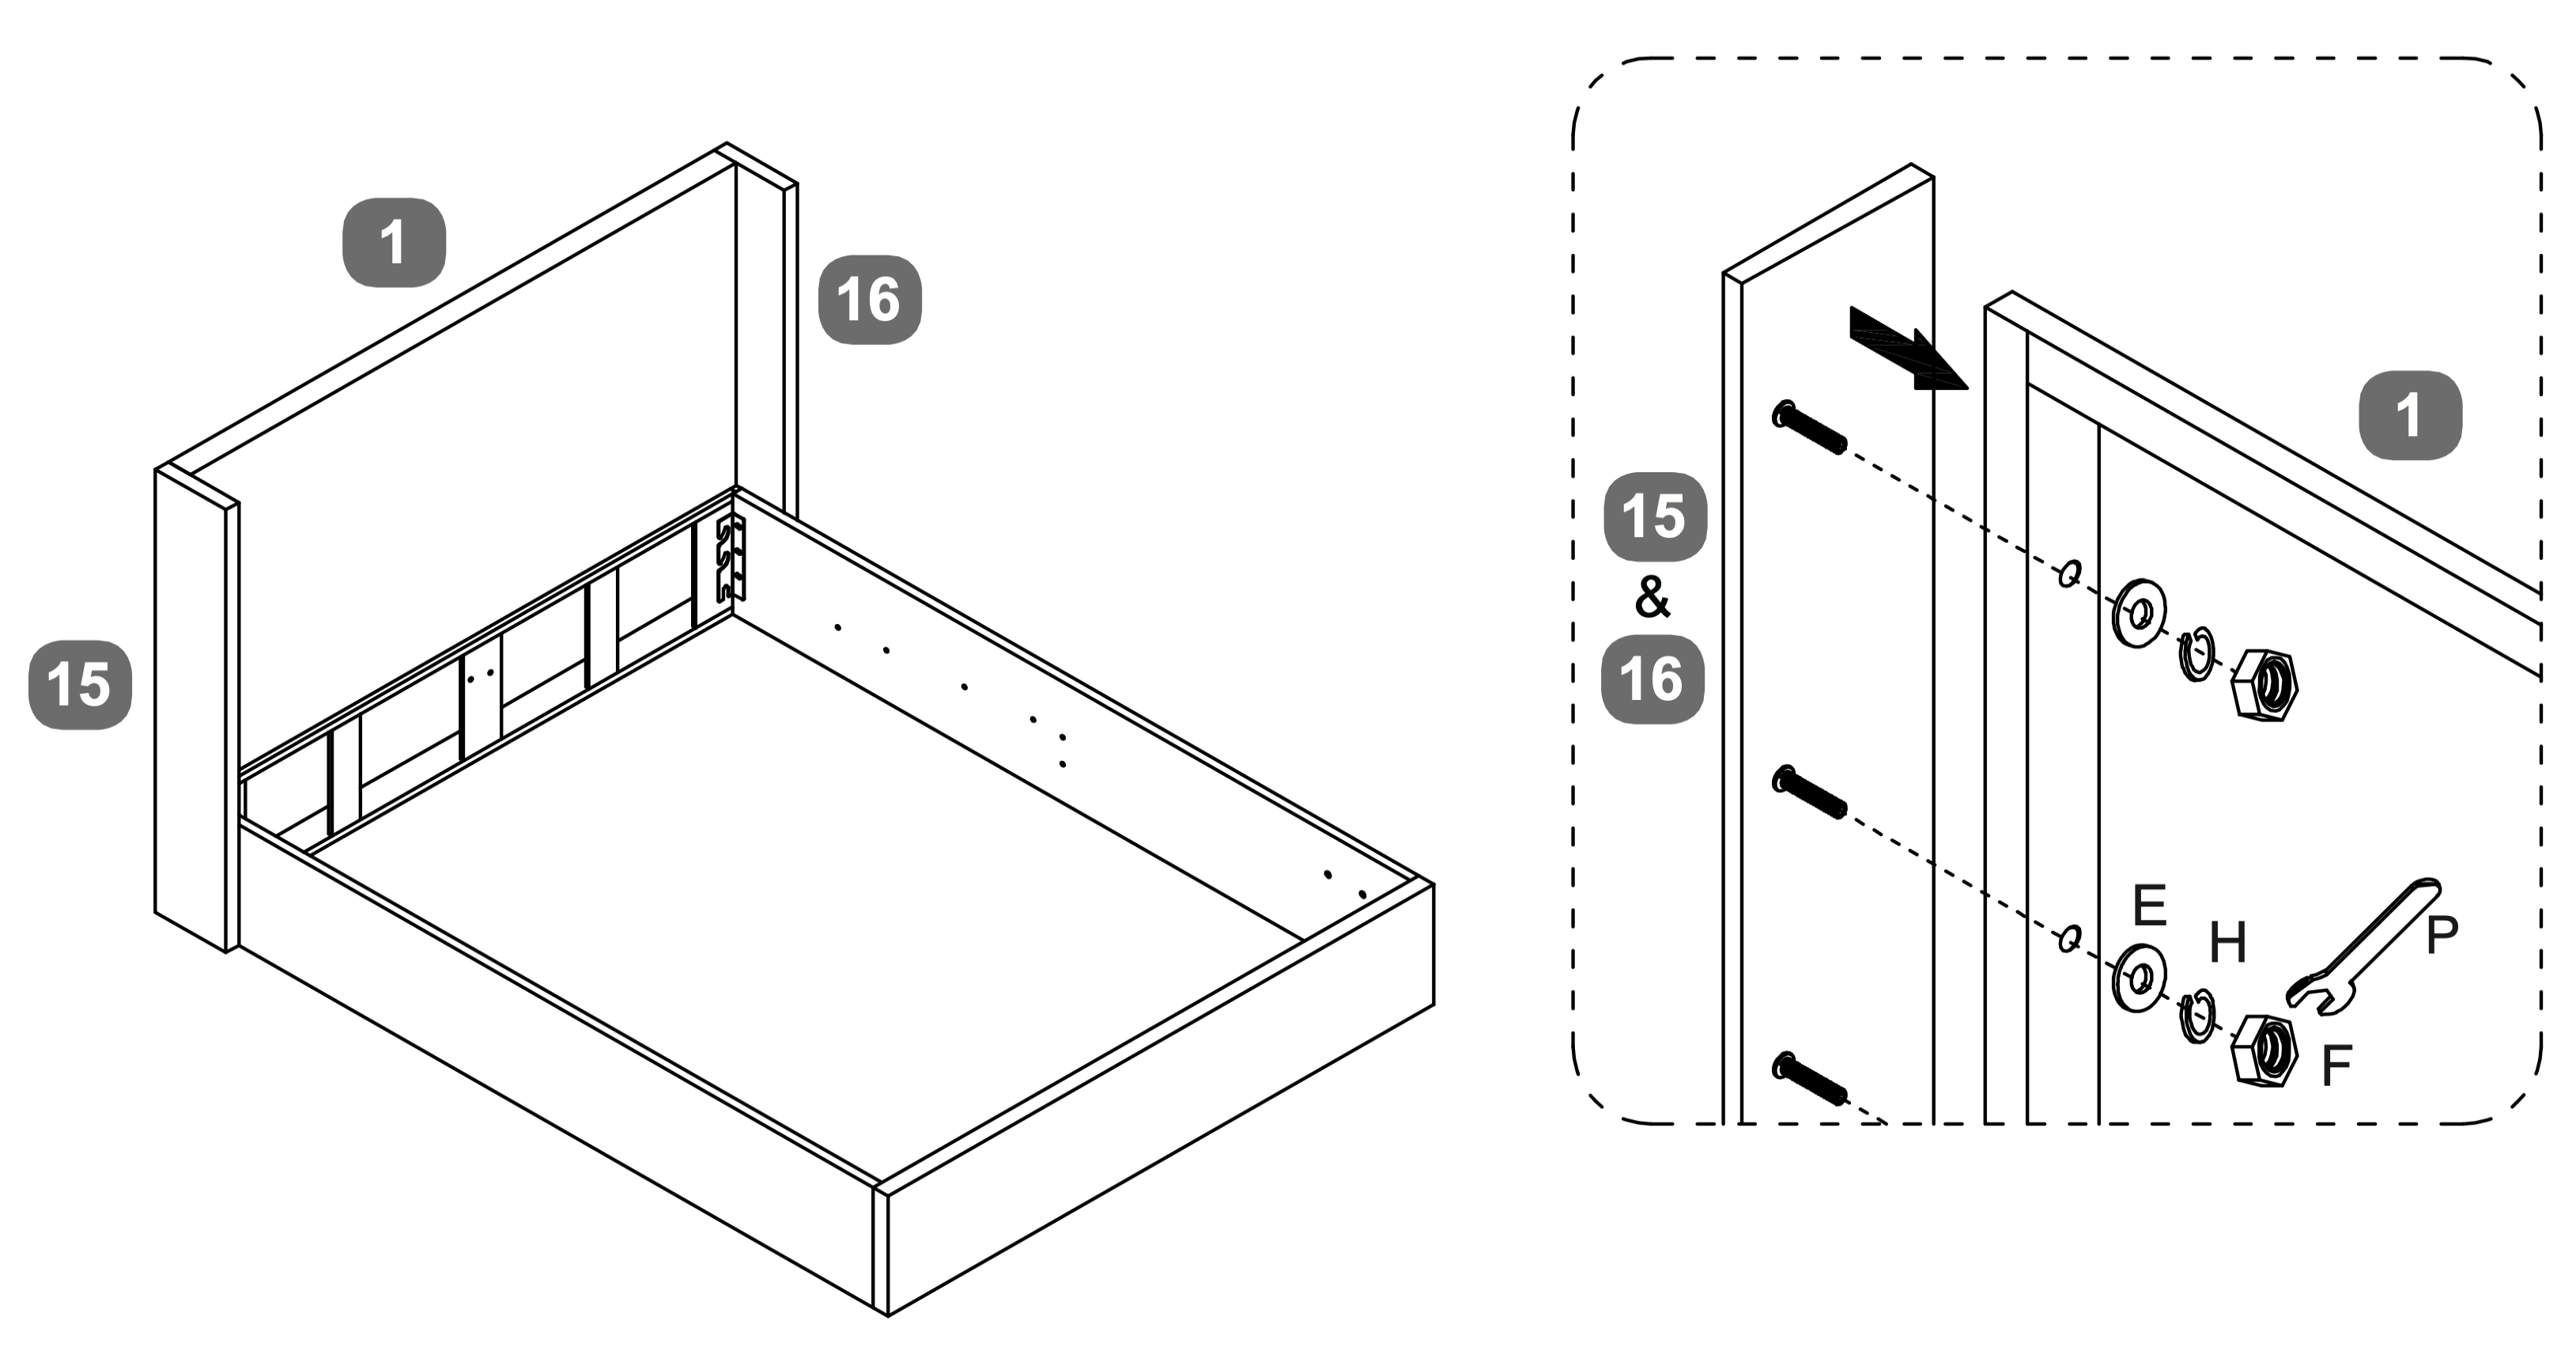 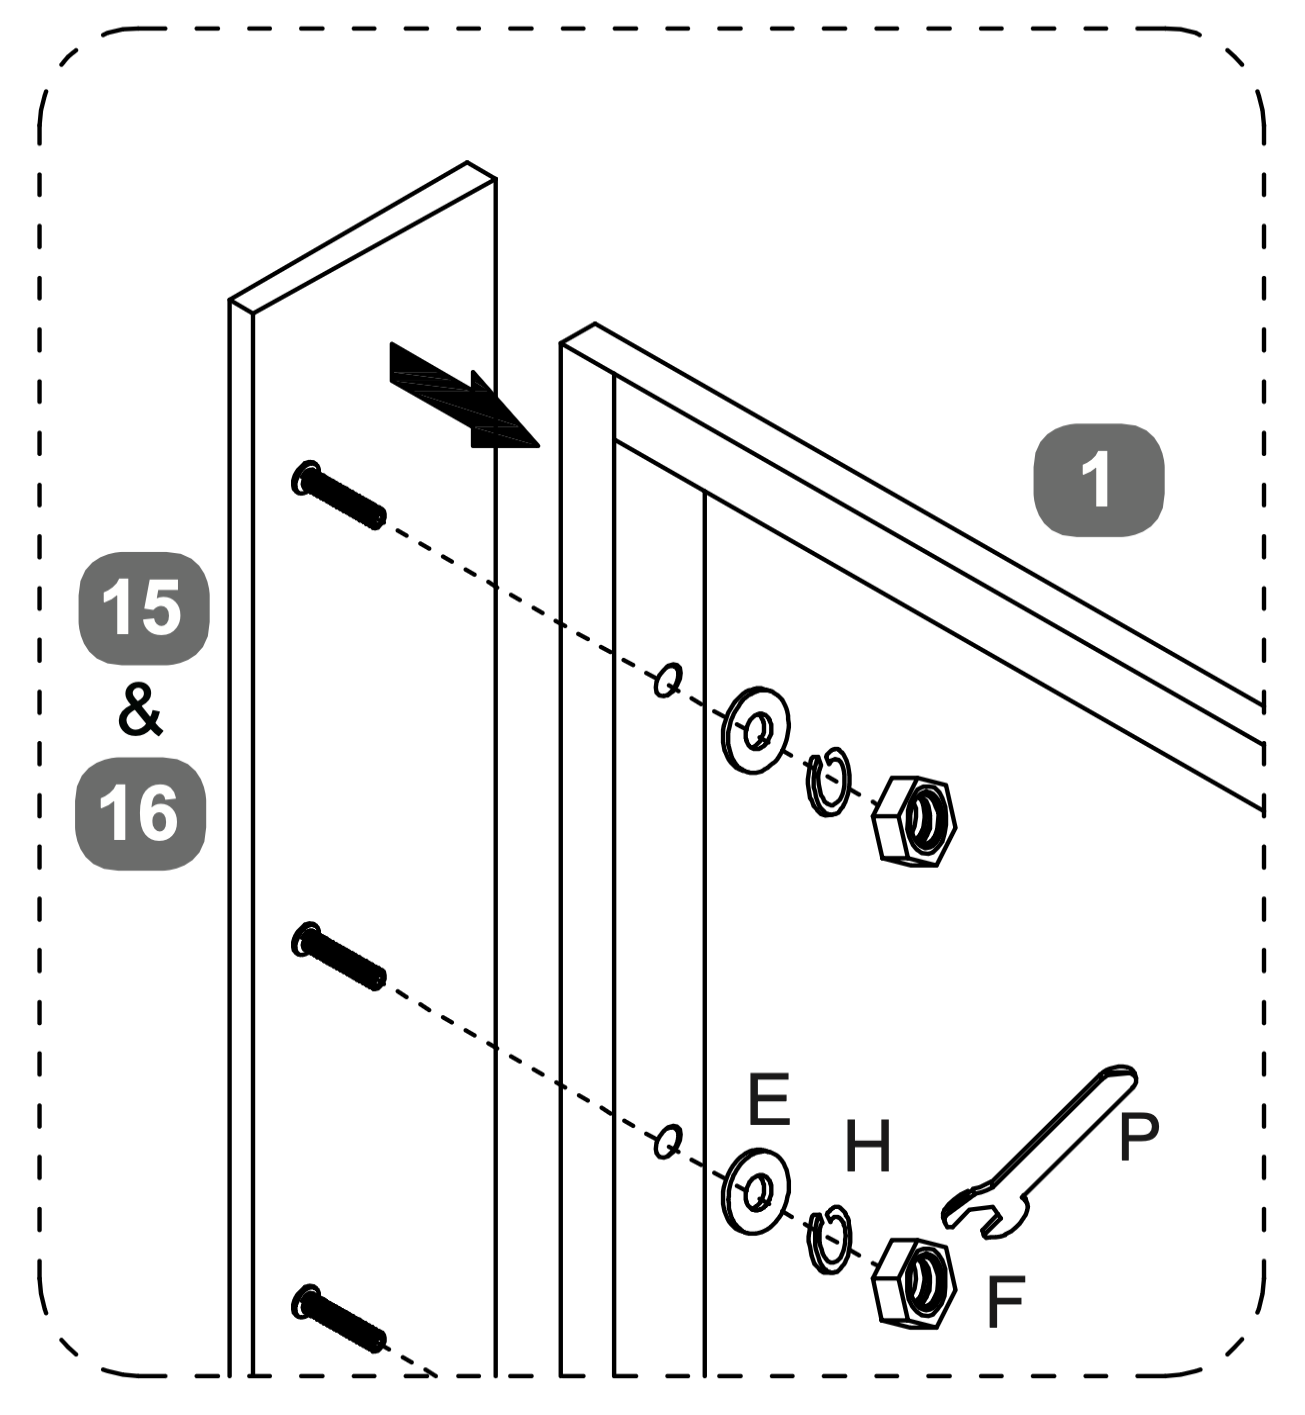 -Align the left wing (15) and right wing (16) with the headboard (1).
5. Cross Bar Stabilization Assembly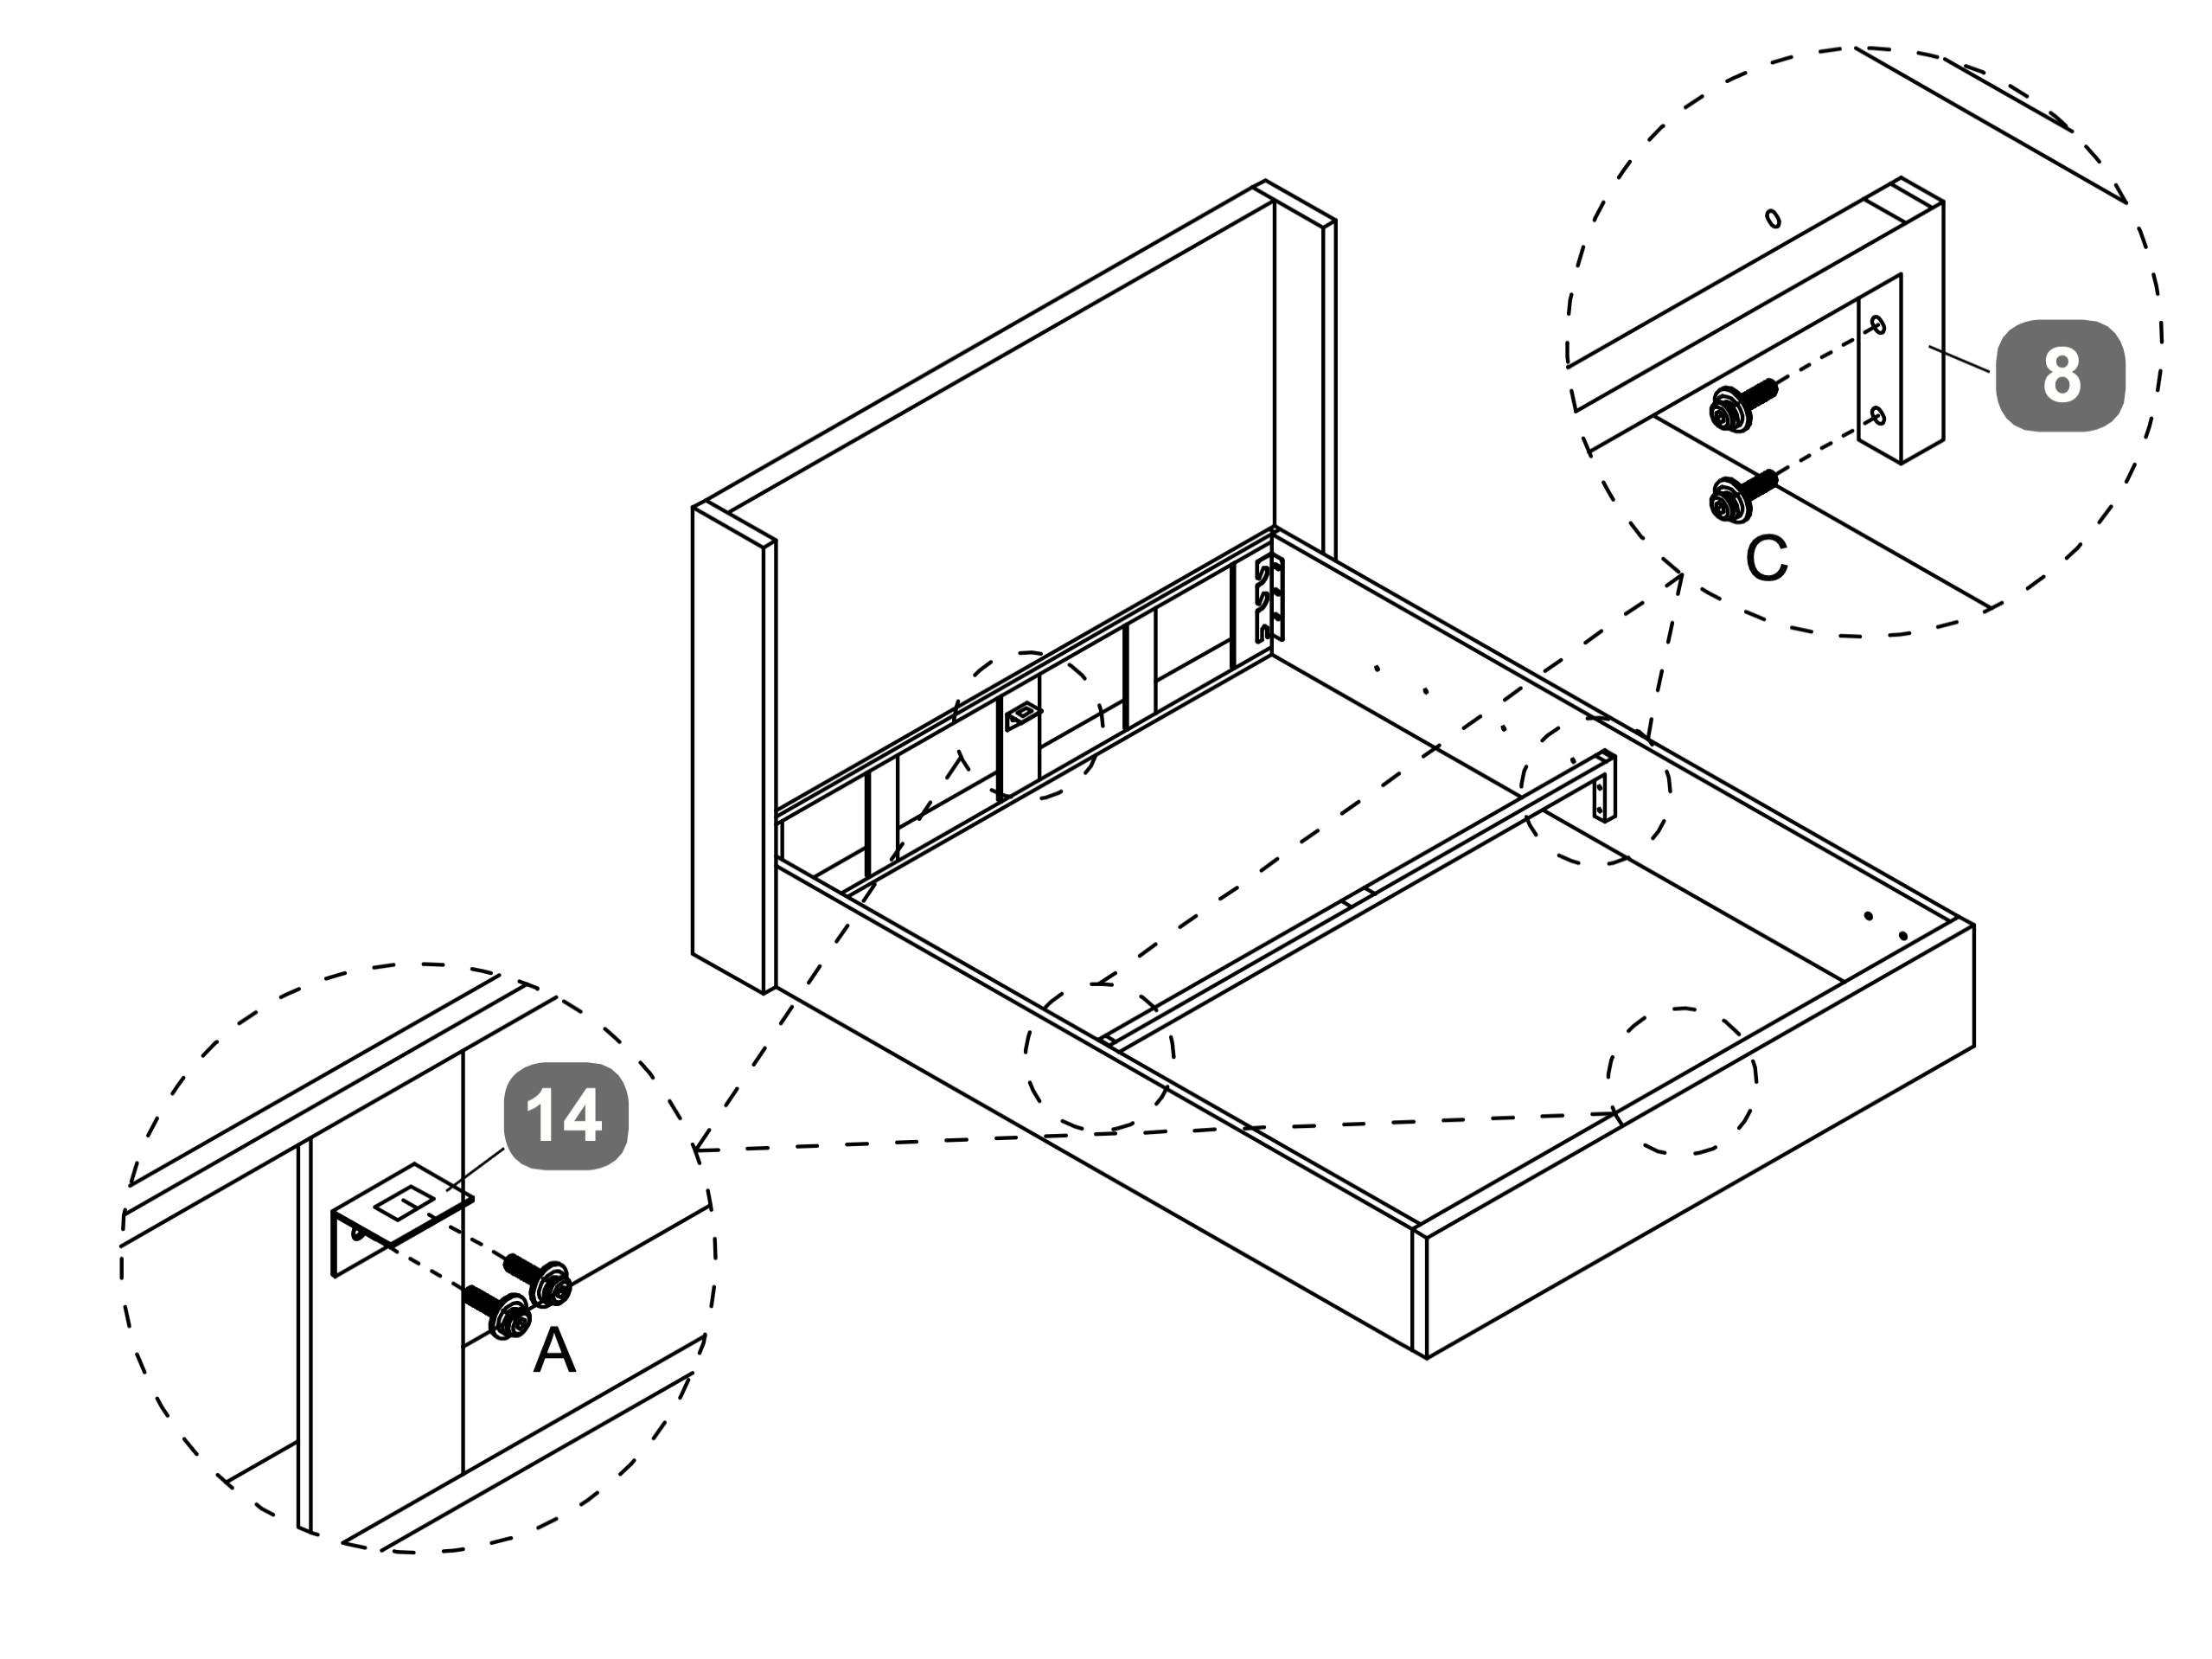 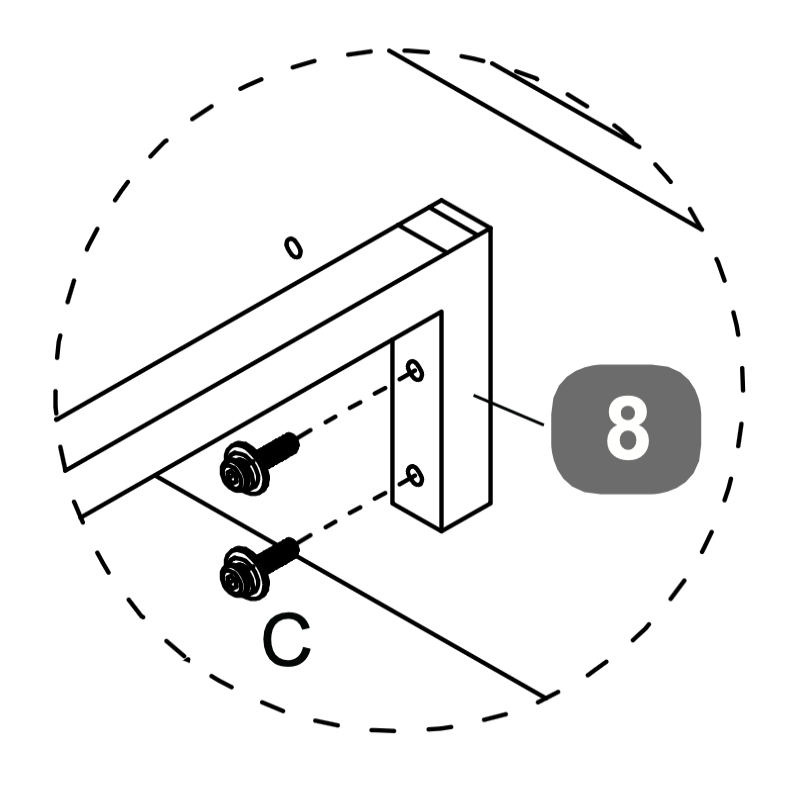
6. Corner Bracket Installation and Stabilization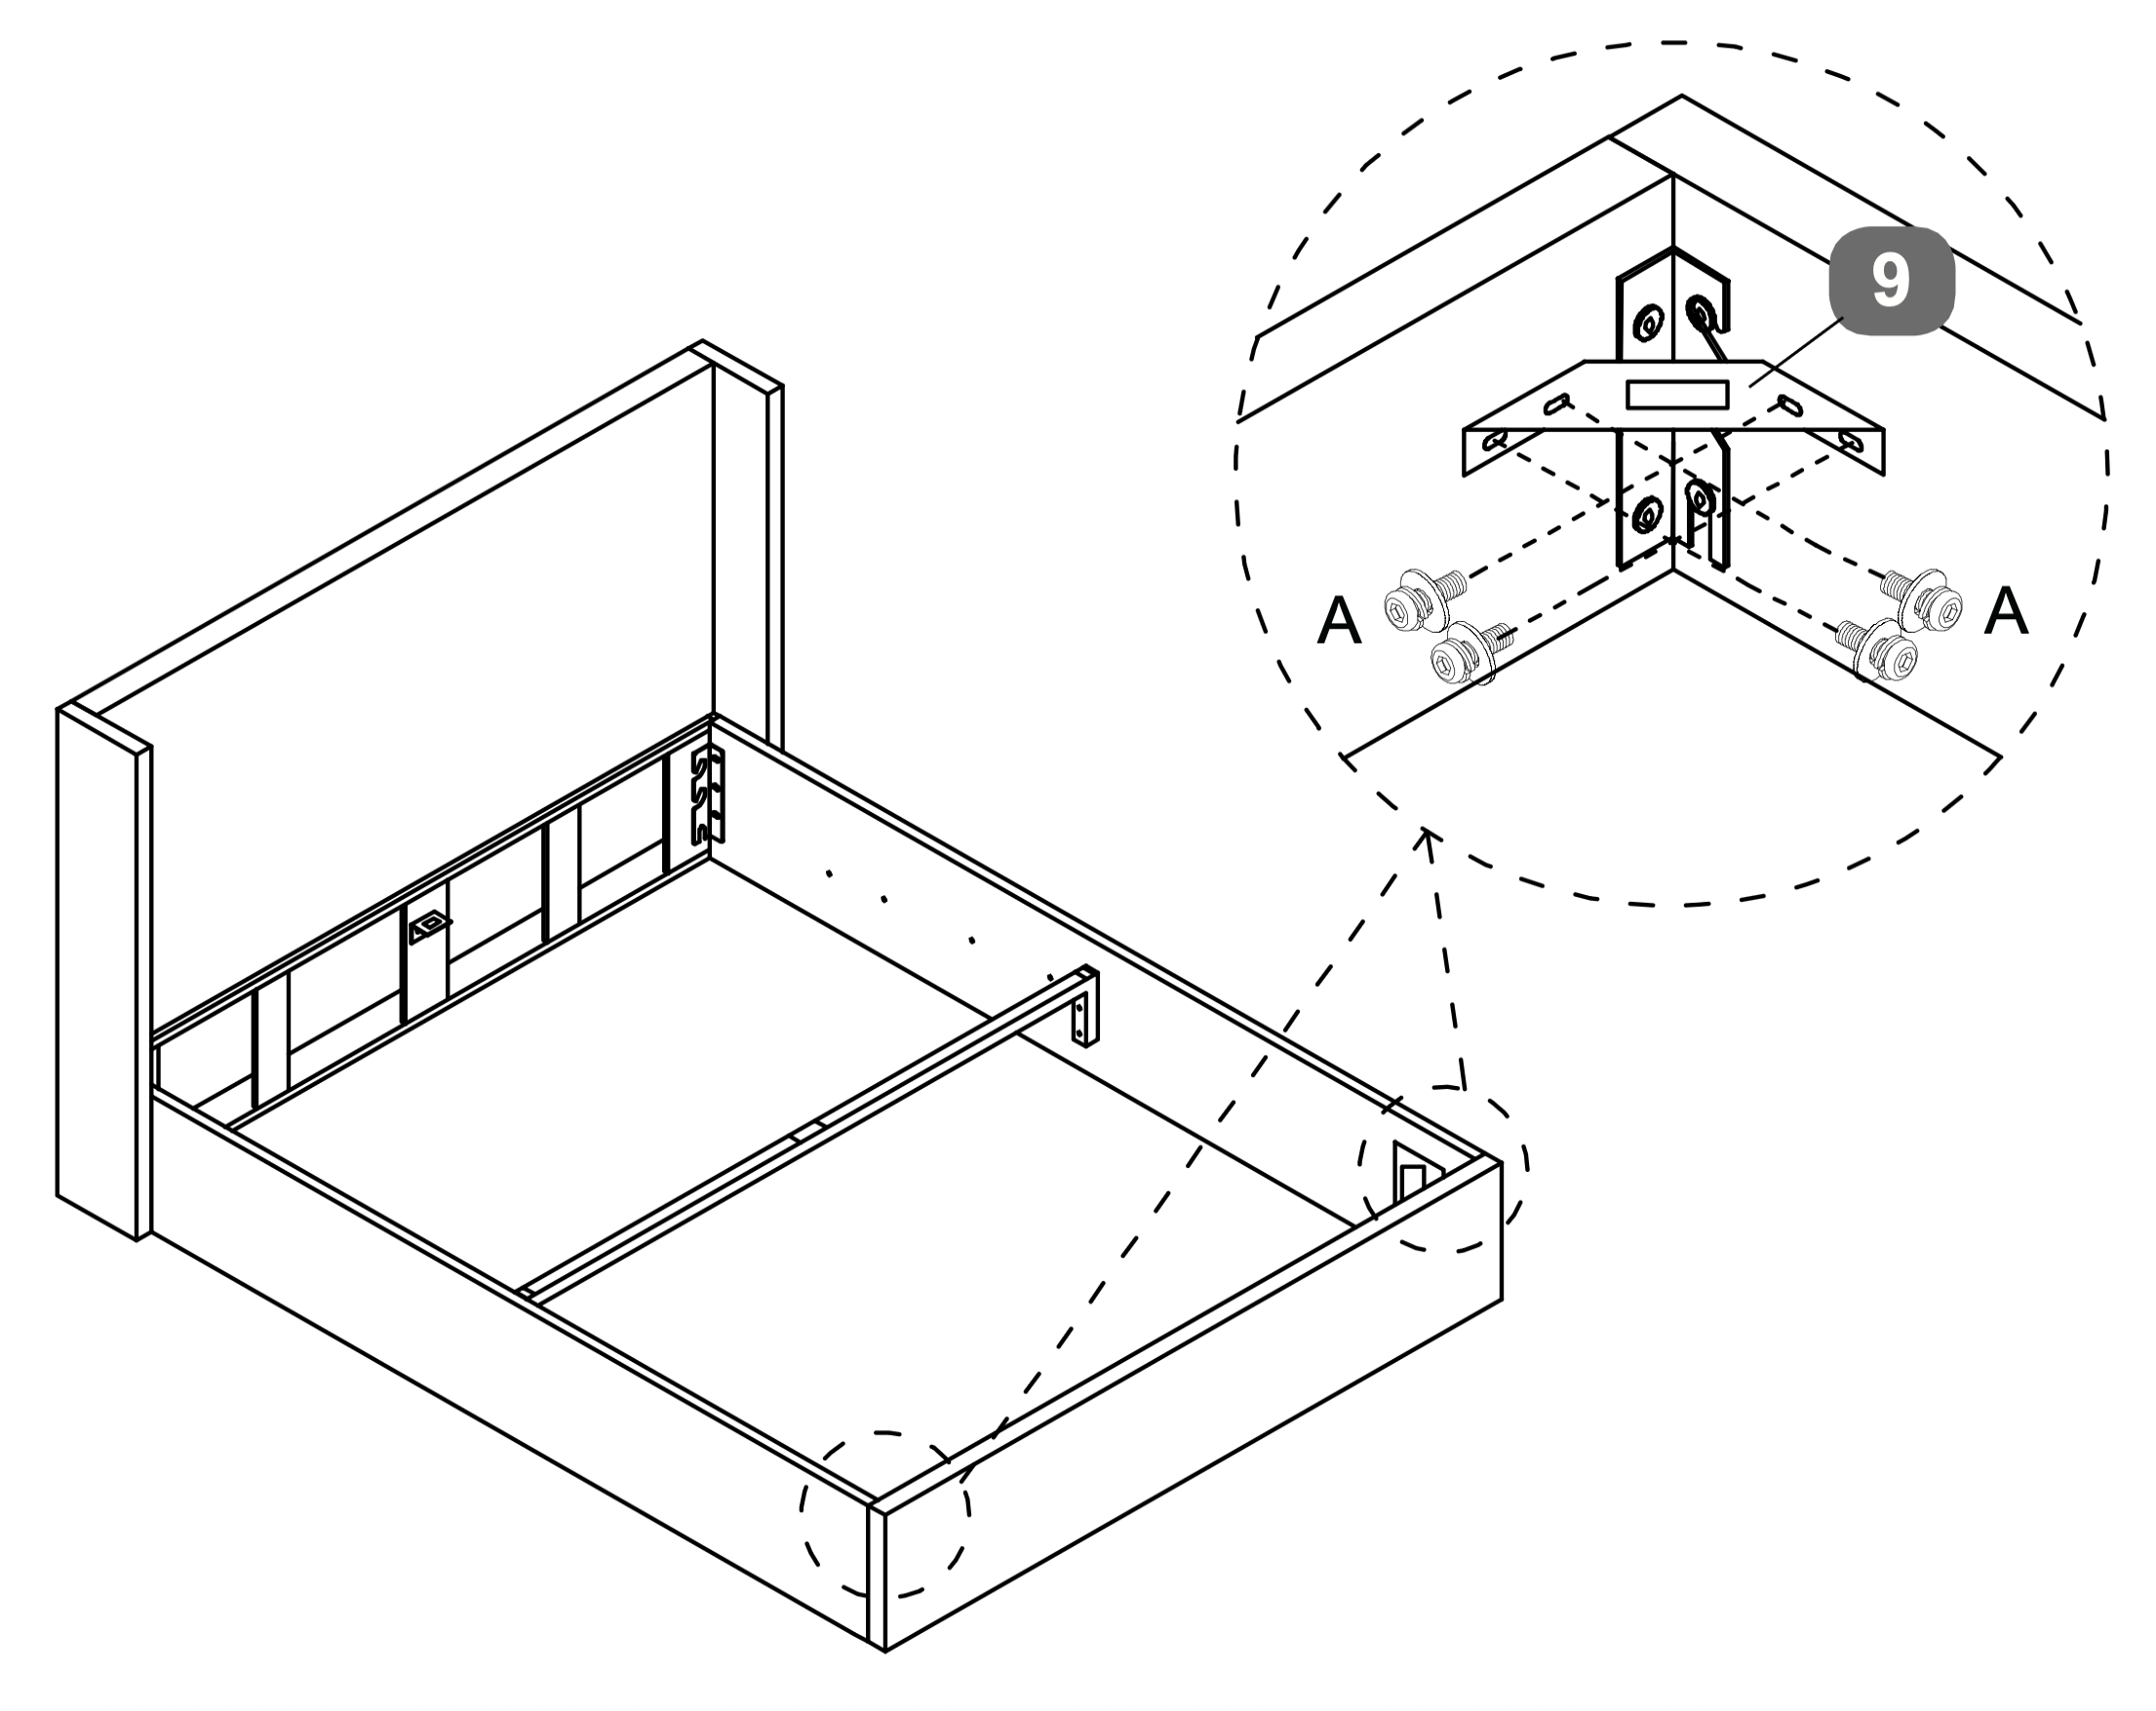 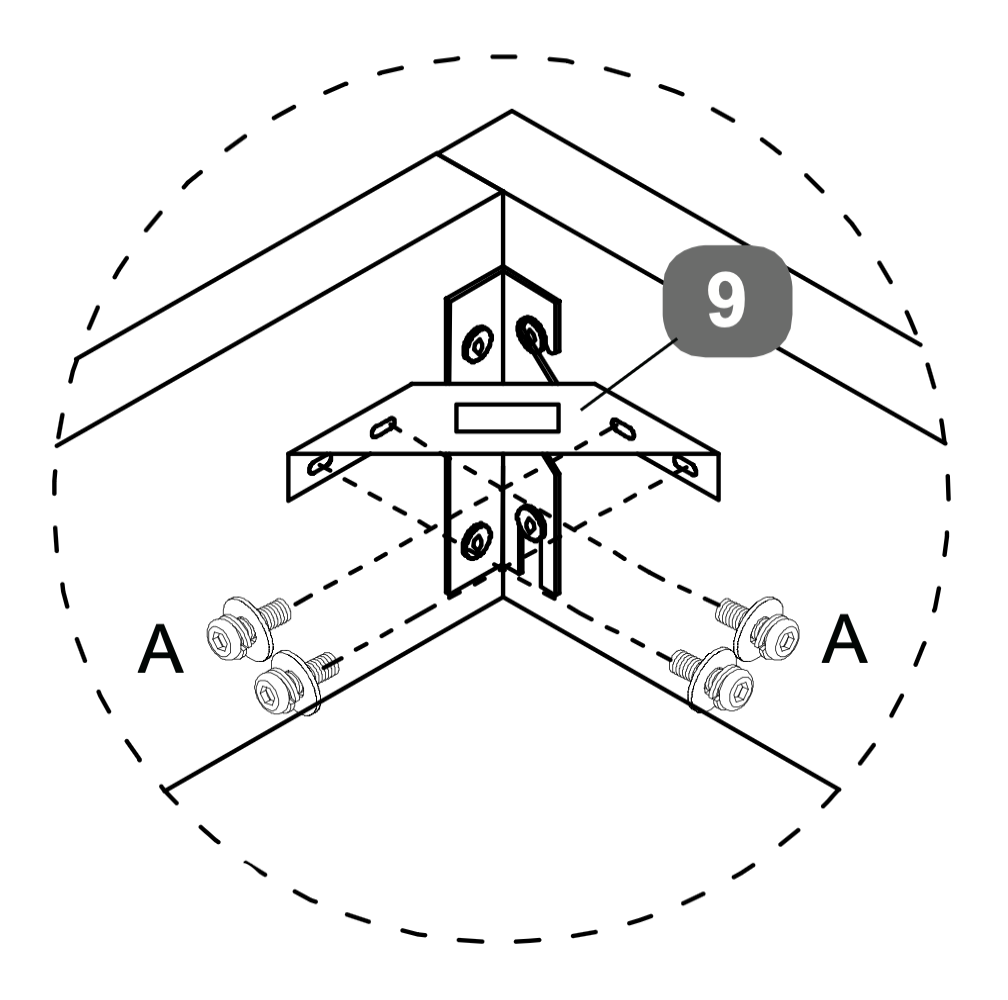 
7. Gas Lift Mechanism Installation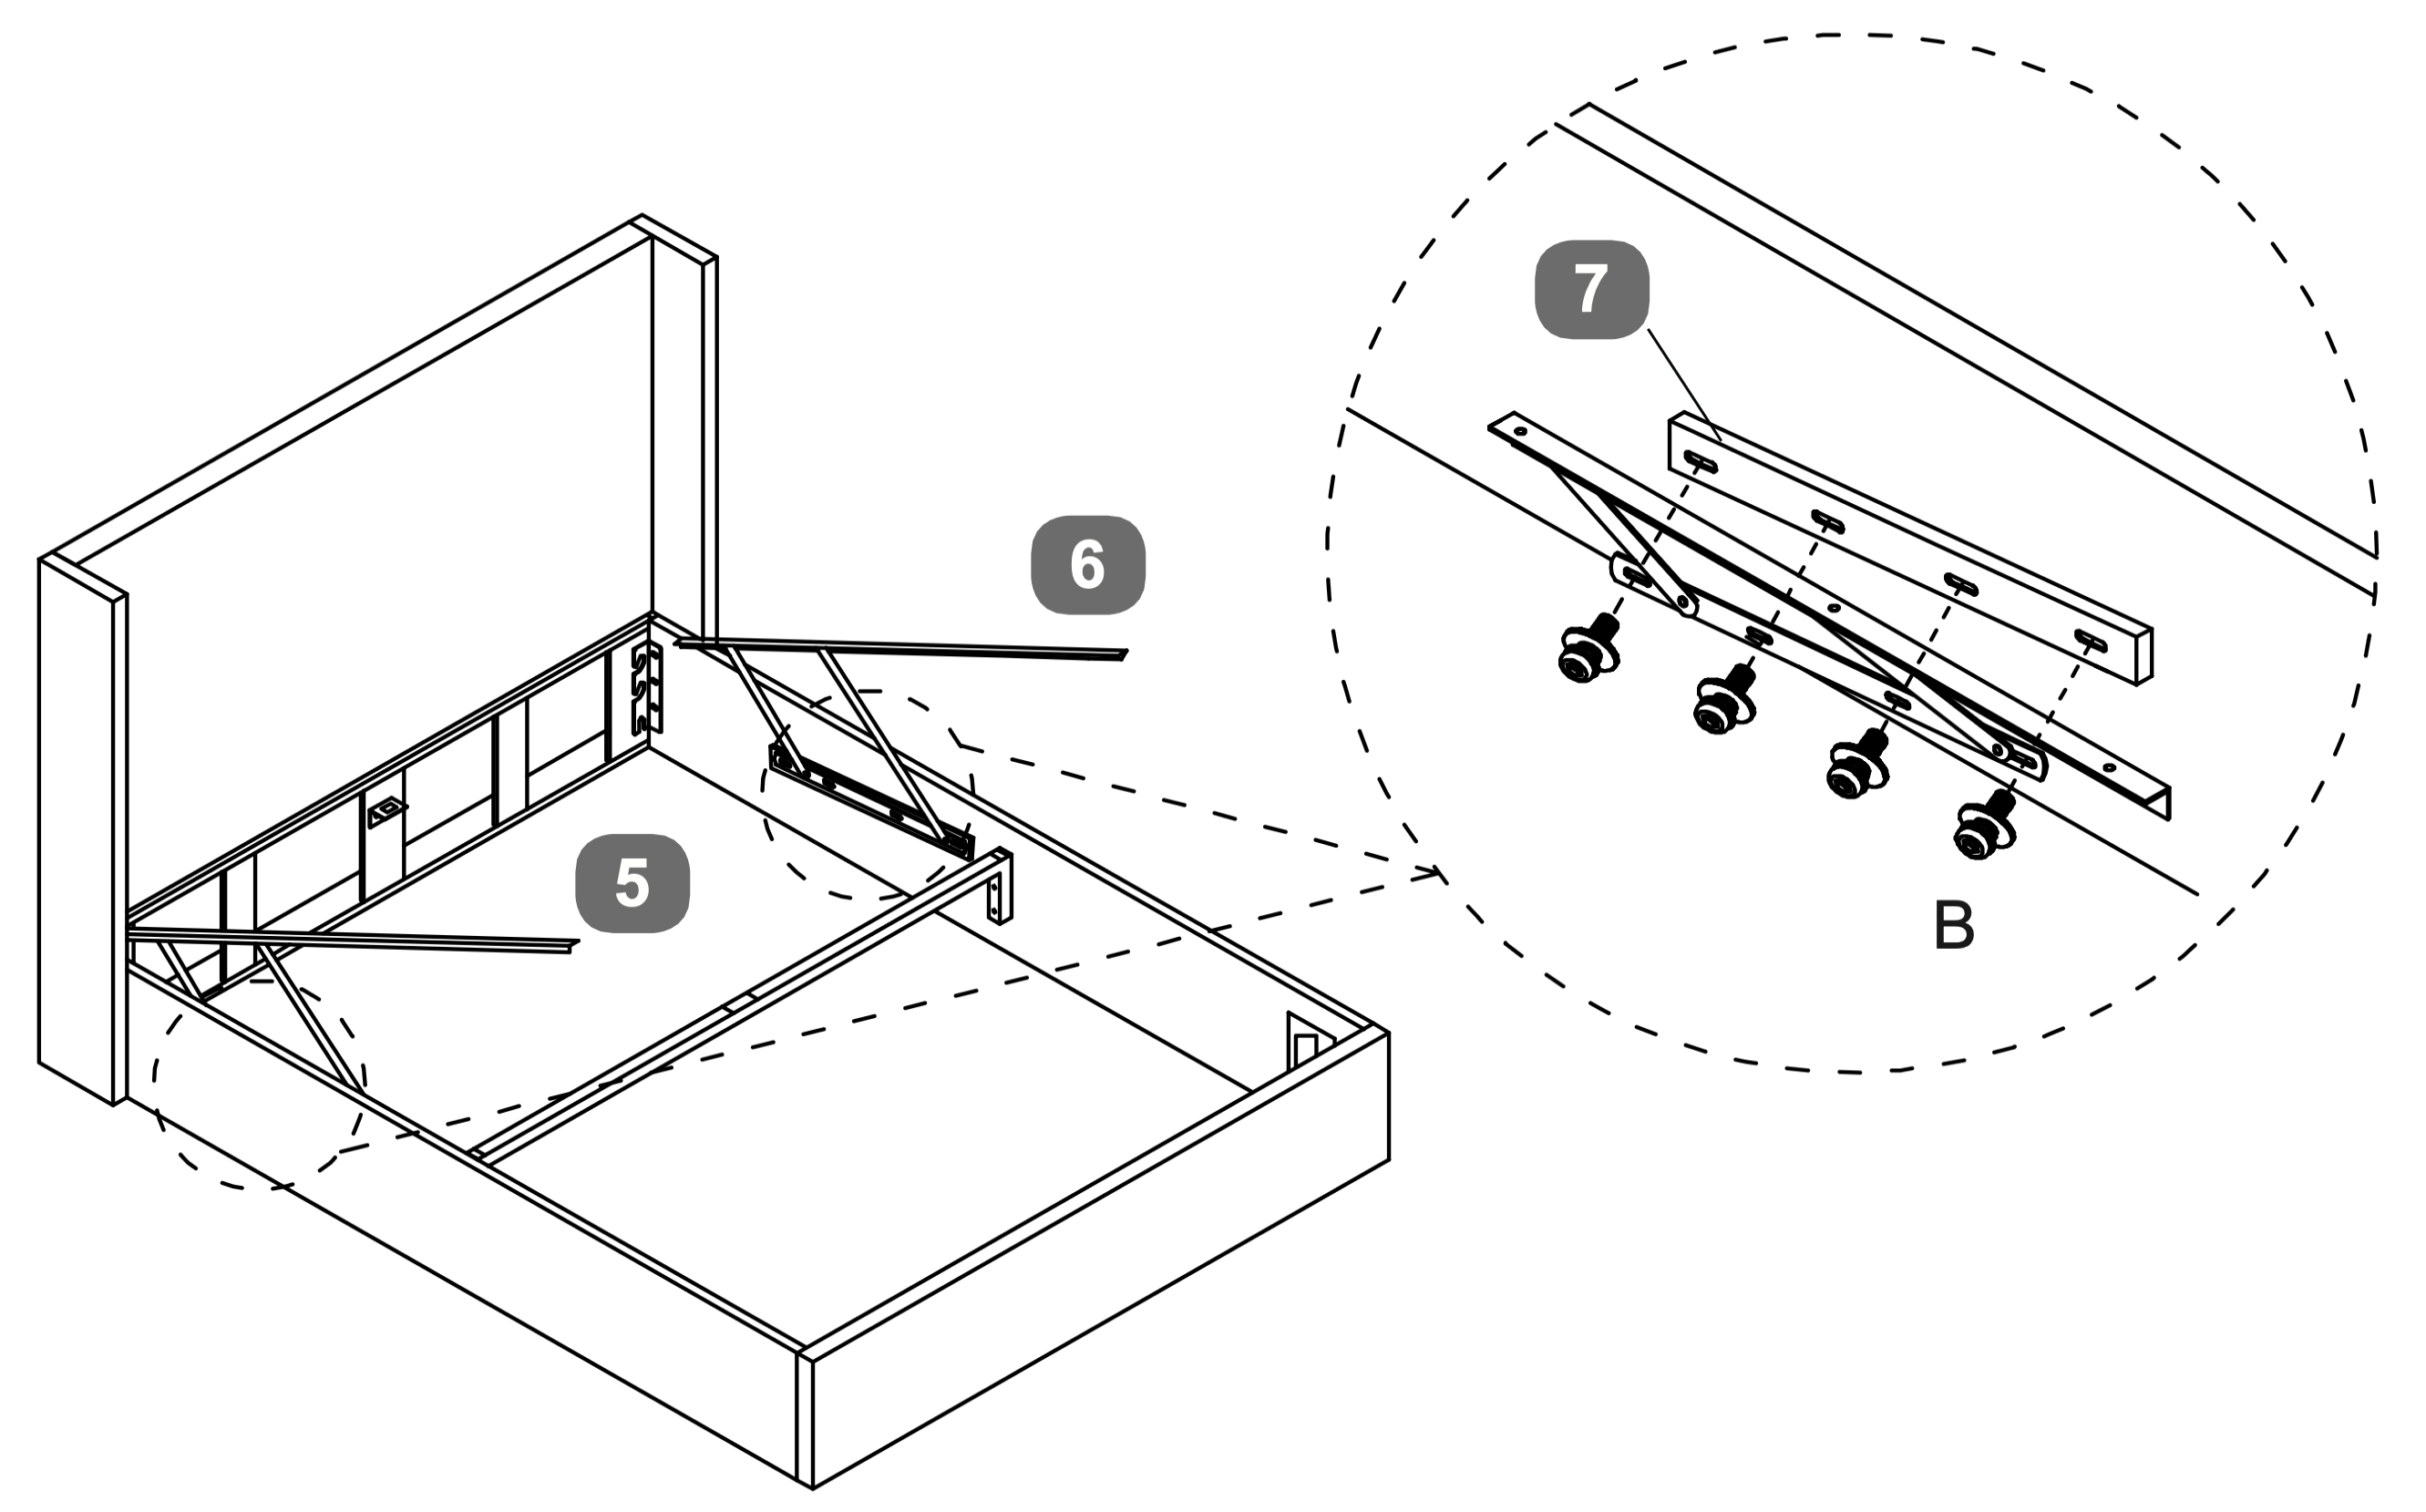 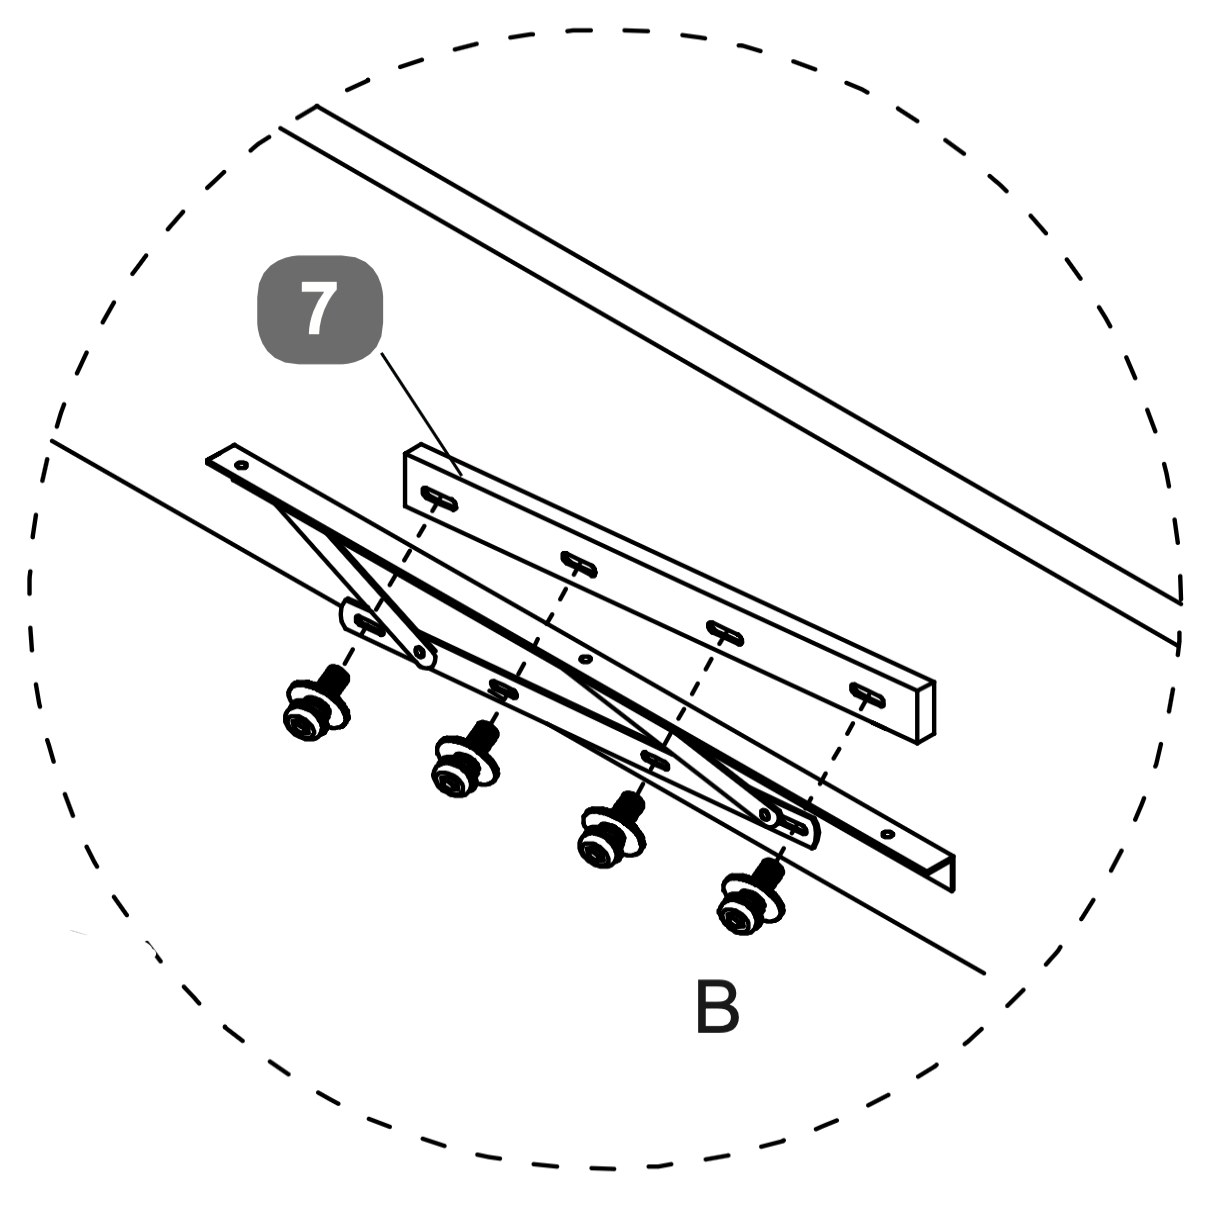
8. Base Board Placement and Alignment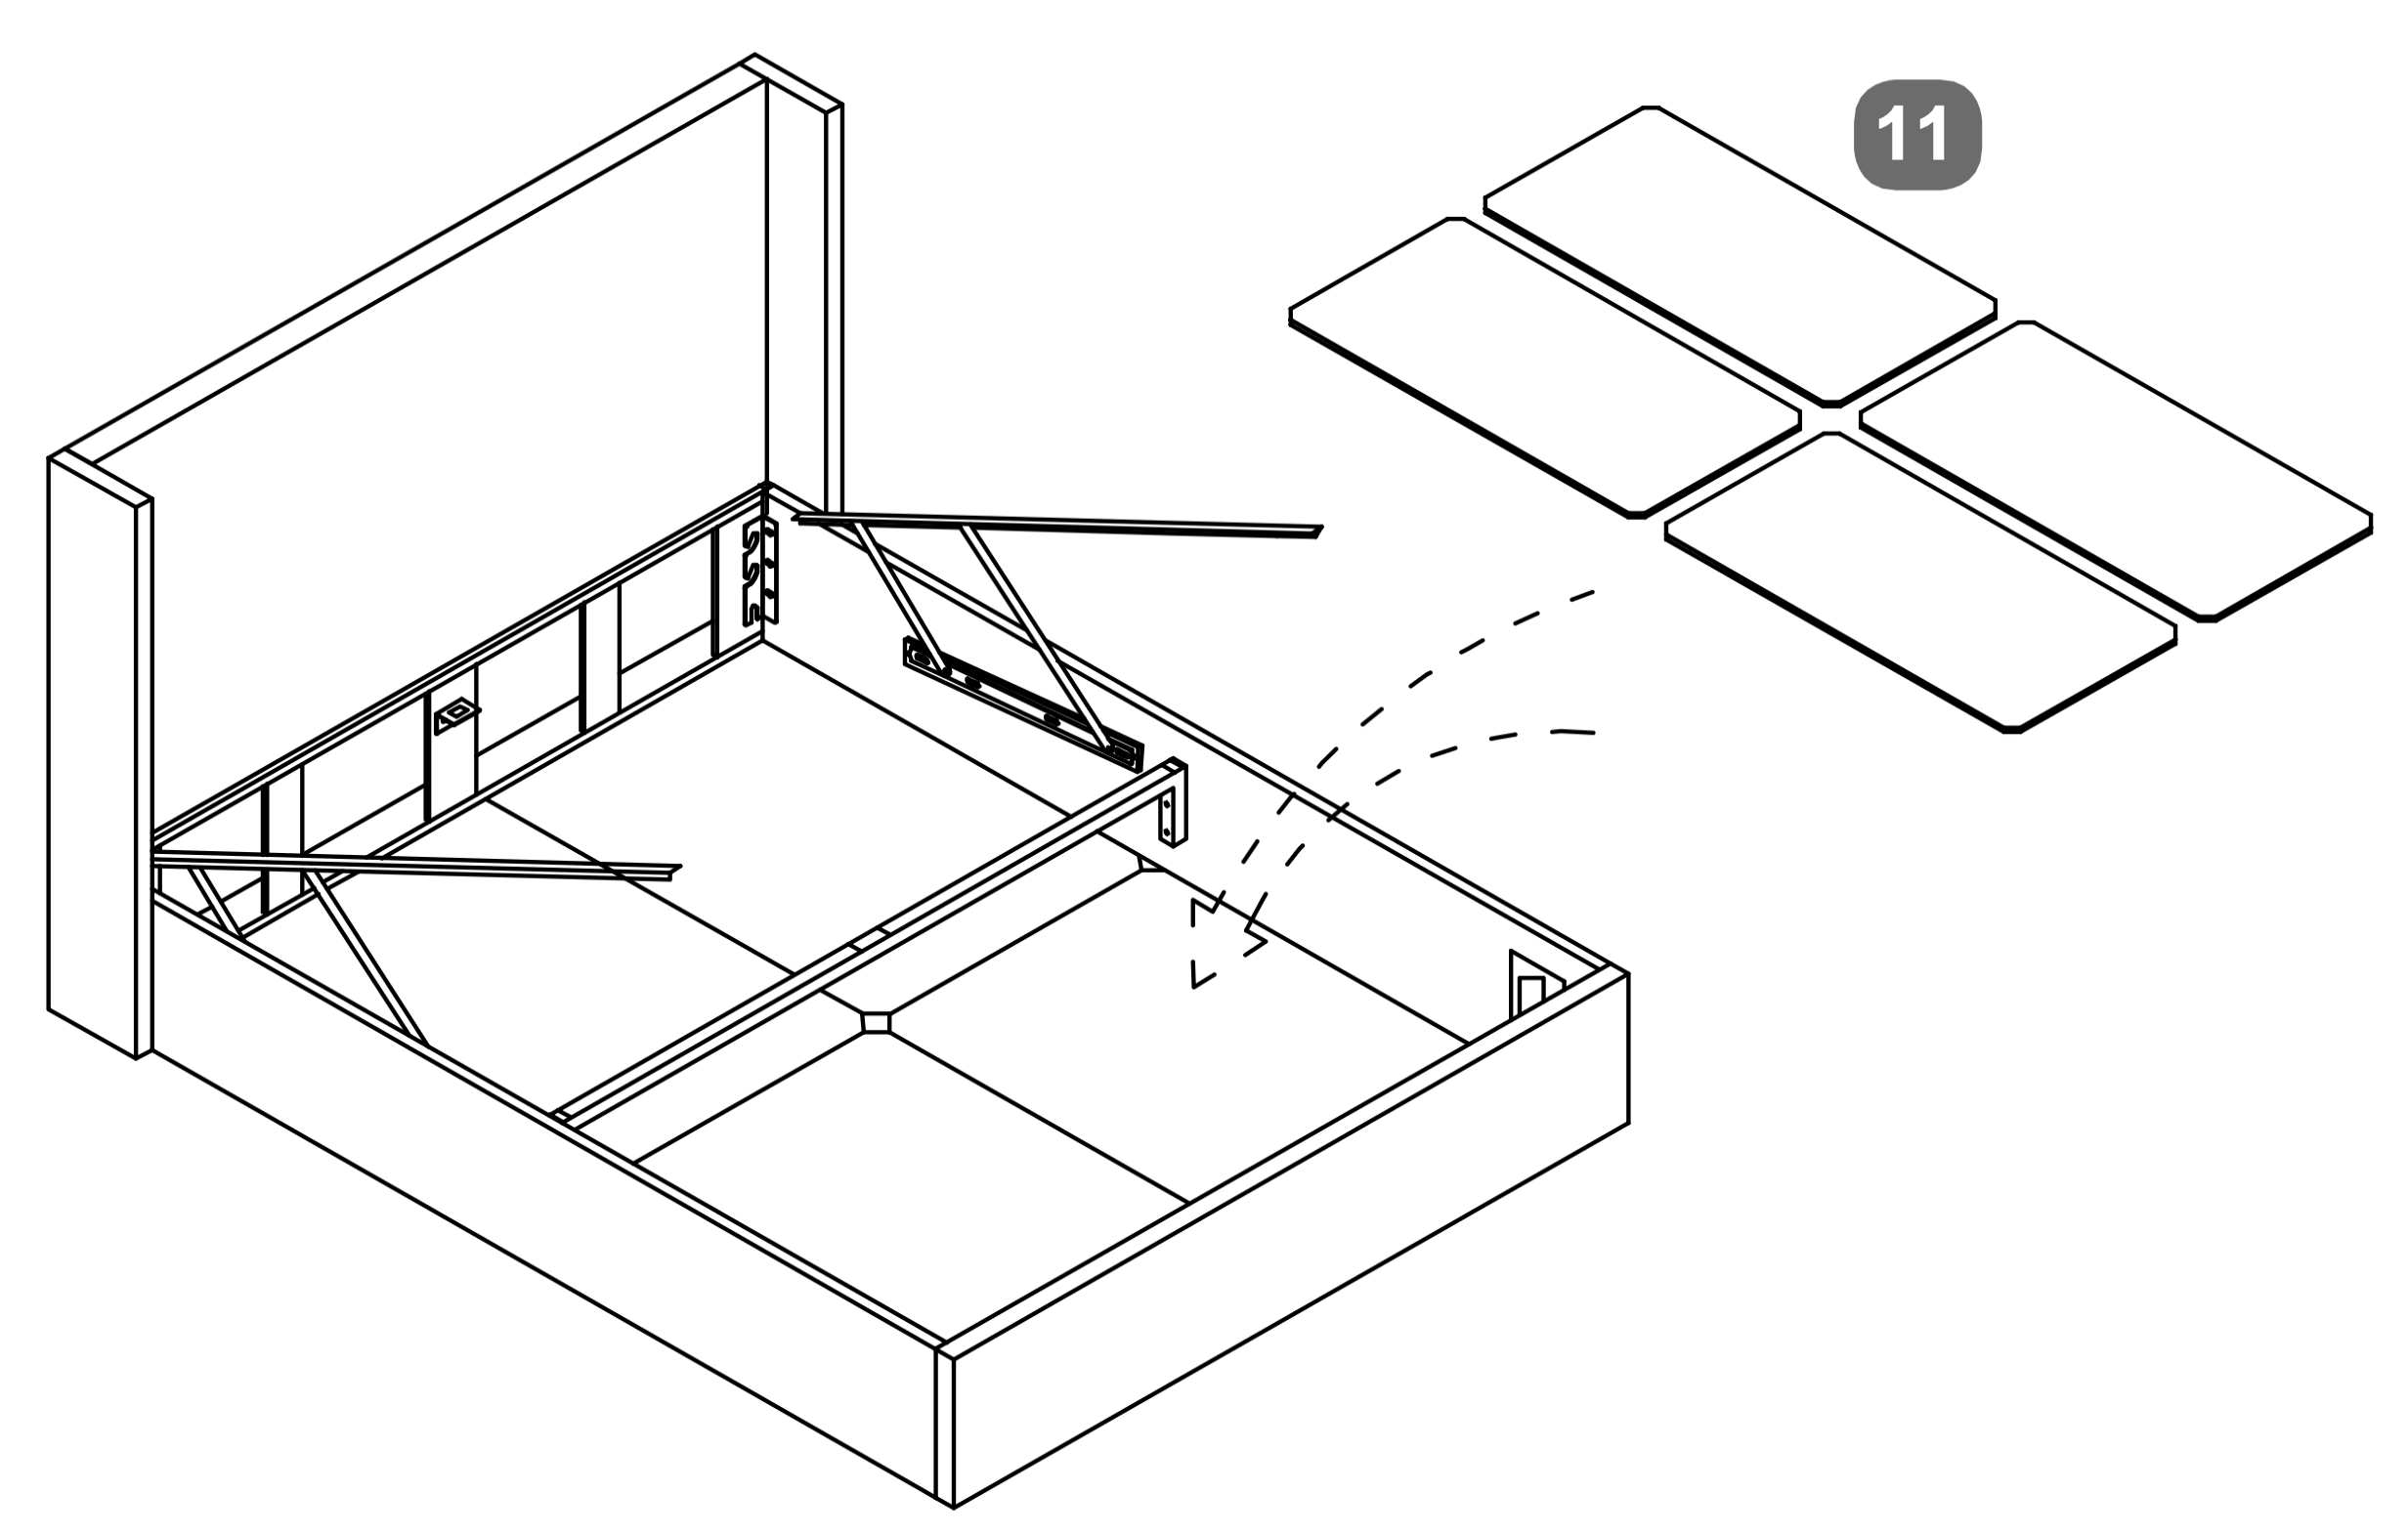
9. SINGLE BED FRAME -Mattress Stabilization and Handle Attachment 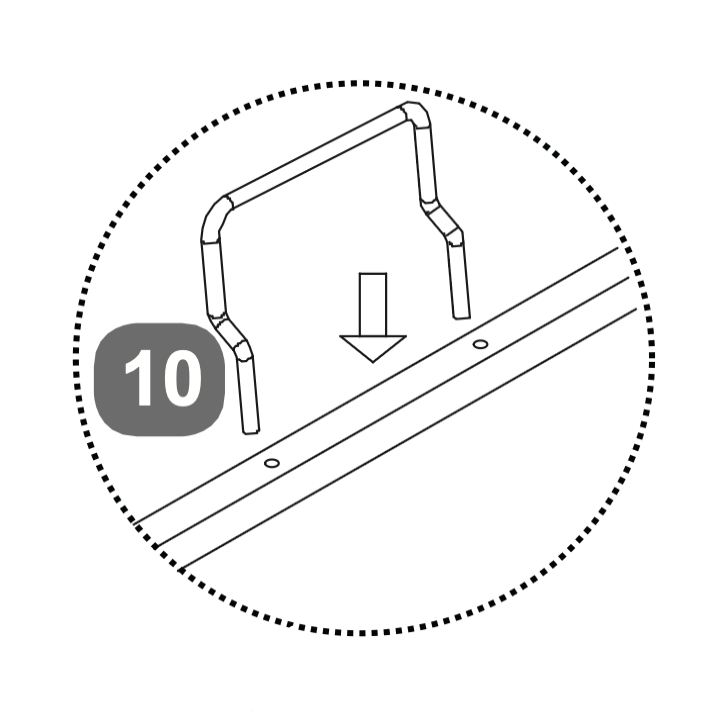 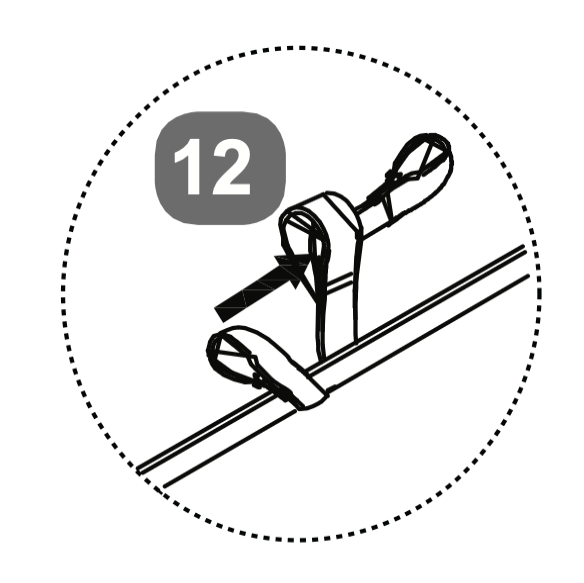
10. Frame Stabilization and Accessory Attachment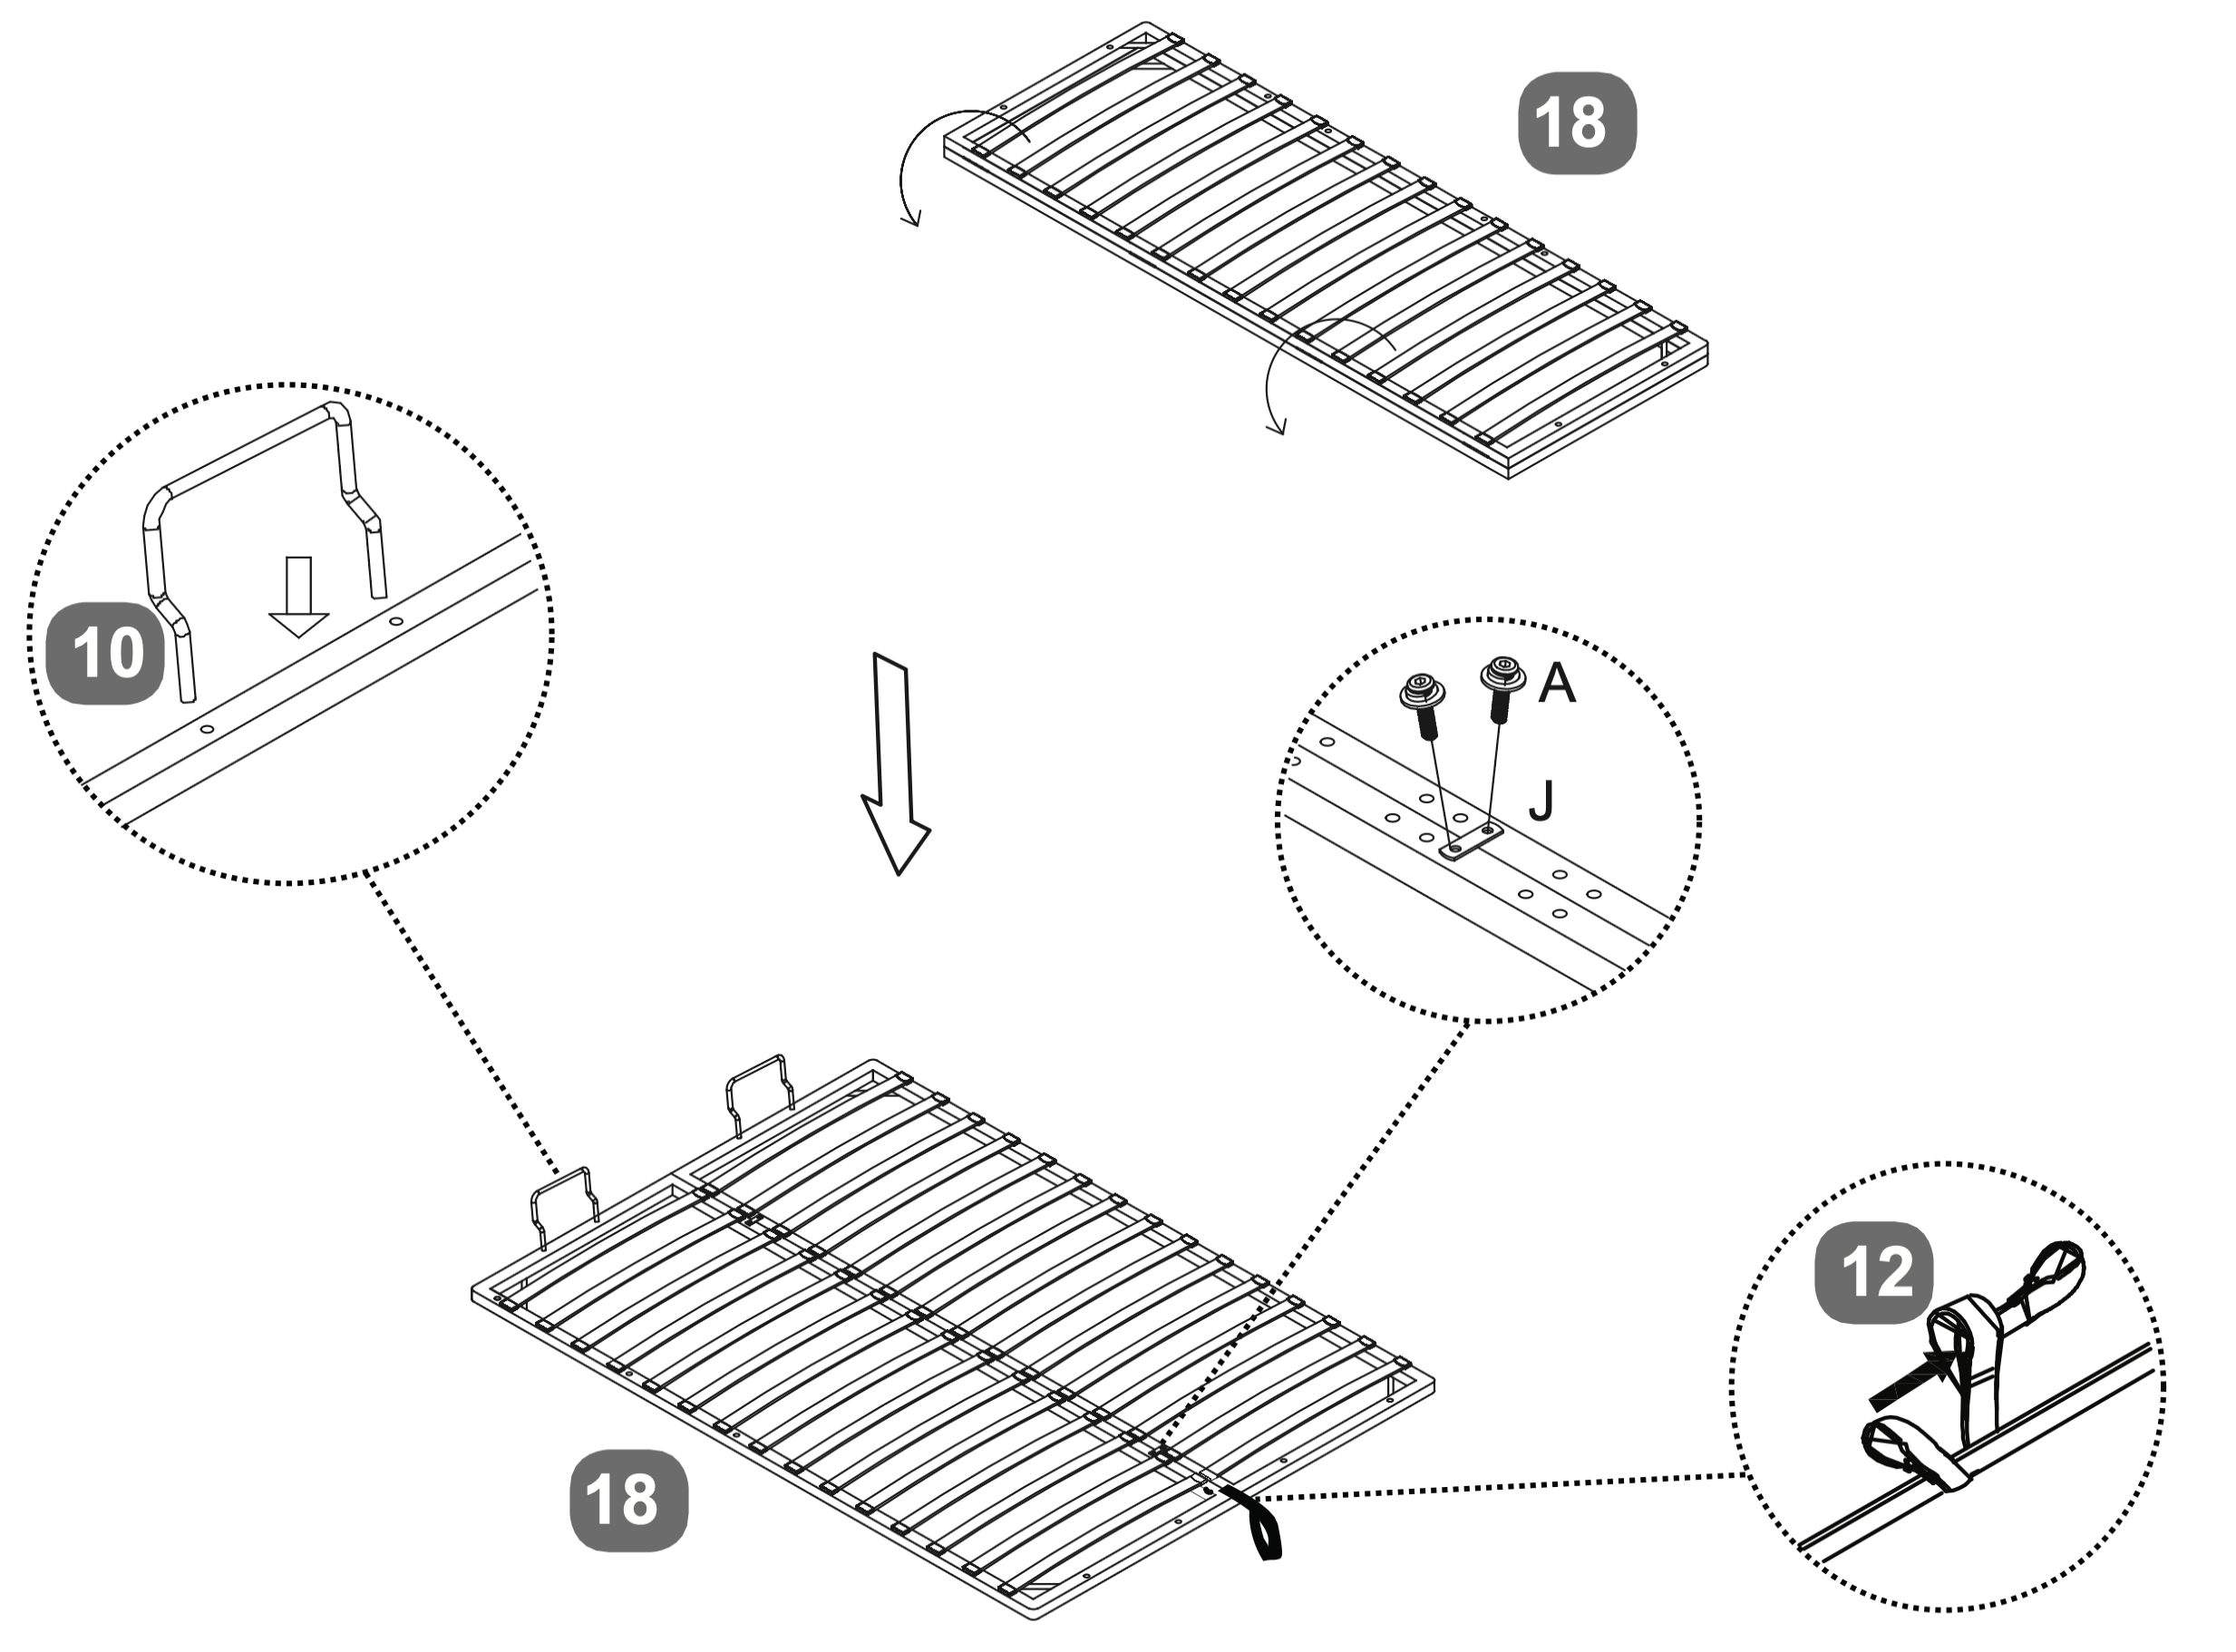 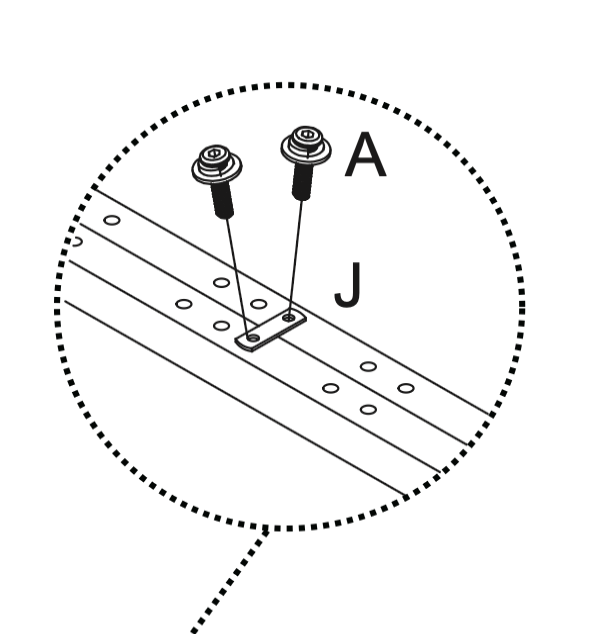
11. Piston Connection and Adjustment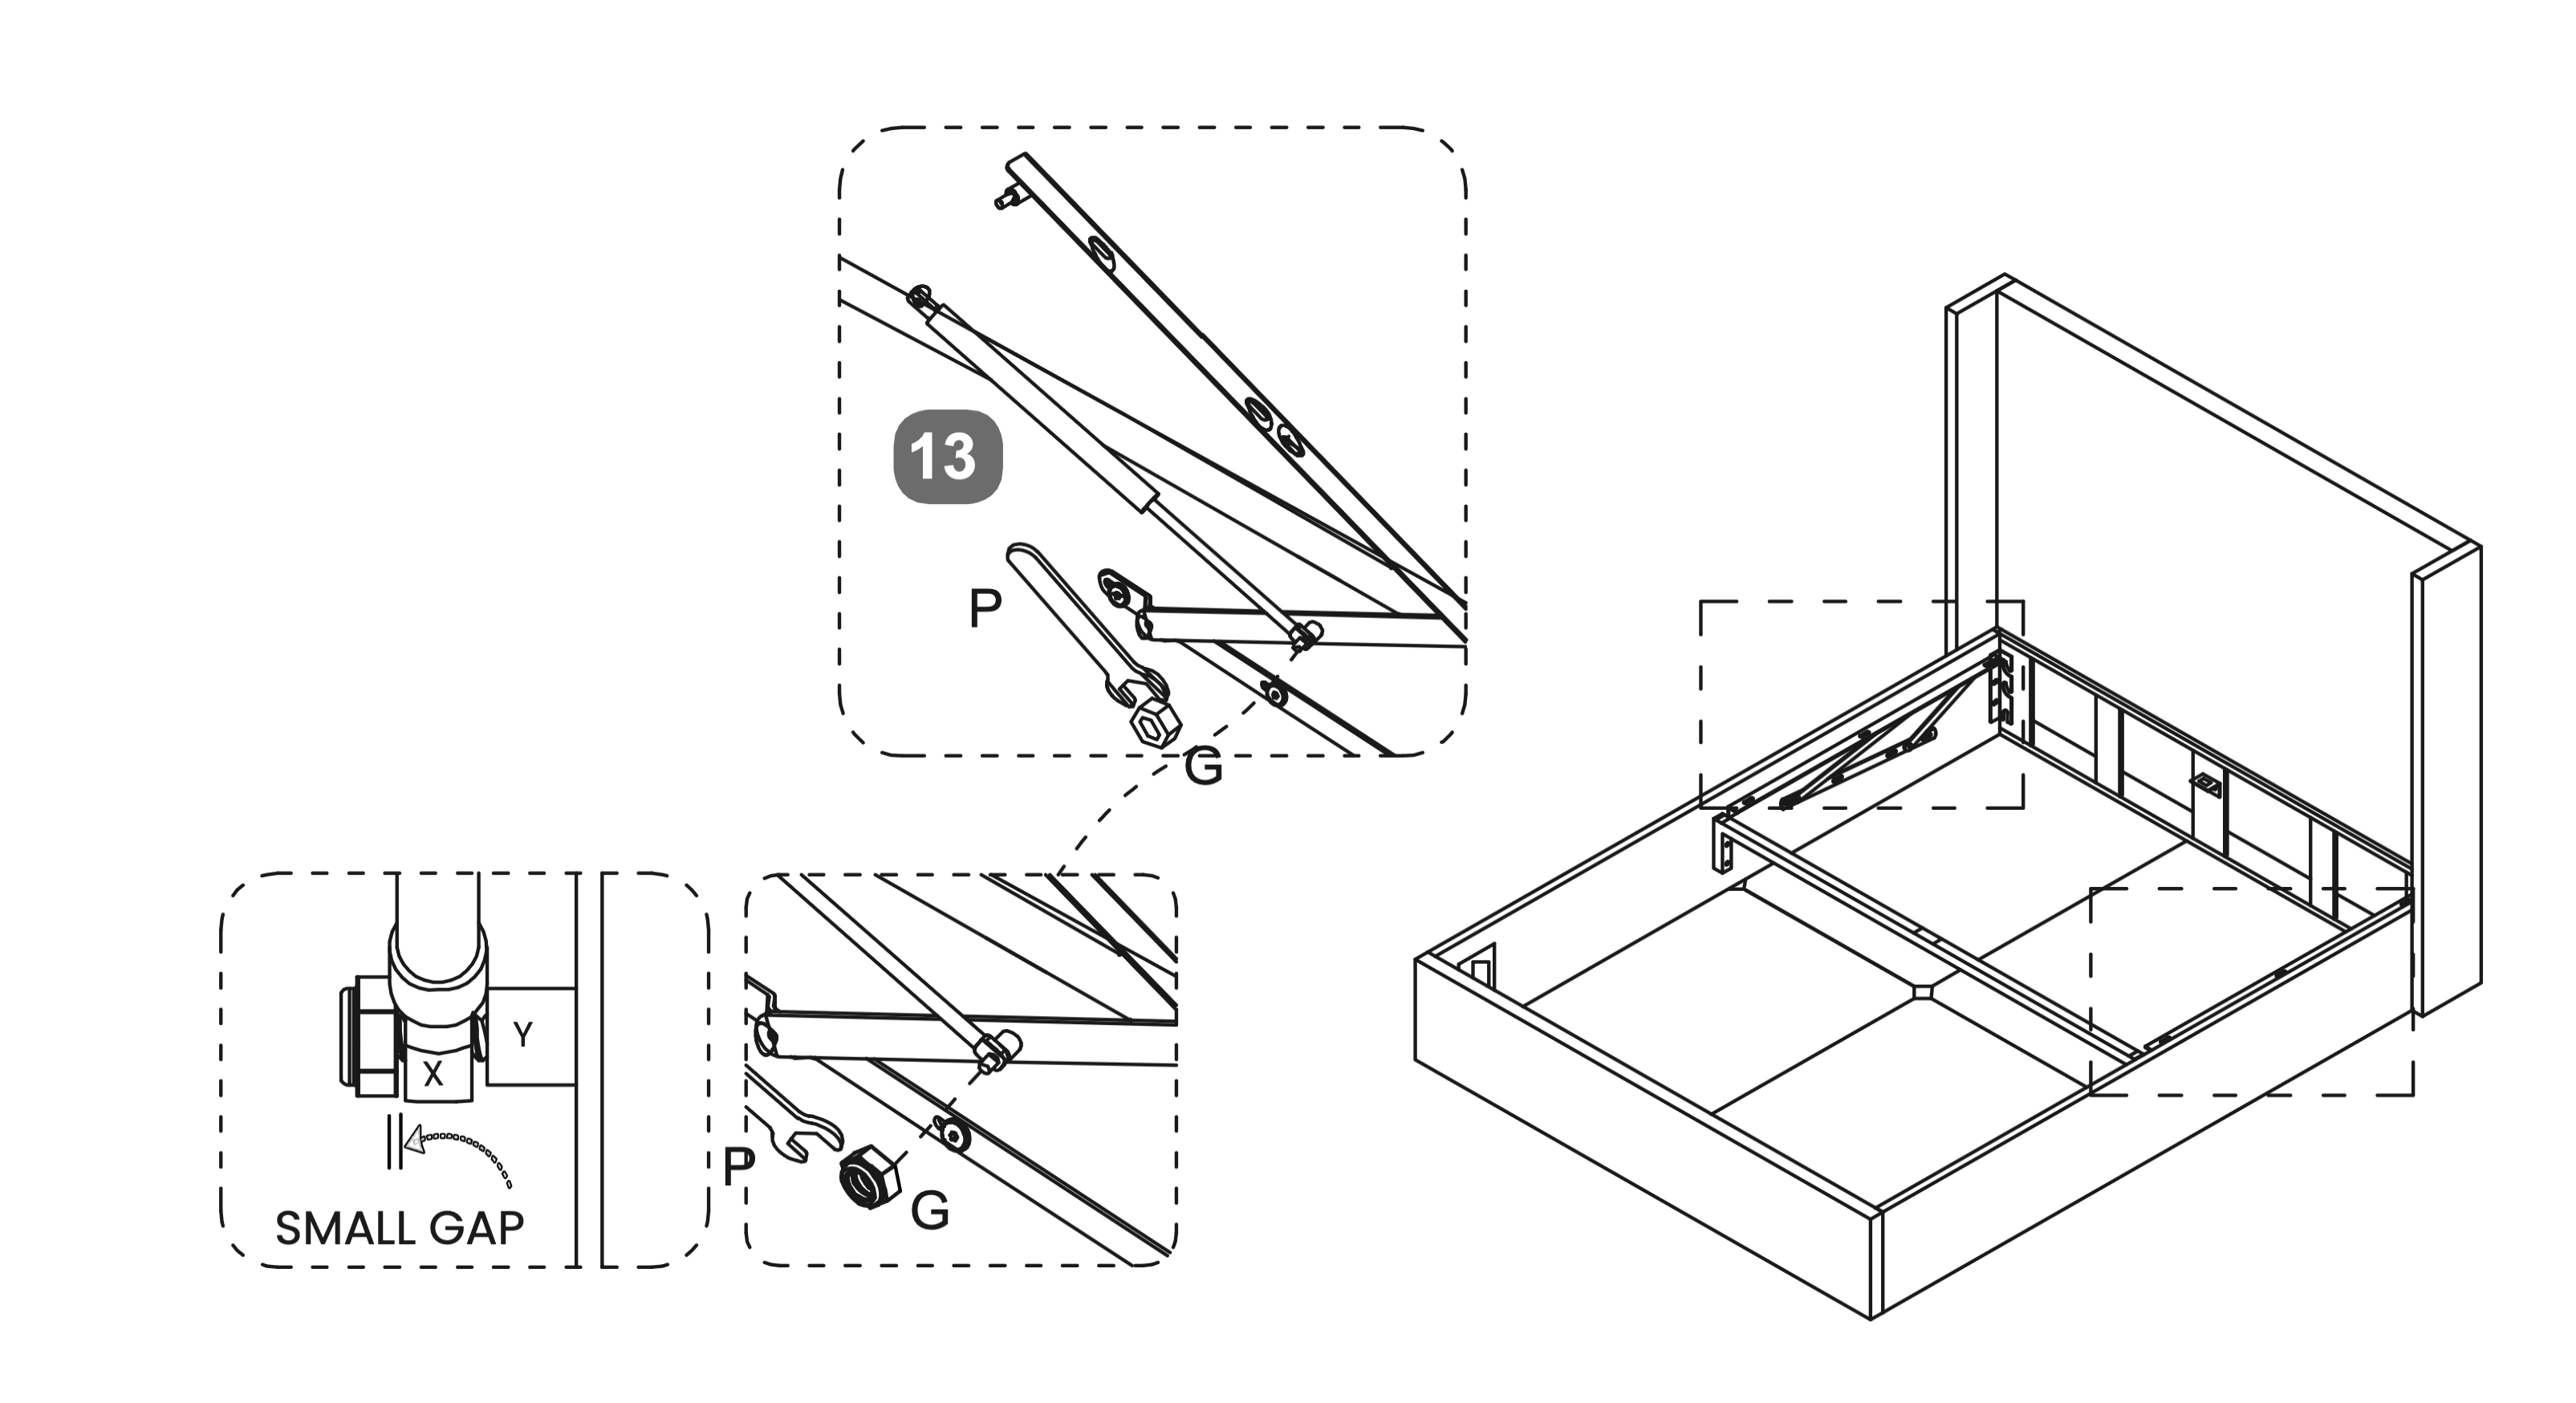 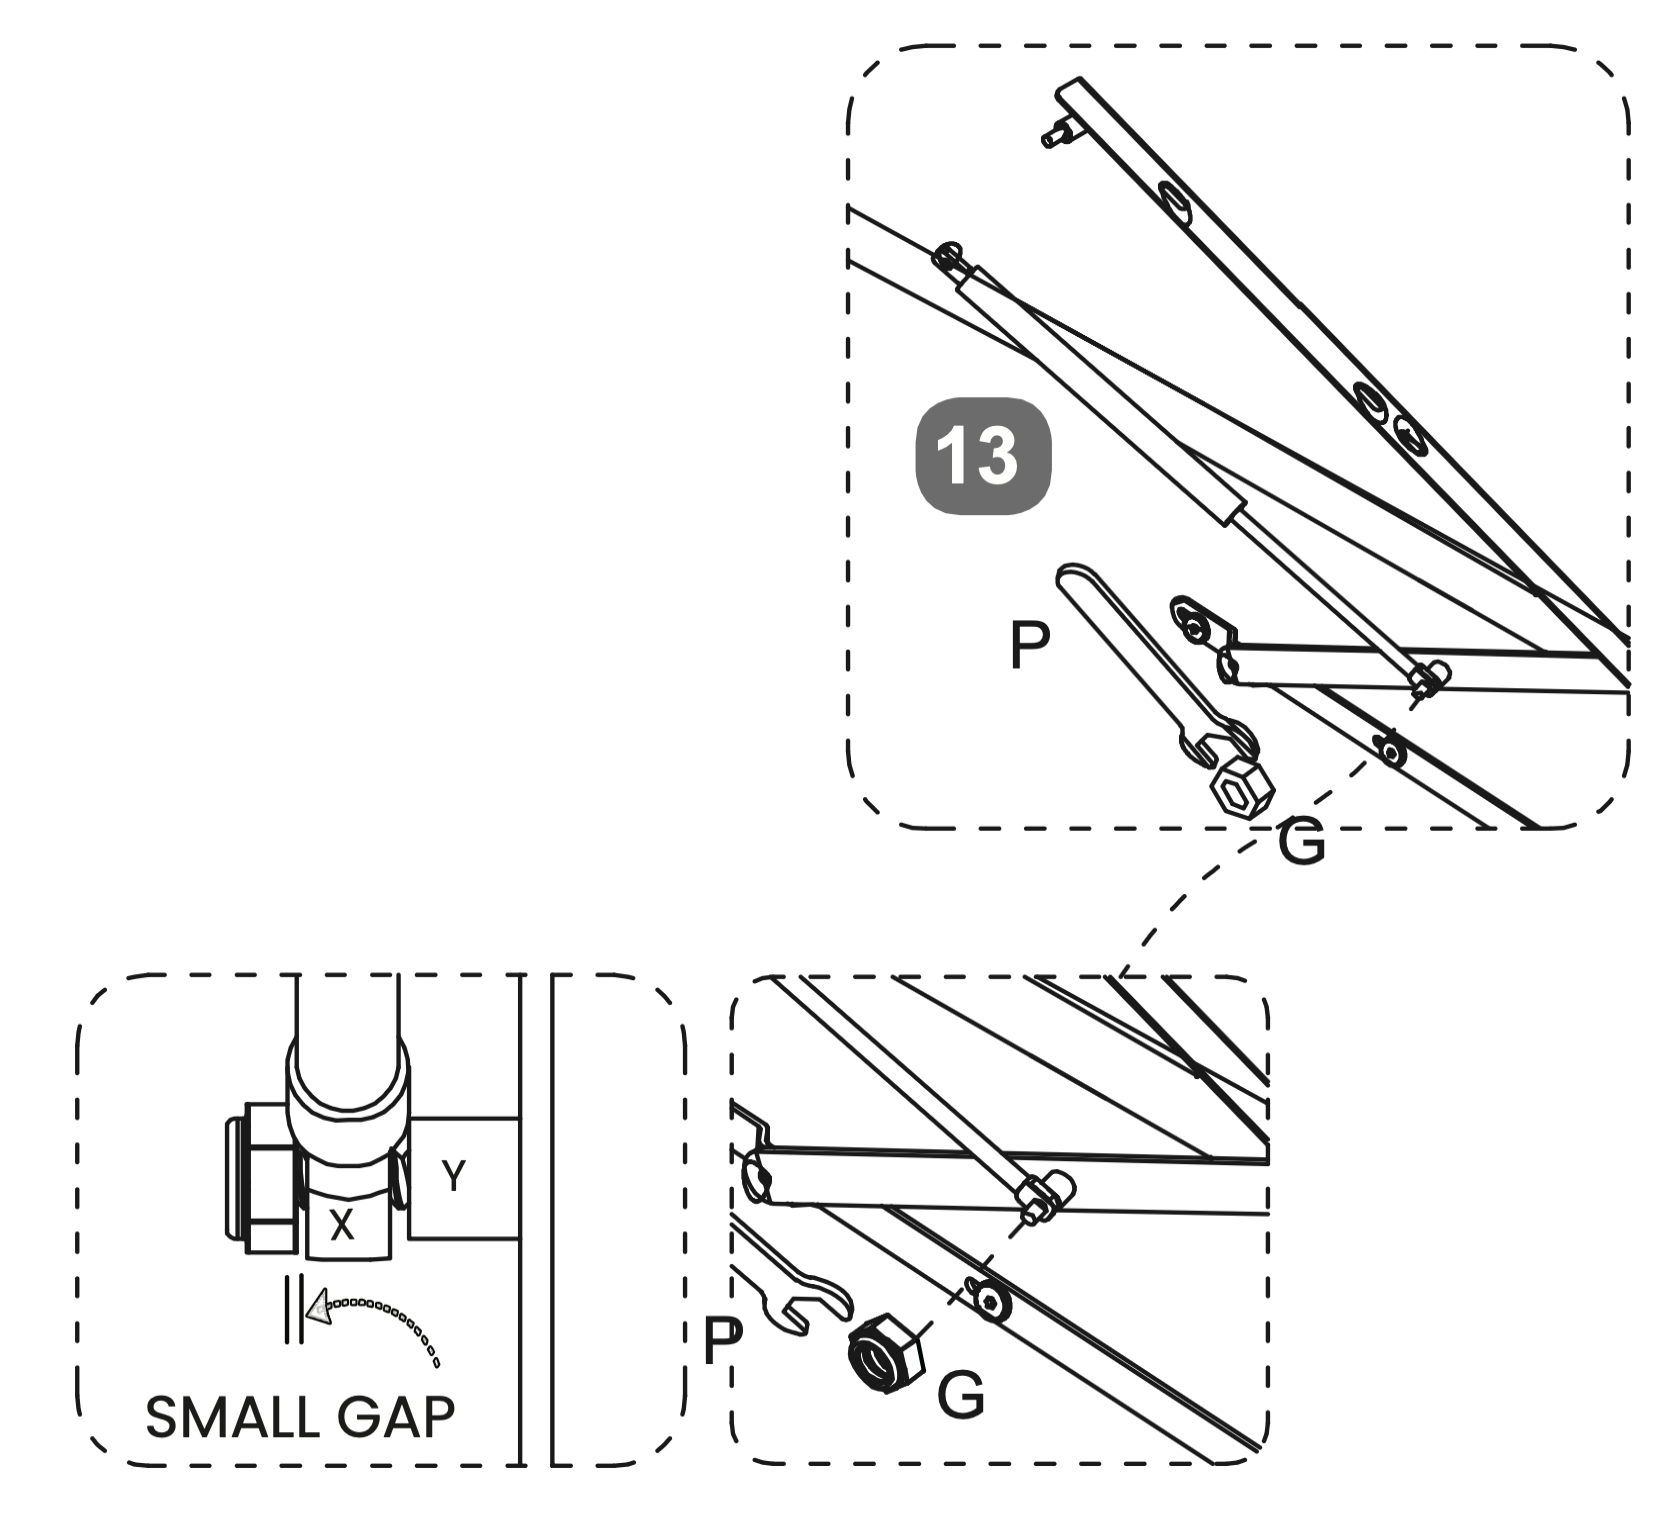 -Attach the Gas Lift Piston (13) to the pre-installed Gas-lift Mechanism on the bed frame.
12. Mechanism Assembly and Alignment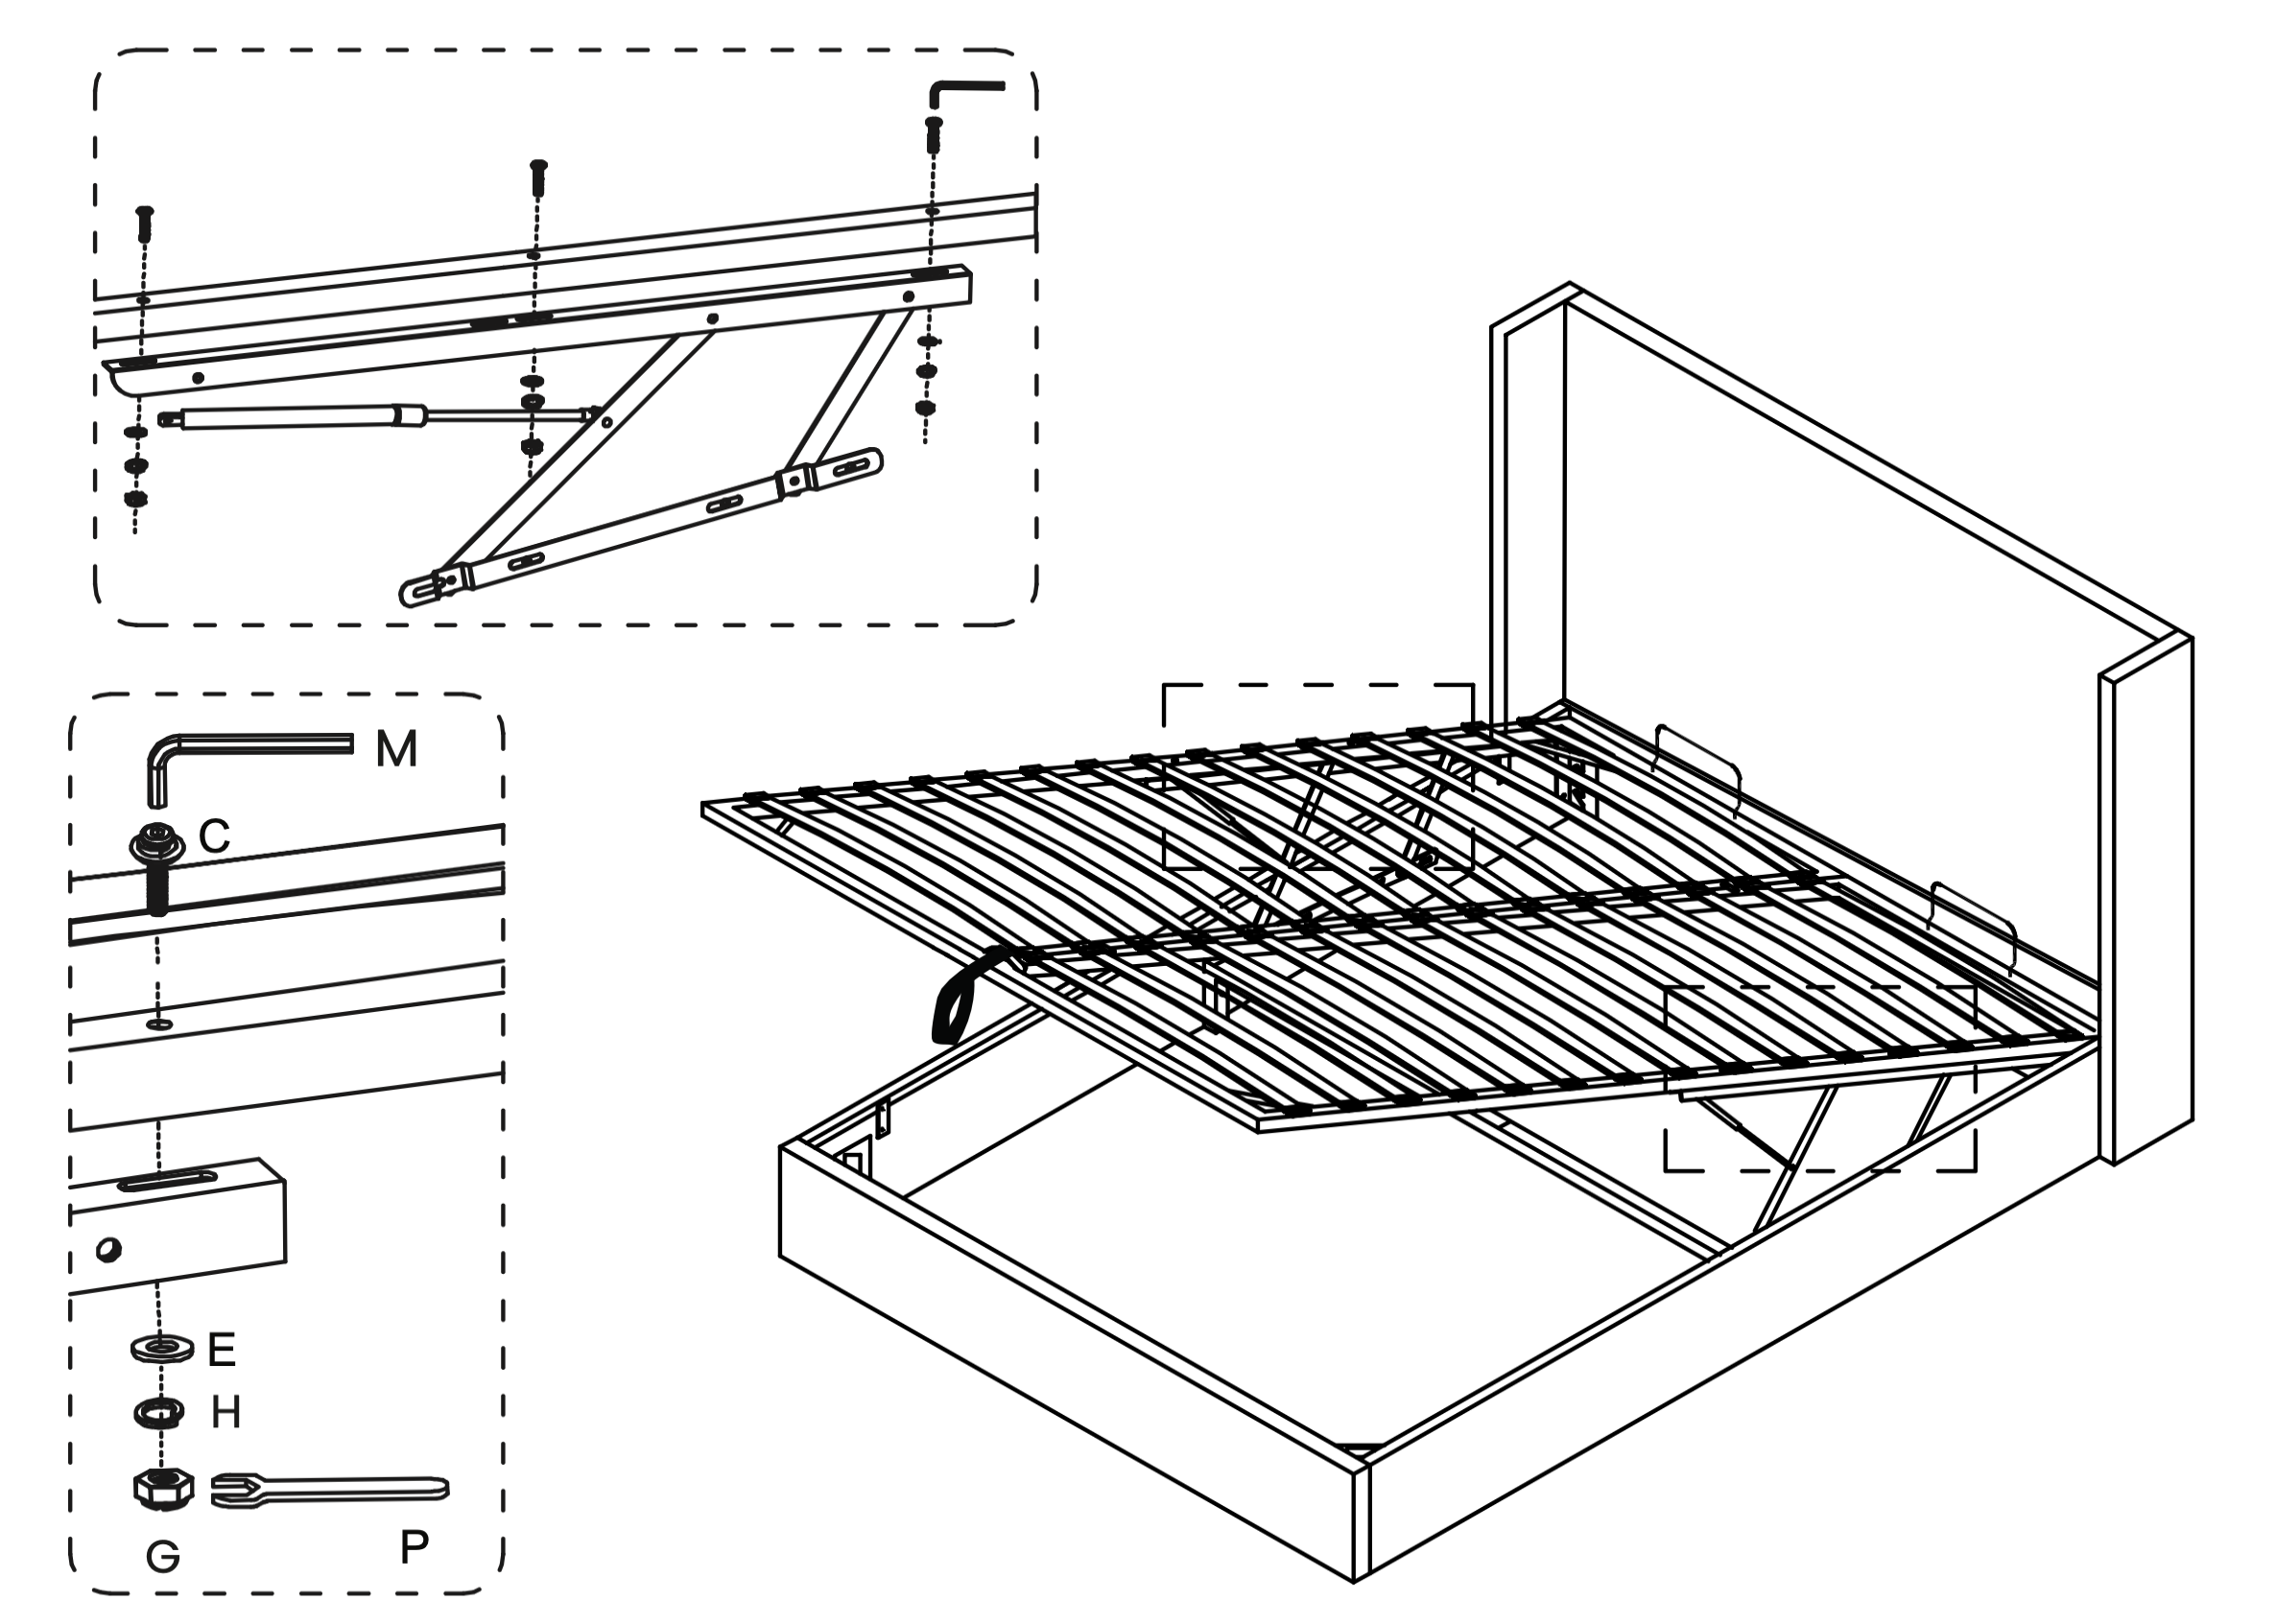 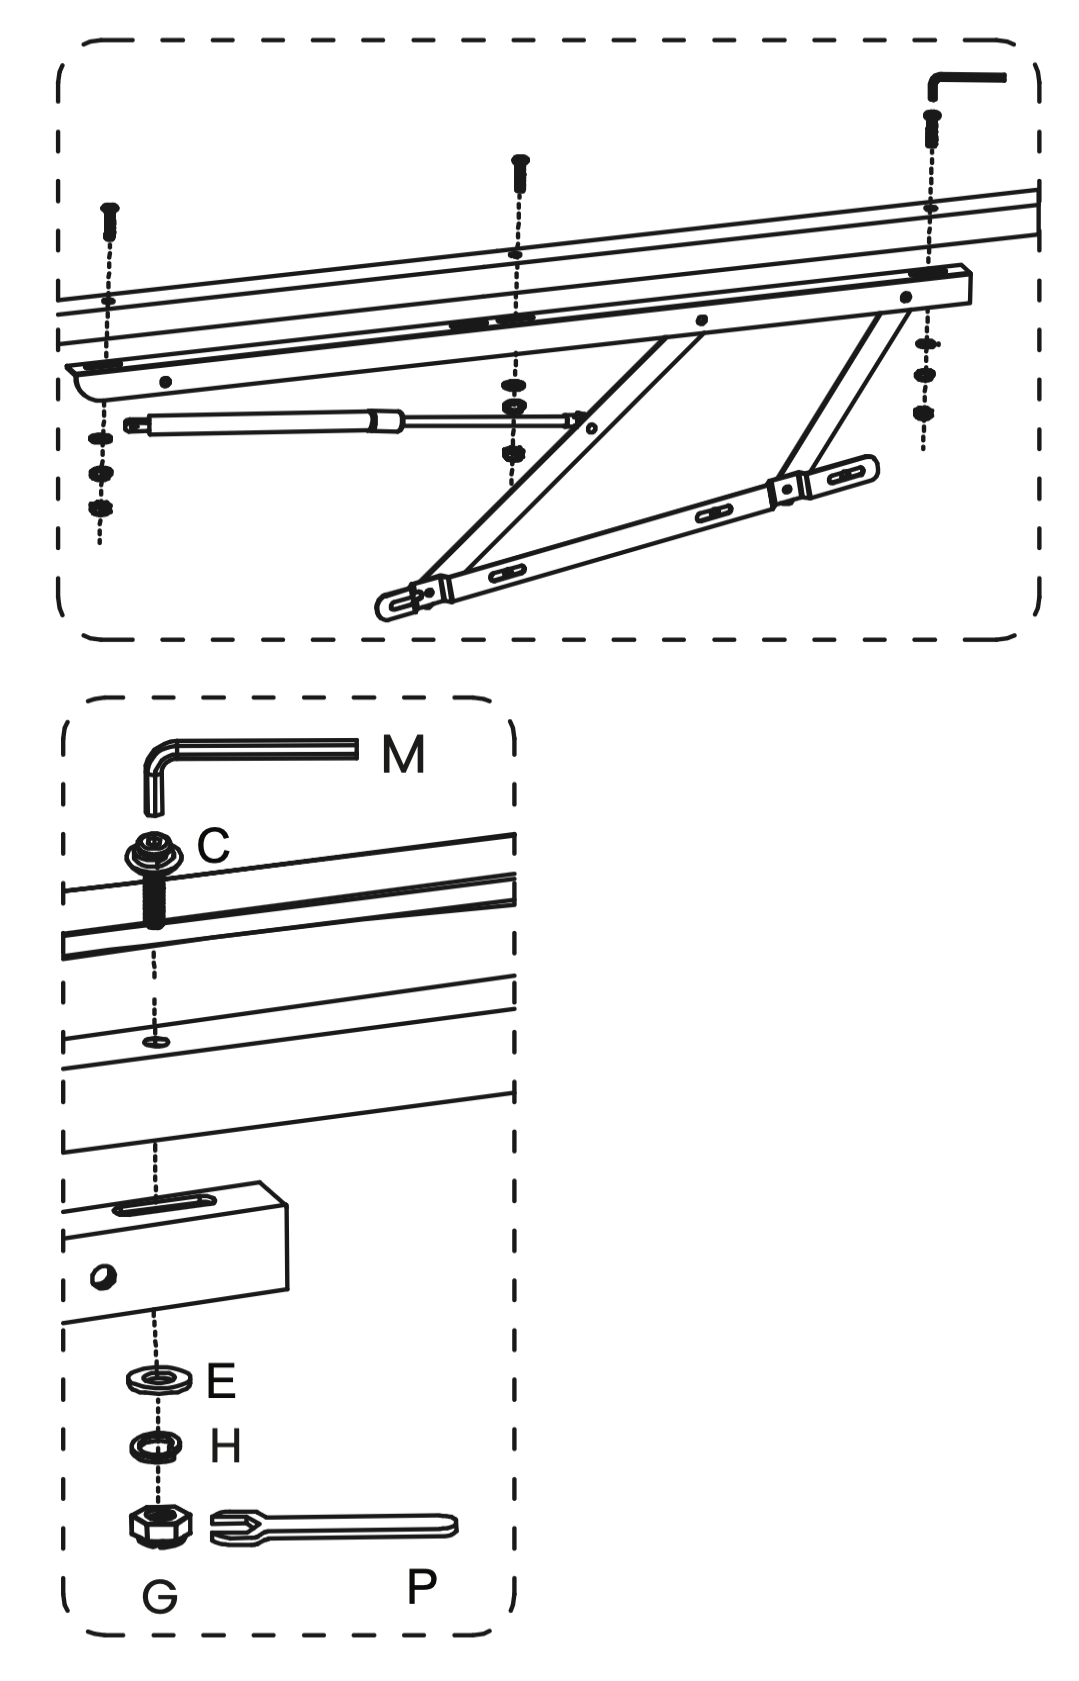 -Secure the Metal Slat Frame to the Gas-lift Mechanism using Bolt (M8x50mm) (C) and tighten with the Allen Key for M8 (M).
13. Piston Adjustment and Mechanism Verification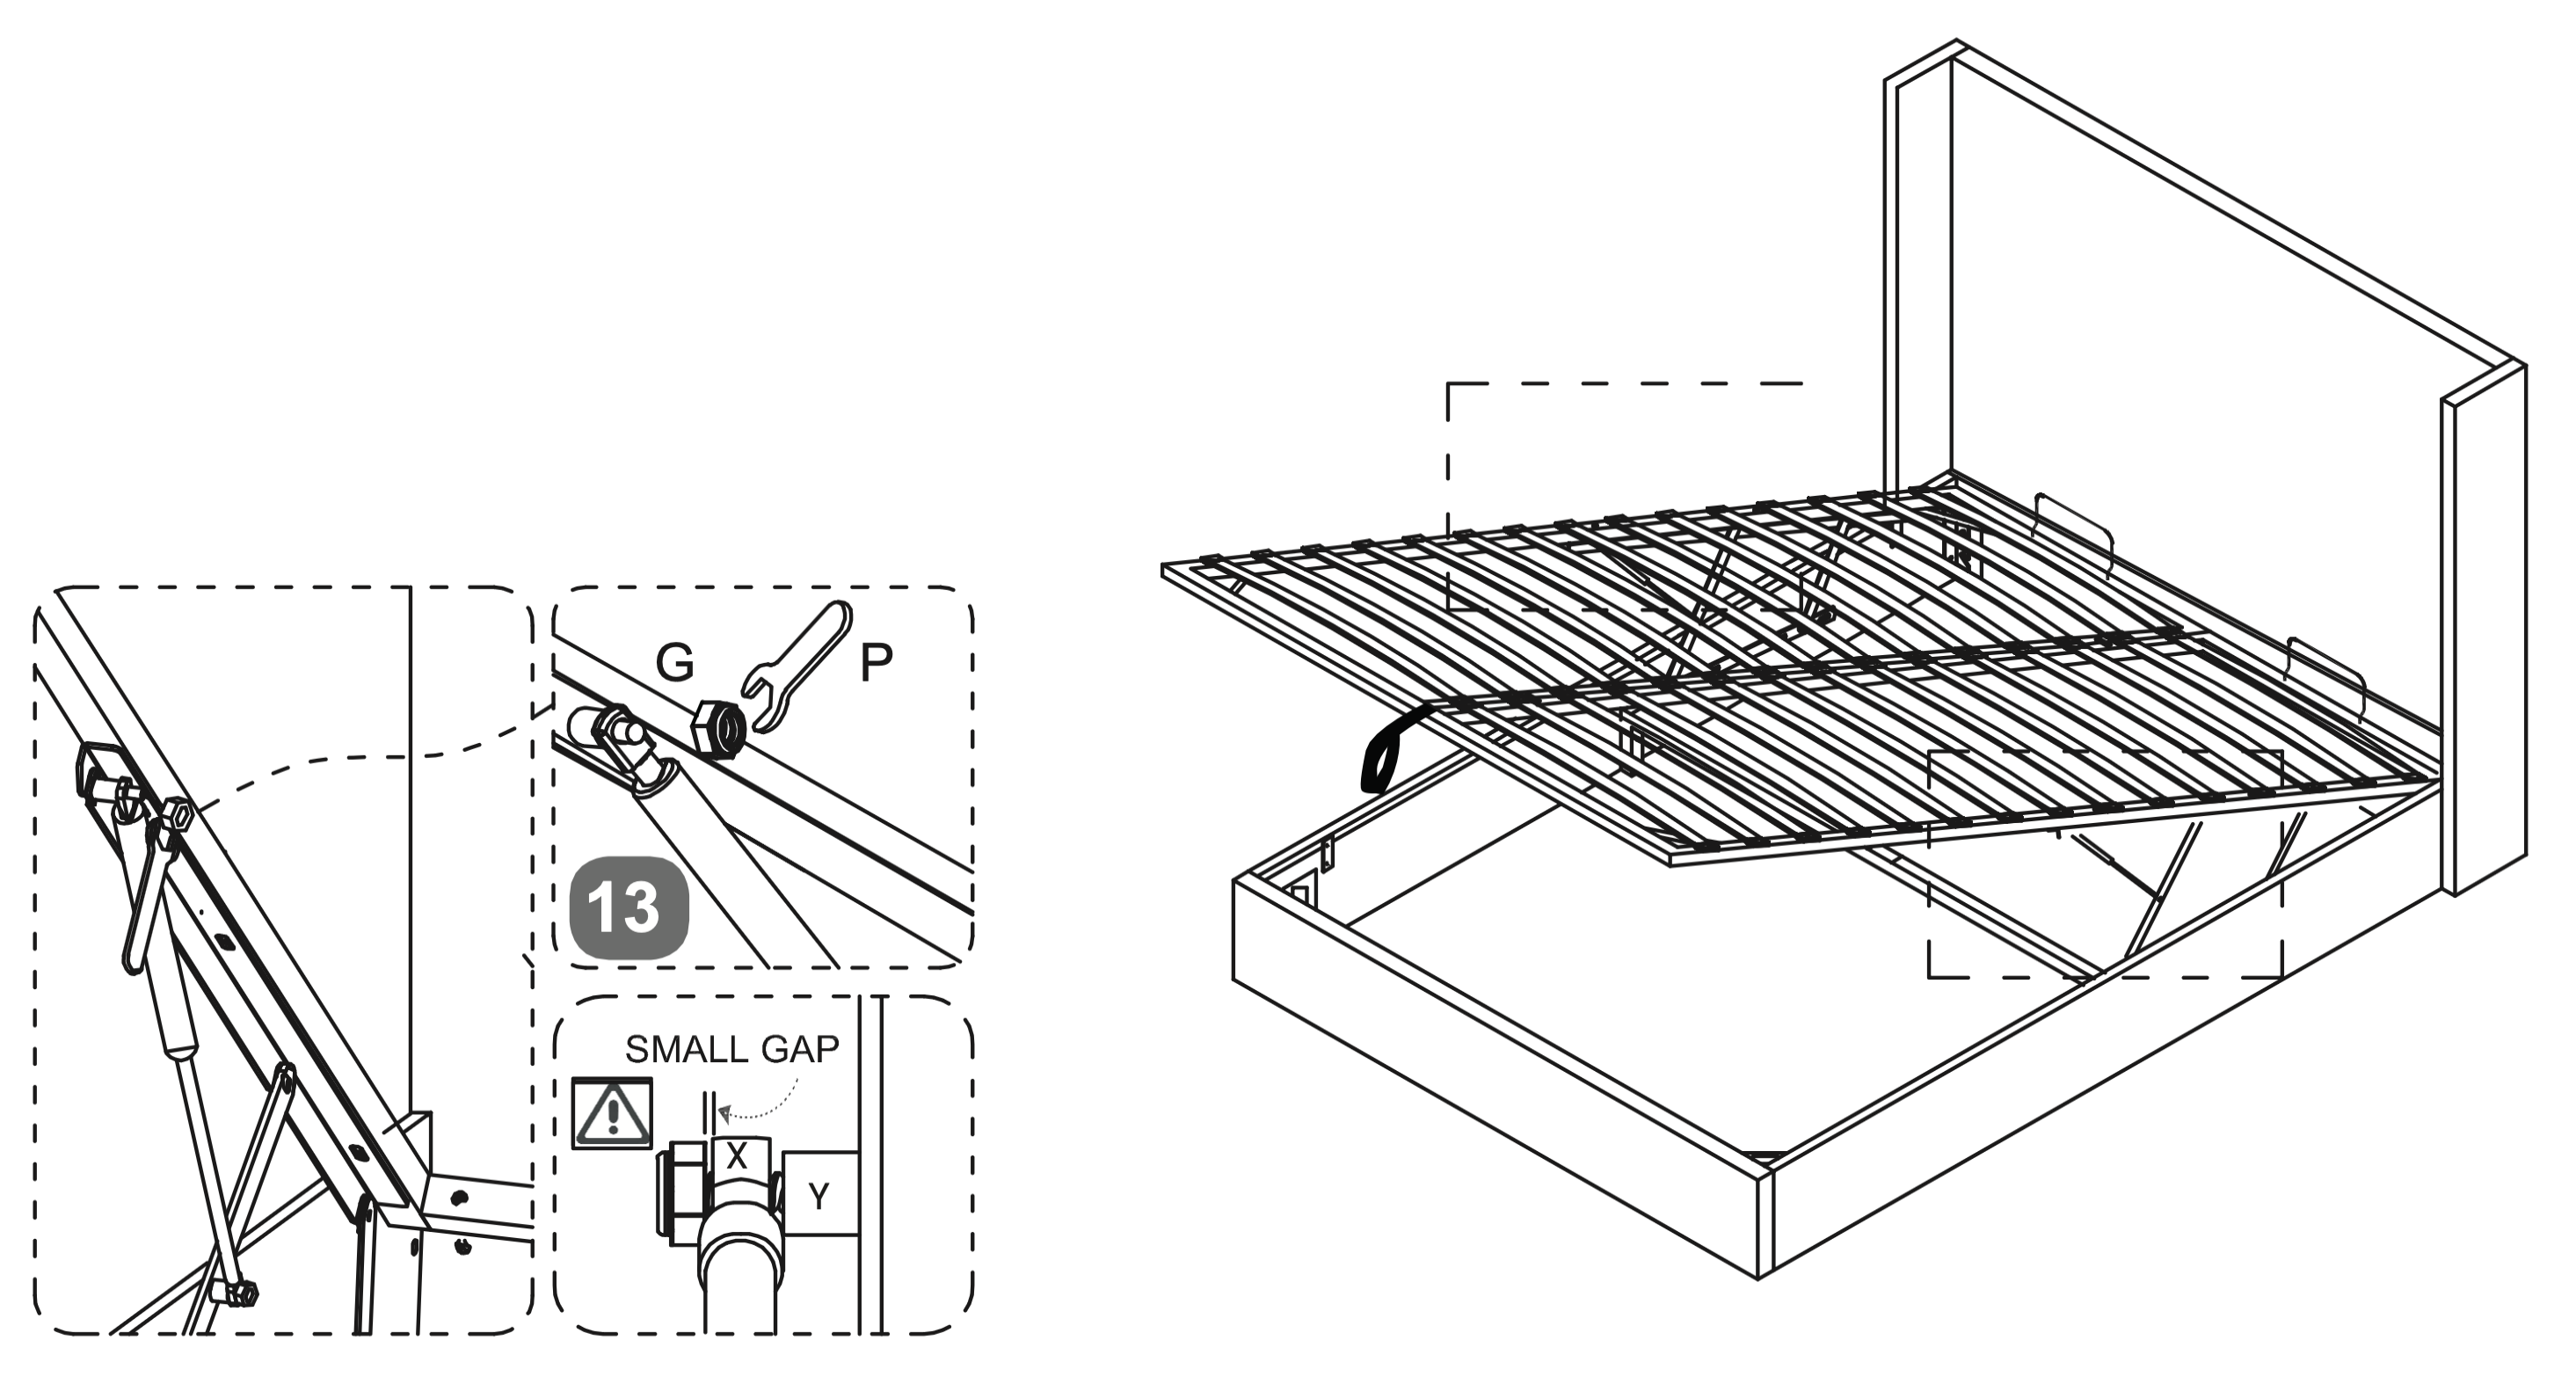 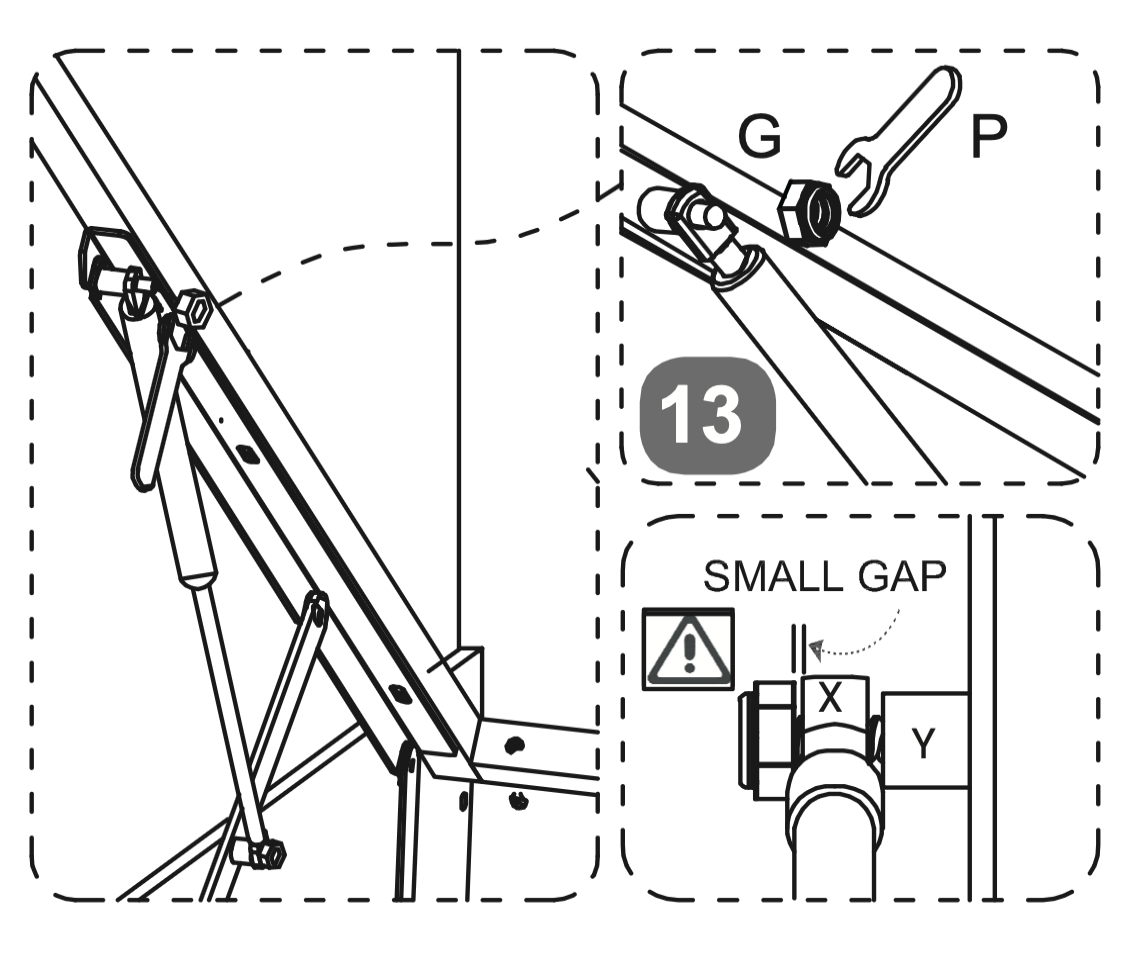
|