Assembly instructions for Valencia Upholstered Ottoman Bed Frame by Time4Sleep.
Product Information
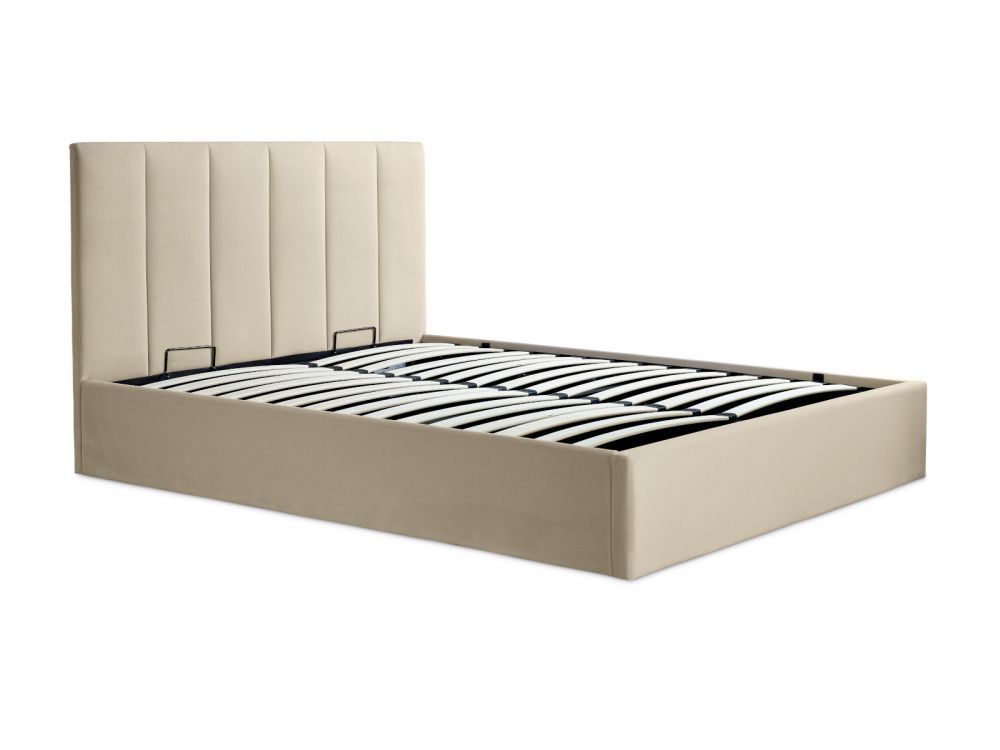
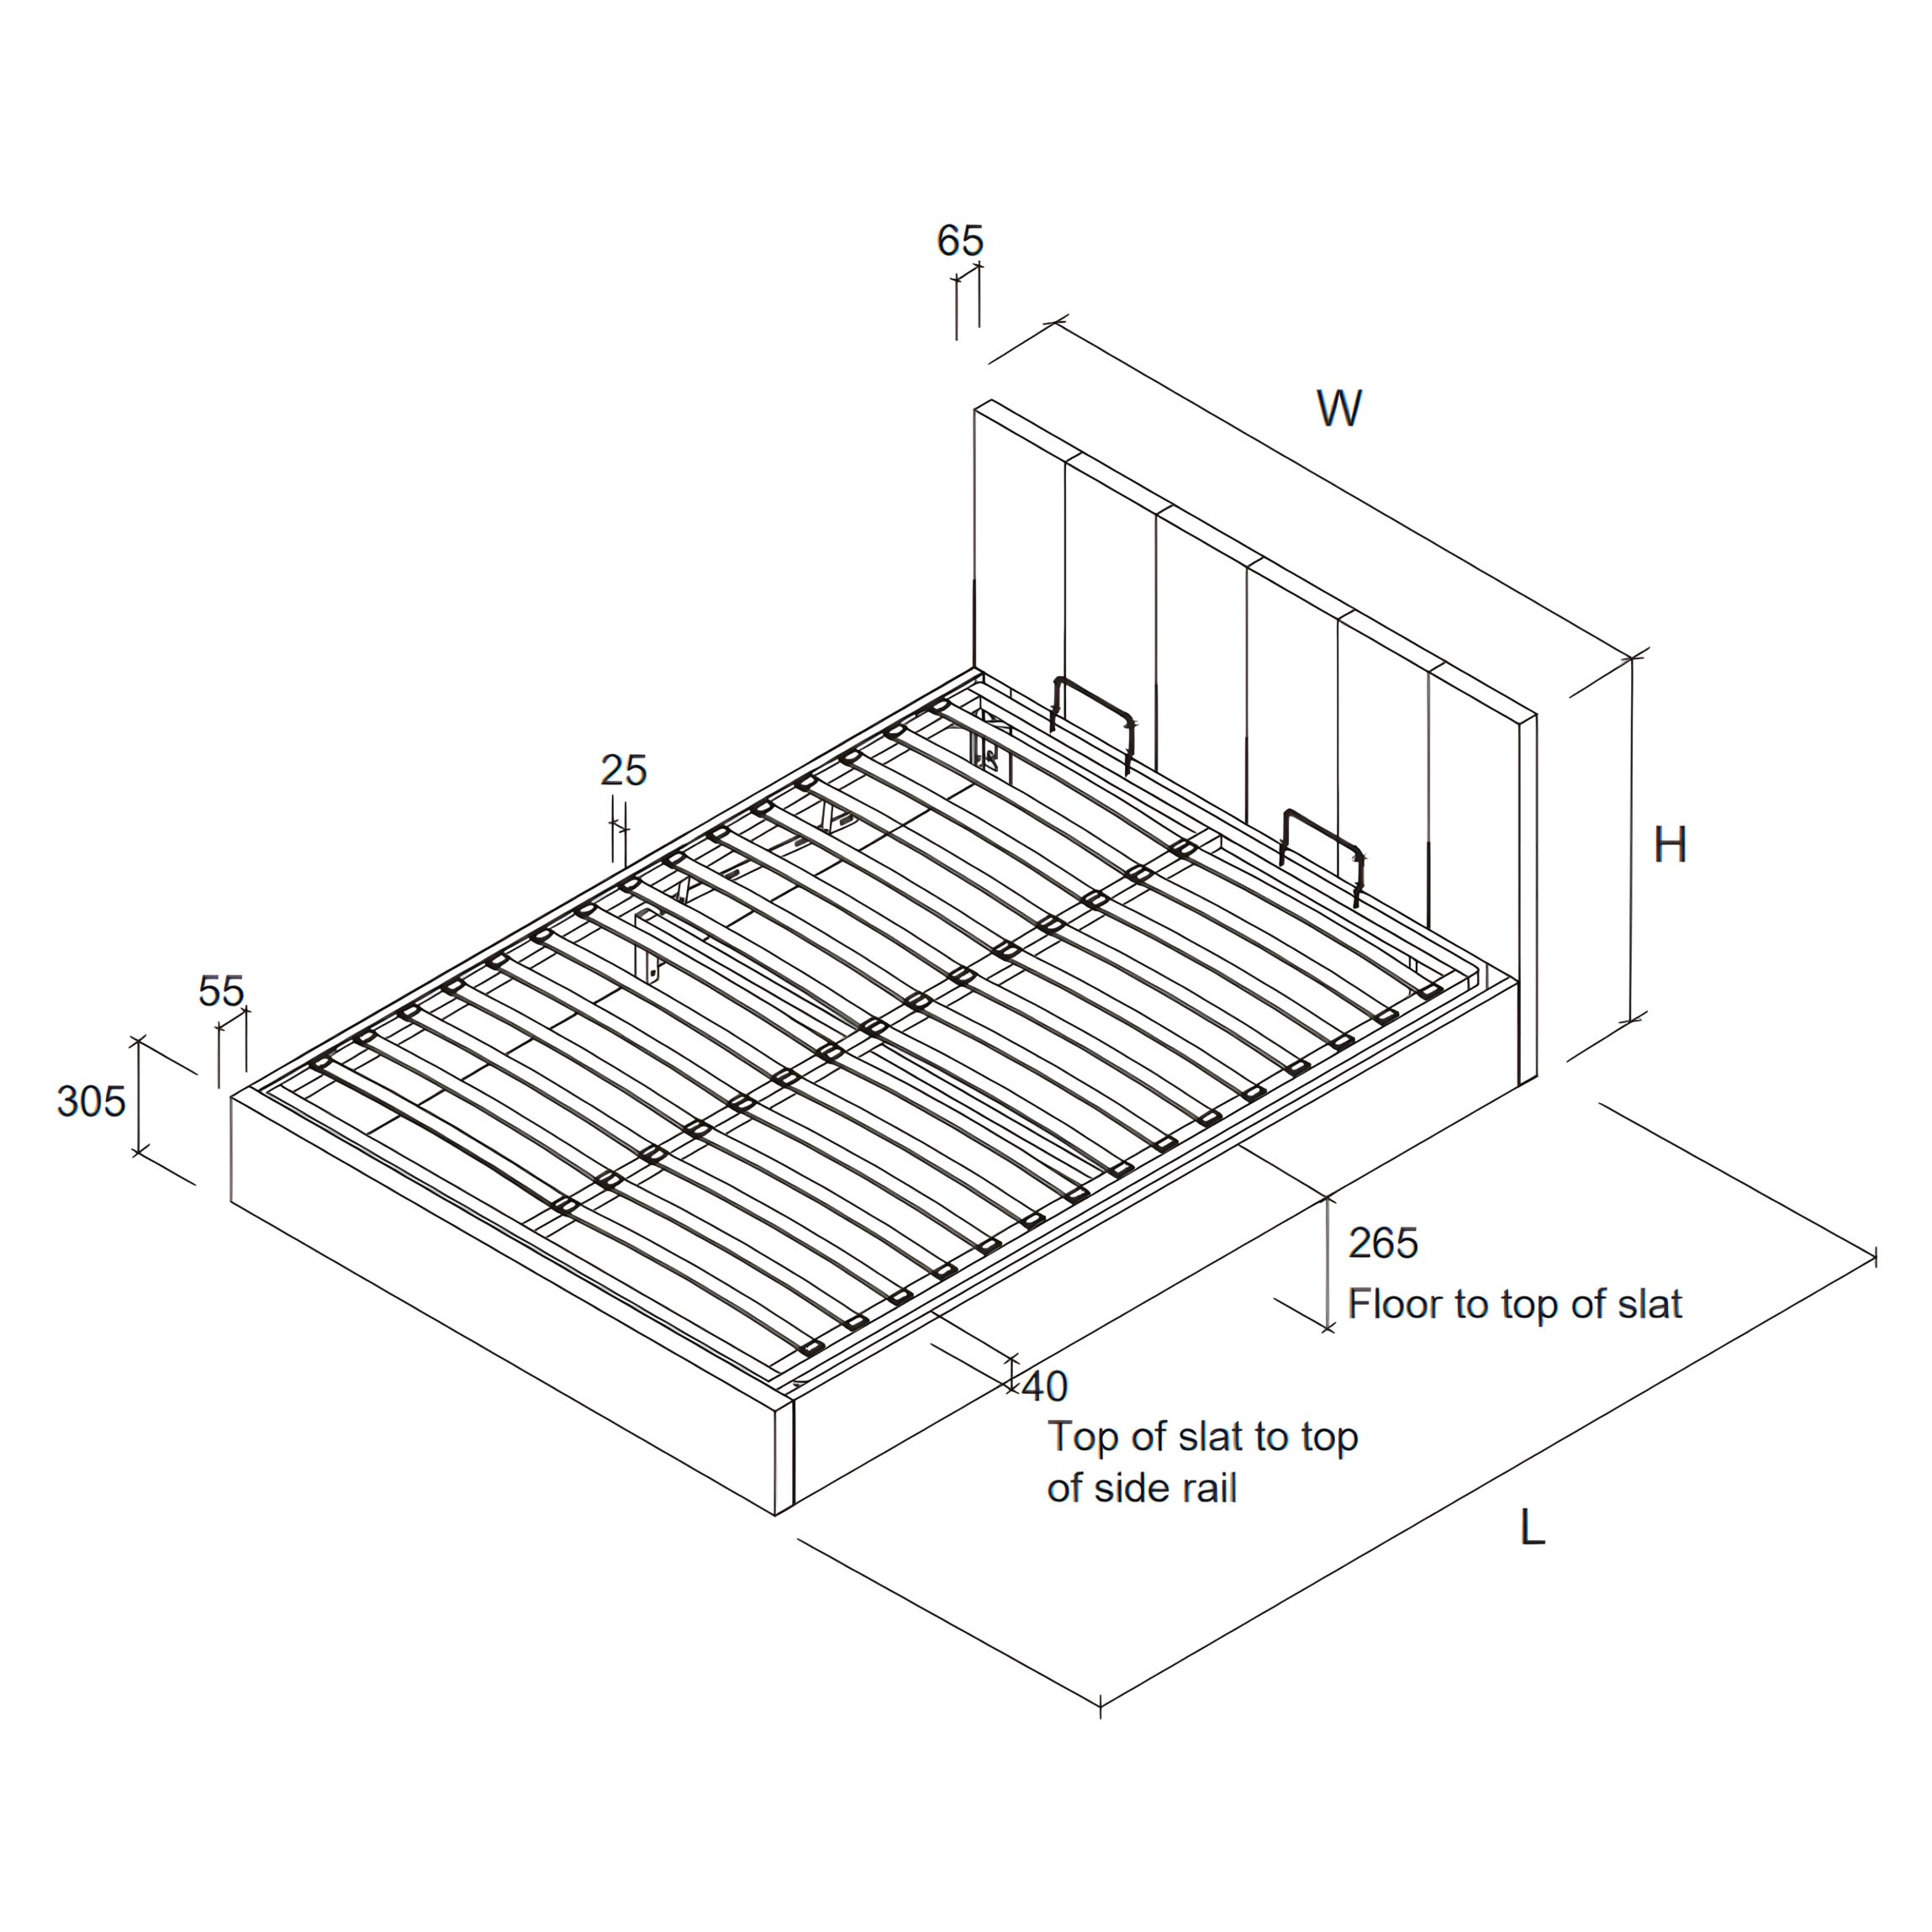
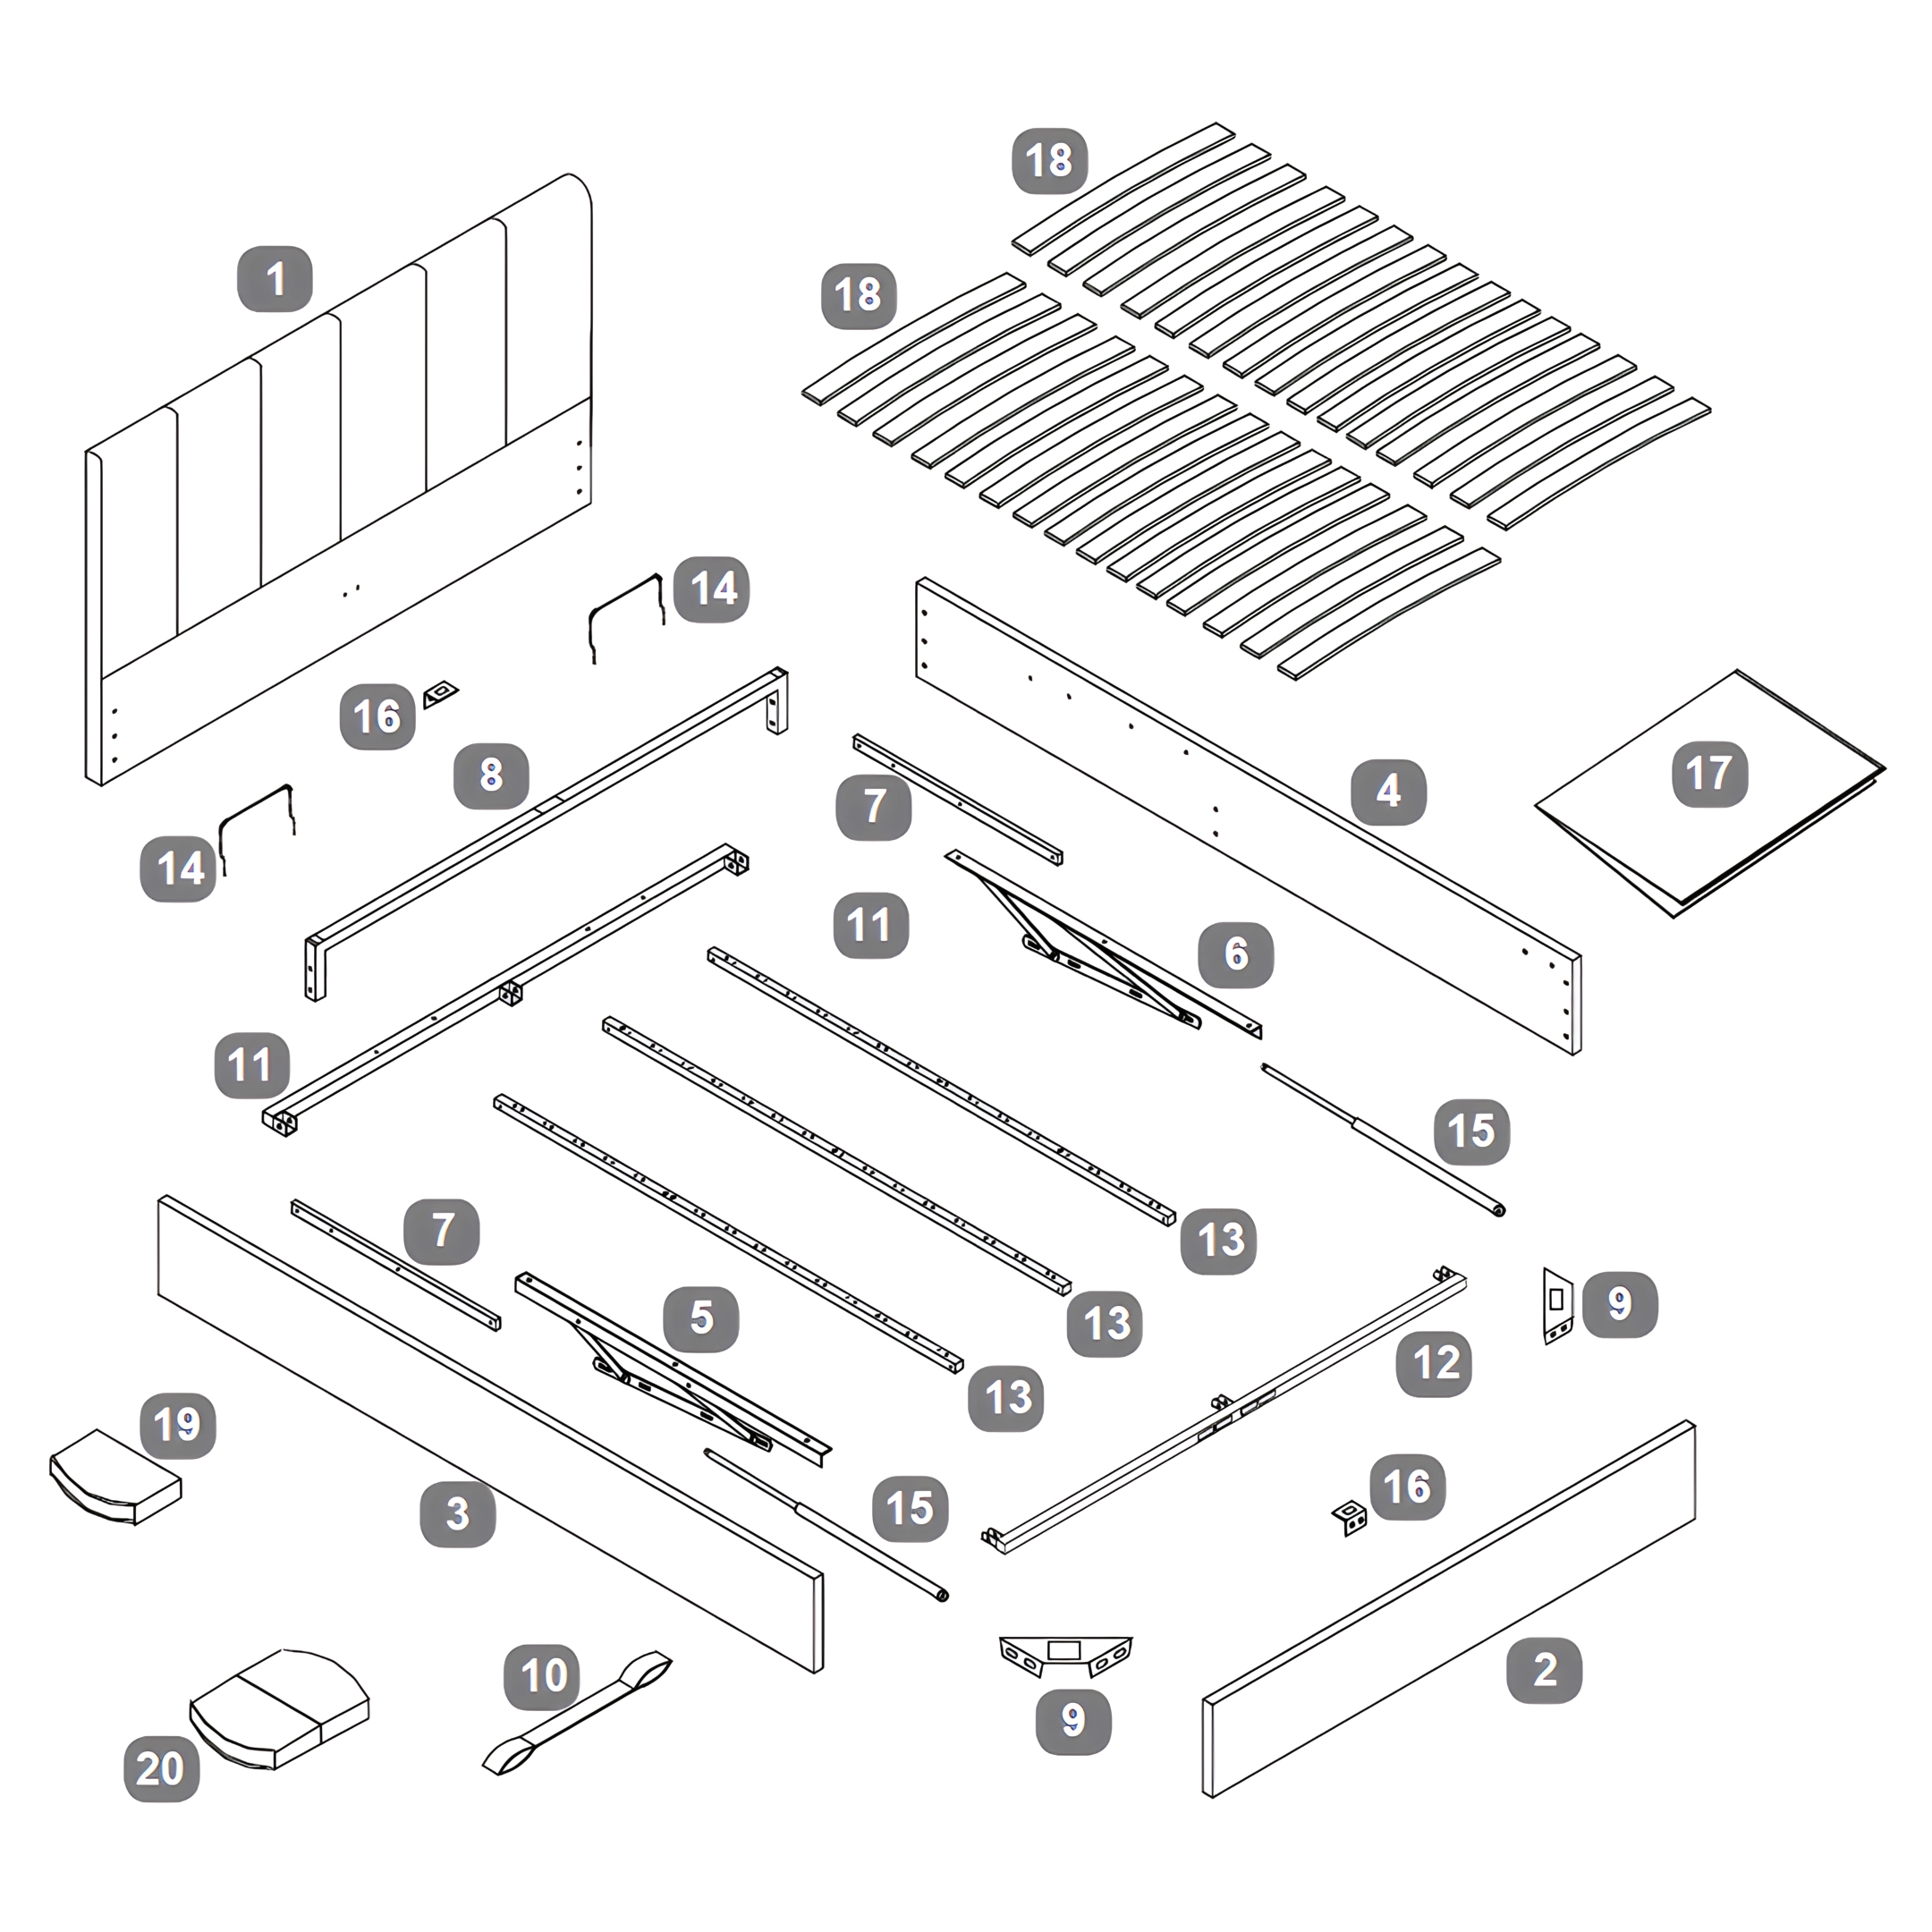
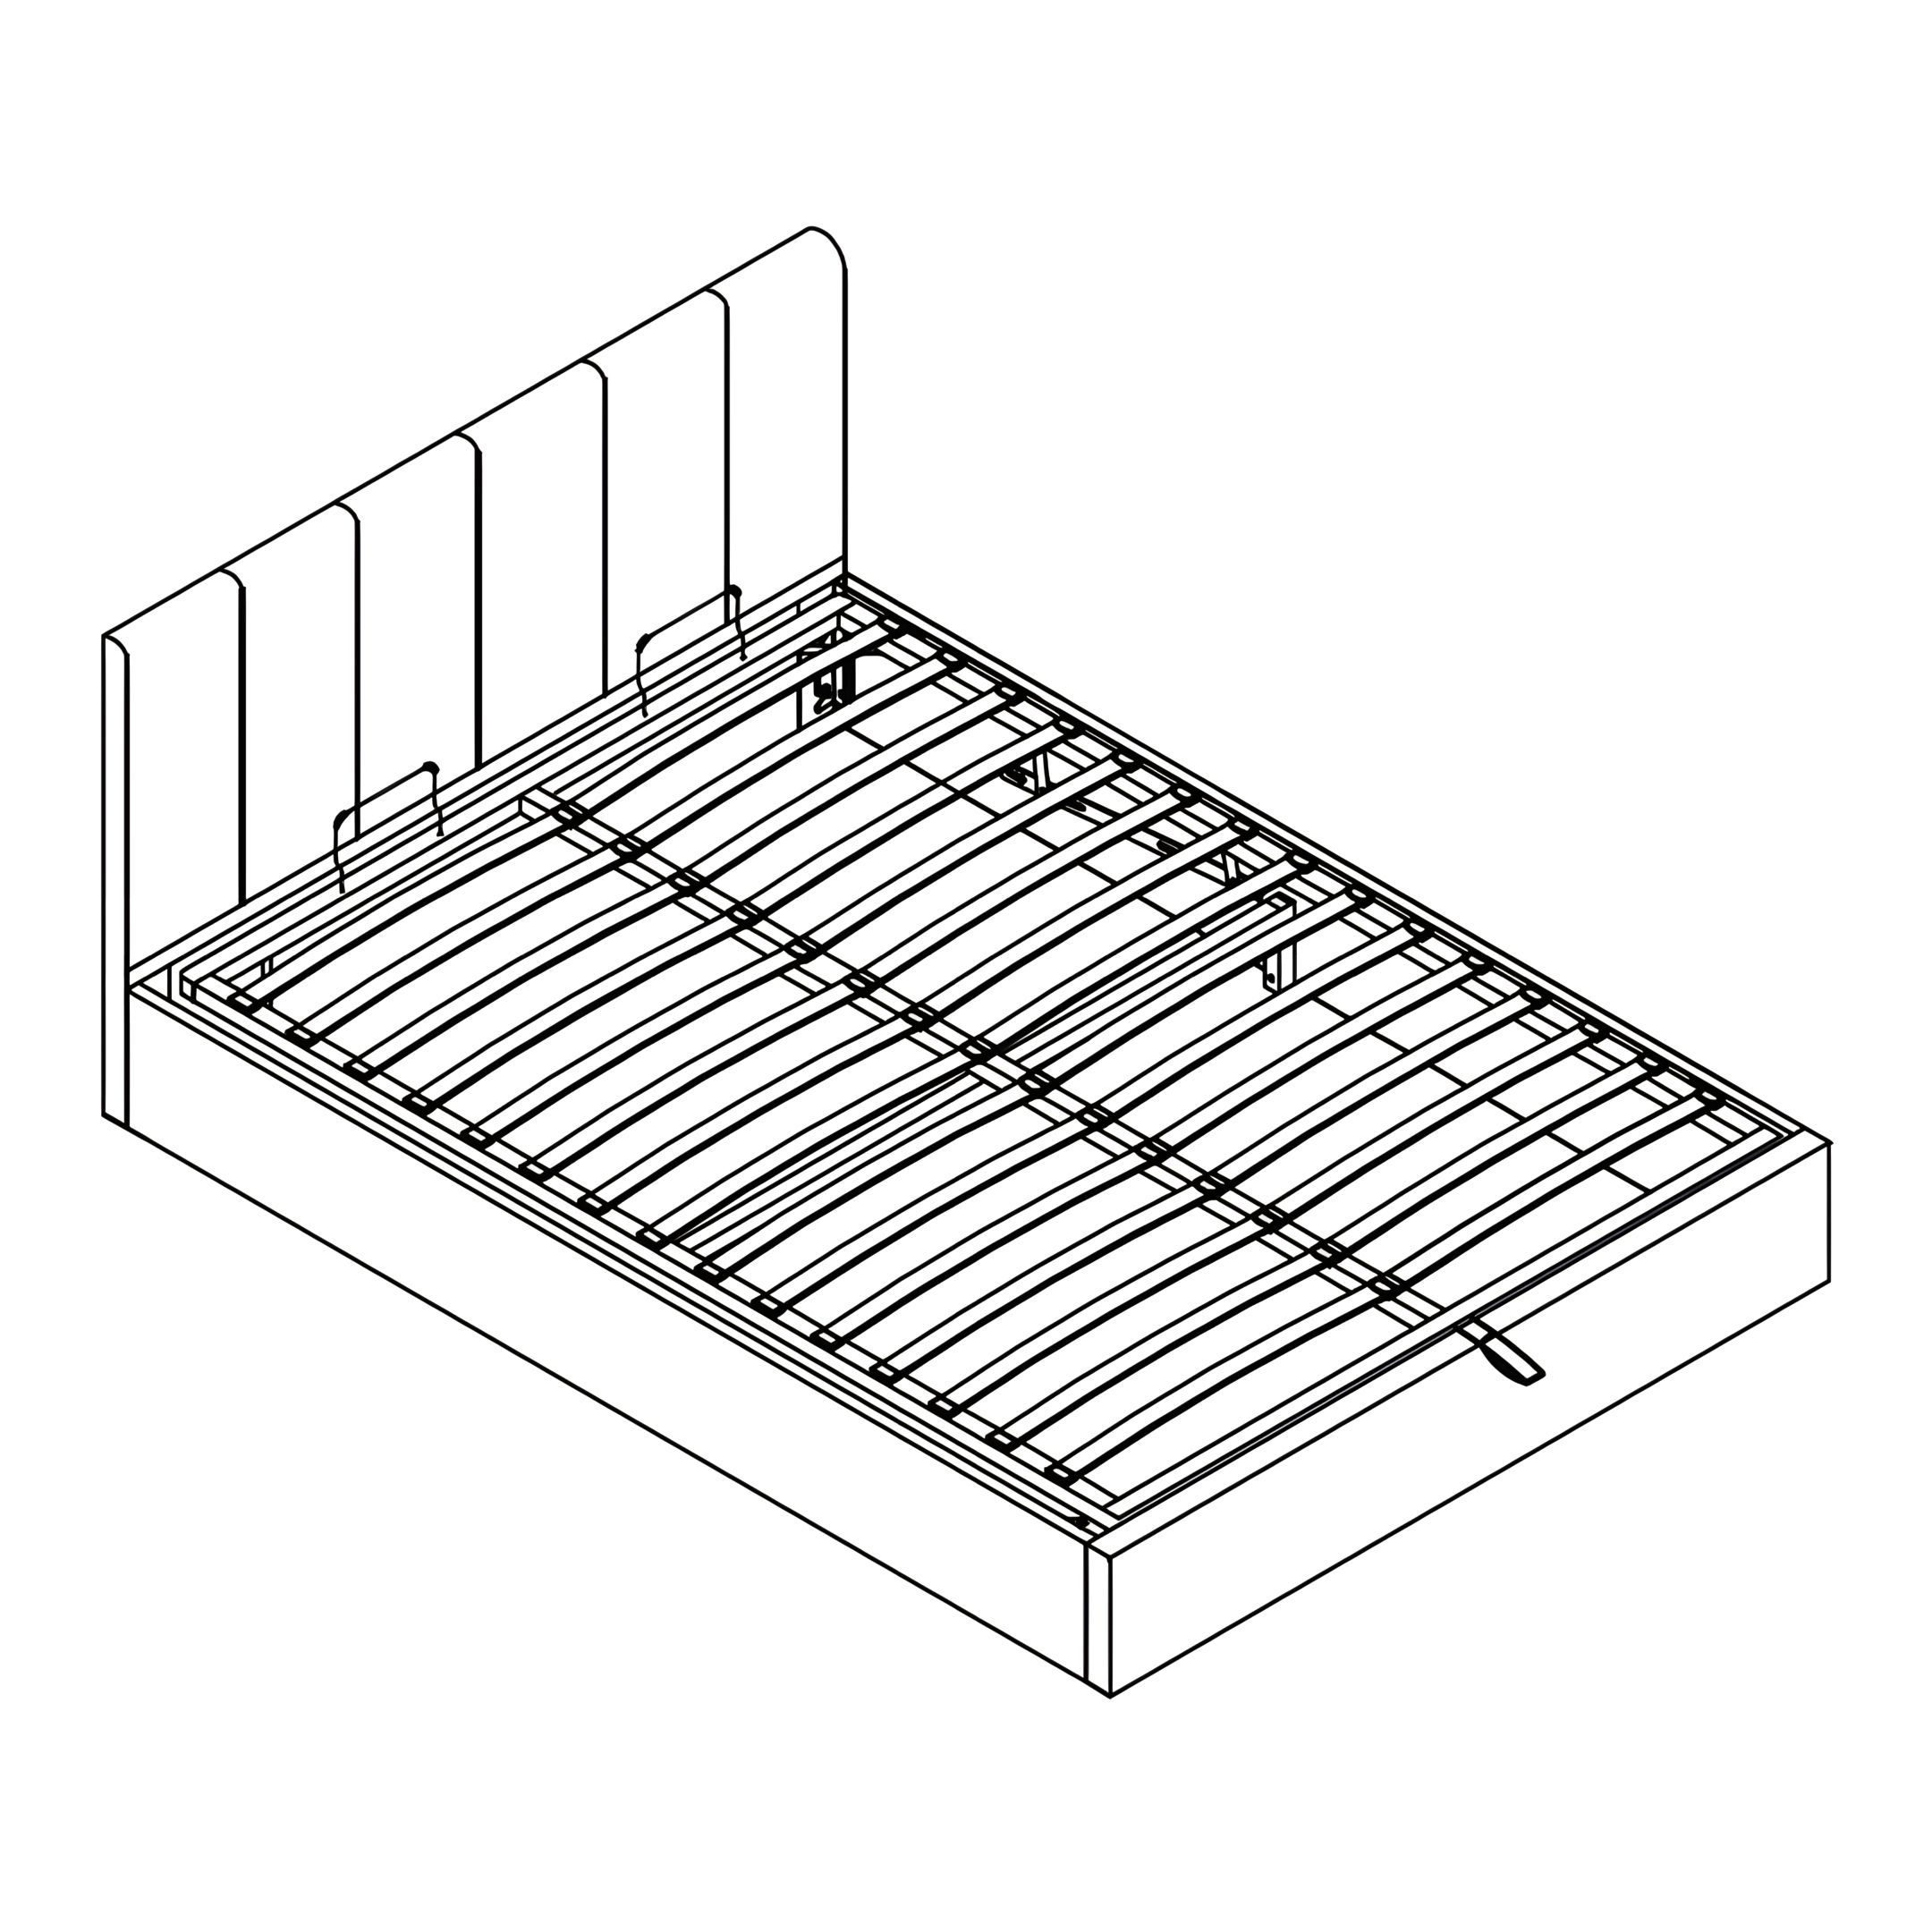
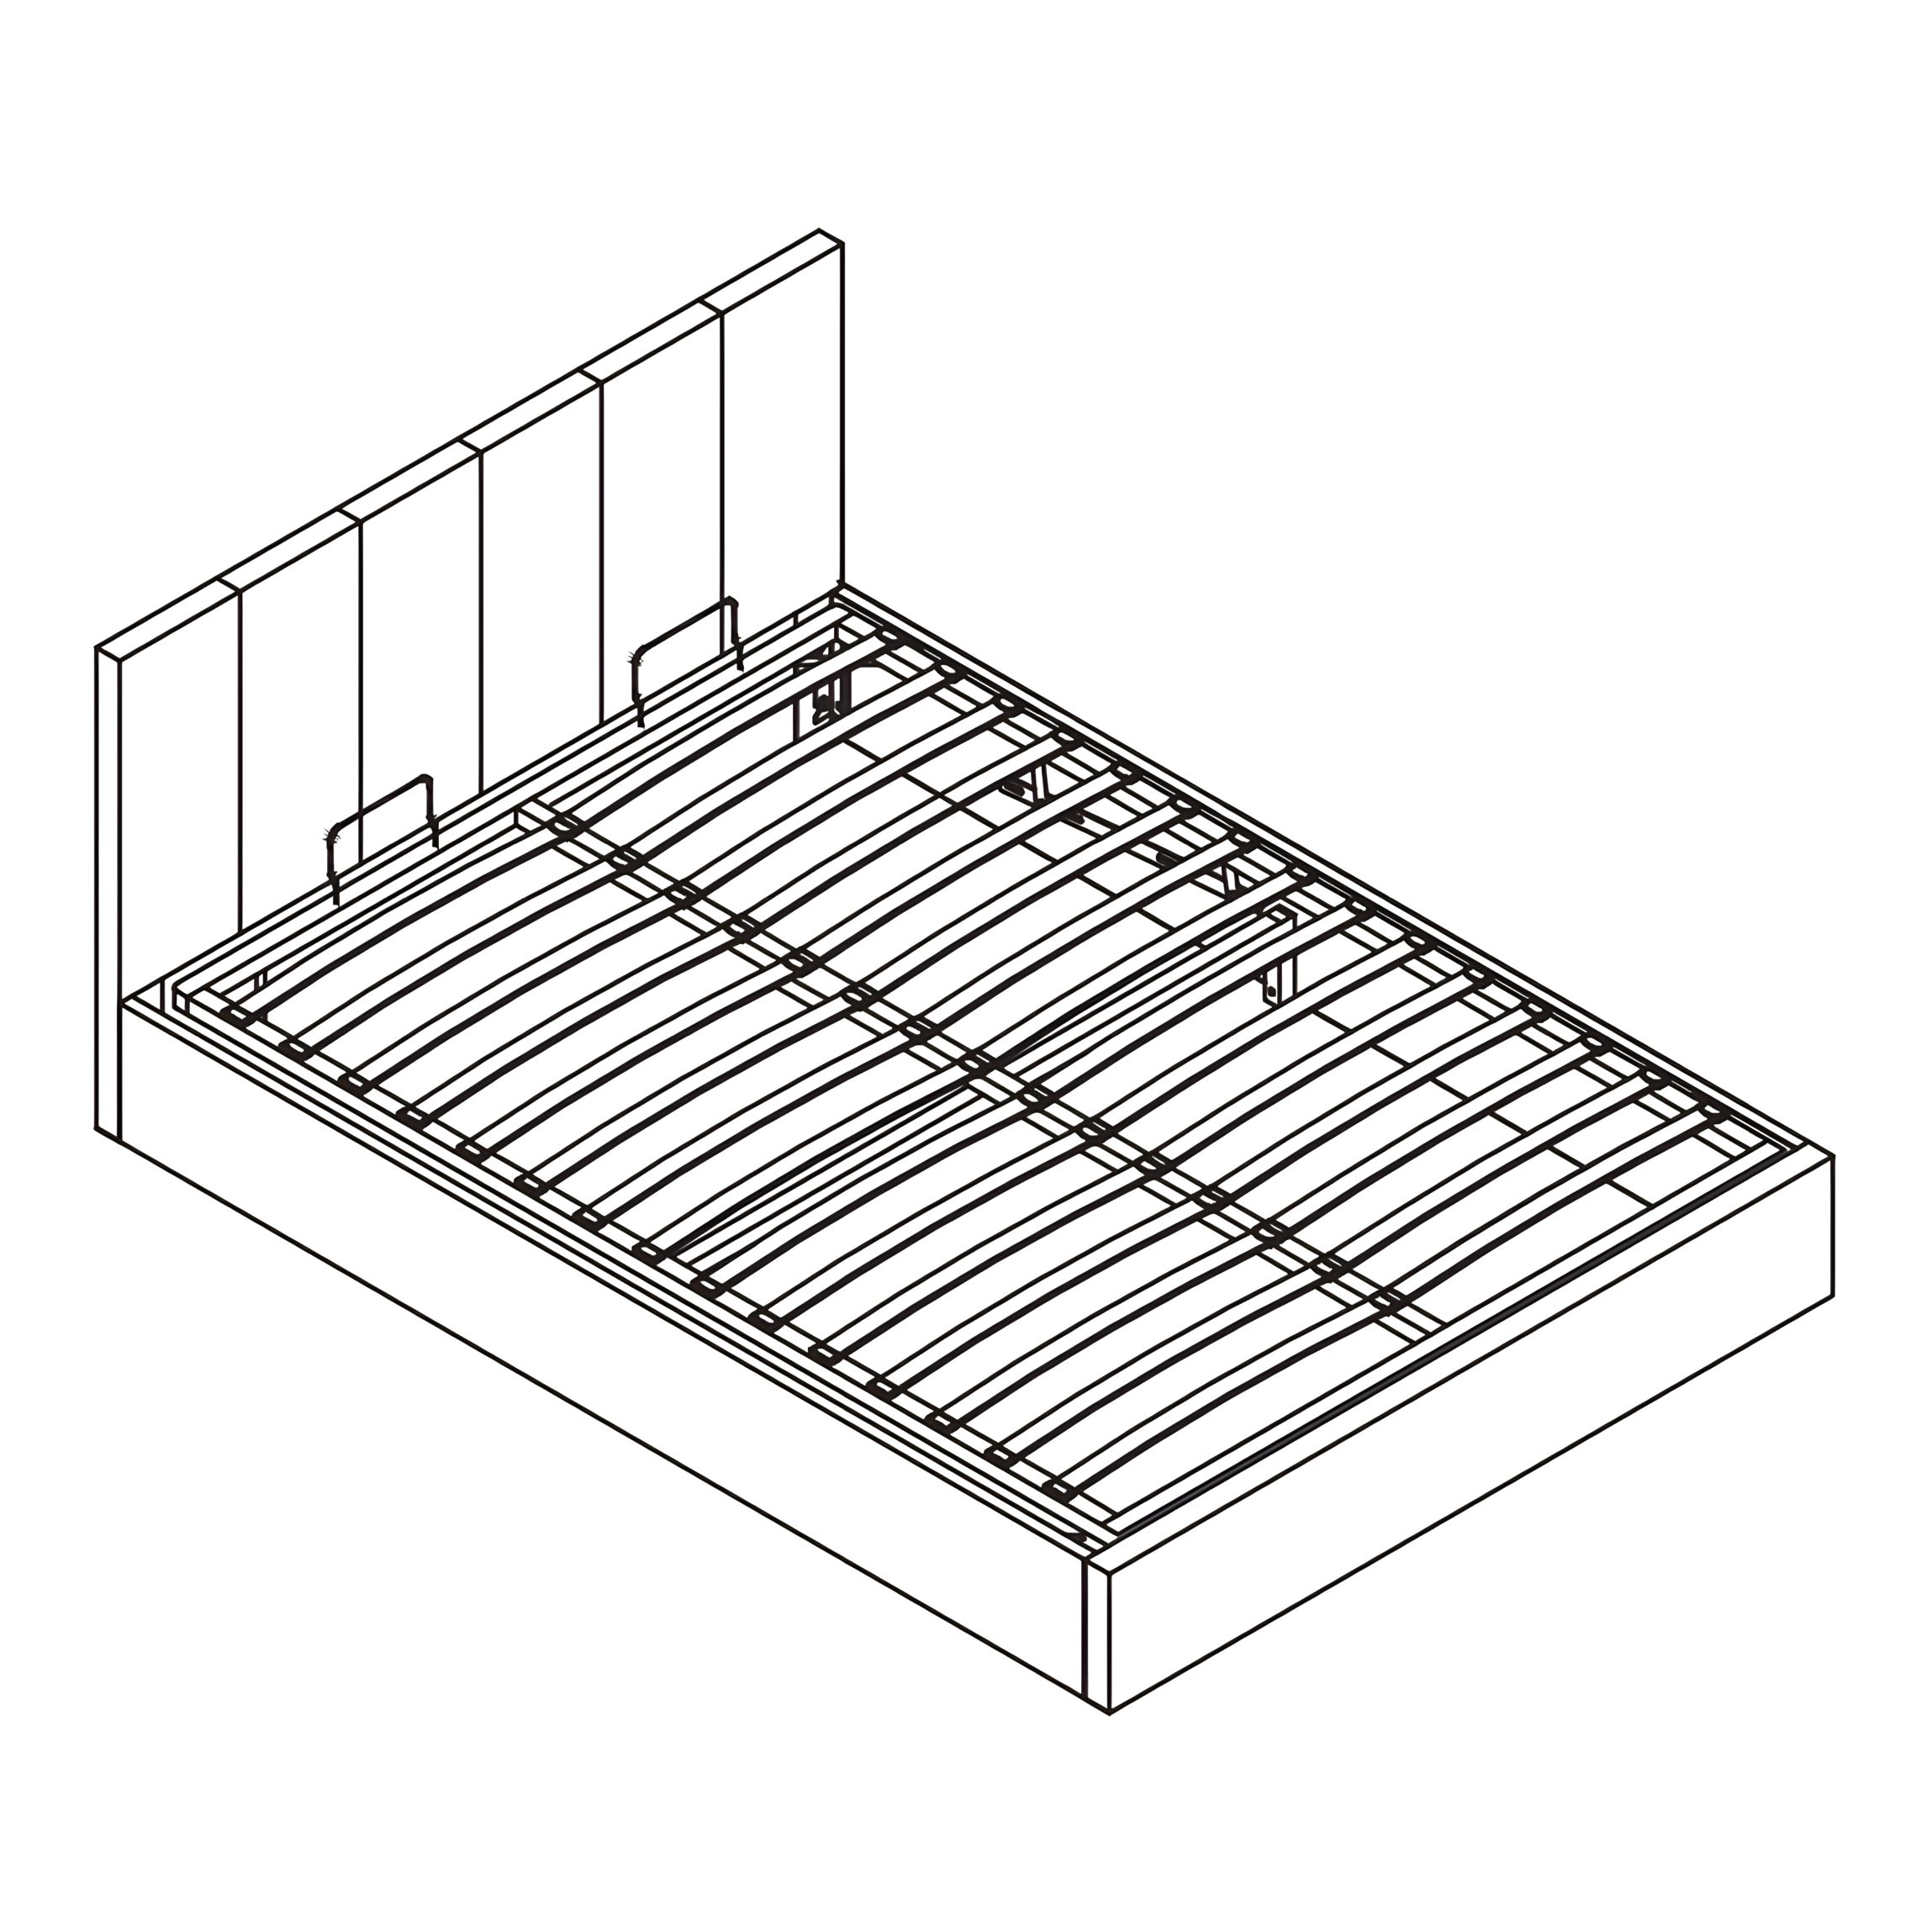
Valencia Upholstered Ottoman Bed Frame
Invite luxury into your home with the Valencia Stone Ottoman Bed Frame. A modern ottoman bed that allows functionality without compromising on style. The slatted Ottoman base can be easily raised with the assistance of the gas lift struts to reveal a class leading level of fabric lined storage. Designed for comfort and support, the sprung slatted base of this bed base offers excellent mattress support whilst the flexible slats also enhance ventilation and helps to promoting air circulation to keep your mattress fresh and hygienic.
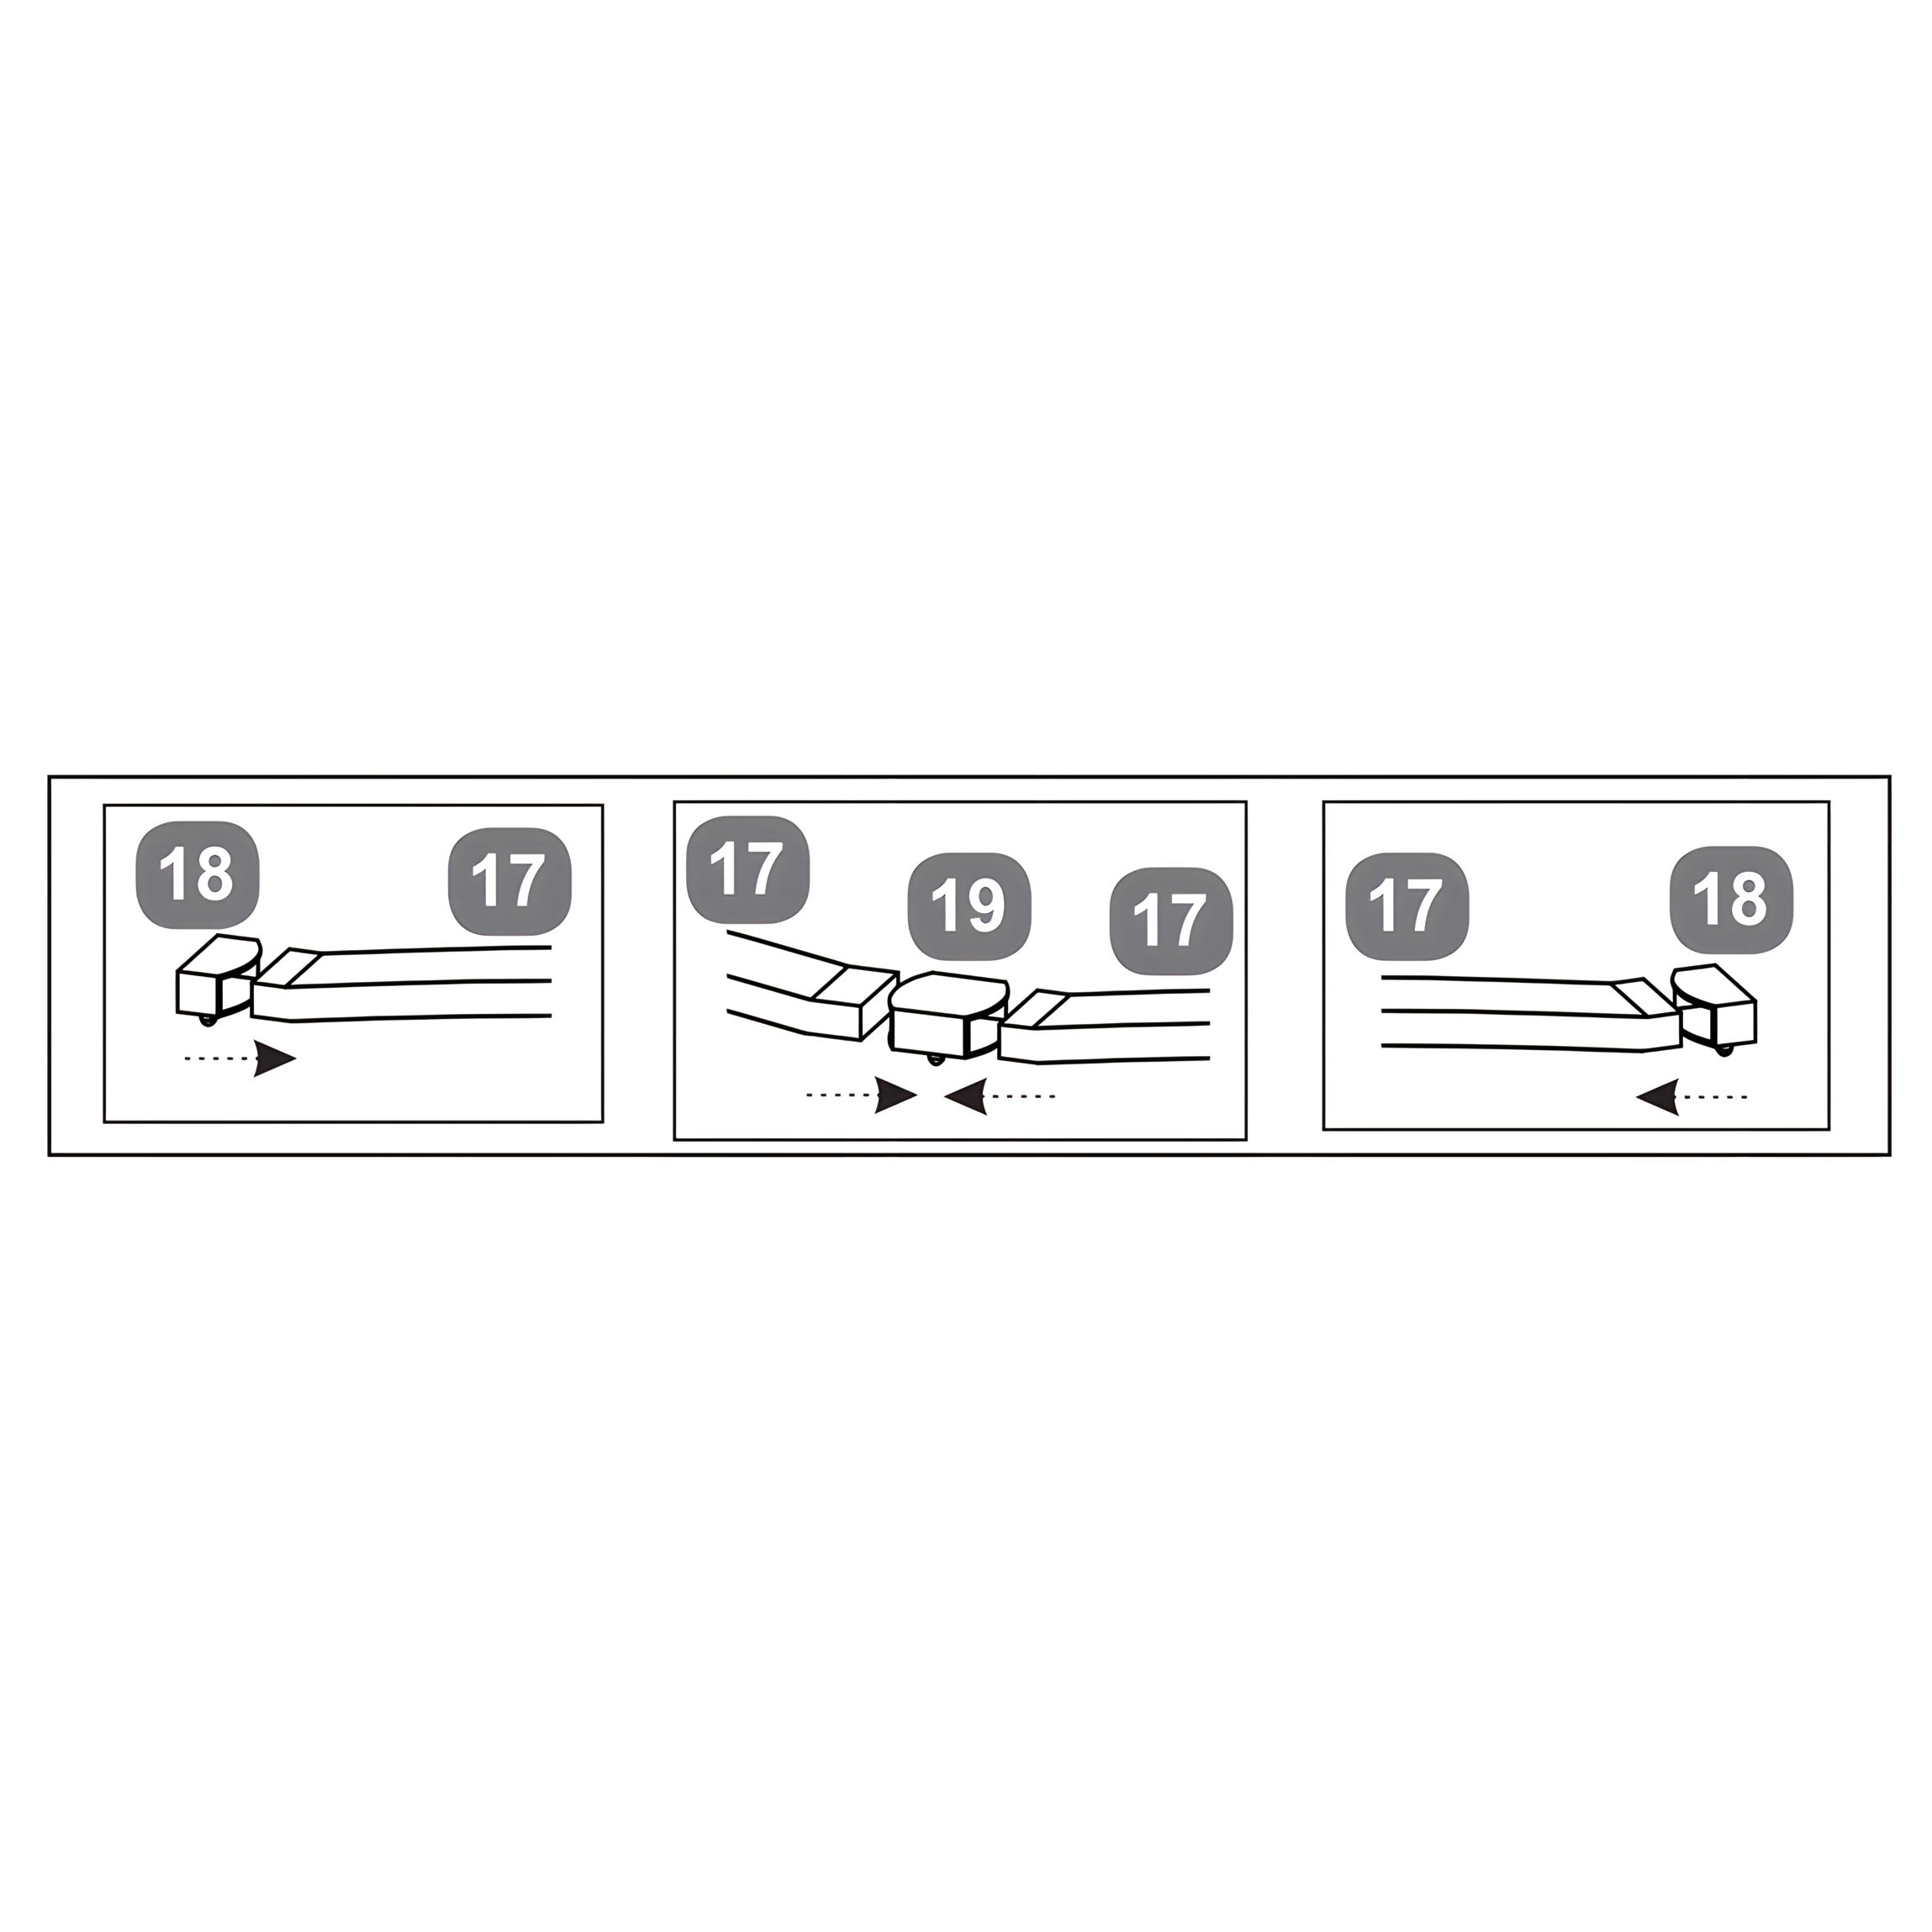
18Single Plastic Caps (28 for Double, 30 for King)
19Double Plastic Caps (14 for Double, 15 for King)
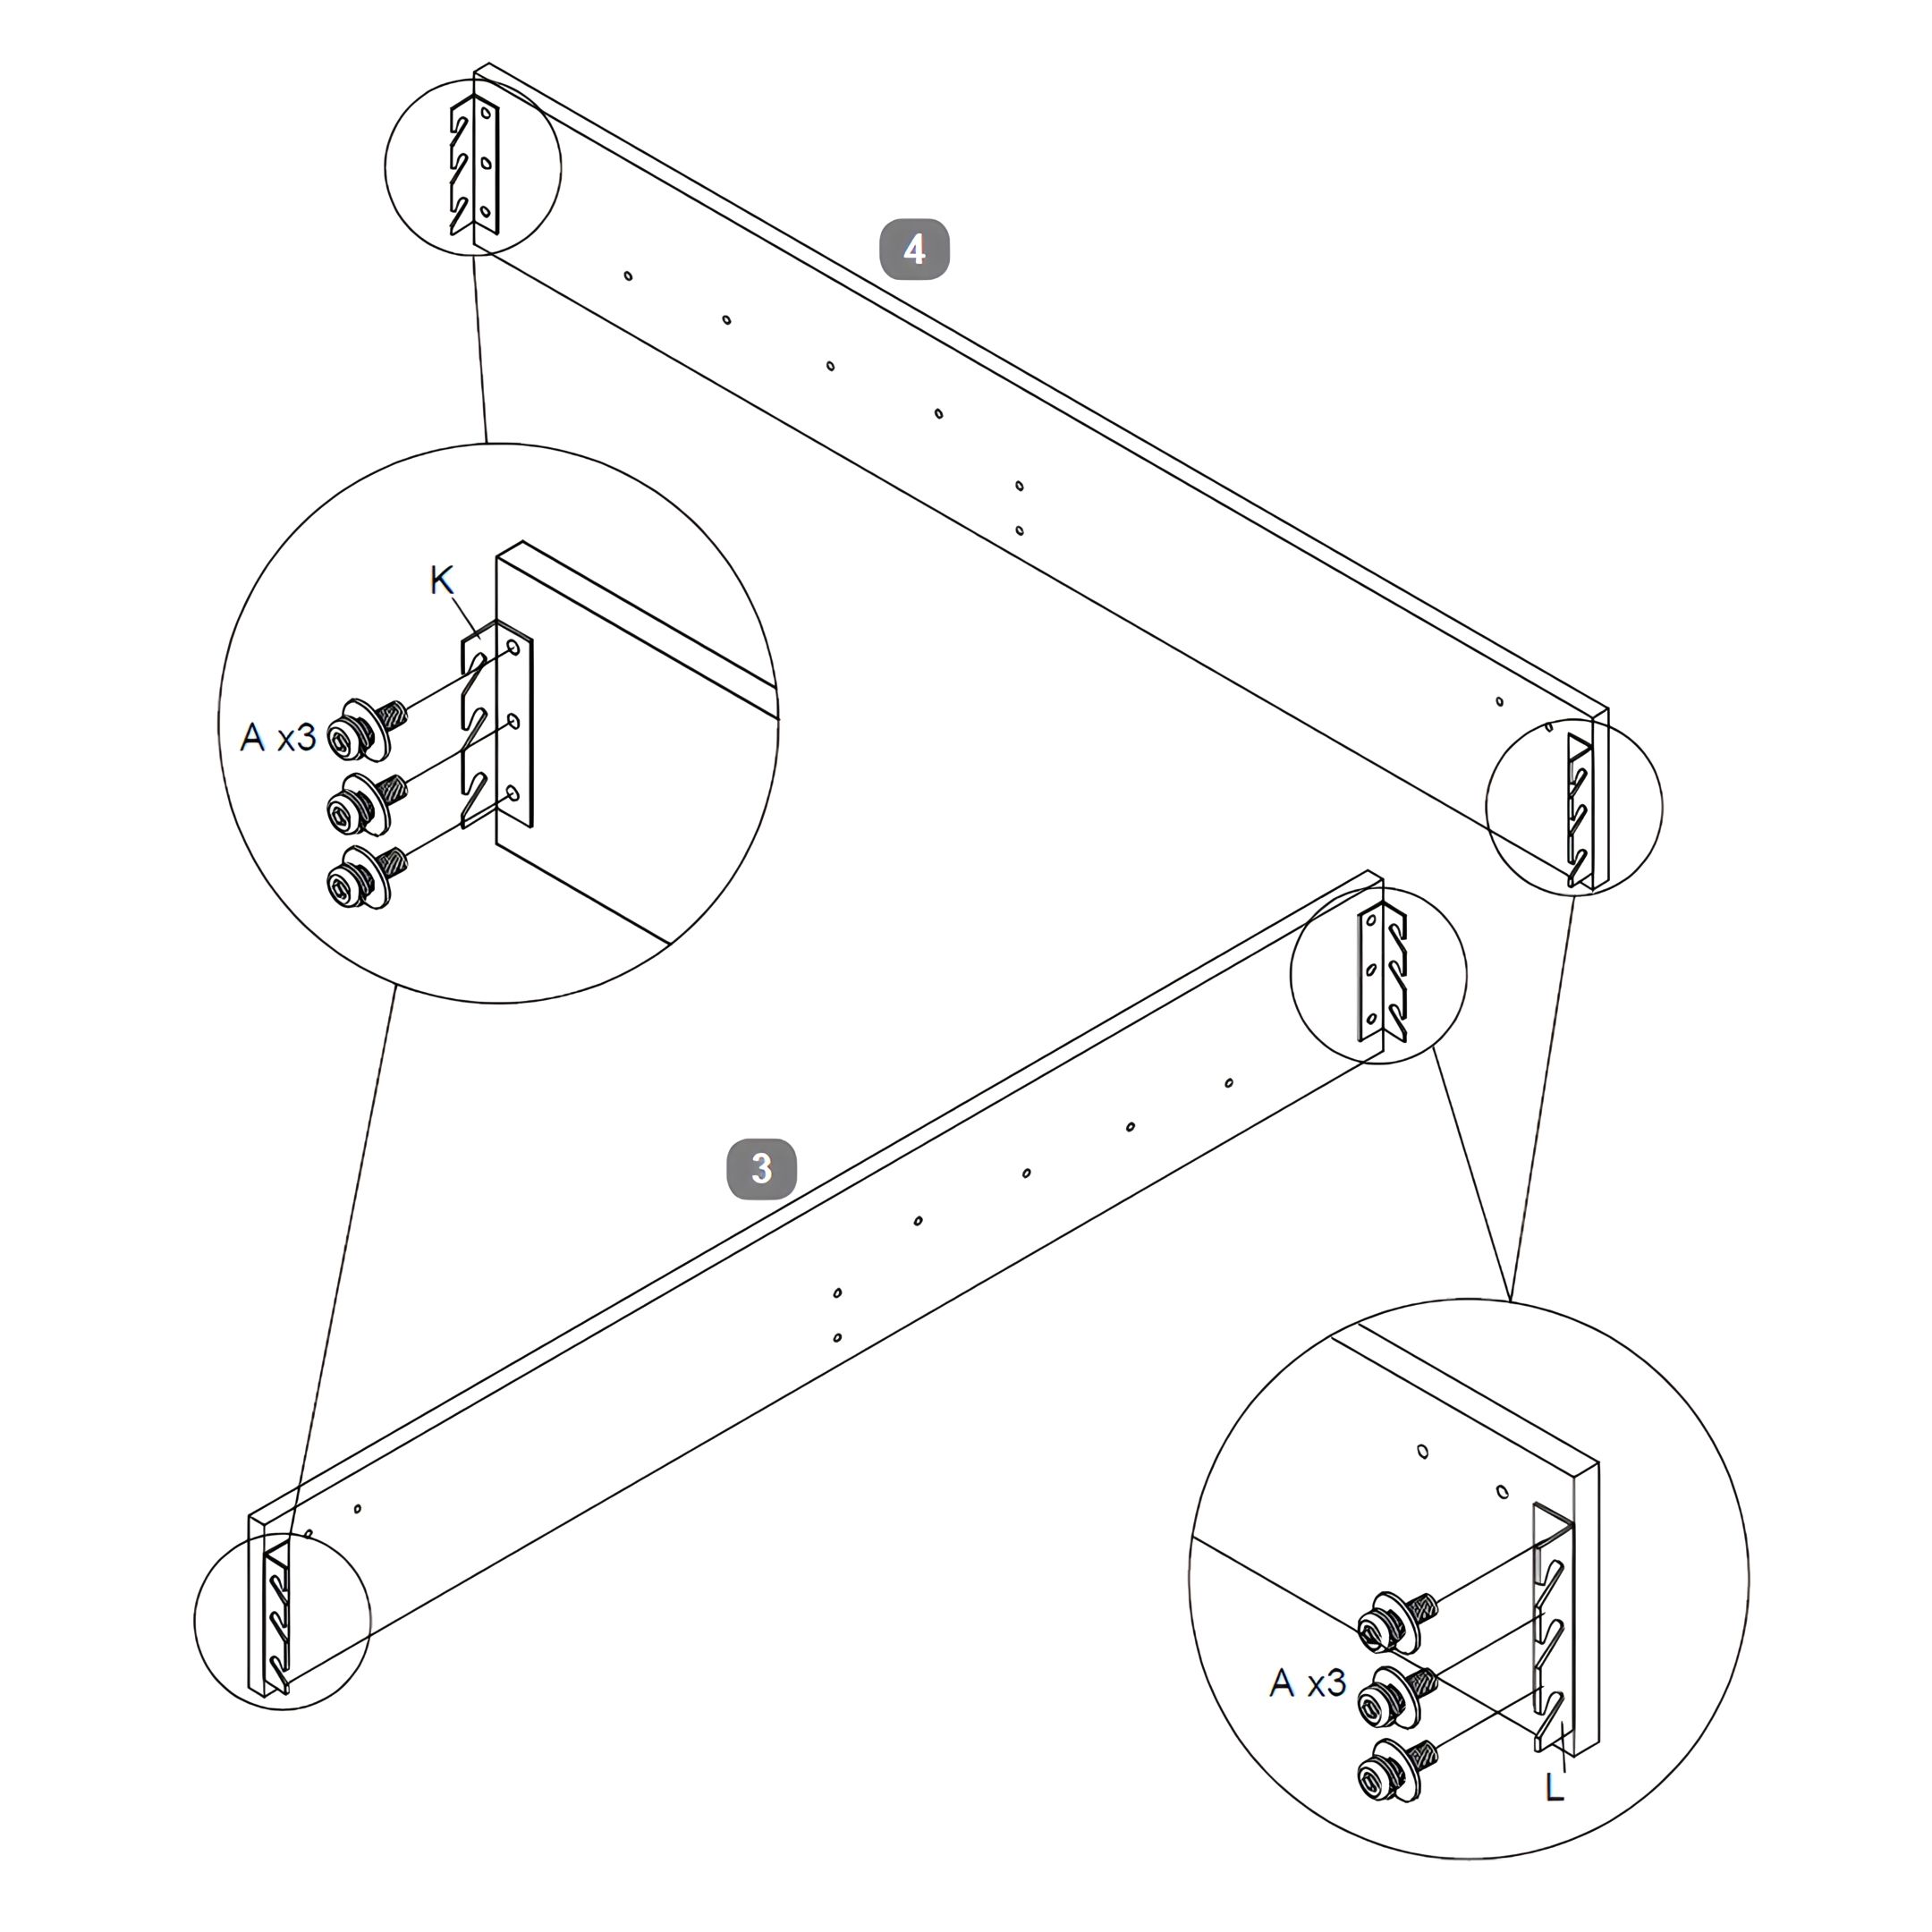
1. Attach Angle Brackets to Side Rails
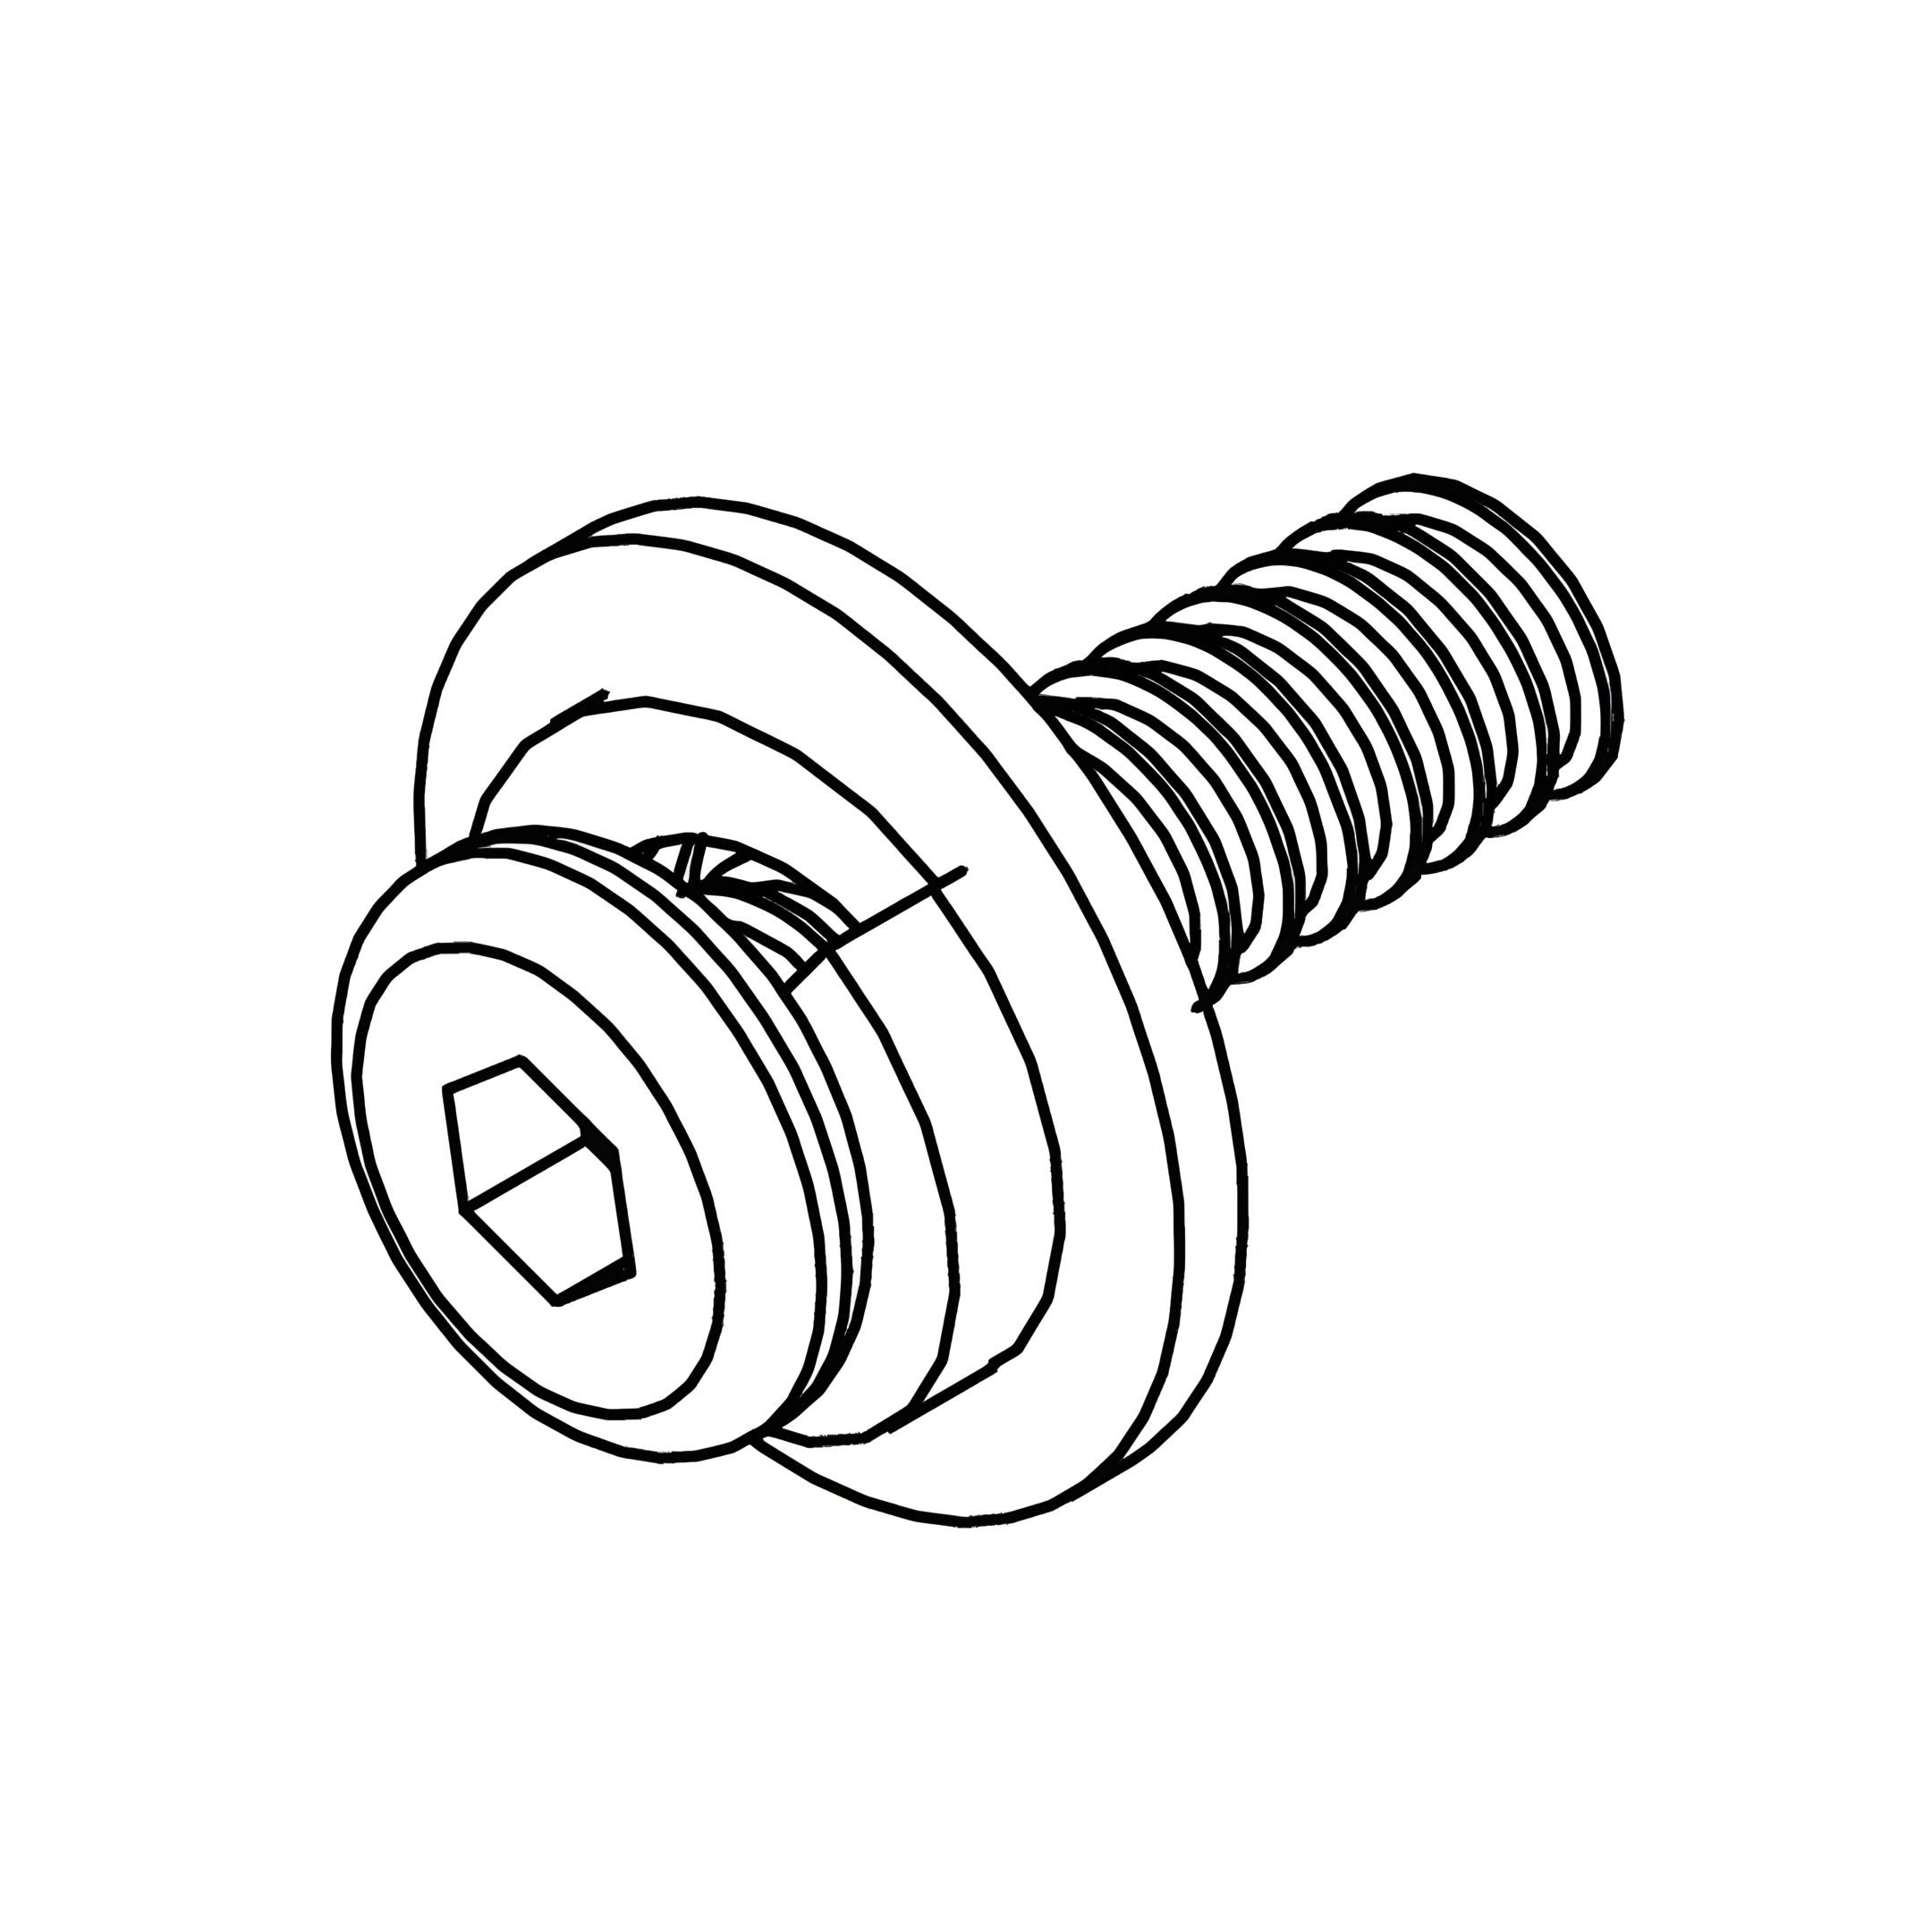
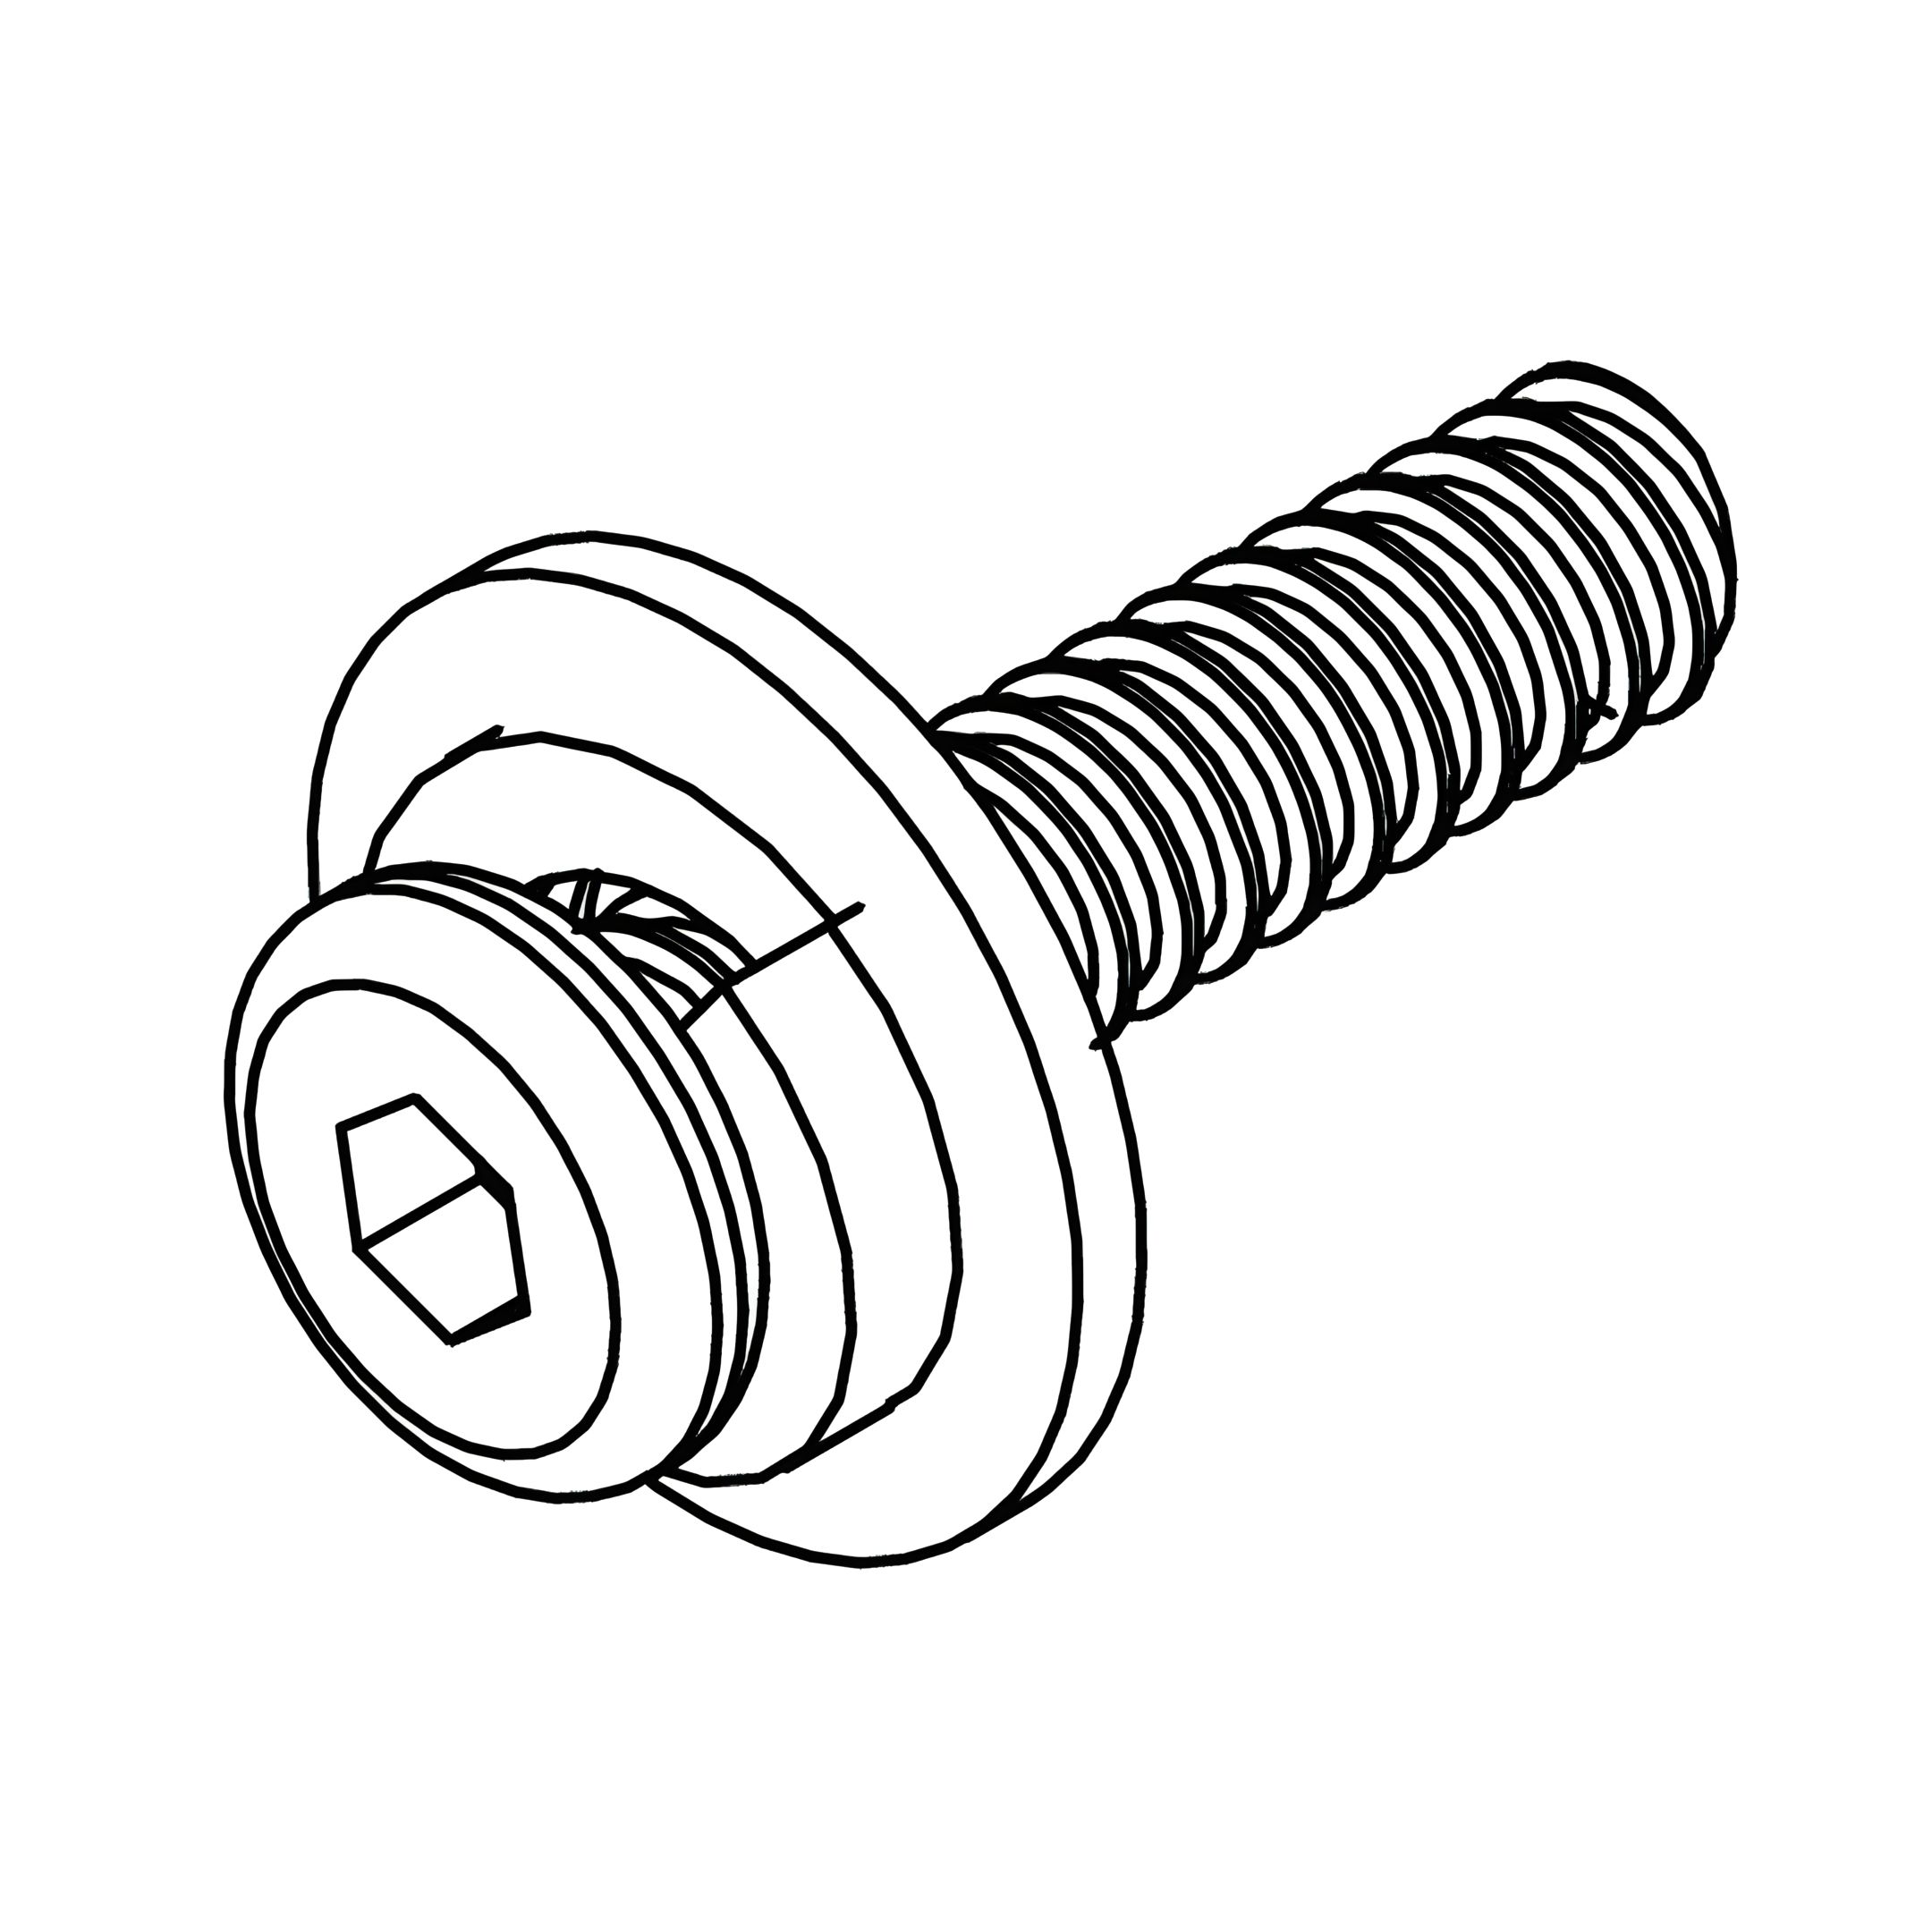
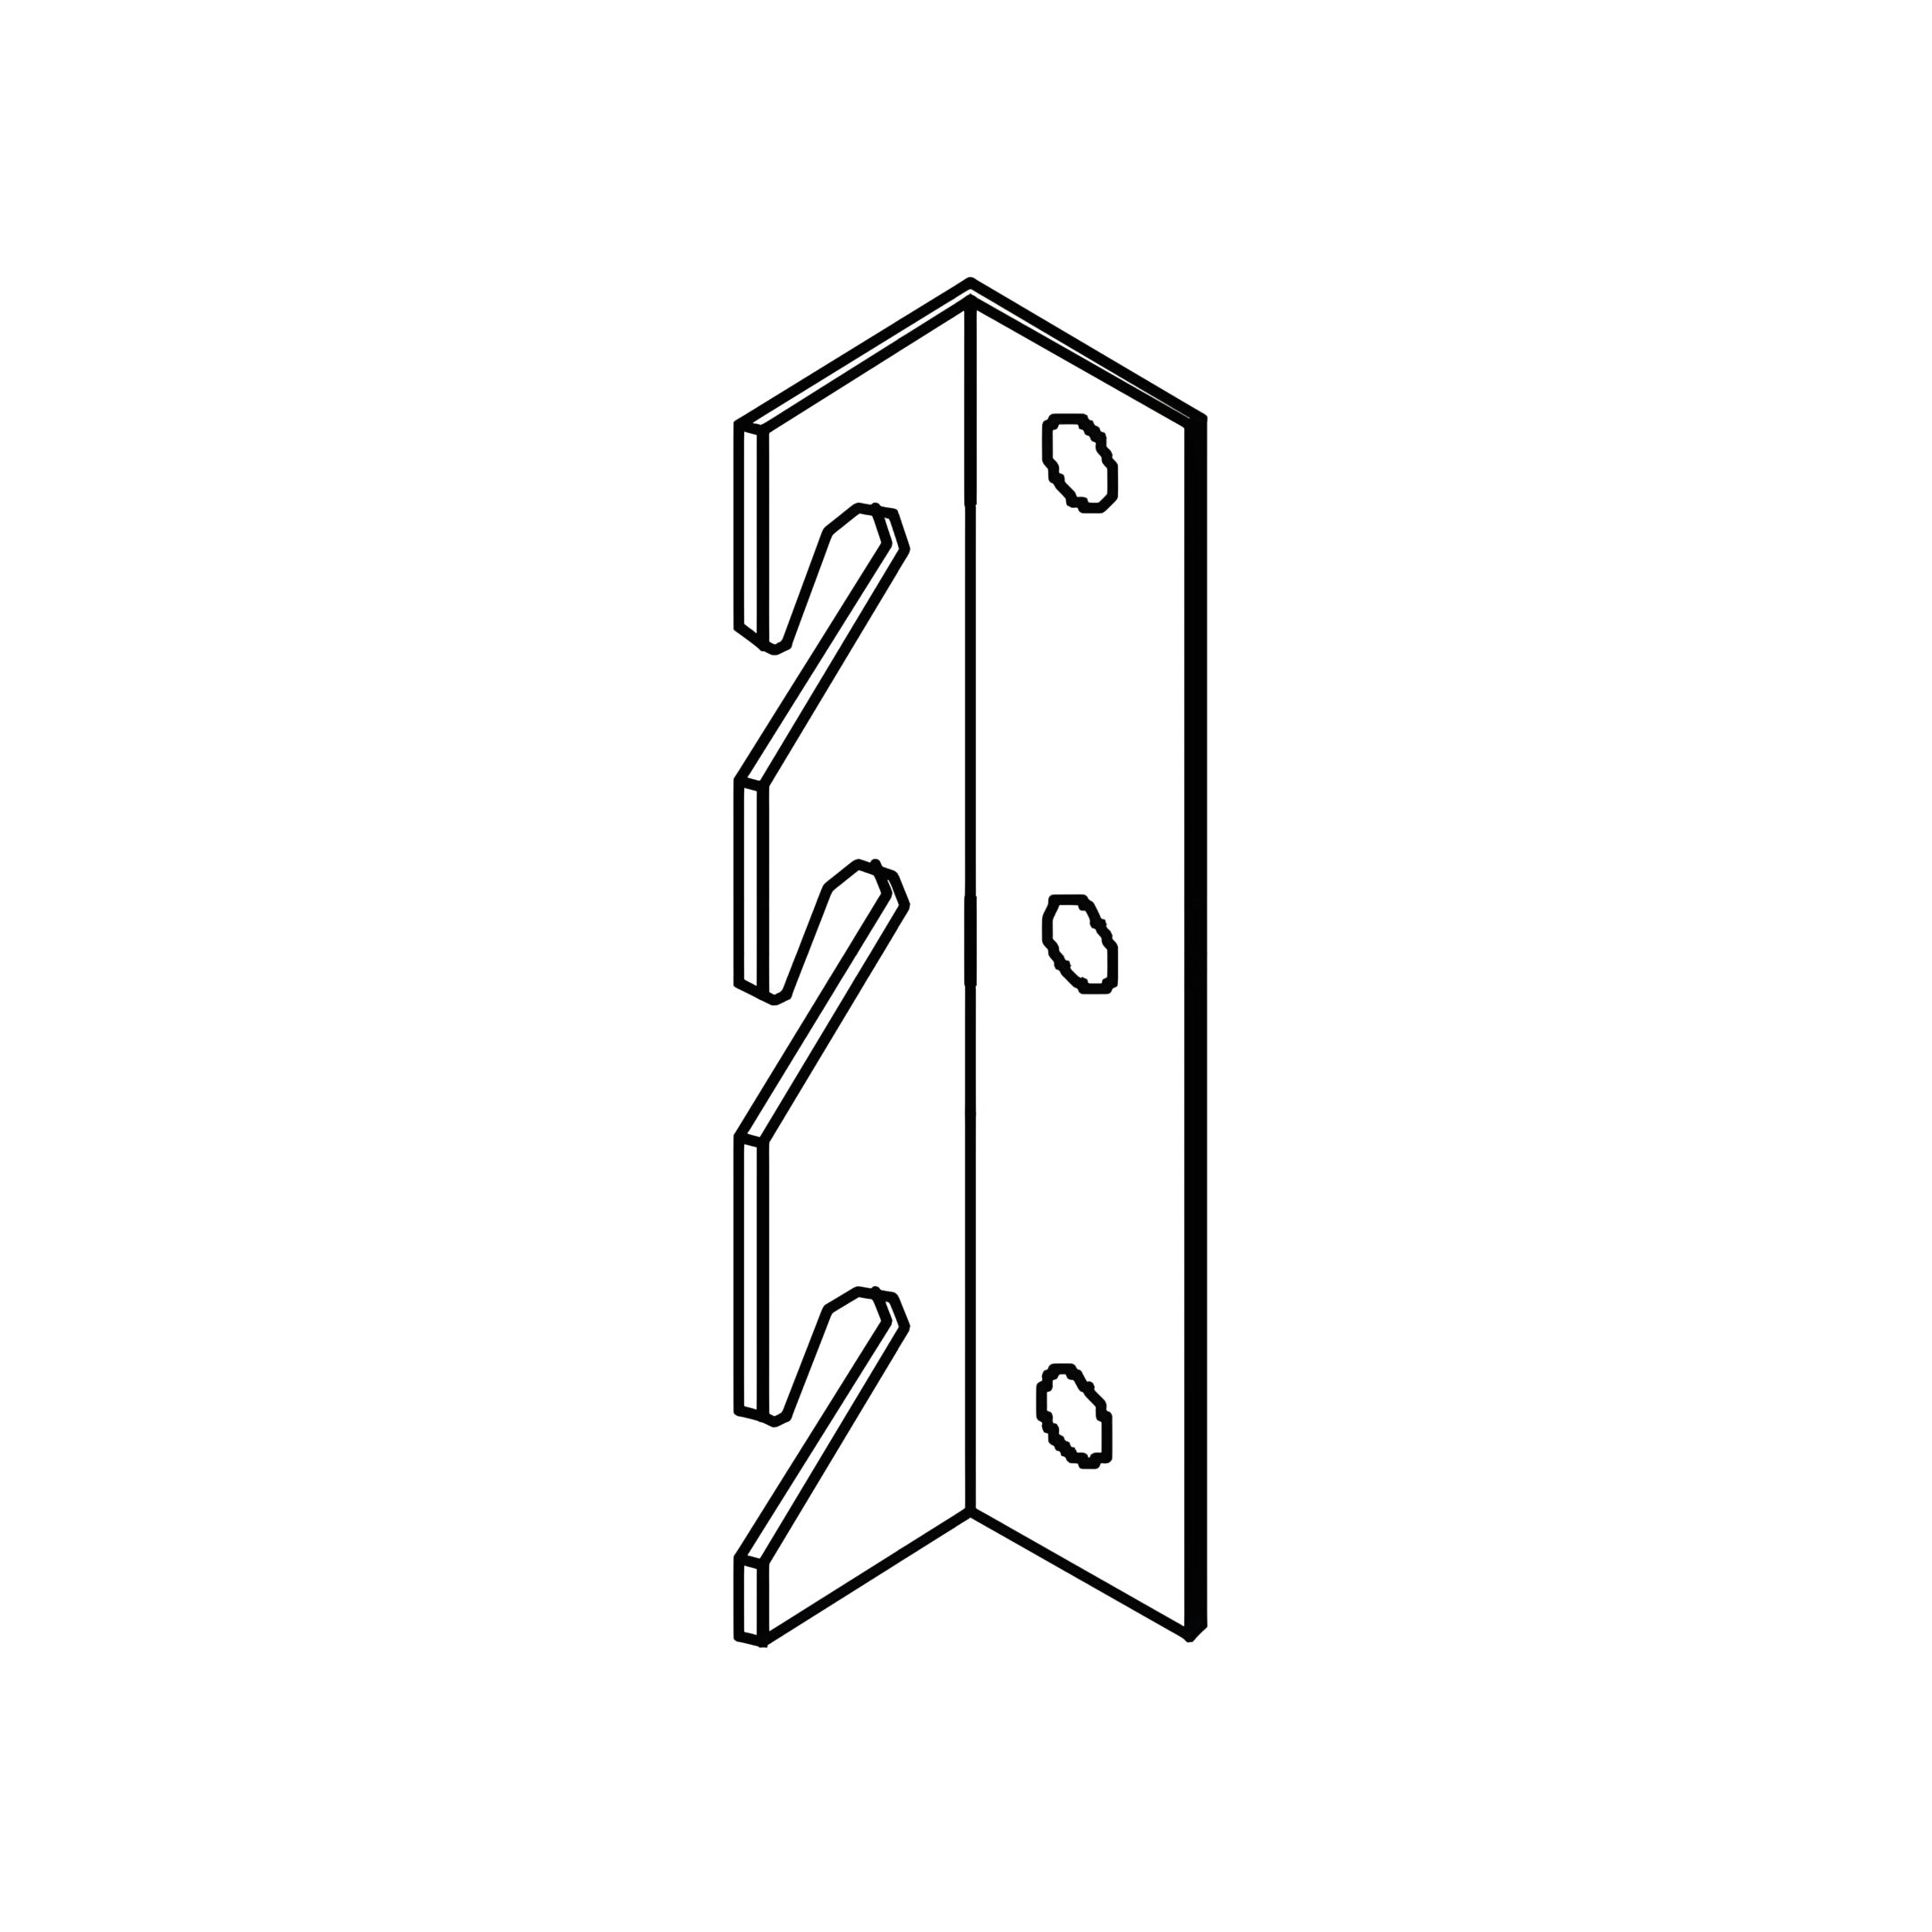
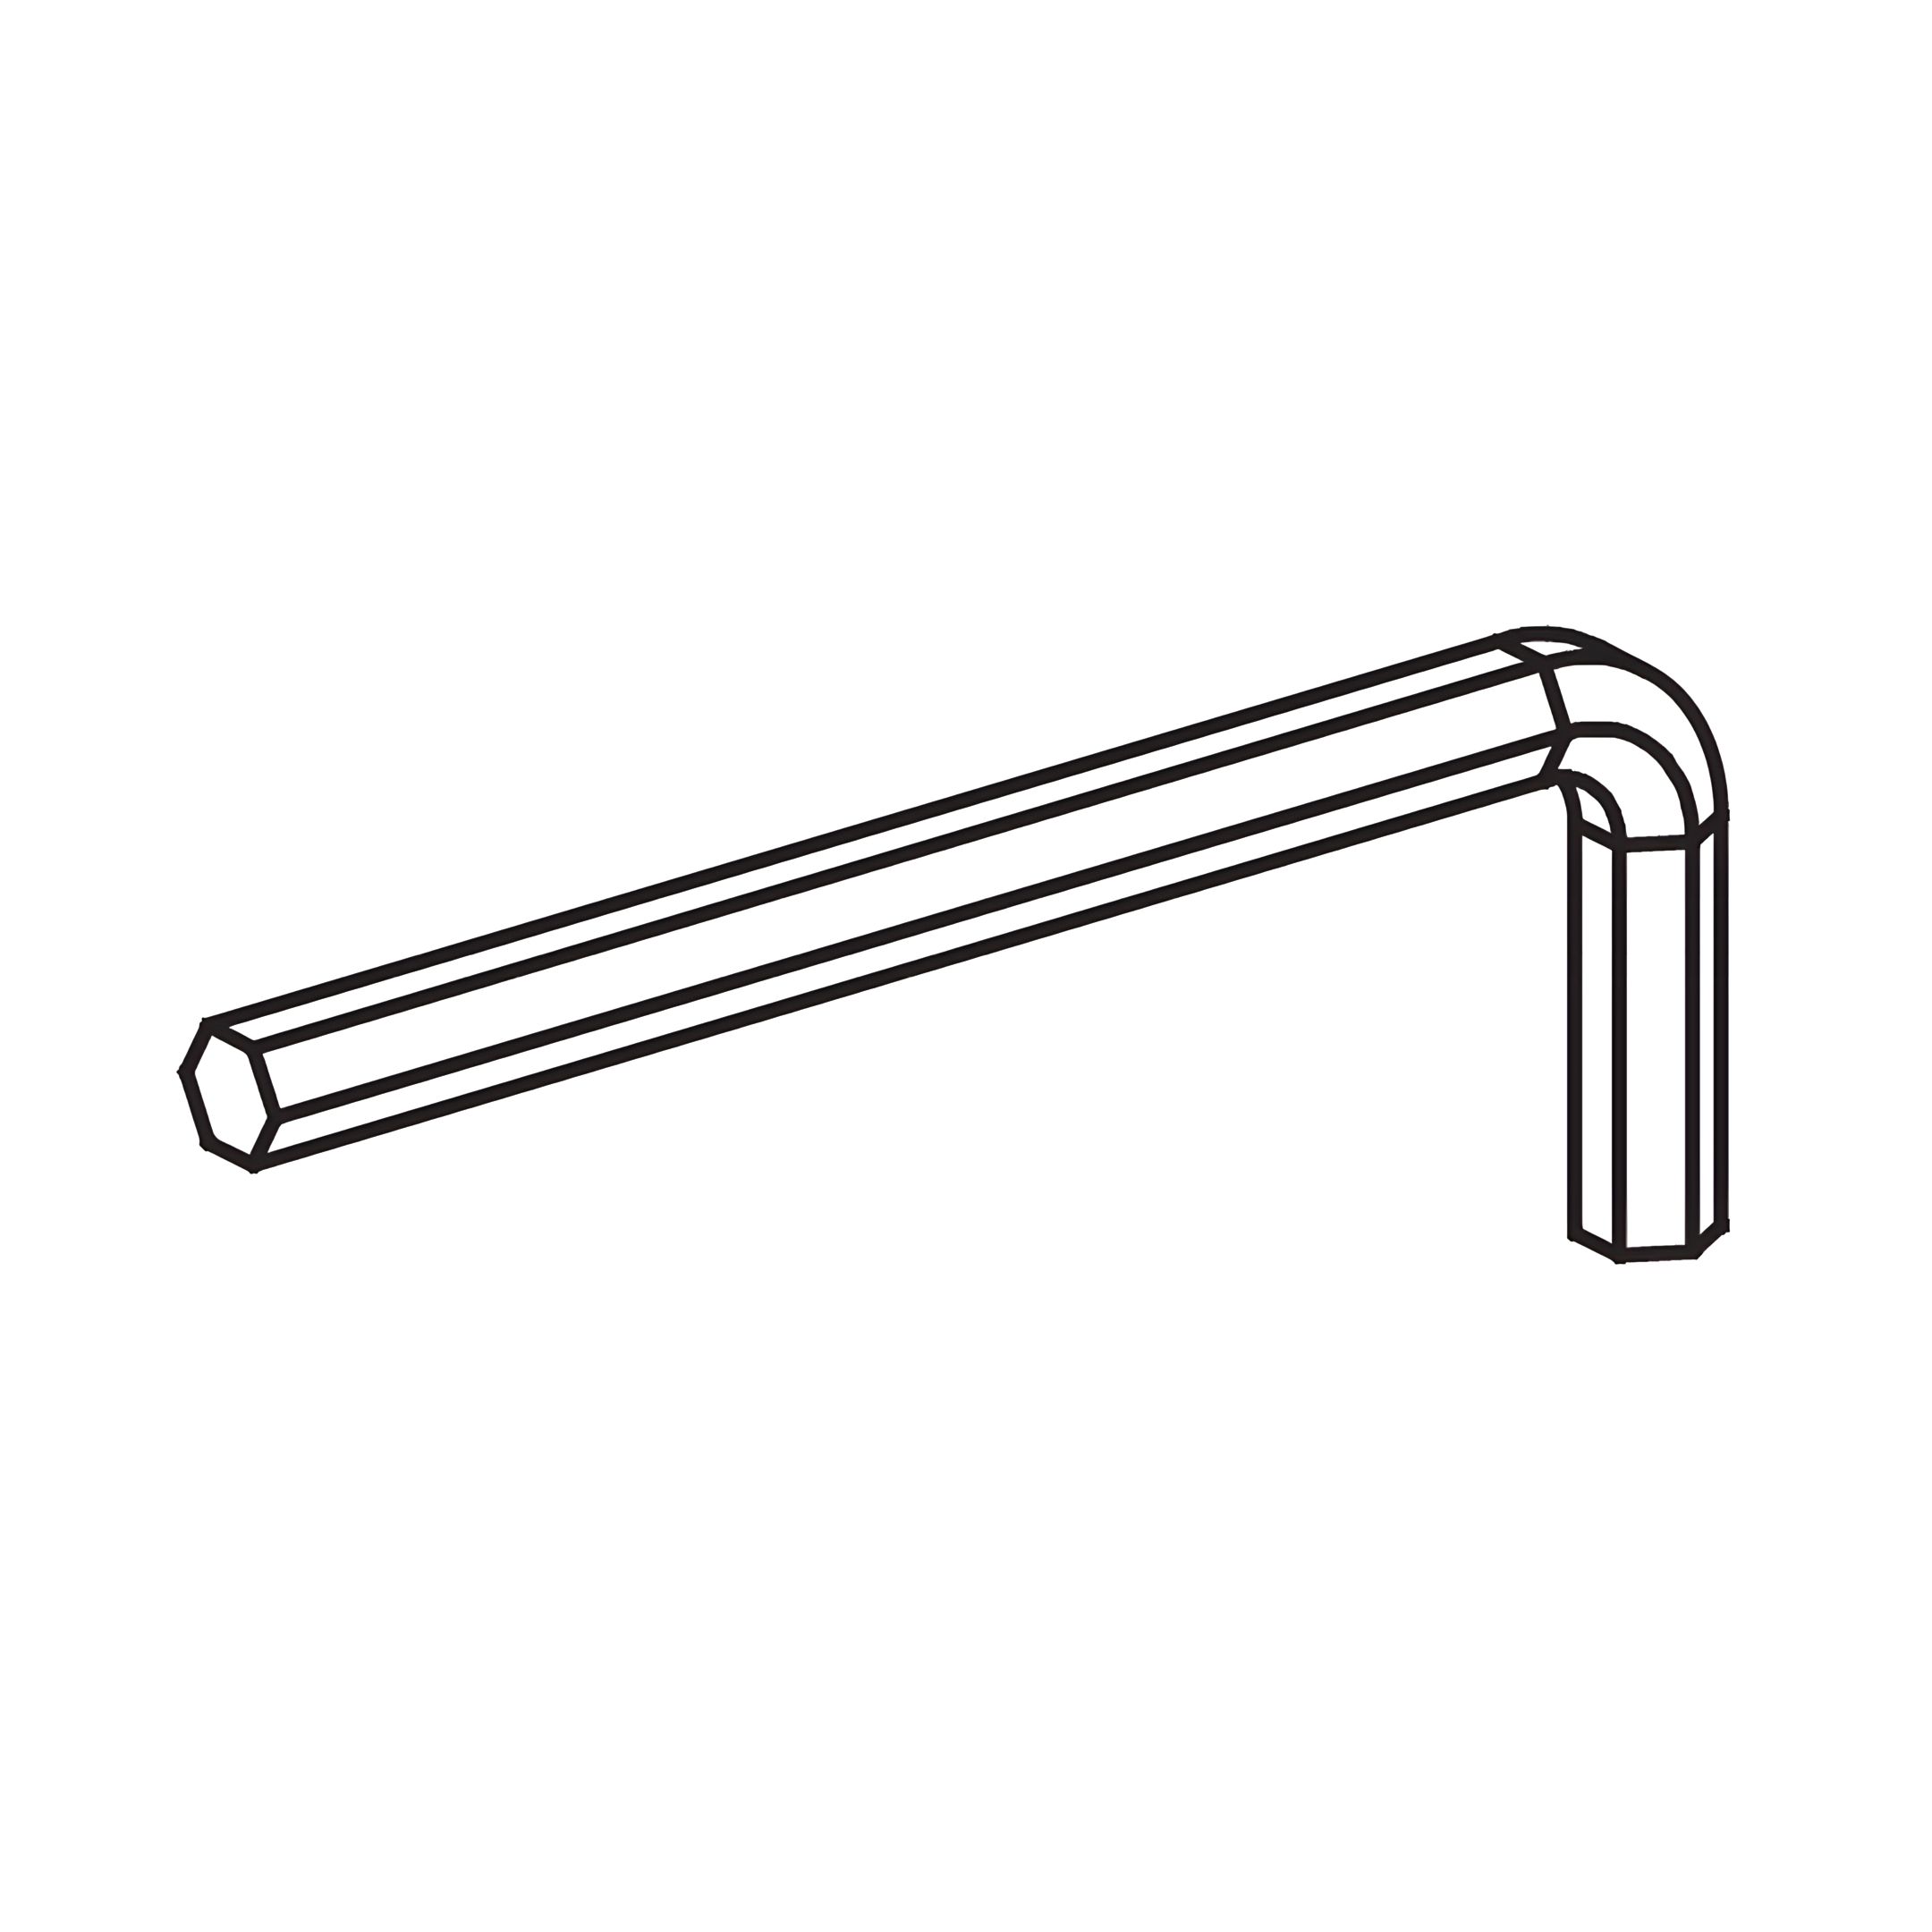
1. Position each Left Side Rail (3) and Right Side Rail (4) on a flat surface. 2. Align the Angle Brackets (K, L) with the pre-drilled holes on both ends of the side rails. 3. Secure each bracket using 3x Bolt Sets (A) on each side. 4. Tighten the bolts securely with the Allen Key (M).
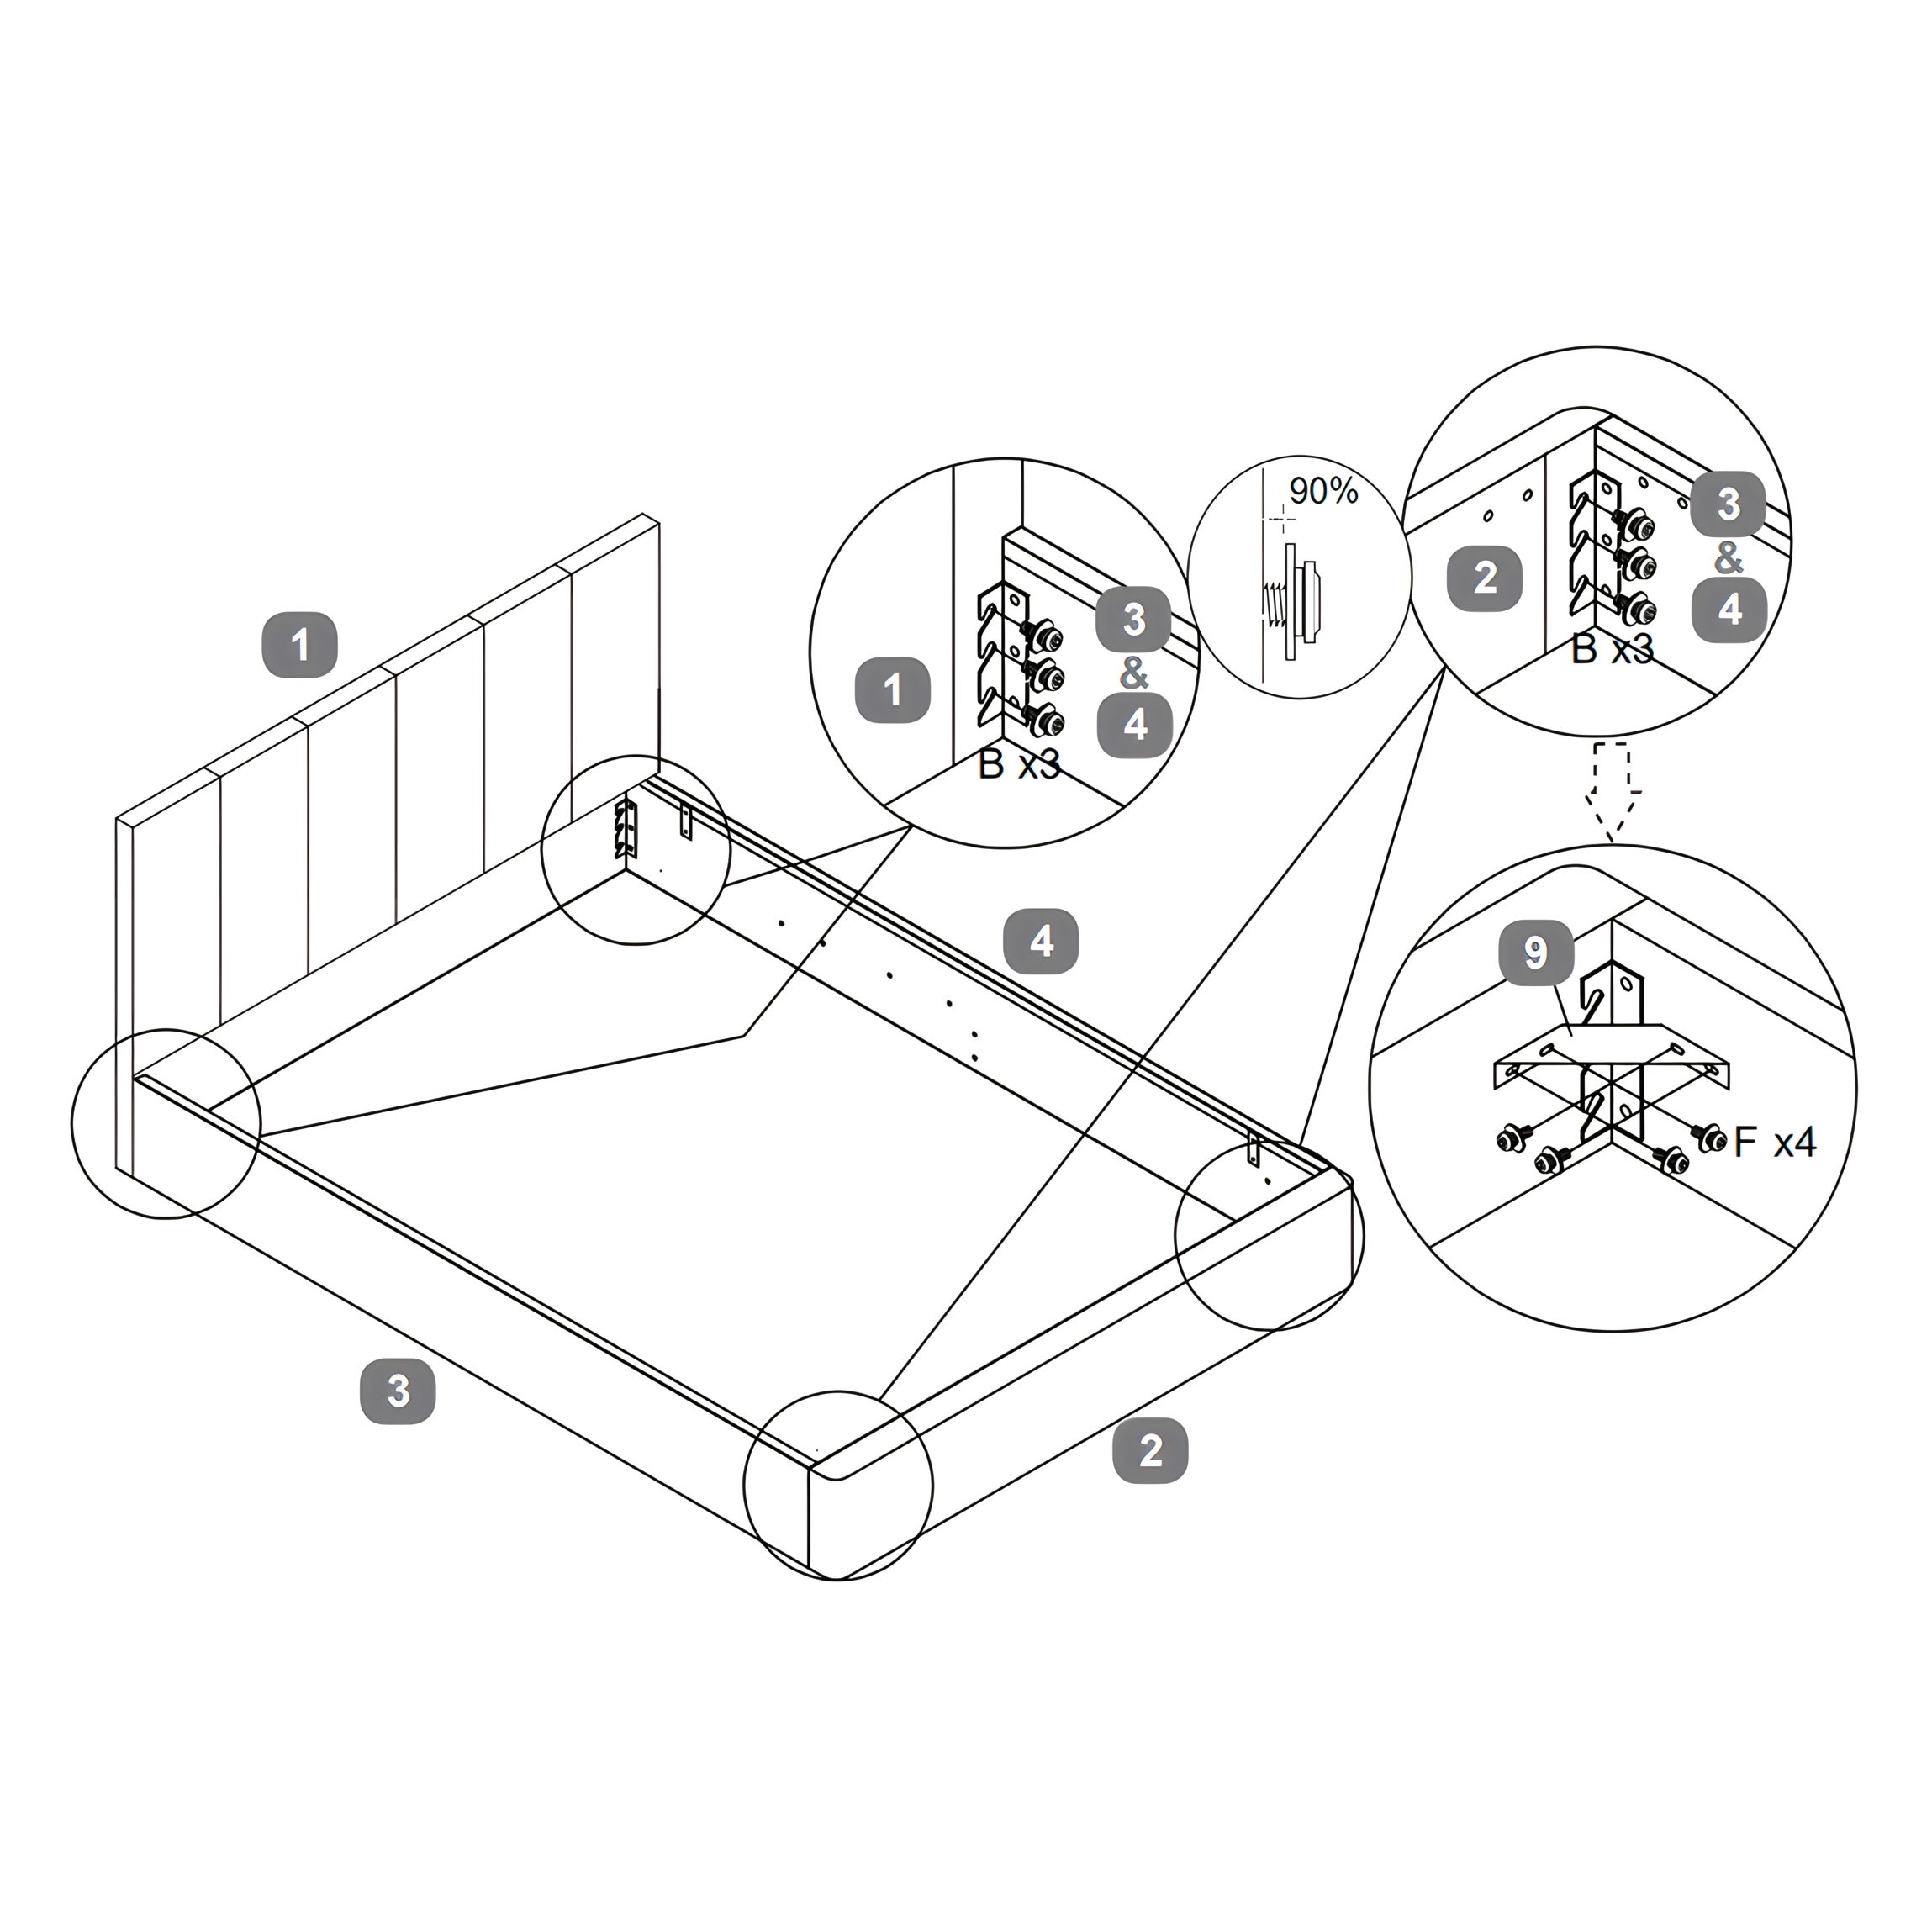
2. Assemble Bed Frame and Corner Brackets
Assemble Bed Frame
1. Position the Headboard (1) and Footboard (2) upright at each end of the assembled side rails. 2. Align the pre-drilled holes of the side rails with the headboard and footboard brackets. 3. Secure each corner using 3x Bolt Sets (B) per bracket (total of 4 brackets). 4. Tighten all bolts securely with the Allen Key (M).
Attach Corner Brackets
1. At each corner where the Side Rails (3 & 4) meet the Footboard (2), attach the Angled Corner Brackets (9) using 4x Bolt Sets (F). 2. Tighten all bolts securely with the Allen Key (O).
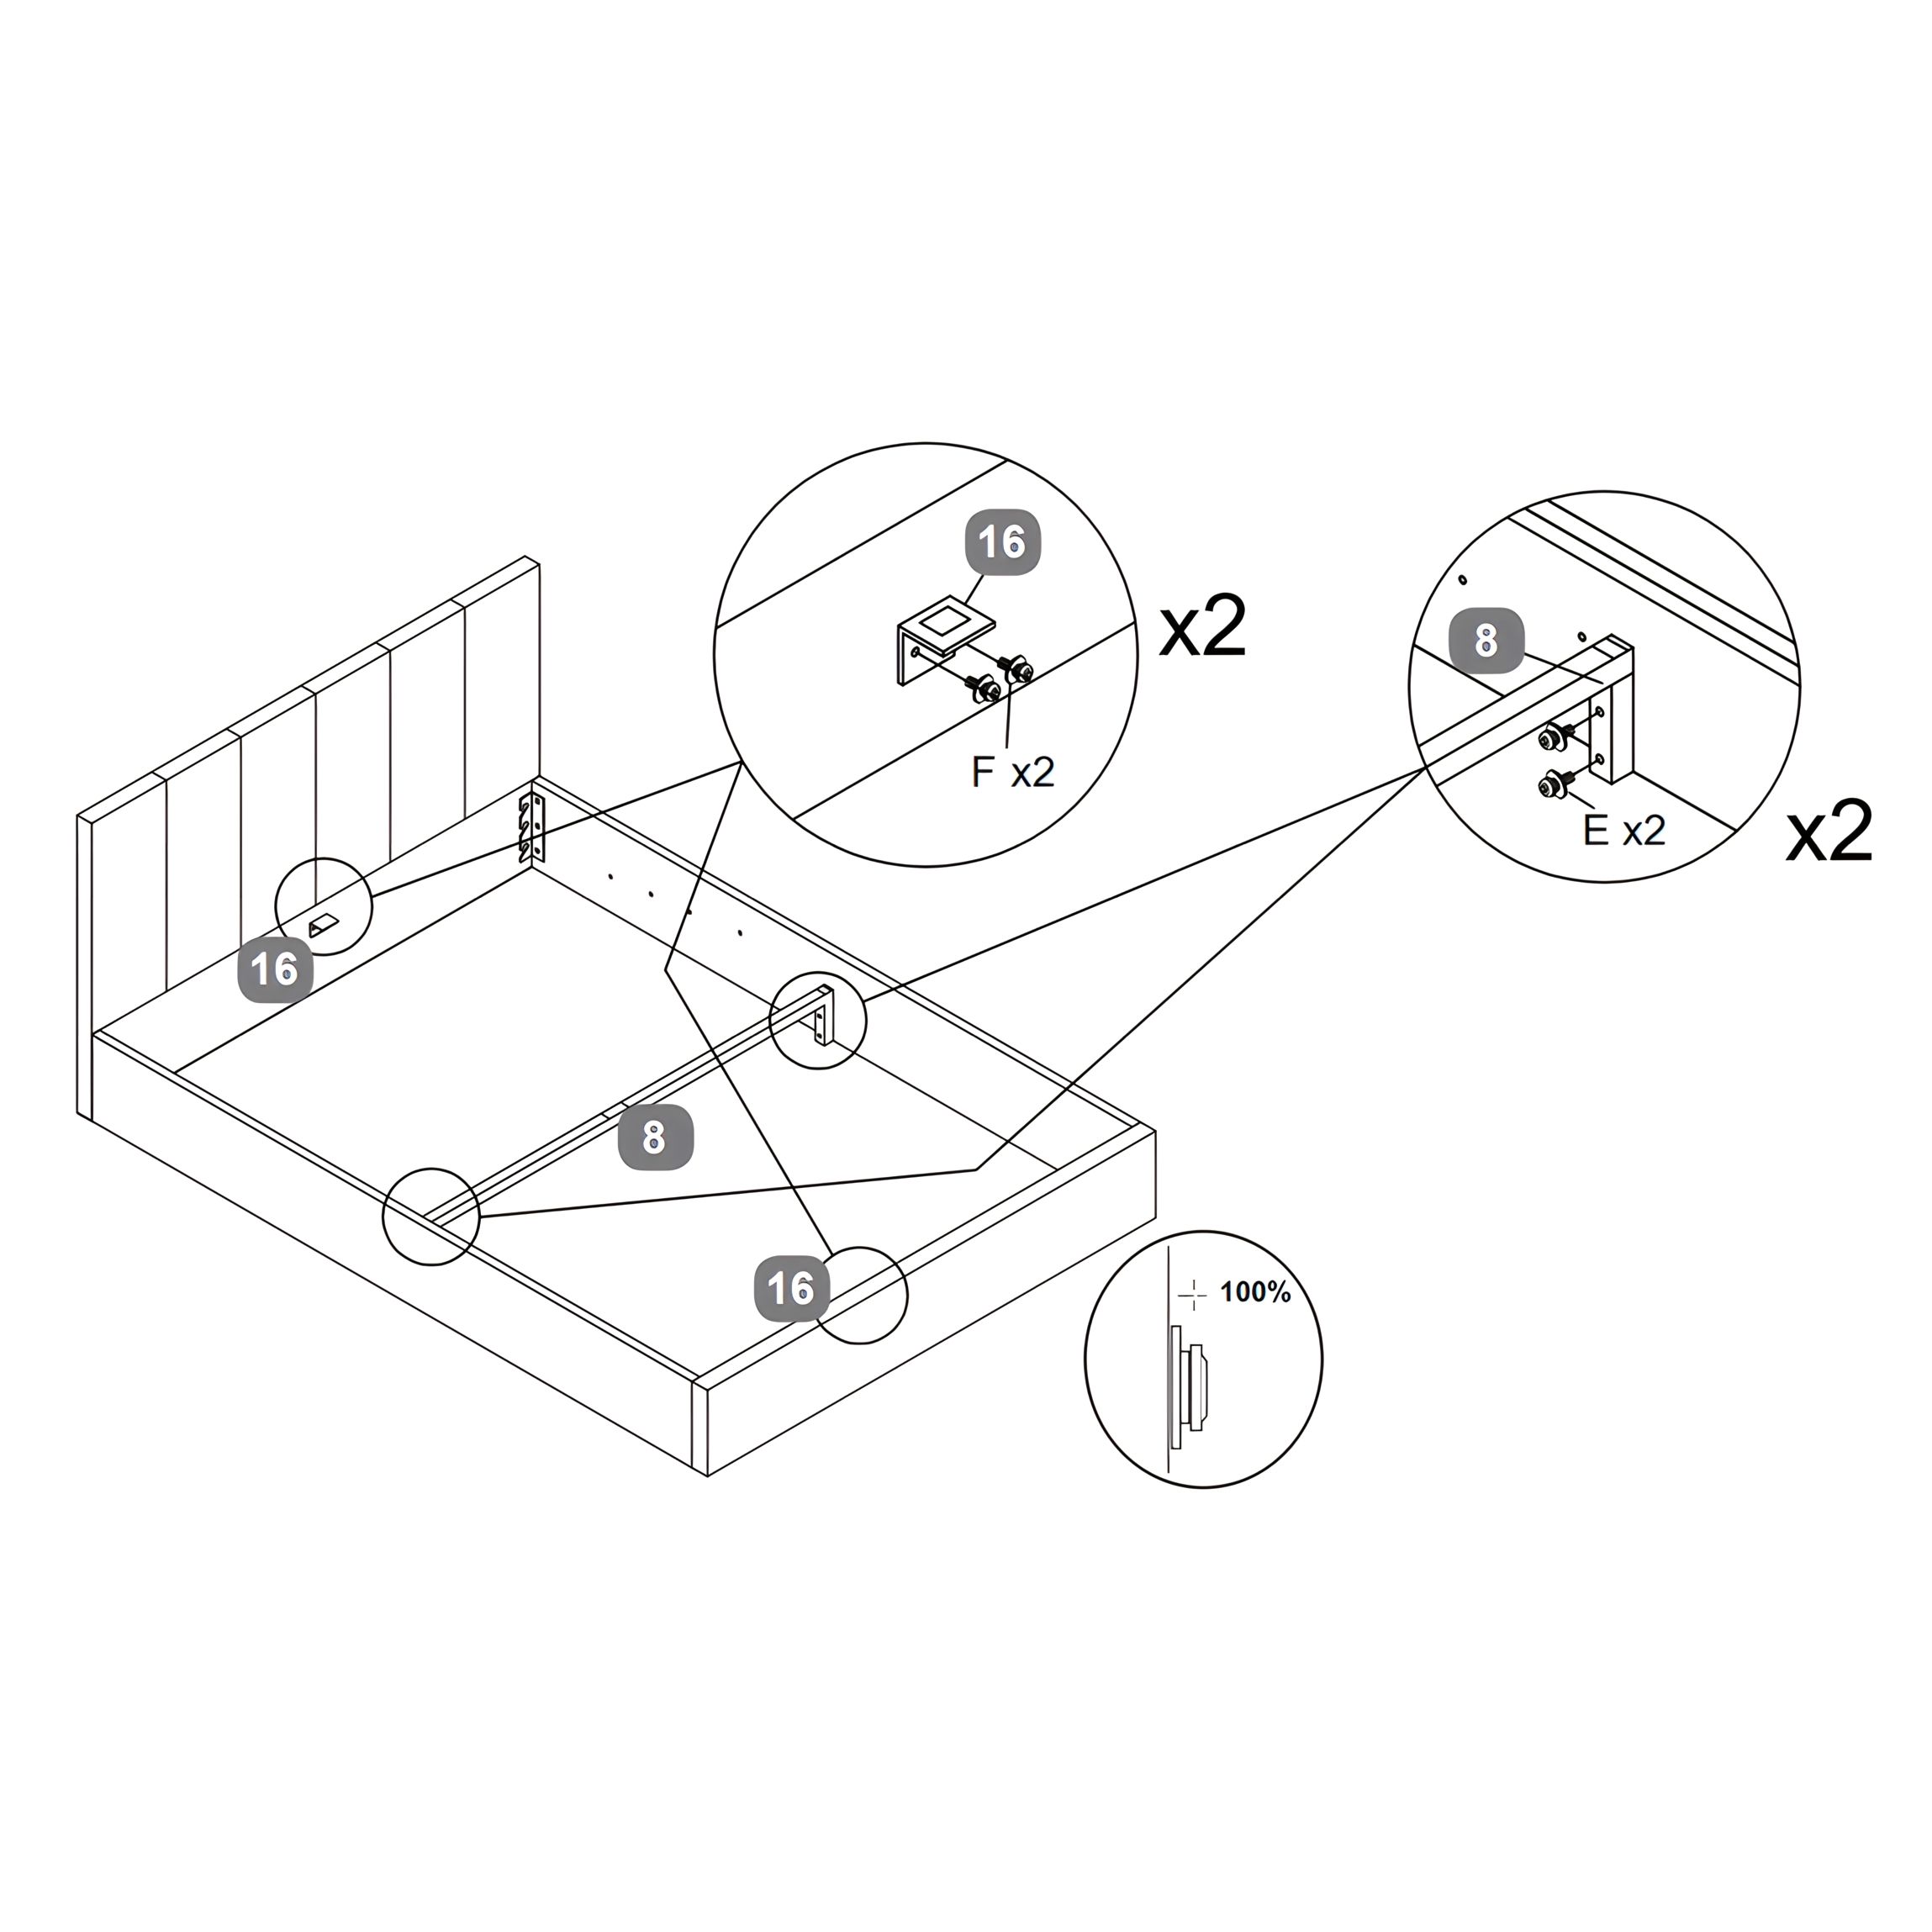
3. Install the Frame Support Brackets and Cross Rail
1. Attach the "L" Shape Frame Support Brackets (16) to the Headboard (1) and Footboard (2) using 2x Bolt Sets (F) per bracket. 2. Secure the "U" Shape Cross Bar (8) to the Side Rails (3 & 4) using 2x Bolt Sets (E) on each end. 3. Tighten all bolts securely with the Allen Key (O).
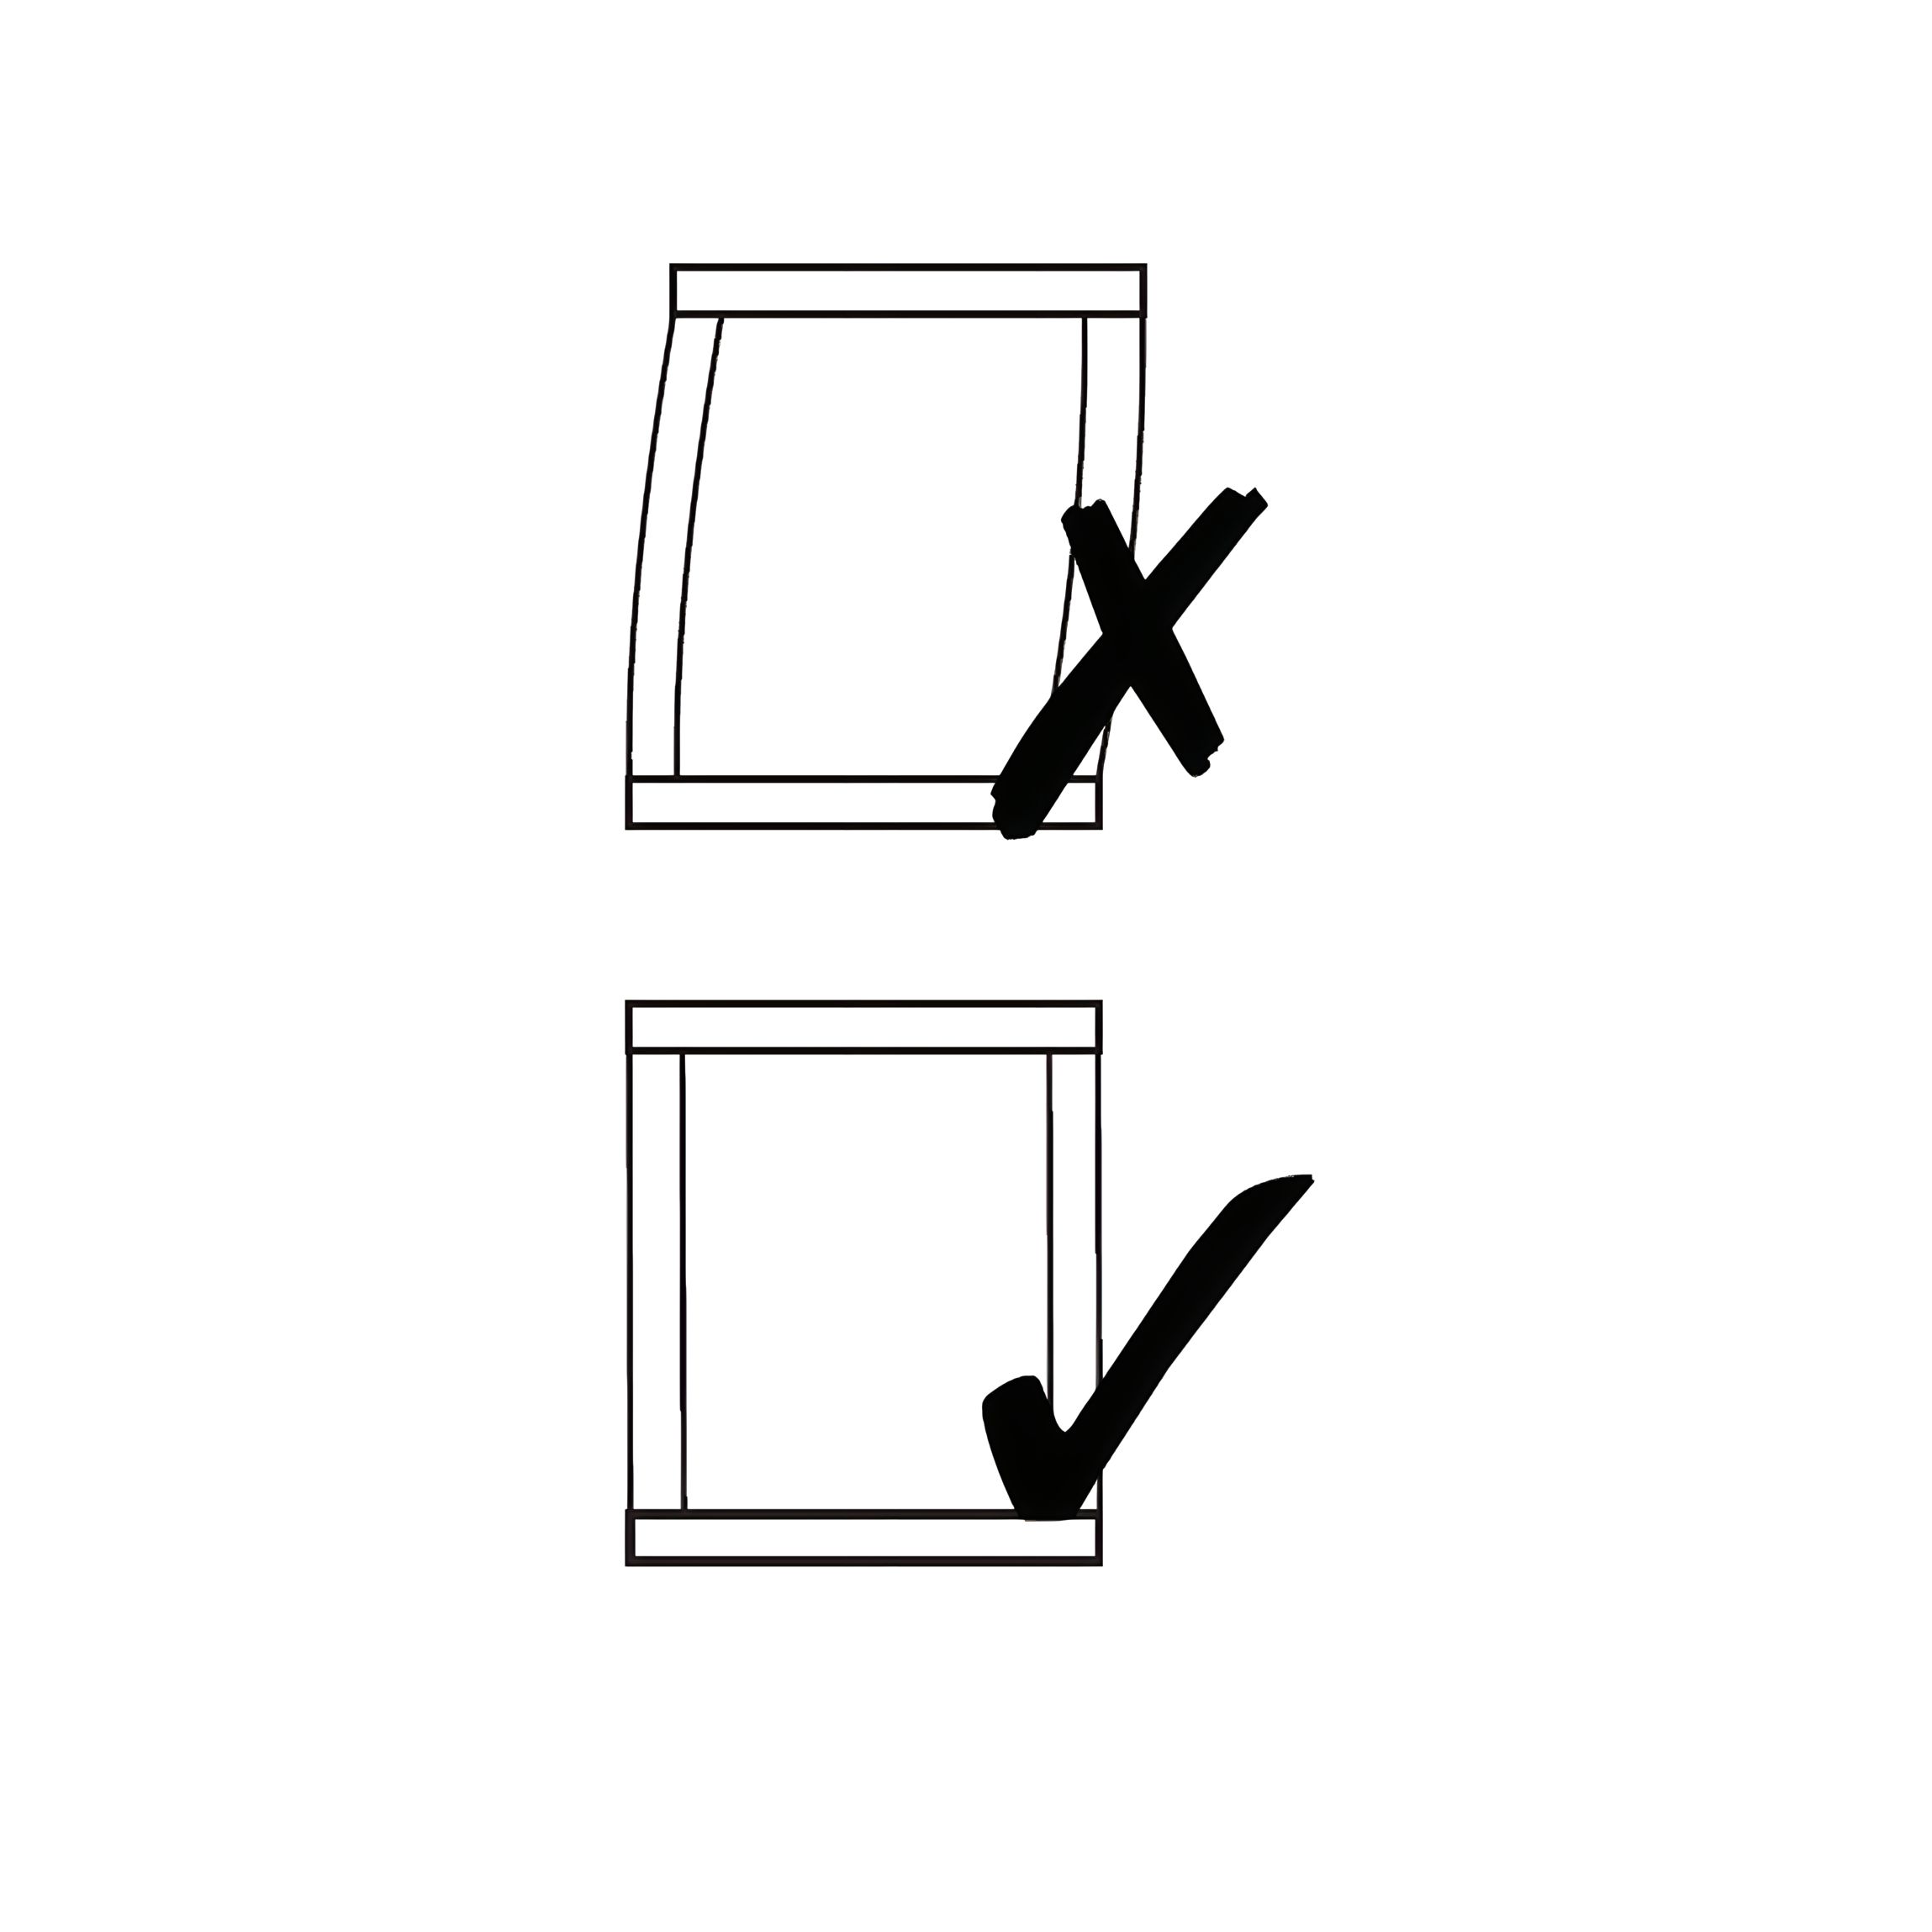
Important: Make certain the bed is squared up as shown in the diagram, then tighten all bed assembly bolts 100%.
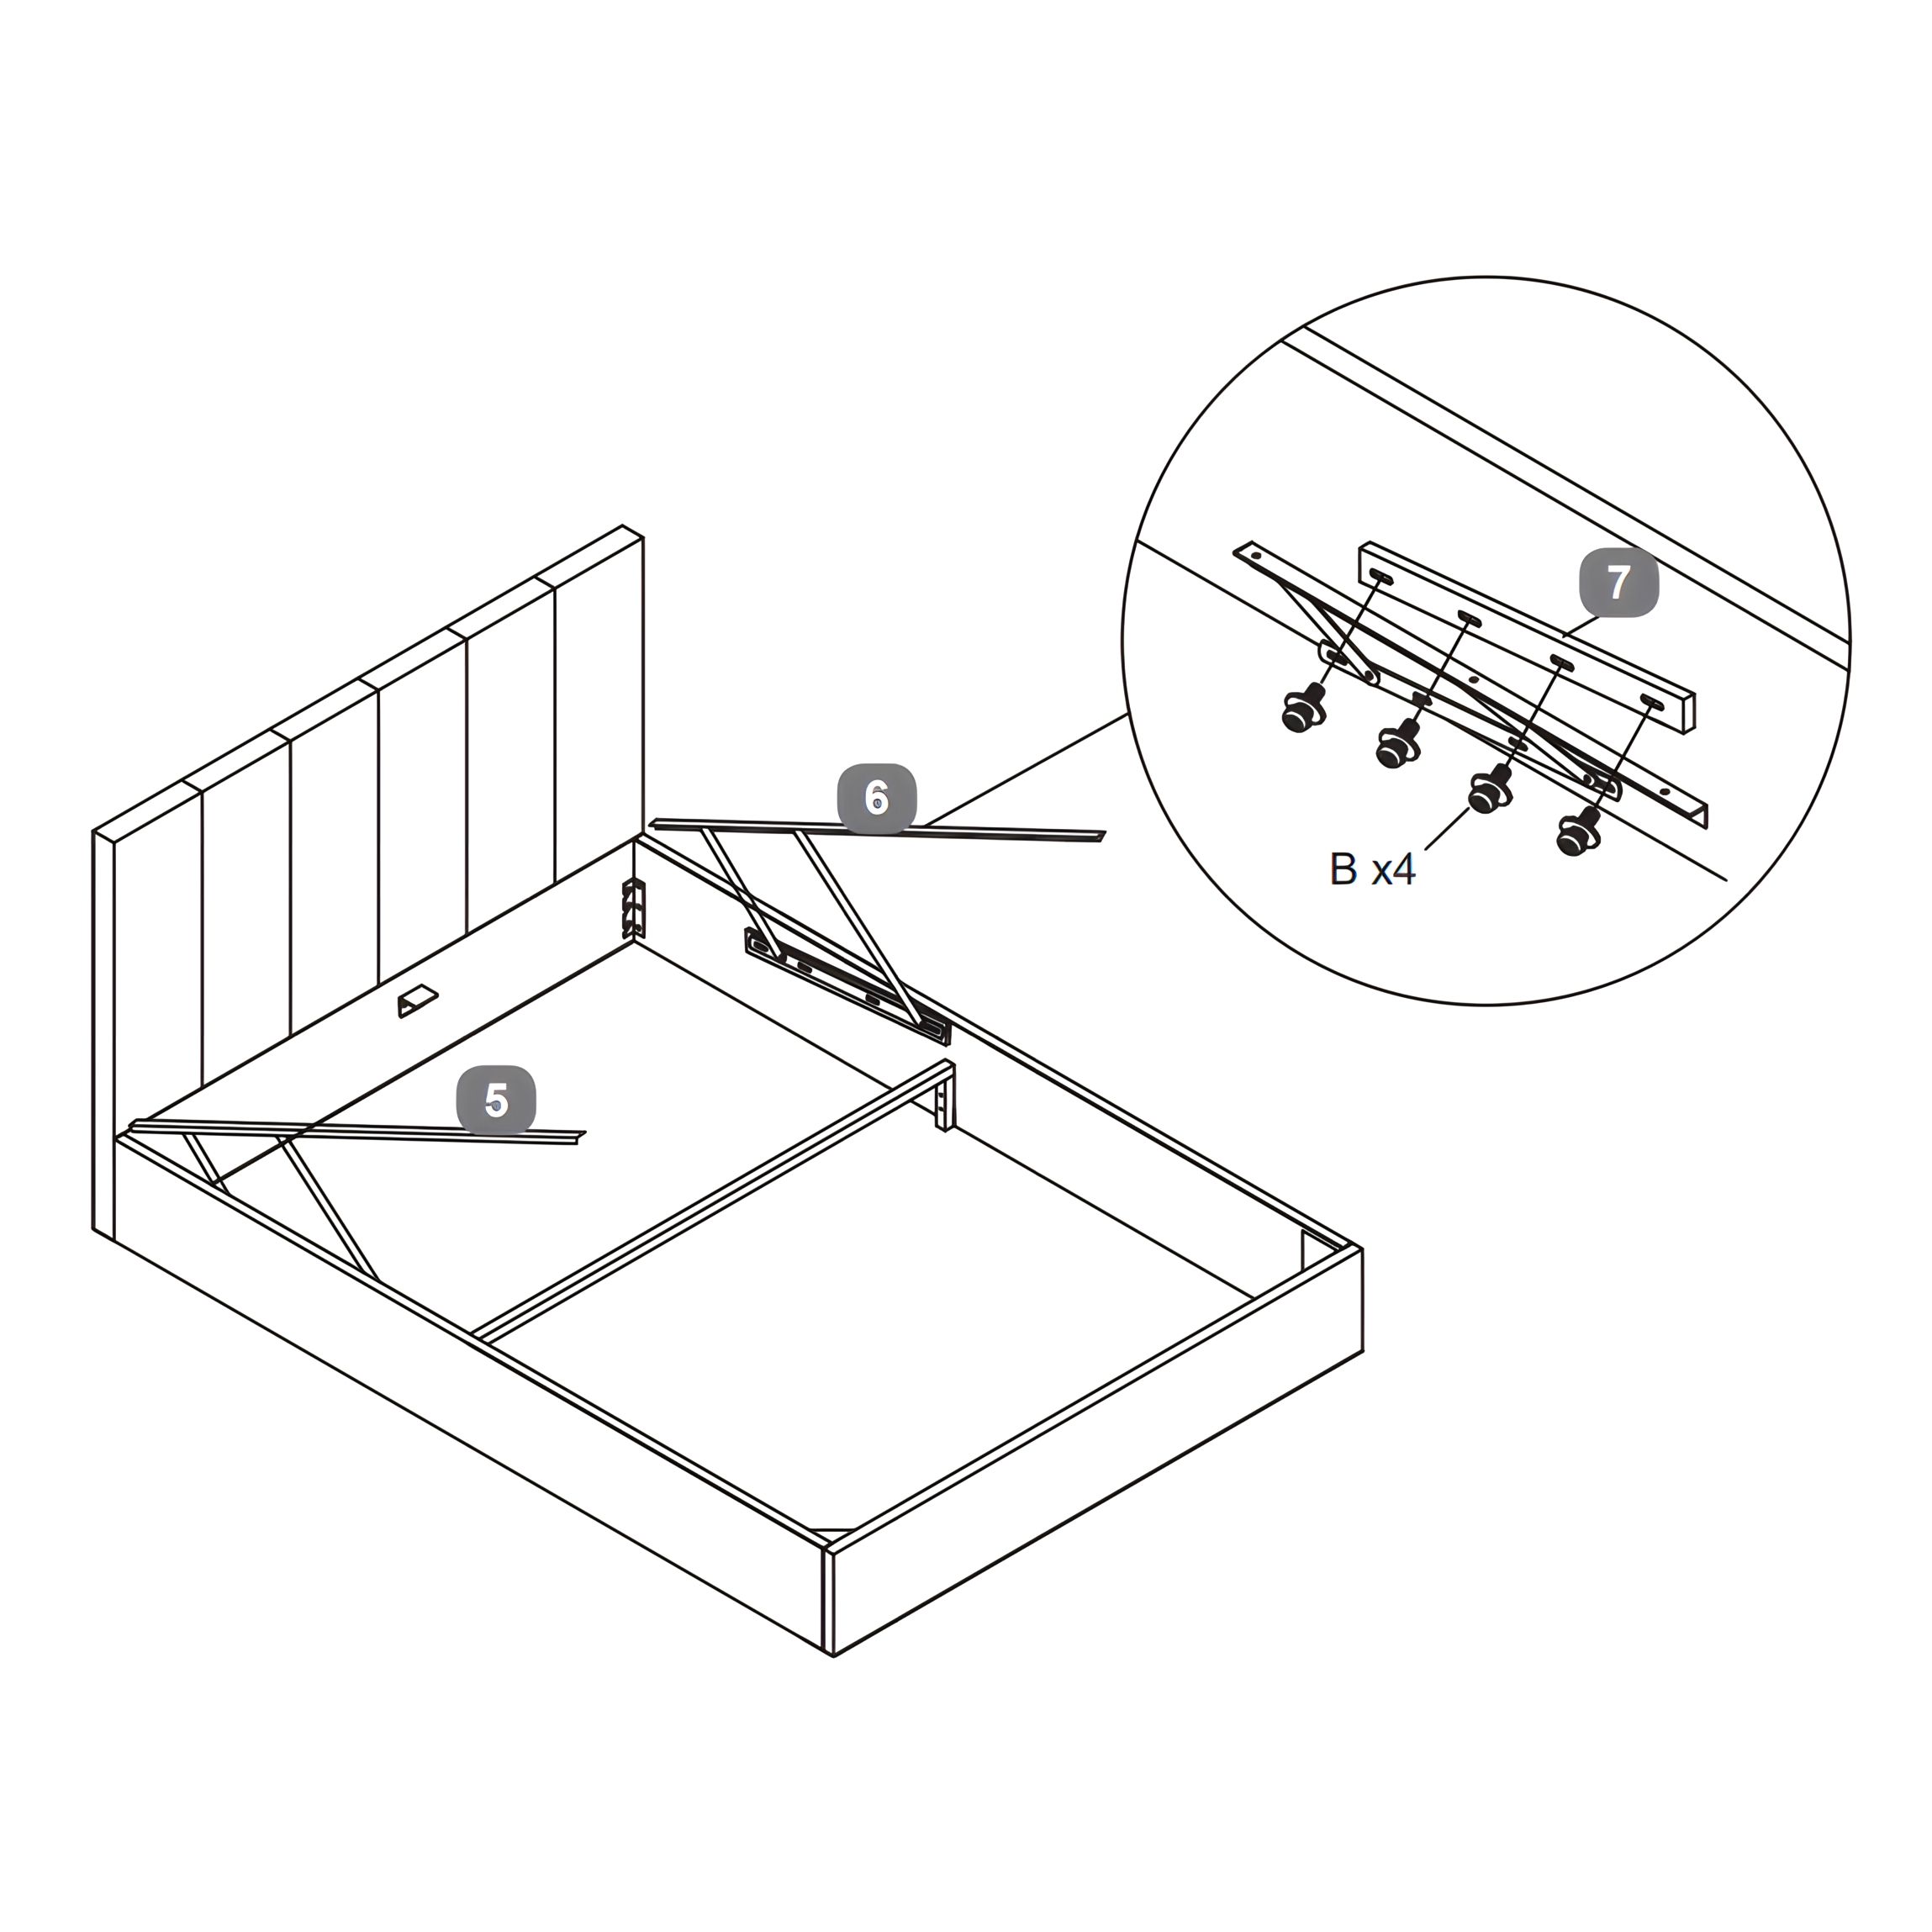
4. Install the Lift Mechanisms and Corner Brackets
1. Position the Spacer Rails (7) along the inner sides of the Side Rails (3 & 4). 2. Place the Lift Mechanisms (5 & 6) on top of the spacer rails, aligning the holes with the pre-drilled slots on the side rails. 3. Secure both the Spacer Rails (7) and Lift Mechanisms (5 & 6) in place using 4x Bolt Sets (B) per side. 4. Tighten all bolts securely with the Allen Key (M).
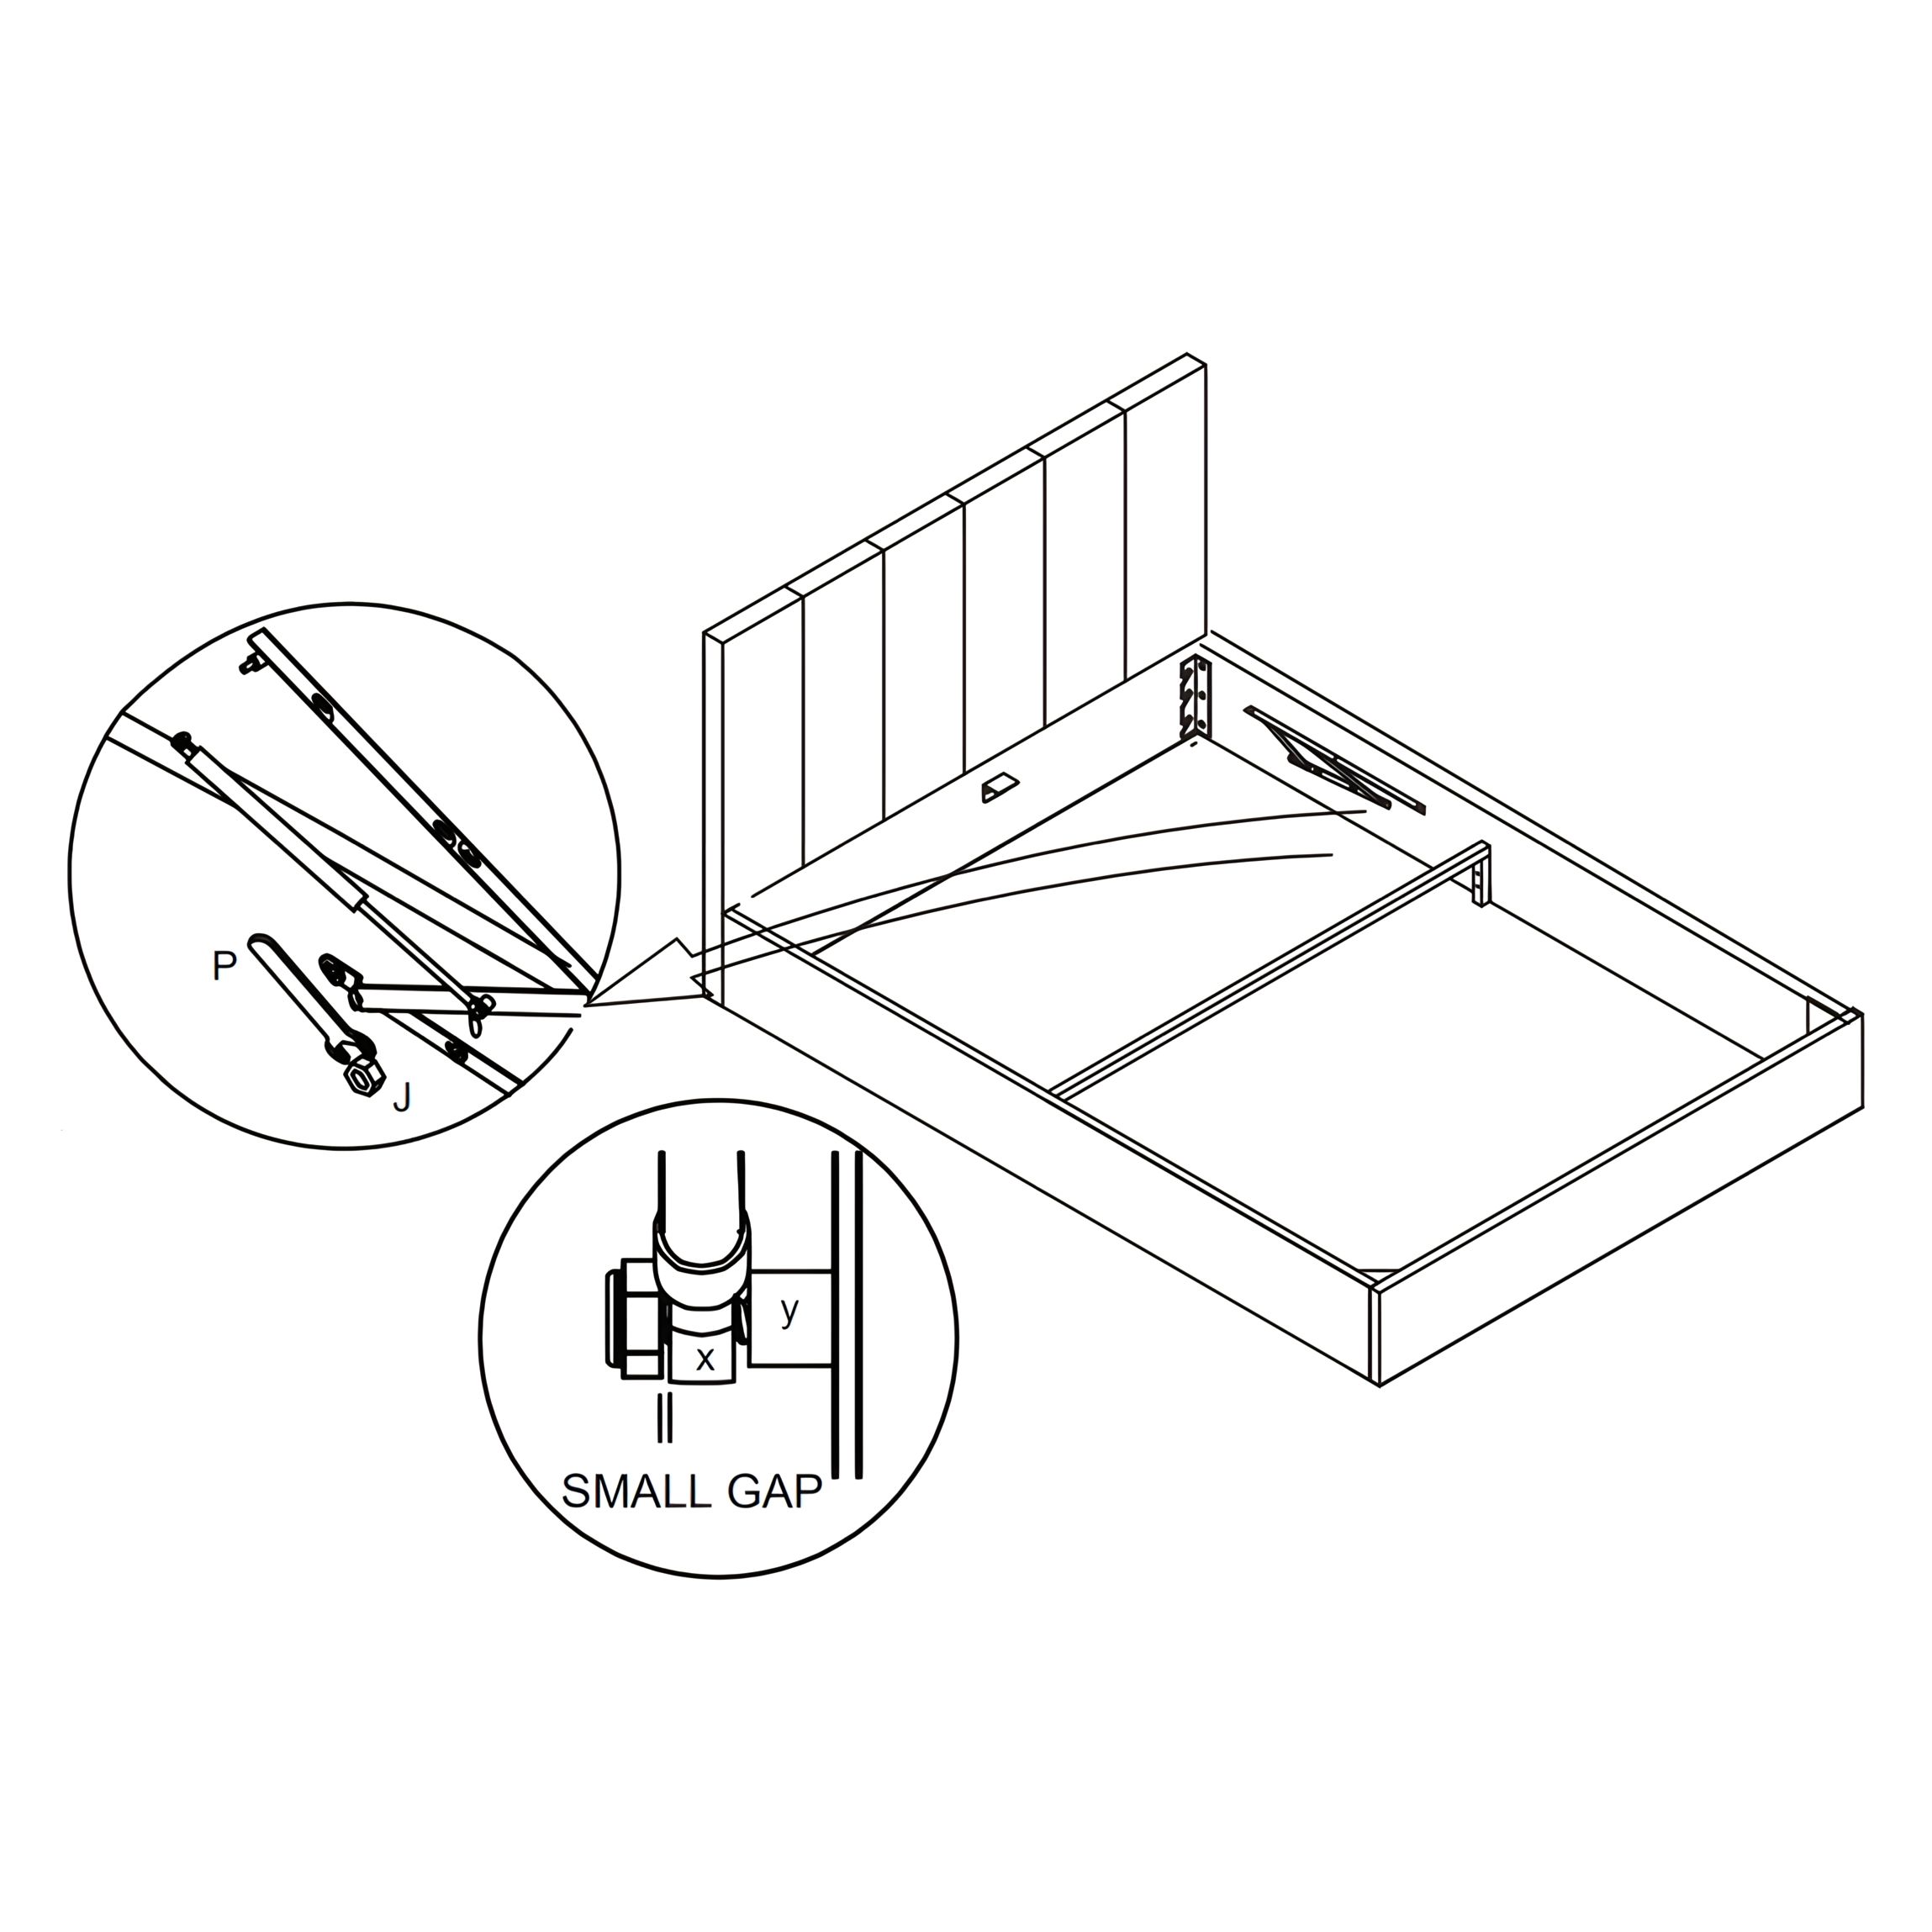
5. Install the Gas Lift Pistons
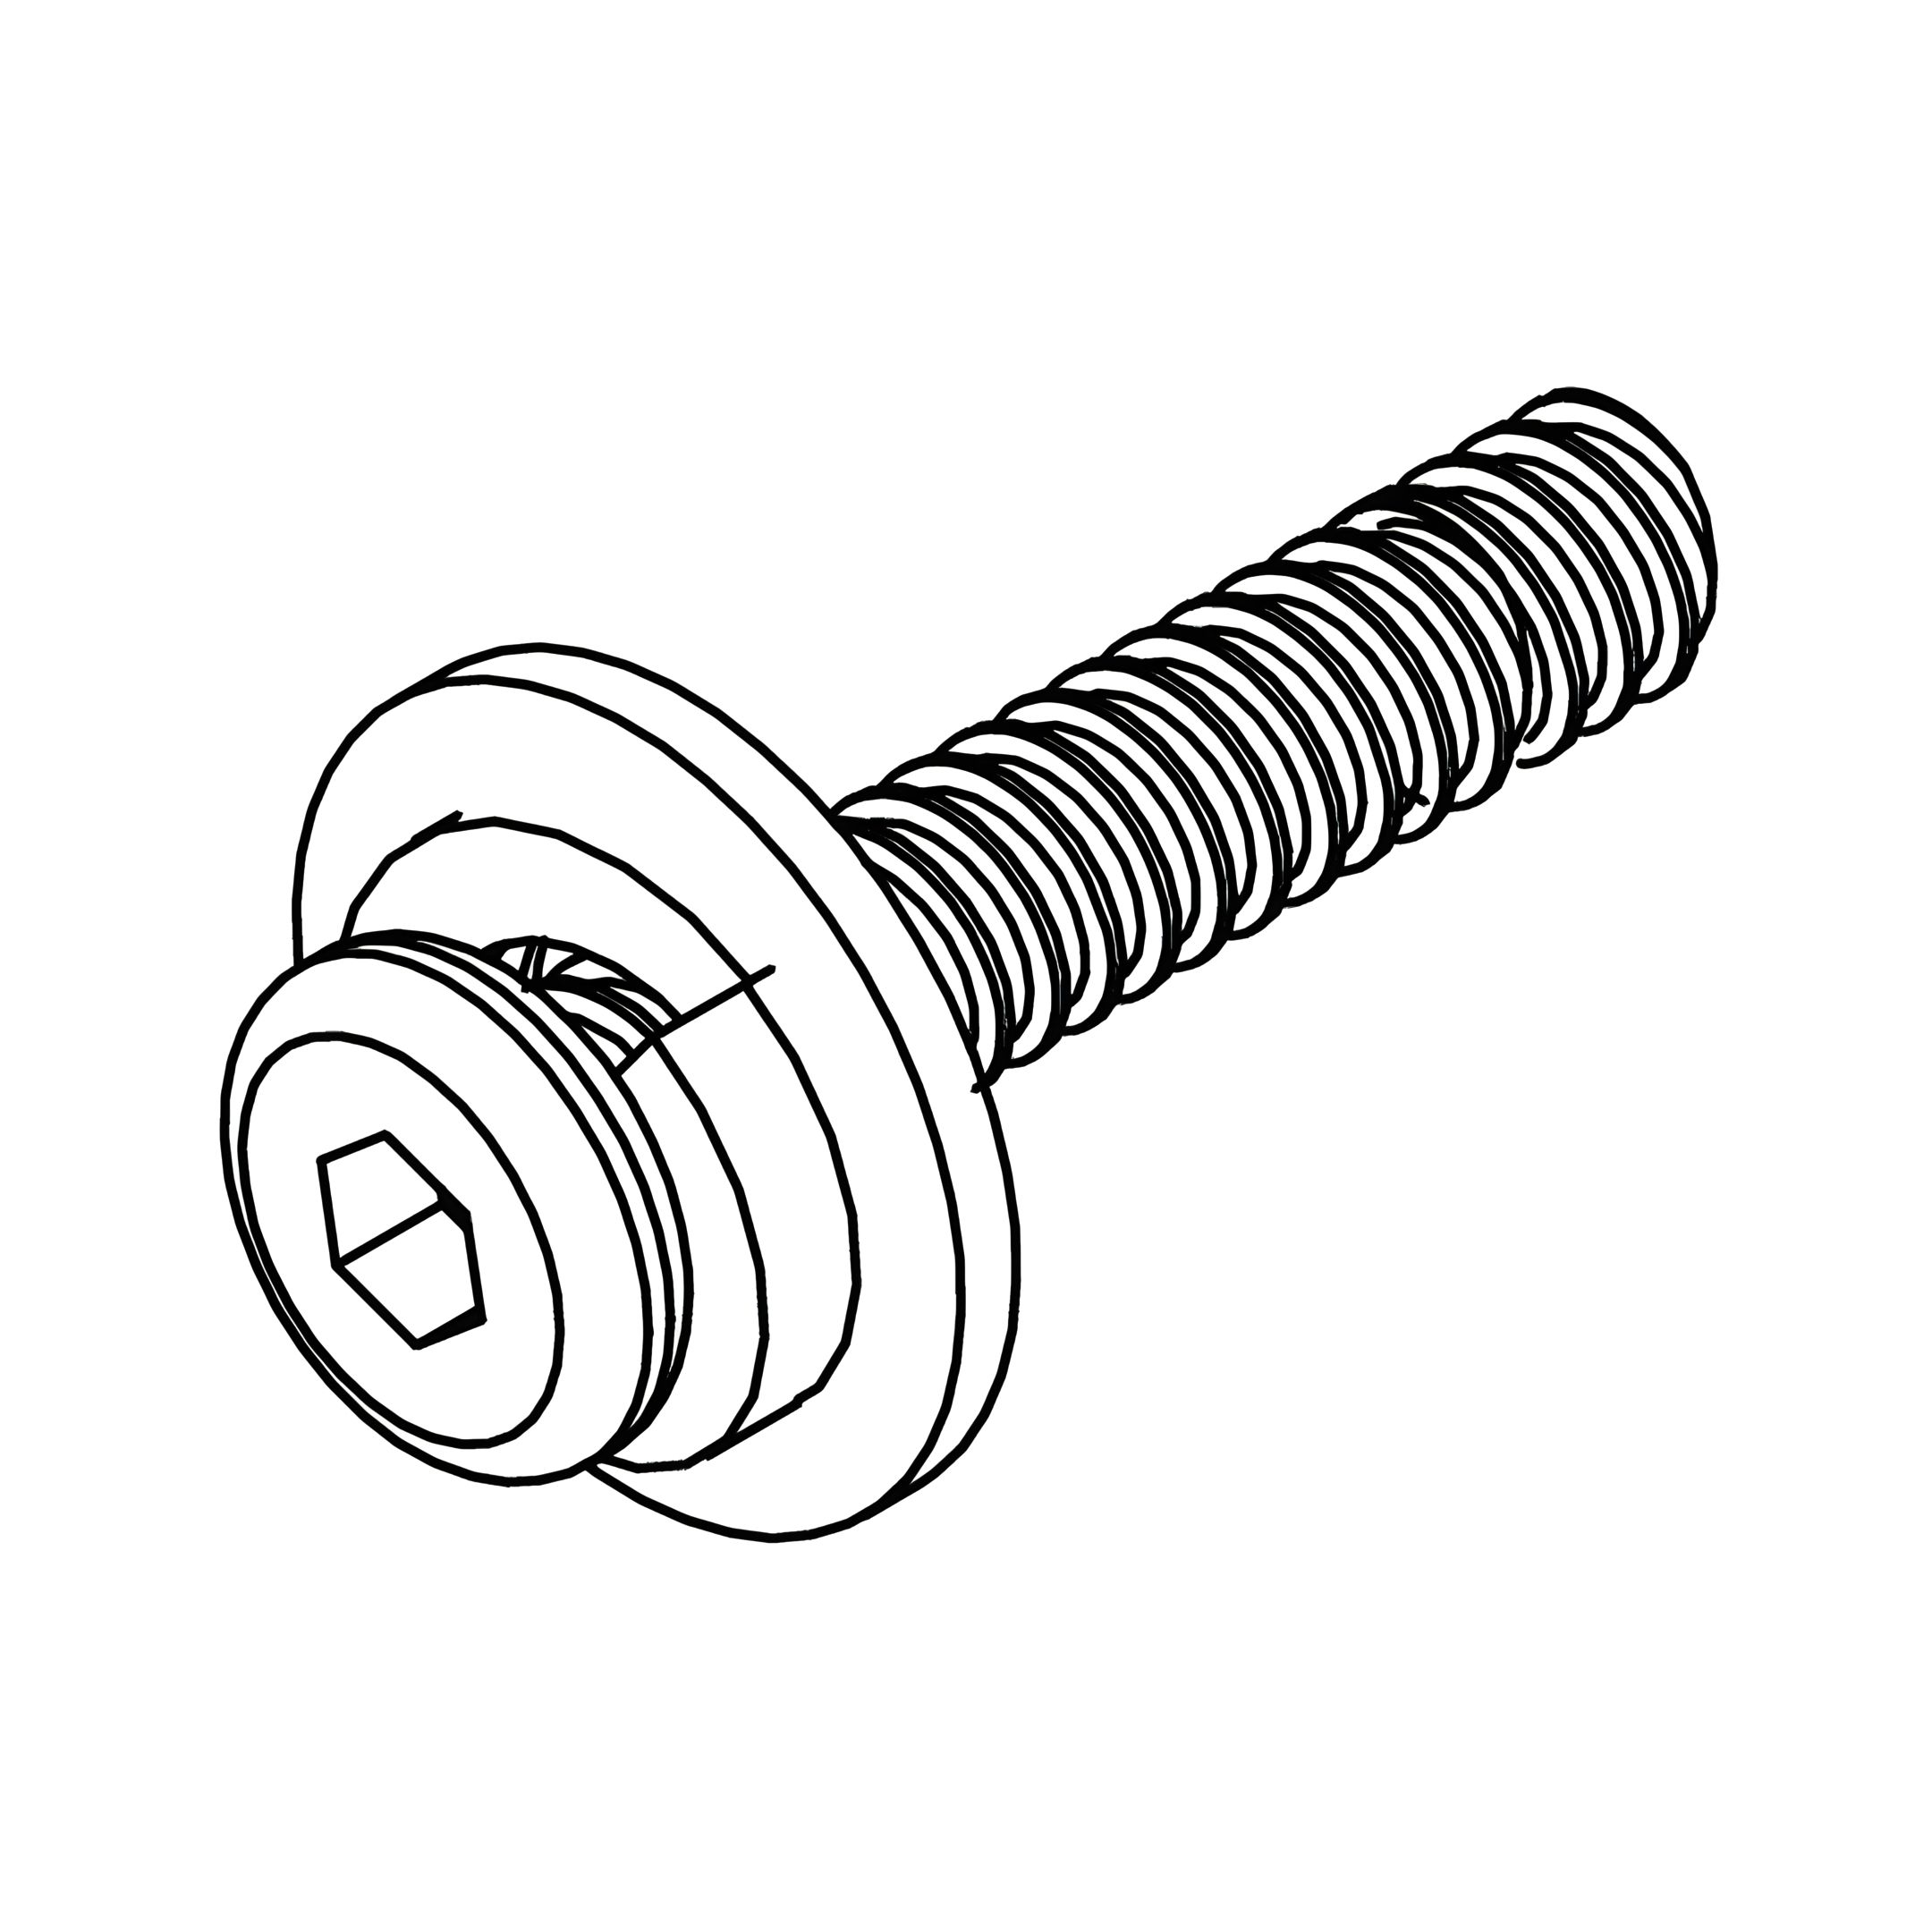
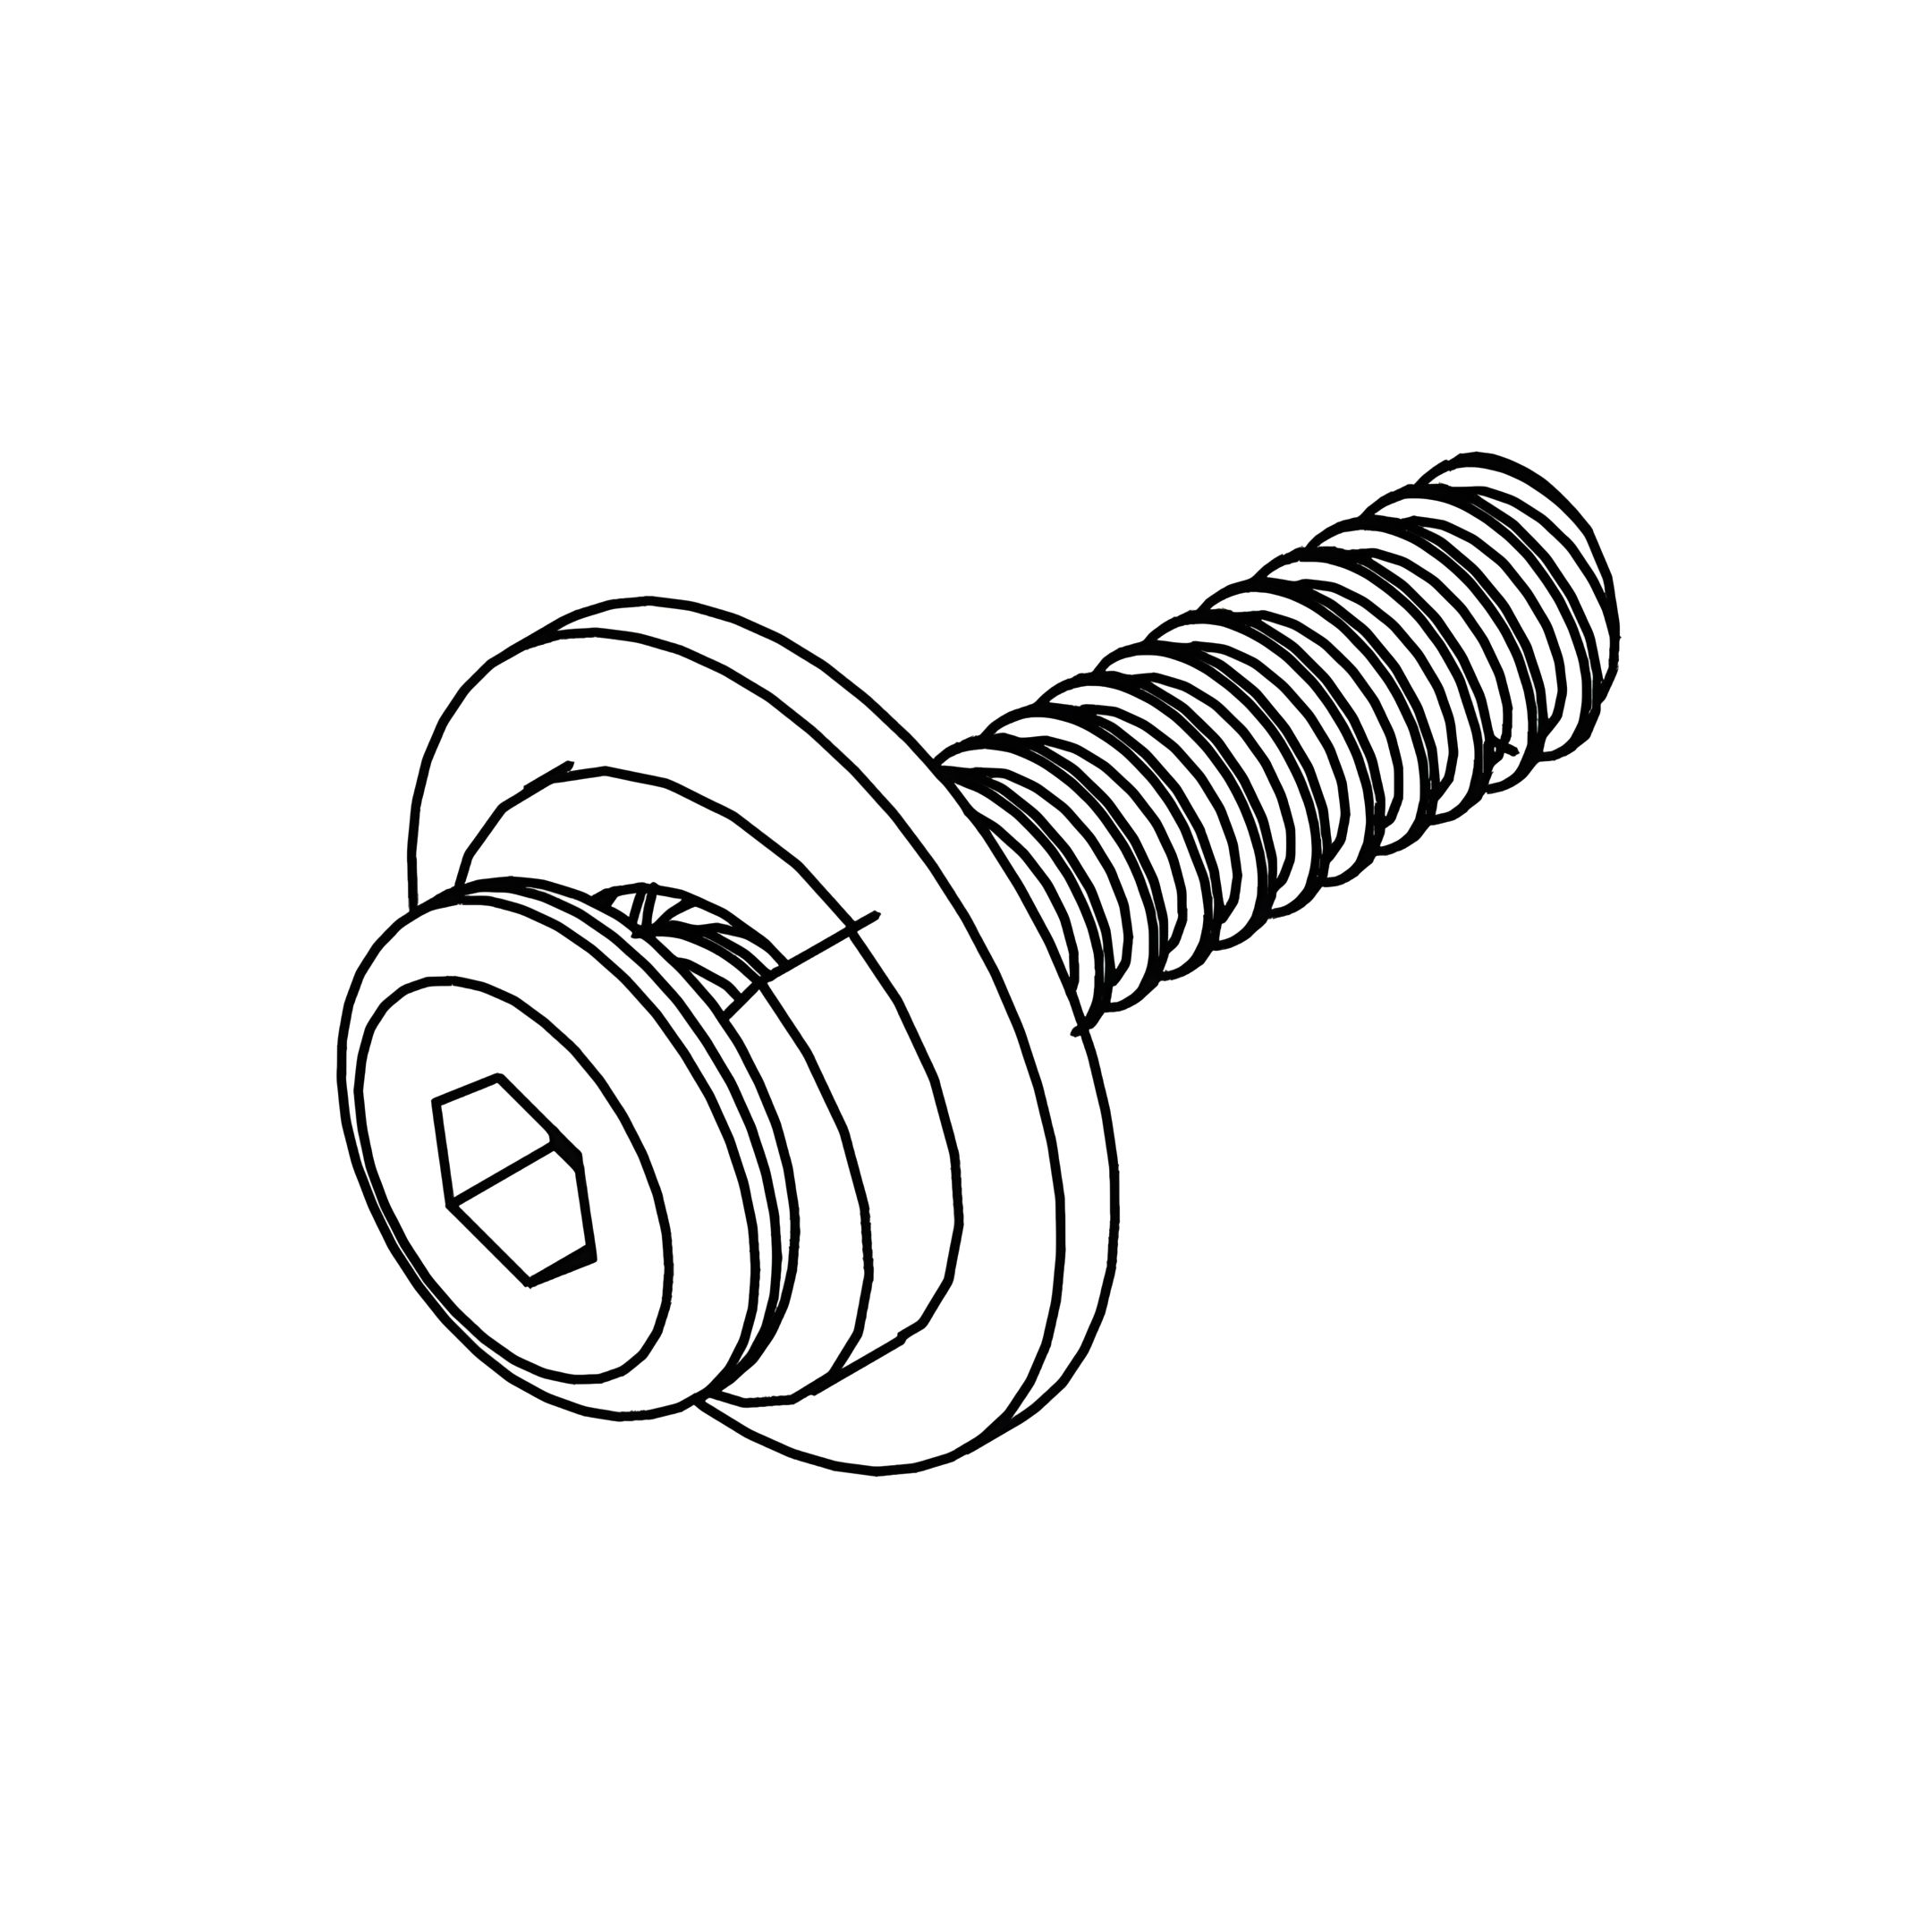
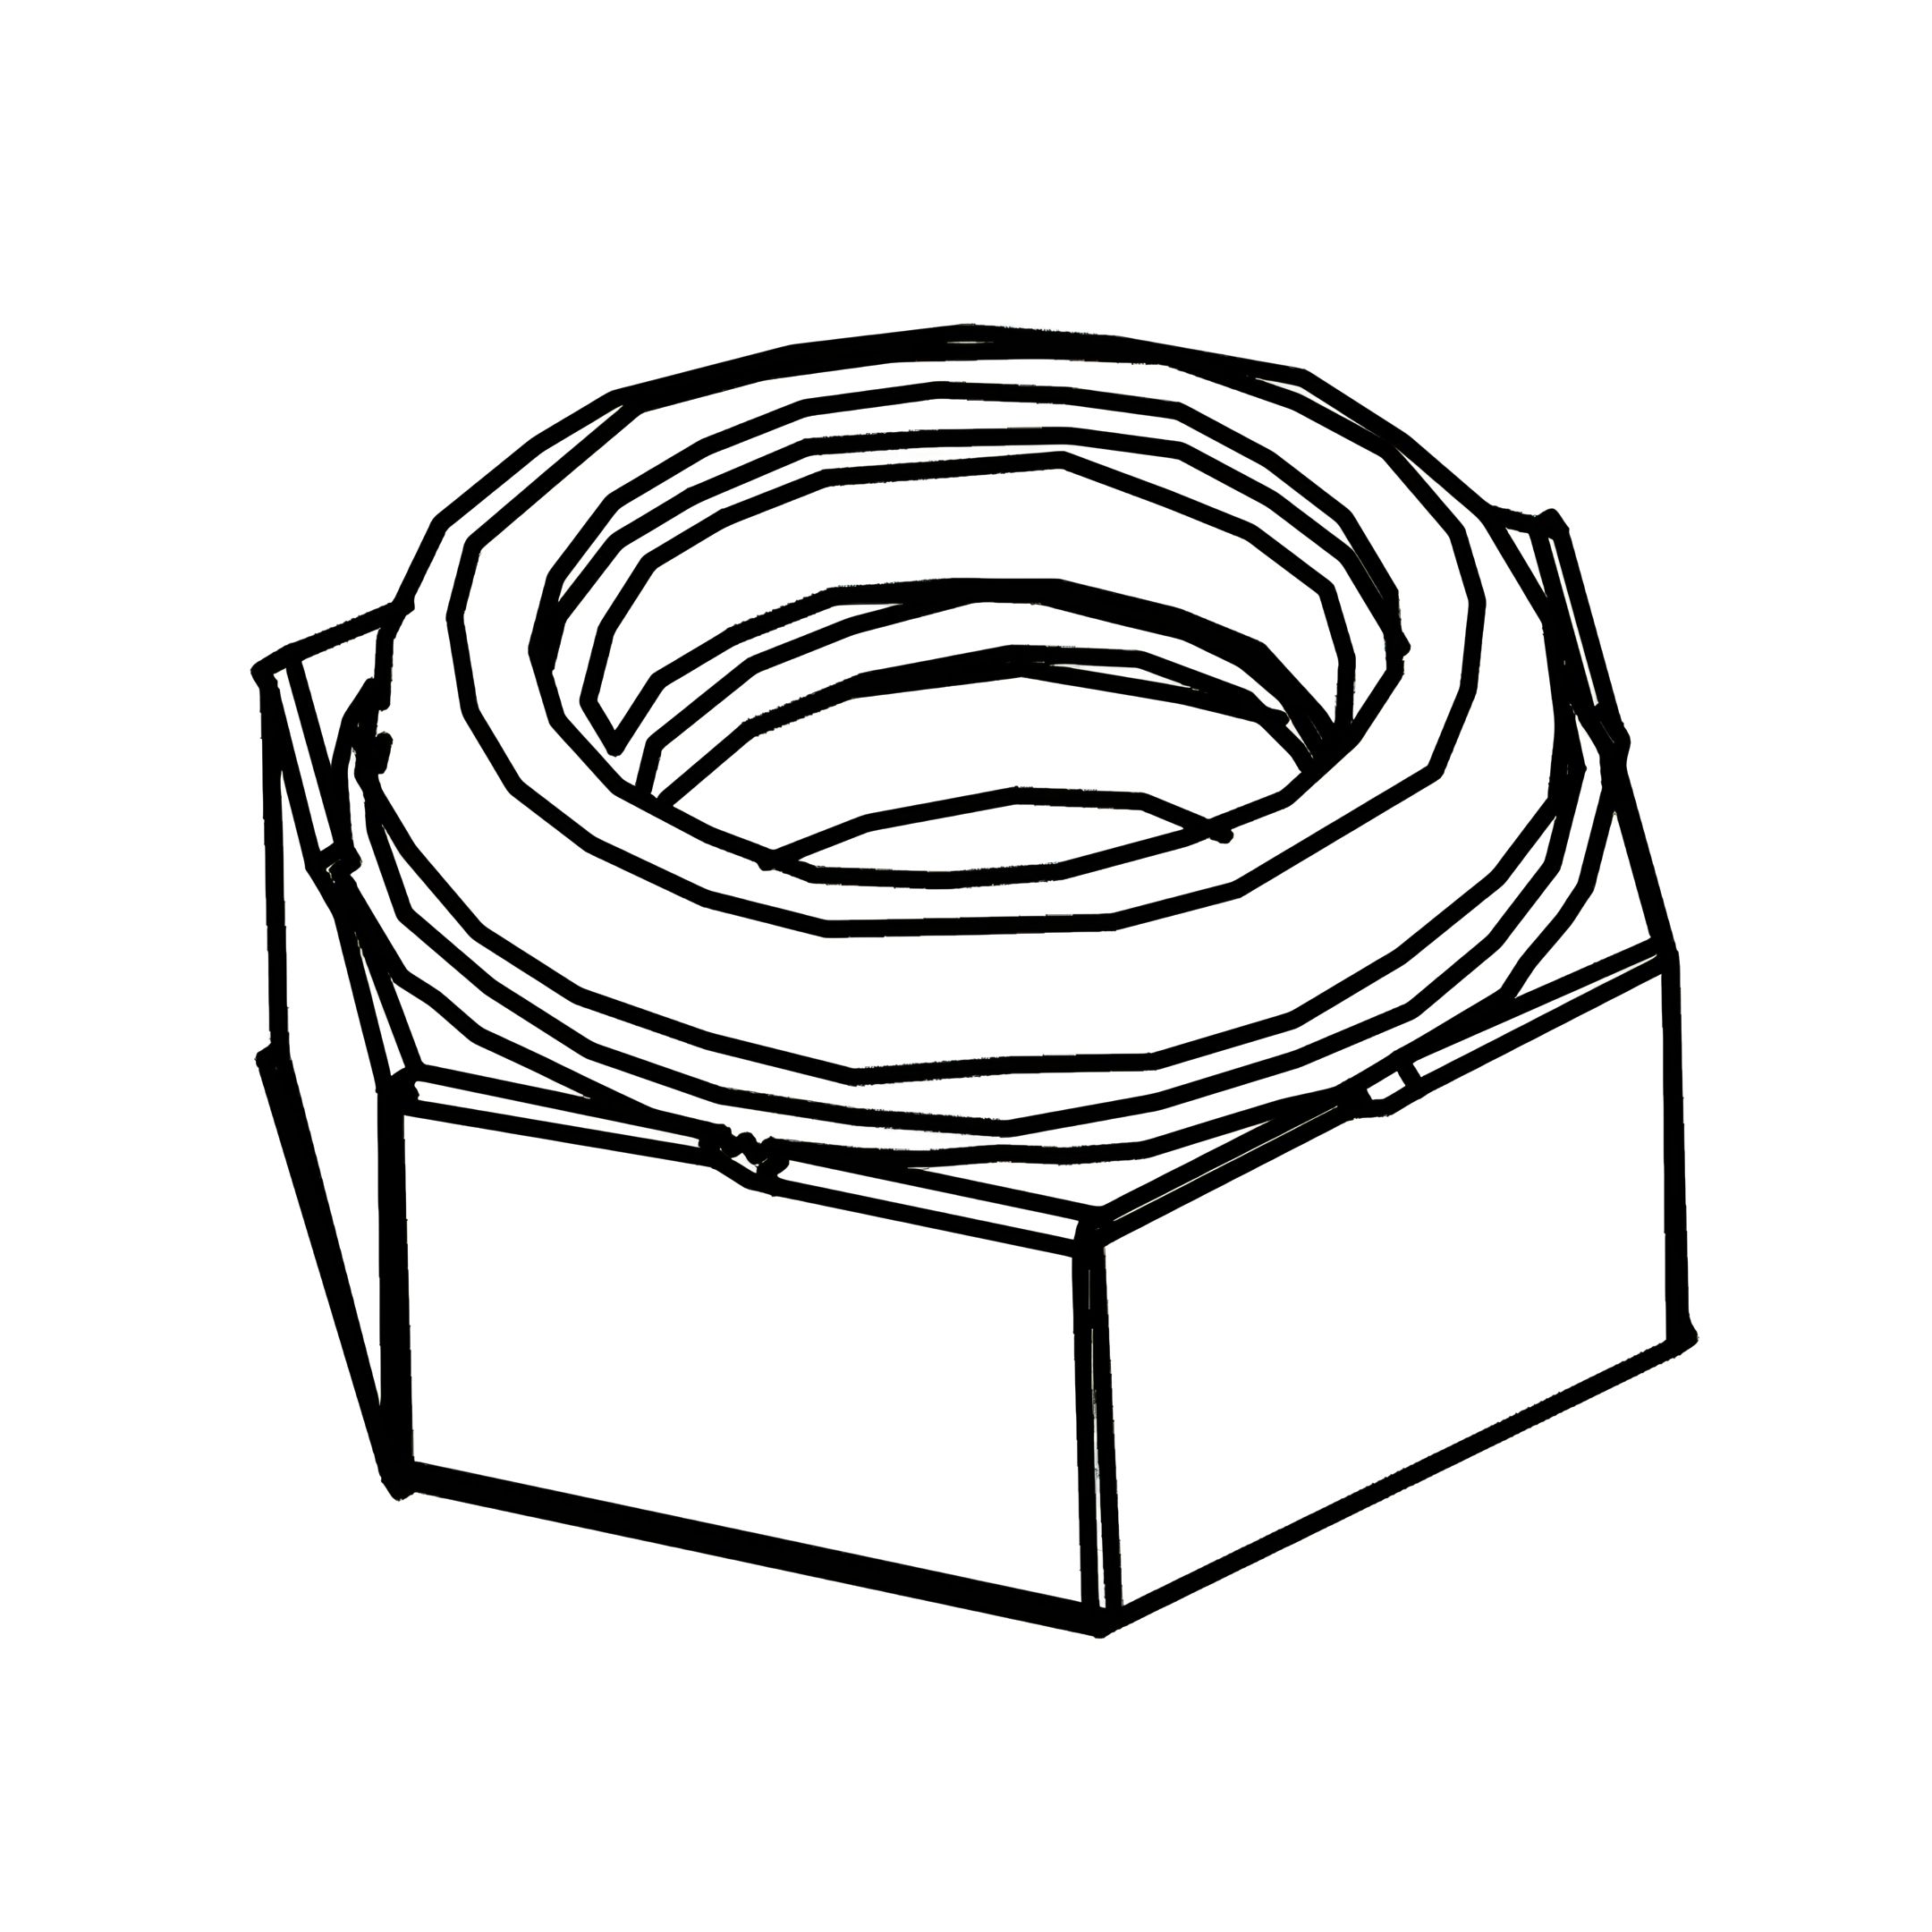
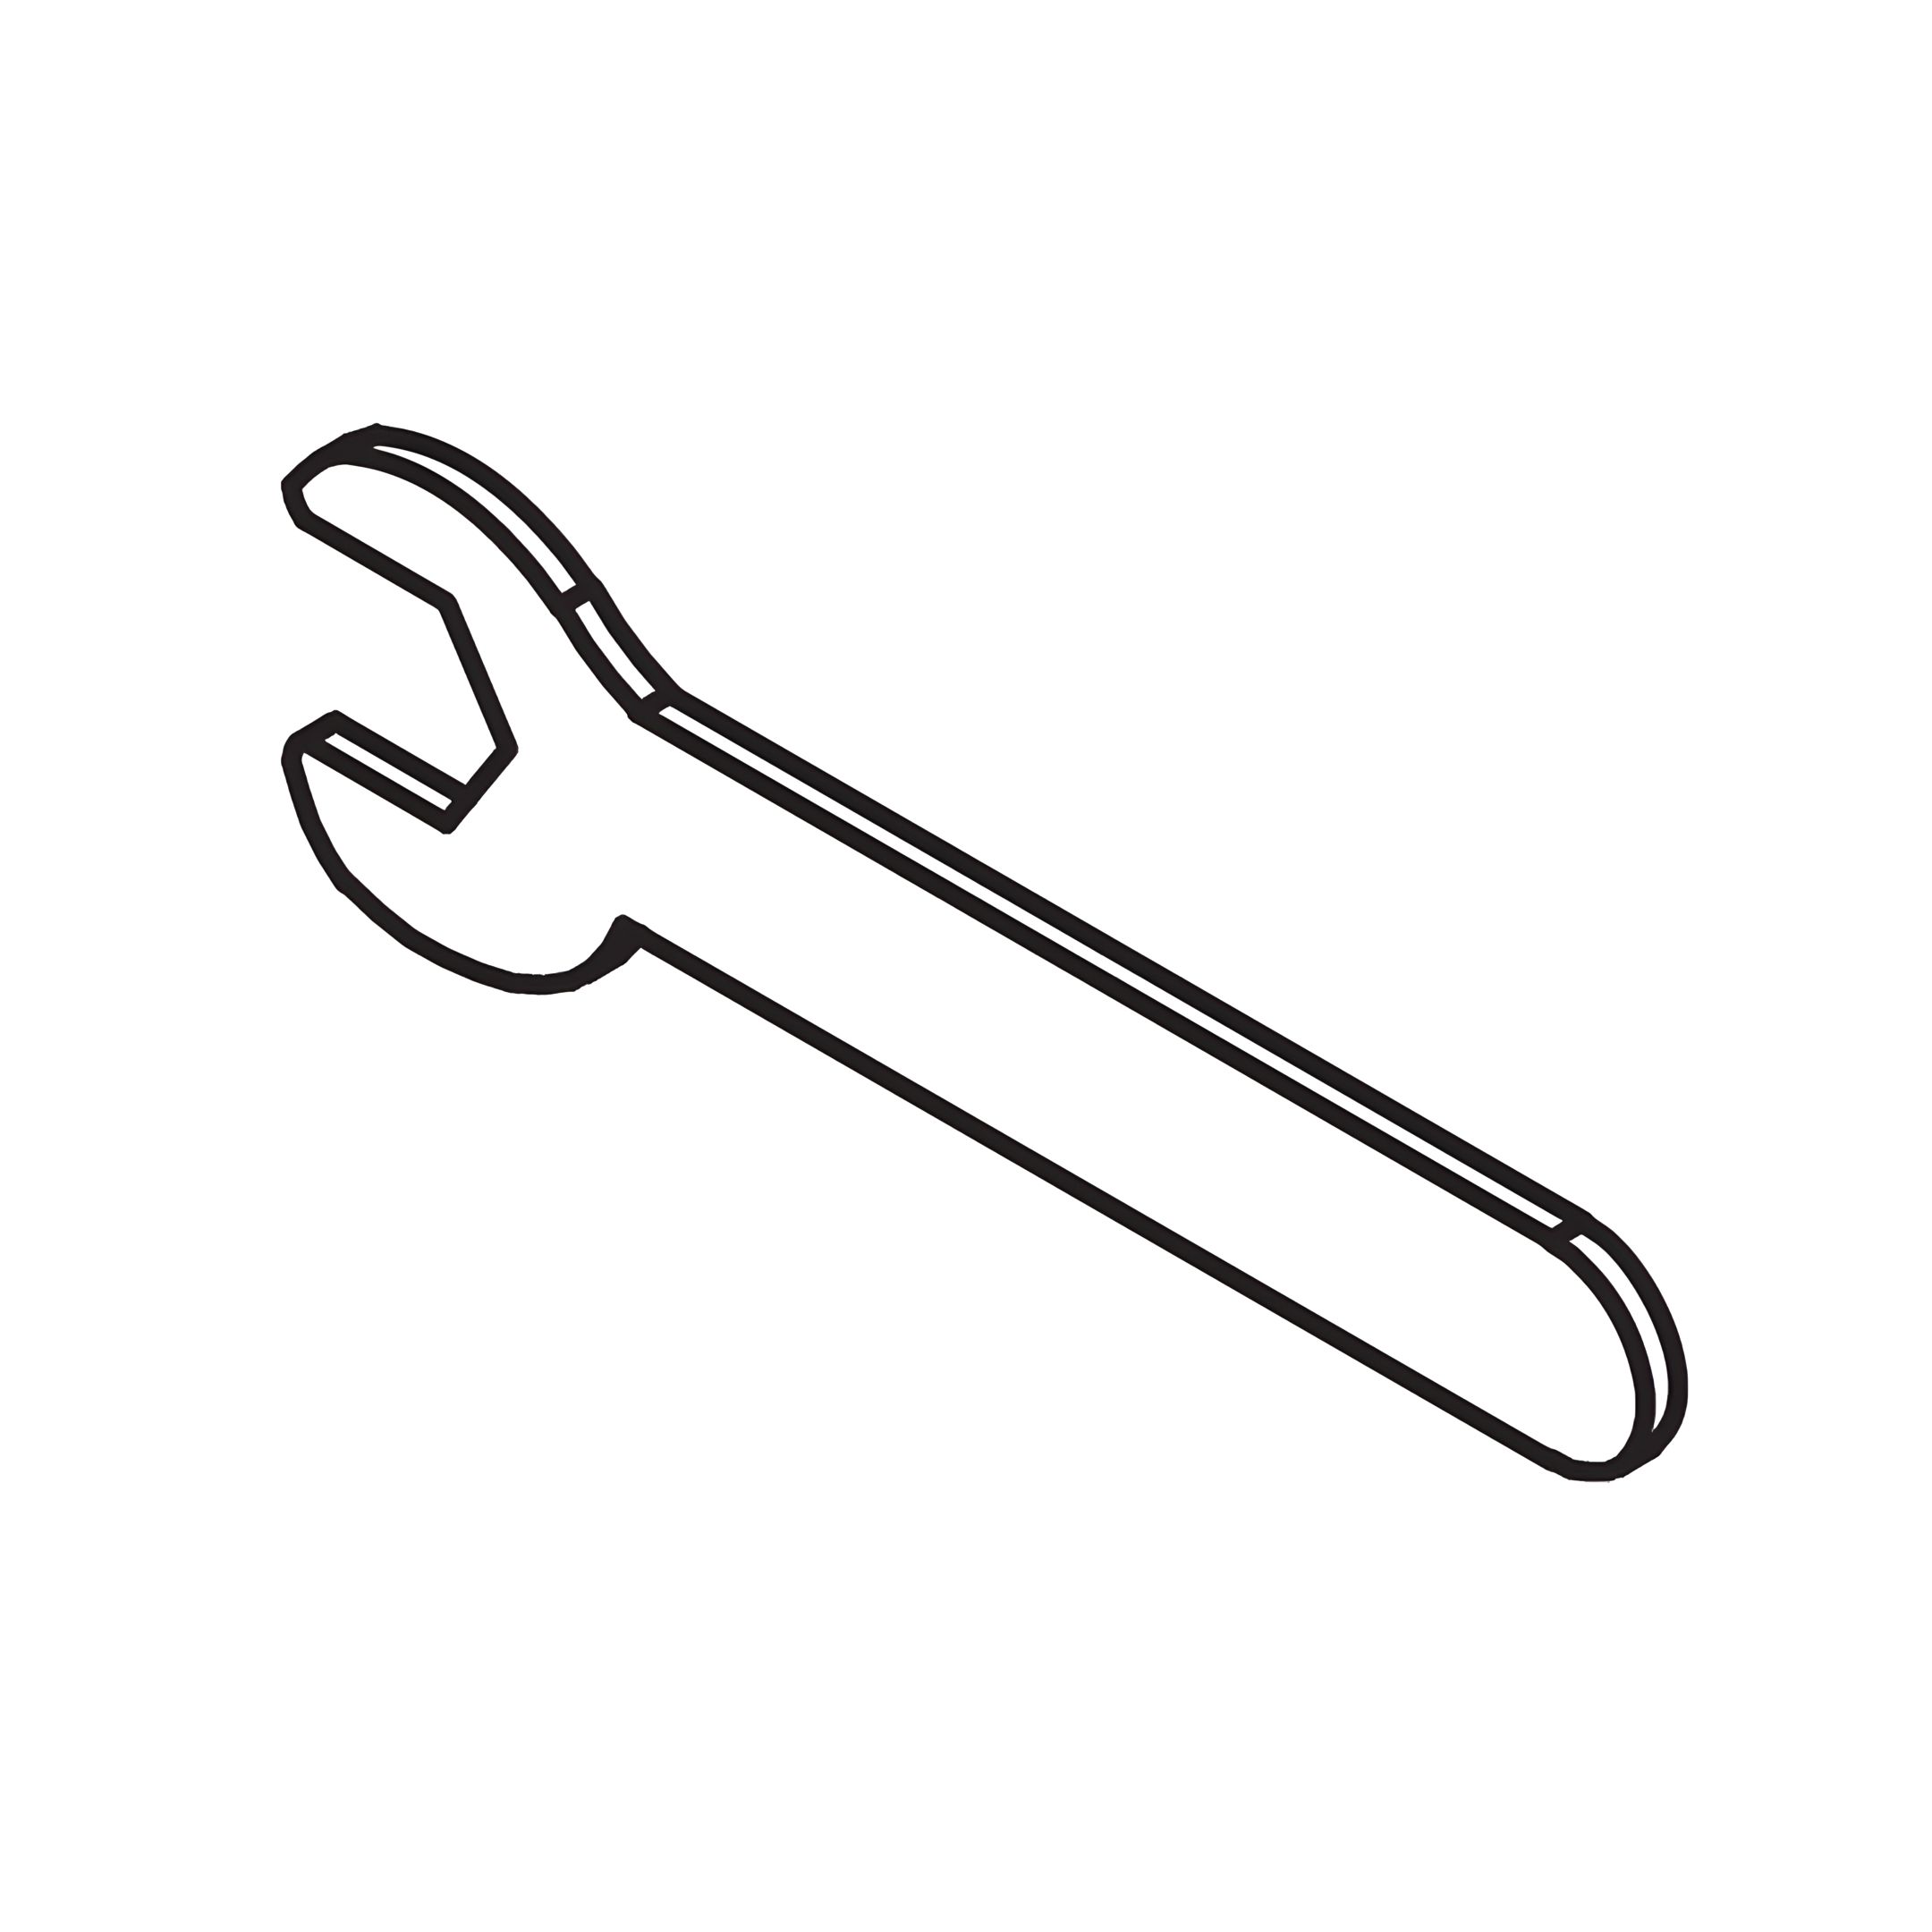
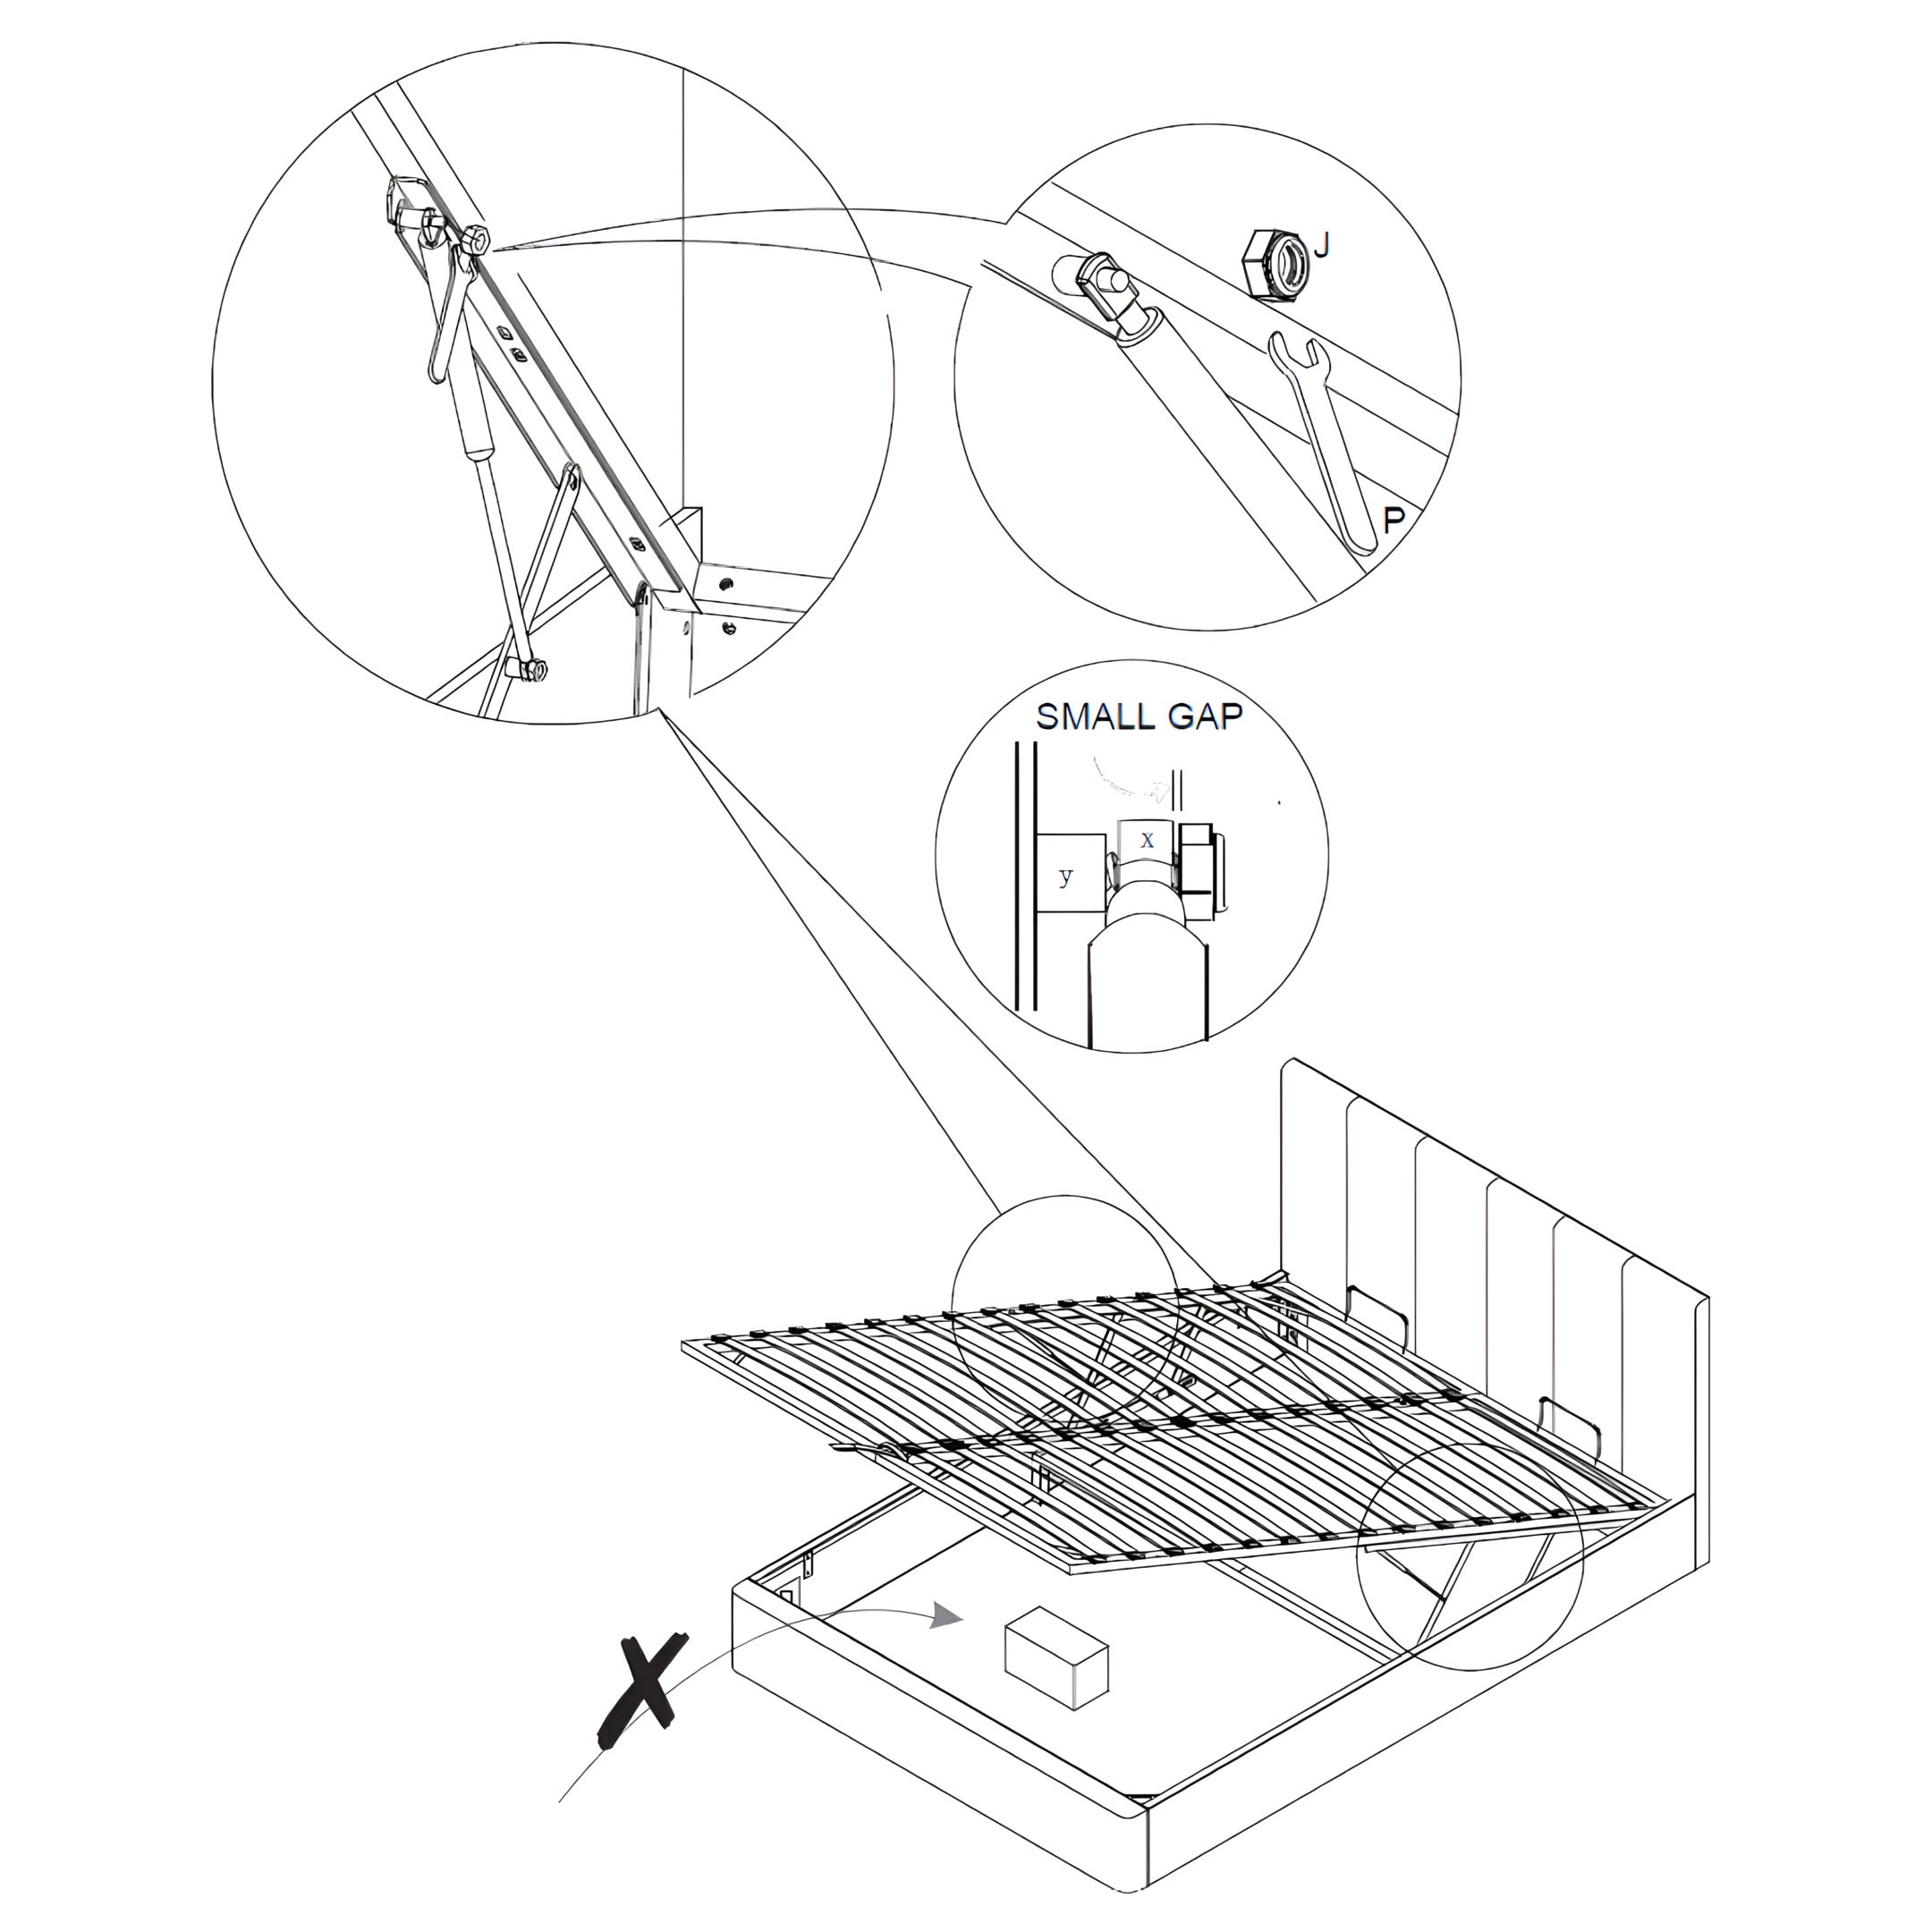
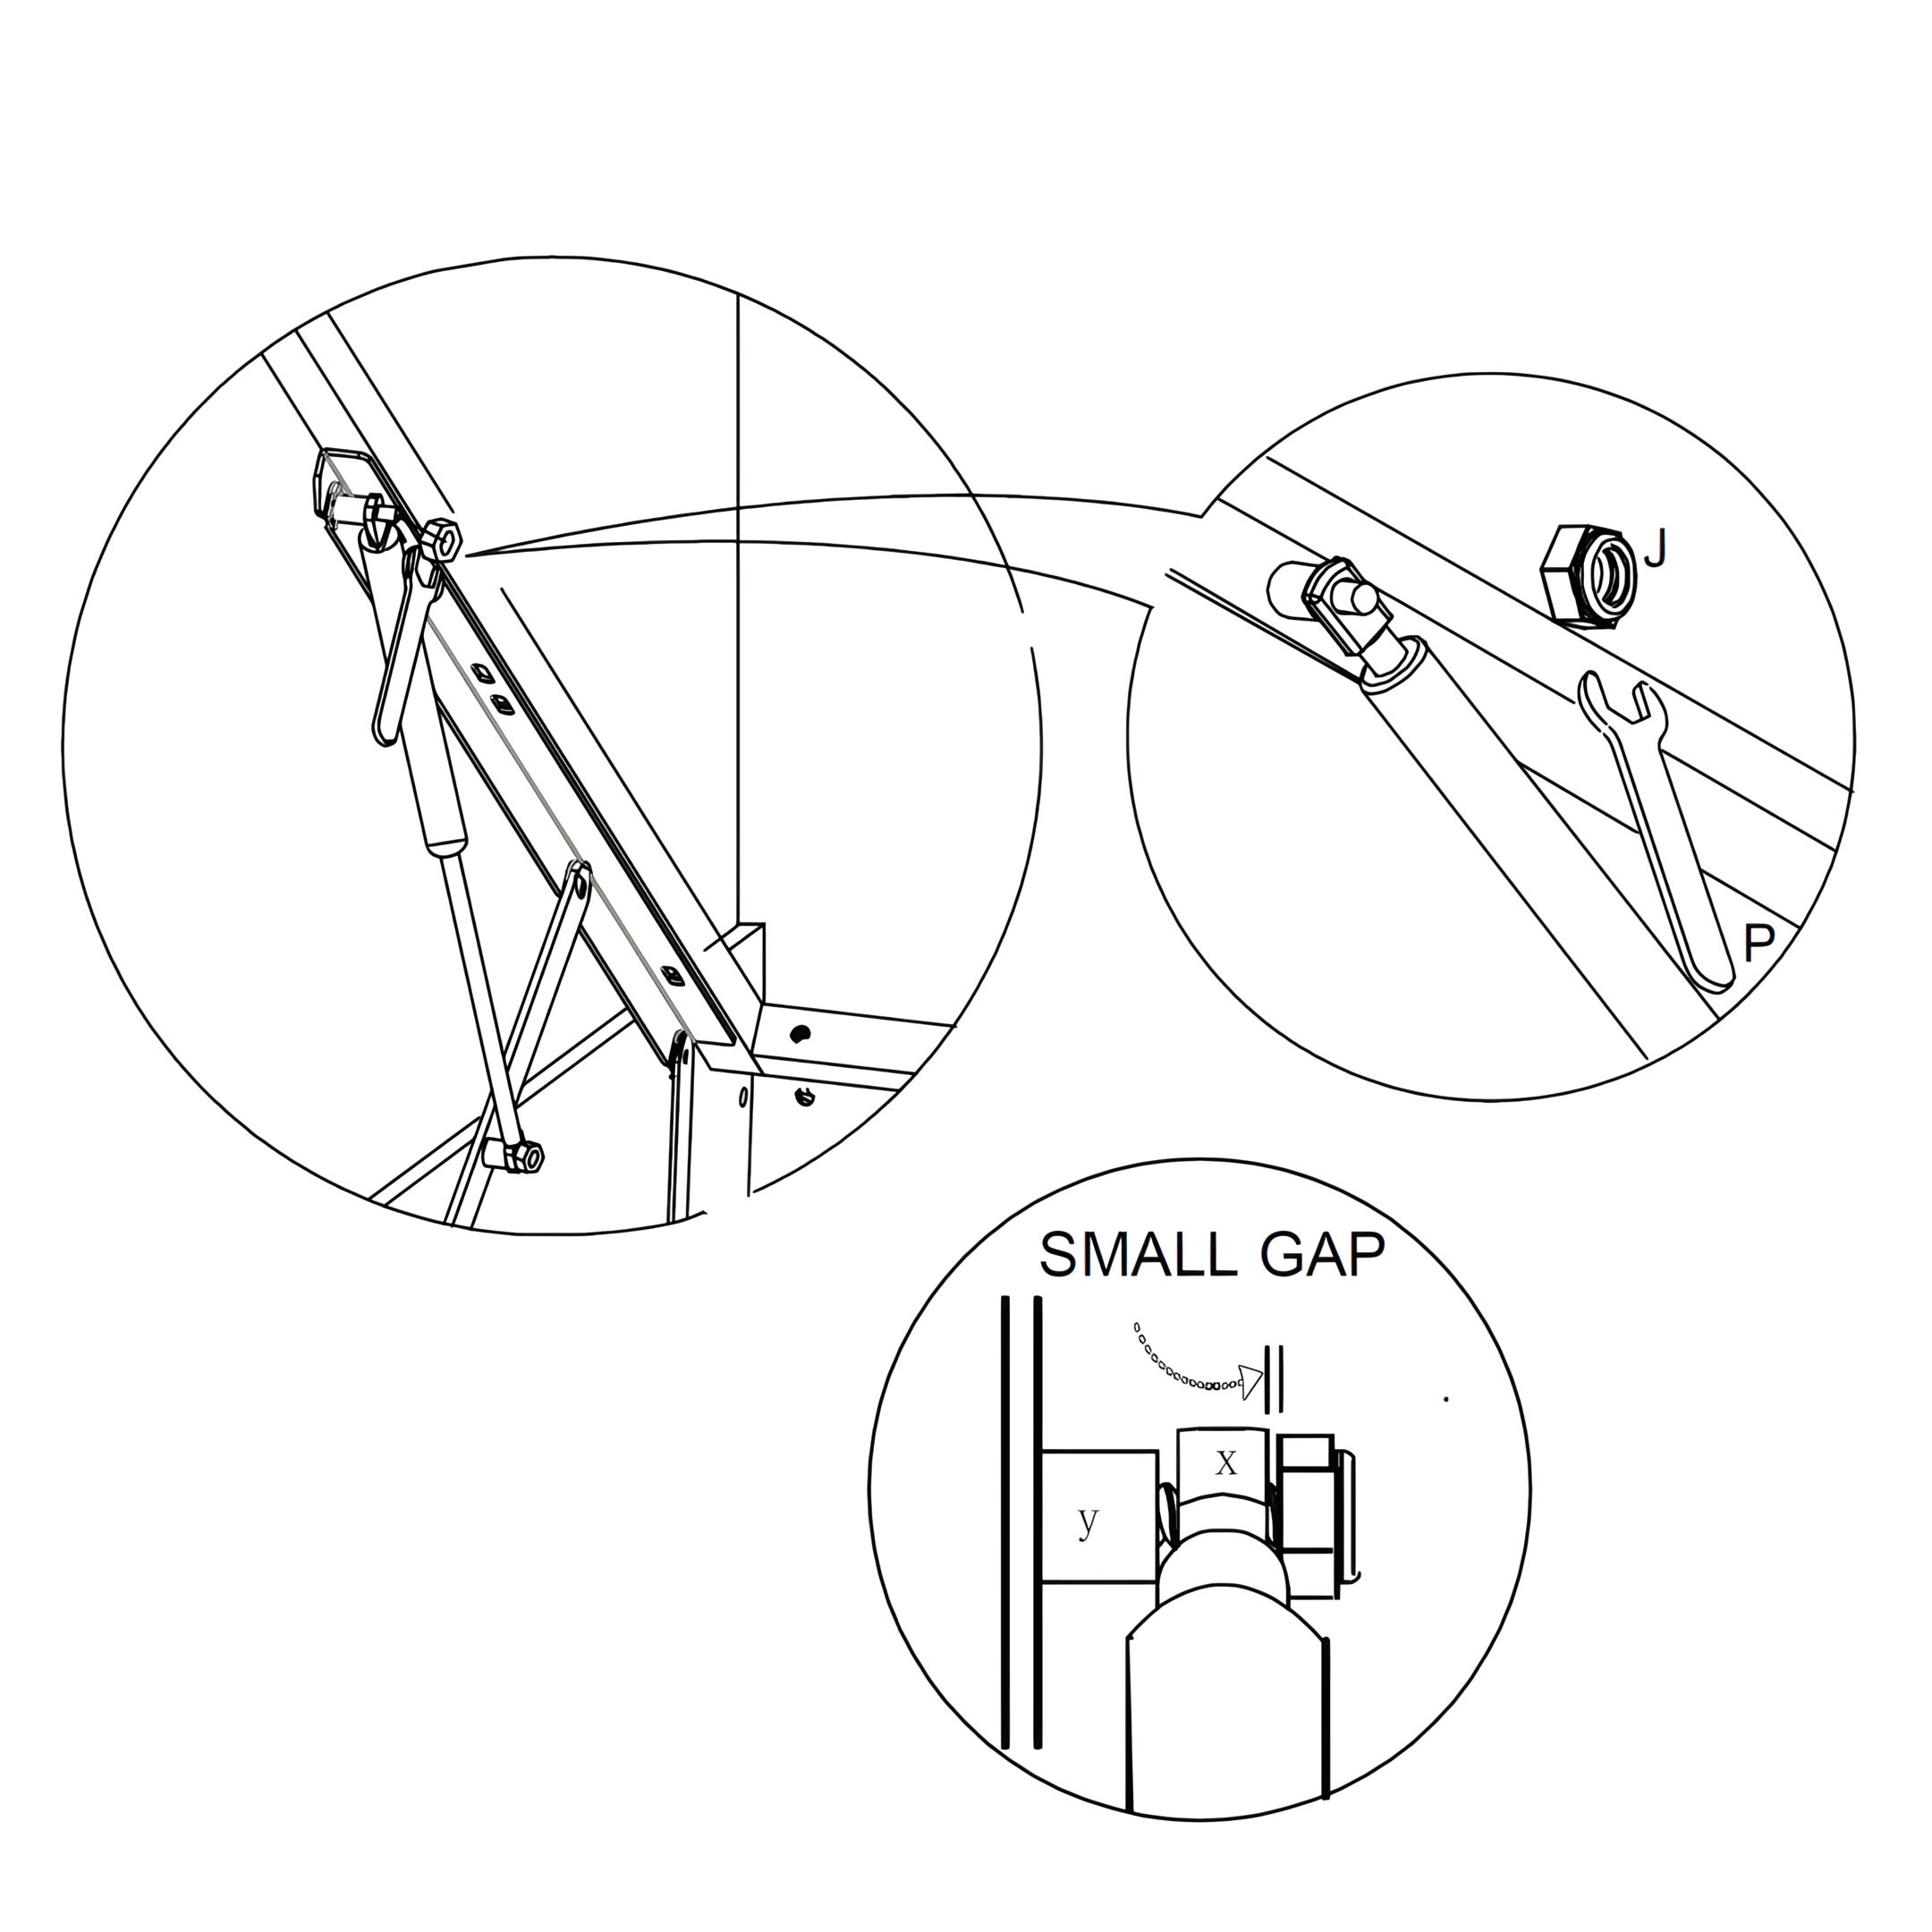
1. Slide the Gas Lift Piston Stem (x) onto the Axle (y) as shown. 2. Secure the piston in place using the Flange Lock-Nut (J). 3. Use the Spanner (P) to tighten the nut. Do not over-tighten. 4. Leave a small gap to ensure the piston stem can move freely, as indicated in the diagram.
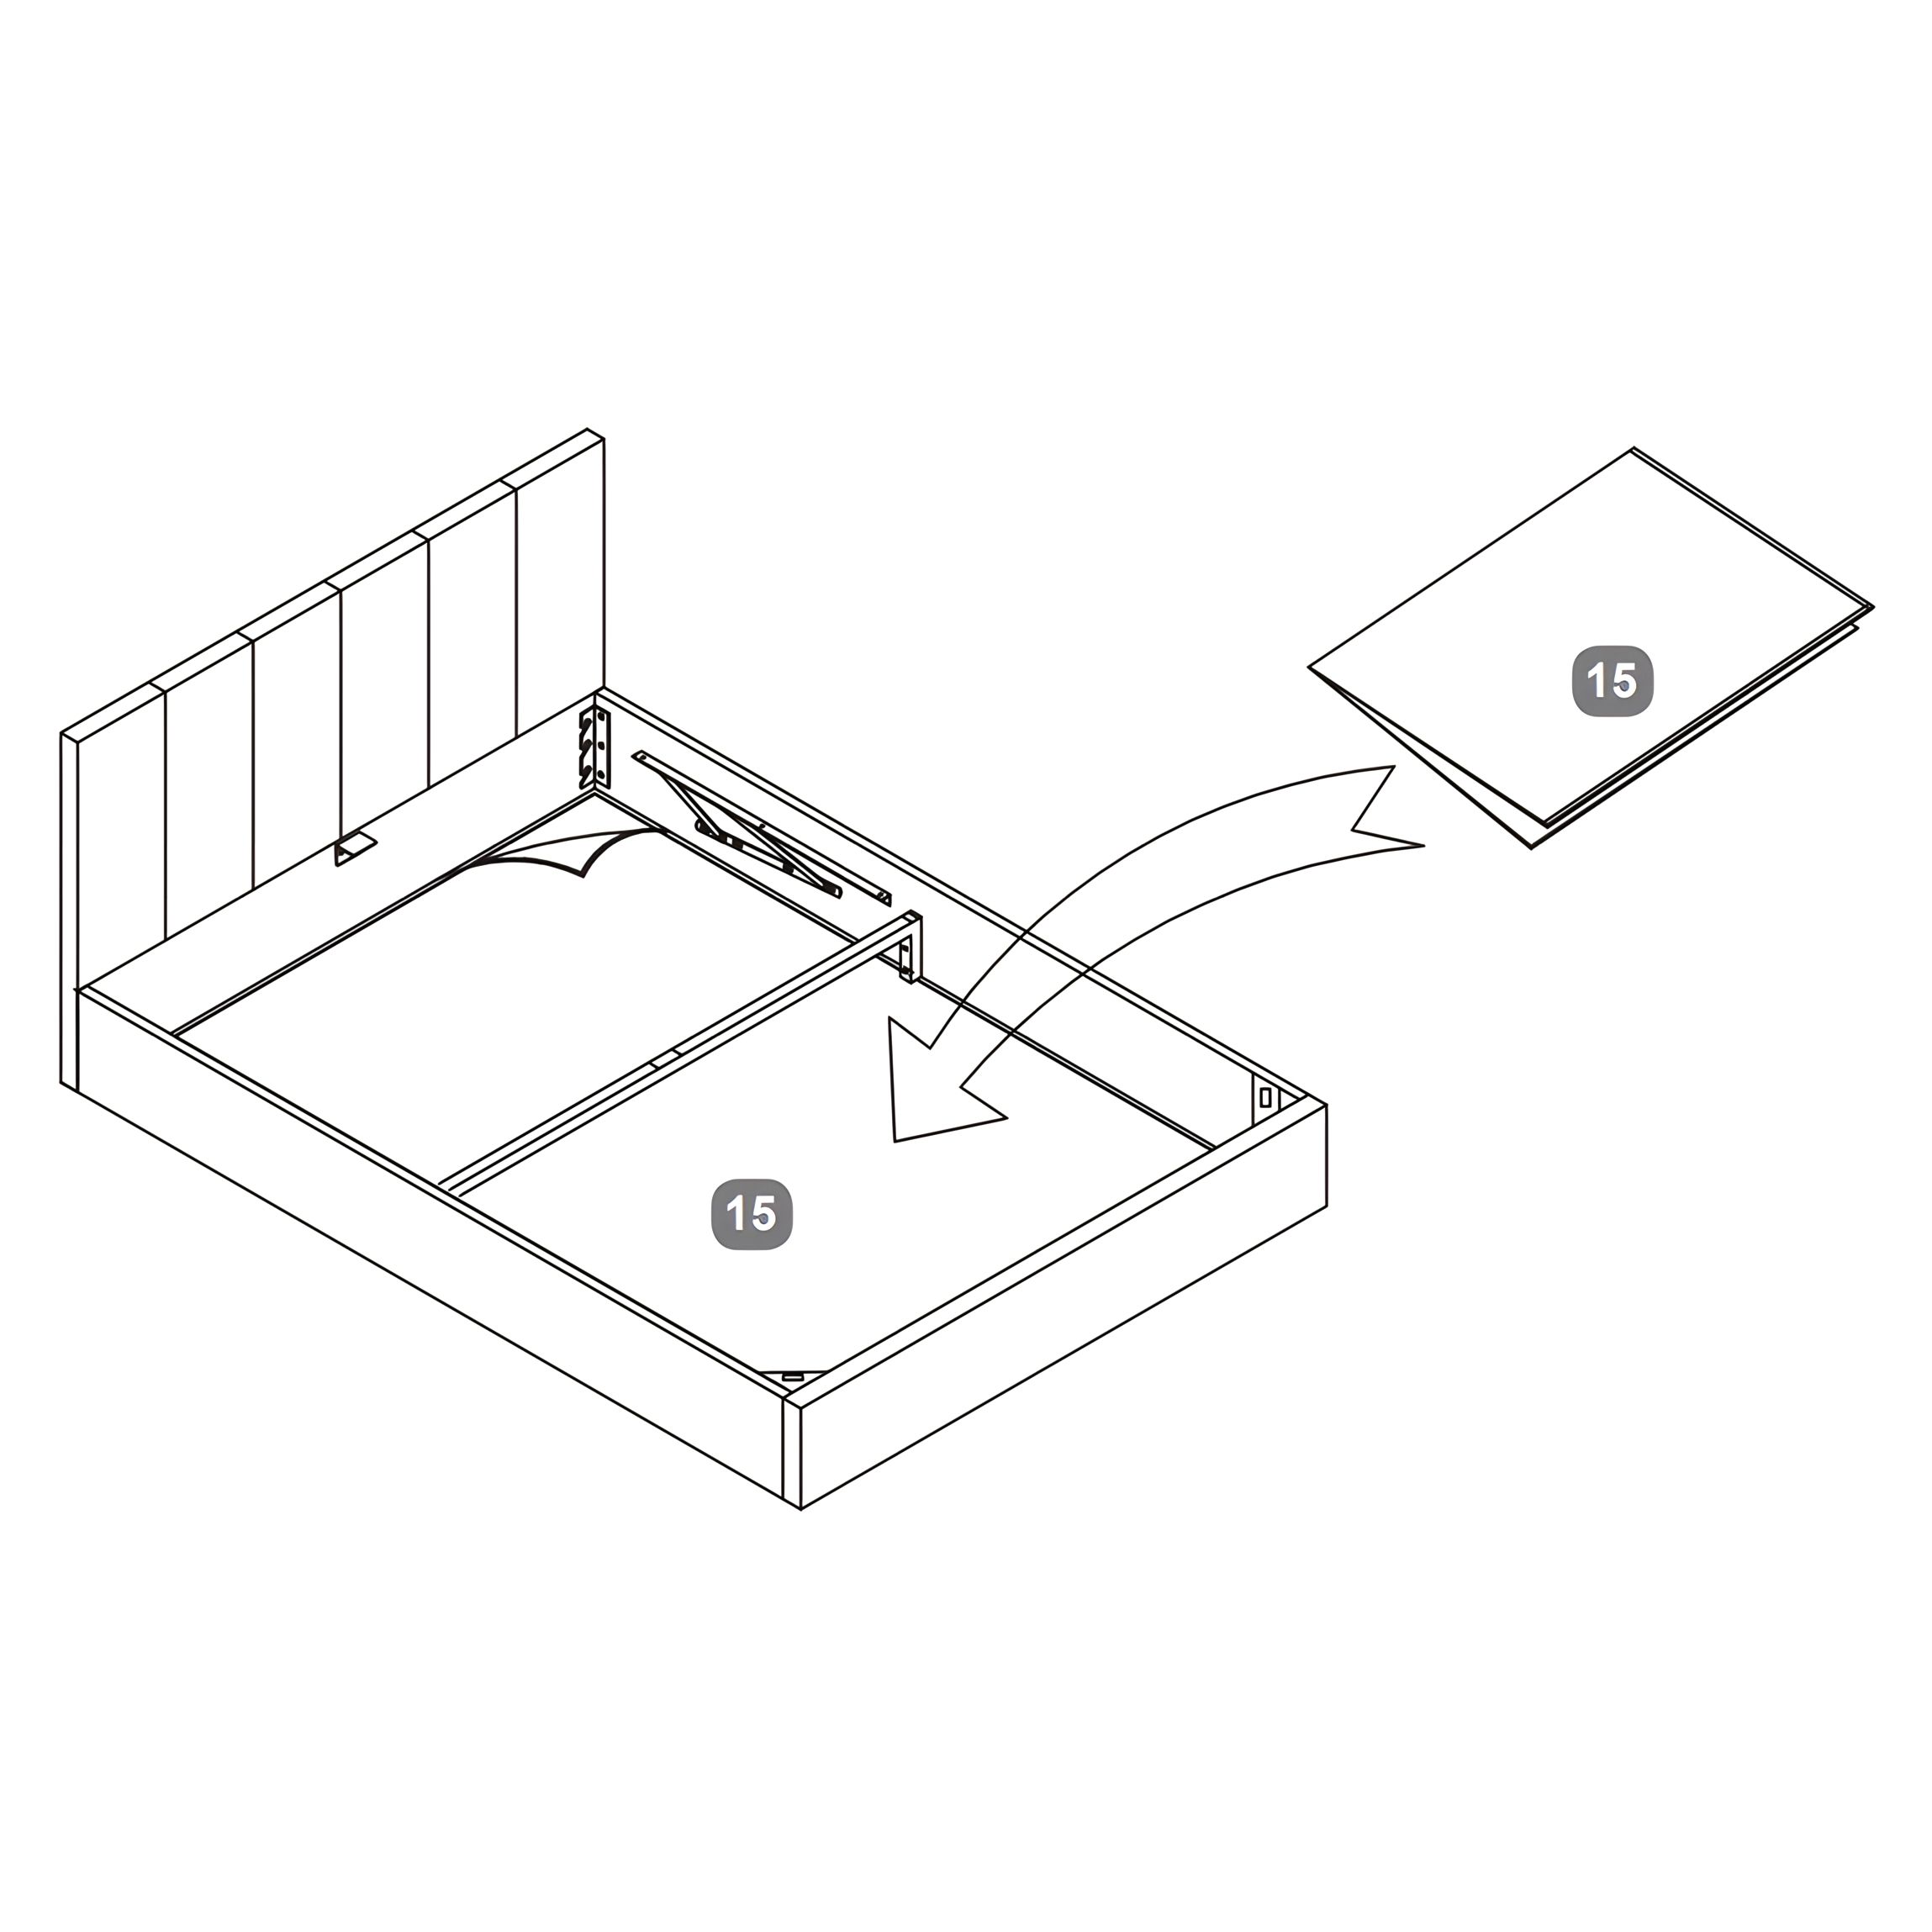
6. Place the Fabric Base Cover
1. Lay the Fabric Base Cover (15) flat inside the storage compartment of the bed frame. 2. Adjust the cover so it fits neatly within the frame and sits flush against the edges.
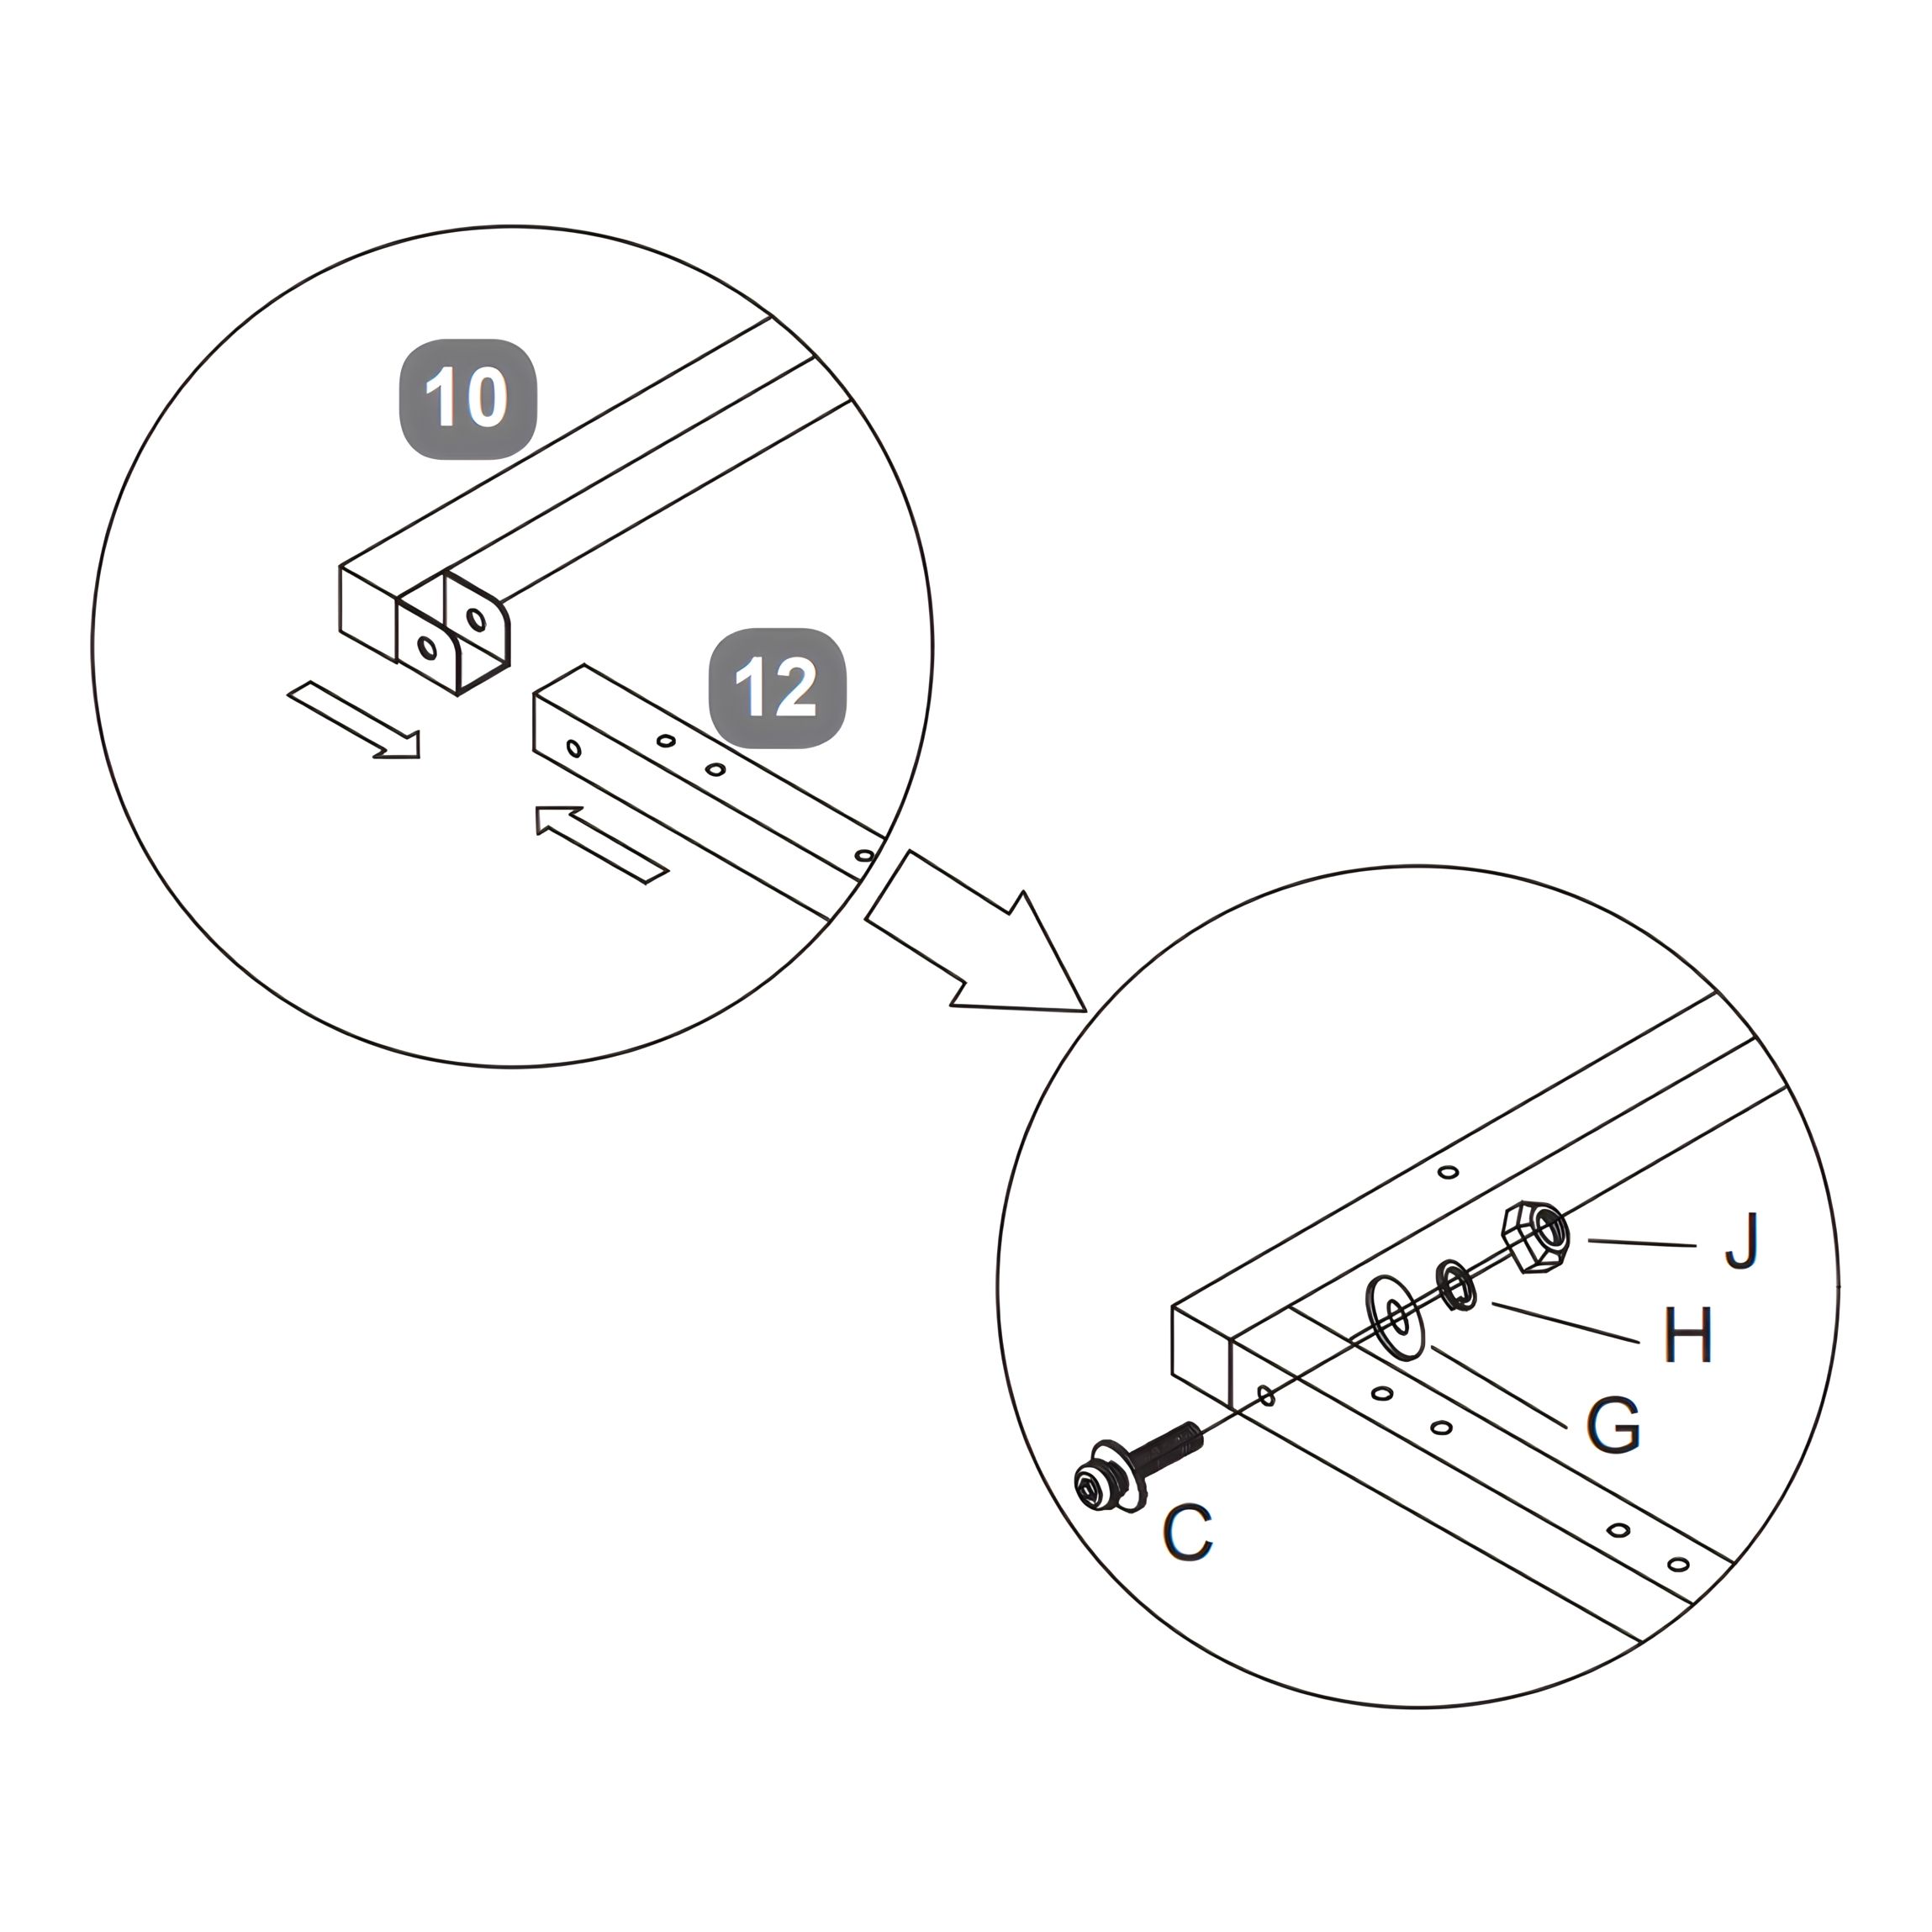
7. Assemble the Slat Frame Structure
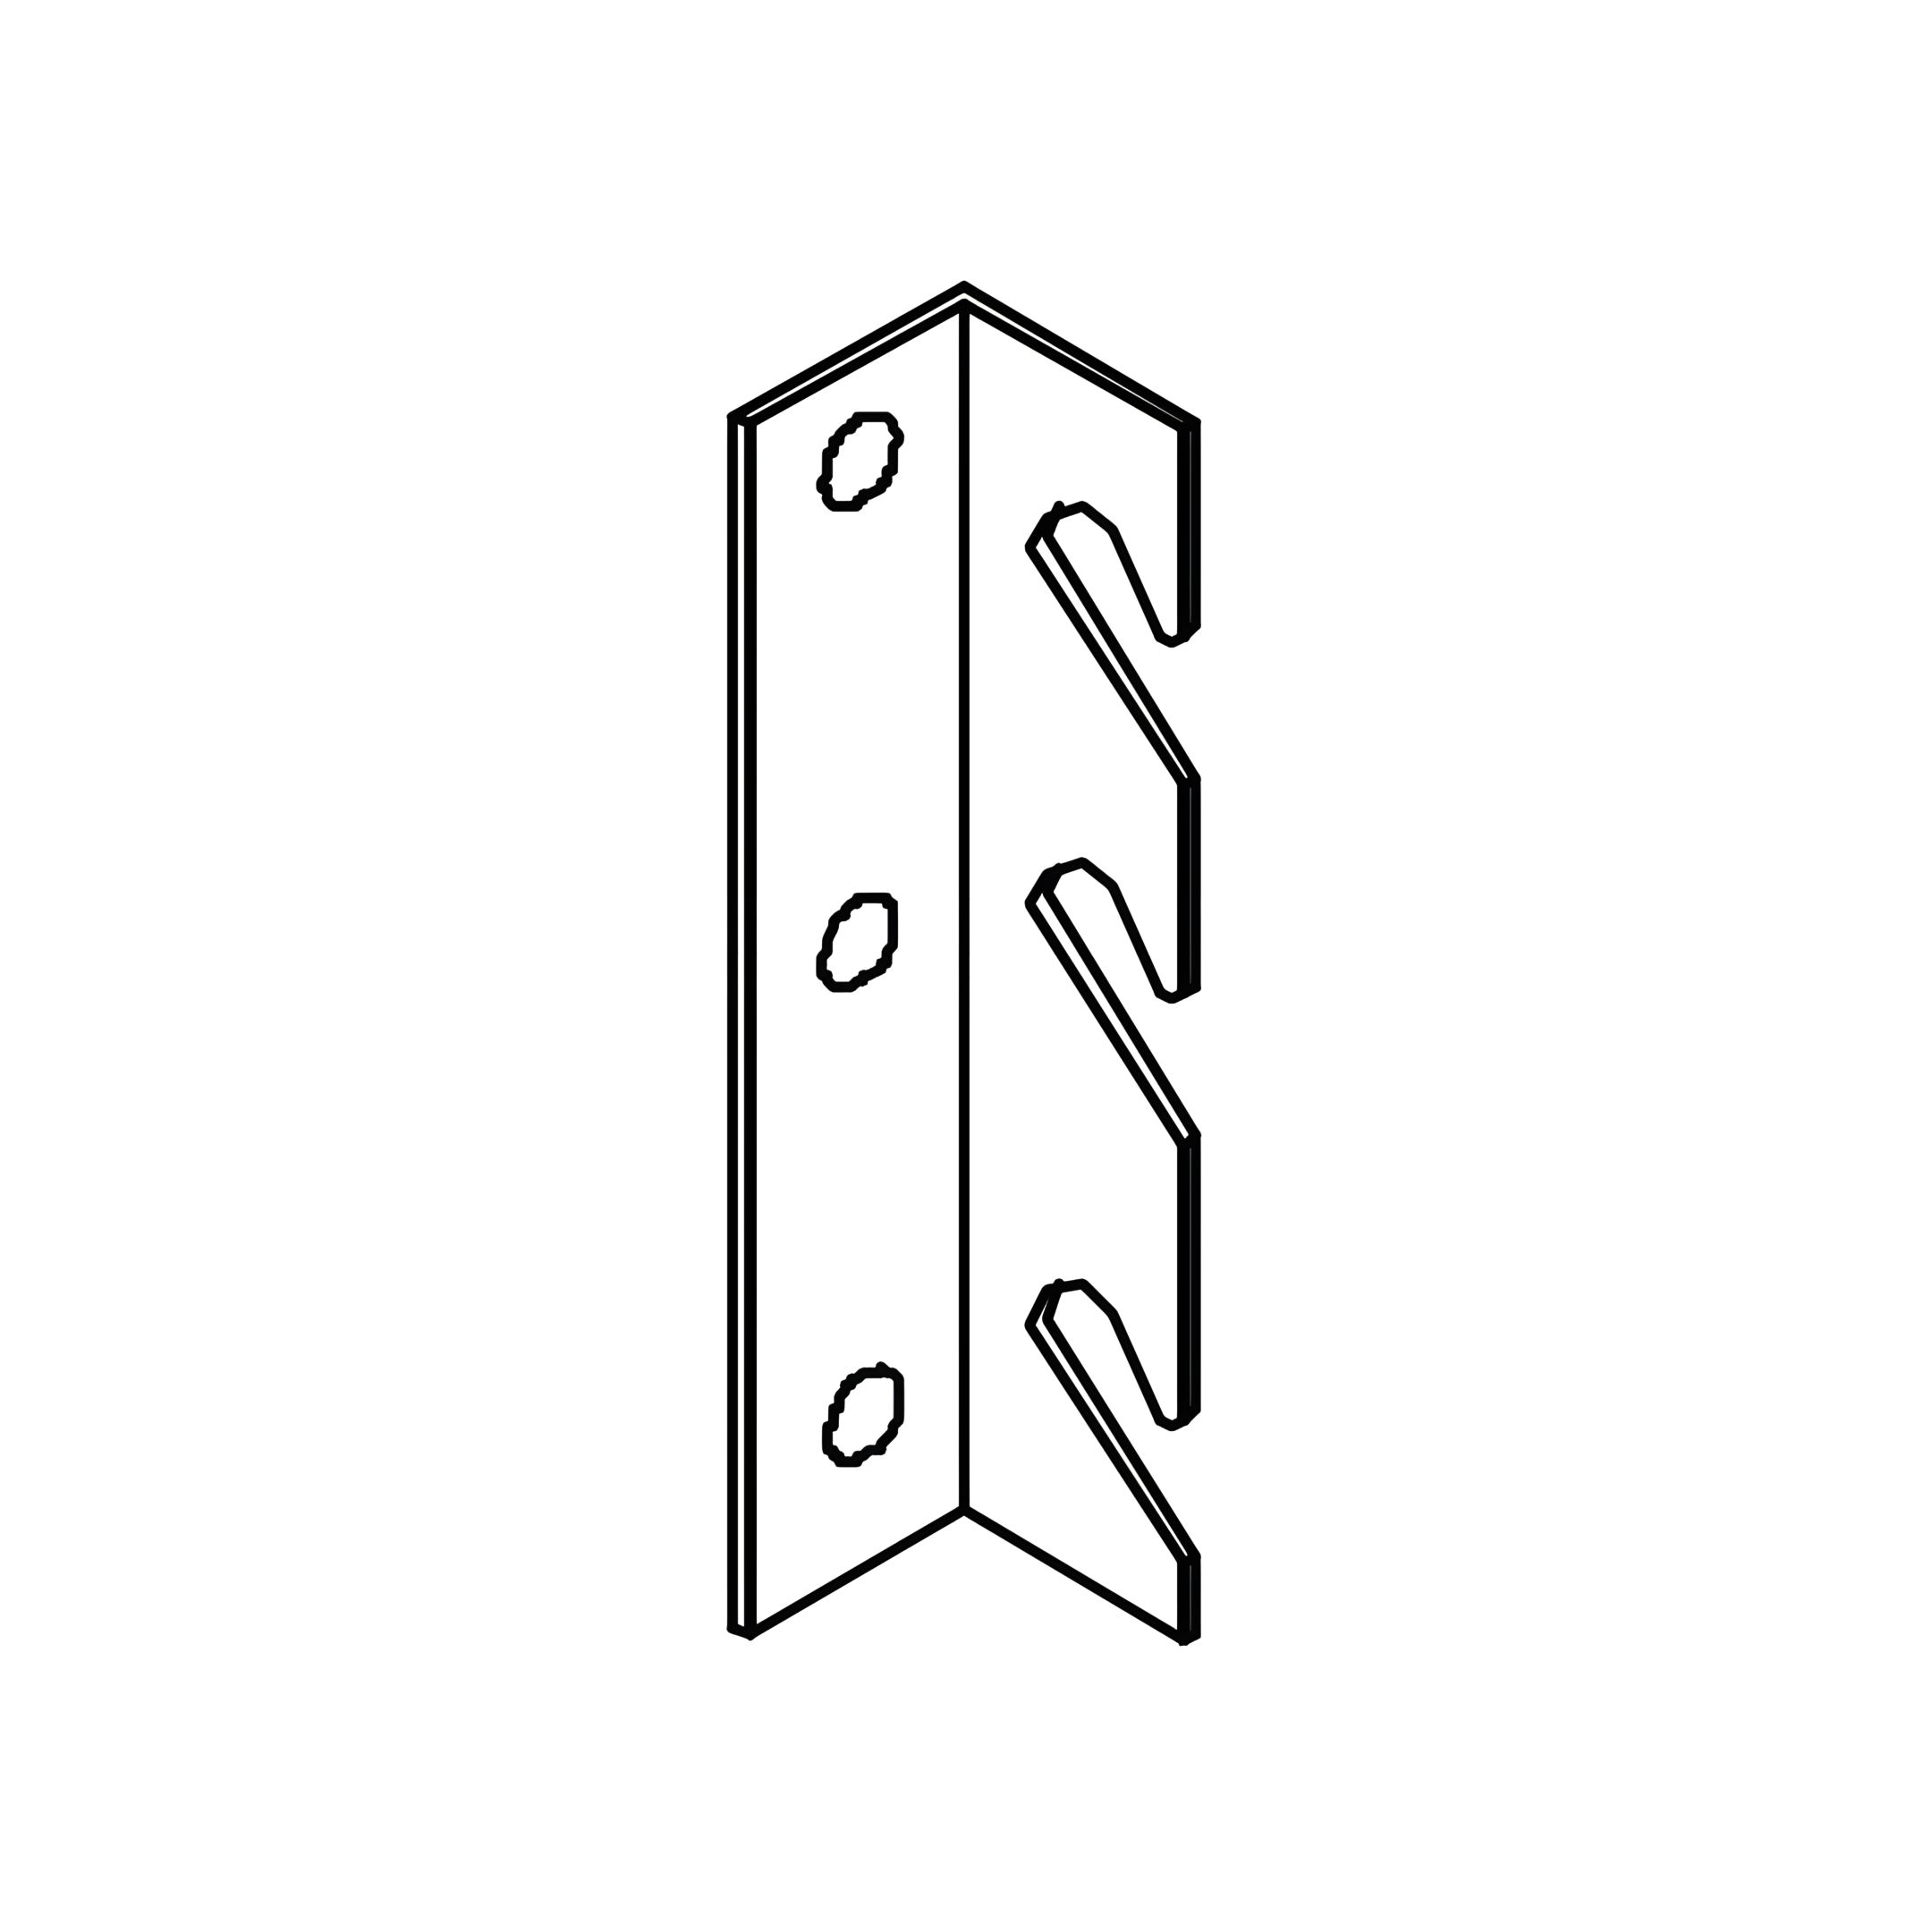
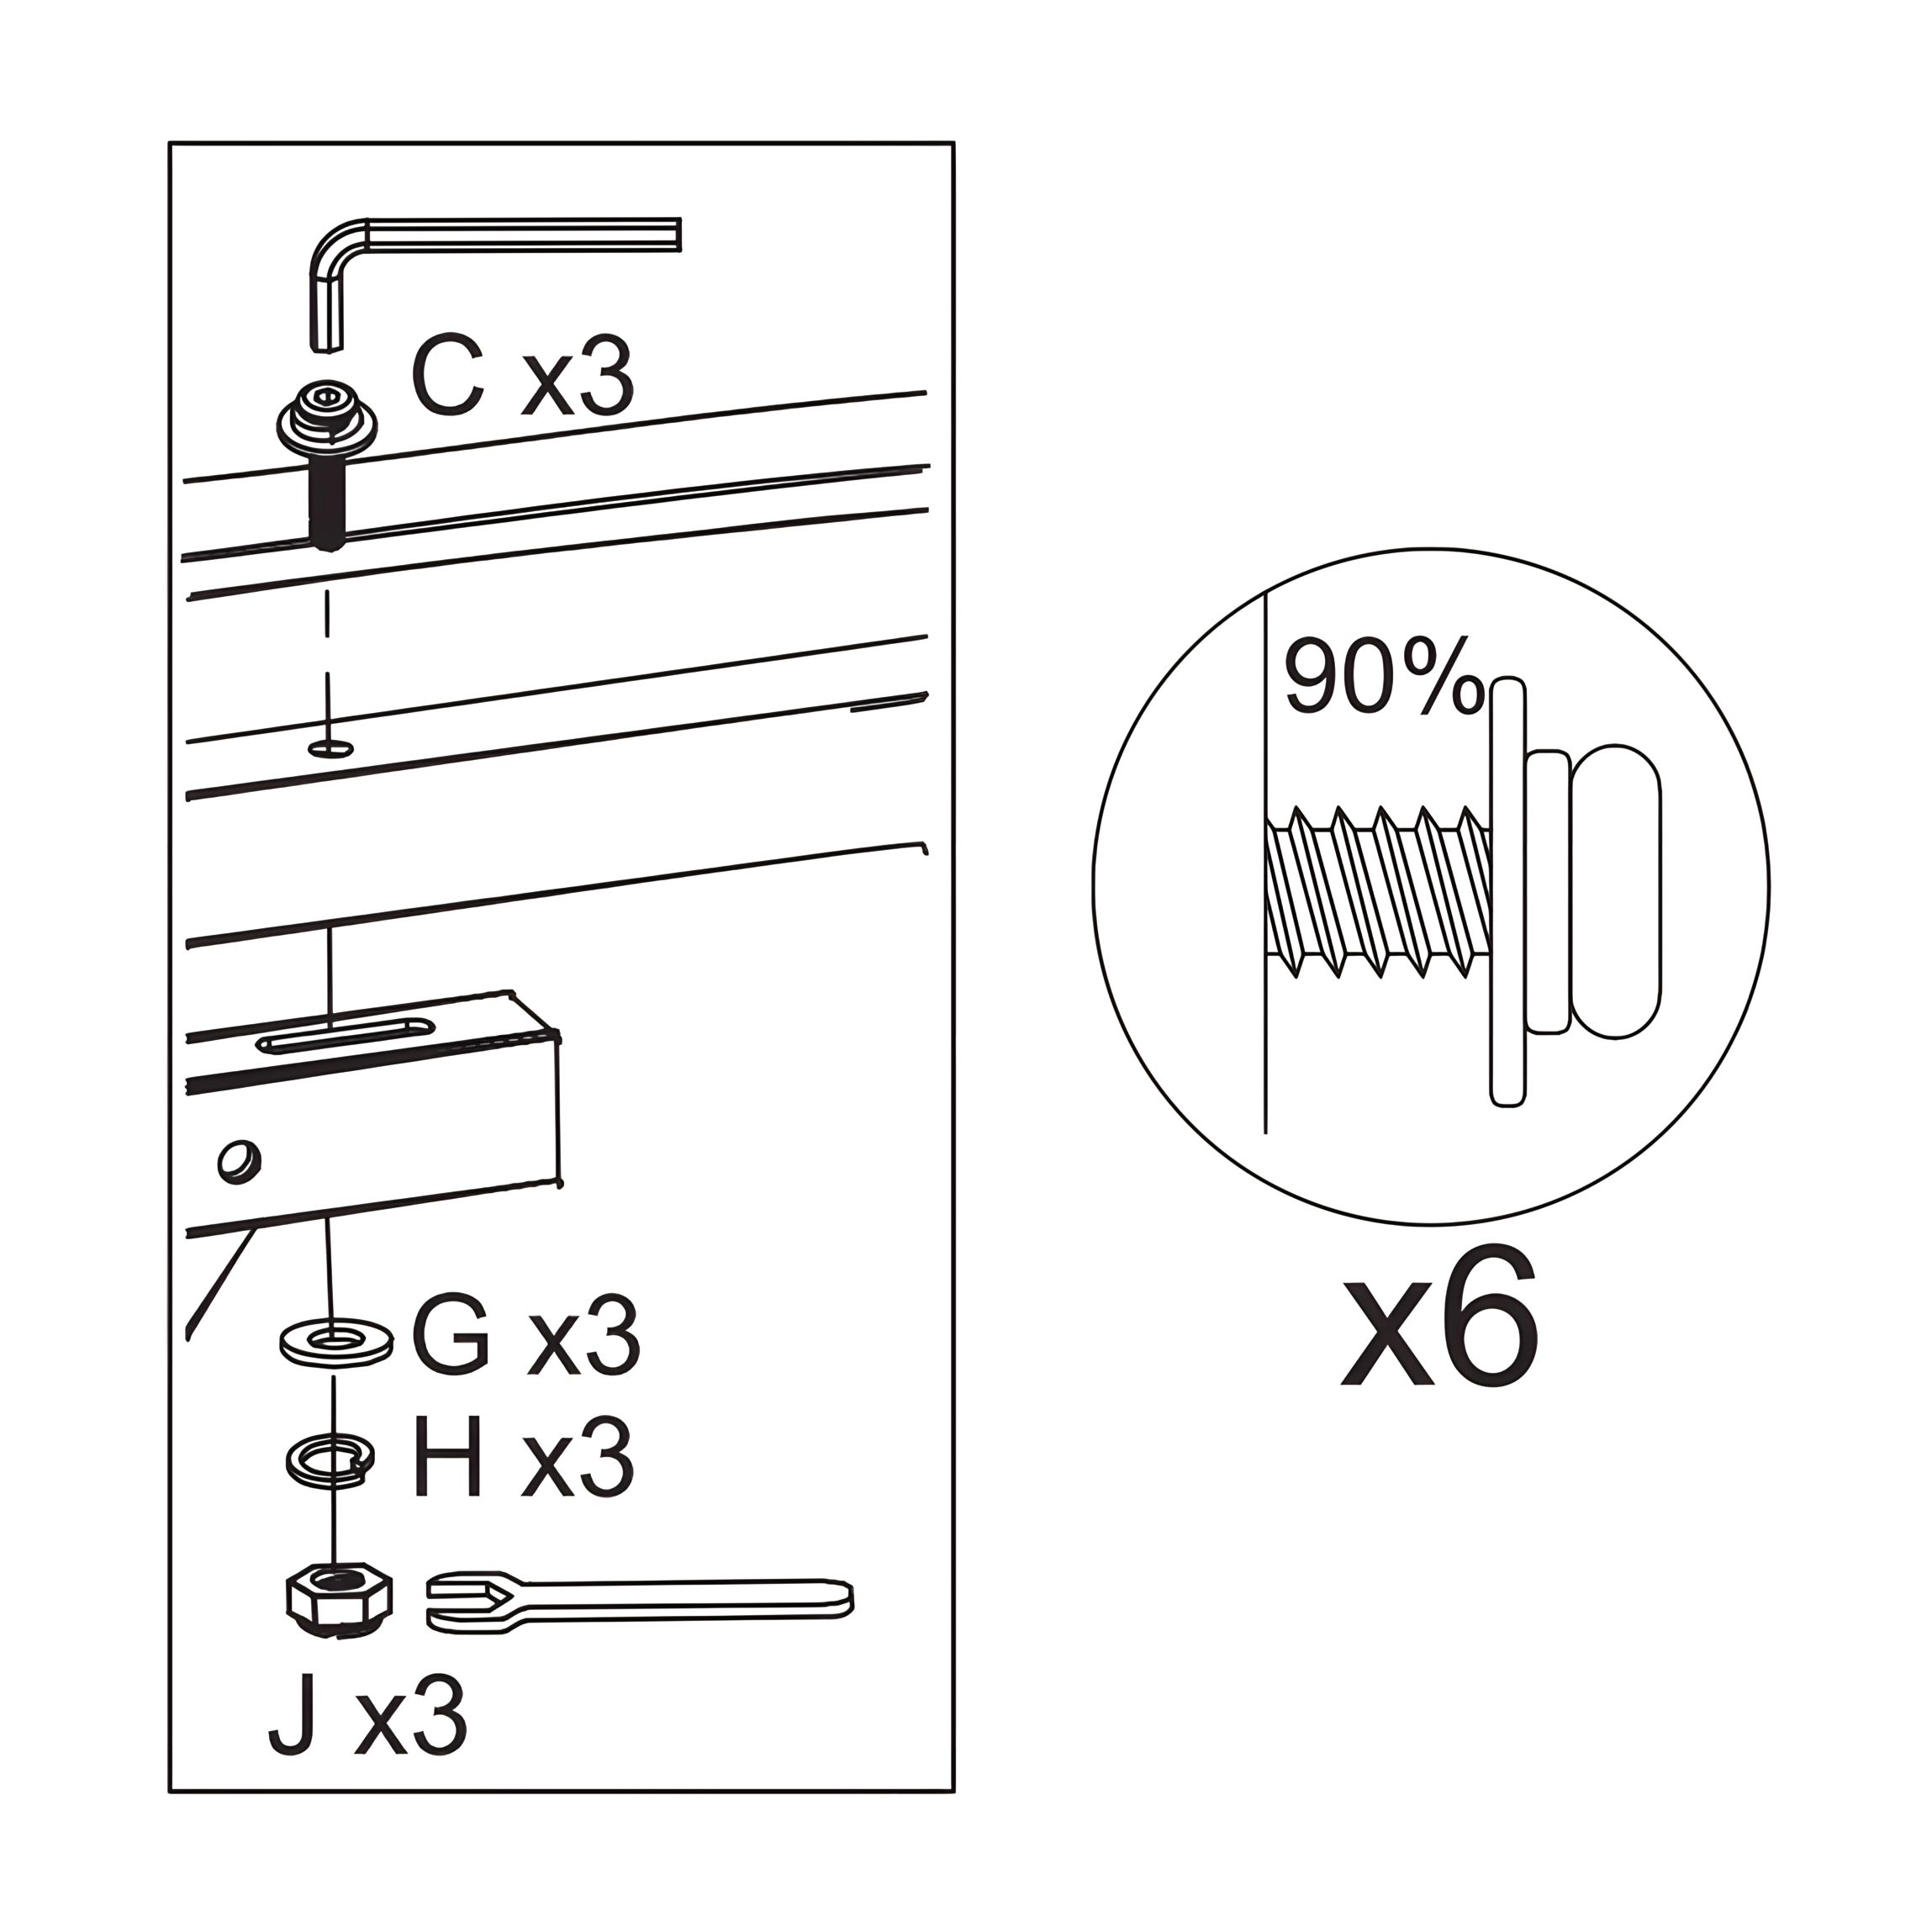
1. Lay out the Metal Slat Frame End Rails (10) and Side Rails (12) as shown. 2. Ensure that the split joints in the End Rails (10) point upwards. 3. Position the Side Rails (12) so that the slat cap holes are facing downward, touching the floor. Only the 13 marked holes by the line should be visible from above. 4. Slide the Side Rails (12) into the End Rails (10) as shown in the diagram. 5. Secure all joints using Bolt Sets (C), Flat Washers (G), Spring Washers (H), and Nuts (J). 6. Tighten all bolts using the Allen Key (M) and Spanner (P).
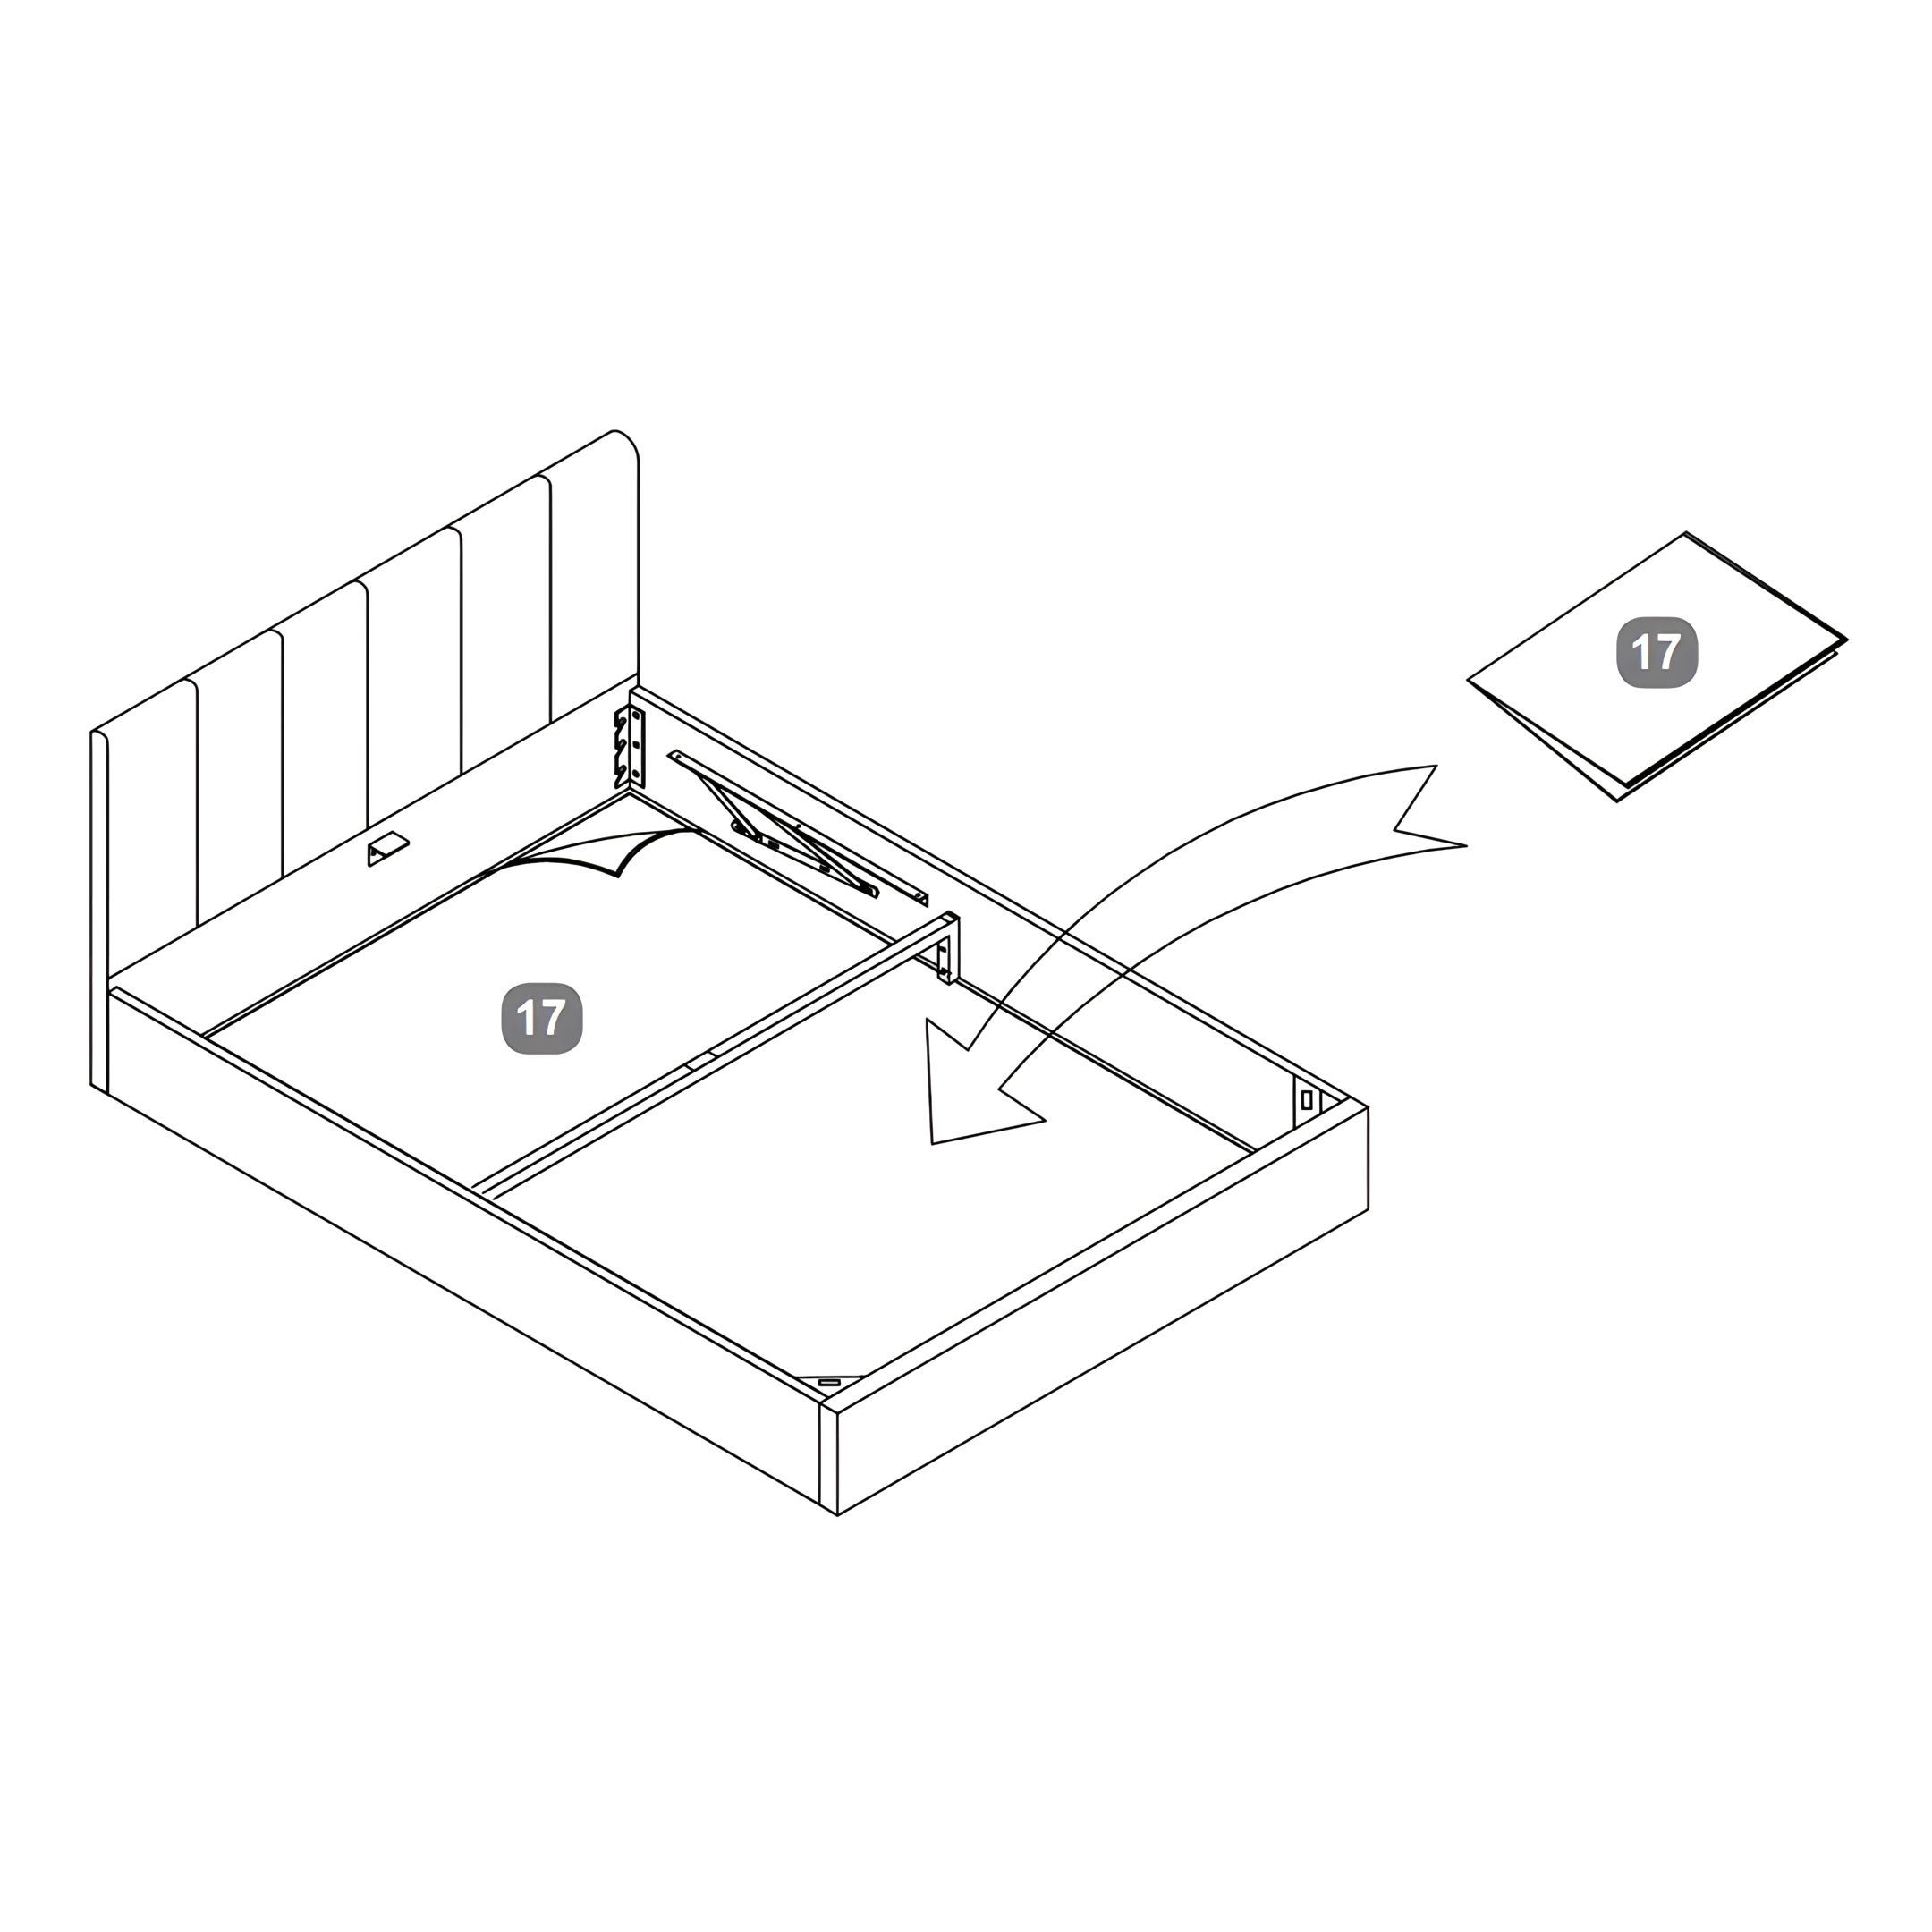
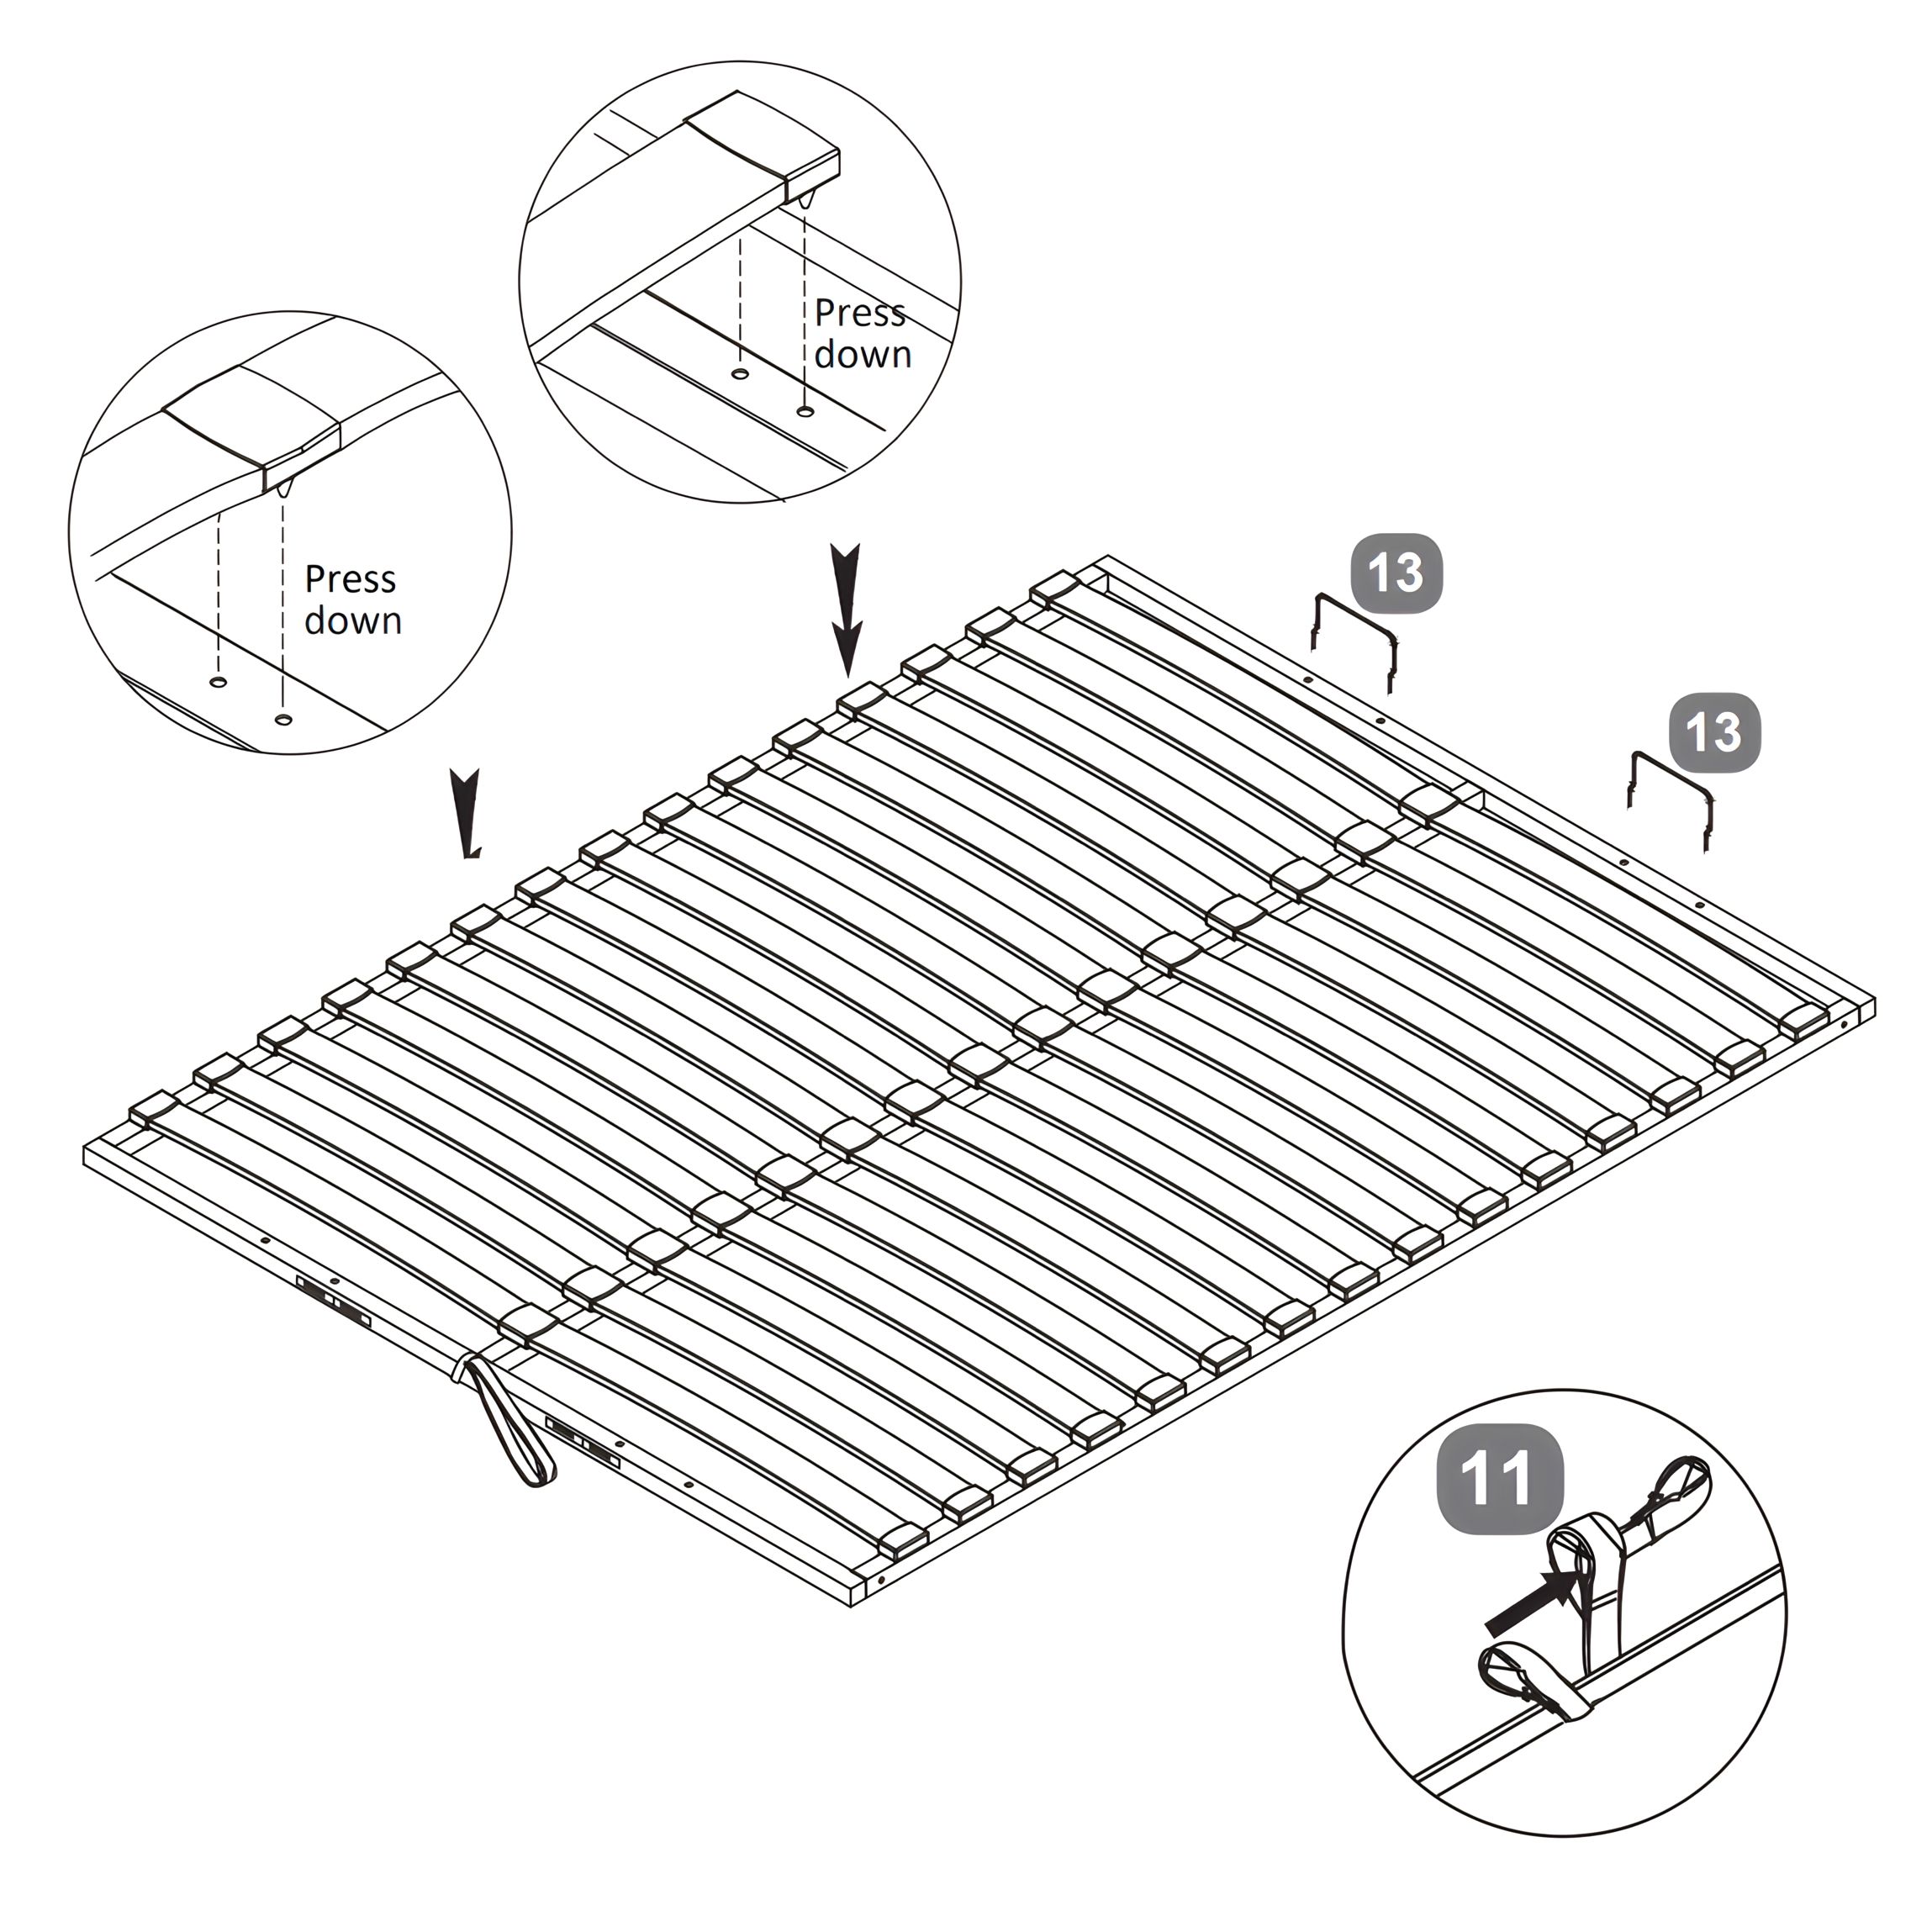
8. Install the Slats
1. After assembling the slat frame, turn it over so the slat cap holes face upwards. 2. Take the Wooden Slats (17) and attach a Single Plastic Cap (18) to each end. 3. For central slats, insert a Double Plastic Cap (19) in the middle. 4. Push each slat with caps firmly into the pre-drilled holes in the frame as shown. 5. Secure the Mattress Stoppers (13) at the designated positions. 6. Attach the Fabric Hand Strap (11) to the center rail.
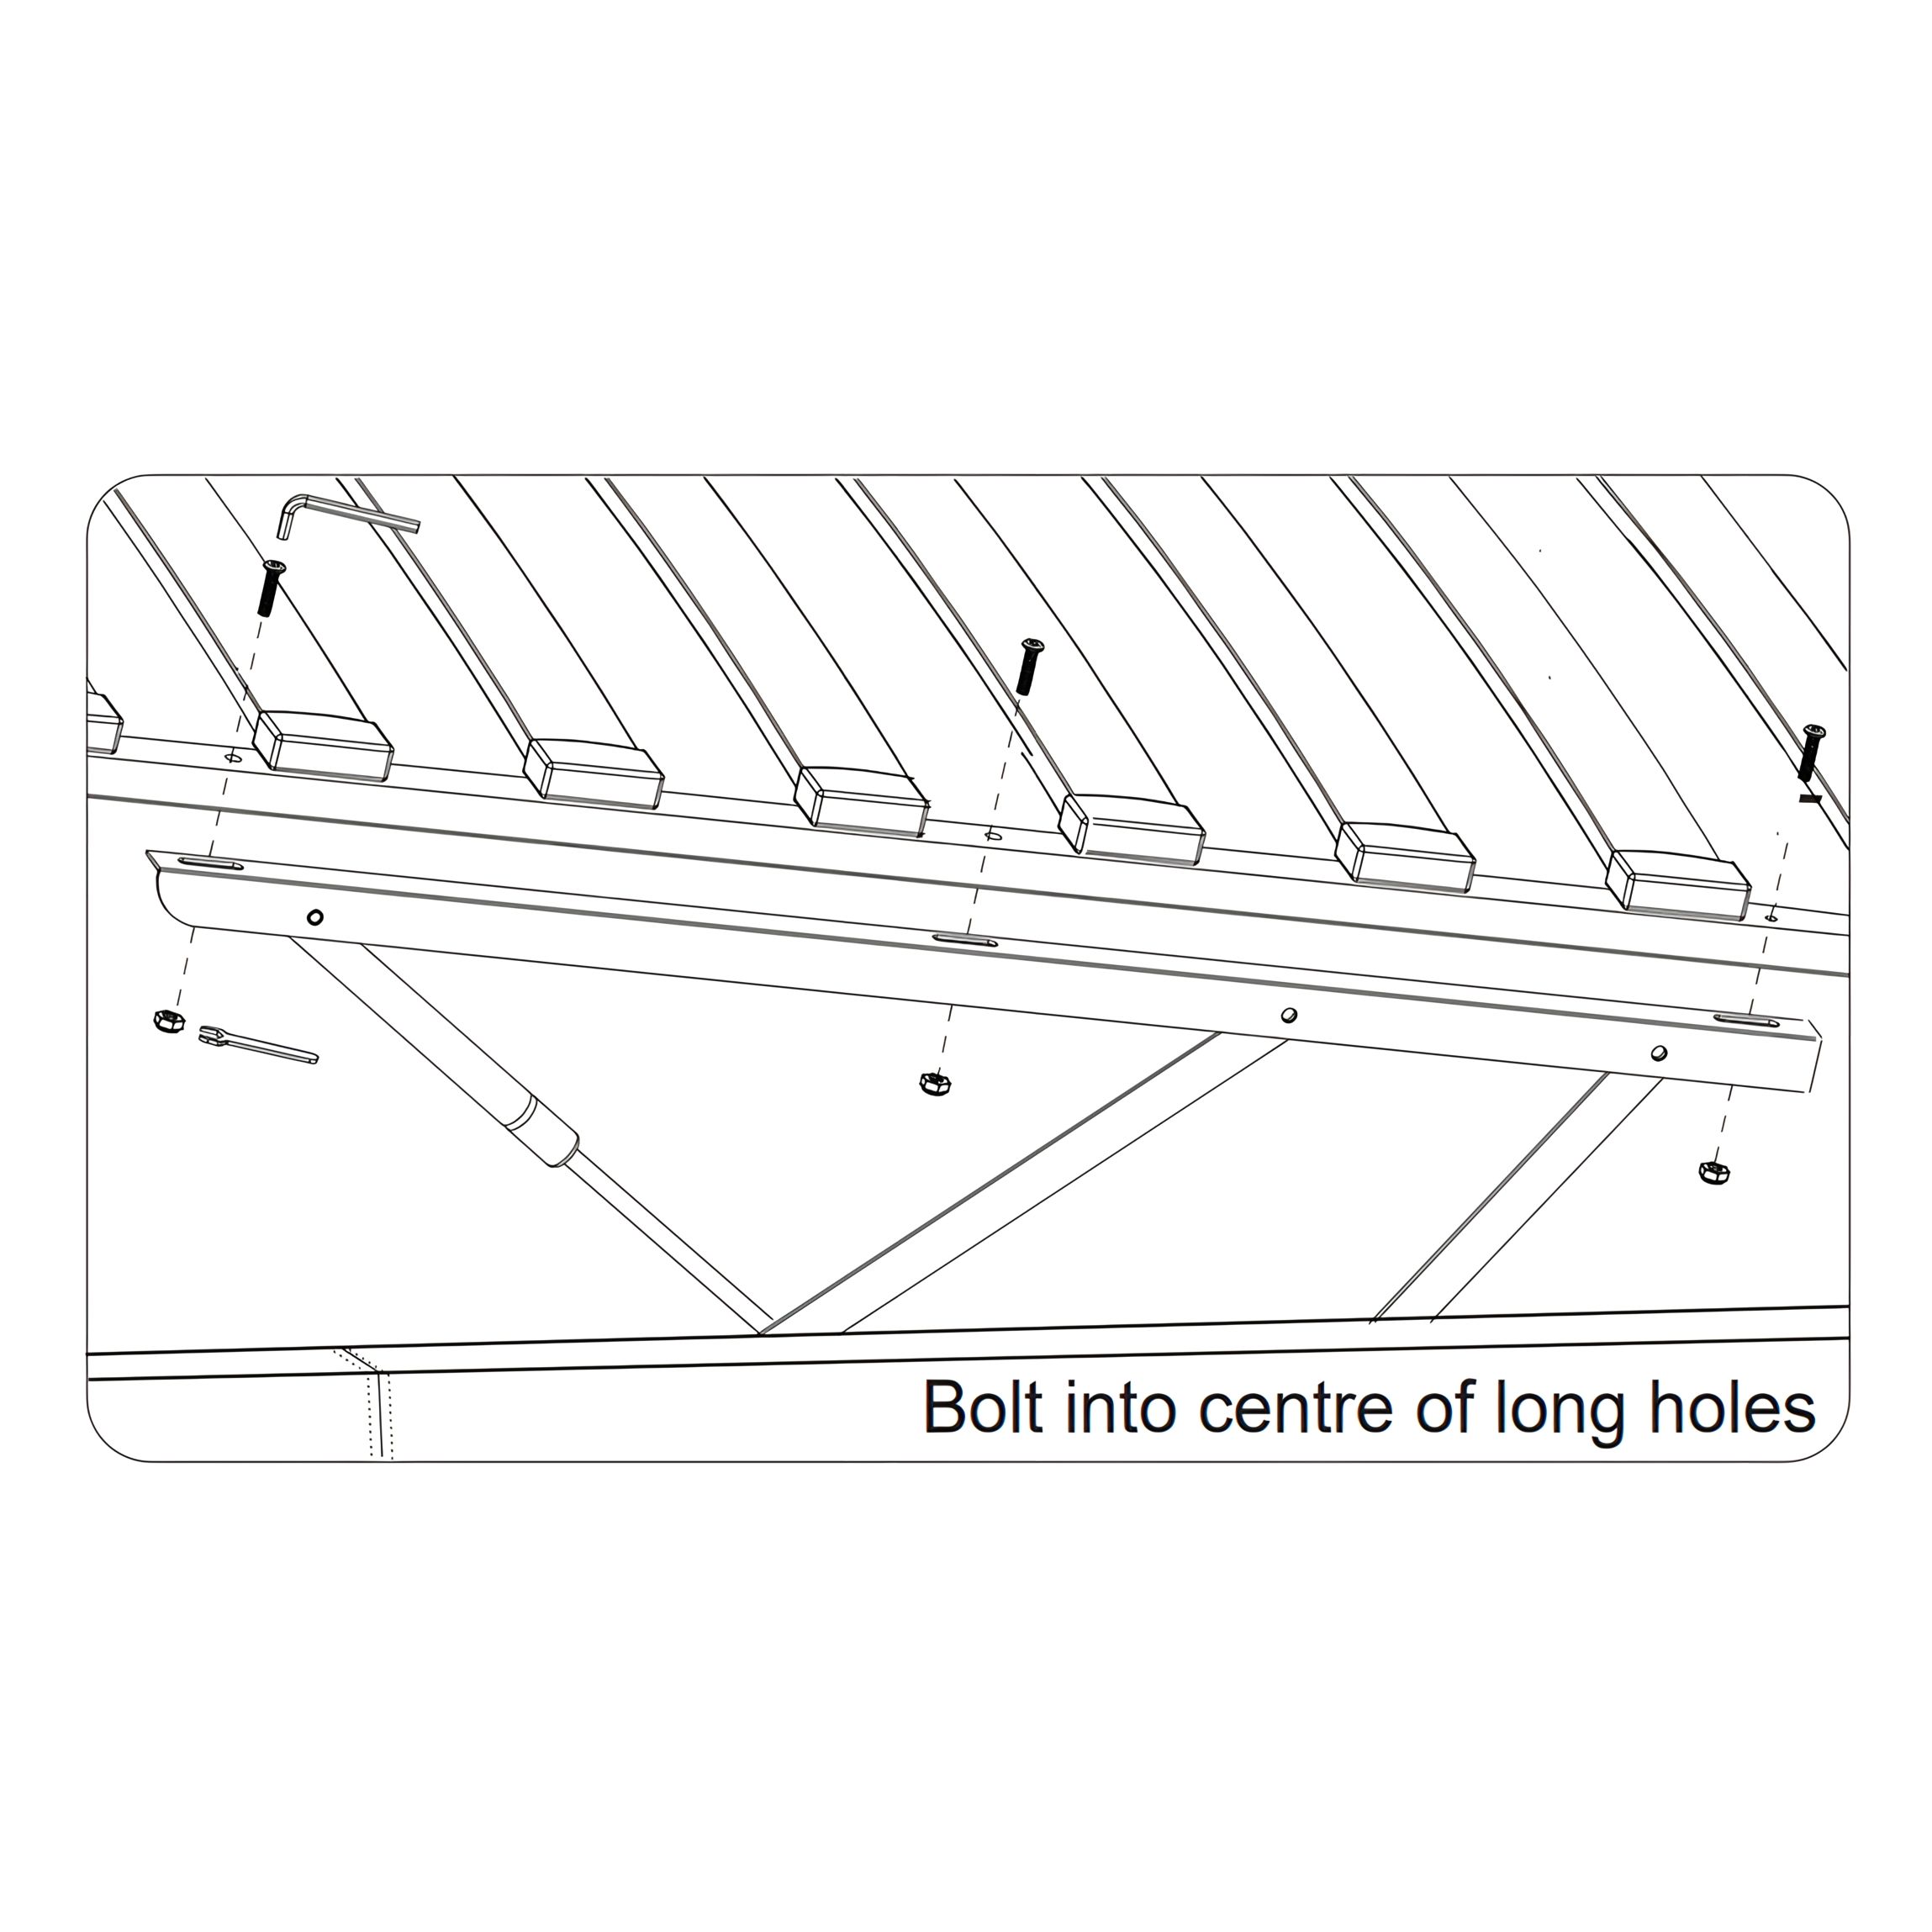
9. Secure the Slat Frame to the Lift Mechanism
1. Position the slat frame onto the lift mechanism arms. 2. Loosely fit 3x Bolt Sets (C), Washer (G), Spring Washer (H) and Nut (J) on each side. 3. Carefully hold the frame down and align it so that there are even gaps on both sides. 4. Once aligned, tighten all bolts 90% using the Allen Key (M) and Spanner (P).
10. Alignment Check
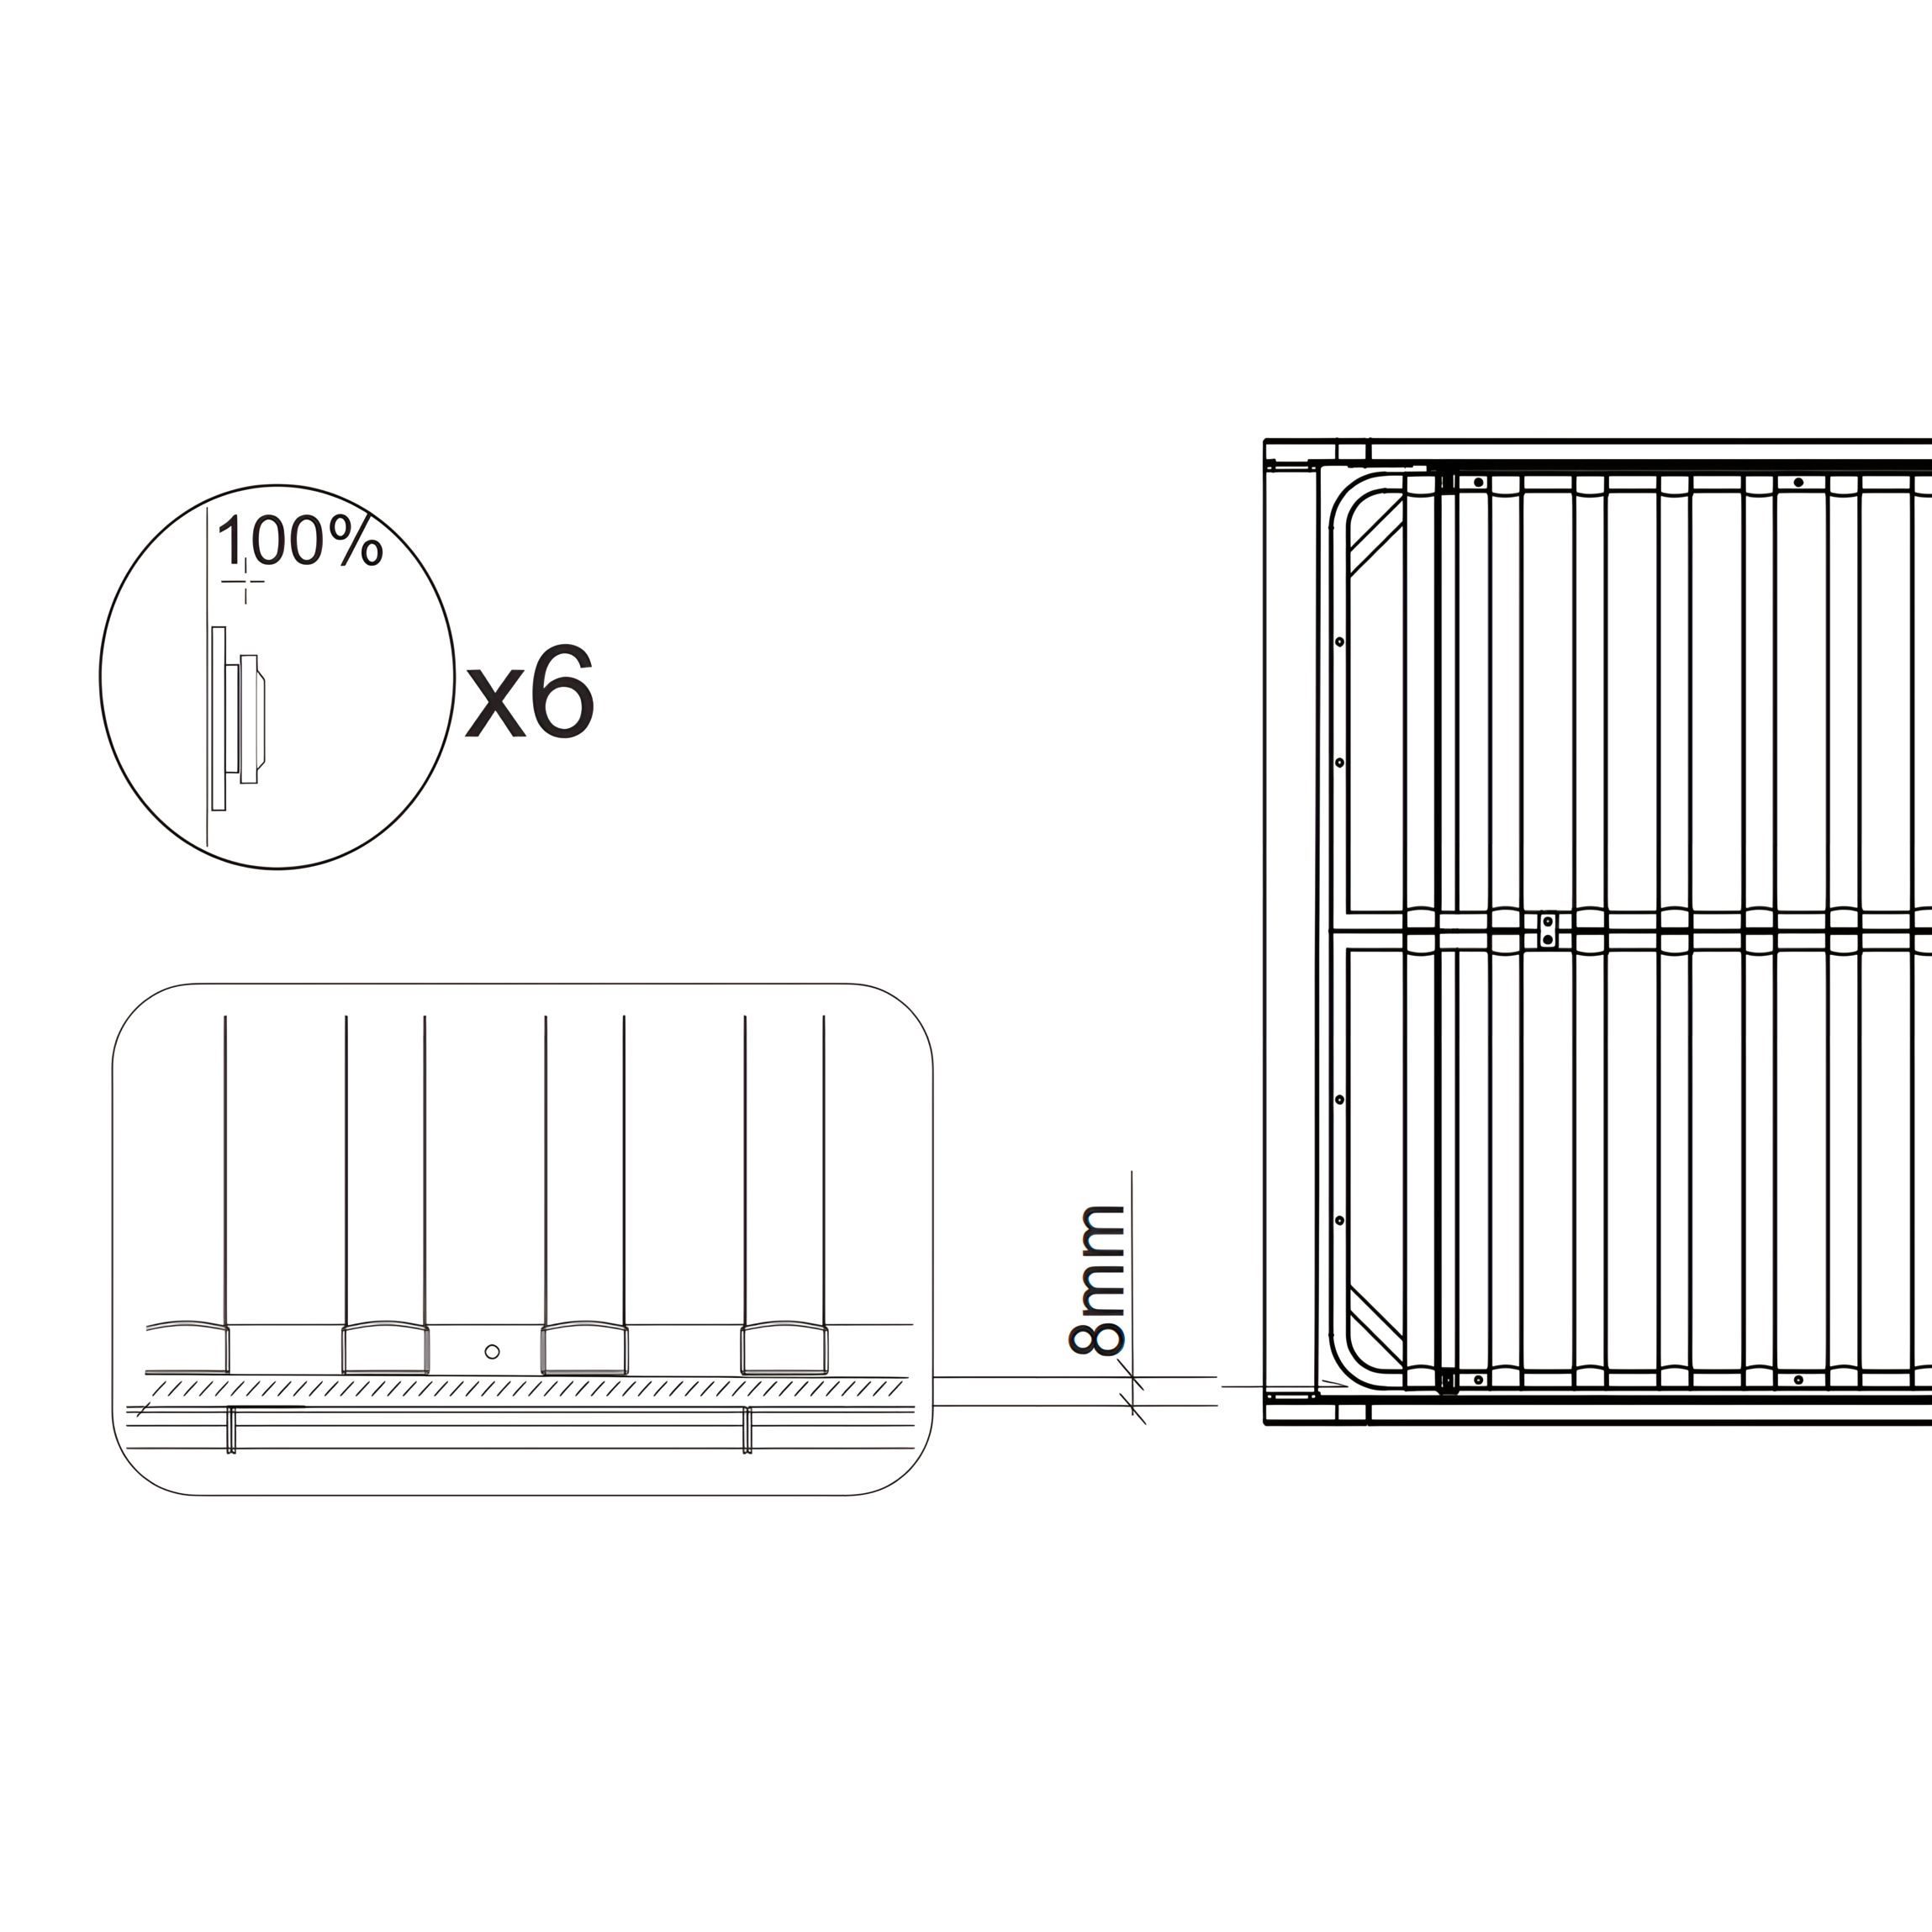
1. Ensure a uniform 8mm gap between the bed frame and slat mechanism. 2. Tighten six fixings to 100% for stability. 3. Verify the top-down alignment of the slatted base before placing the mattress.
11. Attach the Gas Lift Cylinder
1. Slide the Gas Lift Cylinder Stem (x) onto the Axle (y) as shown. 2. Secure it using the Flange Lock-Nut (J). 3. Tighten the nut with the Spanner (P)—do not over-tighten. 4. Leave a small gap to ensure the cylinder stem can move freely, as indicated in the sketch.
Important:
Be cautious about what you store under the bed. Ensure that stored items, such as suitcases or boxes, do not touch the slats. The maximum storage height is 195mm to prevent damage.
12. Final Check
Verify that all slats are securely fastened and evenly spaced.
Check for any loose connections and tighten the screws if necessary.